Se você estiver entendendo este texto, talvez queira ler este documento em Português
This document is aimed at the Arduino developers, radio experimenters, hobbyists and anyone interested in building a receiver based on the Si47XX IC family from Silicon Labs. This project is about an Arduino library for the SI47XX BROADCAST AM/FM/SW RADIO RECEIVER. This library is intended to provide an easier interface for controlling the SI47XX by using Arduino platform. The communication protocol used by this library is the I²C. This library was built based on "AN332 Si47XX PROGRAMMING GUIDE REV 1.0" and AN332 REV 0.8 UNIVERSAL PROGRAMMING GUIDE AMENDMENT FOR SI4735-D60 SSB AND NBFM PATCHES. It also can be used on all members of the SI473X family respecting, of course, the features available in each IC version. Please, follow the summary below to get the most out of this document.
This library can be freely distributed using the MIT Free Software model.
Copyright (c) 2019 Ricardo Lima Caratti.
Contact: pu2clr@gmail.com.
- SI4735 Library construction history
- Labrary Features
- License Copyright
- Library Installation
- Groups and Forums
- Thanks
- Your support is important
- About the SI4735
- Terminology
- API Documentation
- About Class, Methods(functions) and custom data type structures
- PU2CLR SI4735 Arduino Library methods (functions)
- RDS support
- SSB support
- EEPROM support
- Customizing PU2CLR Arduino Library
- Most Frequent Problems
- Boards where this library has been successfully tested
- Photos (Tools and Accessories)
- References
- Examples
- Third Party Projects
- Videos
- Commercial Receivers based on Si47XX Family
- The SI473 (SI47XX) is a 3.3V part. If you are not using a 3.3V version of Arduino, you have to use a kind of 5V to 3.3V bidirectional converter. It is important to say that just power the Si47XX device with 3.3V from Arduino board is not enough. You have to be aware that the Arduino that operates with 5V, the digital pins and the I2C bus will send 5V signals to the Si47XX device. That configuration can make the system unstable or damage the Si47XX device.
- This library has been successfully tested on many boards including: ESP32; STM32; Mega 2560; DUE; ATmega328 and Atmega32u4 based boards; ATtiny85 and more. See Boards where this library has been successfully tested.
- The Si47XX IC family functionalities can be seen in the comparison matrix shown in table 1 (Product Family Function); pages 2 and 3 of the “Si47XX PROGRAMMING GUIDE; AN332 (REV 1.0)”.
I started my work on building an Arduino library for SI375 in early November 2019. The initial idea was to build a receiver by using an Arduino board, few components and the SI4735 device from Silicon Labs. Checking some videos on Youtube, I realized that the receiver besed on Si4735-D60 could go far beyond the initial proposal, including listening to amateur radio and citizens band stations on SSB mode. Via forums and websites, I also realized that there was a great demand for experimenters who would like to see the SI4735 device working on SSB mode. So, instead of developing a simple receiver based on the SI4735, I decided to develop a library for Arduino platform that would provide full support to the SI4735 and all SI473X device family as well.
With this library, more than 20 examples were developed using various display types. These examples can assist the experimenter in building their own receiver.
Judging by the groups created around the SI47XX devices, I estimate that this library is currently being used by hundreds of experimenters. If you are an experimenter or a radio enthusiast and want to try the SI473X devices, then this library is for you.
The following video is a little joke that shows the trajectory of the construction of this library. "PU2CLR SI4735 Arduino Library. IT IS OPEN SOURCE IT IS FREE. IT IS FOR YOU".
{% include libhistory.html %}
This library uses the I²C communication protocol and implements most of the functions offered by Si47XX (BROADCAST AM / FM / SW / LW RADIO RECEIVER) IC family from Silicon Labs. This library also has primitive functions that make it easier for you to implement commands that may not have been implemented yet. See setProperty, getProperty sendCommand, getCommandResponse and getStatusResponse functions and also How to customize PU2CLR Arduino Library. It is worth noting, however, that this library is constantly improving. Check the API documentation before implementing a new function. It is likely that your demand is already implemented. See the API documentation for this library. The main features of this library are listed below.
- Open Source. It is free. You can use, copy, modify, merge, publish, distribute, sublicense, and/or sell copies of the Software. See MIT License to know more.
- Built based on AN332 SI47XX PROGRAMMING GUIDE (REV 1.0) and AN332 REV 0.8 UNIVERSAL PROGRAMMING GUIDE AMENDMENT FOR SI4735-D60 SSB AND NBFM PATCHES;
- C++ Language and Object-oriented programming. You can easily extend the SI4735 class by adding more functionalities. See Customizing PU2CLR Arduino Library;
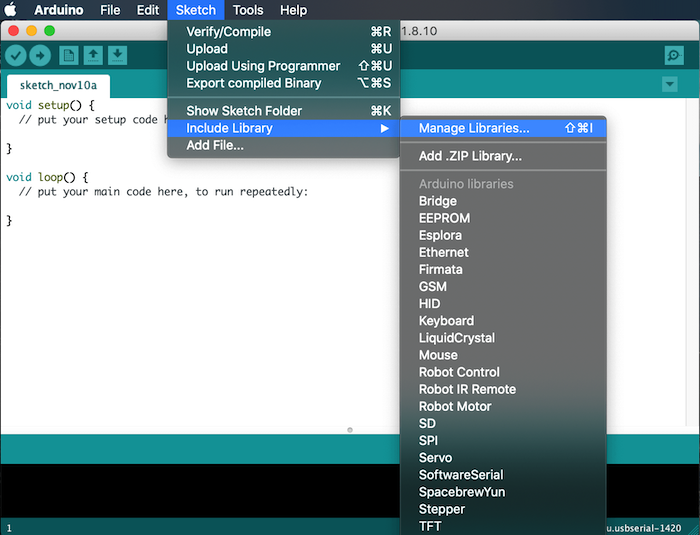
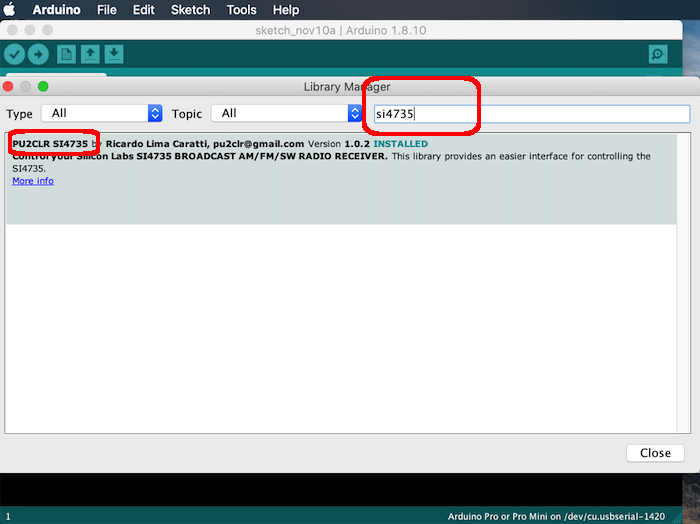
- Available on Arduino IDE (via Manage Libraries). Easy to install and use. See Library Installation;
- Cross-platform. You can compile and run this library on most of board available on Arduino IDE (Examples: ATtiny85, boards based on ATmega328 and ATmega-32u4, ATmega2560, ARM Cortex, STM32, Arduino DUE, ESP32 and more). See Boards where this library has been successfully tested;
- Simplifies projects based on SI4735;
- I²C communication protocol and Automatic I²C bus address detection;
- More than 120 functions implemented. You can customize almost every feature available on Si47XX family;
- More than 20 examples to guide the user;
- RDS support;
- SSB (Single Side Band) patch support;
- Clock reference selection (crystal or external clock reference);
- FM Receive de-emphasis to 50 or 75 μs selection.
There is a Facebook group called Si47XX for Radio Experimenters where the purpose is exchanging experiences with projects based on Silicon Labs SI47XX IC family. You will be welcome to the group Si47XX for Radio Experimenters.
You can also be a member of group.io SI47XX for hobbyists {% include groupio.html %}
Follow a project using this library on hackaday.io
Copyright (c) 2019 Ricardo Lima Caratti
Permission is hereby granted, free of charge, to any person obtaining a copy of this software and associated documentation files (the "Software"), to deal in the Software without restriction, including without limitation the rights to use, copy, modify, merge, publish, distribute, sublicense, and/or sell copies of the Software, and to permit persons to whom the Software is furnished to do so, subject to the following conditions:
The above copyright notice and this permission notice shall be included in all copies or substantial portions of the Software.
THE SOFTWARE IS PROVIDED "AS IS", WITHOUT WARRANTY OF ANY KIND, EXPRESS OR IMPLIED, INCLUDING BUT NOT LIMITED TO THE ARRANTIES OF MERCHANTABILITY, FITNESS FOR A PARTICULAR PURPOSE AND NONINFRINGEMENT. IN NO EVENT SHALL THE AUTHORS OR COPYRIGHT HOLDERS BE LIABLE FOR ANY CLAIM, DAMAGES OR OTHER LIABILITY, WHETHER IN AN ACTION OF CONTRACT, TORT OR OTHERWISE, ARISING FROM, OUT OF OR IN CONNECTION WITH THE SOFTWARE OR THE USE OR OTHER DEALINGS IN THE SOFTWARE.
You can install this library on your Arduino environment using different methods. The best ways to do that are described below.
This is the easiest method to install this library.
{% include libinstalling.html %}
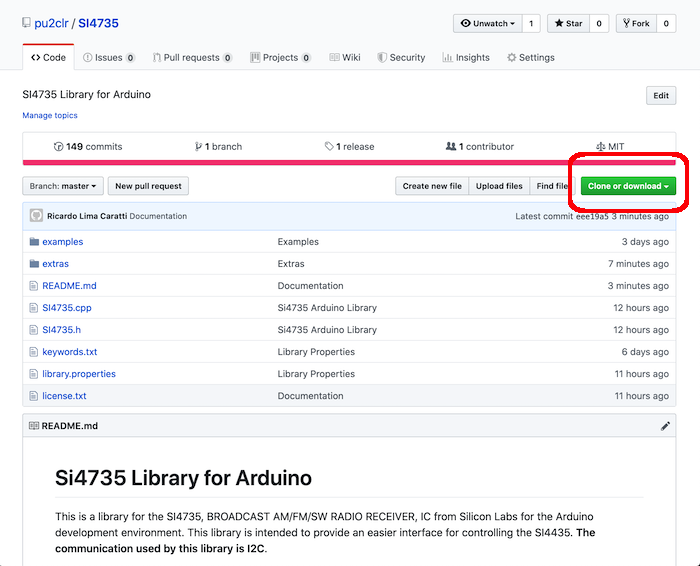
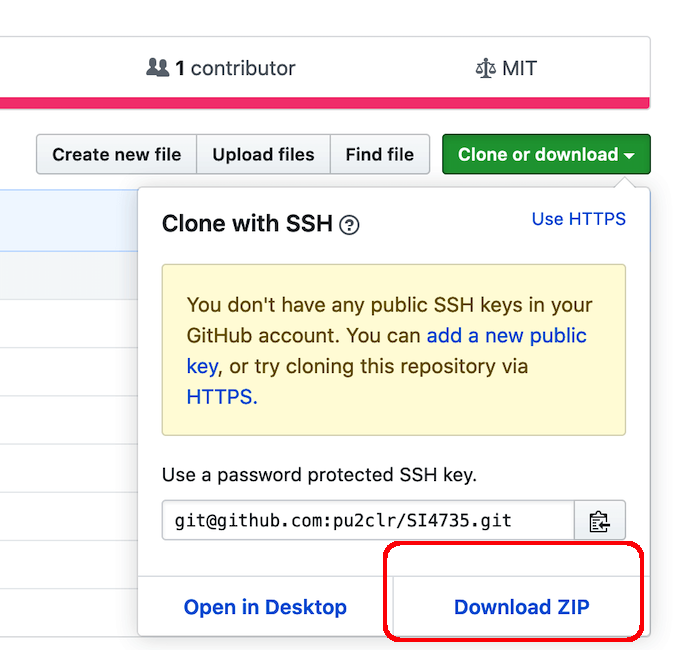
First, you have to download this library in zip format. After, unzip the SI4735-master.zip file in your Arduino Library folder.
- On Windows: "My Documents\Arduino\libraries"
- On MAC OS: ˜/Documents/Arduino/libraries
- On Linux: ˜/Documents/Arduino/libraries
With that approach, you will have the most current version of the library. However, it may not be the most stable version. This is because the current version is always in development. Prefer releases. Do you need some old version (release) of this library? If yes, check here.
- Mr. Tom Nardi for his great article "Multi-Band Receiver On A Chip Controlled By Arduino" on Hackaday website;
- I would like to thank Mr Vadim Afonkin for making available the SSBRX patches for SI4735-D60 on his Dropbox repository;
- I would like to thank Mr Francisco Scaramella for the suggestions and contributions provided in the electronics field as well as for the testing of the functions implemented in this library;
- David Kellmer (USA) for suggesting corrections on the documentation and sketches;
- WH2Q, Morikaku Gotoh, for his suggestion about Automatic Volume Control on AM mode;
- Jim Reagan, W0CHL, for contributions on circuit design;
- Gert Baak, PE0MGB, for library improvements suggestions;
- All members of the Facebook groups "Si47XX for radio experimenters" and "Si47XX para radioescutas" for the suggestions and corrections during the development of this project.
If you would like to support this library development, consider joining this project via Github. Alternatively, make suggestions on new features and report errors if you find them. Thank you!
The Si4735 is DSP radio receiver IC from Silcon Labs. It has great performance on AM (LW/MW/SW) and local FM station. The SI4735 can be programmed by using commands and responses. You can contron it via a microcontroller like Arduino. To make the SI4735 perform an action, the microccontroller have to send a set of bytes (command and arguments) that the device interpret it and executes the given command.
The image below shows the SI473X-D60 block diagram. It was extracted from Silicon Labs Si4730/31/34/35-D60 / BROADCAST AM/FM/SW/LW RADIO RECEIVER (page 21). Note that the author of this Library highlights in red the pin operating voltages that can be connected to the Arduino. Be aware of the operating voltage of the Arduino pins you will use in your project. Preferably use an Arduino with 3.3V operating voltage. If you are not using a 3.3V version of Arduino, you must use a kind of 5V to 3.3V converter on RST, SCLK, SDIO and SEN (depending on your project).
- FM (VHF) support (64–108 MHz)
- AM (MW) band support (520–1710 kHz)
- SW band support (2.3–26.1 MHz)
- LW band support (153–279 kHz)
- Allows firmware upgrade. Including the possibility of adjustments to demodulate SSB.
- Advanced AM/FM seek tuning
- Automatic frequency control (AFC)
- Automatic gain control (AGC)
- Digital FM stereo decoder
- AM/FM/SW/LW digital tuning
- RDS/RBDS processor
- Digital audio out
- I²C and SPI interface
- Great Programming Guide and additional documentation to deal with the device
| Term | Description |
|---|---|
| API | Application Programming Interface (API). In this context, it is an interface that you can use to simplify the implementation and maintenance of your software (Arduino sketch). All API documentation about this library can be found on https://pu2clr.github.io/SI4735/extras/apidoc/html/index.html. |
| Arduino Libraries | Libraries are files written in C or C++ (.c, .cpp) which provide your sketches with extra functionality. The SI4735 Library provides extra functionalities to make easier the Arduino deal with Si4735 device |
| DFS | I²S - digital frame synchronization input |
| DIN | I²S - digital data input |
| DCLK | I²S - digital bit synchronization input clock |
| IDE | Integrated Development Environment |
| I²C | I²C - Inter-Integrated Circuit |
| I²S | Serial bus interface used for connecting digital audio devices |
| Sketch | Name that Arduino environment uses for a program |
| Interrupt | In this context, it is a Arduino Resource. Allows important tasks to be performed regardless of the flow of your program |
| C++ | A object-oriented programming (OOP) language. It is a superset of the C language with an additional concept of "classes." |
| programming guide | In this context it refers to Si47XX PROGRAMMING GUIDE (REV 1.0) |
| LNA | Low Noise Amplifier |
| POC | Proof of Concept |
| SEN | Serial enable pin, active low; used as device select in 3-wire and SPI operation and address selection in 2-wire operation |
| CTS | Clear to send |
| STC | Seek/Tune Complete |
| RESP | Response byte (n = 1 to 15) |
| RESPONSEn | Response register (16-bit) in 3-Wire mode (n = 1 to 8) |
| RST | Also RSTb—Reset pin, active low |
| RCLK | External reference clock |
| SSB | Single Side Band |
| Attack | attack-time delay - the time needed for a receiver to respond to an incoming signal |
| SDIO | Serial data in/data out pin |
| SCLK | Serial clock pin |
| Soft Mute | Resource used to attenuate the audiooutputs and minimize audible noise in very weak signalconditions |
| Firmware Upgrades | The Si473x-D60 contains on-chip program RAM to accommodate minor changes to the firmware |
{% include apidoc.html %}
This library has tow documentation sources:
- SI4735 Arduino Library documentation generated by Doxygen (updated)
- Legacy documentation (not updated frequently)
Doxygen is a tools that can generate documentation from source code. This tools help the development team to keep the documentation updated.
If you prefer, you can also read the documentation directly from the SI4735.cpp and SI4735.h. These files are also well documented.
This library has more than 120 functions. The table below shows the mains functions used in a regular receiver. Full details on the functions shown below can be read on https://pu2clr.github.io/SI4735/extras/apidoc/html/.
| Method / Function | Description |
|---|---|
| setup | Use this function to start the device up with the parameters shown below. |
| getStatus | Used to get the current status of the Si4735. |
| getCurrentRSSI | Get the current receive signal strength (0–127 dBμV). |
| getCurrentSNR | Gets the current SNR metric (0–127 dB). |
| getFrequency | Gets the current frequency of the Si4735. |
| frequencyUp | Increments the current frequency on current band/function by using the current step. |
| frequencyDown | Decrements the current frequency on current band/function by using the current step. |
| setFrequencyStep | Sets the current step value. |
| setVolume | Sets volume level (0 to 63). |
| setFM | Sets the radio to FM function. |
| isCurrentTuneFM | Returns true if the current function is FM (FM_TUNE_FREQ). |
| getCurrentPilot | Checks the current pilot. Indicates stereo pilot presence. |
| setAM | Sets the radio to AM function. It means: LW MW and SW. |
| setAmSoftMuteMaxAttenuation | Sets the Am Soft Mute Max Attenuation. |
| setAutomaticGainControl | Automatic Gain Control setup. |
| getAutomaticGainControl | Queries Automatic Gain Control STATUS. |
| setBandwidth | Selects the bandwidth of the channel filter for AM reception. |
| isAgcEnabled | Checks if the AGC is enabled (returns true if enabled). |
| setRdsConfig | Sets RDS property. |
| getRdsStatus | Gets the RDS status. Store the status in currentRdsStatus member. COMMAND FM_RDS_STATUS. |
| getRdsReceived | Get the Rds Received FIFO. |
| getRdsSync | Get the Rds Sync. Returns true if RDS currently synchronized. |
| getRdsSyncFound | Get the Rds Sync Found. Returns true if found RDS synchronization. |
| getRdsText2A | Gets the Text processed for the 2A group. |
| getRdsText2B | Gets the Text processed for the 2B group. |
| getRdsText0A | Gets the station name and other messages. |
| getRdsTime | Gets the RDS time and date when the Group type is 4. |
| reset | Reset the SI473X. |
| queryLibraryId | Queries the library information of the Si47XX device. |
| patchPowerUp | This method can be used to prepare the device to apply SSBRX patch. |
| downloadPatch | Transfers the content of a SSB patch stored in a array of bytes to the SI4735 device. |
| downloadPatchFromEeprom | Transfers the content of a SSB patch stored in an eeprom to the SI4735 device. |
| setSSBConfig | Sets the SSB receiver mode. |
| setSSB | Tunes the SSB (LSB or USB) receiver to a frequency between 520 and 30 MHz in 1 kHz steps. |
| setSSBAutomaticVolumeControl | Sets SSB Automatic Volume Control (AVC) for SSB mode. |
| setSSBBfo | Sets the SSB Beat Frequency Offset (BFO). |
| setSSBAudioBandwidth | SSB Audio Bandwidth for SSB mode. |
| setSBBSidebandCutoffFilter | Sets SBB Sideband Cutoff Filter for band pass and low pass filters. |
| setTuneFrequencyAntennaCapacitor | Only FM. Freeze Metrics During Alternate Frequency Jump. |
| setI2CFastModeCustom | Sets the I2C bus to a given value. |
| setI2CStandardMode | Sets I2C bus to 100KHz. |
| setAudioMuteMcuPin | This function sets the mcu digital pin you want to use to control the external audio mute circuit. |
The Si47XX family works with many internal data that can be represented by data structure or defined data type in C/C++. These C/C++ resources have been used widely here. This aproach made the library easier to build and maintain. Each data structure created here has its reference (name of the document and page on which it was based). In other words, to make the SI47XX device easier to deal, some defined data types were created to handle byte and bits to process commands, properties and responses. The goal of this approach is separating data from code.
All data types defined in Si4735 Arduino Library are explained here
This library was developed using the C++ language and the Object-oriented Programming approach. Methods are functions that belongs to the class, in this case SI4735 class. Click here to go to API docummentation.
All methods defined in Si4735 class are explained here. The list below refer to the method groups implemented by the Si4735 class.
Methods of this group are useful to configure the way that the Si47XX devices have to be initiate.
Allows to query the part number, chip revision, firmware revision, patch revision and component revision numbers.
The Si4735 class has a set of methods to query the current frequency, RSSI, SNR, multipath, and the antenna tuning capacitance value (0-191).
Methods to query AGC status. Returns whether the AGC is enabled or disabled and it returns the gain index.
The SI4735 class has a set of methods to setup filters on AM and SSB mode.
Methods to setup the audio mode (Digital or Analog), volume, mute etc.
This library implements some RDS features of the SI4735. All function to deal with RDS are documented here. Below you have some videos showing the RDS functionalities implemented by the PU2CLR Si4735 Arduino Library.
{% include videoRDS2.html %}
{% include videoRDS1.html %}
See RDS example implementations here.
The table below shows the features that this library implements.
| Feature | Infoirmation type | Description |
|---|---|---|
| PTY | Program Type | PTY is a 5-bit that indicates the program type (see table below) |
| PS | Program Service Name | Station name. It has eight static caharacter with the name of the station |
| RT | Radiotext (under construction...) | String with up to 64 characters with additional information about the content currently being transmitted |
| CT | Clock Time (under construction...) | It provides the the current clock |
| Group Type | Description |
|---|---|
| 0A | Basic information [ˆ3] |
| 0B | Basic information [ˆ3] |
| 1A | Additional information |
| 3A | Setup open data application |
| 4A | Date and time (UTC) and Offset to convert UTC to local time |
| 10A | Program Type Name |
| 15B | Basic information |
- [ˆ3] The basic information includes the Program Service Name and it has 8 characters. It should identifie just the name of the station. However, some stations might use this resource to show other kind of messages, contradicting what is established by the RDS protocol.
| RDS/RBDS Code | European Program Type | North American Program Type |
|---|---|---|
| 0 | No program definition type | No program definition type |
| 1 | News News | |
| 2 | Current affairs | Information |
| 3 | Information | Sport |
| 4 | Sport | Talk |
| 5 | Education | Rock |
| 6 | Drama | Classic Rock |
| 7 | Culture | Adult Hits |
| 8 | Science | Soft Rock |
| 9 | Variable | Top 40 |
| 10 | Popular Music (Pop) | Country Music |
| 11 | Rock Music | Oldies Music |
| 12 | Easy Listening | Soft Music |
| 13 | Light Classical | Nostalgia |
| 14 | Serious Classical | Jazz |
| 15 | Other Music | Classical |
| 16 | Weather | Rhythm & Blues Music |
| 17 | Finance | Soft Rhythm & Blues Music |
| 18 | Children’s Programs | Language |
| 19 | Social Affairs | Religious Music |
| 20 | Religion | Religious Talk |
| 21 | Phone-in Talk | Personality |
| 22 | Travel | Public |
| 23 | Leisure | College |
| 24 | Jazz Music | Not assigned |
| 25 | Country Music | Not assigned |
| 26 | National Music | Not assigned |
| 27 | Oldies Music Not assigned | |
| 28 | Folk Music | Not assigned |
| 29 | Documentary | Weather |
| 30 | Alarm Test | Emergency Test |
| 31 | Alarm | Emergency |
The SI4735 class implements a set of methods to apply patches and deal with SSB mode. All documentation about pathces can be seen here.
The SSB patches used in some examples of this library were tested only on SI4735-D60. The updates used in that examples are unlikely to work on other SI47XX devices.
First of all, it is important to say that the SSB patch content is not part of this library. The paches used here were made available by Mr. Vadim Afonkin on his Dropbox repository. It is important to note that the author of this library does not encourage anyone to use the SSB patches content for commercial purposes. In other words, this library only supports SSB patches, the patches themselves are not part of this library.
In this context, a patch is a piece of software used to change the behavior of the SI4735 device.
There is little information available about patching the SI4735. The following information is the understanding of the author of this project and it is not necessarily correct.
A patch is executed internally (run by internal MCU) of the device. Usually, patches are used to fixes bugs or add improvements and new features of the firmware installed in the internal ROM of the device. Patches to the SI4735 are distributed in binary form and have to be transferred to the internal RAM of the device by the host MCU (in this case Arduino boards). Since the RAM is volatile memory, the patch stored into the device gets lost when you turn off the system. Consequently, the content of the patch has to be transferred again to the device each time after turn on the system or reset the device.
I would like to thank Mr Vadim Afonkin for making available the SSBRX patches for SI4735-D60 on his Dropbox repository. On this repository you have two files, amrx_6_0_1_ssbrx_patch_full_0x9D29.csg and amrx_6_0_1_ssbrx_patch_init_0xA902.csg. It is important to know that the patch content of the original files is constant hexadecimal representation used by the language C/C++. Actally, the original files are in ASCII format (not in binary format). If you are not using C/C++ or if you want to load the files directly to the SI4735, you must convert the values to numeric value of the hexadecimal constants.
| Hexadecimal C/C++ constant | Binary representation | Decimal representation |
|---|---|---|
| 0x15 | 00010101 | 21 |
| 0x01 | 00000001 | 1 |
| 0xFF | 11111111 | 255 |
Also, on Silcon Labs website, support and community, there is a topic called "SSB and/or ASK/FSK/nPSK demodulation on Si radio chips". If you follow that topic, you will see a post from a member called "DASM" making available a link to a patch for the Si4735. The structure of this file is a bit different if compared with amrx_6_0_1_ssbrx_patch_full_0x9D29.csg and amrx_6_0_1_ssbrx_patch_init_0xA902.csg. However, they have the same idea and can be easily adjusted for patching. If you have some experience with C, all you have to do is following the recommendations of the SI47XX PROGRAMMING GUIDE AN332; page 219.
ATTENTION: The author of this project does not guarantee that procedures shown here will work in your development environment. Given this, it is at your own risk to continue with the procedures suggested here. This library works with the I²C communication protocol and it is designed to apply a SSB extension PATCH to CI SI4735-D60. Once again, the author disclaims any liability for any damage this procedure may cause to your SI4735 or other devices that you are using.
All methods/functions to deal with SSB on Si4735-D60 can be seen here.
This library implements many SSB examples. See the table below.
{% include videoSSB.html %}
See SSB example implementations here.
Depending on your MCU memory size, to use SSB mode may not be possible due to the large amount of memory required by the patch. To solve this problem this library implemented the function cpp downloadPatchFromEeprom. This function reads the patch content from an external EEPROM and transfer it to the SI4735-D60 device. To run this function you must have a external I2C EEPROM device well configured with your MCU and the Si4735-D60 device on i2C bus. Also, the EEPROM must have the patch content generated by the sketch SI47XX_09_SAVE_SSB_PATCH_EEPROM. See folder SI47XX_09_TOOLS.
The example SI4735_06_SSB_EEPROM shows this functionality on an Arduino Pro Mini.
The example SI47XX_03_SSB_Tiny4kOLED implements this functionality on an ATtiny85.
To store the SSB patch content into an EEPROM, see folder SI47XX_09_SAVE_SSB_PATCH_EEPROM.
Attention: The full ssb patch needs about 16KB on eeprom. All data that you have stored before into eeprom will be lost after the execution of the sketch SI47XX_09_SAVE_SSB_PATCH_EEPROM.
The EEPROM device used for testing was the AT24C256 Serial I2C Interface
Watch the video: ATtiny85 working with SI4735-D60 and SSB
{% include eeprom.html %}
Maybe you need some Si47XX device functions that the PU2CLR SI4735 Arduino Library has not implemented so far. Also, you may want to change some existent function behaviors.
The best way to customize the PU2CLR SI4735 Arduino Library for your needs is extending the current version of the library by using C++ OOP approaching. For example:
#include <SI4735.h>
class MyCustomSI4735 : public SI4735 { // extending the original class SI4735
  public:
    // New functions / methods
    int methodA() {    // some SI47XX command that PU2CLR SI4735 Arduino Library does not implement
      return 0;
    }

    int methodB() {    // another SI47XX command that PU2CLR SI4735 Arduino Library does not implement
      return 1;
    }

    // Overwriting existent methods
    void setTuneFrequencyAntennaCapacitor(uint16_t capacitor) {
      // Here, your setTuneFrequencyAntennaCapacitor code that will replace the original code
      // Tip: currentFrequencyParams is a protected member of SI4735 class and can be referred in your code
      currentFrequencyParams.arg.ANTCAPH = 0;         // it is just an example
      currentFrequencyParams.arg.ANTCAPL = capacitor; // it is just an example
      return;
    }

    void reset() {
      /// your reset code that will replace the original reset code
      pinMode(resetPin, OUTPUT);
      delay(1);
      digitalWrite(resetPin, LOW);
      delay(50);
      digitalWrite(resetPin, HIGH);
    }
};

MyCustomSI4735 radio; // the instance of your custom class based on SI4735 class

void setup()
{
  Serial.begin(9600);
  while (!Serial);
  Serial.println("Customizing Si4735 class example.");
  radio.setup(12, 0); // Arduino pin 12 as reset and FM mode (0)
  radio.setFM(8400, 10800, 10390, 10);
  // Setting the tune capacitor with your code instead Si4735 library code.
  radio.setTuneFrequencyAntennaCapacitor(100);
  // Calling new functions implemented by you.
  Serial.println(radio.methodA());
  Serial.println(radio.methodB());
}

void loop() {
  // Your code with your custom SI4734 library.
}
If you use that approach, all you have to do is downloading the current version of PU2CLR SI4735 Arduino Library. Instead of using PU2CLR SI4735 Arduino Library class directly, you can use your own class that extends the original class. This way, you always have the current version of the library customized for your needs. So, no extra work will be needed when you update the PU2CLR SI4735 Arduino Library. In other words, your custom code will be always sincronized with the PU2CLR SI4735 Arduino Library code.
See also:
This library has been written for the Arduino platform and has been successfully tested on many boards. See Boards where this library has been successfully tested
- THE SI4735 IS A 3.3V PART. IF YOU ARE NOT USING A 3.3V VERSION OF ARDUINO or anothe board, YOU HAVE TO USE A KIND OF 5V-3.3V BIDIRECTIONAL CONVERTER. Also pay attention to the appropriated pinout of your board to select the correct interrupt (IRQ- if you are using), RST, SDIO and SCLK pins. The table below shows some Arduino board pinout.
| Board | InterrupT (IRQ) Pins | I²C / TWI pins | successfully tested | Voltage converter |
|---|---|---|---|---|
| 328-based (Nano, Uno or Mini 5V) |
D2 and D3 | A4 (SDA/SDIO), A5 (SCL/SCLK) | Yes | Yes |
| 328-based (Pro Mini 3.3 / 8Mhz) |
D2 and D3 | A4 (SDA/SDIO), A5 (SCL/SCLK) | Yes | No |
| Mega 2560 | 2, 3, 18, 19, 20 and 21 | 20 (SDA/SDIO), 21 (SCL/SCLK) | Yes | Yes |
| 32u4-based (Micro, Leonardo or Yum) |
0, 1, 2, 3 and 7 | 2 (SDA/SDIO), 3 (SCL/SCLK) | Yes | Yes |
| Zero | all digital pins except pin 4 | D8 (SDA/SDIO) and D9 (SCL/SCLK) | Not tested | No |
| Due | all digital pins | 20 (SDA/SDIO), 21 (SCL/SCLK) | Yes | No |
| 101 | all digital pins. Only pins 2, 5, 7, 8, 10, 11, 12, 13 work with CHANGE |
- | Not tested | No |
| ESPRESSIF ESP32 | all GPIO pins | Most pins (usually 21 and 22) | Yes | No |
| STM32F103 | PA0, PA1 | PB6 (SCL) and PB7(SDA) | Yes | No |
The main porpuse of this prototype is testing de Si4735 Arduino Library. It does not intend to be a real radio for exigent listener. However, it is possible to start with it and after include some devices to improve, for example, its sensibility beyond other desired features.
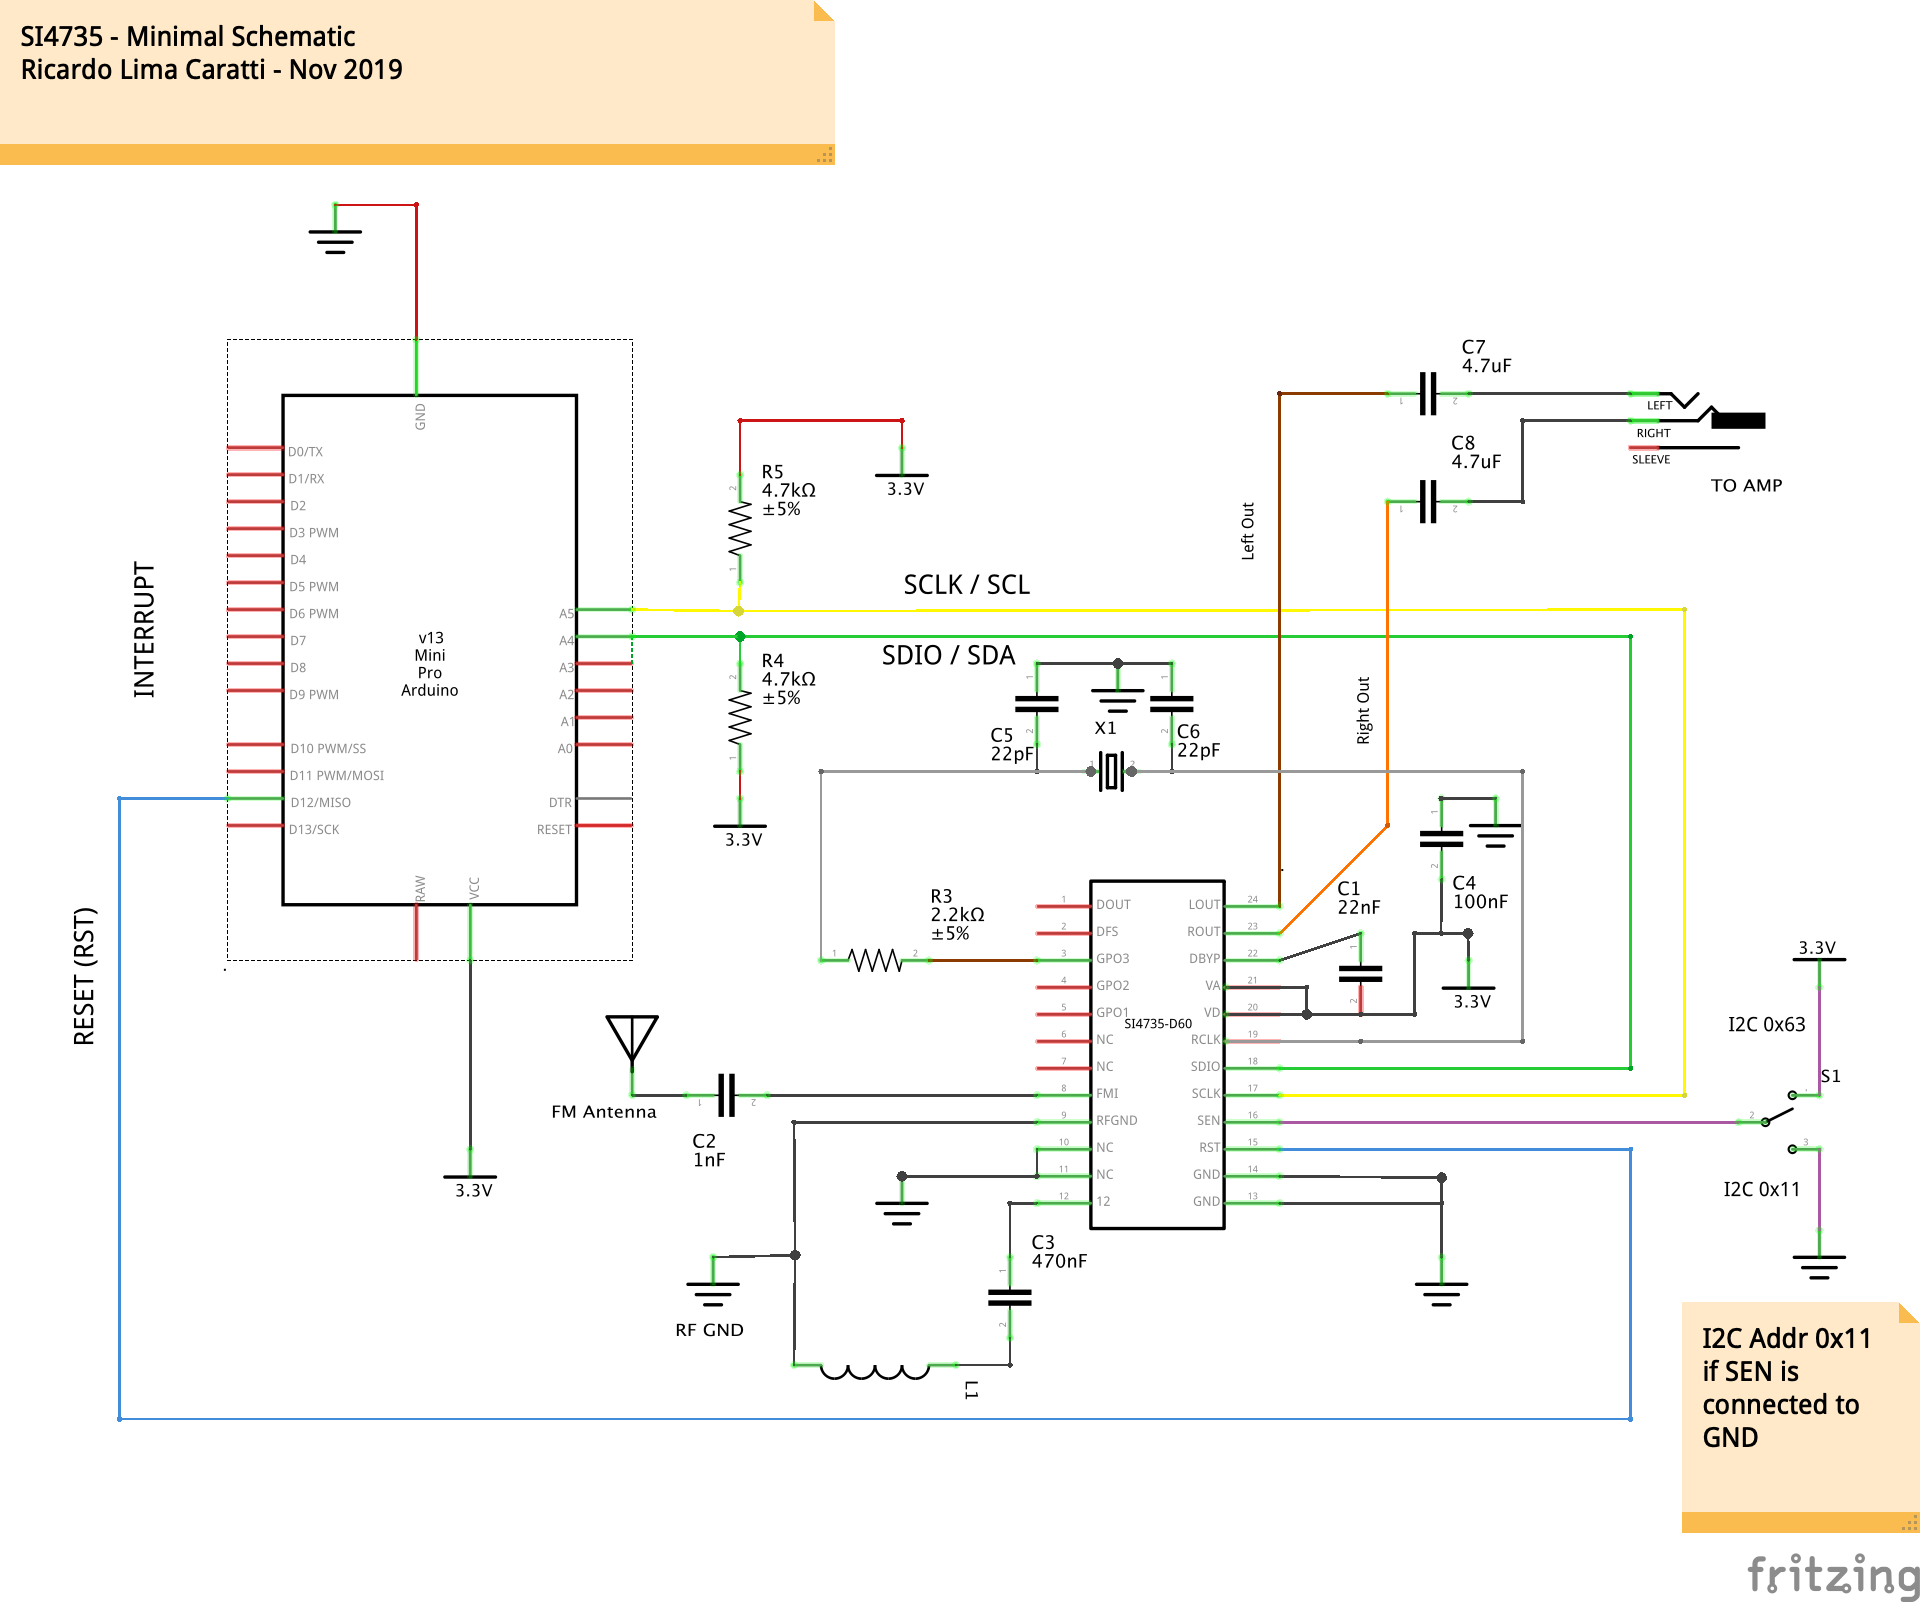
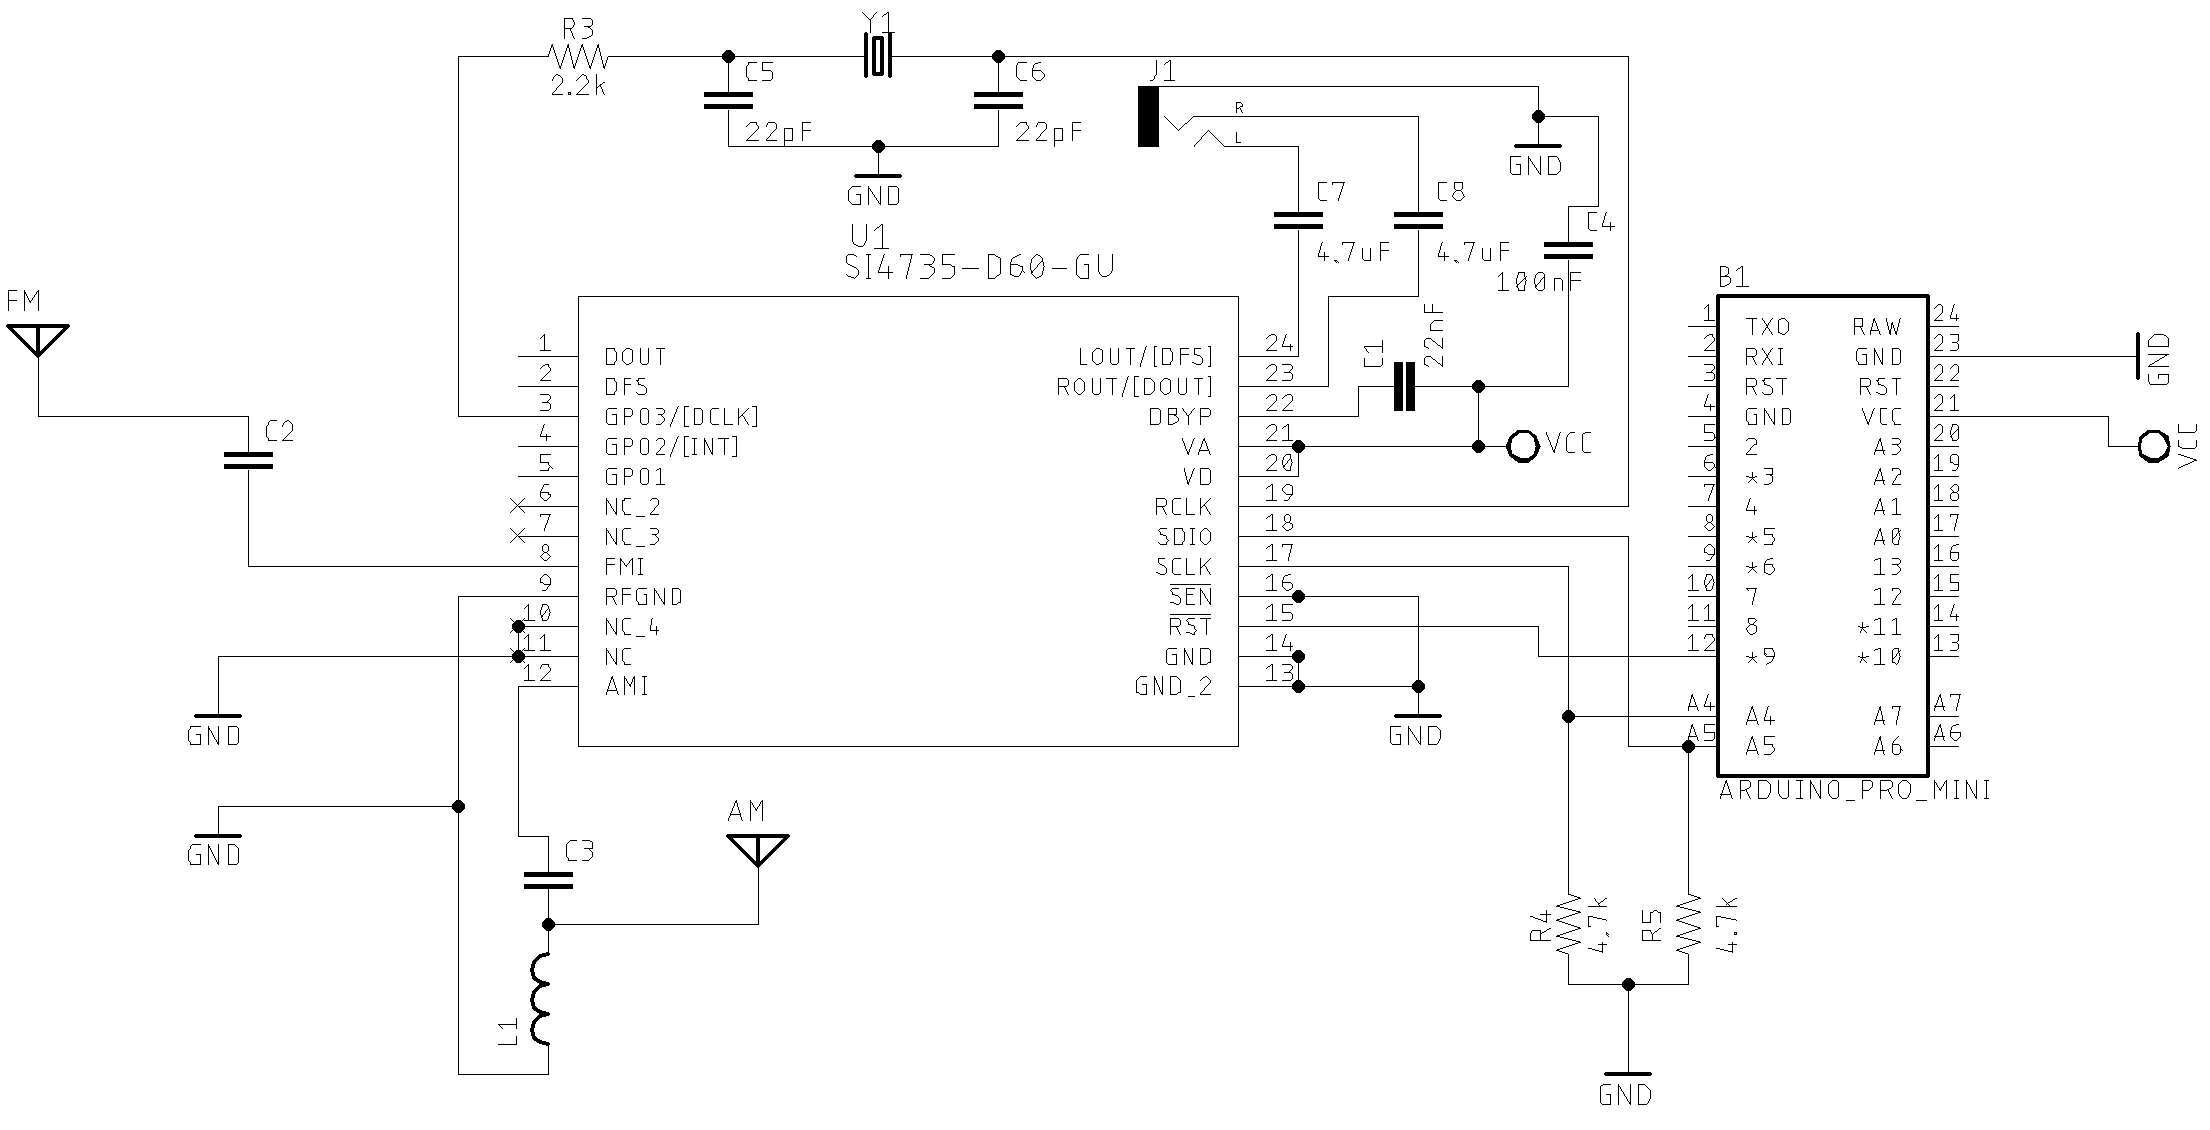
The image bellow shows a version of Slicon Labs SSOP Typical Application Schematic connect to the host MCU (Arduino Pro Pini 3.3V). Pay attention to the Si4735-D60 SEN pin (16). When the SEN pin is connected to the ground, the I²C bus address is 0x11. When the SEN pin is connected to +3.3V, the I²C bus address is 0x63. By default, the "Si4735 Arduino Library" uses the 0x11 I²C bus address (SEN pin connected to GND). If you want to use the address 0x63 (SEN connected on +3.3V), see the functions (methods) getDeviceI2CAddress, setDeviceI2CAddress and setDeviceOtherI2CAddress.
-
See some Shortwave antenna configuration on Si47XX ANTENNA, SCHEMATIC, LAYOUT, AND DESIGN GUIDELINES; AN383
-
Pay attention to the appropriated Arduino pinout to select the correct interrupt (IRQ), RST, SDIO and SCLK pins. The previous table shows some Arduino board pinout.
-
The Si473X SEN pin (16 on SSOP version and 6 on QFN version) when connected to the ground, the I²C bus address is 0x11. When this pin is connected to +3.3V, the I²C bus address is 0x63. See the functions getDeviceI2CAddress and setDeviceI2CAddress to correct setup. If you follow the schematic used in this project, you do not need to do anything (the default I²C bus address is 0x11). If you do not know how this pin is configured on the board, use getDeviceI2CAddress.
The table below shows the component parts used to build the radio prototype based on Si4735 and used the Slicon Labs SSOP Typical Application Schematic as main source. However, some parts were included by the author of this project.
| Part | Description |
|---|---|
| C1 | 22nF Monolithic Multilayer Chip Ceramic non polarized capacitor (Place it close to VA pin) |
| C2 | 1nF Monolithic Multilayer Chip Ceramic non polarized capacitor |
| C3 | 470nF Monolithic Multilayer Chip Ceramic non polarized capacitor |
| C4 | 100nF Monolithic Multilayer Chip Ceramic non polarized capacitor (Place it close to VD pin) |
| C5 and C6 | 22pF (Crystal load capacitors) |
| C7 and C8 *1 | 4.7uF Monolithic Multilayer Chip Ceramic non polarized capacitor |
| R3 | 2.2K |
| (R4 and R5) *2 | 2.2K to 10K (pull-up resistors) |
| L1 | Ferrite loop stick (about 500 μH) |
| X1 | 32.768 kHz crystal |
| SI4735 | digital CMOS AM(LW, MW and SW)/FM radio receiver IC |
- *1: C7 and C8 are ceramic capacitors included by the author of this project. They are not present on original Silicon Labs schematic. Actually, you can use also electrolytic capacitors. Values between 2.2uF to 10uF will work well.
- *2: R4 and R5 are pull-up resistor included by the author of this project. They are not present on original Silicon Labs schematic. This will also depend on other devices connected to the same I²C bus. Always try to use the lowest possible value.
Notes from Silicon Labs Broadcast AM/FM/SW/LW Radio Receiver documentation (page 12):
- Place C1 close to VA and C4 close to VD pin.
- All grounds connect directly to GND plane on PCB.
- Pins 6 and 7 are no connects, leave floating.
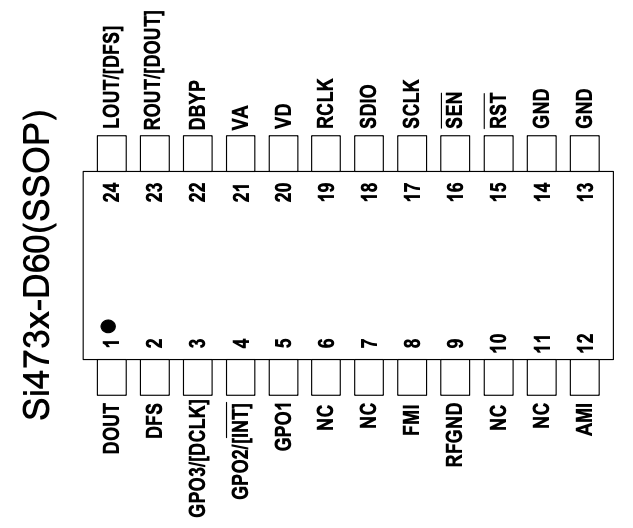
- Pins 10 and 11 are unused. Tie these pins to GND.
- To ensure proper operation and receiver performance, follow the guidelines in “AN383: Si47xx Antenna, Schematic,
- Layout, and Design Guidelines.” Silicon Laboratories will evaluate schematics and layouts for qualified customers.
- Pin 8 connects to the FM antenna interface, and pin 12 connects to the AM antenna interface.
- Place Si473x-D60 as close as possible to antenna and keep the FMI and AMI traces as short as possible.
- Try to follow what the Silicon Labs recommends;
- Start building the minimum circuit and test it;
- Check if the Si47XX RESET pin (15 on SSOP version or 5 on QFN version) is connected on your MCU (Arduino) pin defined as RESET the (the most of schematics and examples of this project this pin is the digital pin 12);
- Use the minimum sketch to test the minimum circuit. The first three examples of this project (see examples folder) can be used to test the minimum circuit;
- Try not improvising the I²C bus connection. Start using a 3.3V MCU (Arduino Pro Mini 8MHz or DUE, ESP32 or other 3.3V device) to connect with SI4735;
- If you are using the Arduino Pro Mini 3.3V board, select the correct Processor on Arduino IDE (ATmega328, 3.3V, 8MHz);
- Some devices provide internal pull-up resistors that in some cases can be enabled or disabled. Also, the capacitance of the I²C bus is another variable that have be considered to select the right resistor values. However, that capacitance is not easy to be measured. For these reasons, it can be a liitle dificult calculate the right resitor values at first. That said, start with a high pullup resistor to I²C bus and then reduce it until the best value. For example: start with 10K and try to reduce the value to 4,7K, 3,3K, 2.2K etc. Select the lowest resistor you can.
- I²C bus devices are available in different speeds. If you are using an I²C display device, check if its speed is compatible with the Si47XX and also with the current speed used by the master MCU;
- Using different voltage levels between I²C devices can be unsafe and can destroy parts connected on I²C bus, specially the Si47XX;
- It is important to wire all your I²C devices on the same common ground.
- If you are using Arduino Mini Pro, UNO or similar, pay attention to the pin 13 and the use of internal pull-up resistor. This pin has a LED and a resistor connected on the board. When this pin is set to HIGH, the LED comes on. If you use the internal pull-up resistor of the pin 13, you might experiment problem due to the drop voltage caused by the LED circuit. If this occurs in your project, you can do:
- Use the pin 14. This pin is the A0 (Analog). But you have to refer it by 14 to use it as digital pin;
- Change the circuit and sketch to use external pull-up on pin 13;
- Remove the LED or resitor connected to the led from the board.
- Use only batteries to power your circuit. Receptions in LW, MW and SW can be seriously harmed by the use of power supplies connected to the grid.
- See some Shortwave antenna configuration on Si47XX ANTENNA, SCHEMATIC, LAYOUT, AND DESIGN GUIDELINES; AN383
Depending on your setup, the system can hang at the beginning.
It has been observed in several tests. Some tips:
- Avoid using the computer connected to the mains during testing. The electrical grid can disturb the communication between the Arduino based board and the SI47XX device;
- The RESET pin is not configured properly. Check the connection of the SI47XX pin 15 (RST) and the Arduino based board;
- If the SI47XX pin 16 (SEN) is grounded, the I2C bus address must be 0x11, otherwise it must be 0x63 (the default I2C bus address is 0x11). Preferably, keep this pin grounded;
- Check if the pins 17 (SCLK / SCL) and 18 (SDIO / SDA) of the SI47XX device are correctly connected to the Arduino board pins;
- Check the pull-up resistors connected to the pins 17 (SCLK / SCL) and 18 (SDIO / SDA) of the SI47XX device;
- Check the voltage on SI47XX pin 15 (RST). It should be 3.3V. All digital pins of your Arduino must have 3.3v when in HIGH condition. If it is greater than 3.3V, probably you are using an 5V board;
- If you are using the board Arduino Pro Mini 3.3V (8MHz), be sure you selected the correct board on Tools menu, Processor: "Atmega328P (3.3V, 8MHz)". By default, the Arduino IDE uses the 5V processor version;
- Do not try to power an ATmega328 Arduino Board designed to work with 5V and 16MHz with a 3.3V supply. That configuration will make your system unstable. See ATmega328P Datasheet;
- Do not try to power your Arduino based board designed to work with 3.3V with greater voltage. See the technical specifications of your Arduino Board and remember that the maximum voltage of the SI47XX MCU CONTROL INTERFACE is 3.6V;
- Check the external crystal and its capacitors connections.
Attention: The pins numbers above is considering Si473x-D60(SSOP) package.
If you are using Arduino Mini Pro, UNO or similar, pay attention to the pin 13 and the use of internal pull-up resistor. This pin has a LED and a resistor connected on the board. When this pin is set to HIGH, the LED comes on. If you use the internal pull-up resistor of the pin 13, you might experiment problem due to the drop voltage caused by the LED circuit. If this occurs in your project, do one of the following:
- Use the pin 14 instead. This pin is the A0 (Analog). But you have to refer it by 14 to use it as digital pin;
- Change the circuit and sketch to use external pull-up on pin 13; or
- Remove the LED or the resitor connected to the LED from the Arduino Board.
This problem can be a little complicated to solve. I have observed that very few times in my experiments. When I am powering the system using the computer USB and the computer is connected to the grid, it might occur. Please, test your system using only batteries.
If you are using the board Arduino Pro Mini 3.3V (8MHz), be sure you selected the correct board on Tools menu, Processor: "Atmega328P (3.3V, 8MHz)". By default, the Arduino IDE uses the 5V processor version.
This problem also can be caused by the external crystal. This crystal needs a minimum delay to become stable after a reset or power up command. Currently, this delay is 10ms. Try to increase that delay by using the method setMaxDelayPowerUp.
Example:
si4735.setMaxDelayPowerUp(500);Also, for some reason, the frequency switching needs a little delay (the default value is 30ms). Try to increase that delay by using the method setMaxDelaySetFrequency.
Example:
si4735.setMaxDelaySetFrequency(50);- Please, use only batteries to power your system up on LW, MW or SW;
- Check your circuit on AMI pin of the Si47XX device;
- Keep as far as possible from noise sources (LED light bulb, computers and any device connected to the power grid);
- Try to find a suitable size for the antenna wire. Too long can be a big noise pickup. If too short, it may not be enough to pick up radio stations.
When the receiver starts or when I switches it from FM to AM and vice-versa, I have loud click in the speaker
Some users may be uncomfortable with the loud popping of the speaker during some transitions caused by some Si47XX device commands. This problem occurs during the receiver transition from the power down to power up internal commands. Also, every time the user changes the mode (FM to AM or AM to FM) the sequence power down and power up internal commands is required by the Si47XX devices.
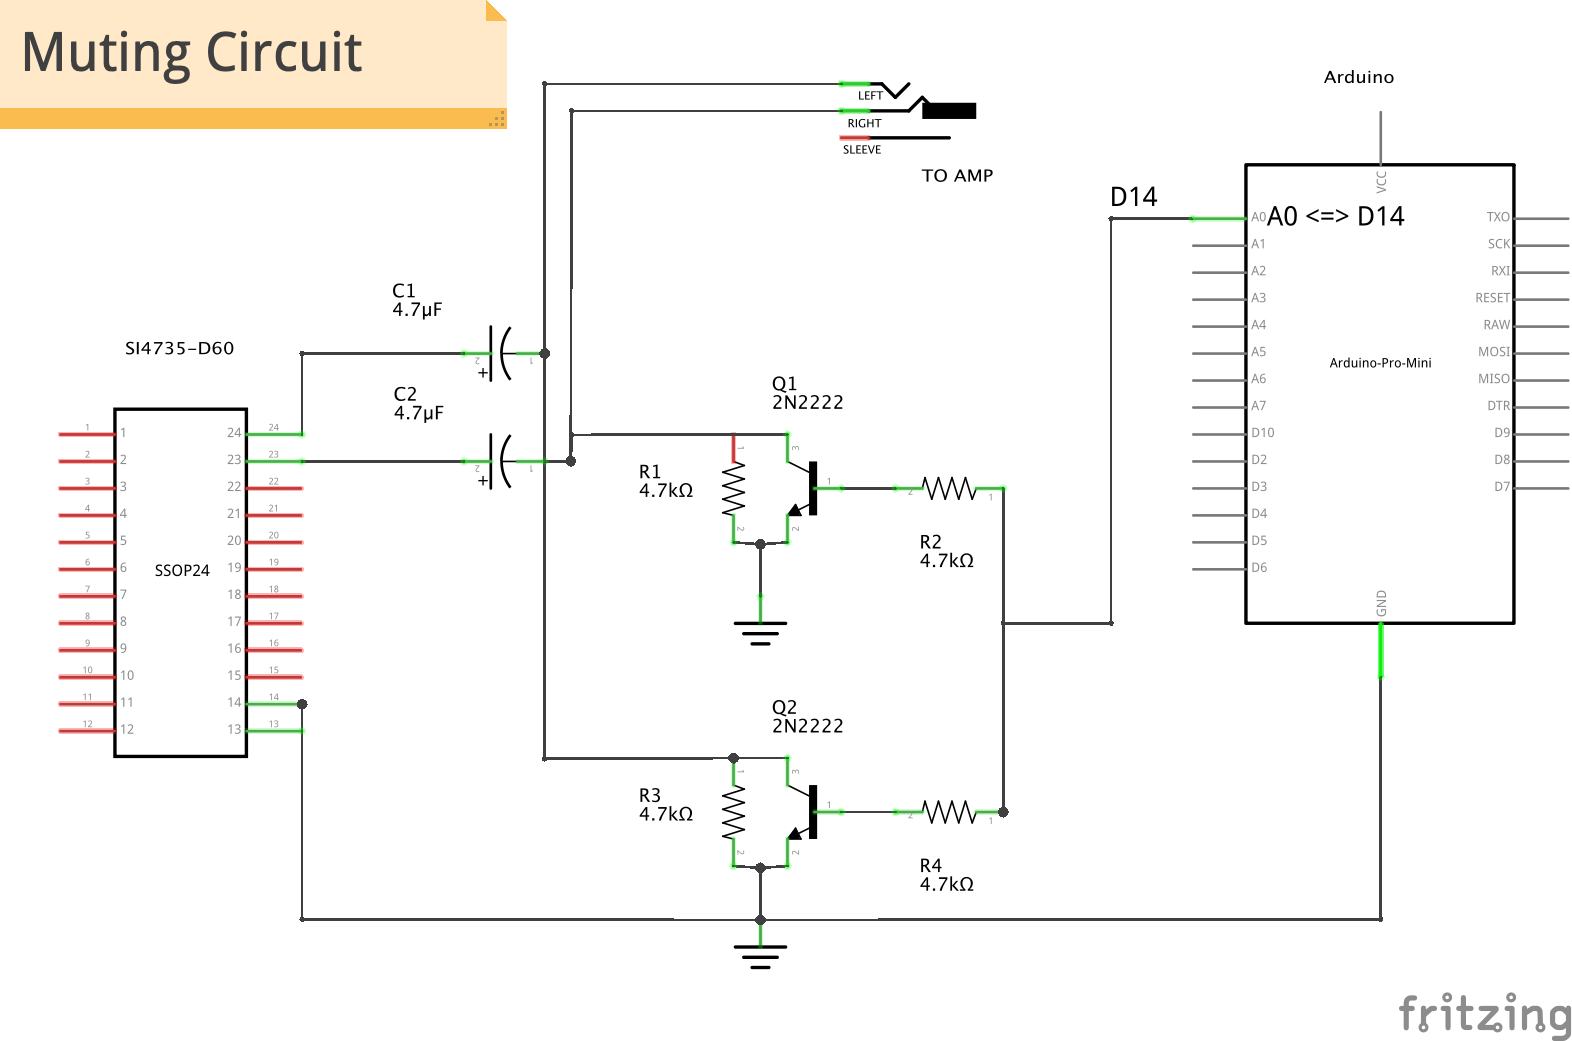
The SI47XX devices have about 0,7 V DC (DC bias) component in the analog audio output pins (SI4735-D60 pins 23 and 24). When the device goes to power down mode, the voltage on the audio pins drops to 0V. The device do it internally and there is not a way to avoid that. When the device goes to power up, that audio pins suddenly goes to the 0,7V DC again. This transition causes the loud pop in the speaker. So far, the author of this library have not found an internal solution to solve the loud popping of the speaker. It is important to say that internal SI47XX mute or volume commands will not work for this purpose. However, it is possible to solve this problem by adding an extra mute circuit and control it by the MCU (Atmega, ESP32, STM32, ATtiny85 etc).
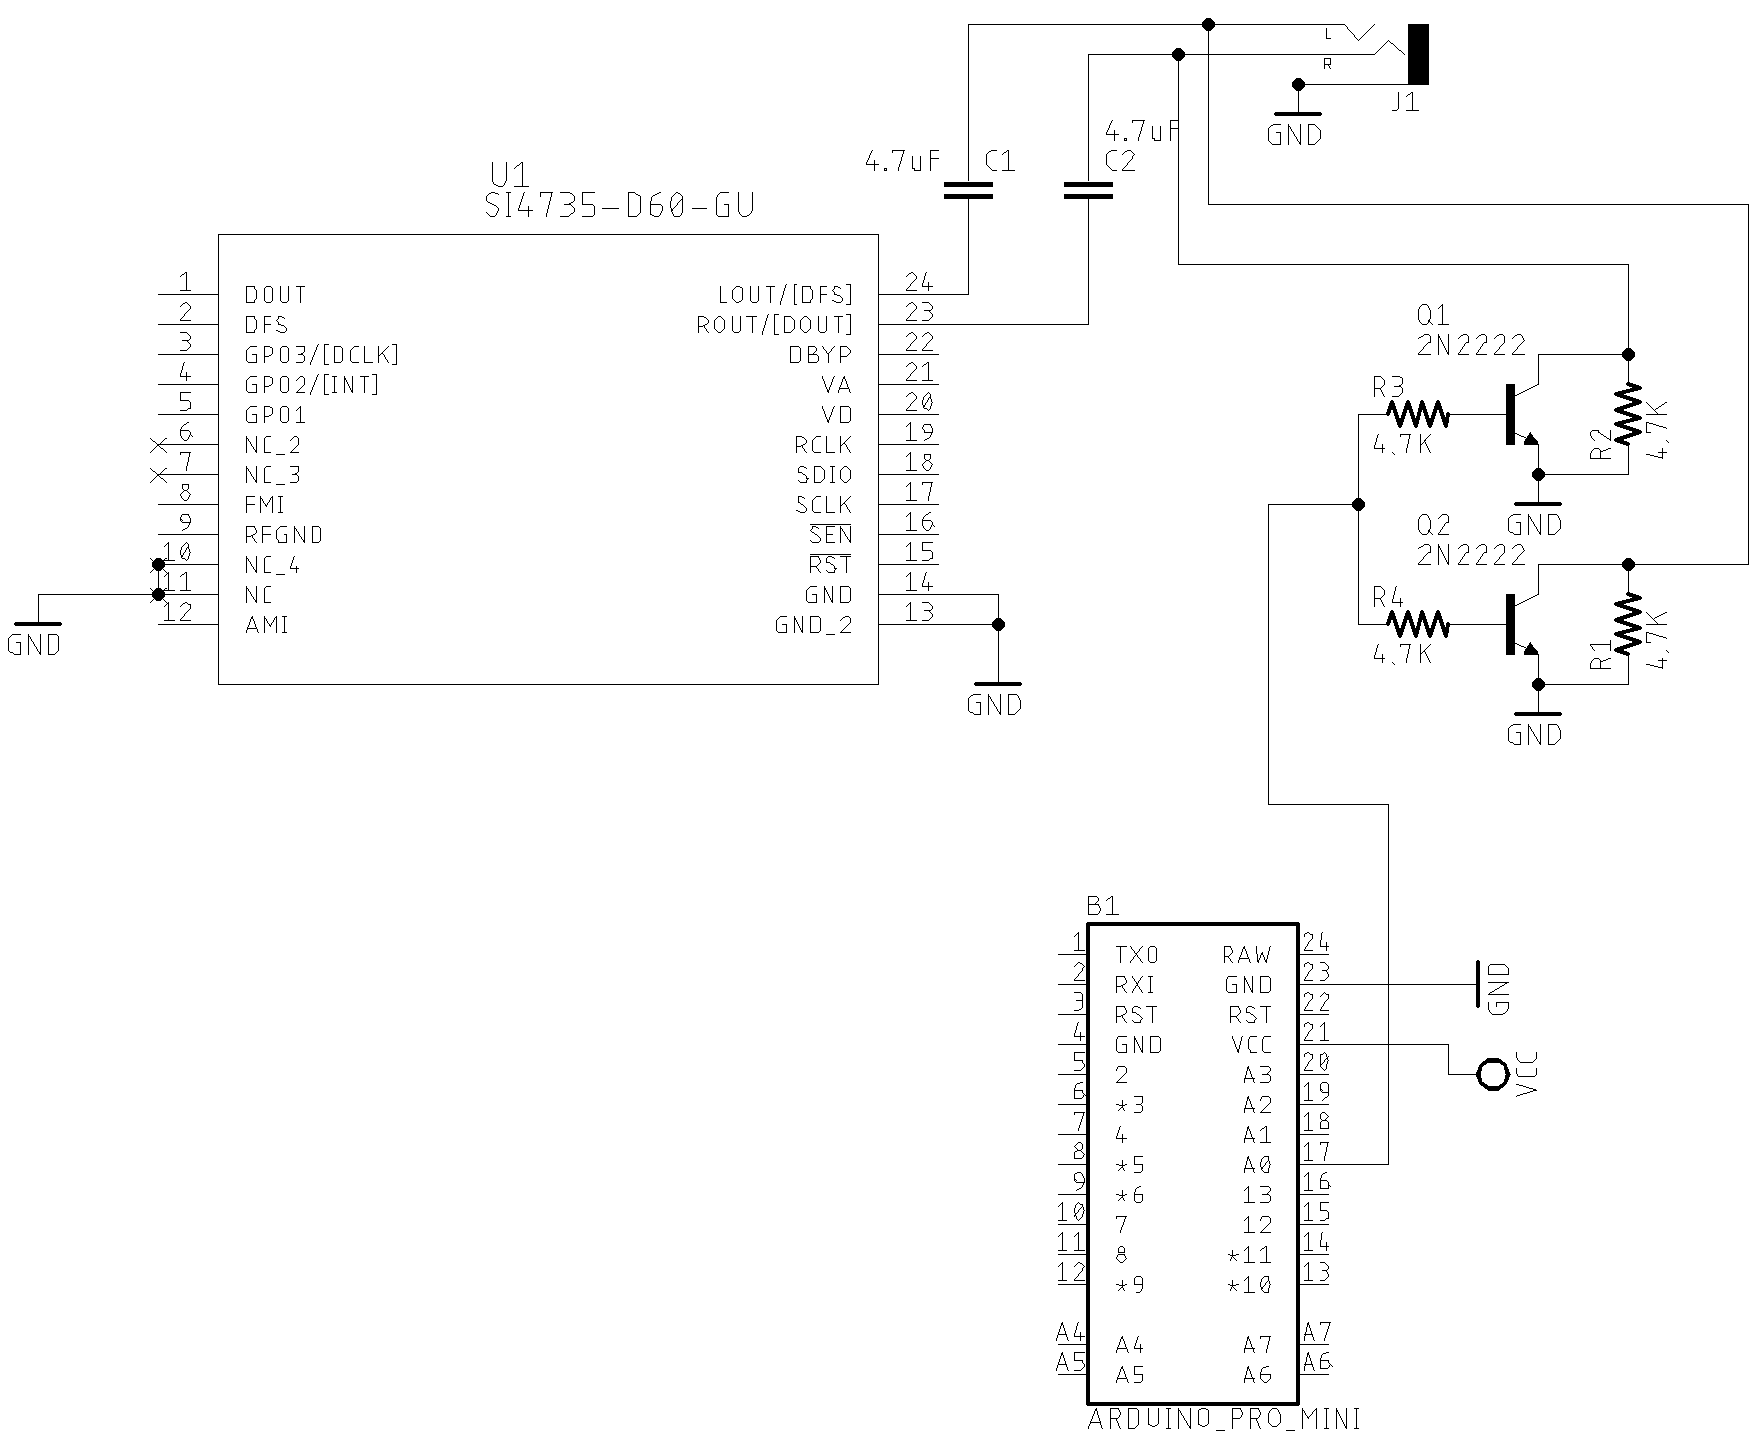
The schematic below shows this approach.
Considering that you are using tme MCU based on Atmega328, when the D14 is HIGH the Si47XX output audio will be drained to the ground. At this condition, no audio will be transferred to the amplifier input and, consequently, to the speaker. So, no loud click in the speaker.
When the D14 is LOW, the most of signal audio output from the Si47XX will be transfered to the input of the amplifier.
The code below shows all you have to do in your sketch to implement this resource.
#include <SI4735.h>
#define AUDIO_MUTE 14      // Pin A0 - Switch AGC ON/OF

Si4735 r;

void setup() {
  .

  // It is all you have to do to control a external audio mute circuit if you have one.
  r.setAudioMuteMcuPin(AUDIO_MUTE); // Tells the system to control an external audio mute circuit.

  r.setup(RESET_PIN, -1, 1, SI473X_ANALOG_AUDIO); // Starts on FM mode and ANALOG audio mode.
  .
  .
  .

}
{% include audiomute.html %}
Some low power audio amplifiers IC also implement mute circuit that can be controlled externally. You can find this resource on LM4906, LM4863, KA8602B, MC34119, PAM8403 and HT82V739 devices.
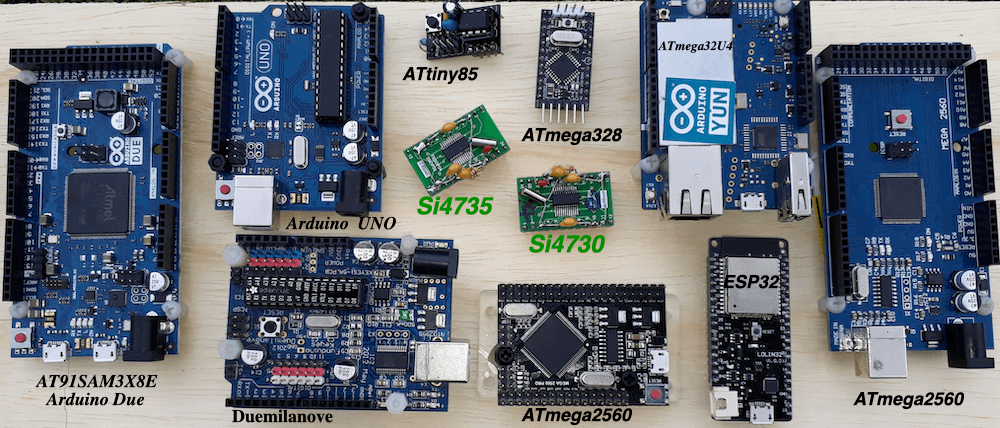
This library can be useful to develop a cross-platform software. So far, it has been successfully tested on the architectures shown below.
The table below shows the some boards where this library has been successfully tested.
| Board | Need voltage converter | I²C Pins | Used Reset Pin | Features |
|---|---|---|---|---|
| Arduino Pro Mini 3.3V 8MHz | No | A4 and A5 | 12 | More... |
| Mega 2560 Pro | Yes | 20 and 21 | 12 | More... |
| ESP WEMOS LOLIN32 | No | 21 and 22 [ˆ4] | 25 [ˆ5] | More... |
| ESP32 Dev Module | No | 21 and 22 [ˆ4] | 25 [ˆ5] | More... |
| Arduino UNO | Yes | A4 and A5 | 12 | More... |
| Arduino Yún / ATmega-32u4 | Yes | 2 and 3 | 12 | More... |
| ATtiny85 | No | 5 and 7 | 2 (D3) | More... |
| Arduino DUE | No | 2 and 3 | 12 | More... |
| BlueDuino 3.3V (ATmega-32u4) | No | 2 and 3 | 10 | More... |
| Arduino Mini Pro 5V 16Mhz | Yes | 2 and 3 | 10 | More... |
| STM32F746G-DISCO | No | - | - | More... |
| STM32F103 Series | No | PB6 (SCL) and PB7(SDA) | PA12 | More... |
- [ˆ4] It seams that in some ESP32 board, the I²C bus is not configured prorpelly by default. However, you can set almost any pin on ESP32 to setup I²C capabilities. All you have to do is call Wire.begin(SDA, SCL); where SDA and SCL are the ESP32 GPIO pins. The code below shows that.
- [^5] You can use the pin 12 too.
- More about ESP boards on ESPRESSOF Development Boards.
- More about BlueDuino on Seed.
- On Arduino.cc you can see the technical specification about many board.
The table below shows some SI473X chips and Si4730 based-boards where the PU2CLR SI4735 Arduino Library has been successfully tested.
| SI473X board / IC | FM | RDS | AM | SSB | LW | MW | SW | Tested |
|---|---|---|---|---|---|---|---|---|
| SI4735-D60 | X | X | X | X | X | X | X | Yes |
| Si4735-B20 | X | X | X | X | X | X | Yes | |
| SI4730-D60 | X | X | X | X | X | X* | Yes | |
| NE928-10A SI4730 | X | X | Yes | |||||
| PL102BA V2.11 10628 | X | X | X | X | X | X | Yes |
- Although the SI4730-D60 does not officially support SW, several tests performed during the development of this library, as well as tests performed by other experimenters, it was observed excellent performance of this IC on HF/SW band. See "Si47XX PROGRAMMING GUIDE; pages 2 and 3; Table 1 - Product Family Function" for more details.
{% include videocross.html %}
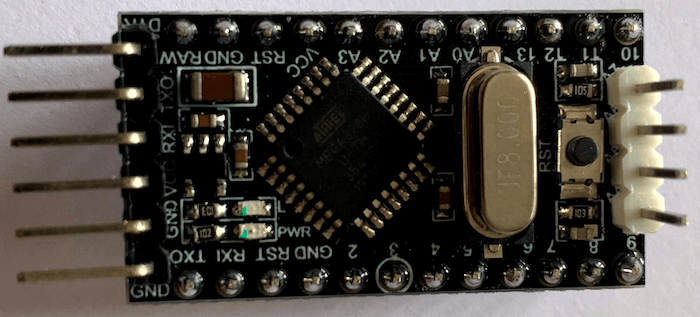
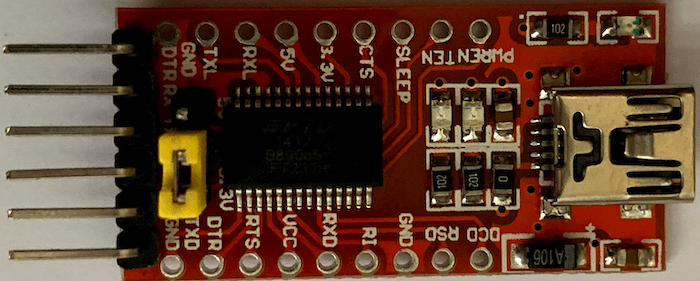
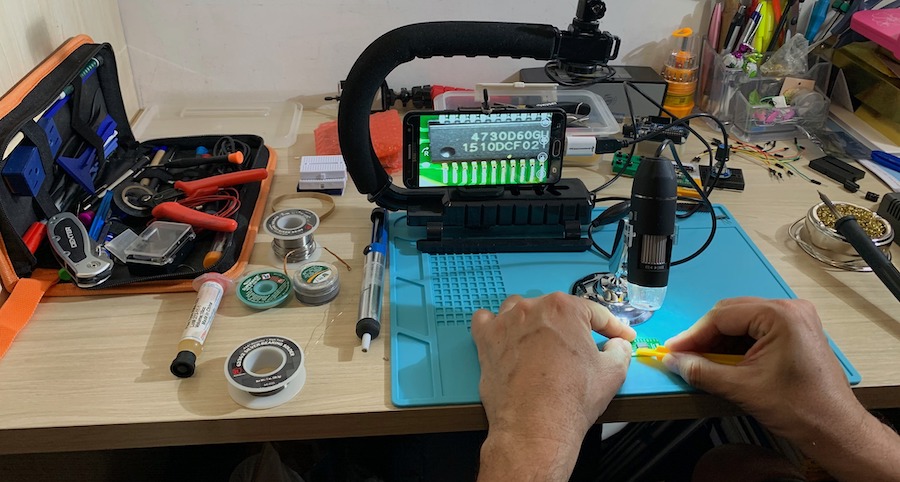
This item describes some tools and accessories you might need to build your radio based on SI4735. Most of the accessories used in this project you will find on eBay and AliExpress.
| Arduino Pro Mini | Arduino Pro Mini |
|---|---|
 |
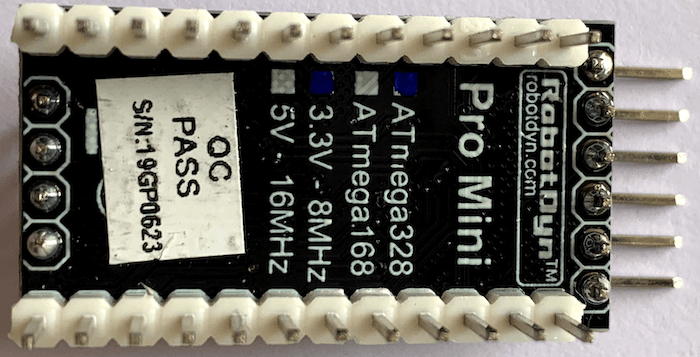 |
- Pro Mini 3.3V 8MHz /5V 16M Atmega328 Replace ATmega128 Arduino Compatible Nano
| FT232 USB Adapter | FT232 USB Adapter |
|---|---|
 |
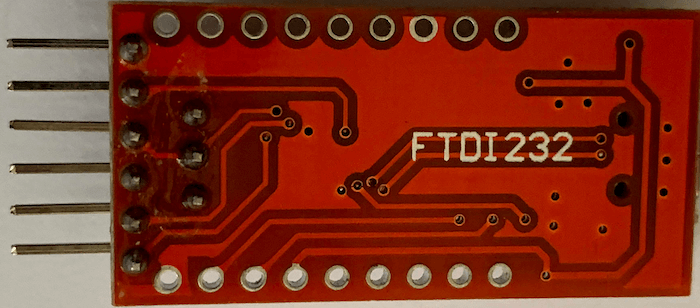 |
- FT232RL 3.3V 5.5V FTDI USB to TTL Serial Adapter Module for Arduino Mini Port
| Magnifier | Solder |
|---|---|
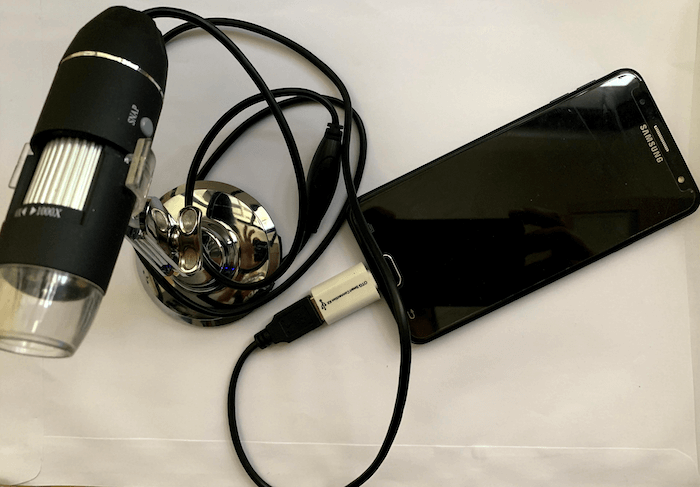 |
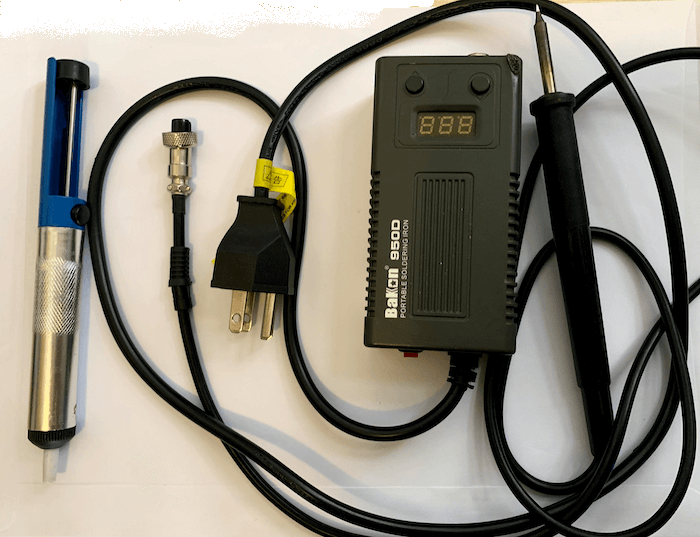 |
- 50-1000X Magnifier Wireless WiFi Electric Microscope 2.0MP 8LED Endoscope Camera
- Soldering Iron Station with Temperature Control
| Adapter for SI4735 | Soldering Accessories |
|---|---|
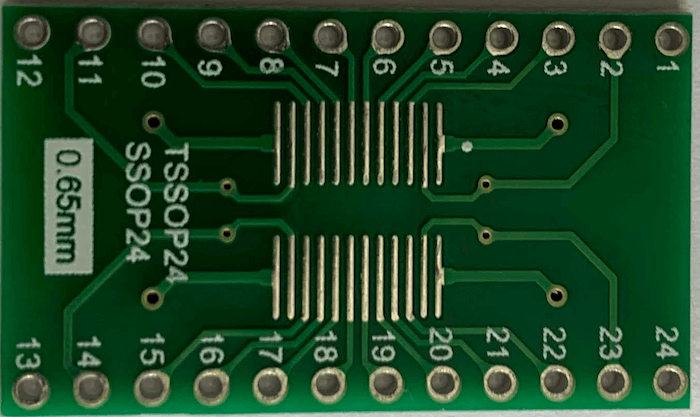 |
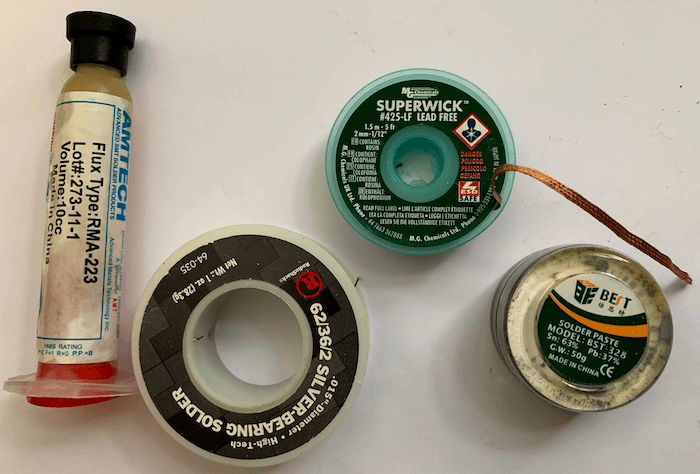 |
- SO SOP SOIC SSOP TSSOP 24 Pin to DIP 24 Adapter PCB Board Converter
- 50g Soldering Paste Solder Flux Paste Cream for PCB PGA SMD BGA
- BGA SMD Soldering Paste Flux
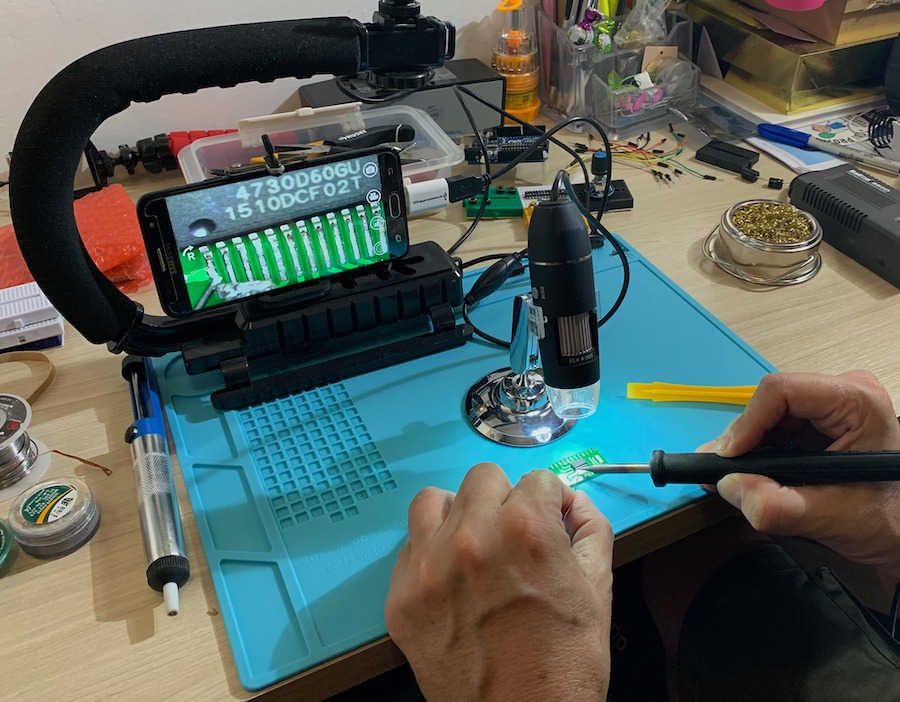
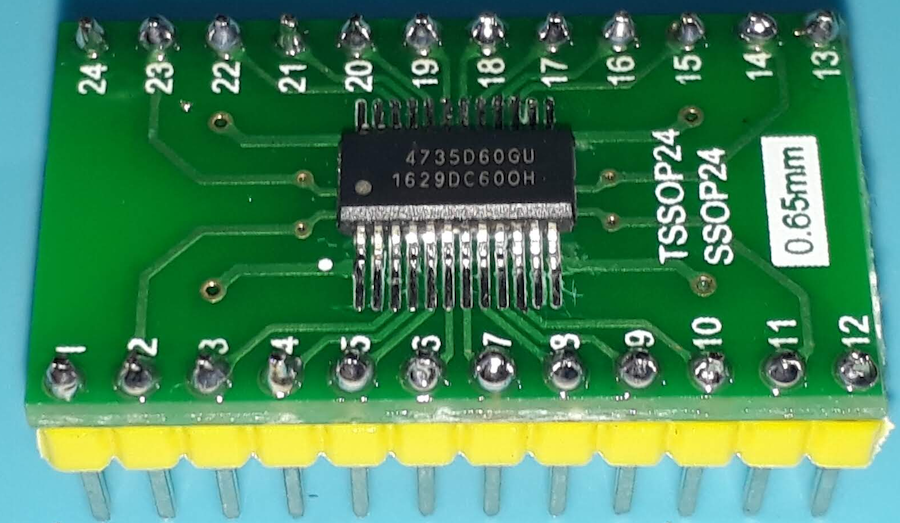
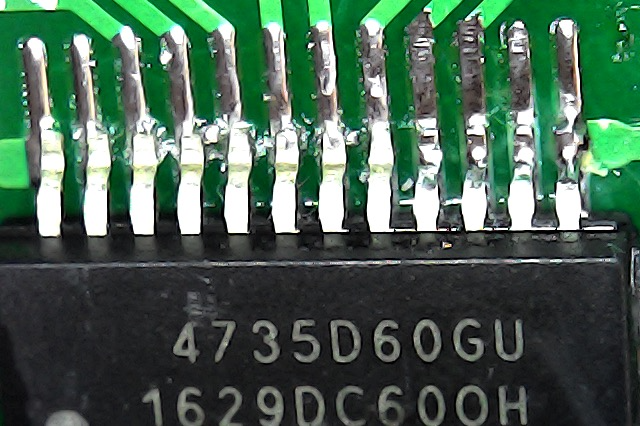
It was a bit hard to solder the kind of CI on adapter. However, by using a electronic magnifier it was possible.
| Si4735 on Adapter | Si4735 on Adapter |
|---|---|
 |
 |
 |
 |
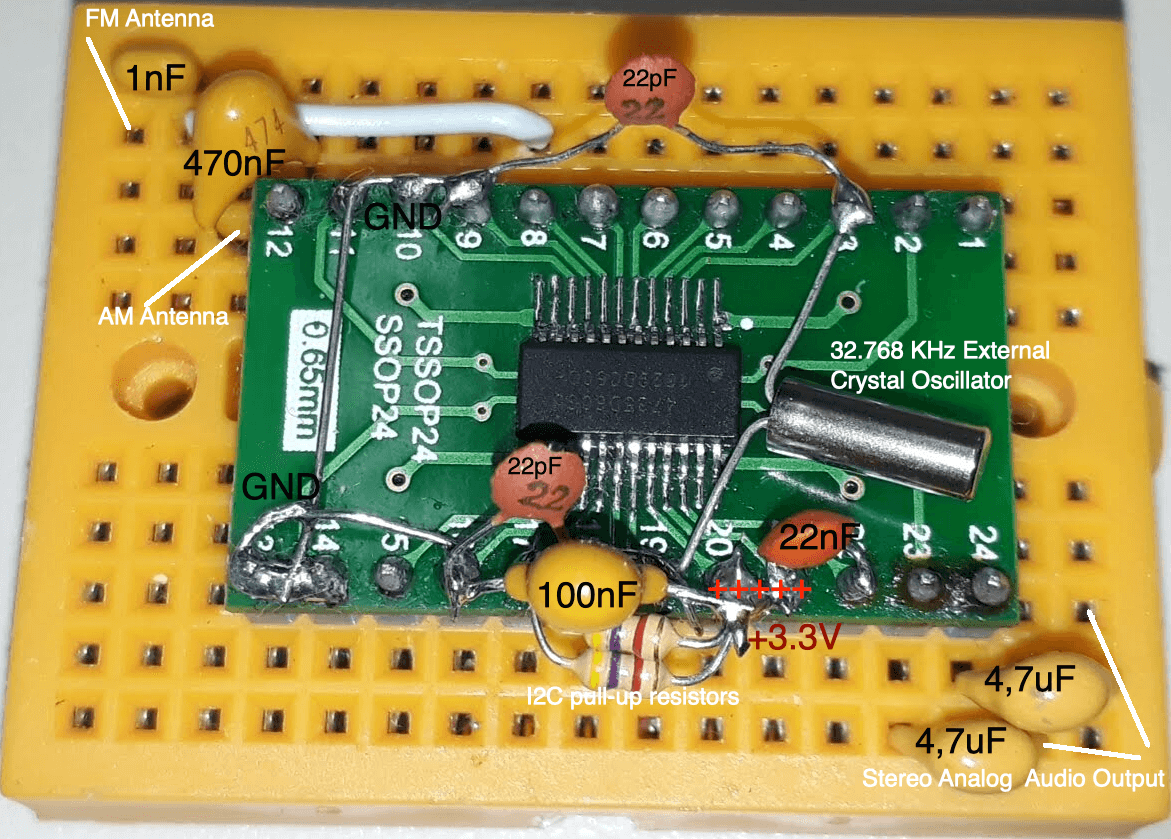
The basic circuit built on protoboard is based on the “SSOP Typical Application Schematic”, suggested by the Silicon Labs Documentation (Si4730/31/34/35-D60-BROADCAST AM/FM/SW/LW RADIO RECEIVER; page 19). Two pull-up 4.7K resistors were added on I²C bus (It is an arbitrary value. Actually, this value may vary depending on your devices connected to the bus). Also, it is recomended to add two 4.7uF capacitors between the CI audio output and audio amplifier. The photos below do not show these capacitors. See C7 and C8 on schematic.
The figure below shows a suggestion to shrink the prototype and connections. If you are just doing prototyping, I recommend this approach due to the short connections with the Si4735 (recommended by the manufacturer).
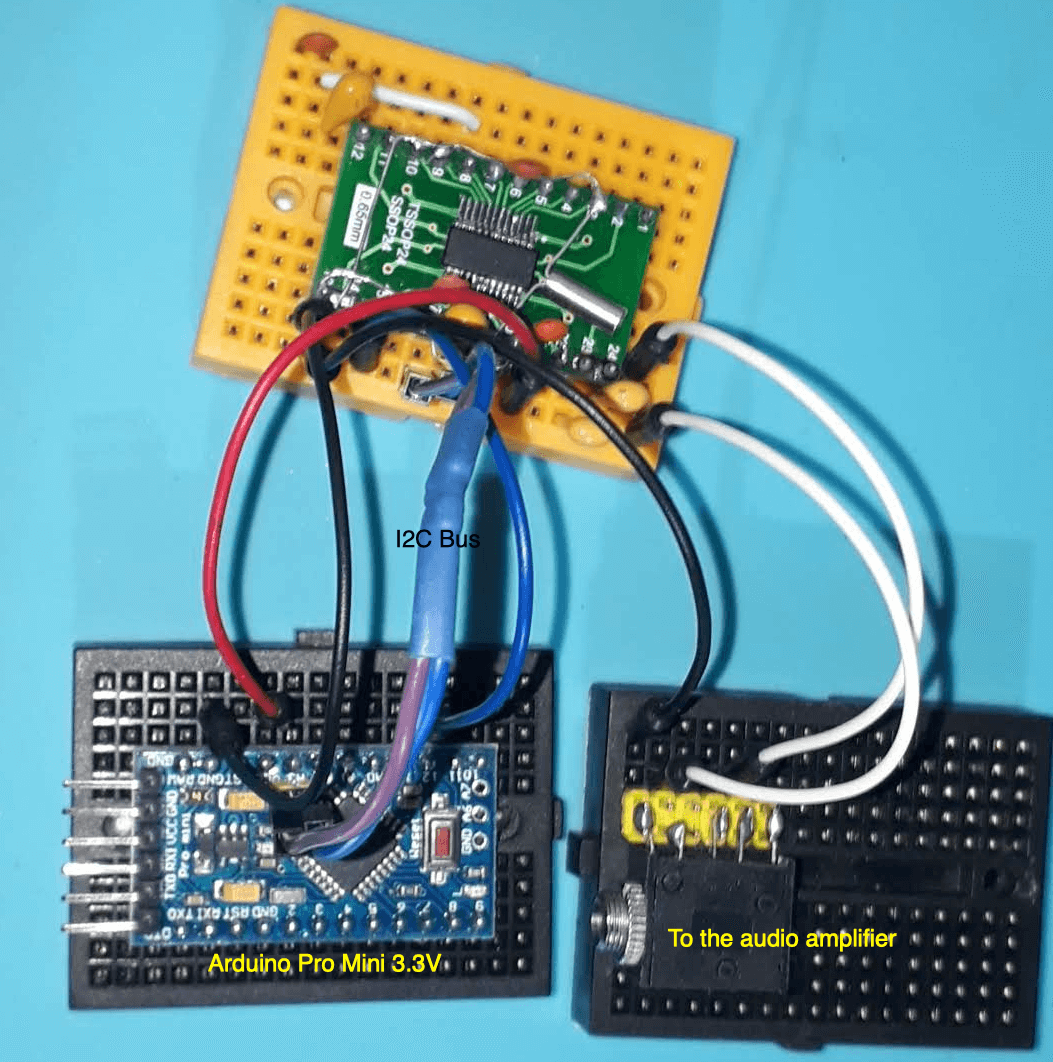
The configuration above connected to Arduino Pro Mini is shown below.
The following photo shows the most common prototyping approach. Use this approach if you don't want to solder the components on the adapter plate.
The figure above shows the very basic shematic implementation (no Button or Encoder). See the folder examples for more details and other configuration with LCD and OLED
- Silicon Labs Si4737 WB/AM/FM Stereo/RDS single-chip receiver HAL library for Arduino
- BROADCAST AM/FM/SW/LW RADIO RECEIVER
- SI47XX PROGRAMMING GUIDE (REV 1.0)
- AN332 REV 0.8 UNIVERSAL PROGRAMMING GUIDE AMENDMENT FOR SI4735-D60 SSB AND NBFM PATCHES
- Installing Additional Arduino Libraries
- Specification of the radio data system (RDS) for VHF/FM sound broadcasting in the frequency range from 87,5 to 108,0 MHz
- Radio Data System
- RDS Encoder
- RDS in Europe, RBDS in the USA –What are the differences and how canreceivers cope with both systems?
- RBDS & RDS PTY Codes and Program Types
- Using RDS/RBDS with the Si4701/03
- Si47XX ANTENNA, SCHEMATIC, LAYOUT, AND DESIGN GUIDELINES; AN383
- Other implementations using Si4735 and Arduino
- This is a git fork of [Michael Kennedy's]
- Arduino Si4735 radio library
- SI4735 AM & FM Receiver Shield
- Si4735 Digital AM/FM Radio Receiver
- Ryan Owens for SparkFun Electronics
- Silicon Labs Si4737 WB/AM/FM Stereo/RDS single-chip receiver HAL library for Arduino
- Enhanced Software for Elektor DSP-Radio (Si4735)
- I²C
- Taking The Leap Off Board: An Introduction To I²C Over Long Wires
- Difference between I²C and SPI
- Issues with the I²C (Inter-IC) Bus and How to Solve Them
- I²C Manual; Application Note; AN10216-01
- IMPROVING NOISE IMMUNITY FOR SERIAL INTERFACE; A Lattice Semiconductor White Paper; July 2014
- Bus Buffers Simplify Design of Large, Noisy I²C Systems
- Common Problems In Systems
- Forums
- "Multi-Band Receiver On A Chip Controlled By Arduino" commented by Tom Nardi on Hackaday
- C/C++ for Arduino
Here you can see some experiments using this library. Watch them.
{% include video01.html %}
- Si4735 All in One Receiver running on Arduino Pro Mini 3.3V (8MHz) and TFT Display
- Si4735 All in One Receiver with TFT Touch Screen
- Si4735 Arduino Library example. OLED Application.
- SI4735 Arduino Library and a simple FM and AM radio implementation
- SI4735 ARDUINO LIBRARY BANDWIDTH TEST
- Si4735 Arduino Library and SSB Support (Listening to a QSO on 20 meters)
- Evaluating SSB audio from the SI4735-based radio prototype
- How to "SI4735 Arduino Library and ATtiny85"
- SI4735 Arduino Library working with ATtiny85
- NE928-10A V:01 board working with "Si4735 Arduino Library"
- Si4735 Arduino Library and Blepill STM32F103
- SI4735 SSB
- All Band Radio with a Nice Interface
- SI4735 11 ALL IN ONE TEST OLED ver from jg3pup
- New HF SSB receiver made of Si4735 is done!
- SSB DSP radio (Si4735) version 5 revision 2
- Si4735 LCD版でSSBを受信
- Wefax576 via SI4735 with audio cable fldigi
- SI4735 Radio KIT prototype
- SI4735 KIT. First LF test
- SI4735 KIT. First SSB test
- SI4735 KIT - First FM test
- Great interface by Gert Baak
- si4735 betatest radio
The table below shows some radios based on SI47XX
| Manufacturer | Model | CI | More information |
|---|---|---|---|
| Tecsun | PL310ET | Si4734 | About |
| Tecsun | PL-365 | Si4735 | Review |
| Tecsun | PL-360 | Si4734 | Review |
| Tecsun | PL380 | Si4734 | Reviews |
| Tecsun | PL880 | Si4735 | Reviews |
| Degen | DE1103 DSP | Si4735 | Review |
| Degen | DE1123/Kaito KA1123 | Si4734 | Review |
| Degen | DE1125/Kaito KA801 | Si4734 | Reviews |
| Degen | DE1126 | Si4734 | Review |
| Degen | DE1127 (discontinued) | Si4734 | Review |
| Sangean | ATS-909X | Si4735 | Review |
| XHDATA | D808 | Si4735 | Review |
| RADIWOW | R-108 | Review | |
| C Crane | CC Skywave | Review |
