| page_type | name | description | languages | products | urlFragment | extensions | ||||||||||||||||||||||||
|---|---|---|---|---|---|---|---|---|---|---|---|---|---|---|---|---|---|---|---|---|---|---|---|---|---|---|---|---|---|---|
sample |
Enable your Blazor Single-page Application (SPA) to sign-in users with the Microsoft identity platform |
|
|
ms-identity-blazor-wasm |
|
Enable your Blazor Single-page Application (SPA) to sign-in users with the Microsoft identity platform
- Overview
- Scenario
- Prerequisites
- Setup the sample
- Explore the sample
- Troubleshooting
- About the code
- Next Steps
- Contributing
- Learn More
This sample demonstrates a ASP.NET Core Blazor WebAssembly Web App calling Microsoft Graph.
ℹ️ To learn how applications integrate with Microsoft Graph, consider going through the recorded session:: An introduction to Microsoft Graph for developers
- The client ASP.NET Core Blazor WebAssembly Web App uses the to authenticate a user and obtain a JWT ID Token and an Access Token from Azure AD.
- The access token is used as a bearer token to authorize the user to call the Microsoft Graph protected by Azure AD.

- Install .NET.
- Either Visual Studio or Visual Studio Code and .NET Core SDK
- An Azure AD tenant. For more information, see: How to get an Azure AD tenant
- A user account in your Azure AD tenant.
This sample will not work with a personal Microsoft account. If you're signed in to the Azure portal with a personal Microsoft account and have not created a user account in your directory before, you will need to create one before proceeding.
From your shell or command line:
git clone https://github.com/Azure-Samples/ms-identity-blazor-wasm.gitor download and extract the repository .zip file.
⚠️ To avoid path length limitations on Windows, we recommend cloning into a directory near the root of your drive.
cd WebApp-graph-user/Call-MSGraph/blazorwasm-calls-MS-graphThere is one project in this sample. To register it, you can:
- follow the steps below for manually register your apps
- or use PowerShell scripts that:
- automatically creates the Azure AD applications and related objects (passwords, permissions, dependencies) for you.
- modify the projects' configuration files.
Expand this section if you want to use this automation:
> :warning: If you have never used **Microsoft Graph PowerShell** before, we recommend you go through the [App Creation Scripts Guide](./AppCreationScripts/AppCreationScripts.md) once to ensure that your environment is prepared correctly for this step.

1. On Windows, run PowerShell as **Administrator** and navigate to the root of the cloned directory
1. In PowerShell run:

   ```PowerShell
   Set-ExecutionPolicy -ExecutionPolicy RemoteSigned -Scope Process -Force
   ```

1. Run the script to create your Azure AD application and configure the code of the sample application accordingly.
1. For interactive process -in PowerShell, run:

   ```PowerShell
   cd .\AppCreationScripts\
   .\Configure.ps1 -TenantId "[Optional] - your tenant id" -AzureEnvironmentName "[Optional] - Azure environment, defaults to 'Global'"
   ```

> Other ways of running the scripts are described in [App Creation Scripts guide](./AppCreationScripts/AppCreationScripts.md). The scripts also provide a guide to automated application registration, configuration and removal which can help in your CI/CD scenarios.
To manually register the apps, as a first step you'll need to:
- Sign in to the Azure portal.
- If your account is present in more than one Azure AD tenant, select your profile at the top right corner in the menu on top of the page, and then switch directory to change your portal session to the desired Azure AD tenant.
- Navigate to the Azure portal and select the Azure Active Directory service.
- Select the App Registrations blade on the left, then select New registration.
- In the Register an application page that appears, enter your application's registration information:
- In the Name section, enter a meaningful application name that will be displayed to users of the app, for example
WebApp-blazor-wasm. - Under Supported account types, select Accounts in this organizational directory only
- Select Register to create the application.
- In the Name section, enter a meaningful application name that will be displayed to users of the app, for example
- In the Overview blade, find and note the Application (client) ID. You use this value in your app's configuration file(s) later in your code.
- In the app's registration screen, select the Authentication blade to the left.
- If you don't have a platform added, select Add a platform and select the Single-page application option.
- In the Redirect URI section enter the following redirect URI:
https://localhost:44314/authentication/login-callback
- In the Front-channel logout URL section, set it to
https://localhost:44314/signout-oidc. - Click Save to save your changes.
- In the Redirect URI section enter the following redirect URI:
- Since this app signs-in users, we will now proceed to select delegated permissions, which is is required by apps signing-in users.
- In the app's registration screen, select the API permissions blade in the left to open the page where we add access to the APIs that your application needs:
- Select the Add a permission button and then:
- Ensure that the Microsoft APIs tab is selected.
- In the Commonly used Microsoft APIs section, select Microsoft Graph
- In the Delegated permissions section, select User.Read in the list. Use the search box if necessary.
- Select the Add permissions button at the bottom.
- Still on the same app registration, select the Token configuration blade to the left.
- Select Add optional claim:
- Select optional claim type, then choose ID.
- Select the optional claim acct.
Provides user's account status in tenant. If the user is a member of the tenant, the value is 0. If they're a guest, the value is 1.
- Select Add to save your changes.
Open the project in your IDE (like Visual Studio or Visual Studio Code) to configure the code.
In the steps below, "ClientID" is the same as "Application ID" or "AppId".
- Open the
blazorwasm-calls-MS-graph\wwwroot\appsettings.jsonfile. - Find the key
Enter_Application_ID_hereand replace the existing value with the application ID (clientId) ofWebApp-blazor-wasmapp copied from the Azure portal. - Find the key
Enter_Tenant_ID_hereand replace the existing value with 'https://login.microsoftonline.com/'+$tenantId.
From your shell or command line, execute the following commands:
    cd WebApp-graph-user/Call-MSGraph/blazorwasm-calls-MS-graph
dotnet runIf you are using incognito mode of browser to run this sample then allow third party cookies.
-
Open your browser and navigate to
https://localhost:44314. -
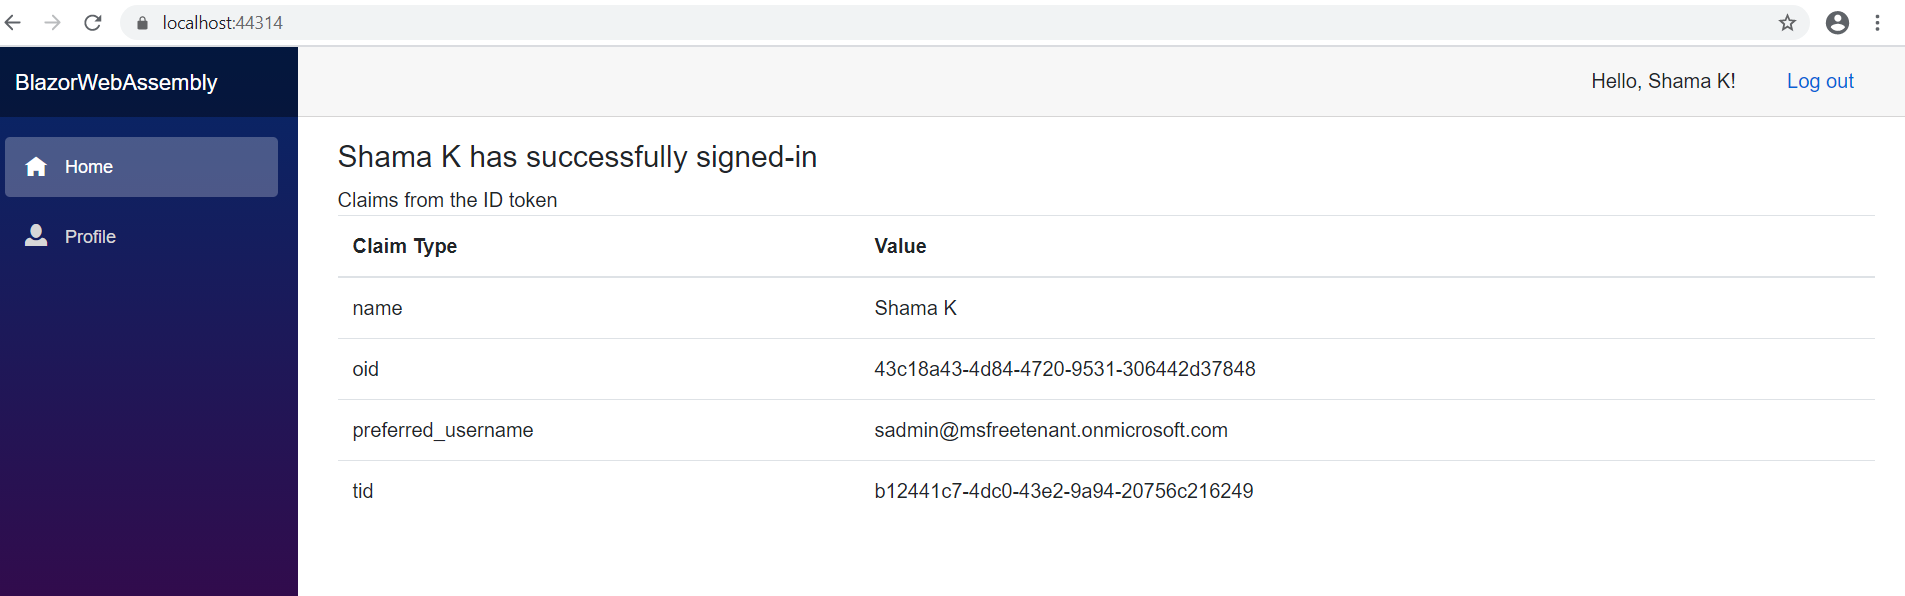
Select the Sign in button on the top right corner. You will see claims from the signed-in user's token.
-
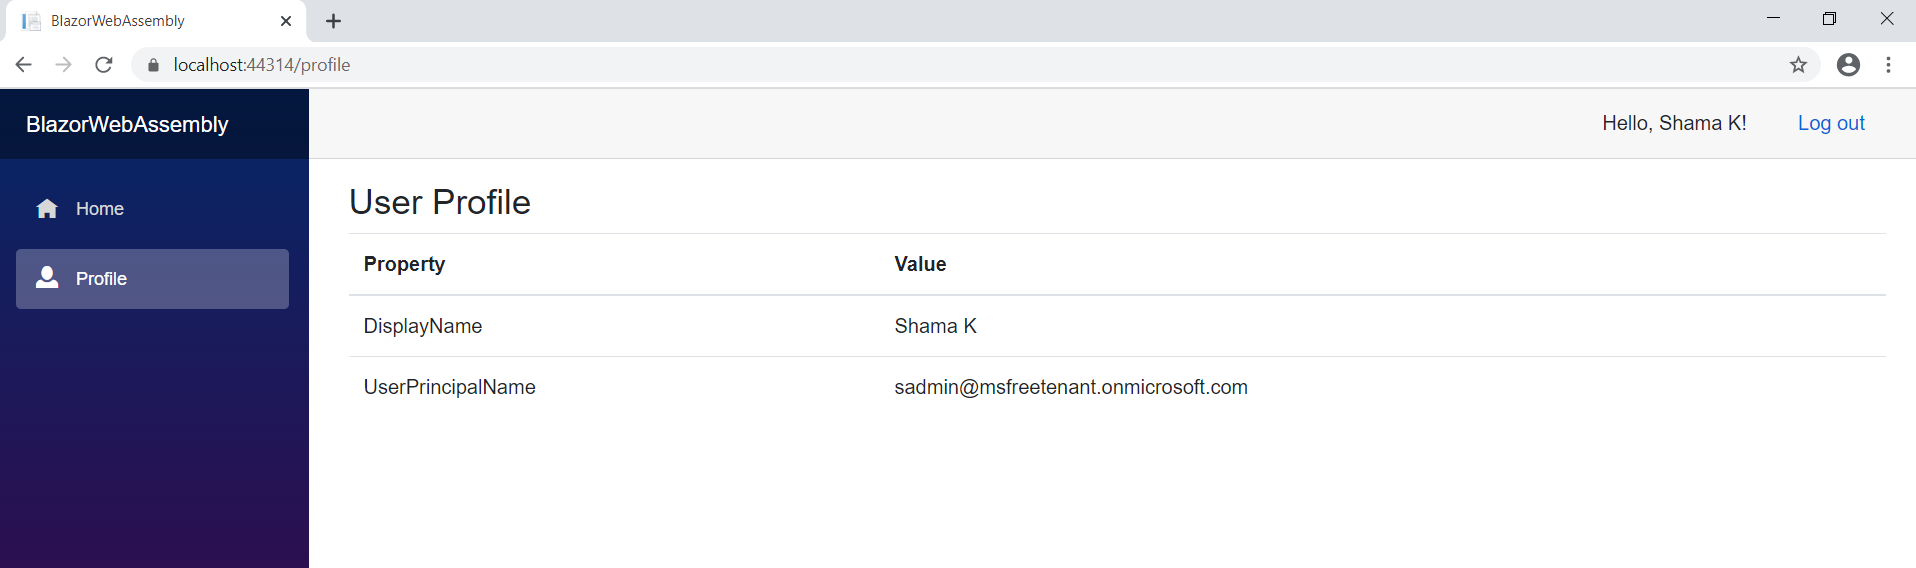
Select Profile from navigation bar on the left. If user has signed-in then information fetched from Microsoft Graph is displayed, otherwise login screen will appear.


ℹ️ Did the sample not work for you as expected? Then please reach out to us using the GitHub Issues page.
Were we successful in addressing your learning objective? Do consider taking a moment to share your experience with us.
-
In Program.cs, Main method registers AddMsalAuthentication as explained below:
 builder.Services.AddMsalAuthentication(options =>
 {
     builder.Configuration.Bind("AzureAd", options.ProviderOptions.Authentication);
 });
AddMsalAuthentication is an extension method provided by the Microsoft.Authentication.WebAssembly.Msal package and it provides support for authenticating users with the Microsoft Identity Platform.
-
Index.razor is the landing page when application starts. Index.razor contains child component called
UserClaims. If user is authenticated successfully,UserClaimsdisplays a few claims present in the ID Token issued by Azure AD. -
In the
UserClaimsBase.csclass, GetClaimsPrincipalData method retrieves signed-in user's claims using the GetAuthenticationStateAsync() method of the AuthenticationStateProvider class.public class UserClaimsBase: ComponentBase { [Inject] private AuthenticationStateProvider AuthenticationStateProvider { get; set; } protected string _authMessage; protected IEnumerable<Claim> _claims = Enumerable.Empty<Claim>(); private string[] returnClaims = { "name", "preferred_username", "tid", "oid" }; protected override async Task OnInitializedAsync() { await GetClaimsPrincipalData(); } private async Task GetClaimsPrincipalData() { var authState = await AuthenticationStateProvider.GetAuthenticationStateAsync(); var user = authState.User; if (user.Identity.IsAuthenticated) { _authMessage = $"{user.Identity.Name} is authenticated."; _claims = user.Claims.Where(x => returnClaims.Contains(x.Type)); } else { _authMessage = "The user is NOT authenticated."; } } }
-
In Program.cs, Main method registers AddMicrosoftGraphClient as explained below:
builder.Services.AddMicrosoftGraphClient("https://graph.microsoft.com/User.Read");
AddMsalAuthentication is an extension method provided by GraphClientExtensions.cs class.
-
UserProfile.razor component displays user information retrieved by GetUserProfile method of UserProfileBase.cs.
UserProfileBase.cs calls Microsoft Graph
/meendpoint to retrieve user information.public class UserProfileBase : ComponentBase { [Inject] GraphServiceClient GraphClient { get; set; } protected User _user=new User(); protected override async Task OnInitializedAsync() { await GetUserProfile(); } private async Task GetUserProfile() { ... var request = GraphClient.Me.Request(); _user = await request.GetAsync(); ... } }
See README.md to deploy this sample to Azure.
Use Stack Overflow to get support from the community.
Ask your questions on Stack Overflow first and browse existing issues to see if someone has asked your question before.
Make sure that your questions or comments are tagged with [azure-active-directory ms-identity msal].
If you find a bug in the sample, raise the issue on GitHub Issues.
To provide feedback on or suggest features for Azure Active Directory, visit User Voice page.
If you'd like to contribute to this sample, see CONTRIBUTING.MD.
This project has adopted the Microsoft Open Source Code of Conduct. For more information, see the Code of Conduct FAQ or contact opencode@microsoft.com with any additional questions or comments.
- Microsoft identity platform (Azure Active Directory for developers)
- Azure AD code samples
- Overview of Microsoft Authentication Library (MSAL)
- Register an application with the Microsoft identity platform
- Configure a client application to access web APIs
- Understanding Azure AD application consent experiences
- Understand user and admin consent
- Application and service principal objects in Azure Active Directory
- Authentication Scenarios for Azure AD
- Building Zero Trust ready apps
- National Clouds
- Microsoft.Identity.Web
- Microsoft Graph permissions reference
- Authentication and authorization basics for Microsoft Graph
- Secure an ASP.NET Core Blazor WebAssembly standalone app with Azure Active Directory
- ASP.NET Core Blazor WebAssembly additional security scenarios