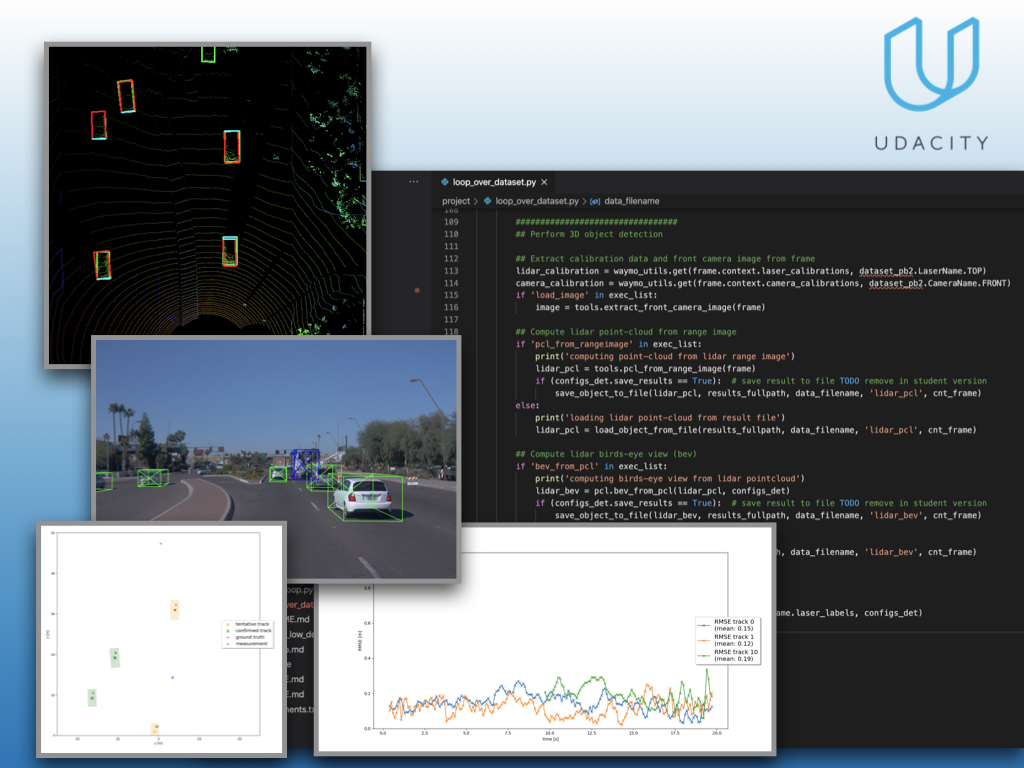
This is the project for the second course in the Udacity Self-Driving Car Engineer Nanodegree Program : Sensor Fusion and Tracking.
In this project, you'll fuse measurements from LiDAR and camera and track vehicles over time. You will be using real-world data from the Waymo Open Dataset, detect objects in 3D point clouds and apply an extended Kalman filter for sensor fusion and tracking.
The project consists of two major parts:
- Object detection: In this part, a deep-learning approach is used to detect vehicles in LiDAR data based on a birds-eye view perspective of the 3D point-cloud. Also, a series of performance measures is used to evaluate the performance of the detection approach.
- Object tracking : In this part, an extended Kalman filter is used to track vehicles over time, based on the lidar detections fused with camera detections. Data association and track management are implemented as well.
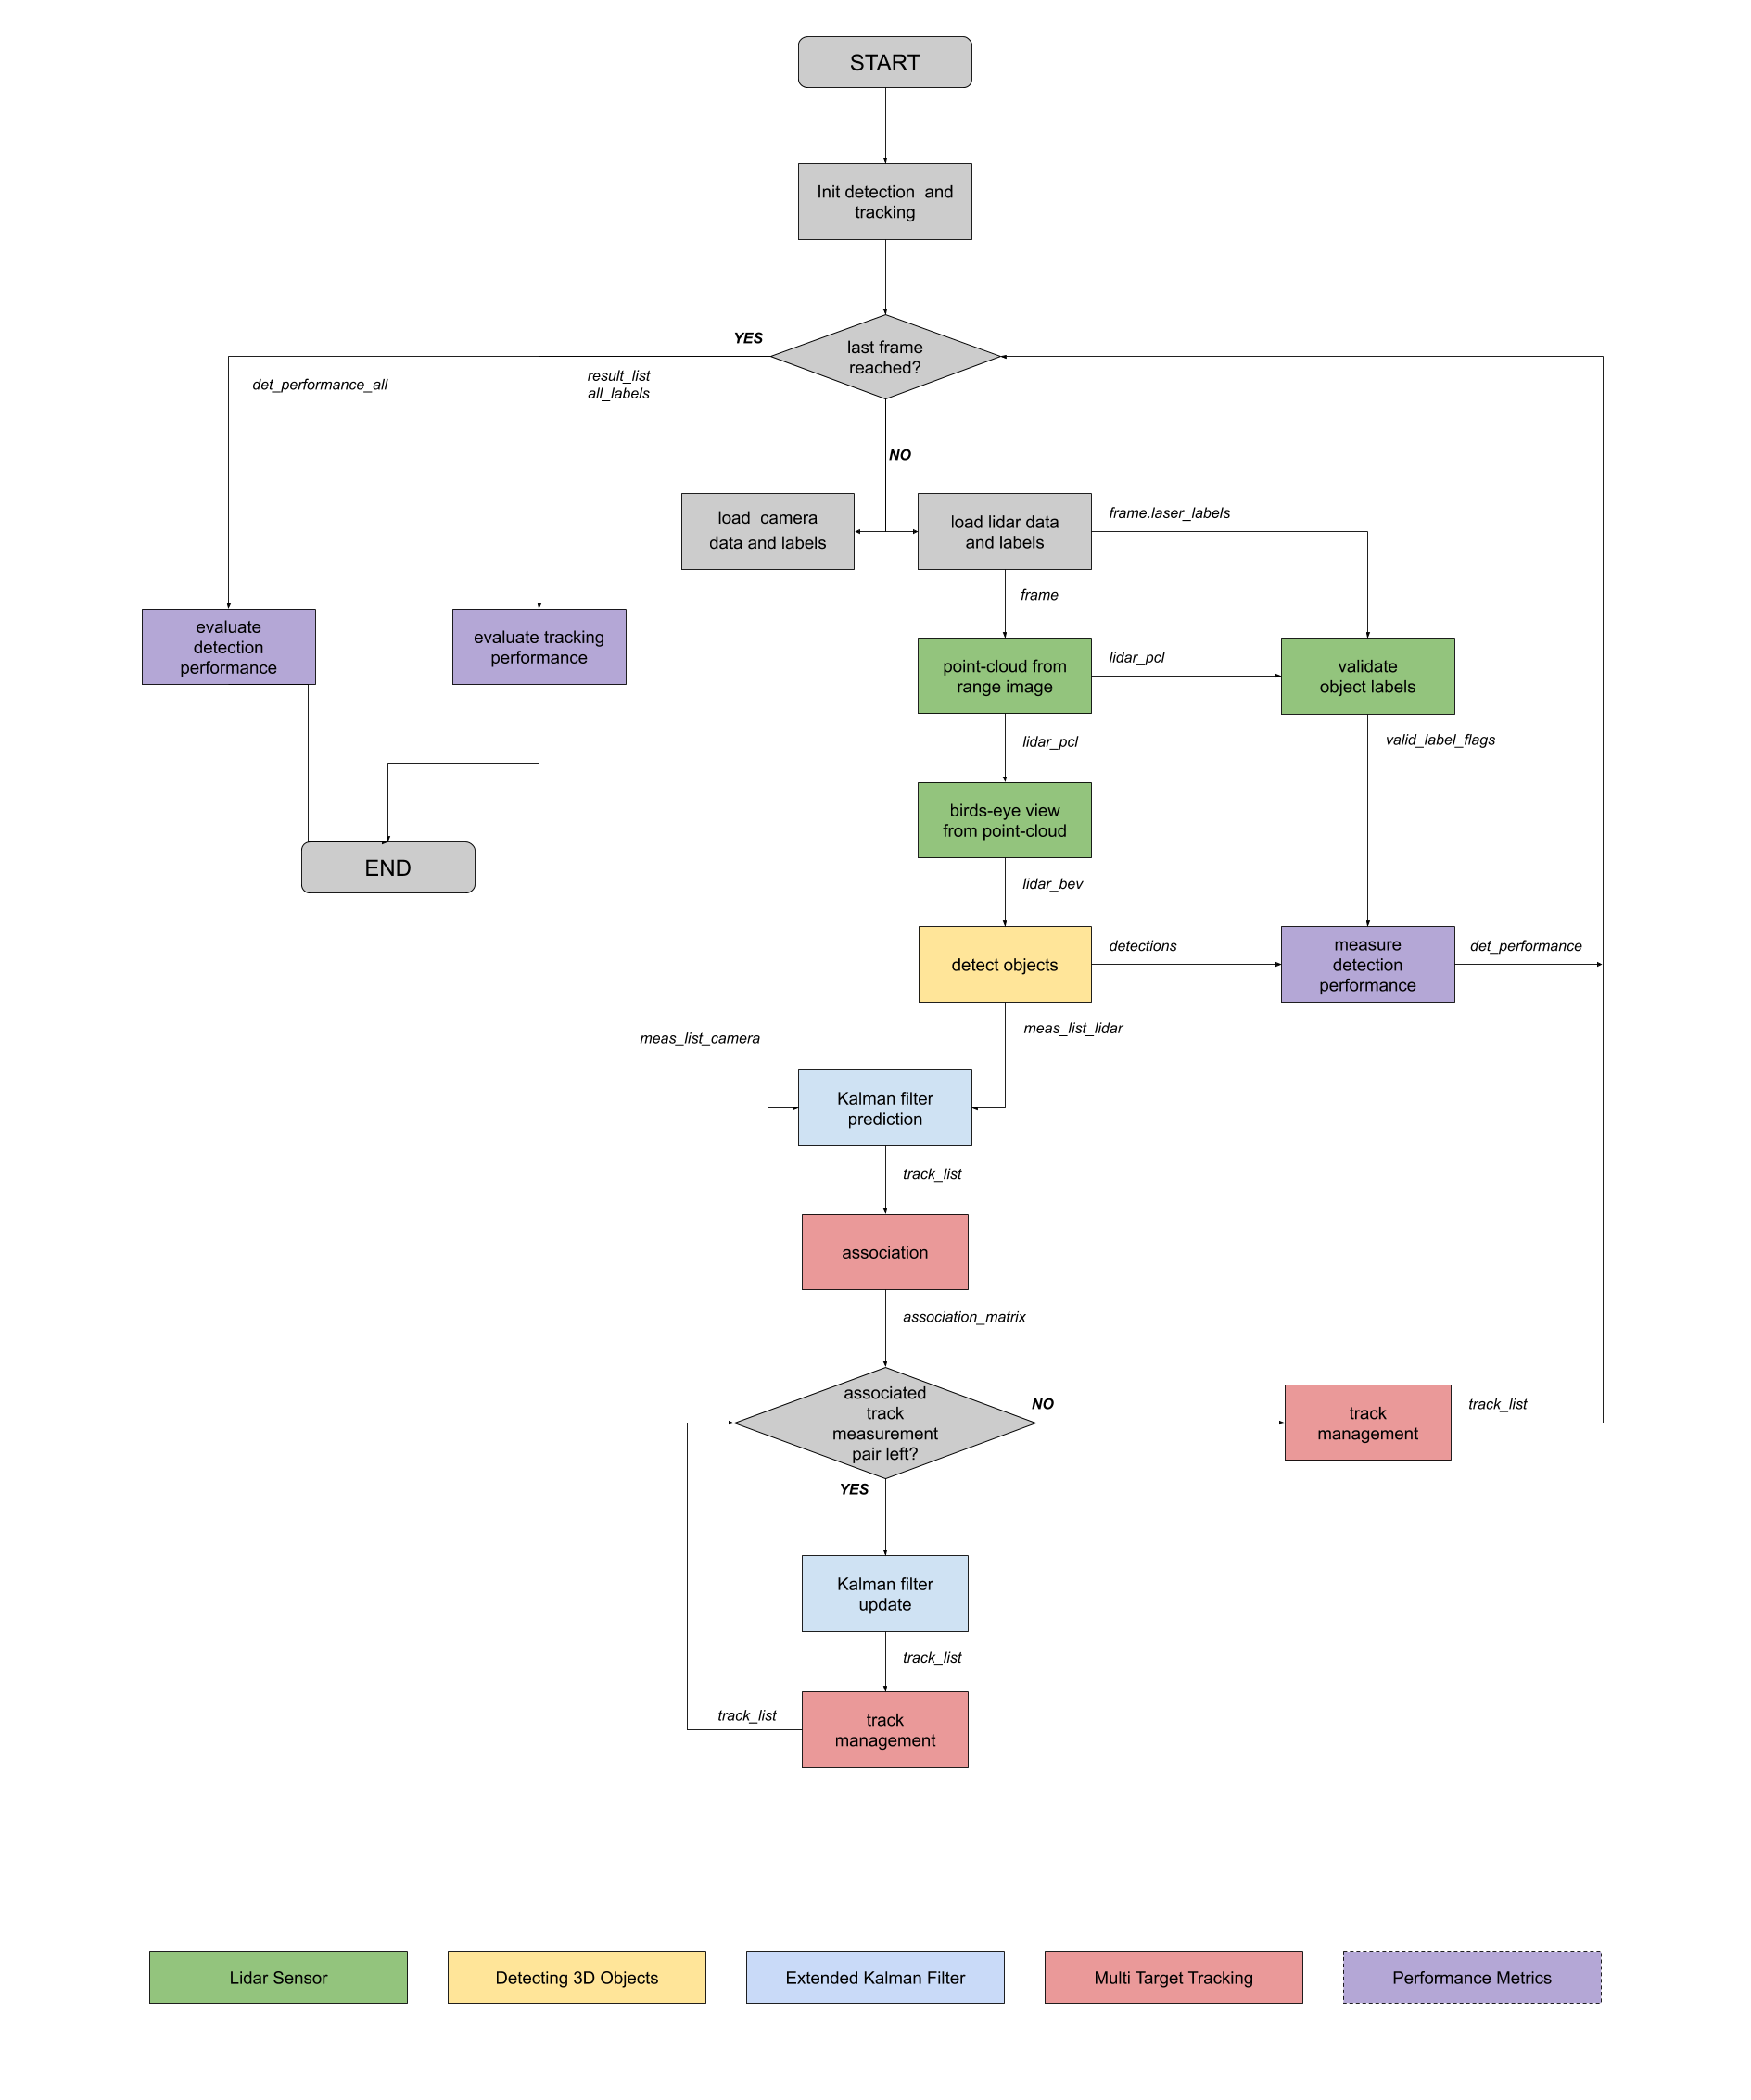
The following diagram contains an outline of the data flow and of the individual steps that make up the algorithm.
Also, the project code contains various tasks, which are detailed step-by-step in the code. More information on the algorithm and on the tasks can be found in the Udacity classroom.
📦project
┣ 📂dataset --> contains the Waymo Open Dataset sequences
┃
┣ 📂misc
┃ ┣ evaluation.py --> plot functions for tracking visualization and RMSE calculation
┃ ┣ helpers.py --> misc. helper functions, e.g. for loading / saving binary files
┃ ┗ objdet_tools.py --> object detection functions without student tasks
┃ ┗ params.py --> parameter file for the tracking part
┃
┣ 📂results --> binary files with pre-computed intermediate results
┃
┣ 📂student
┃ ┣ association.py --> data association logic for assigning measurements to tracks incl. student tasks
┃ ┣ filter.py --> extended Kalman filter implementation incl. student tasks
┃ ┣ measurements.py --> sensor and measurement classes for camera and lidar incl. student tasks
┃ ┣ objdet_detect.py --> model-based object detection incl. student tasks
┃ ┣ objdet_eval.py --> performance assessment for object detection incl. student tasks
┃ ┣ objdet_pcl.py --> point-cloud functions, e.g. for birds-eye view incl. student tasks
┃ ┗ trackmanagement.py --> track and track management classes incl. student tasks
┃
┣ 📂tools --> external tools
┃ ┣ 📂objdet_models --> models for object detection
┃ ┃ ┃
┃ ┃ ┣ 📂darknet
┃ ┃ ┃ ┣ 📂config
┃ ┃ ┃ ┣ 📂models --> darknet / yolo model class and tools
┃ ┃ ┃ ┣ 📂pretrained --> copy pre-trained model file here
┃ ┃ ┃ ┃ ┗ complex_yolov4_mse_loss.pth
┃ ┃ ┃ ┣ 📂utils --> various helper functions
┃ ┃ ┃
┃ ┃ ┗ 📂resnet
┃ ┃ ┃ ┣ 📂models --> fpn_resnet model class and tools
┃ ┃ ┃ ┣ 📂pretrained --> copy pre-trained model file here
┃ ┃ ┃ ┃ ┗ fpn_resnet_18_epoch_300.pth
┃ ┃ ┃ ┣ 📂utils --> various helper functions
┃ ┃ ┃
┃ ┗ 📂waymo_reader --> functions for light-weight loading of Waymo sequences
┃
┣ basic_loop.py
┣ loop_over_dataset.py
In order to create a local copy of the project, please click on "Code" and then "Download ZIP". Alternatively, you may of-course use GitHub Desktop or Git Bash for this purpose.
The project has been written using Python 3.7. Please make sure that your local installation is equal or above this version.
All dependencies required for the project have been listed in the file requirements.txt. You may either install them one-by-one using pip or you can use the following command to install them all at once:
pip3 install -r requirements.txt
The Waymo Open Dataset Reader is a very convenient toolbox that allows you to access sequences from the Waymo Open Dataset without the need of installing all of the heavy-weight dependencies that come along with the official toolbox. The installation instructions can be found in tools/waymo_reader/README.md.
This project makes use of three different sequences to illustrate the concepts of object detection and tracking. These are:
- Sequence 1 :
training_segment-1005081002024129653_5313_150_5333_150_with_camera_labels.tfrecord - Sequence 2 :
training_segment-10072231702153043603_5725_000_5745_000_with_camera_labels.tfrecord - Sequence 3 :
training_segment-10963653239323173269_1924_000_1944_000_with_camera_labels.tfrecord
To download these files, you will have to register with Waymo Open Dataset first: Open Dataset – Waymo, if you have not already, making sure to note "Udacity" as your institution.
Once you have done so, please click here to access the Google Cloud Container that holds all the sequences. Once you have been cleared for access by Waymo (which might take up to 48 hours), you can download the individual sequences.
The sequences listed above can be found in the folder "training". Please download them and put the tfrecord-files into the dataset folder of this project.
The object detection methods used in this project use pre-trained models which have been provided by the original authors. They can be downloaded here (darknet) and here (fpn_resnet). Once downloaded, please copy the model files into the paths /tools/objdet_models/darknet/pretrained and /tools/objdet_models/fpn_resnet/pretrained respectively.
In the main file loop_over_dataset.py, you can choose which steps of the algorithm should be executed. If you want to call a specific function, you simply need to add the corresponding string literal to one of the following lists:
-
exec_data: controls the execution of steps related to sensor data.pcl_from_rangeimagetransforms the Waymo Open Data range image into a 3D point-cloudload_imagereturns the image of the front camera
-
exec_detection: controls which steps of model-based 3D object detection are performedbev_from_pcltransforms the point-cloud into a fixed-size birds-eye view perspectivedetect_objectsexecutes the actual detection and returns a set of objects (only vehicles)validate_object_labelsdecides which ground-truth labels should be considered (e.g. based on difficulty or visibility)measure_detection_performancecontains methods to evaluate detection performance for a single frame
In case you do not include a specific step into the list, pre-computed binary files will be loaded instead. This enables you to run the algorithm and look at the results even without having implemented anything yet. The pre-computed results for the mid-term project need to be loaded using this link. Please use the folder darknet first. Unzip the file within and put its content into the folder results.
-
exec_tracking: controls the execution of the object tracking algorithm -
exec_visualization: controls the visualization of resultsshow_range_imagedisplays two LiDAR range image channels (range and intensity)show_labels_in_imageprojects ground-truth boxes into the front camera imageshow_objects_and_labels_in_bevprojects detected objects and label boxes into the birds-eye viewshow_objects_in_bev_labels_in_cameradisplays a stacked view with labels inside the camera image on top and the birds-eye view with detected objects on the bottomshow_tracksdisplays the tracking resultsshow_detection_performancedisplays the performance evaluation based on all detectedmake_tracking_movierenders an output movie of the object tracking results
Even without solving any of the tasks, the project code can be executed.
The final project uses pre-computed lidar detections in order for all students to have the same input data. If you use the workspace, the data is prepared there already. Otherwise, download the pre-computed lidar detections (~1 GB), unzip them and put them in the folder results.
Parts of this project are based on the following repositories:
- Simple Waymo Open Dataset Reader
- Super Fast and Accurate 3D Object Detection based on 3D LiDAR Point Clouds
- Complex-YOLO: Real-time 3D Object Detection on Point Clouds
Write a short recap of the four tracking steps and what you implemented there (filter, track management, association, camera fusion). Which results did you achieve? Which part of the project was most difficult for you to complete, and why?
The 1st step of this project is to visualize range image channels (ID_S1_EX1), In file loop_over_dataset.py, I set the attributes for code execution in the following way:
data_filename = 'training_segment-1005081002024129653_5313_150_5333_150_with_camera_labels.tfrecord
show_only_frames = [0, 1]
exec_visualization = ['show_range_image']
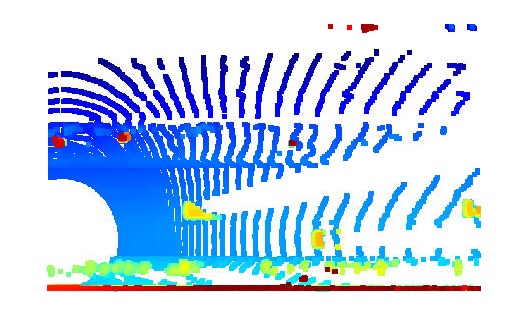
In the Waymo Open dataset, lidar data is stored as a range image. Therefore, this task is about extracting two of the data channels within the range image, which are "range" and "intensity",
Firstly, convert the floating-point data to an 8-bit integer value range.
Then, use OpenCV library to stack the range and intensity image vertically and visualize it.
Result:
 The Second task is to Visualize lidar point-cloud (ID_S1_EX2),
In file loop_over_dataset.py, I set the attributes for code execution in the following way:
data_filename = 'training_segment-10963653239323173269_1924_000_1944_000_with_camera_labels.tfrecord'
show_only_frames = [0, 200]
exec_visualization = ['show_pcl']
The goal of this task is to use the Open3D library to display the lidar point-cloud in a 3d viewer in order to develop a feel for the nature of lidar point-clouds.
Result:
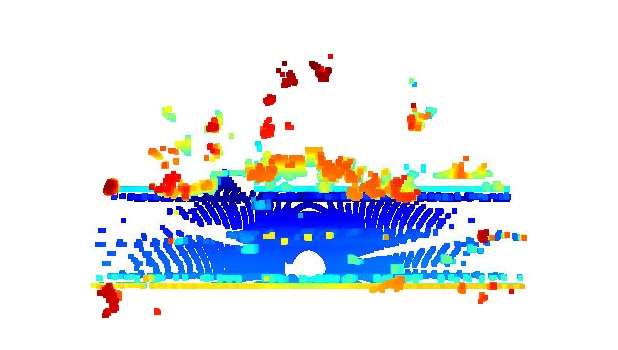
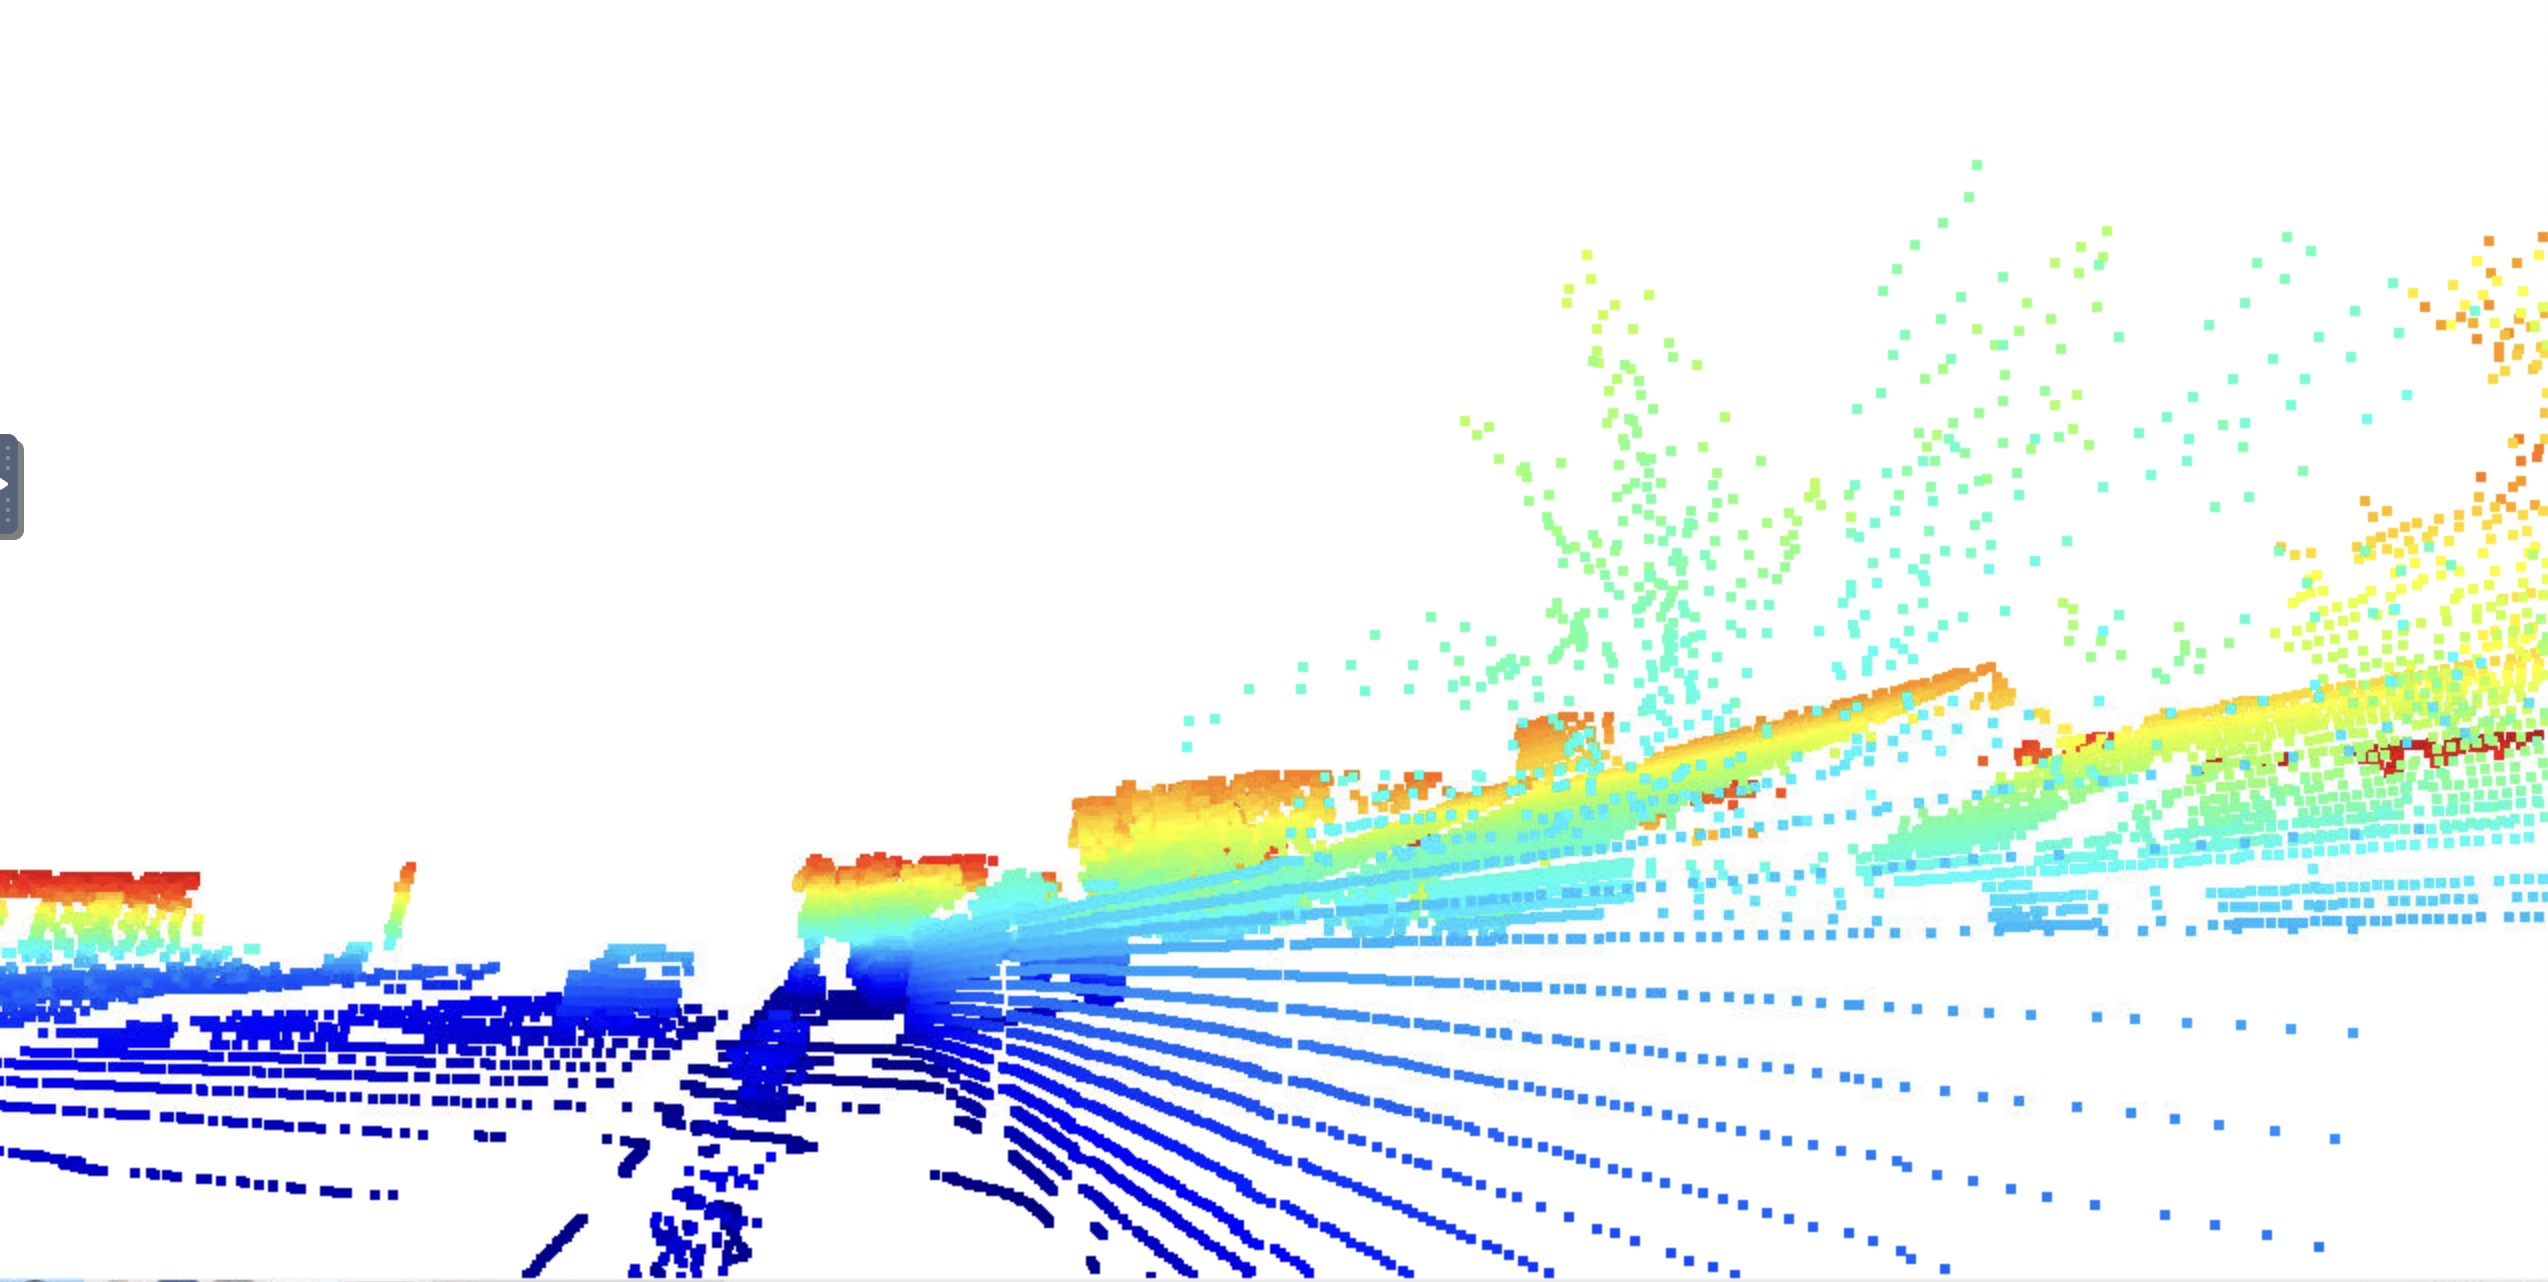
The following shows vehicles with varying degrees of visibility in the point-cloud.
Car with front bumper and front wind shield.
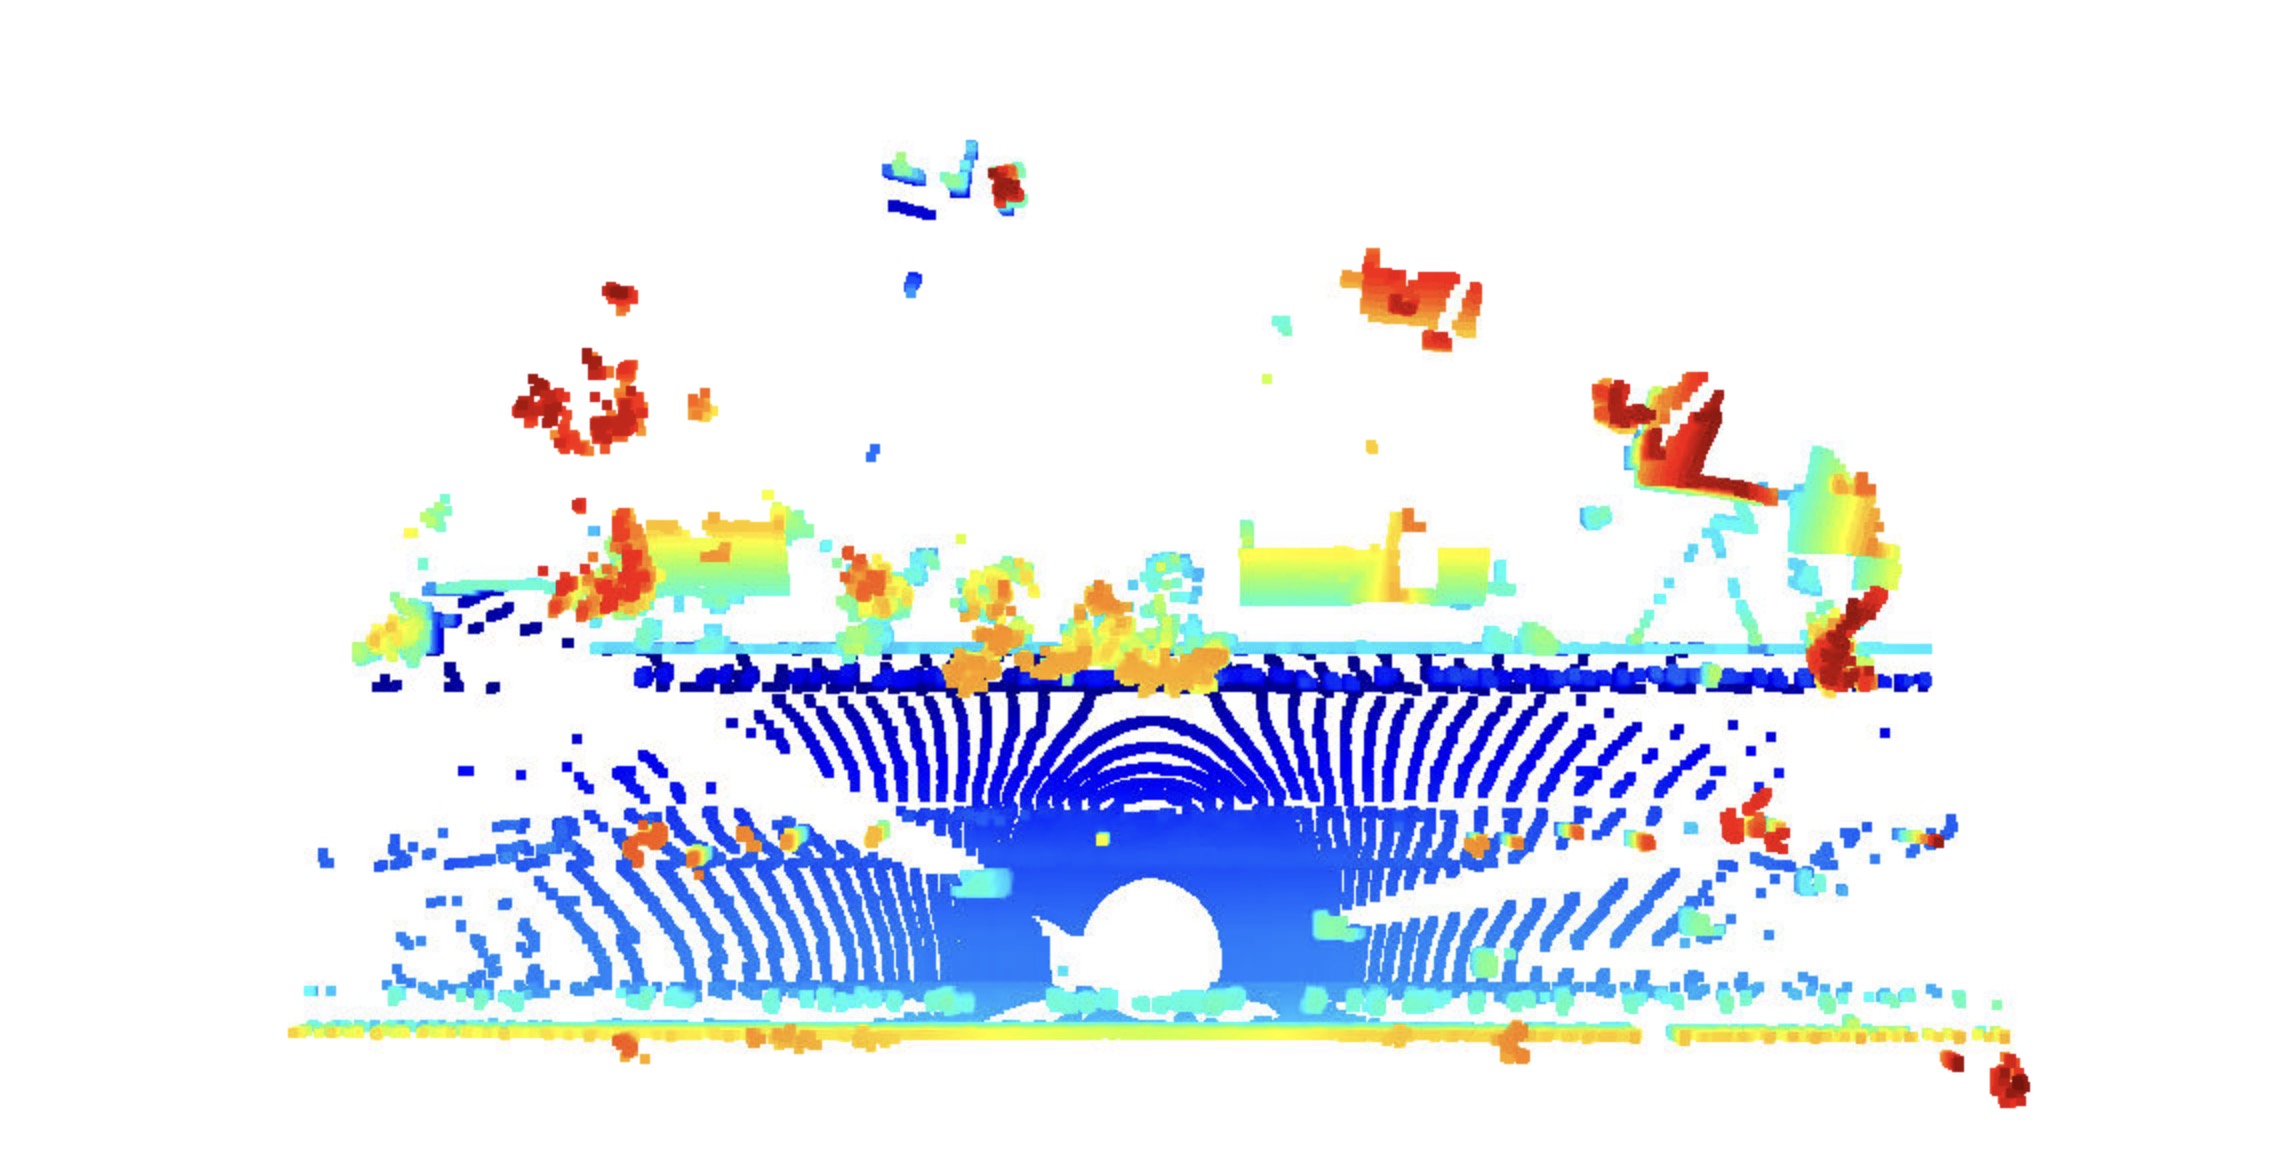
Top view of the car, we can see the roof of the cars.
Side view of the car, we can see tires and back bumper.
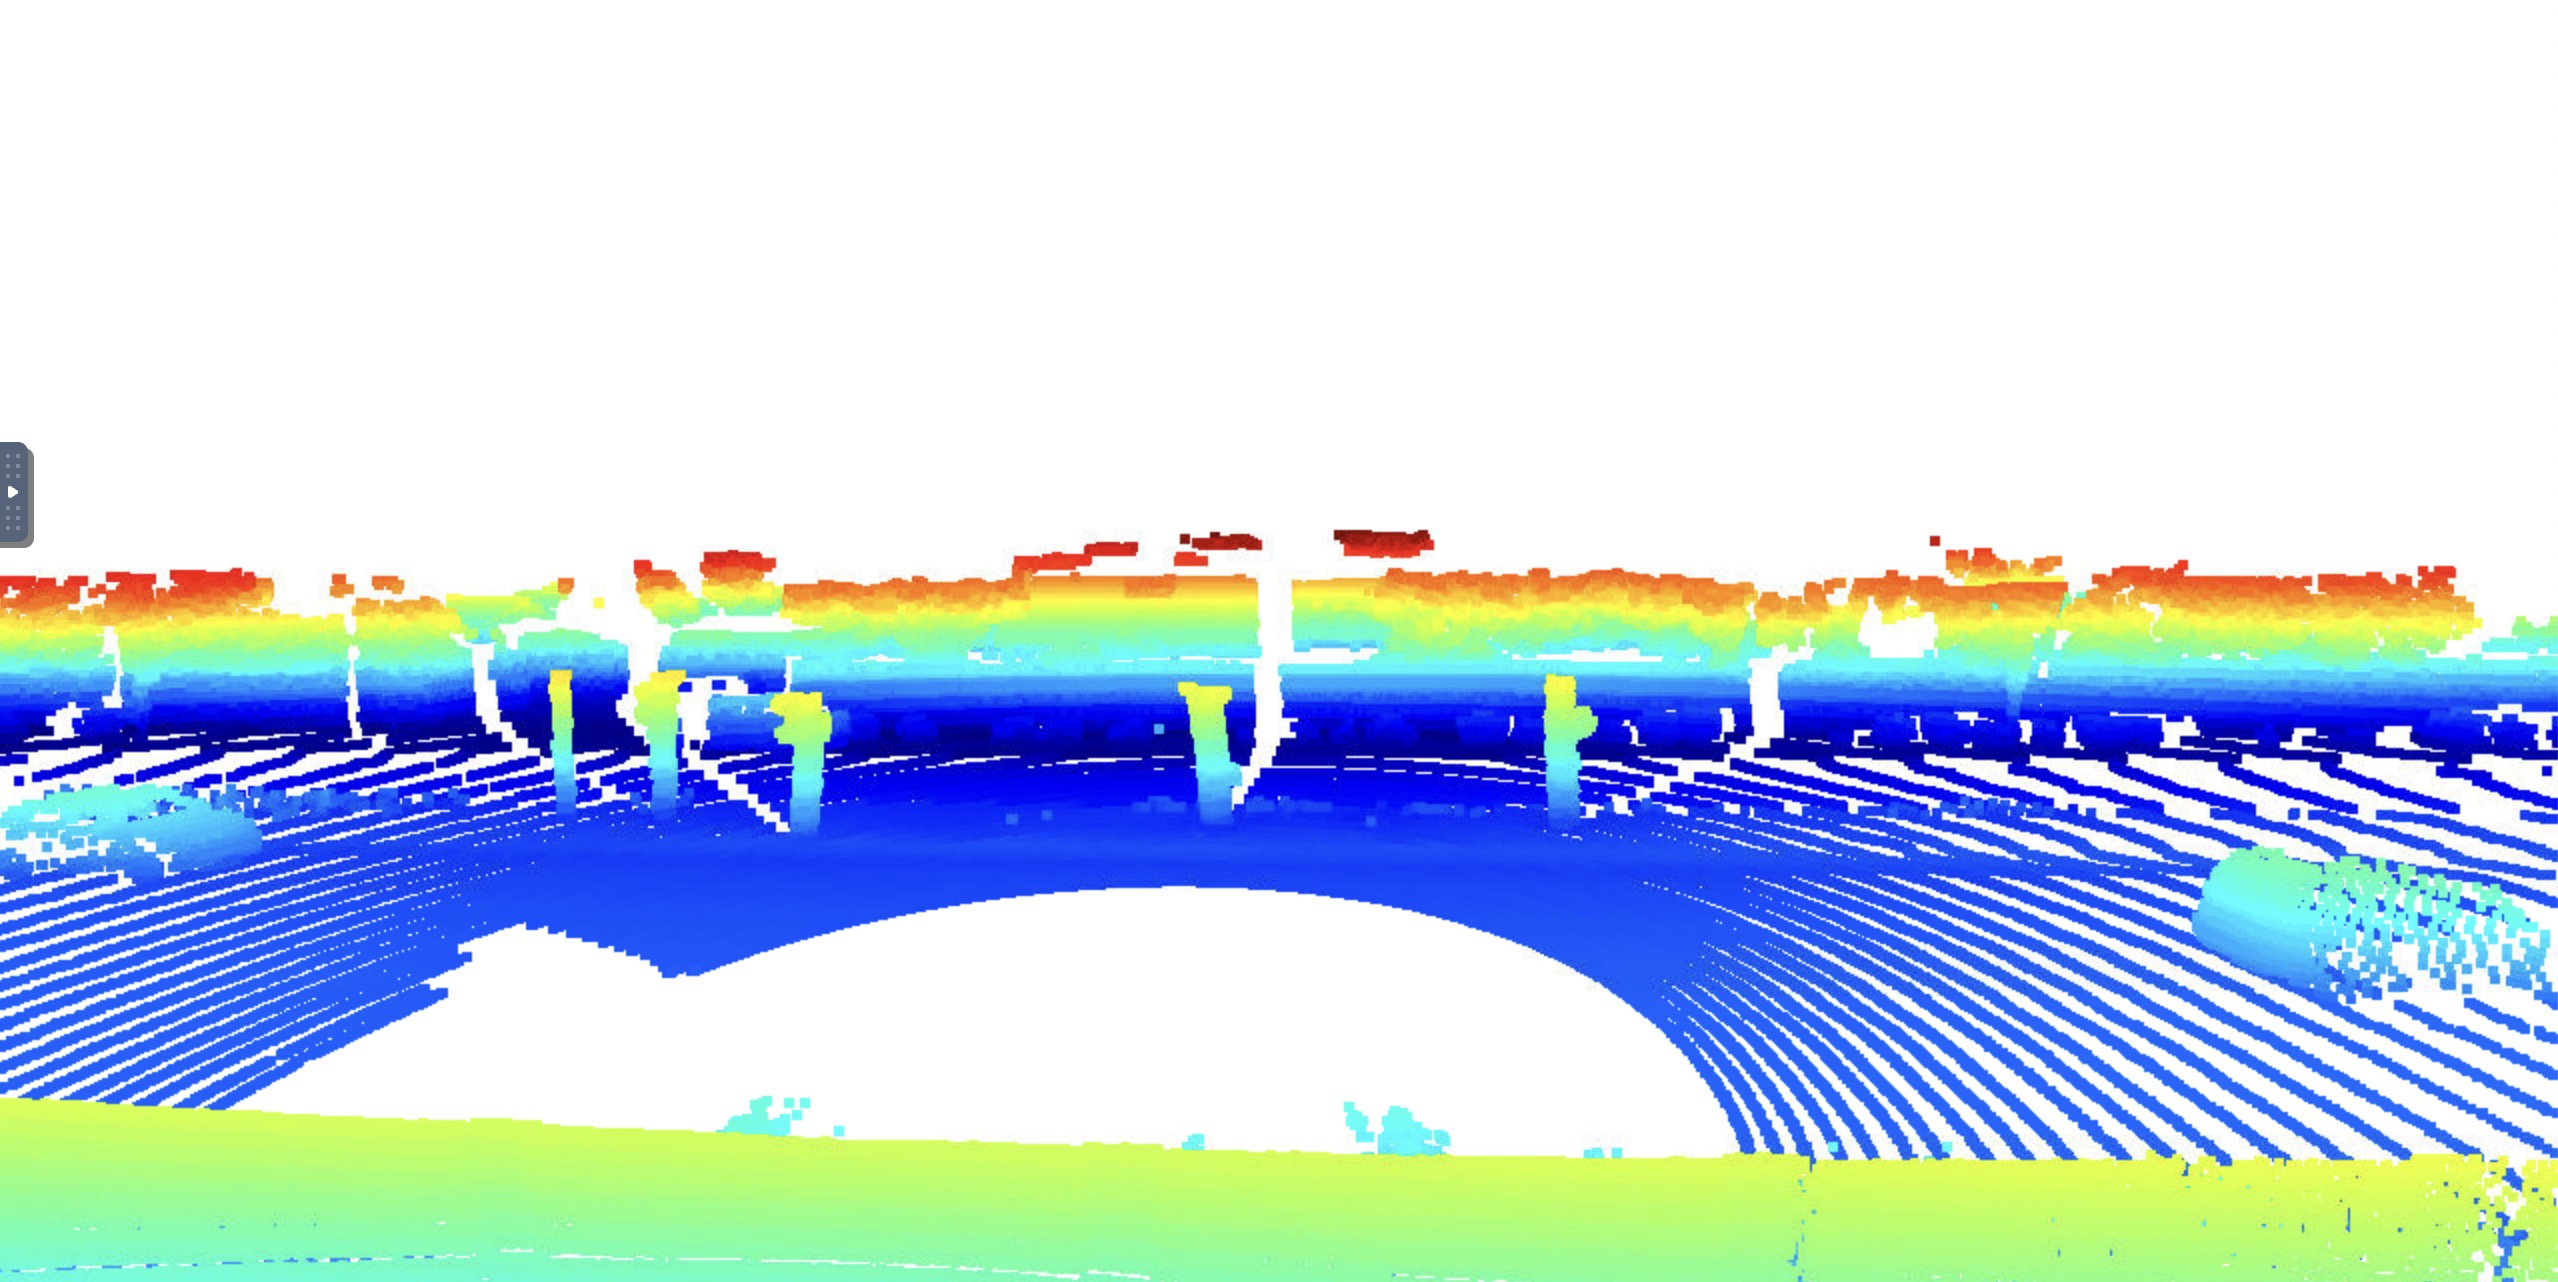
Another side view of the car, we can see tires and back bumper, and car body shape.
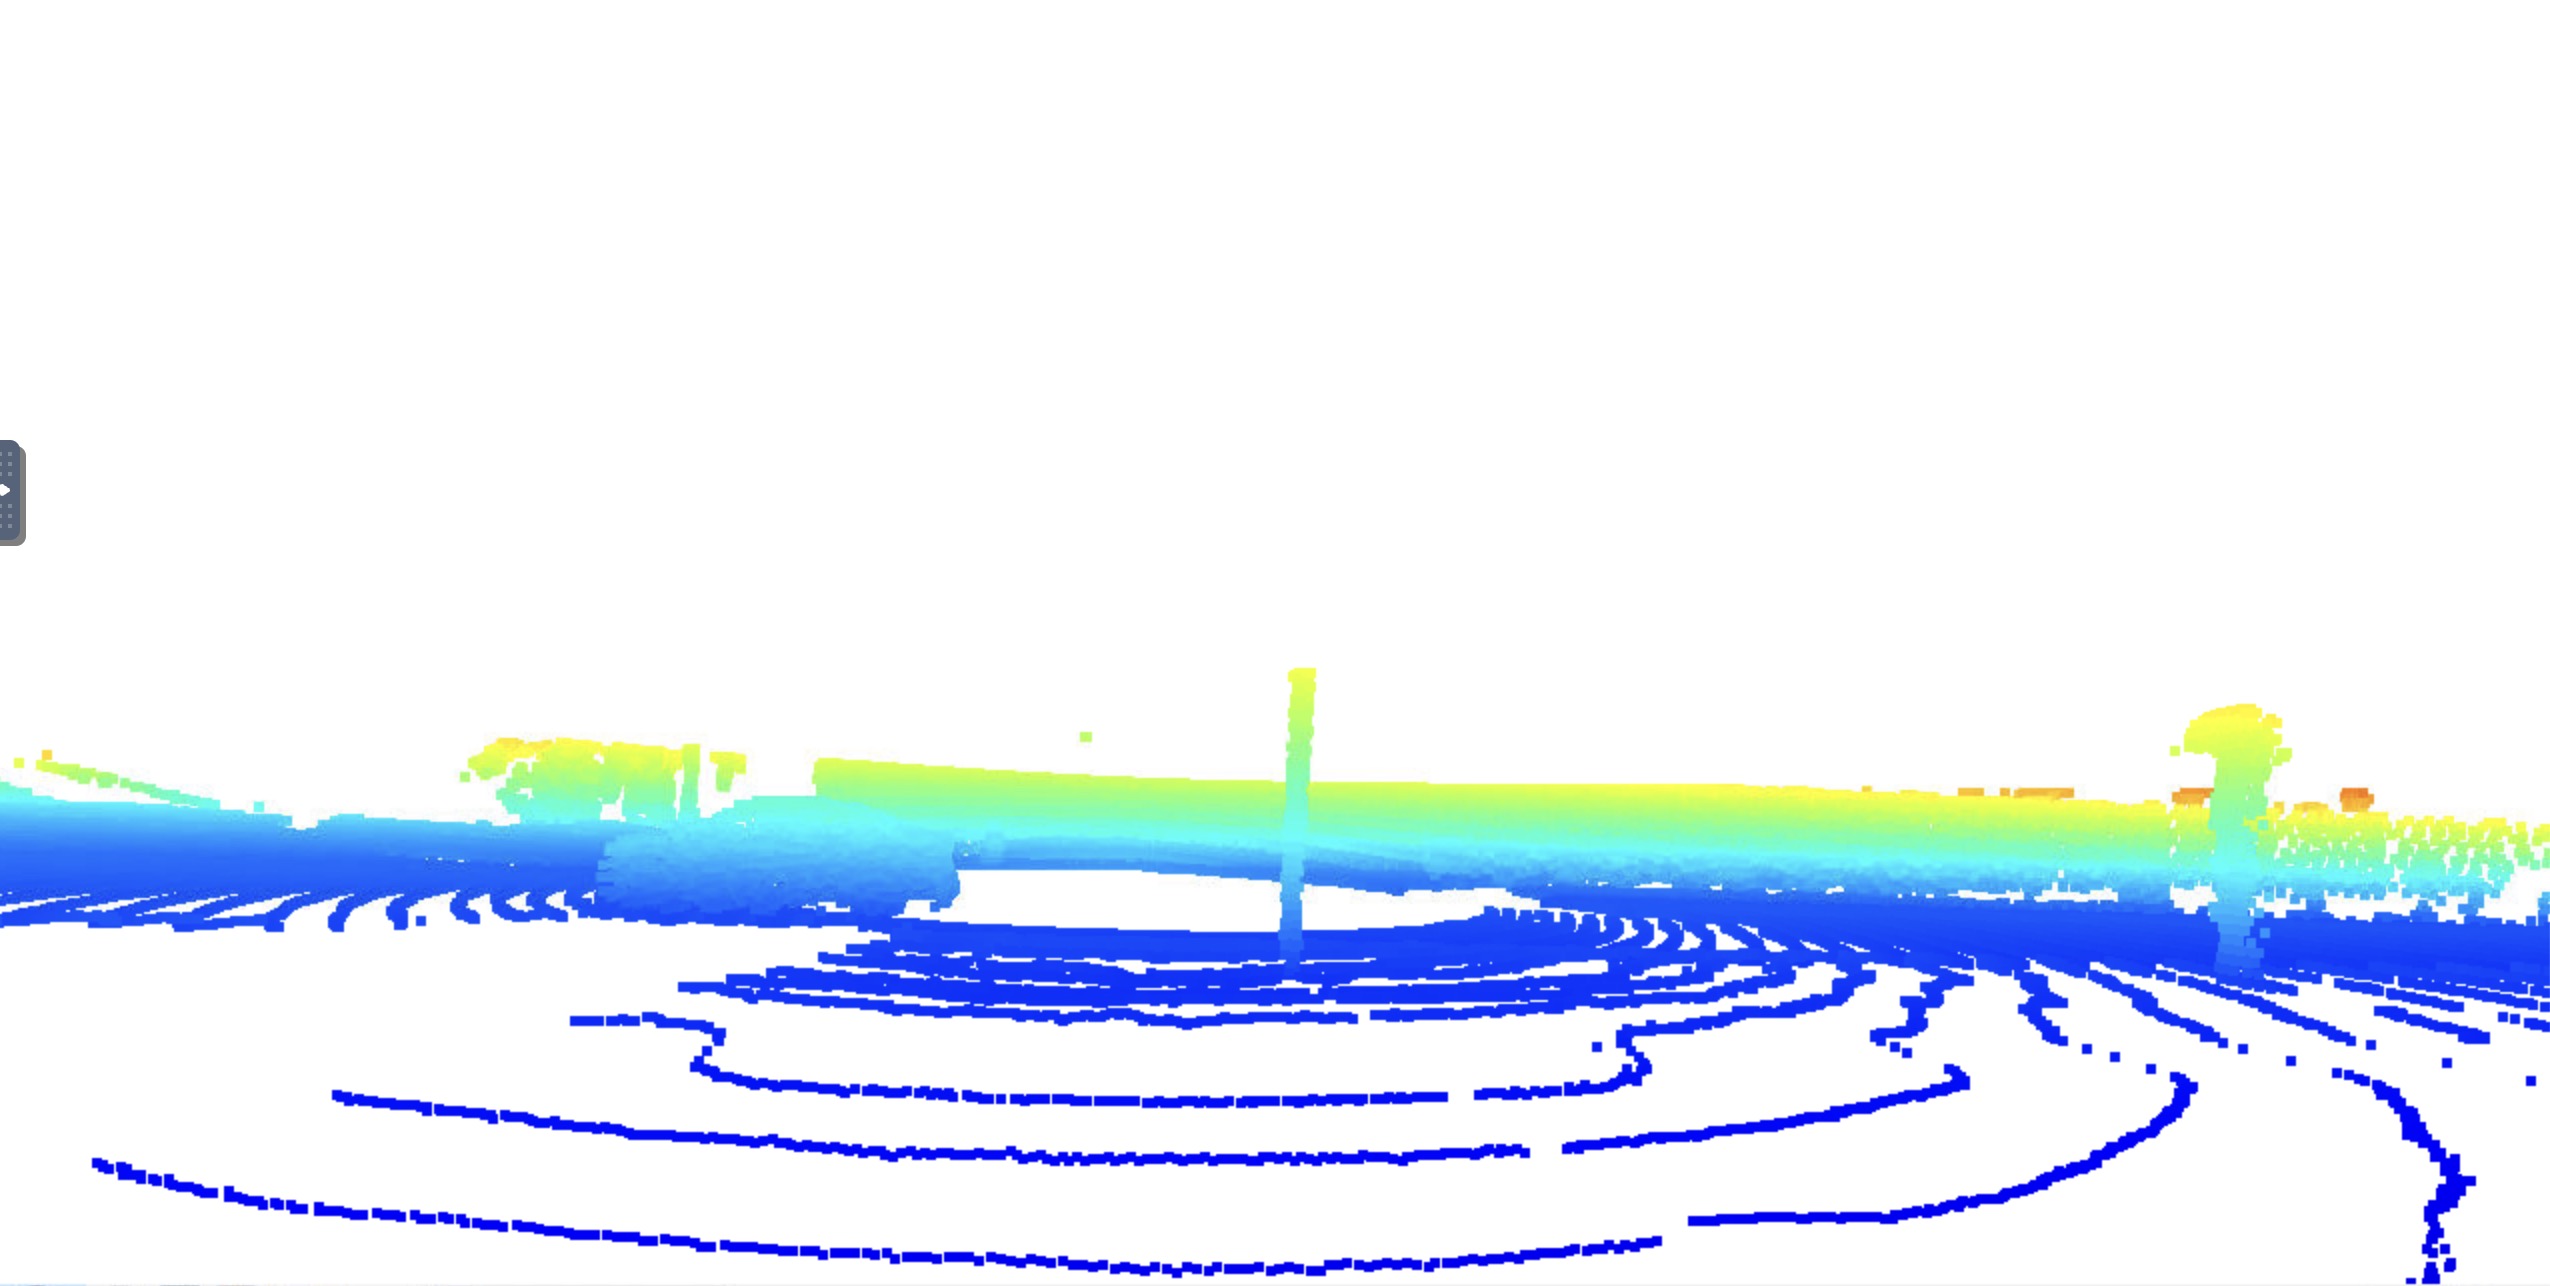
Front view of the car, we can see tires and back bumper, and back wind shield.
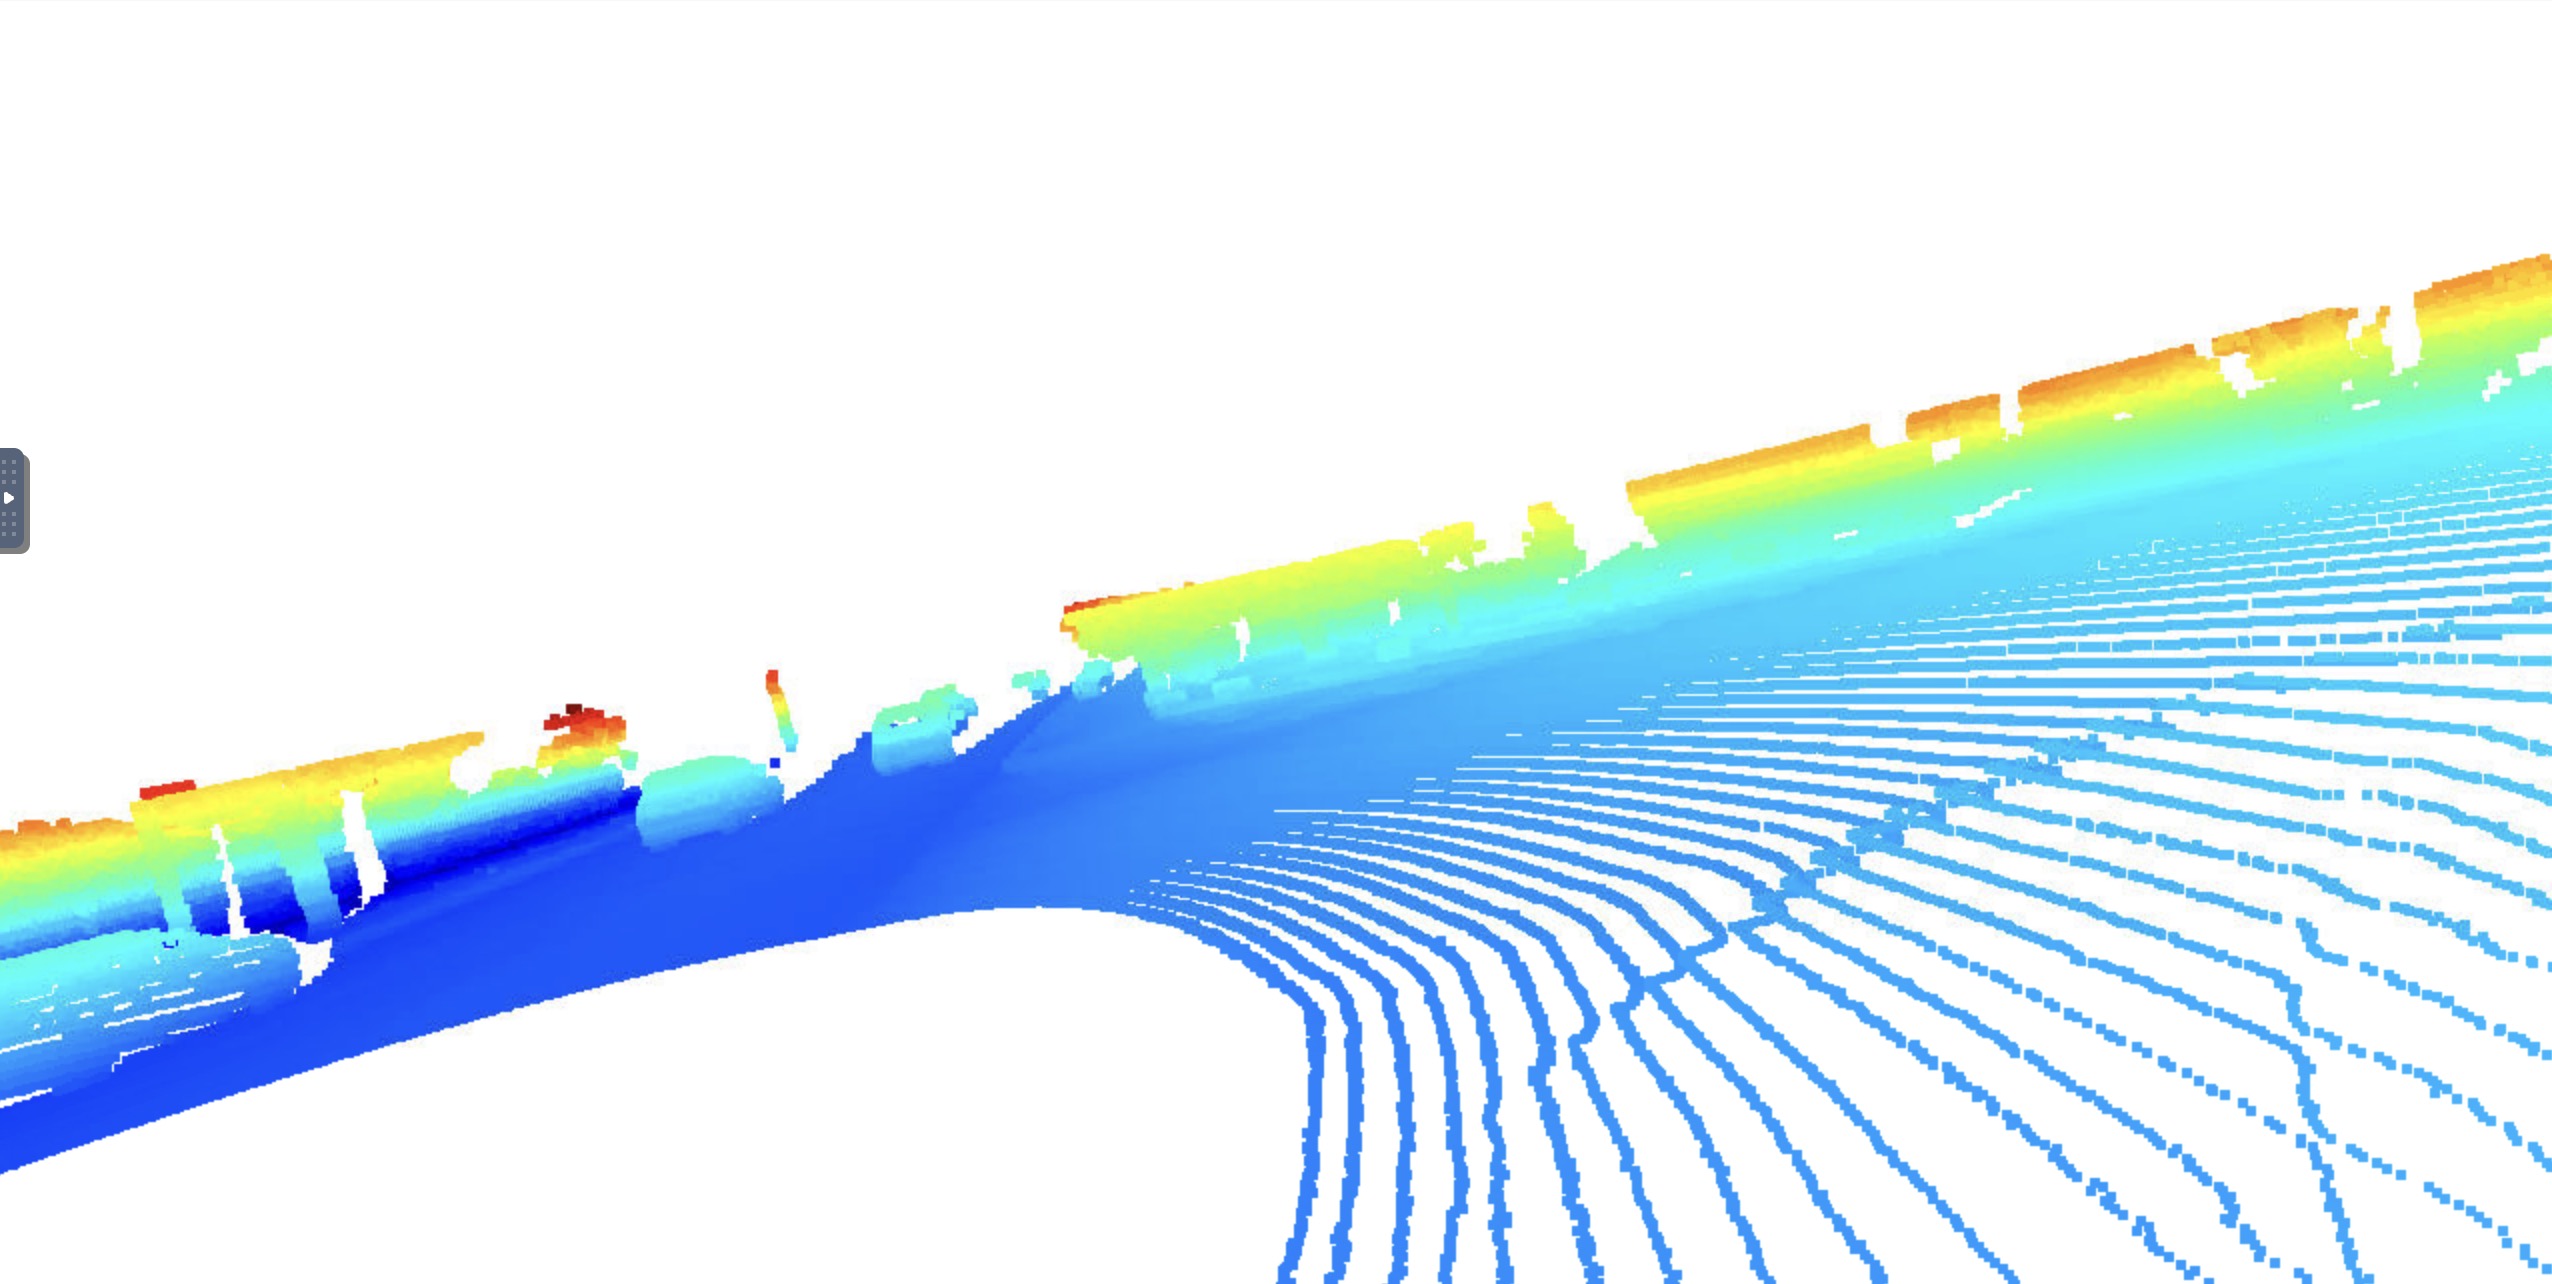
From bird-eye view, we can identify the cars easily.
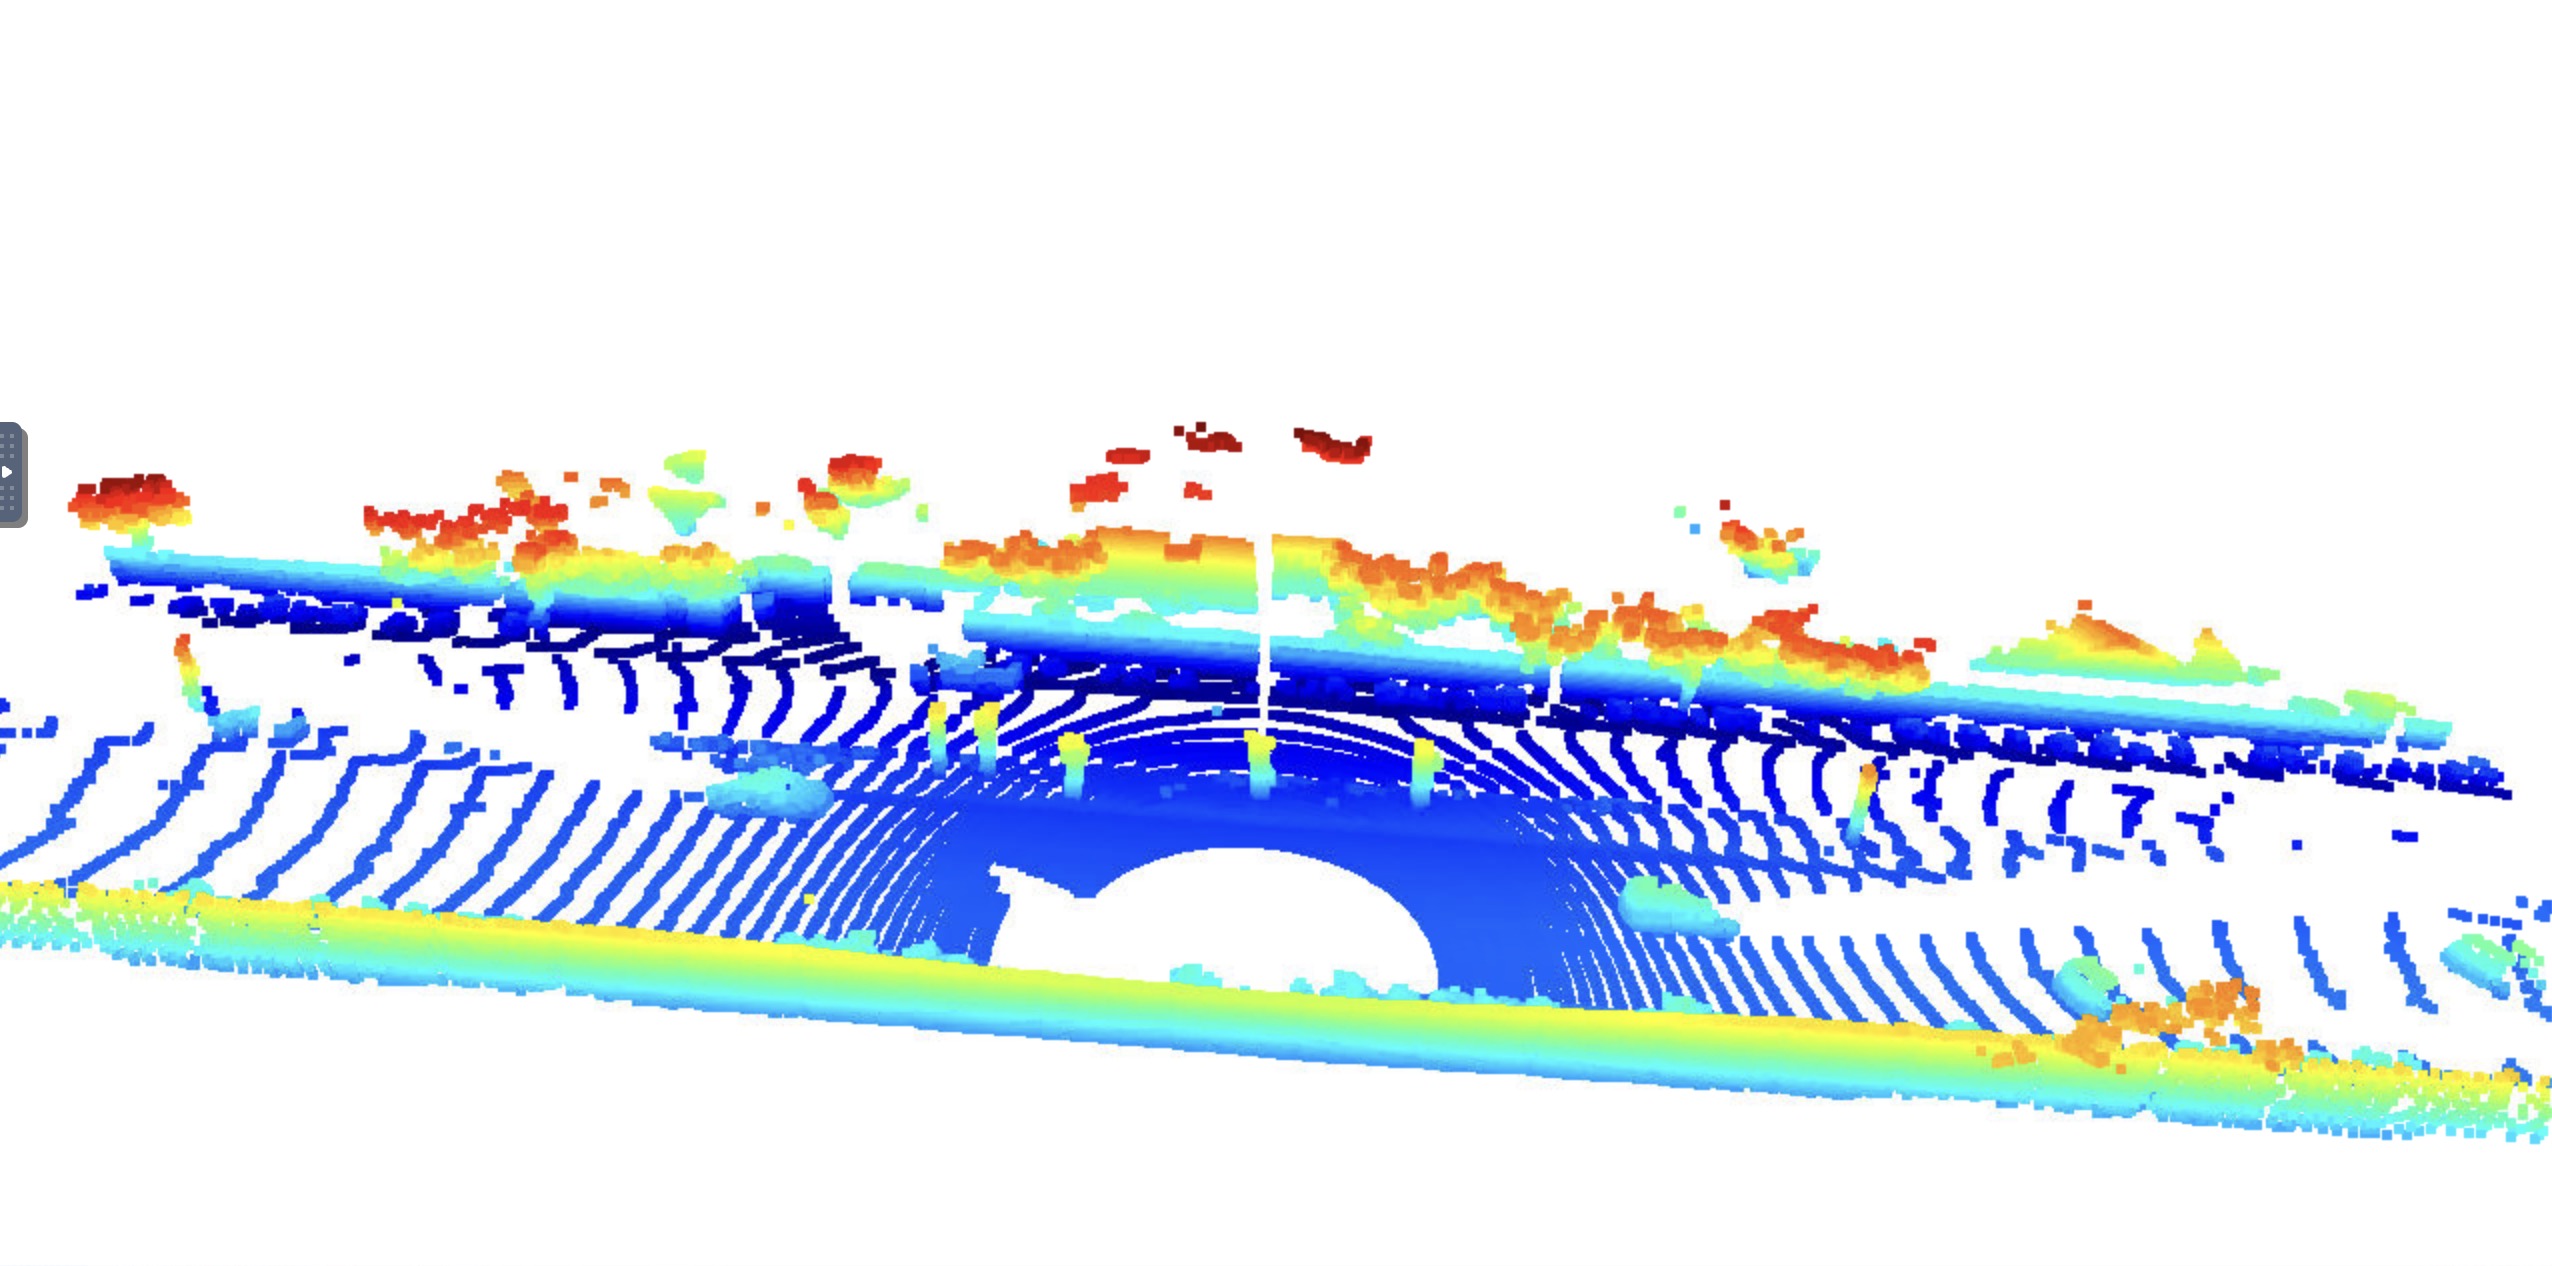
The second step is to Convert sensor coordinates to BEV-map coordinates (ID_S2_EX1) In file loop_over_dataset.py, I set the attributes for code execution in the following way:
data_filename = 'training_segment-1005081002024129653_5313_150_5333_150_with_camera_labels.tfrecord
show_only_frames = [0, 1]
exec_detection = ['pcl_from_rangeimage','bev_from_pcl']
exec_tracking = []
exec_visualization = []
The goal of this task is to perform the first step in creating a birds-eye view (BEV) perspective of the lidar point-cloud.
The 2nd task for step2 is to Compute intensity layer of the BEV map (ID_S2_EX2) In file loop_over_dataset.py, I set the attributes for code execution in the following way:
data_filename = 'training_segment-1005081002024129653_5313_150_5333_150_with_camera_labels.tfrecord
show_only_frames = [0, 1]
exec_detection = ['pcl_from_rangeimage','bev_from_pcl']
exec_tracking = []
exec_visualization = []
The goal of this task is to fill the "intensity" channel of the BEV map with data from the point-cloud. In order to do so, I identified all points with the same (x,y)-coordinates within the BEV map and then assigned the intensity value of the top-most lidar point to the respective BEV pixel.
Result:
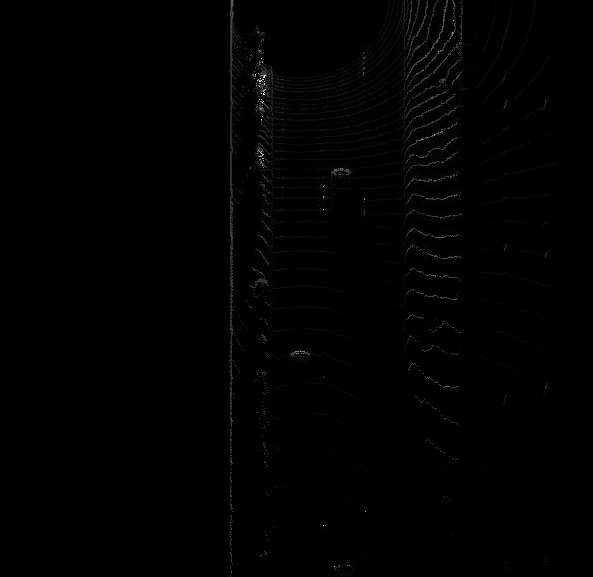
The 3rd task of Step 2 is to Compute height layer of the BEV map (ID_S2_EX3) In file loop_over_dataset.py, I set the attributes for code execution in the following way:
data_filename = 'training_segment-1005081002024129653_5313_150_5333_150_with_camera_labels.tfrecord
show_only_frames = [0, 1]
exec_detection = ['pcl_from_rangeimage','bev_from_pcl']
exec_tracking = []
exec_visualization = []
The goal of this task is to fill the "height" channel of the BEV map with data from the point-cloud. In order to do so, I use the sorted and pruned point-cloud lidar_pcl_top from the previous task and normalized the height in each BEV map pixel by the difference between max. and min.
Result:
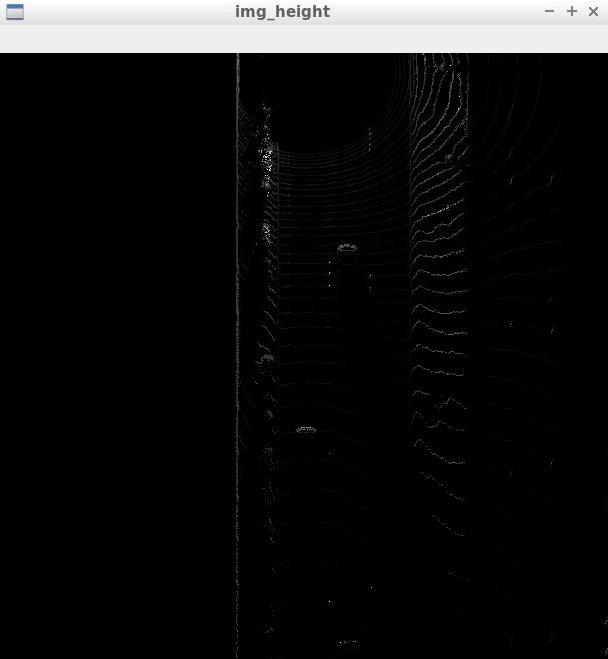
The 1st task for Step 3 is to Add a second model from a GitHub repo (ID_S3_EX1) In file loop_over_dataset.py, I set the attributes for code execution in the following way:
data_filename = 'training_segment-1005081002024129653_5313_150_5333_150_with_camera_labels.tfrecord
show_only_frames = [50, 51]
exec_detection = ['pcl_from_rangeimage', 'load_image', 'bev_from_pcl', 'detect_objects']
exec_tracking = []
exec_visualization = ['show_objects_in_bev_labels_in_camera']
configs_det = det.load_configs(model_name="fpn_resnet")
The goal of this task is to illustrate how a new model can be integrated into an existing framework.
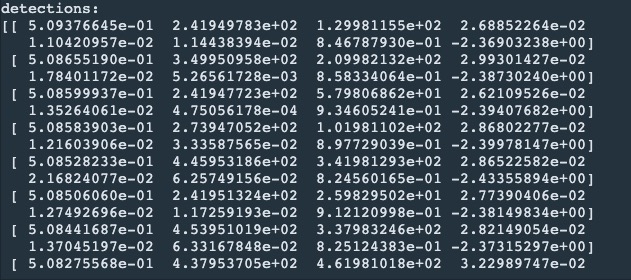
The detection results is as follows:
The 2nd task is to Extract 3D bounding boxes from model response (ID_S3_EX2) In file loop_over_dataset.py, I set the attributes for code execution in the following way:
data_filename = 'training_segment-1005081002024129653_5313_150_5333_150_with_camera_labels.tfrecord
show_only_frames = [50, 51]
exec_detection = ['pcl_from_rangeimage', 'load_image', 'bev_from_pcl', 'detect_objects']
exec_tracking = []
exec_visualization = ['show_objects_in_bev_labels_in_camera']
configs_det = det.load_configs(model_name="fpn_resnet")
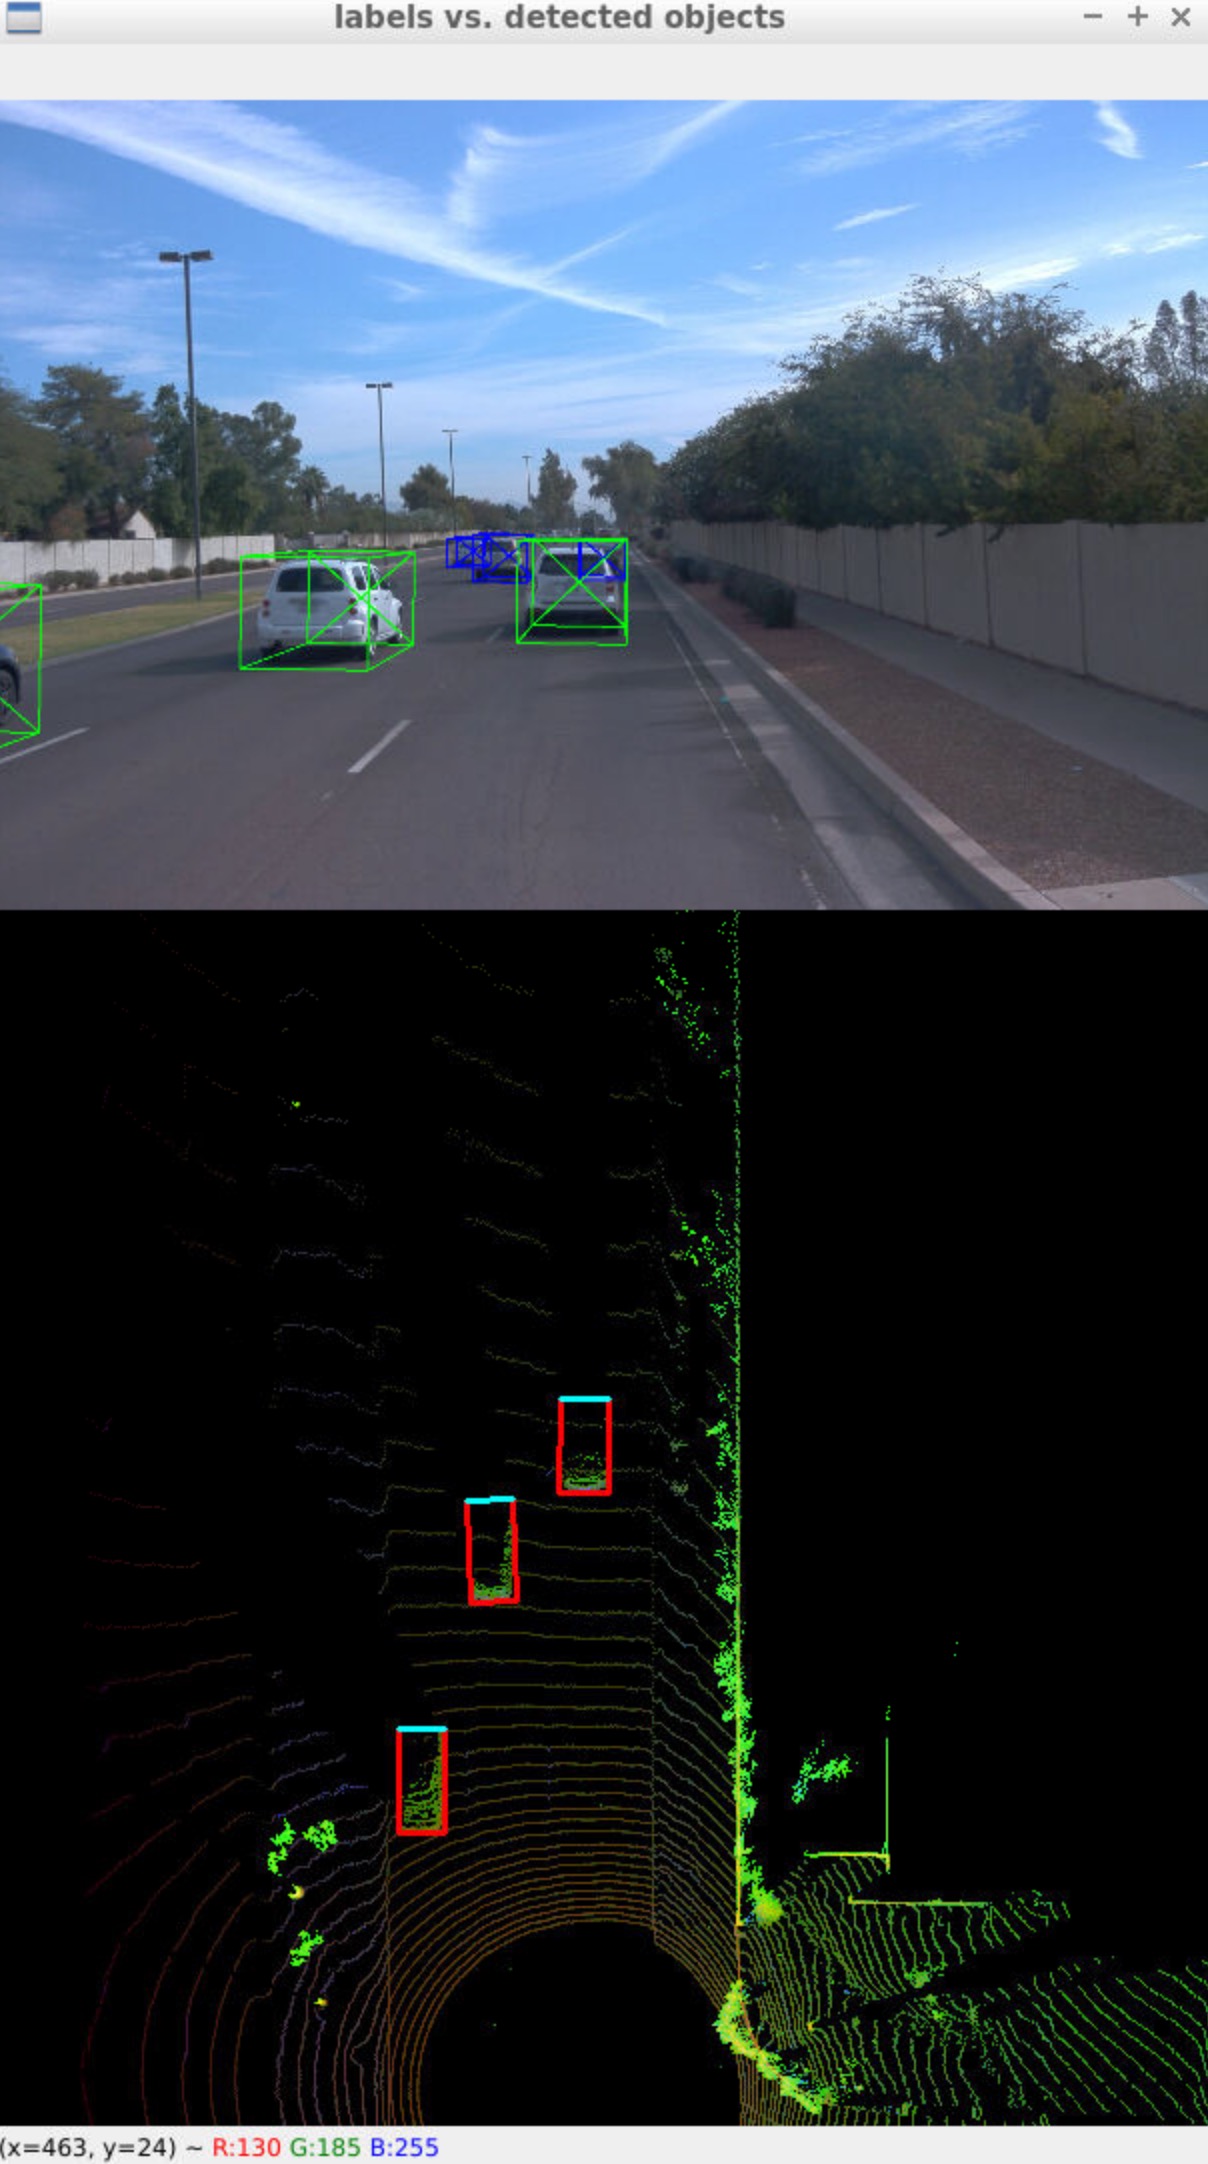
This task is about detecting objects and the result will be returned with coordinates and properties in the BEV coordinate space. The result is as follows:
The 1st task for Step 4 is to Compute intersection-over-union between labels and detections (ID_S4_EX1) In file loop_over_dataset.py, I set the attributes for code execution in the following way:
data_filename = 'training_segment-1005081002024129653_5313_150_5333_150_with_camera_labels.tfrecord
show_only_frames = [50, 51]
exec_detection = ['pcl_from_rangeimage', 'bev_from_pcl', 'detect_objects', 'validate_object_labels', 'measure_detection_performance']
exec_tracking = []
exec_visualization = ['show_detection_performance']
configs_det = det.load_configs(model_name="darknet")
The goal of this task is to find pairings between ground-truth labels and detections, so that we can determine wether an object has been missed (false negative), successfully detected (true positive) or has been falsely reported (false positive).
Based on the labels within the Waymo Open Dataset, I computed the geometrical overlap between the bounding boxes of labels and detected objects and determine the percentage of this overlap in relation to the area of the bounding boxes. The result is as following:
ious:
[0.8234346907261101, 0.8883709520530157]
center_devs:
[[tensor(0.1402), tensor(-0.0197), 1.0292643213596193], [tensor(-0.0835), tensor(0.0698), 0.8291298942401681]]
The 2nd task is about Computing false-negatives and false-positives (ID_S4_EX2) In file loop_over_dataset.py, I set the attributes for code execution in the following way:
- show_only_frames is from 50 to 100, if i set the fames bigger, the computation may cost a lot time.
data_filename = 'training_segment-1005081002024129653_5313_150_5333_150_with_camera_labels.tfrecord
show_only_frames = [50, 100]
exec_detection = ['pcl_from_rangeimage', 'bev_from_pcl', 'detect_objects', 'validate_object_labels', 'measure_detection_performance']
exec_tracking = []
exec_visualization = ['show_detection_performance']
configs_det = det.load_configs(model_name="darknet")
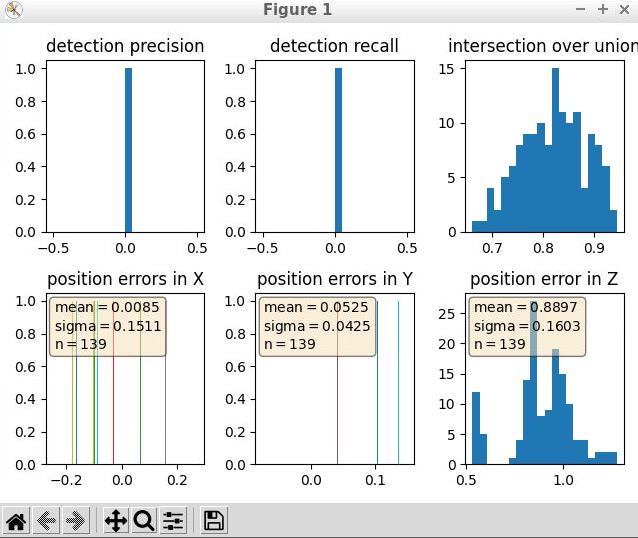
Based on the pairings between ground-truth labels and detected objects, the goal of this task is to determine the number of false positives and false negatives for the current frame.
After processed the specific frames, the results are in the following Graphing performance metrics.
Do you see any benefits in camera-lidar fusion compared to lidar-only tracking (in theory and in your concrete results)?
- Data noise can be reduced by averaging two uncorrelated sensors.
- Camera-lidar fusion can increase coverage. One camera can only see a limit area of the environment, but the lidar can see much wider area than camera. Camera-lidar fusion can create a more wider and accurate results.
Which challenges will a sensor fusion system face in real-life scenarios? Did you see any of these challenges in the project?
- The dataset for testing and training is made in daytime, which has a good sunshine. At night, our system may face Challenges due to the less light.
- In real-life scenarios, the weather condition has many types, such as froggy, rainy, snowy. This can impact lidar and camera a lot.
Can you think of ways to improve your tracking results in the future?
- Use larger dataset: A bigger dataset can cover more conditions in the real-life which may lead a better results
- Implement more advanced framework such as YOLOv8, a NEW cutting-edge, state-of-the-art model.
- Change parameters to get a lower Root-mean-square deviation.
