
- I'm sure there are errors
- I'm sure it's not complete
- It clearly can be improved
Please contact me if you have feedback or if you find glitches or problems.
- on Slack: @niklaushirt or
- by Mail: nikh@ch.ibm.com
❗The installation has been tested for the CP4WAIOPS v3.7.1 release on OpenShift 4.12 on:
- OpenShift Cluster (VMware on IBM Cloud) - IPI
- OpenShift Cluster (VMware on IBM Cloud) - UPI
- IBM RedHat Openshift Kubernetes Service (ROKS) with IBM Cloud Storage (ibmc-xxx)
But it should work on other Openshift Platforms as well
❗Those are non-production installations and are suited only for demo and PoC environments. ❗ Please refer to the official IBM Documentation for production ready installations.
- Get an OpenShift Cluster
- Get your entitlement key/pull token
- Paste the install file into the OpenShift web UI and insert your entitlement key
- Grab a coffe and come back after 2-3 hours depending on the modules you're installing
📱 Slack integration (optional)
ℹ️ You can find a more detailed presentation about how the automation works here: PDF.
Here is a quick video that walks you through the installation process

- It's way faster
- You don't have to install all the tooling locally
- You don’t need a connection to the cluster during the installation (fire and forget)
🤓 So this could basically be done from an iPhone or iPad
🚀 Already have a cluster? Dive right in
✅ Prerequisites
I installed the demo in a Techzone environment.
You'll need:
- ROKS 4.12
- 5x worker nodes with 32 CPU / 128 GB ❗
You might get away with less if you don't install some components (Event Manager, ELK, Turbonomic,...) but no guarantee.
IBMers and Partners can get a temporary cluster from Techzone.
-
Select
OpenShift Cluster (VMware on IBM Cloud) - IPI - PublicOpenshift that you want to use above -
Create a cluster for
Practice/Self EducationorTestif you don't have an Opportunity Number -
Select your preferred Geograpy

-
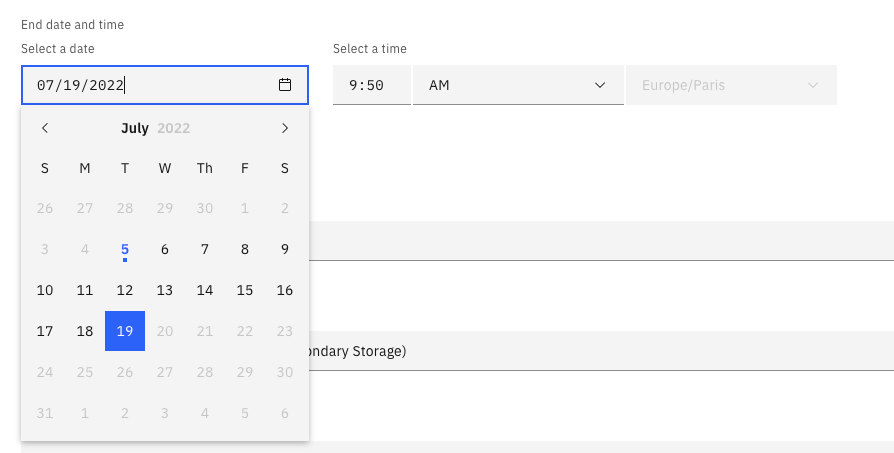
Select the maximum end date that fits your needs (you can extend the duration once after creation)
-
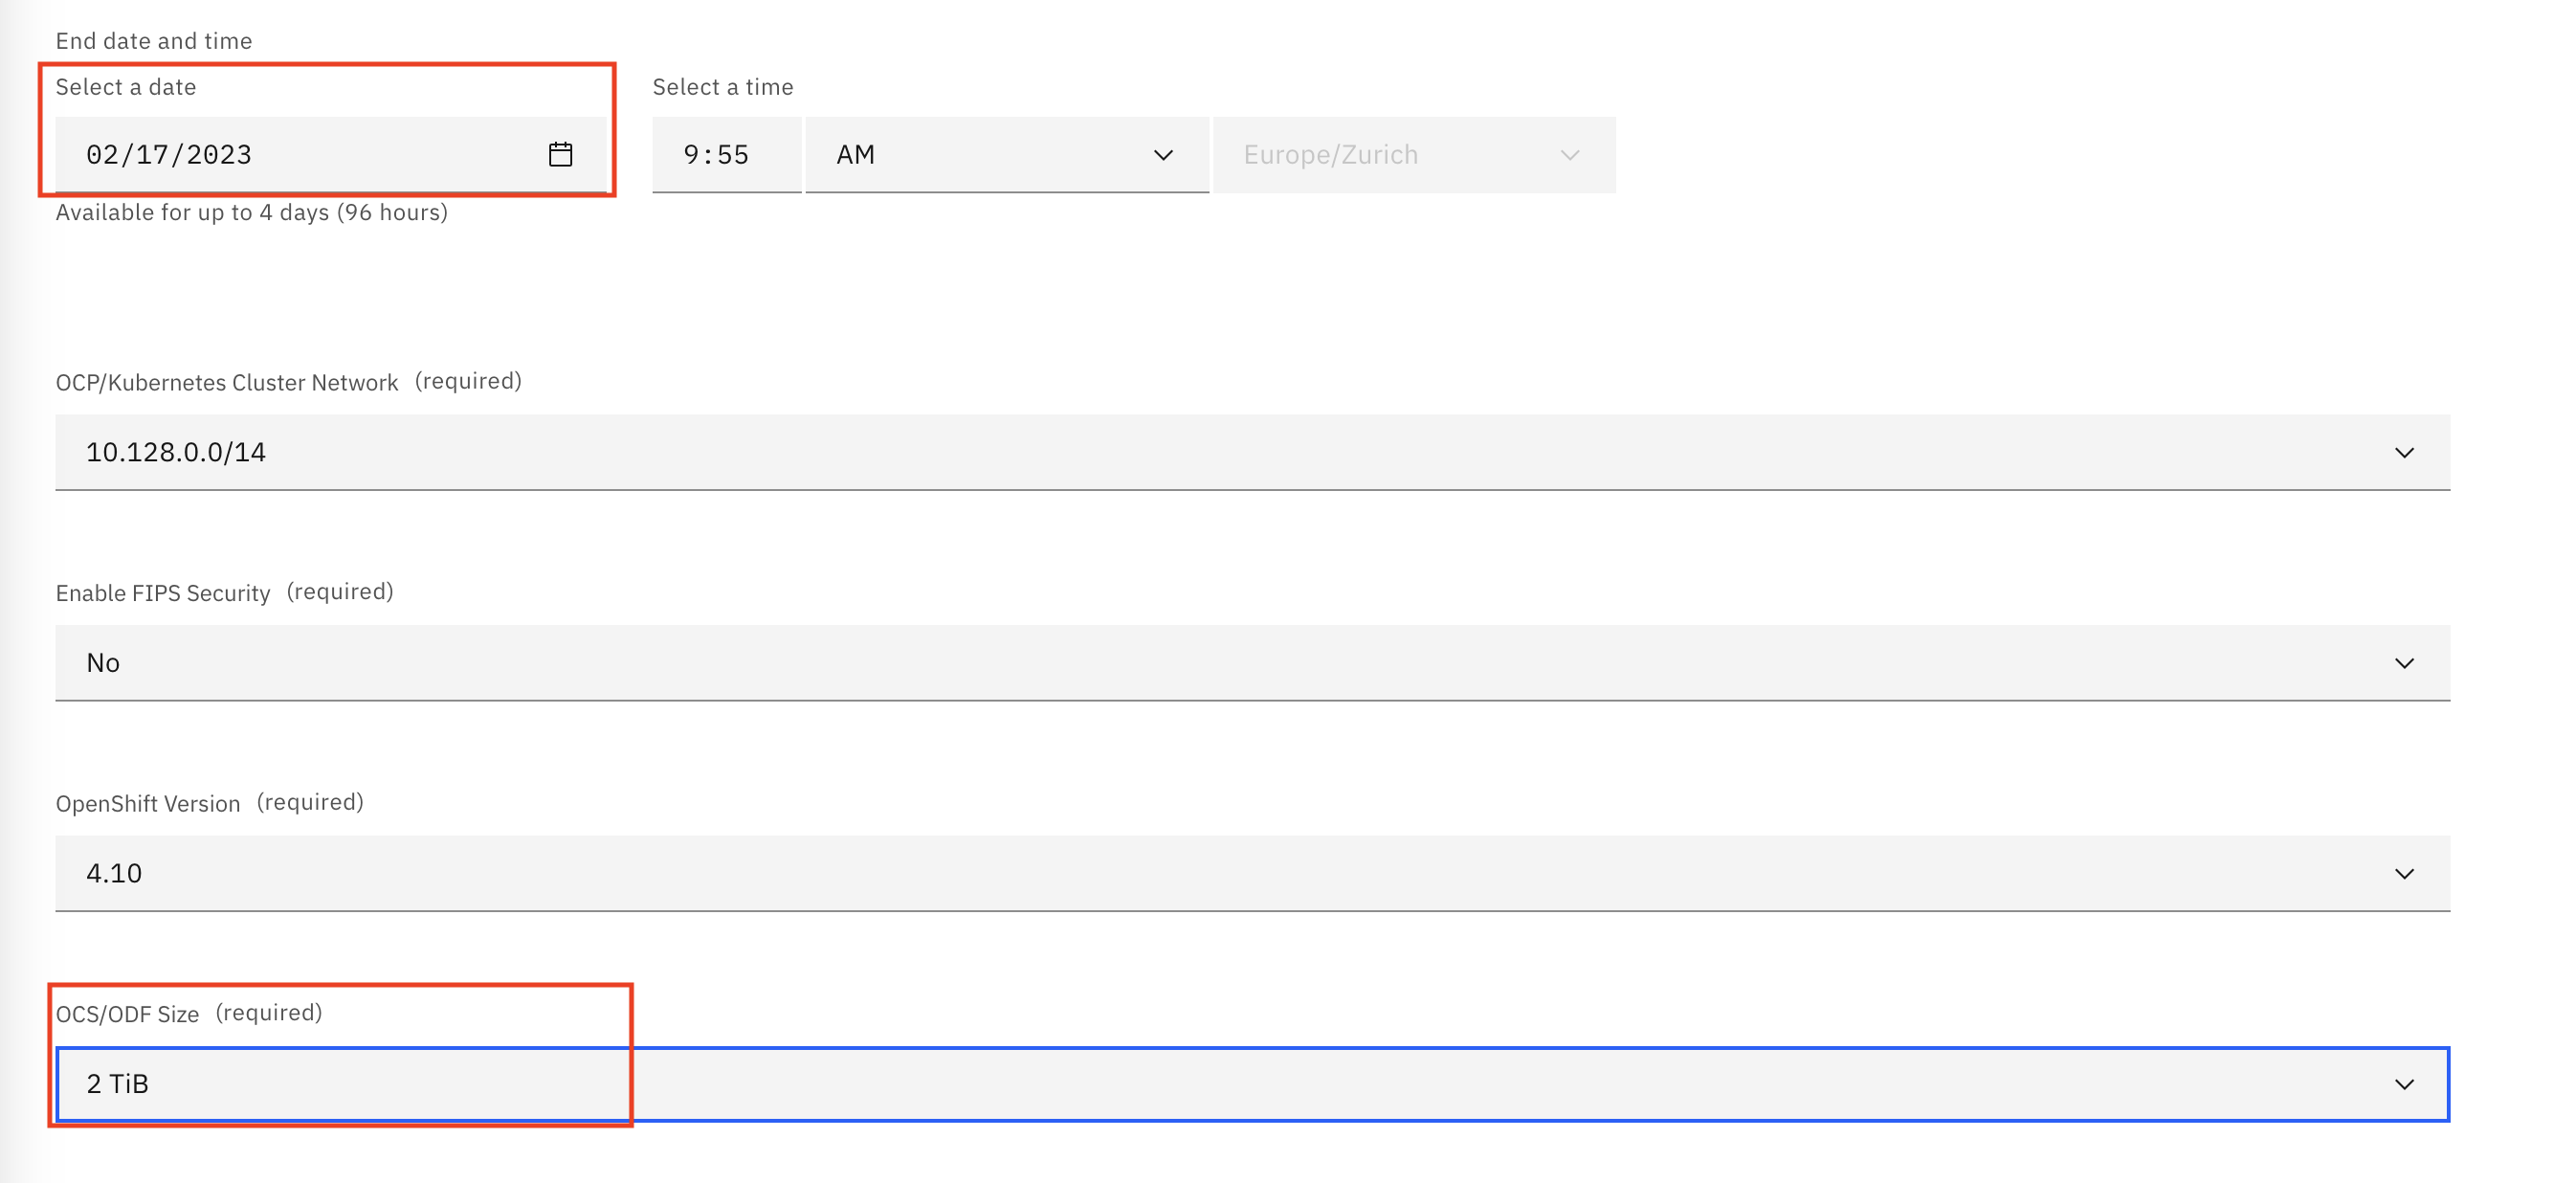
Select Openshift Storage
-
Storage OCS/ODF Size: 5TiB - This is important as with the 500MiB option your installation will run out of space rapidly.
-
OpenShift Version: 4.12
-
-
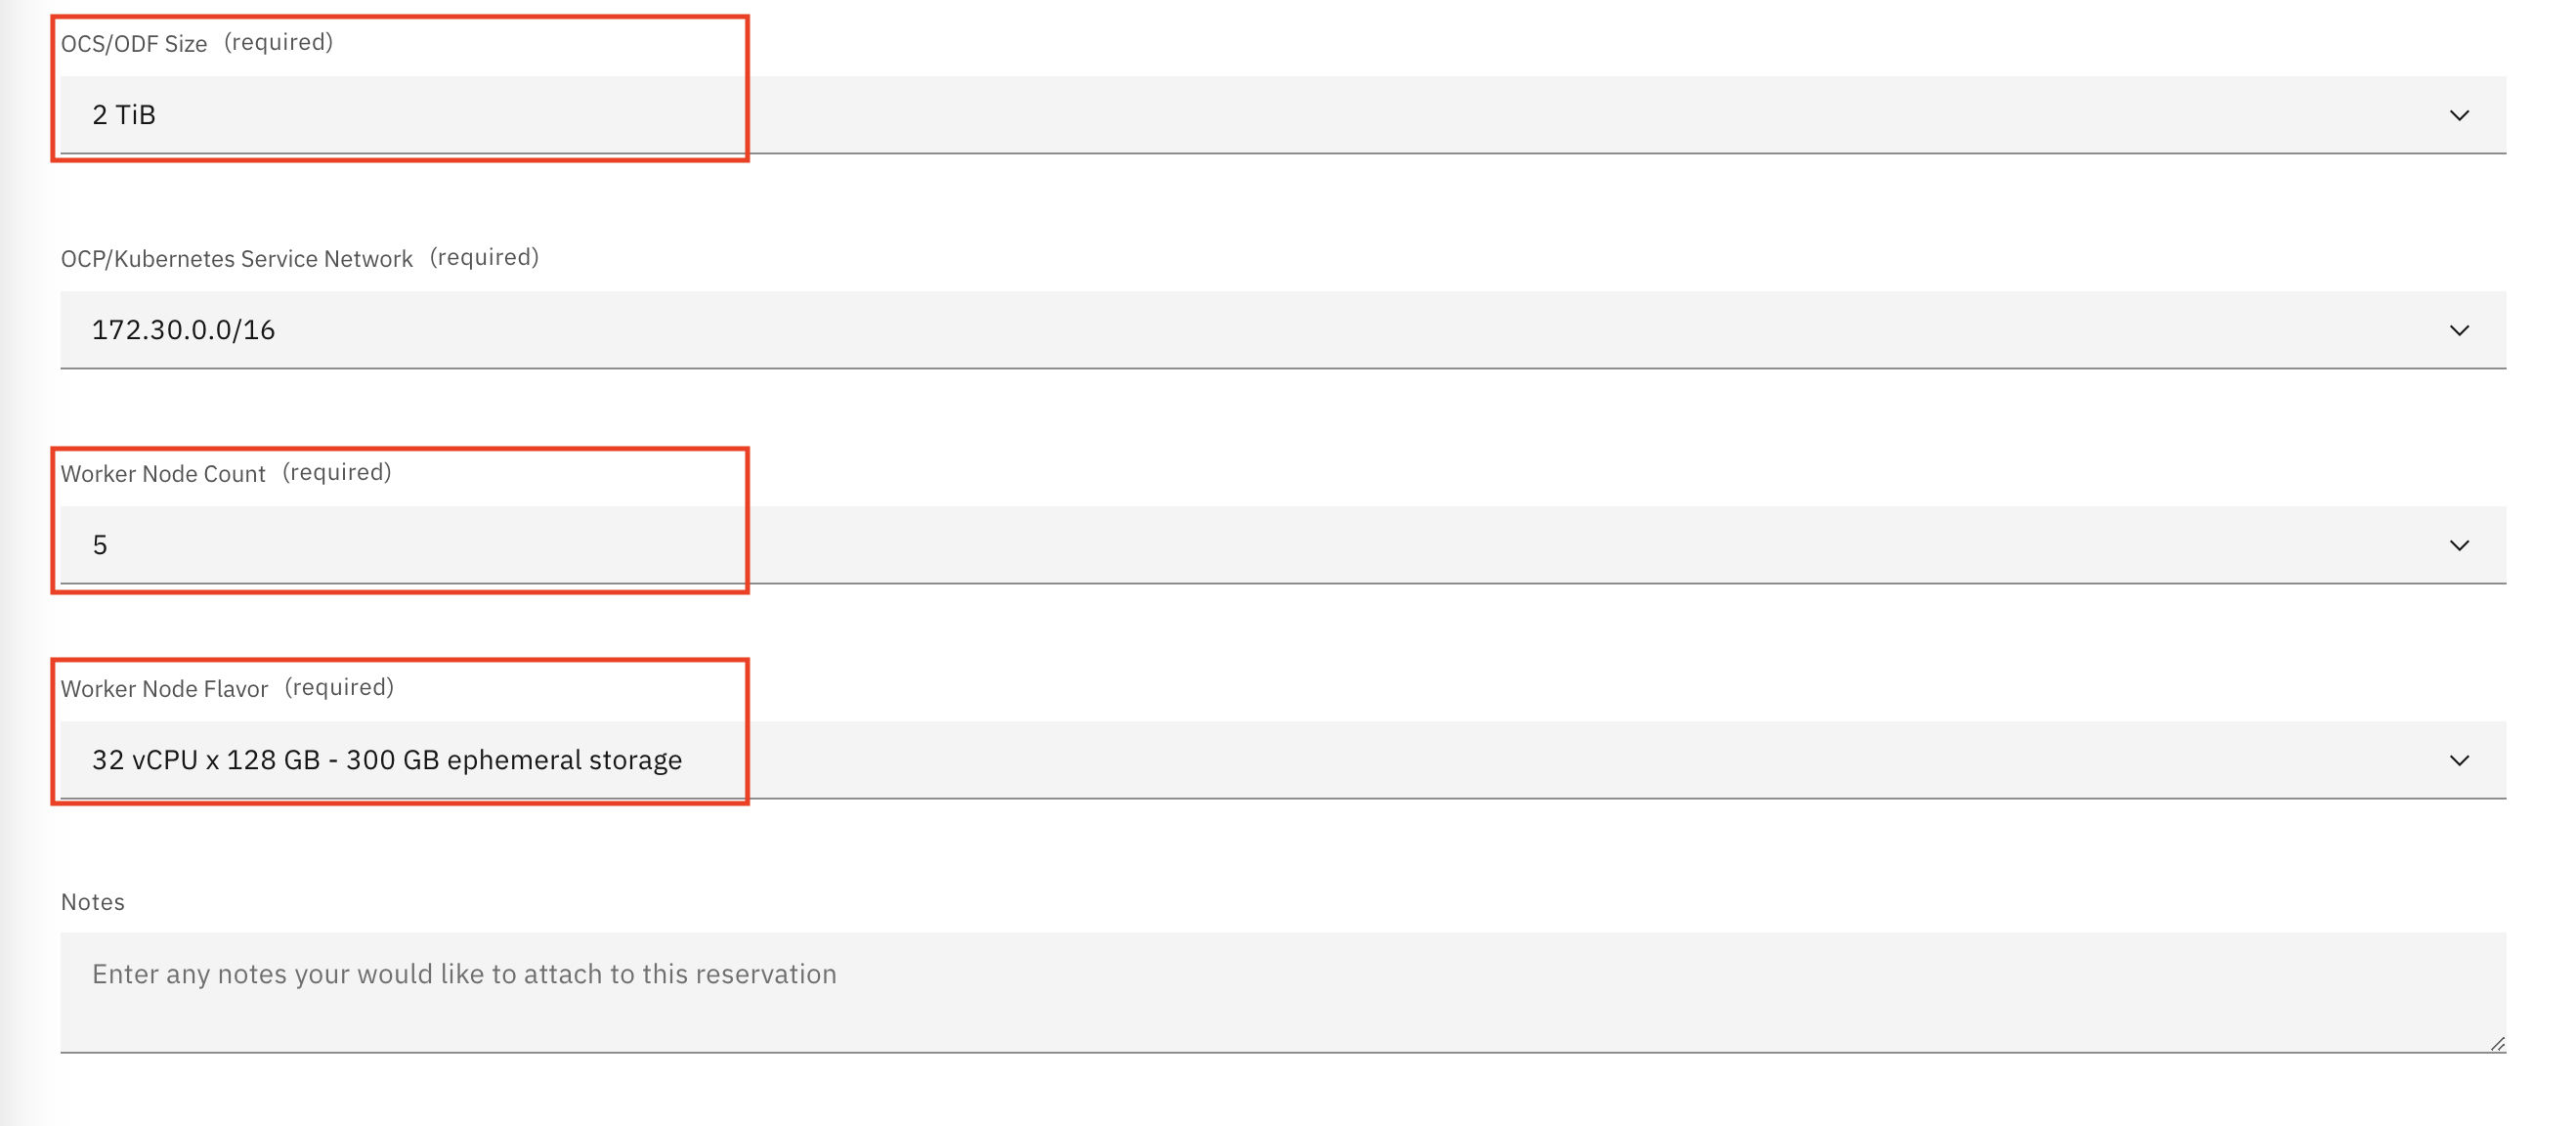
Select the Cluster Size
- Worker node count: 5
- Flavour: 32 vCPU X 128 GB ❗
❗ If you want to install CP4WAIOps, Trubonomic and Instana please select 32 vCPU X 128 GB
-
Click
Submit -
Once the cluster is provisioned, don't forget to extend it to 8 days if needed.


You can get the installation (registry pull token) token from https://myibm.ibm.com/products-services/containerlibrary.
This allows the CP4WAIOPS images to be pulled from the IBM Container Registry.
⚠️ Important remarks before you start
Those are remarks to feedback and problem reports I got from the field.
Those scripts have been tested thoroughly on different environments and have proven to be VERY reliable.
If you think that you hit a problem:
- Make sure that you have provisioned a cluster with 5 worker nodes with 32 CPU and 128 GB each (
b3c.16x64- it's easy to select the wrong size). If you have Pods in0/0state verify theEvents. If you getNot enough CPUthen delete the cluster and provision the correct size. - If you want to install CP4WAIOps, Turbonomic and Instana please select 5 worker nodes with 32 CPU and 128 GB
- The complete installation takes about 2.5 to 8 hours depending on your region where and how you deployed ROKS to (see above).
- If you see Pods in
CrashLoopor other error states, try to wait it out (this can be due to dependencies on other componenets that are not ready yet). Chances are that the deployment will eventually go through. If after 8h you are still stuck, ping me. - Select and use ONLY ONE of the scripts below, depending on which components you want to install.
You can use the scritps in the Quick_Install folder to rapidly spin up a demo environment.
The names should be self explaining and the headers of the files explain the modules to be installed.
You can find some examples below.
✅ Install CP4WAIOps with demo content, Turbonomic and Instana
You get CP4WAIOps installed and pre-trained in one simple script. Ready to go. On top of that you get Turbonomic and Instana instances to play around a bit (you'll need a license key for each).

- In the the OCP Web UI click on the
+sign in the right upper corner - Copy and paste the content from this file
- Replace
<REGISTRY_TOKEN>at the end of the file with your pull token from step 1.1.3 (the Entitlement key from https://myibm.ibm.com) - Replace
<YOUR_SALES_KEY>and<YOUR_AGENT_KEY>at the end of the file with your Instana license if you have one - Replace the TURBO_LICENSE
NONEat the end of the file with your Turbonomic license if you have one - Click
Save
ℹ️❗ If you get a ClusterRoleBinding already exists, just ignore it
🚀 You can now go to Demo the Solution
This installation cocntains:
- CP4WAIOps
- IBM Operator
- CP4WAIOps Instance
- CP4WAIOps Demo Content
OpenLDAP & Register with CP4WAIOps
AWX (Open Source Ansible Tower) with preloaded Playbooks
AI Models - Load and Train
- Create Training Definitions (TG, LAD, CR, SI. Turn off RSA)
- Create Training Data (LAD, SNOW)
- Train Models (TG, LAD, CR, SI)
Topology
- RobotShop Demo App
- Create K8s Observer
- Create ASM merge rules
- Load Overlay Topology
- Create CP4WAIOps Application
Misc
- Creates valid certificate for Ingress (Slack)
- External Routes (Flink, Topology, ...)
- Disables ASM Service match rule
- Create Policy Creation for Stories and Runbooks
- Demo Service Account
- Turbonomic
- Turbonomic Demo Content - Demo User - RobotShop Demo App with synthetic metric - Instana target (if Instana is installed - you have to enter the API Token Manually) - Groups for vCenter and RobotShop - Groups for licensing - Resource Hogs
- Instana
☑️ Install CP4WAIOps, Event Manager with demo content
You get all the CP4WAIOPS components installed and pre-trained in one simple script. Ready to go.
- In the the OCP Web UI click on the
+sign in the right upper corner - Copy and paste the content from this file
- Replace
<REGISTRY_TOKEN>at the end of the file with your pull token from step 1.1.3 (the Entitlement key from https://myibm.ibm.com) - Click
Save
ℹ️❗ If you get a ClusterRoleBinding already exists, just ignore it
🚀 You can now go to Demo the Solution
This installation cocntains:
- CP4WAIOps
- IBM Operator
- CP4WAIOps Instance
- CP4WAIOps Demo Content
OpenLDAP & Register with CP4WAIOps
AWX (Open Source Ansible Tower) with preloaded Playbooks
AI Models - Load and Train
- Create Training Definitions (TG, LAD, CR, SI. Turn off RSA)
- Create Training Data (LAD, SNOW)
- Train Models (TG, LAD, CR, SI)
Topology
- RobotShop Demo App
- Create K8s Observer
- Create ASM merge rules
- Load Overlay Topology
- Create CP4WAIOps Application
Misc
- Creates valid certificate for Ingress (Slack)
- External Routes (Flink, Topology, ...)
- Disables ASM Service match rule
- Create Policy Creation for Stories and Runbooks
- Demo Service Account
- Event Manager
- Event Manager
- Event Manager Demo Content
- Topology
- Create ASM merge rules
- Load ASM merge Topology
- Create CP4WAIOps Application
☑️ Custom Install
-
Open the 00_INSTALL_CUSTOM.yaml file
-
Adap the installation configuration to your needs. Select the modules to install and their configuration.
- name: cp4waiops
  kind: CP4WAIOps						<-- The feature to be configured
  install: true							<-- Install yes/no

  # current_cp4waiops_feature			<-- Configuration of the feature
  # CP4WAIOPS Size of the install
  waiops_size: small
  ...
  # Version of the catalog subscription
  subscription_channel: v3.7
-
Replace
<REGISTRY_TOKEN>at the end of the file with your pull token from step 1.1.3 (the Entitlement key from https://myibm.ibm.com) -
Copy the content
-
In the the OCP Web UI click on the
+sign in the right upper corner -
Paste the content
-
Click
Save
ℹ️❗ If you get a ClusterRoleBinding already exists, just ignore it
🚀 You can now go to Demo the Solution
📹 Please use the Demo Script to prepare for the demo.
📹 I have also added a short Demo Walkthrough video that you can watch to get an idea on how to do the demo. This is based on 3.2 and the Click Through PPT, but should work more or less with your own instance.
🌏 Access the Environment
To access the demo environment:
-
Click on the Application Menu in your Openshift Web Console.
-
Select
CP4WAIOps Demo UI -
Login with the password
P4ssw0rd!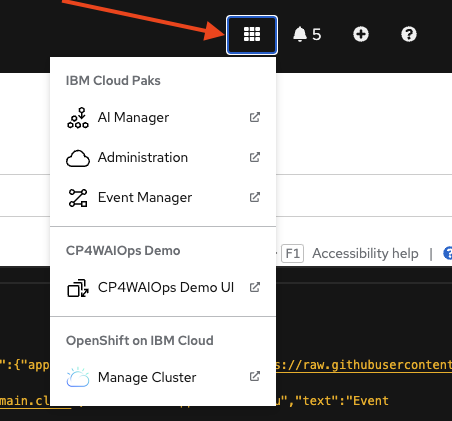

🔐 Login to CP4WAIOps as demo User
- Click on the blue
CP4WAIOpsbutton - Login as User
demowith the PasswordP4ssw0rd!

🚀 Demo the Solution
Please use the Script to prepare for the demo.
Then start the demo with the Demo Script.
For the system to work you need to follow those steps:
- Create Slack Workspace
- Create Slack App
- Create Slack Channels
- Create Slack Integration
- Get the Integration URL
- Create Slack App Communications
- Slack Reset
📥 Detailed Instructions
- Create a Slack workspace by going to https://slack.com/get-started#/createnew and logging in with an email which is not your IBM email. Your IBM email is part of the IBM Slack enterprise account and you will not be able to create an independent Slack workspace outside if the IBM slack service.

- After authentication, you will see the following screen:

-
Click Create a Workspace ->
-
Name your Slack workspace

Give your workspace a unique name such as aiops-<yourname>.
- Describe the workspace current purpose

This is free text, you may simply write “demo for Watson AIOps” or whatever you like.

You may add team members to your new Slack workspace or skip this step.
At this point you have created your own Slack workspace where you are the administrator and can perform all the necessary steps to integrate with CP4WAOps.

Note : This Slack workspace is outside the control of IBM and must be treated as a completely public environment. Do not place any confidential material in this Slack workspace.
-
Create a Slack app, by going to https://api.slack.com/apps and clicking
Create New App.
-
Select
From an app manifest


-
Select the appropriate workspace that you have created before and click
Next -
Copy and paste the content of this file ./doc/slack/slack-app-manifest.yaml.
Don't bother with the URLs just yet, we will adapt them as needed.
-
Click
Next -
Click
Create -
Scroll down to Display Information and name your CP4WAIOPS app.
-
You can add an icon to the app (there are some sample icons in the ./tools/4_integrations/slack/icons folder.
-
Click save changes
-
In the
Basic Informationmenu click onInstall to Workspacethen clickAllow
-
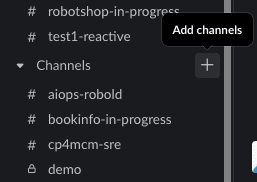
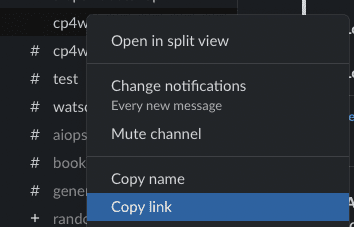
In Slack add a two new channels:
- aiops-demo-reactive
- aiops-demo-proactive
-
Right click on each channel and select
Copy LinkThis should get you something like this https://xxxx.slack.com/archives/C021QOY16BW The last part of the URL is the channel ID (i.e. C021QOY16BW) Jot them down for both channels
-
Under Apps click Browse Apps
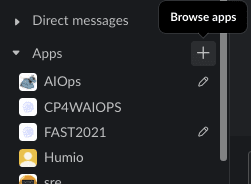
-
Select the App you just have created
-
Invite the Application to each of the two channels by typing
@<MyAppname>
-
Select
Add to channelYou shoud get a message from saying
was added to #<your-channel> by ...


In the Slack App:
-
In the
Basic Informationmenu get theSigning Secret(not the Client Secret!) and jot it down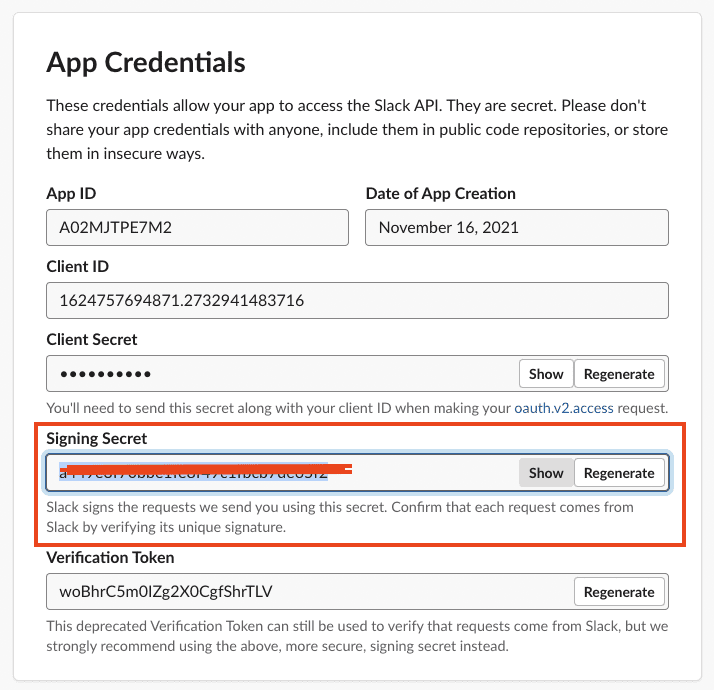
-
In the
OAuth & Permissionsget theBot User OAuth Token(not the User OAuth Token!) and jot it down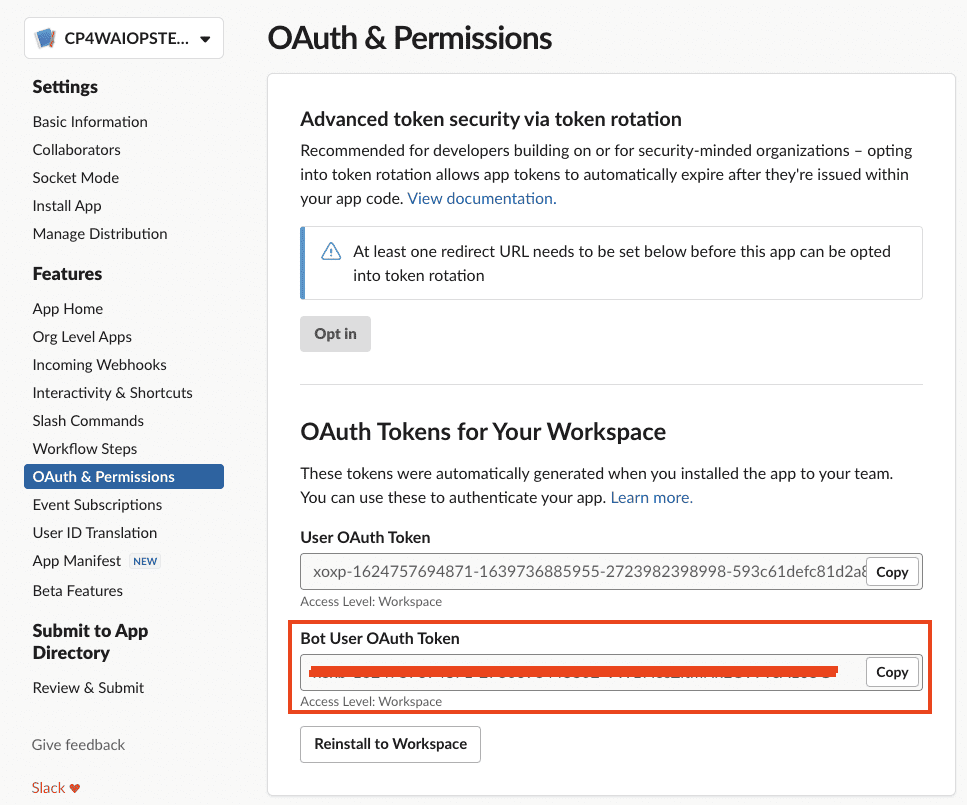


In the CP4WAIOps (CP4WAIOPS)
-
In the
CP4WAIOps"Hamburger" Menu selectDefine/Data and tool integrations -
Click
Add connection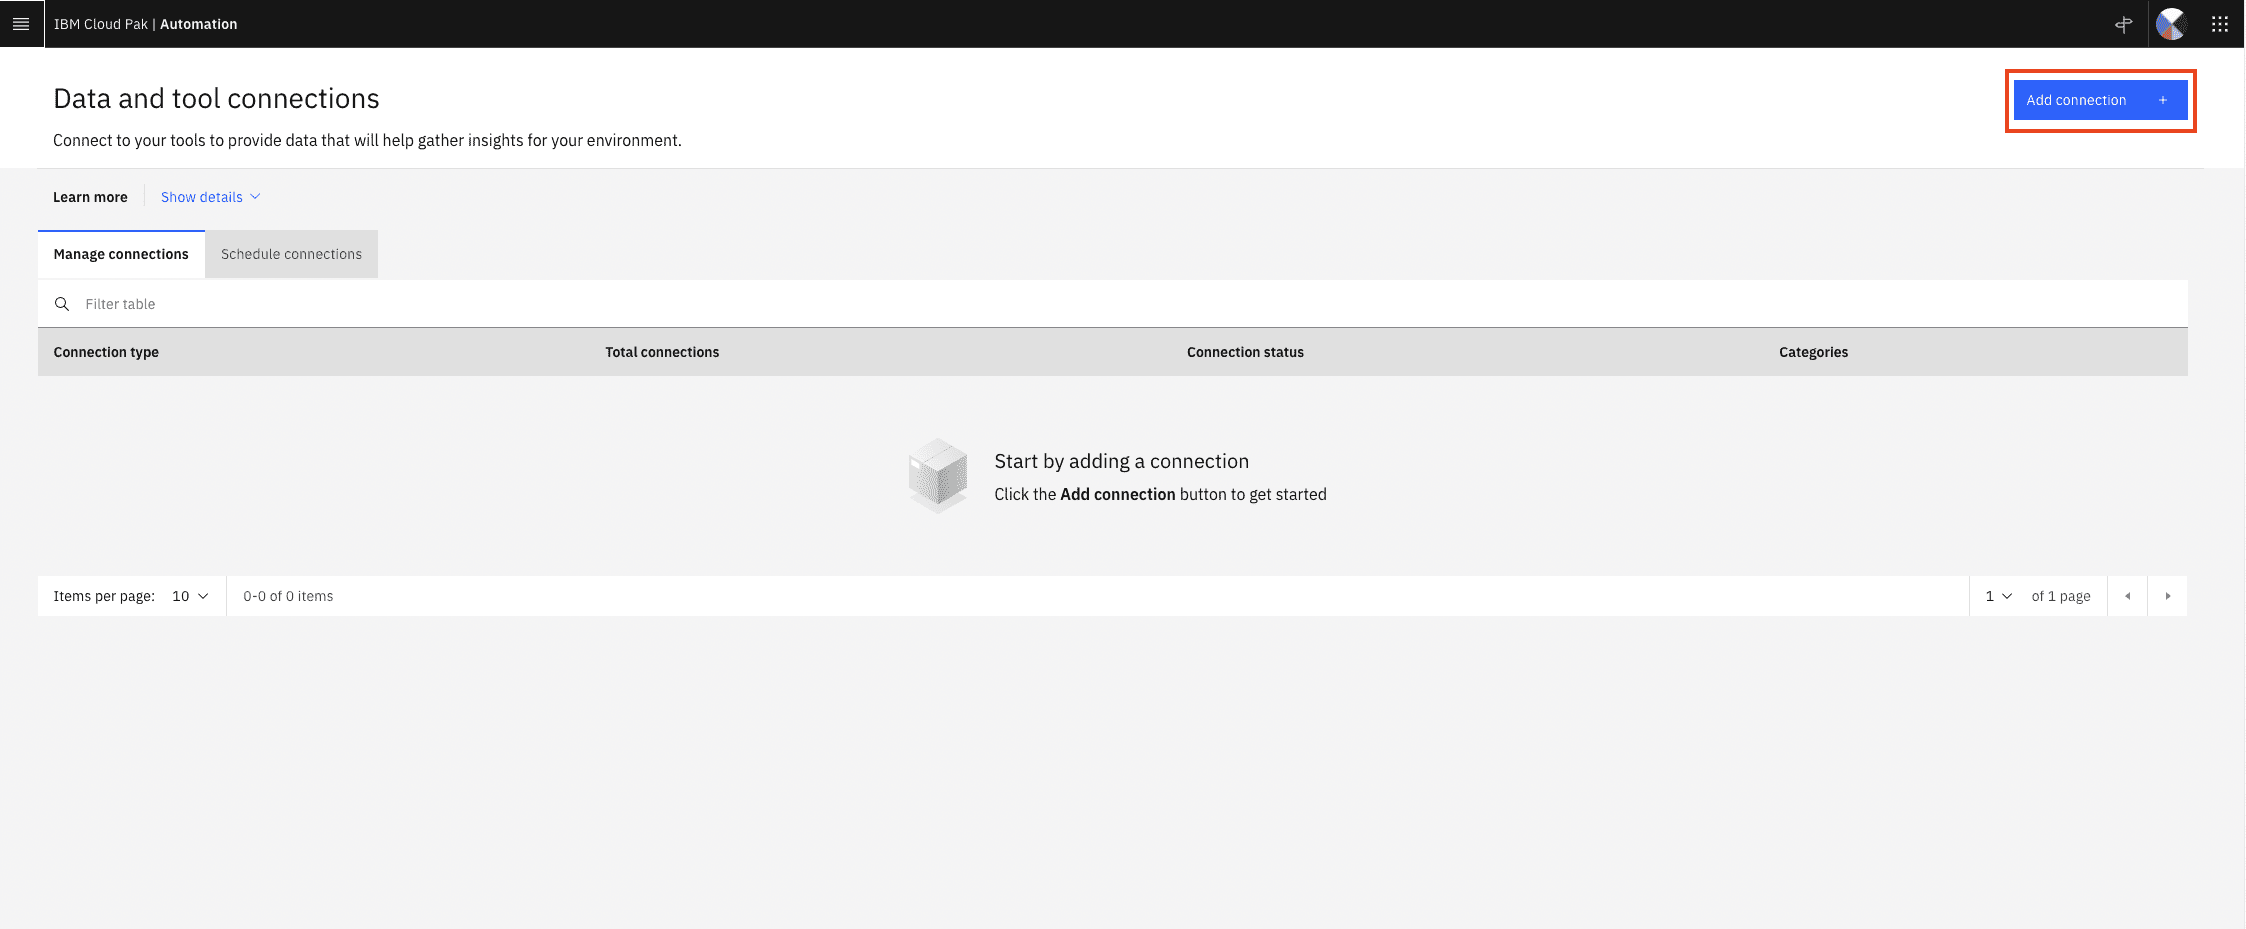
-
Under
Slack, click onAdd Connection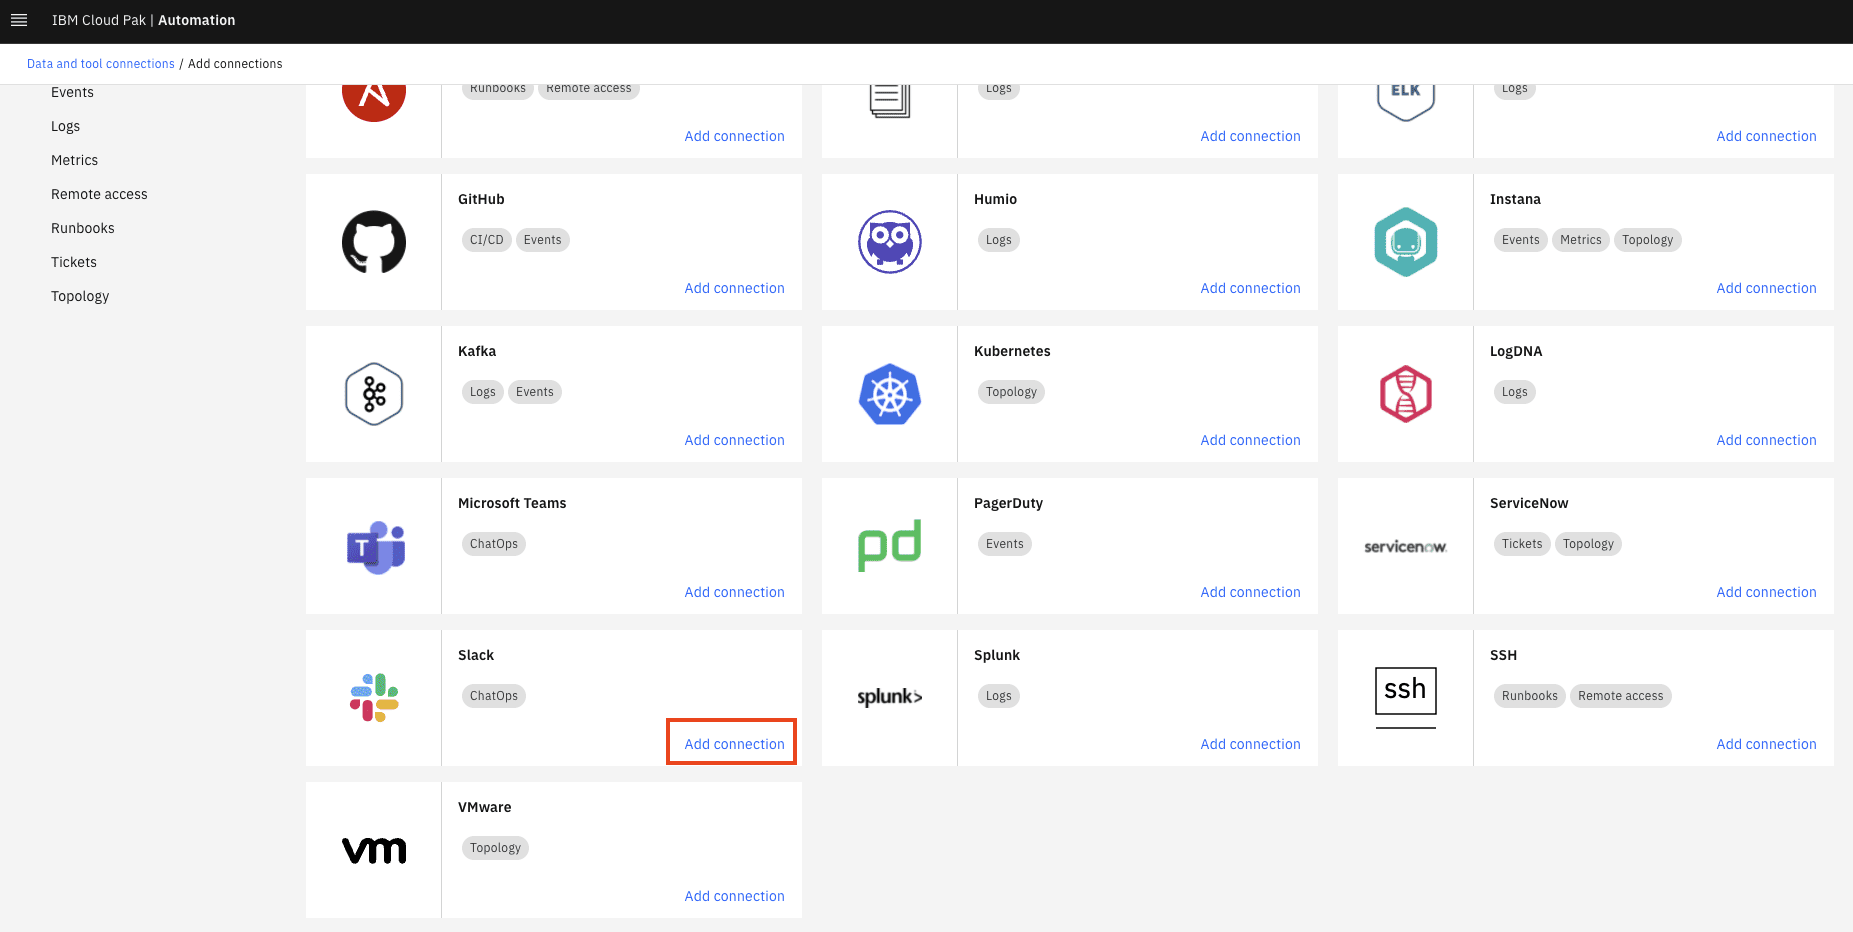
-
Name it "Slack"
-
Paste the
Signing Secretfrom above -
Paste the
Bot User OAuth Tokenfrom above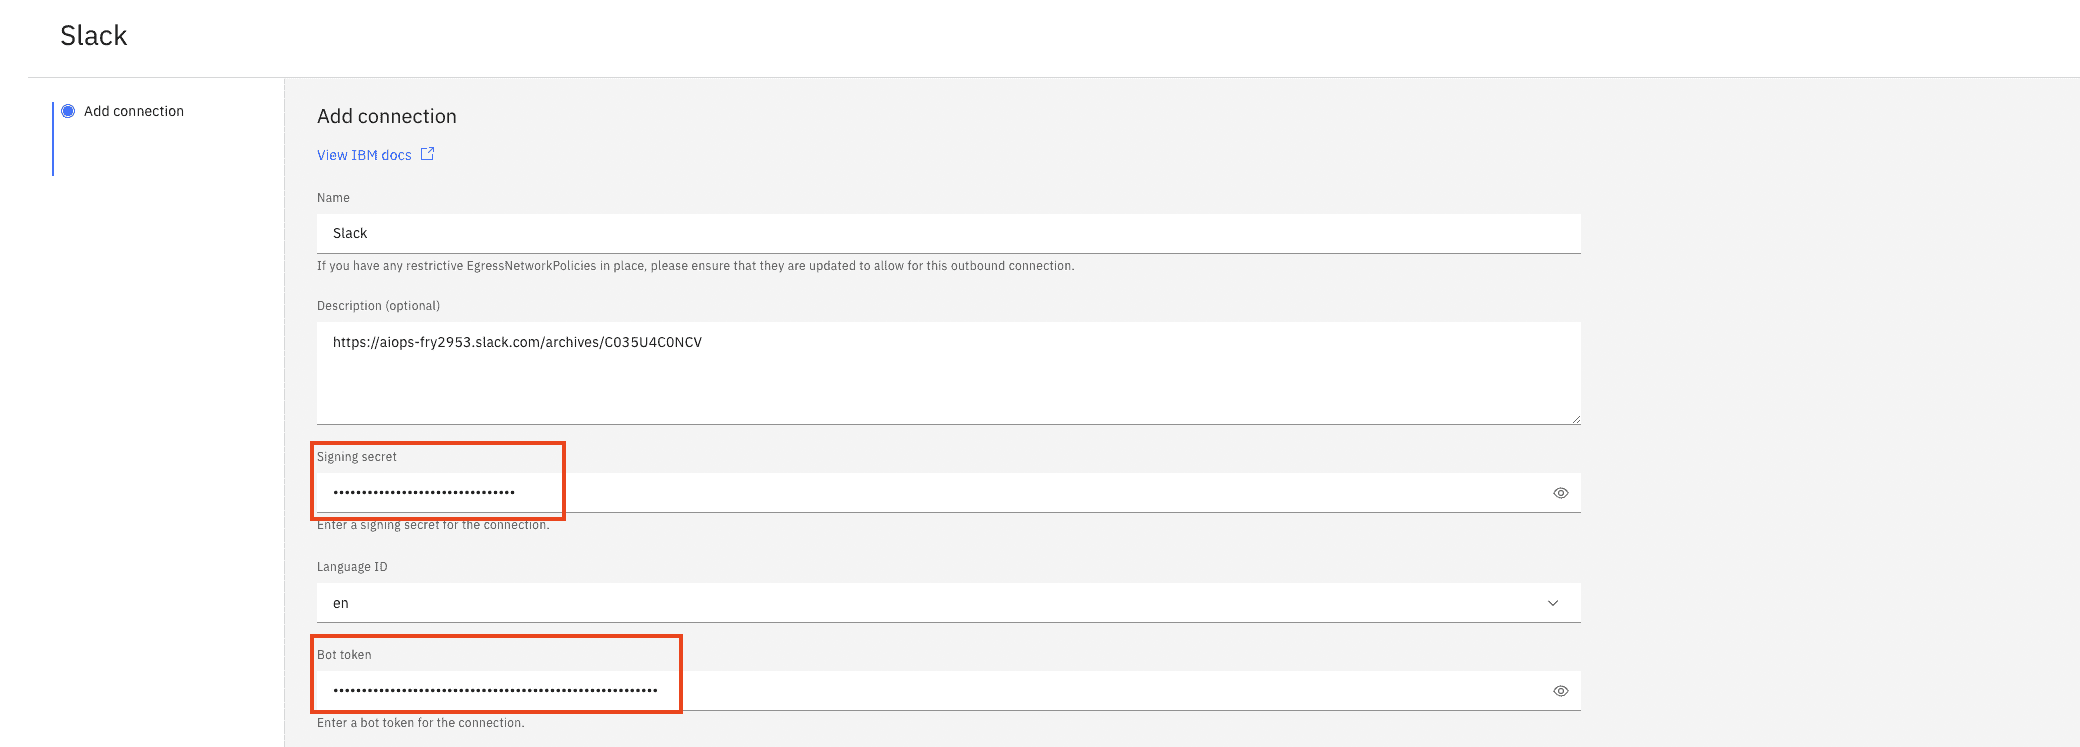
-
Paste the channel IDs from the channel creation step in the respective fields
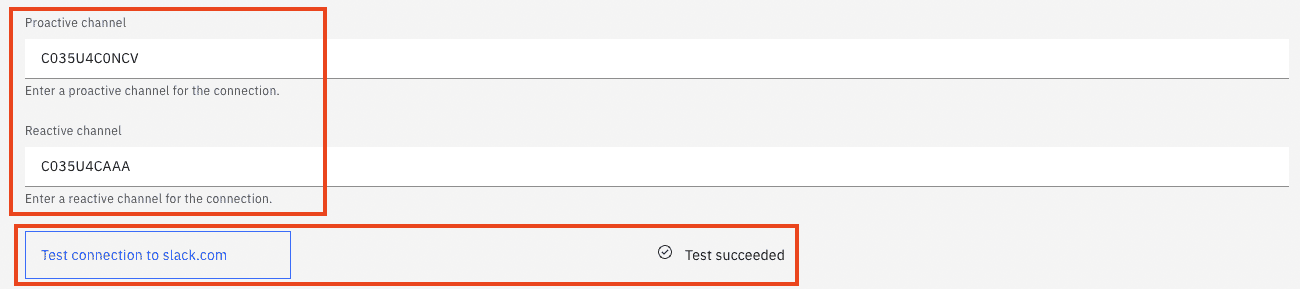
-
Test the connection and click save


In the CP4WAIOps (CP4WAIOPS)
-
Go to
Data and tool integrations -
Under
Slackclick on1 integration -
Copy out the URL
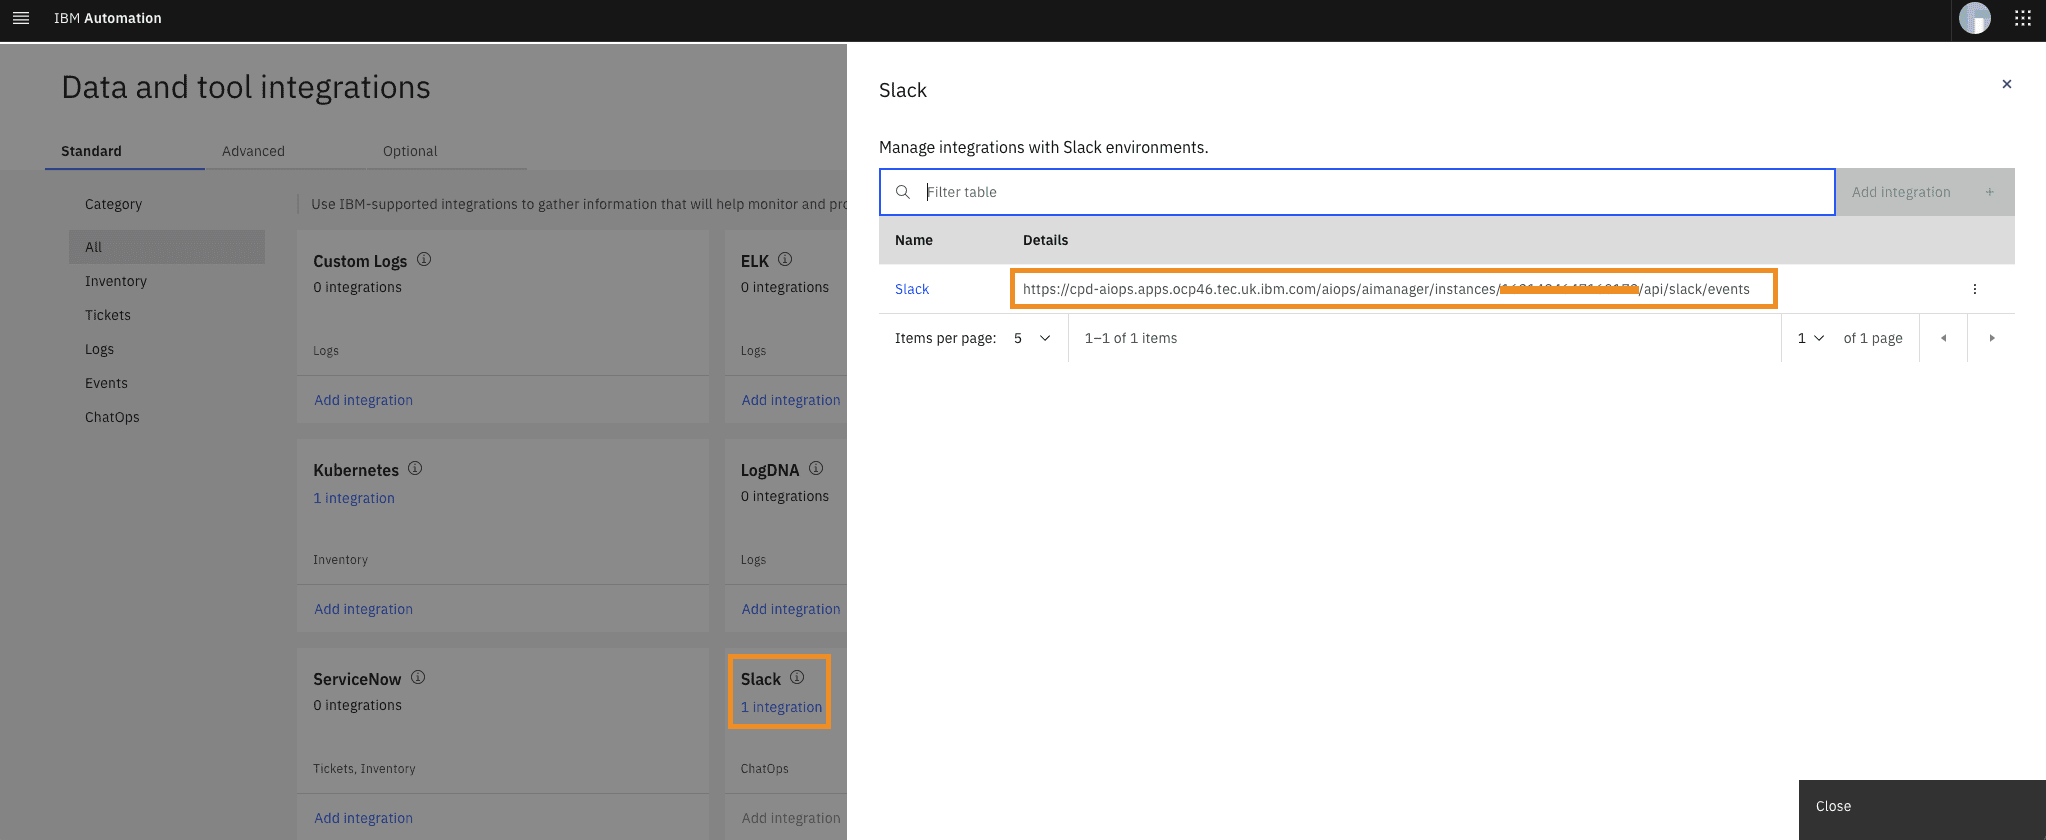

This is the URL you will be using for step 6.
Return to the browser tab for the Slack app.
-
Select
Event Subscriptions. -
In the
Enable Eventssection, click the slider to enable events. -
For the Request URL field use the
Request URLfrom step 5.e.g:
https://<my-url>/aiops/aimanager/instances/xxxxx/api/slack/events -
After pasting the value in the field, a Verified message should display.
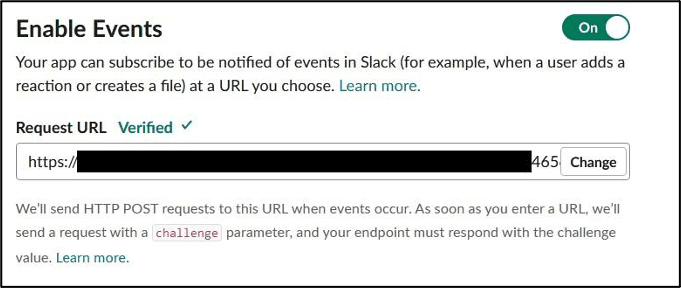
If you get an error please check 5.7
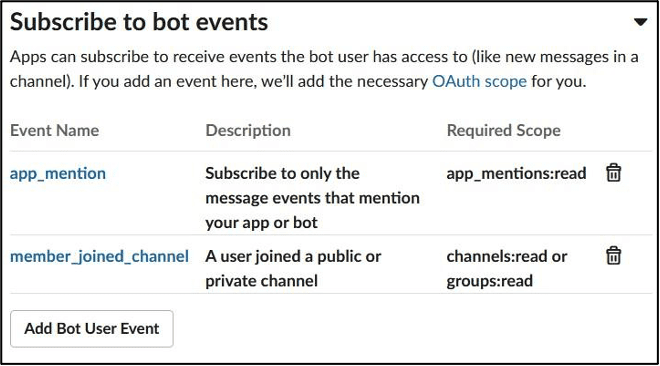
-
Verify that on the
Subscribe to bot eventssection you got:app_mentionandmember_joined_channelevents.
-
Click
Save Changesbutton.


-
Select
Interactivity & Shortcuts. -
In the Interactivity section, click the slider to enable interactivity. For the
Request URLfield, use use the URL from above.
There is no automatic verification for this form

- Click
Save Changesbutton.
Now, configure the welcome slash command. With this command, you can trigger the welcome message again if you closed it.
-
Select
Slash Commands -
Click
Create New Commandto create a new slash command.Use the following values:
Field Value Command /welcome Request URL the URL from above Short Description Welcome to Watson AIOps -
Click
Save.
The Slack app must be reinstalled, as several permissions have changed.
- Select
Install App - Click
Reinstall to Workspace
Once the workspace request is approved, the Slack integration is complete.
If you run into problems validating the Event Subscription in the Slack Application, see 5.2
This is needed for the reset scripts in order to empty/reset the Slack channels.
This is based on Slack Cleaner2. You might have to install this:
pip3 install slack-cleaner2In your Slack app
- In the
OAuth & Permissionsget theUser OAuth Token(not the Bot User OAuth Token this time!) and jot it down
In file ./tools/98_maintenance/scripts/13_reset-slack.sh
- Replace
not_configuredfor theSLACK_TOKENparameter with the token - Adapt the channel name for the
SLACK_REACTIVEparameter
In your Slack app
- In the
OAuth & Permissionsget theUser OAuth Token(not the Bot User OAuth Token this time!) and jot it down (same token as above)
In file ./tools/98_maintenance/scripts/14_reset-slack-changerisk.sh
- Replace
not_configuredfor theSLACK_TOKENparameter with the token - Adapt the channel name for the
SLACK_PROACTIVEparameter
Call either of the scripts above to reset the channel:
./tools/98_maintenance/scripts/13_reset-slack.sh

or

./tools/98_maintenance/scripts/14_reset-slack-changerisk.sh

📥 Basic Architecture
The environement (Kubernetes, Applications, ...) create logs that are being fed into a Log Management Tool (ELK in this case).
- External Systems generate Alerts and send them into the CP4WAIOps for Event Grouping.
- At the same time CP4WAIOps ingests the raw logs coming from the Log Management Tool (ELK) and looks for anomalies in the stream based on the trained model.
- It also ingests Metric Data and looks for anomalies
- If it finds an anomaly (logs and/or metrics) it forwards it to the Event Grouping as well.
- Out of this, CP4WAIOps creates a Story that is being enriched with Topology (Localization and Blast Radius) and with Similar Incidents that might help correct the problem.
- The Story is then sent to Slack.
- A Runbook is available to correct the problem but not launched automatically.
📥 Optimized Demo Architecture
The idea of this repo is to provide a optimised, complete, pre-trained demo environment that is self-contained (e.g. can be deployed in only one cluster)
It contains the following components (which can be installed independently):
- CP4WAIOps
- IBM Operator
- CP4WAIOps Instance
- CP4WAIOps Demo Content (optional)
- OpenLDAP & Register with CP4WAIOps
- AWX (Open Source Ansible Tower) with preloaded Playbooks
- AI Models - Load and Train
- Create Training Definitions (TG, LAD, CR, SI. Turn off RSA)
- Create Training Data (LAD, SNOW)
- Train Models (TG, LAD, CR, SI)
- Topology
- RobotShop Demo App
- Create K8s Observer
- Create ASM merge rules
- Load Overlay Topology
- Create CP4WAIOps Application
- Misc - Creates valid certificate for Ingress (Slack) - External Routes (Flink, Topology, ...) - Disables ASM Service match rule - Create Policy Creation for Stories and Runbooks - Demo Service Account
- Event Manager (optional)
- Event Manager
- Event Manager Demo Content (optional)
- Topology
- Create ASM merge rules
- Load ASM merge Topology
- Create CP4WAIOps Application
- Topology
- Turbonomic (optional)
- Turbonomic Demo Content (optional)
- Demo User
- RobotShop Demo App with synthetic metric
- Instana target (if Instana is installed - you have to enter the API Token Manually)
- Groups for vCenter and RobotShop
- Groups for licensing
- Resource Hogs
- Instana (optional)

For the this specific Demo environment:
- ELK is not needed as I am using pre-canned logs for training and for the anomaly detection (inception)
- Same goes for Metrics, I am using pre-canned metric data for training and for the anomaly detection (inception)
- The Events are also created from pre-canned content that is injected into CP4WAIOps
- There are also pre-canned ServiceNow Incidents if you don’t want to do the live integration with SNOW
- The Webpages that are reachable from the Events are static and hosted on my GitHub
- The same goes for ServiceNow Incident pages if you don’t integrate with live SNOW
This allows us to:
- Install the whole Demo Environment in a self-contained OCP Cluster
- Trigger the Anomalies reliably
- Get Events from sources that would normally not be available (Instana, Turbonomic, Log Aggregator, Metric Provider, ...)
- Show some examples of SNOW integration without a live system
📥 Training

Loading Training data is done at the lowest possible level (for efficiency and speed):
- Logs: Loading Elastic Search indexes directly into ES - two days of logs for March 3rd and 4th 2022
- SNOW: Loading Elastic Search indexes directly into ES - synthetic data with 15k change requests and 5k incidents
- Metrics: Loading Cassandra dumps of metric data - 3 months of synthetic data for 13 KPIs
The models can be trained directly on the data that has been loaded as described above.
📥 Incident creation

Incidents are being created by using the high level APIs in order to simulate a real-world scenario.
- Events: Pre-canned events are being injected through the corresponding REST API
- Logs: Pre-canned anomalous logs for a 30 min timerange are injected through Kafka
- Metrics: Anomalous metric data are generated on the fly and injected via the corresponding REST API