Gatsby is a static site generator built on top of React. A static site has all the data you need when the user requests it, so the site loads blazing fast. Gatsby does this by fetching all the data you hook up to it at build time. It can also still behave like a react app, too, so you get the best of both worlds!
The headless CMS (that is - a content management system without a frontend) that we will be using is Contentful. Gatsby has many plugins to use other CMS platforms like SanityIO, Netlify CMS, or even WordPress API.
Then to get our site on the internet, we will be using Netlify, an all-in-one platform for automating deployment of modern frontend web projects.
To read more about this tech stack, check out the tutorial introduction presentation to accompany this tutorial.
We will be developing a blog in this tutorial. It's perfect for this tech stack, because often we use a Content Management System (CMS) like Contentful to pull data from. We also want to have our site dynamically re-built when we create new posts. We'll do all this in this tutorial!
You can use any text editor to write code for this tutorial, but I recommend you use Visual Studio Code. Download here
NodeJS lets us run JavaScript on our computer. It also comes with npm which is required to install Gatsby. If you don't have NodeJS, download it here
You will need to use source control (git) to complete this project. VS Code comes with git integrated, so that's a good option to go with. Gatsby will also initiated a repository for you. You can certainly wait until it sets that up for you.
If you want to know more about git, check out this shorter rundown, this detailed blog or browse through this spread of articles from Atlassian for more in depth reading.
Let's cover some terminology before we dive in.
You will be doing most of your code in one of two places: the command line and your text editor.
While there is nuanced differences, the command line is also known as the terminal, console and shell. Examples of commands you'll have to use in the terminal are cd (change directory), git push (push your git repo), npm install (install something with node package manager), etc.
The text editor has a variety of options. Common ones are standalone applications like VS Code, Atom, Sublime, Web Storm, etc. Common shell integrated text editors are Vim, Emacs, and Nano. If I say to "edit a file" or "add the following code to the file", this means open the file in your editor of choice to change it.
You'll be running the Gatsby server locally with the command gatsby develop. To exit the server, whether you are on a Mac or PC, use the shortcut ctrl+c. You'll need to be hopping back and forth between the development server and the command line, so remember this key binding.
VS Code also allows for multiple command line windows. To access the command line in VS Code you can go to View --> Terminal or use the shortcut ctrl-`. From there, you can split terminals or create new ones with the buttons on the top right of the terminal.
Let's start by creating the Gatsby project
Gatsby comes with a slick CLI that helps you generate new applications. Before creating your first project, install gatsby-cli globally.
npm i -g gatsby-cli
Gatsby is a static site generator that it built on top of react. At build time, Gatsby reaches out to all your data sources (markdown files, json, yaml, WordPress, Contentful, etc) and puts it in the graphQL data layer. Creating a new project will set you up with the basic stack you'll need to get started.
gatsby new gatsby-contentful
This is auto-generated from Gatsby when you create your site.
Navigate into the folder you created your site in.
cd gatsby-contentful
Gatsby has it's own commands. If you're used to npm run start, don't fret, they aliased that for ya 😉
gatsby develop
Investigate the starter site! There are lots of starters available on the Gatsby website. For now we're going to start with the basic starter by editing the main page (index.js) and page-2 before creating contentful.
We're not going to change a whole lot here. The most important part is that the <Link> at the bottom of the page gets changed from page-2 to blogposts. Update the file pages/index.js with the following.
import React from "react"
import { Link } from "gatsby"
import Layout from "../components/layout"
import Image from "../components/image"
import SEO from "../components/seo"
import "./index.css"

const IndexPage = () => (
  <Layout>
    <SEO title="Home" keywords={[`gatsby`, `application`, `react`]} />
    <div className="home">
      <h1>Hello There</h1>
      <p>Welcome my awesome blog</p>
      <div>
        <div
          style={{
            maxWidth: `300px`,
            margin: "0 auto 1.45rem",
          }}
        >
          <Image />
        </div>
      </div>
      <Link to="/blogposts/">View all posts</Link>
    </div>
  </Layout>
)

export default IndexPageCreate a file in the pages directory named index.css. You probably noticed we imported that in index.js.
This tutorial is focused on loading data from our CMS through Gatsby and not design. I'll provide a style sheet for you later in this tutorial but will not go into depth on what it does.
Change the name of page-2.js to blogposts.js. This is where we'll list all of the blogs from Contetnful after we hook it up with a Gatsby plugin.
Navigate to the file gatsby-config.js and update siteMetadata with your own information. The title is what appears at the top of the browser window/tab. The description and author can be queried and used as data in components. All three values are used in the baked in SEO component.
siteMetadata: {
  title: `My Awesome Blog`,
  description: `An awesome place where all my posts live`,
  author: `YOUR_NAME`,
}
To see these changes, you will need to restart your server.
Update homepage, rename page-2 to blogposts, and update siteMetadata
Head to Contentful and create an account. You can do this with a 3rd party login (google, github, etc.) or with a username and password.
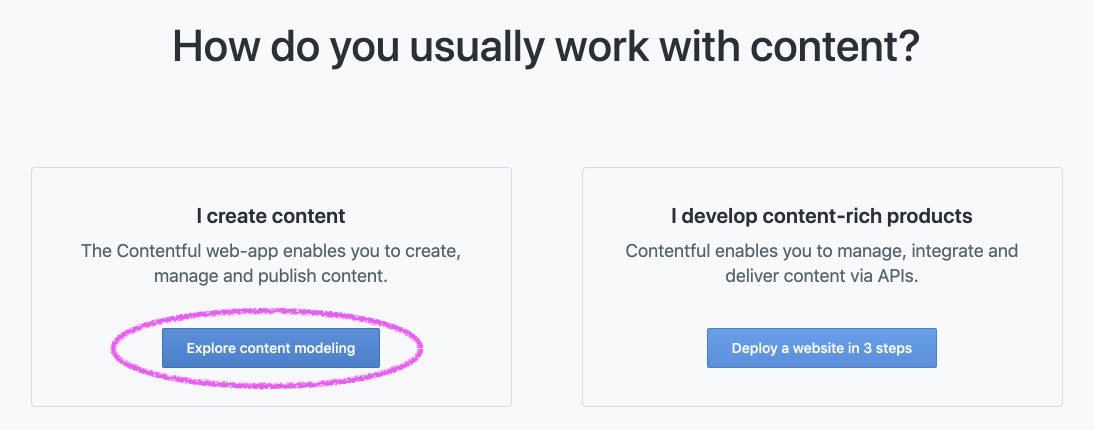
You'll be provided with options to explore or create a 3-step site. While Contentful has an awesome tutorial, choose to explore to continue following this
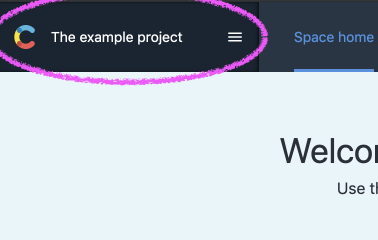
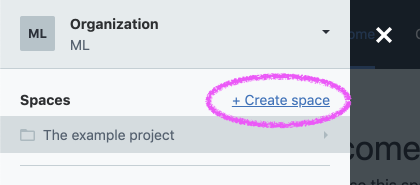
You will probably be created a contentful-starter space. Go ahead and click that left hand header to open up a sidenav that will allow you to create a new space:
Notice the free tier limitations.

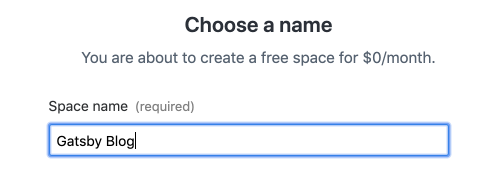
Create an empty space.
Go to Content model on the top nav. Then click this "Add Content Type" in the center of the screen. Name the content type Blog Post. Leave the identifier alone and create any description if you'd like.
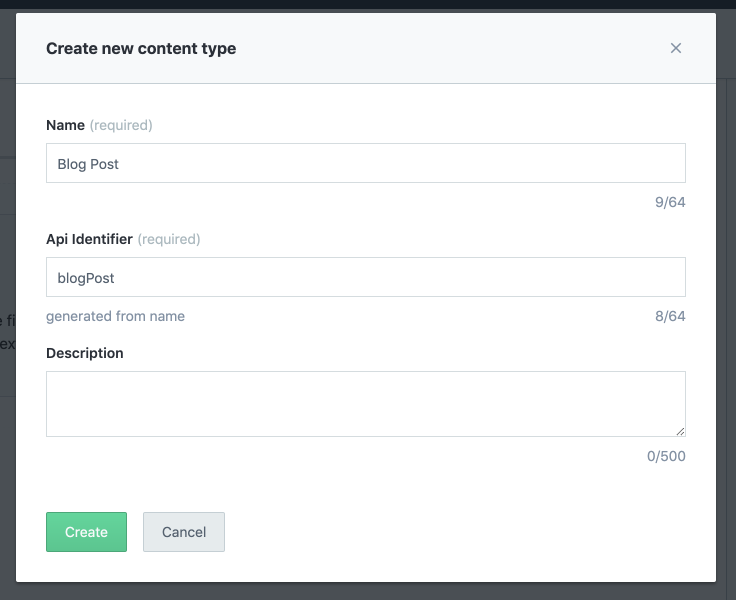
You'll notice a button to the side to "(+) Add Field". Fields act as data entries on your model and can be of a variety of types. The fields associated with our blog that we'll be creating are:
- Title (short text)
- Body (long text)
- Image (media)
- Tags (short text, list) *
- Slug (short text, slug, unique, required) *
Go ahead and try to make a few fields on your own. Images of configuring them are shown below. *The last two fields have special settings so pay close attention to them.
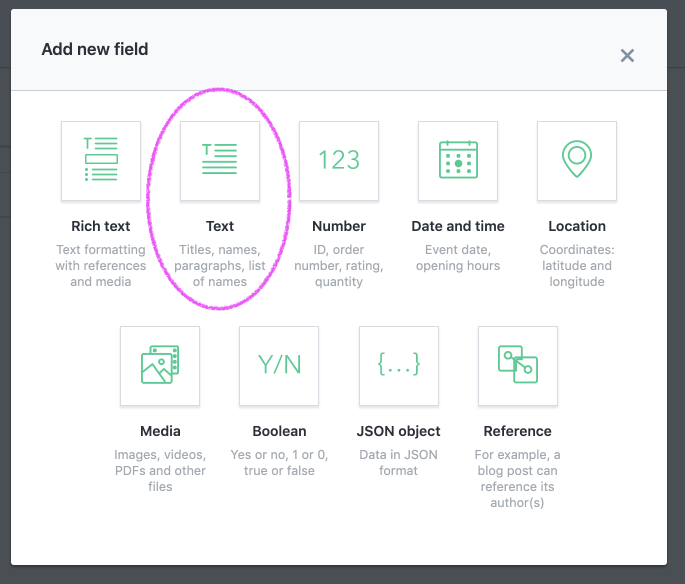
- Click on Add Field start adding fields to your model.
- Select Text for your first field.
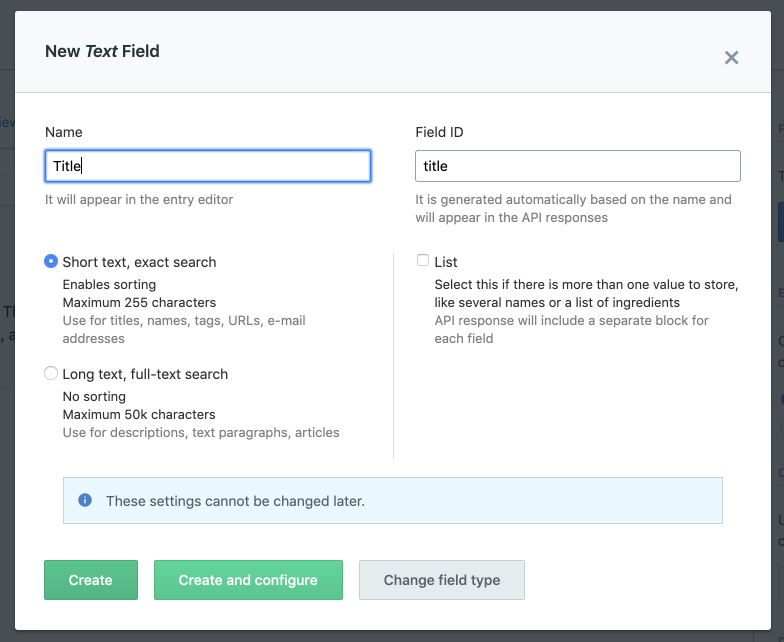
- Put Title as its name, leave it as a short text and click create (not create and configure).
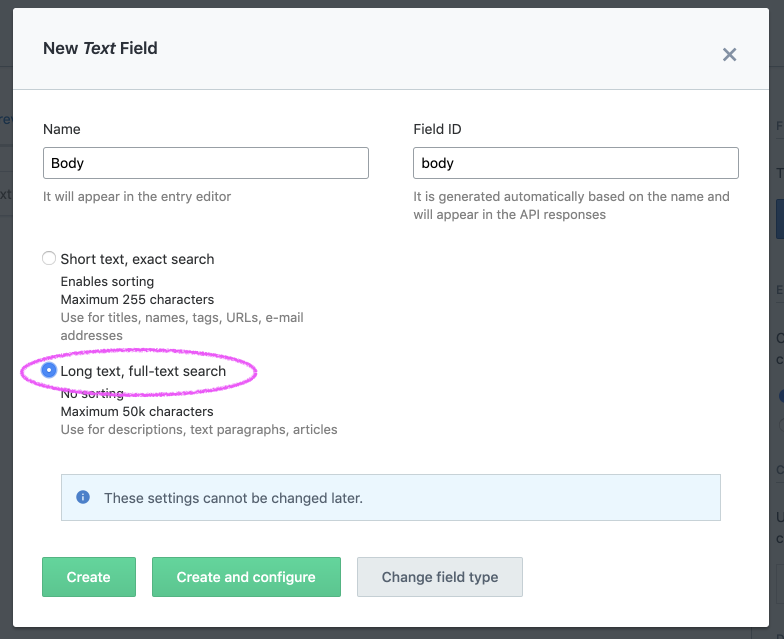
- Create another field for Body and make this one a Long Text field.
- Create a Media field and label it as Image (NOTICE: No image for this one, don't skip it 😉)
- Create another text field and name it tags. *Make sure to check the list option on the right.

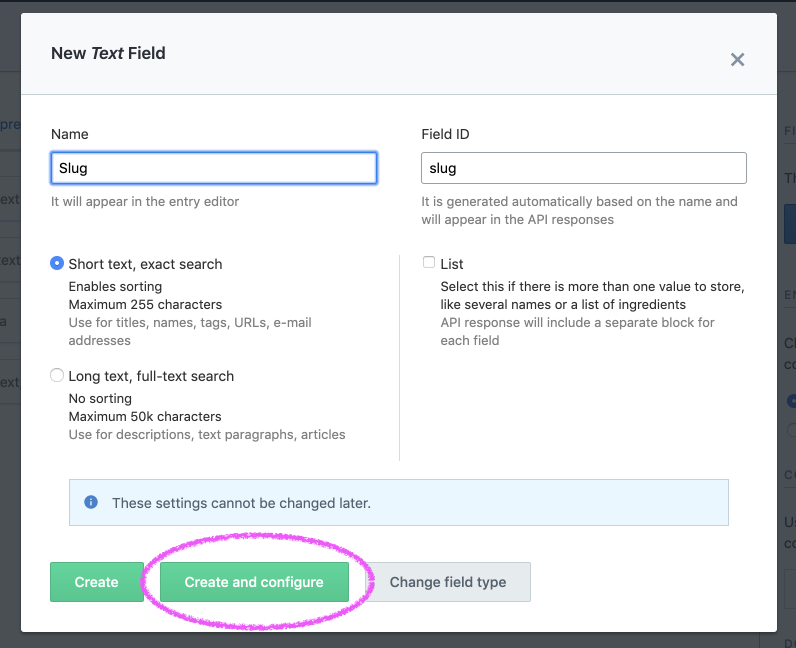
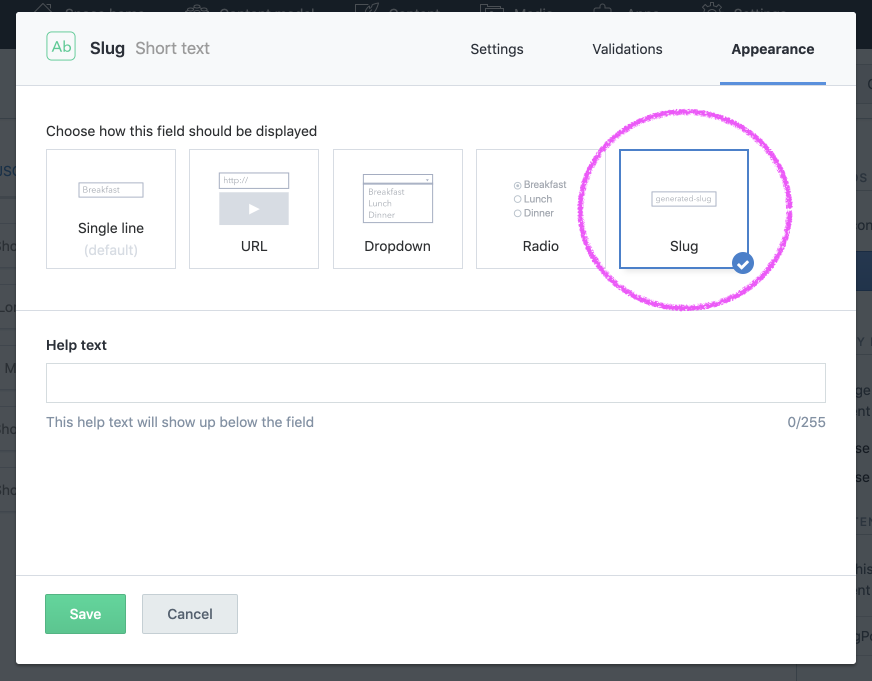
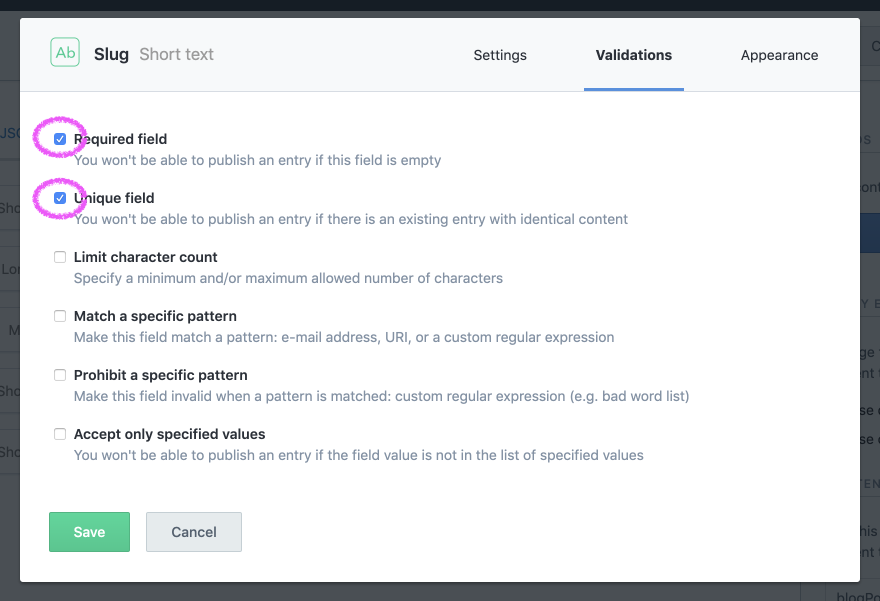
- Create a final Text field for Slug. *Instead of clicking create, click Create and Configure and do the following: - Go to Appearance Tab and select Slug. - Go to Validations and select Required and Unique. The slug field is the final part of the URL path that will lead to your post, so we want it to be unique (no two posts can have the same URL)
In the end, you should have the following fields on your blog:

Save changes and then let's start creating content.
On the top nav menu, go to Content and click the blue button Add Blog Post to start generating content.
Create three new posts with placeholder data (or your own content if you have it). Feel free to use the following resources to help:
- Hipster Ipsum for filler content
- Unsplash for open source photos (FYI - horizontal images look better for this demo)
We are going to use environment variables to store our API tokens. By placing the environment file in our .gitignore we'll keep our keys secret.
For now, the instructions below should be good enough to get you going. For full details on environment variables in Gatsby, see the Gatsby Documentation on Environment Variables in Gatsby.
In the root directory of your project create a new file .env.development. We don't want to commit this file to our repository, so go ahead and add this to your `
Before we forget, navigate to .gitignore and add the .env.development to the list. The new file you created should turn from green to grey if your text editor has git integration.
Open .env.development and add the
Now let's go find the variables to put in the placeholders.
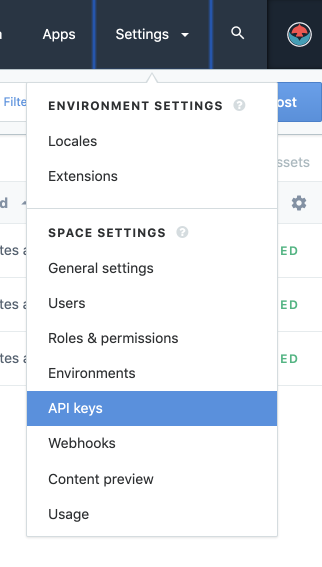
For Space ID, go to Settings in the top navigation, then down to General Settings. Place your Space ID in the environment file.
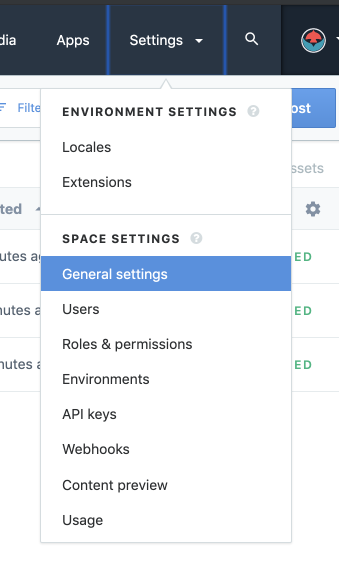
You will need to create an API key by going to the Settings top navigation and go down to API keys. Create a new API Key. Label it with your blog name and copy your Content Delivery API token to your .env.development file.
In the end your .env.development should look something like this:
following fields with placeholders for now:
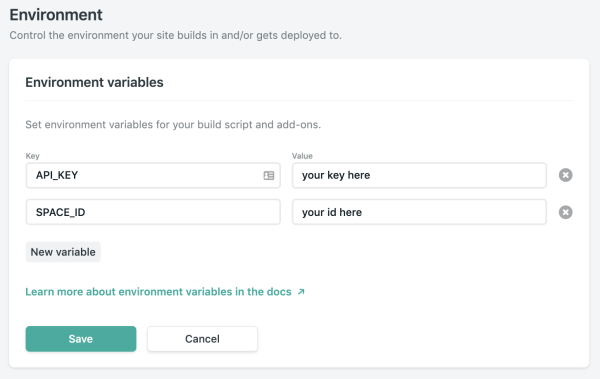
SPACE_ID=z98vmp193pdo
API_KEY=8oud043998dfsd4SDf04fd8dfd08sdf083444
To load our post model data from Contentful into Gatsby, we will install and configure a Gatsby plugin:
npm install gatsby-source-contentful
Then head back to gatsby-config.js and below your site metadata, configure the plugin. First you will need to load your environment file, then configure your plugin with the information from it.
require("dotenv").config({
  path: `.env.${process.env.NODE_ENV}`,
})

module.exports = {
  siteMetadata: {
    title: `My Awesome Blog`,
    description: `An awesome place where all my posts live`,
    author: `@micLeners`,
  },
  plugins: [
    {
      resolve: `gatsby-source-contentful`,
      options: {
        spaceId: process.env.SPACE_ID,
        accessToken: process.env.API_KEY,
      },
    },
    `gatsby-plugin-react-helmet`,
// ... file truncated ...Add environment variables, install contentful plugin and configure.
Let's take a gander at what data is in your GraphQL layer. If we did things right we should have all our blog information in the GraphQL layer.
Build your project and navigate to the second link. This will open up GraphiQL, an interface that lets you investigate and query the graph layer.
Enter the following query into the lefthand panel and run with the play button:
{
  allContentfulBlogPost{
    edges {
      node {
        id
        slug
        title
        tags
        image {
          file {
            url
          }
        }
        contentful_id
      }
    }
  }
}
If all worked, you should see your blog data in JSON format on the right. How this has happened is gatsby-contentful-plugin makes a call to Contentful when Gatsby builds. It uses the API Key and Space ID you provided to access the data in the models. It then semantically names fields to be accessible over GraphQL.
We want to build out post pages from the content data in our model. We will do this using Gatsby's Node API. It will fetch all our data from the content and create separate pages for them.
Navigate to the gatsby-node.js file and update it with the following:
const path = require(`path`)
const slash = require(`slash`)
exports.createPages = ({ graphql, actions }) => {
  const { createPage } = actions
  // we use the provided allContentfulBlogPost query to fetch the data from Contentful
  return graphql(
    `
      {
        allContentfulBlogPost {
          edges {
            node {
              id
              slug
            }
          }
        }
      }
    `
  )
    .then(result => {
      if (result.errors) {
        console.log("Error retrieving contentful data", result.errors)
      }
      // Resolve the paths to our template
      const blogPostTemplate = path.resolve("./src/templates/blogpost.js")
      // Then for each result we create a page.
      result.data.allContentfulBlogPost.edges.forEach(edge => {
        createPage({
          path: `/blogpost/${edge.node.slug}/`,
          component: slash(blogPostTemplate),
          context: {
            slug: edge.node.slug,
            id: edge.node.id,
          },
        })
      })
    })
    .catch(error => {
      console.log("Error retrieving contentful data", error)
    })
}
Create a template directory in our src folder and add a file named blogpost.js.
You should now have the file ./src/templates/blogpost.js. Update this file with the following content:
import React from "react"
import { Link, graphql } from "gatsby"
import Layout from "../components/layout"
import SEO from "../components/seo"
const BlogPost = ({ data }) => {
  const { title, body, image, tags } = data.contentfulBlogPost
  return (
    <Layout>
      <SEO title={title} />
      <div className="blogpost">
        <h1>{title}</h1>
        <img alt={title} src={image.file.url} />
        <div className="tags">
          {tags.map(tag => (
            <span className="tag" key={tag}>
              {tag}
            </span>
          ))}
        </div>
        <p className="body-text">{body.body}</p>
        <Link to="/blogposts">View more posts</Link>
        <Link to="/">Back to Home</Link>
      </div>
    </Layout>
  )
}
export default BlogPost
export const pageQuery = graphql`
  query($slug: String!) {
    contentfulBlogPost(slug: { eq: $slug }) {
      title
      slug
      body {
        body
      }
      image {
        file {
          url
        }
      }
      tags
    }
  }
`
Lets go back to our pages/blogposts.js file and update it with a list of our blogposts:
import React from "react"
import { Link, graphql } from "gatsby"
import Layout from "../components/layout"
import SEO from "../components/seo"
const BlogPosts = ({ data }) => {
  const blogPosts = data.allContentfulBlogPost.edges
  return (
    <Layout>
      <SEO title="Blog posts" />
      <h1>{"Here's a list of all blogposts!"}</h1>
      <div className="blogposts">
        {blogPosts.map(({ node: post }) => (
          <div key={post.id}>
            <Link to={`/blogpost/${post.slug}`}>{post.title}</Link>
          </div>
        ))}
        <span className="mgBtm__24" />
        <Link to="/">Go back to the homepage</Link>
      </div>
    </Layout>
  )
}
export default BlogPosts
export const query = graphql`
  query BlogPostsPageQuery {
    allContentfulBlogPost(limit: 1000) {
      edges {
        node {
          id
          title
          slug
          body {
            body
          }
          image {
            file {
              url
            }
          }
          tags
        }
      }
    }
  }
`
Lastly, let's update the styling of our site a bit. In pages/index.css add the following:
@import url("<https://fonts.googleapis.com/css?family=Open+Sans:300,400,600>");

html {
  font-family: "Open Sans";
}

header {
  /* We use !important here to override
  the inline styles just for this example.
  in production code, avoid using it where
  possible*/
  background-color: cadetblue !important;
}

header div {
  text-align: center;
}

header div h1 {
  font-weight: 600;
}

.home {
  text-align: center;
}

.home img {
  margin: auto;
}

.blogpost {
  font-size: 18px;
  width: 35em;
}

h1 {
  font-weight: 400;
  margin-top: 48px;
  font-family: "Open Sans";
}

img {
  margin-bottom: 8px;
}

.tags {
  margin-bottom: 24px;
}

.tags span.tag {
  font-weight: bold;
  margin-right: 8px;
  background: cadetblue;
  padding: 2px 12px;
  border-radius: 4px;
  color: white;
  font-size: 12px;
}

.blogpost p.body-text {
  margin-bottom: 32px;
}

p {
  line-height: 1.8;
  color: #929191;
  font-weight: 300;
}

.blogpost a {
  display: block;
  margin-bottom: 8px;
}

.blogposts a {
  display: block;
  margin-bottom: 8px;
}

footer {
  margin-top: 120px;
}

.mgBtm__24 {
  display: inline-block;
  margin-bottom: 24px;
}
Before committing, close down you server and start it again. See what has changed!
Load posts through node-api, create template, update blogposts.js and styling
Push your code up to your Github page by creating a new github repo (don't create a readme). Copy the github URL and in your local terminal run the command:
git remote add origin [YOUR_REPO_URL_HERE]
Then push with:
git push origin master
If you don't have a profile on Netlify, create one now. Then create the site
- On your main page, click the green New site from Git button on the top right.
- Under continuous deployment, click Github
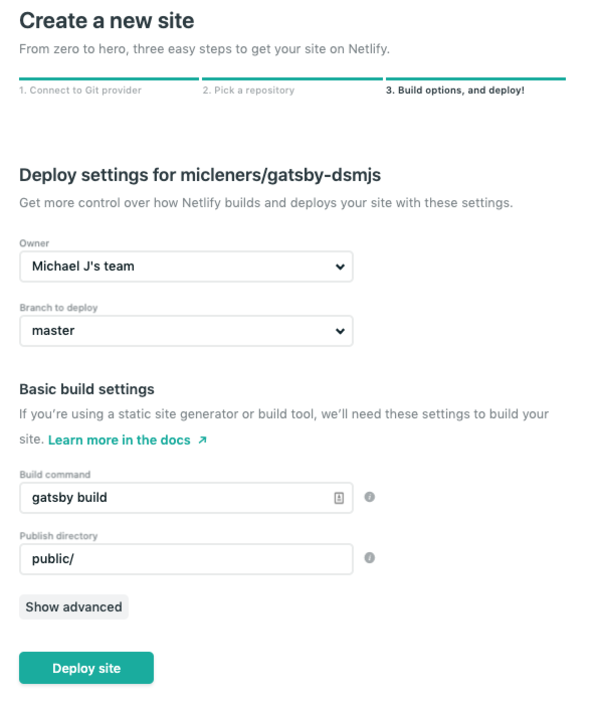
- During the setup, you can choose to either allow all sites to be deployed, or just some. If you choose only some, make sure you add the repo you pushed
gatsby-contentfulto your deploy list - Select the repo that you pushed your work to and click deploy with the default settings
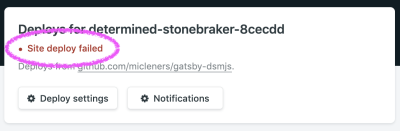
Oh, no! You'll notice that your deploy failed. Let's see why be clicking the Site deploy failed status and navigate to the deploy that failed.
Scroll through the log and you'll see a bunch of successes and then an error. With the output:
4:24:35 PM: Problems with gatsby-source-contentful plugin options:
4:24:35 PM: spaceId: undefined - "spaceId" is required
4:24:35 PM: accessToken: undefined - "accessToken" is required
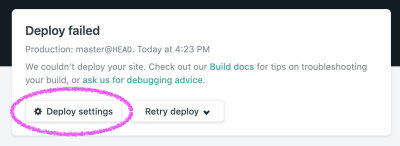
Our gatsby-source-contentful plugin failed to initiate correctly because we didn't include our environment variables. Luckily, Netlify provides an easy way to plug these in.
- Scroll up to the top and click the
Deploy settingsbutton
- Click on environment in the left hand menu
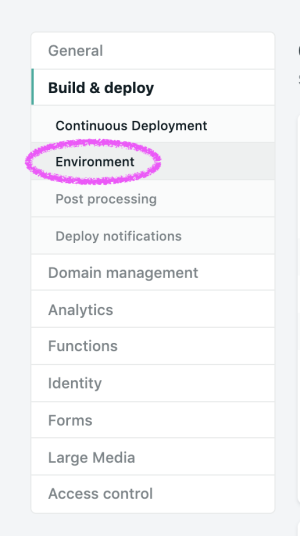
- Click edit variables
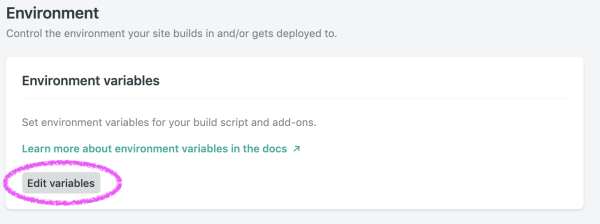
- Then enter your tokens the same as key and values as you did in your
.env.developmentfile:
Scroll up to the top navigation menu item named Deploys. Then in the middle where your deploys are listed drop down Trigger deploy and select Deploy Site.
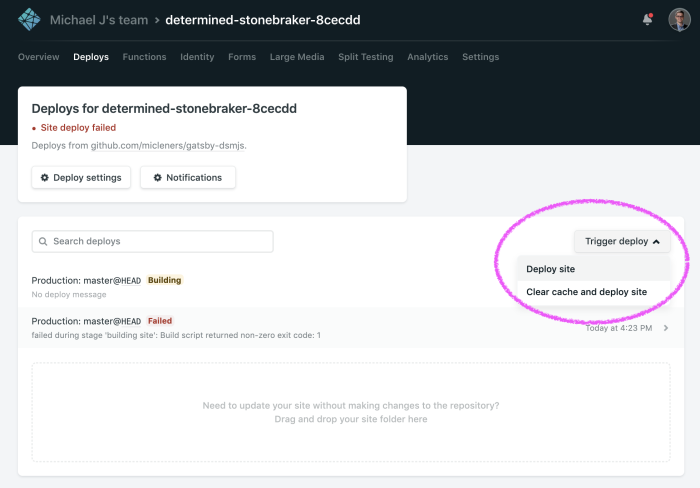
Congratulations, your site should have successfully deployed! Go ahead and visit the URL it provides you to check it out. Then go to the general settings and change the site name to something a bit more on point than the randomly generated one.
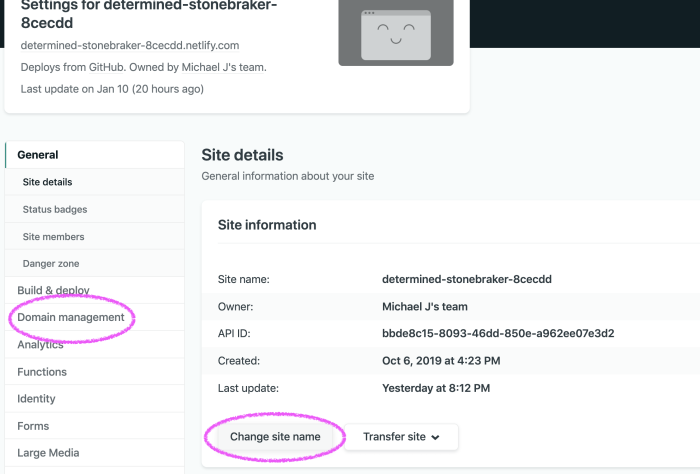
You'll also notice the Domain management option. Feel free to hook up your custom domain to your Netlify site. This means my-custom-url.com --> my-custom-url.netlify.com so that users will navigate to your URL, instead of netlify. For example, the presentation for this blog connects gatsby-intro.micleners.com to gallant-shaw-8bc321.netlify.com.
We can create a hook to trigger our website to build every time we publish new data. In the Deploy settings again (under Build & deploy) find the section labeled Build hooks
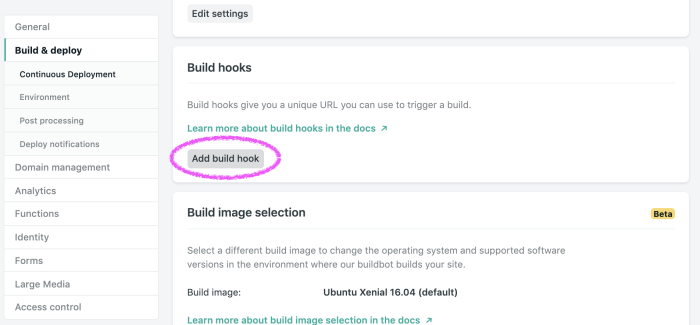
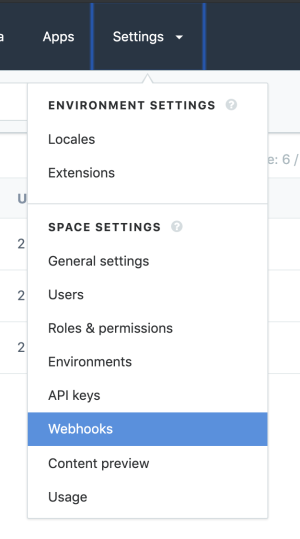
Create a new webhook. I'm calling mine Contentful. Then navigate to your Contentful space and under Settings, go down to Webhooks
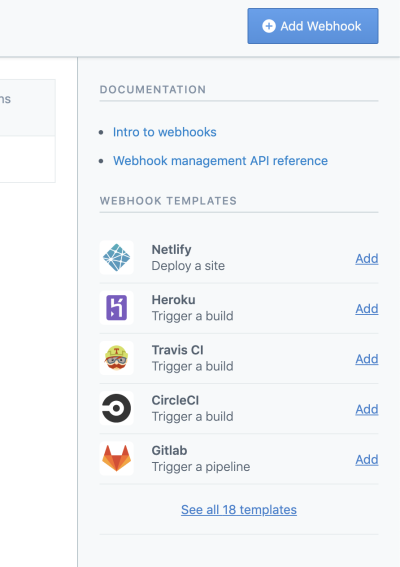
You'll notice on the right there are already pre-built options including one for Netlify. Click Add by Netlify and paste in the URL
#Congratulations 🎉 You have created, built and deployed your gatsby site to the internet :) Feel free to explore the features of Netlify, customize your site, or continue generating content!
Credit: This was inspired by this ITNEXT Blog