How to integrate Vue.js into an existing ASP.Net MVC (not Core!) application (including development integration)
Imagine one has an existing ASP.NET MVC project and wants to add some Vue.js components to it. One would like to keep the sources for the MVC and the Vue.js parts in a single solution and of course get the MVC application updated after some change in the Vue.js components occurs without manual copy of files between the solution folders.
I will show a working solution for a simple straightforward setup (with almost no constraints).
We will start with an empty Asp.Net MVC Project. Then we will add only one trivial controller/action/view. Simultaneously we will setup a new Vue.js project and add it to the same Visual Studio solution. We will use the Vue.js CLI for that and we will build a multipage project (multiple entry points) - with two different pages (components). At the end we will integrate this 2 Vue.js components into the MVC view we created at the start.
At the time of writing I have Visual Studio Professional 2017/ Version 15.9.11 with .NET 4.7 and Vue.js CLI 3.7.0 and Vue.js 2.6.10.


Then we add MVC 5 Controller - Empty to the Controllers folder. We name it HomeController and leave the generated code as it is:
using System;
using System.Collections.Generic;
using System.Linq;
using System.Web;
using System.Web.Mvc;

namespace MVC_Vuejs.Controllers
{
    public class HomeController : Controller
    {
        // GET: Home
        public ActionResult Index()
        {
            return View();
        }
    }
}
The reason behind the name HomeController is that this is the name of the Default route in the RouteConfig.cs. So in this way the Index action will be automatically executed when the website is opened in the browser without further configuration.
Further we define the view for the Index action. Just right-click inside the Index() method and select Add View ...:

We will keep the view simple:
<!DOCTYPE html>

<html>
<head>
    <meta name="viewport" content="width=device-width" />
    <title>ASP.NET MVC  and Vue.js Integration</title>
</head>
<body>
    <h1>ASP.NET MVC  and Vue.js Integration</h1>
</body>
</html>
And so we are ready on the ASP.NET MVC part:

Here I assume you have Vue.js and Vue.js CLI already installed.
Open the command line and navigate to the <<solution/project>> folder (... MVC_Vuejs/MVC_Vuejs). We would like to have the Vue.js project inside it. It's name would be vuejs_src. So we create the Vue.js project there using the Vue.js CLI:
vue create vuejs_src

I would select the defaults here, but you may configure the Vue.js project as you need it and then:
- run on the command line
cd vuejs_src - run
npm run serve - the result should be something like:
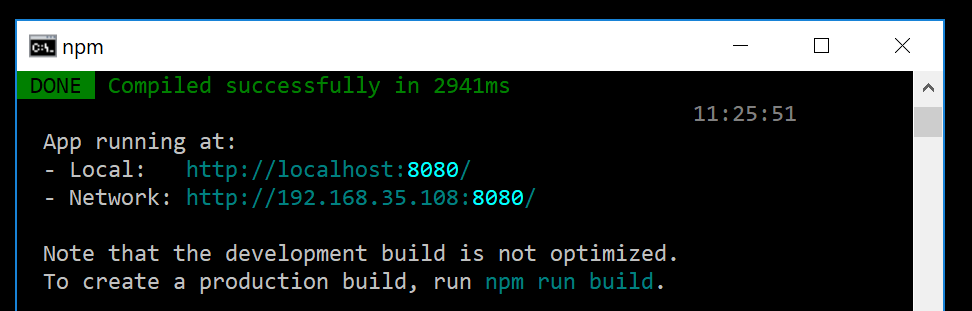

Now if you navigate to http://localhost:8080/ you should be able to see the Vue.js default Hello World page.
Good to notice is that the Vue.js project comes with all kinds of extras like .gitignore file. So it is ready to be included in the Visual Studio solution. There you should click on the Show All Files button (in the toolbar on the Solution Explorer).
WARNING: When adding the vuejs_src folder to the project DO NOT RIGHT-CLICK on the
vuejs_srcfolder ->Include In Project! - there is a bug ot something and Visual Studio freezes. Maybe because of the size of thenode_modulesfolder.
We do not need to include the node_modules folder into the solution anyways, so just right-click any file or subfolder in vuejs_src other than node_modules and select Include In Project. (at the time of writing they are only 7 so it is not a big deal)
So now we have the Vue.js project integrated into our ASP.NET MVC solution. Next we create some Vuejs components there and use them from the ASP.NET MVC view we created earlier.
When developing Vue.js projects I prefer to use Visual Studio Code (instead of Visual Studio alone). There is no problem to do so in the workflow described here. In your file explorer you just right-click on the vuejs_src folder and select
Open with Code. From then on you can work with both editors. Normally I work in Visual Studio for ASP.NET MVC controllers/views and C# code and in Visual Studio Code for Vue.js/Javascript code.
So imagine now we have an existing ASP.NET MVC project and we would like to add some nice new Vue.js components into it. We will develop these new components inside the vuejs_src project and put them ready for use to the ASP.NET MVC project.
So here particularly we will create two extremely simple Vue.js components named Feature1 and Feature2. We will configure the Vue.js project to build multiple components (*.js files) to a dedicated solution vuejs folder. From there on the ASP.NET MVC view files (or any html files from the solution) will be able to reference and use these Vue.js components.
As you surely know Vue.js has development and production mode. We would like to keep using these and furthermore we would like to be able to build development versions of our Vue.js components so we can use the Vue.js developer tools in the browser while we are running the components in the ASP.NET MVC views. So we have 3 modes:
- Vue.js development mode (this is the Vue.js CLI local development server with hot reload) - here we do not use the ASP.NET MVC at all!
- Vue.js development components integrated into the ASP.NET MVC views
- Vue.js components in production mode integrated into the ASP.NET MVC views
These will be trivial components just showing a string. In the folder vuejs_src/src we create Feature1.vue:
// vuejs_src/src/Feature1.vue
<template>
  <p>
    Hello from Feature 1
  </p>
</template>

<script>
</script>

<style>
</style>
And similarly the Feature2.vue.
After that we create 2 Javascript files which load the Feature1.vue and Feature2.vue. In the folder vuejs_src/src we create f1.js:
// vuejs_src/src/f1.js
import Vue from 'vue'
import F1 from './Feature1.vue'

Vue.config.productionTip = false

new Vue({
  render: h => h(F1),
}).$mount('#f1App')
And similarly the f2.js (notice f1 -> f2 and #f1App -> #f2App).
In order to keep the example as simple as possible we may clear the default files created from Vue.js CLI template.
These are main.js, App.vue, the whole content of the components, assets and public folders.
We have just deleted one important file - the public/index.html. Vue.js uses it as template wenn building the project. So let's create templates that suit our needs:
<!-- public/featureTest1.html -->
<!DOCTYPE html>
<html lang="en">
  <head>
    <meta charset="utf-8">
    <meta http-equiv="X-UA-Compatible" content="IE=edge">
    <meta name="viewport" content="width=device-width,initial-scale=1.0">
    <title>Test Feature1</title>
  </head>
  <body>
    <noscript>
      <strong>We're sorry but vuejs_src doesn't work properly without JavaScript enabled. Please enable it to continue.</strong>
    </noscript>
    <div id="f1App"></div>
  </body>
</html>
Similarly we create featureTest2.html. Note that f1Appand f2App correspond to the mounting points of the Feature1 and Feature2 components.
We changed the name of the default template from index.html to featureTest[1/2].html so now we have to tell to Vue.js to use the new templates. For that we need configuration file - we create vuejs_src/vue.config.js:
//vuejs_src/vue.config.js
module.exports = {
    pages: {
        feature1: {
            entry: 'src/f1.js',
            template: 'public/featureTest1.html',
            filename: 'index.html',
            title: 'Feature 1',
            chunks: ['chunk-vendors', 'chunk-common', 'feature1']
        },
        feature2: {
            entry: 'src/f2.js',
            template: 'public/featureTest2.html',
            filename: 'index2.html',
            title: 'Feature 2',
            chunks: ['chunk-vendors', 'chunk-common', 'feature2']
        }
    }
}
So now if we run npm run serve and start web browser we will see:

Loading http://localhost:8080/index1.html gives the same result. If we want to check the Feature2 component we load http://localhost:8080/index2.html.
You can manipulate the filename options in the vue.config.js to get the Feature2 component loaded as default (index.html) or whatever other way you may want.
Setting up Mode 3 (or Integrate the Production Versions of Feature1 and Feature2 in ASP.NET MVC View)
First we have to add some options to the vue.config.js:
module.exports = {
    filenameHashing: false,
    productionSourceMap: false,
    outputDir: '../vuejs/',
    configureWebpack: {
        devtool: 'source-map',
        output: {
            filename: '[name].js'
        }
    },
    pages: {
        hanakoFeature1: {
            entry: 'src/hf1.js',
            template: 'public/hanako_feature.html',
            filename: 'index1.html',
            title: 'Hanako Feature 1',
            chunks: ['chunk-vendors', 'chunk-common', 'hanakoFeature1']
        },
        hanakoFeature2: {
            entry: 'src/hf2.js',
            template: 'public/hanako_feature.html',
            filename: 'index.html',
            title: 'Hanako Feature 2',
            chunks: ['chunk-vendors', 'chunk-common', 'hanakoFeature2']
        }
    }
}
Notes:
-
filenameHashing- currently Vue.js CLI cannot use thefilenameHashingfeature when the template is not theindex.html. On the other hand we want all things running automatically when integrating into an ASP.NET MVC view. If the hash changes on everyvuejs_srcproject build, one has to change thesrcparameter in the view on everyvuejs_srcbuild. At the moment I do not know if it is possible in Vue.js to use constant hashes and how to use hashes without theindex.htmltemplate. This would be a point for improvement. -
outputDir- this is the dedicated folder where the ready to useFeature1andFeature2components will be placed after thevuejs_srcproject build. After a successful build we can include this folder to the solution and also to the source control system.
If you do not specify the outputDir you will get everything in the vuejs_src/dist folder by default
So now let's build the components:
npm run build
If you go to the ../vuejs/ folder you will find feature1.js, feature2.js and the *.html files generated from the templates. Currently I do not know how/if one can suppress their creation. There is one more file created js/chunk-vendors.js. I do not know how to configure the Vue.js CLI to put this file along with the others and not under the js/ folder. Anyway it is not really big limitation.
Next we go to the ASP.NET MVC view file we created earlier and we add to it:
<!DOCTYPE html>

<html>
<head>
    <meta name="viewport" content="width=device-width" />
    <title>ASP.NET MVC  and Vue.js Integration</title>

    <link href="~/vuejs/feature1.js" rel=preload as=script>
    <link href="~/vuejs/feature2.js" rel=preload as=script>
    <link href="~/vuejs/js/chunk-vendors.js" rel=preload as=script>
</head>
<body>
    <h1>ASP.NET MVC  and Vue.js Integration</h1>

    <noscript><strong>We're sorry but vuejs_src doesn't work properly without JavaScript enabled. Please enable it to continue.</strong></noscript>

    <div id=f1App></div>
    <div id=f2App></div>

    <script src="~/vuejs/js/chunk-vendors.js"></script>
    <script src="~/vuejs/feature1.js"></script>
    <script src="~/vuejs/feature2.js"></script>

</body>
</html>
Now we can start the ASP.NET MVC application we created and voilà:

Note that if you want to debug the application in the browser using the Vue.js developer tools you won't be able to do so, because we builded the components in production mode.

So let's enable that in the next step.
Setting up Mode 2 (or Integrate the Developer Versions of Feature1 and Feature2 in ASP.NET MVC View)
We only have to create one additional build step to do so. To acheive it we add new build:dev command to our vuejs_src/package.json:
{
  "name": "vuejs_src",
  "version": "0.1.0",
  "private": true,
  "scripts": {
    "serve": "vue-cli-service serve",
    "build": "vue-cli-service build",
--> "build:dev": "vue-cli-service build src/f1.js src/f2.js --mode development",
    "lint": "vue-cli-service lint"
  },
  "dependencies": {
  ...
}
There is another small inconvenience here to fix. The result of this new command:
npm run build:dev
are only the feature1.js and feature2.js components (much bigger in size!). So we have to comment the lines in the ASP.NET MVC view file for the chunk-vendors.js - otherwise the browser will show 404 Not Found error. But after that you only have to reaload the page (Ctrl+F5) and there it is - the Vue.js developer tools work now perfectly:
