This is a platform where everyone can share, post, comment and like restaurants, cafes and bars in Lund/Sweden. Its purpose is to help users share their experiences, discuss their ideas, and choose a venue if they wish based on the comments they see.
The Live Site can be found here.
- About
- Table of Contents
- Unit Testing
- Testing :
- Validator Testing:
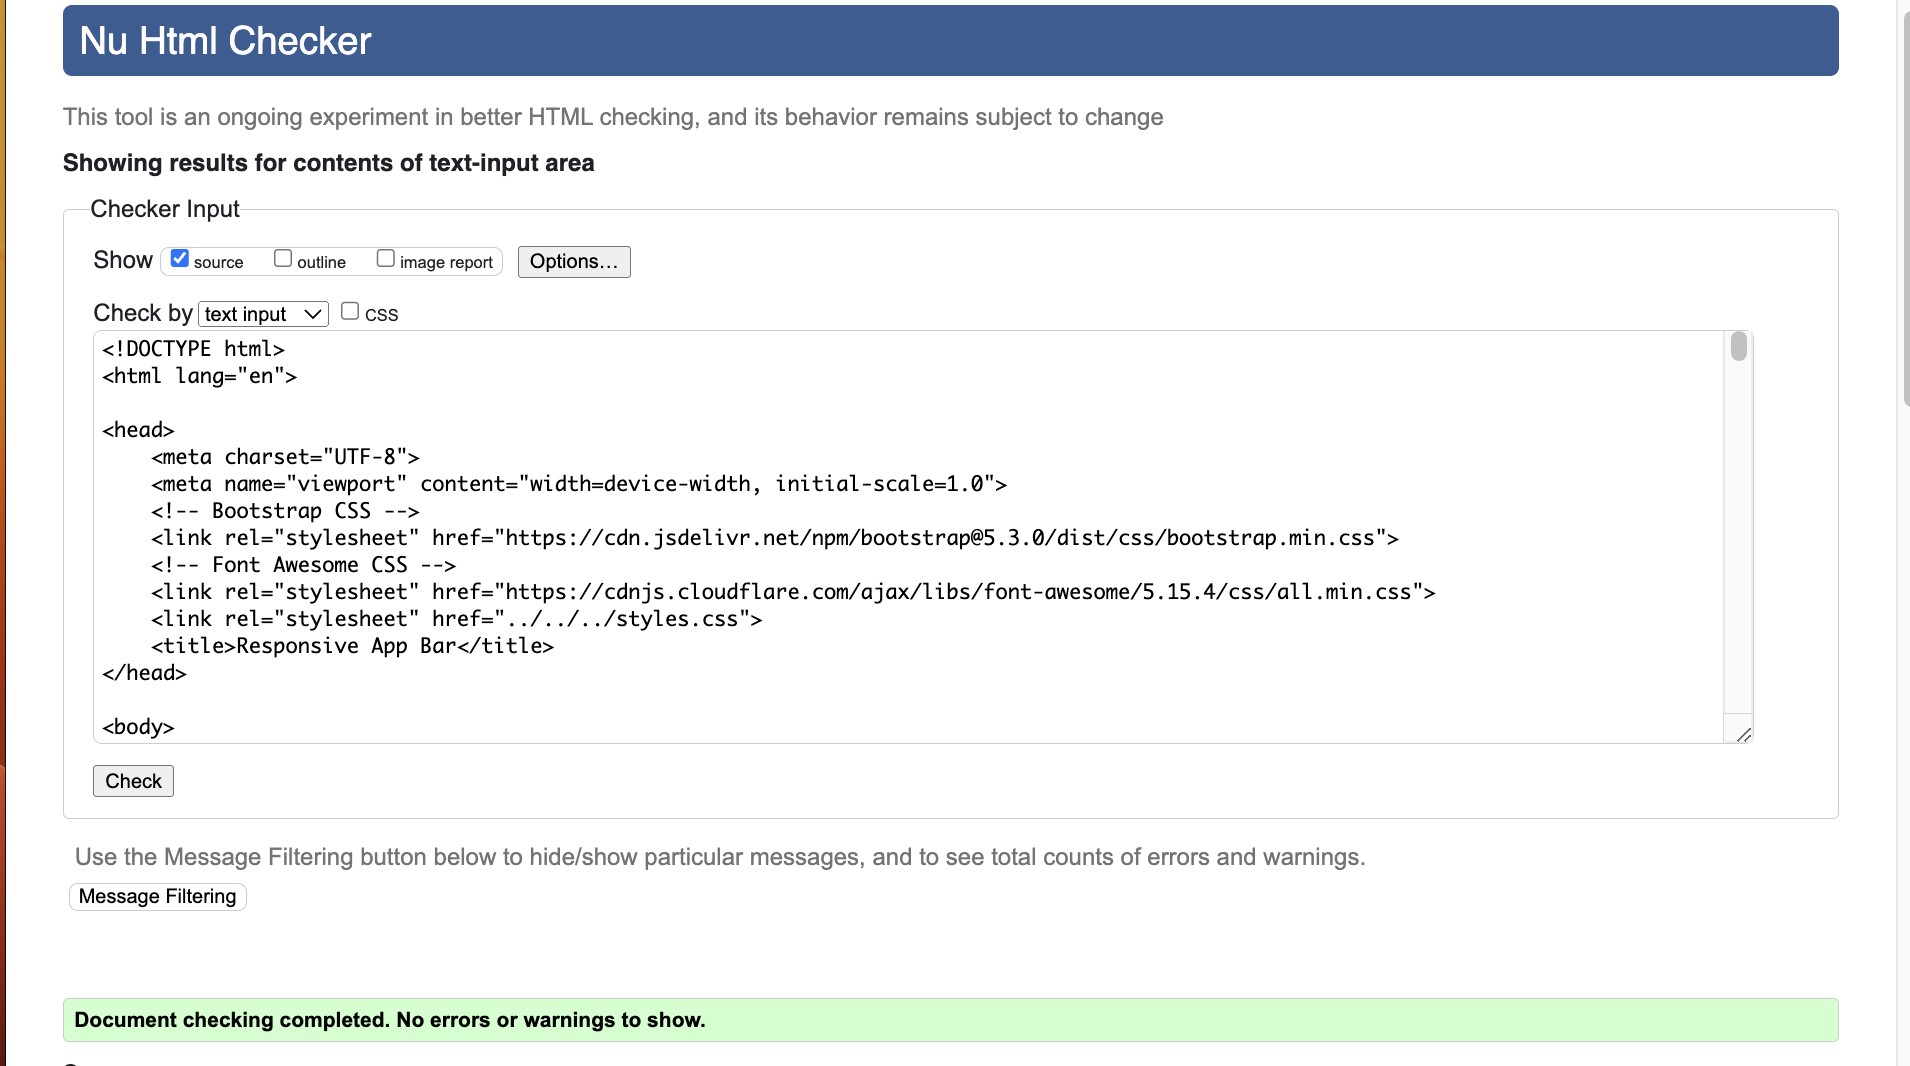
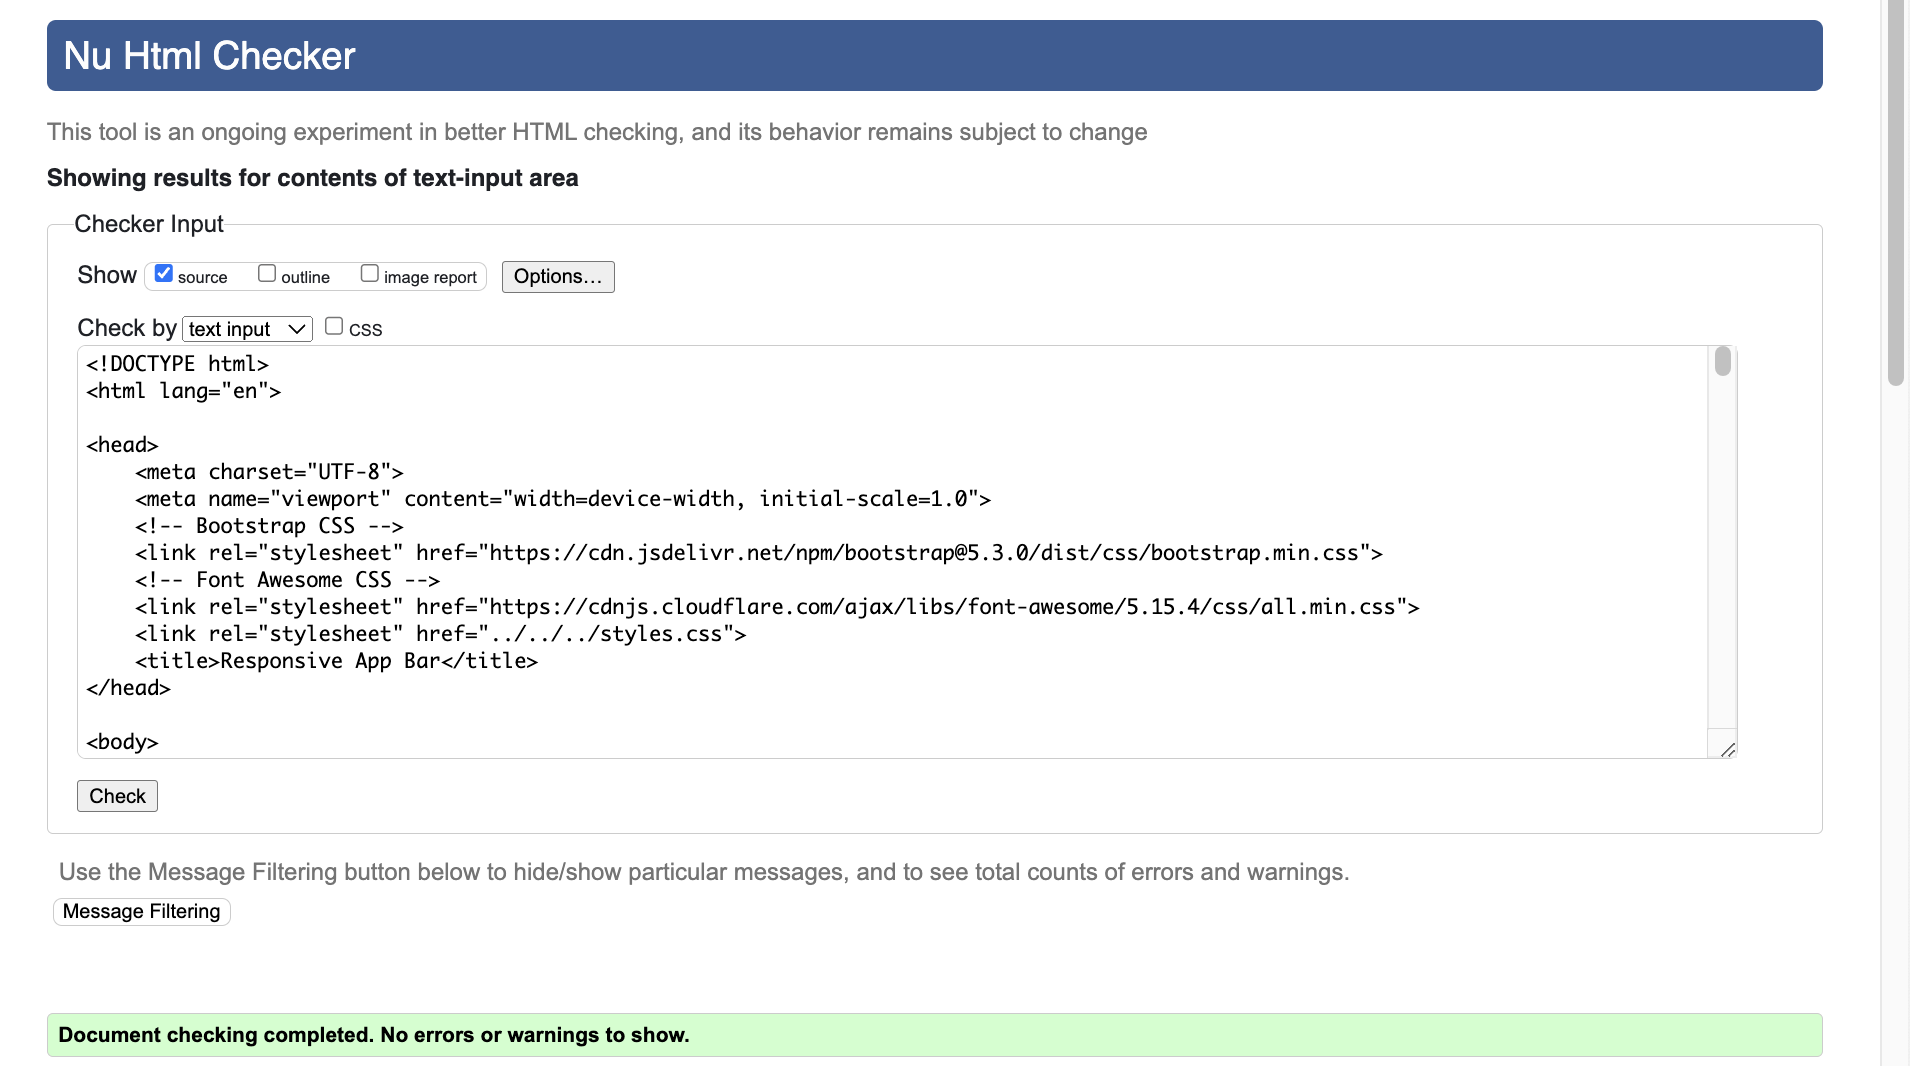
- W3C Markup Validation Service
- CSS Validation Results
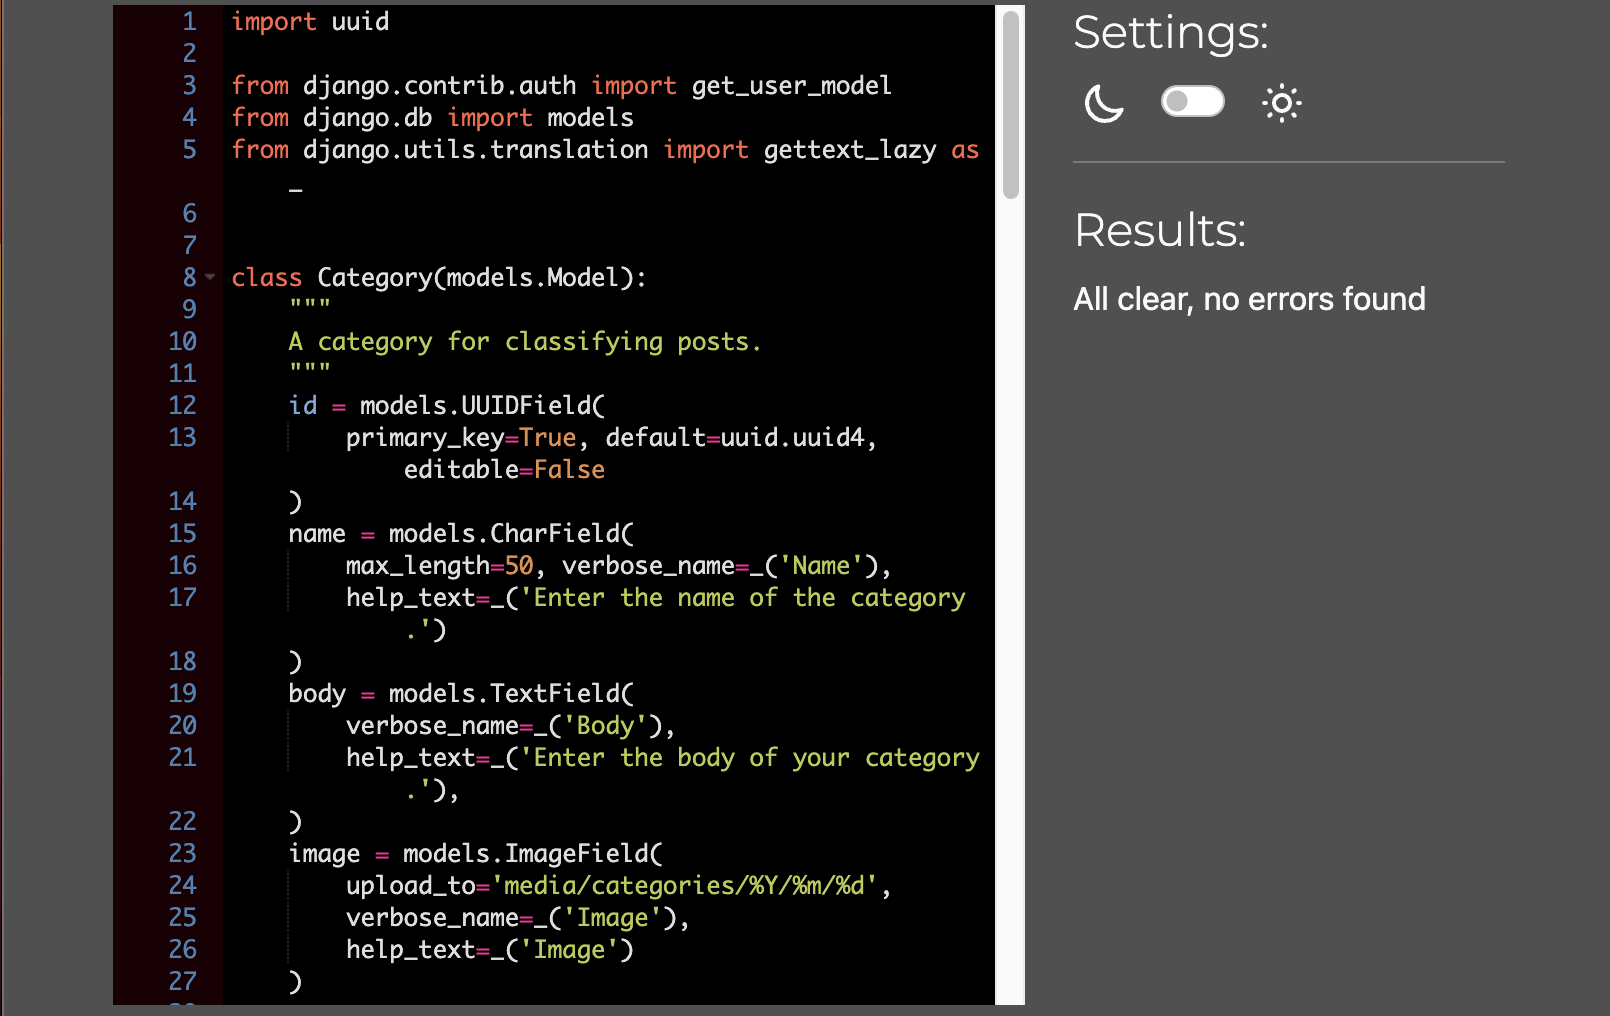
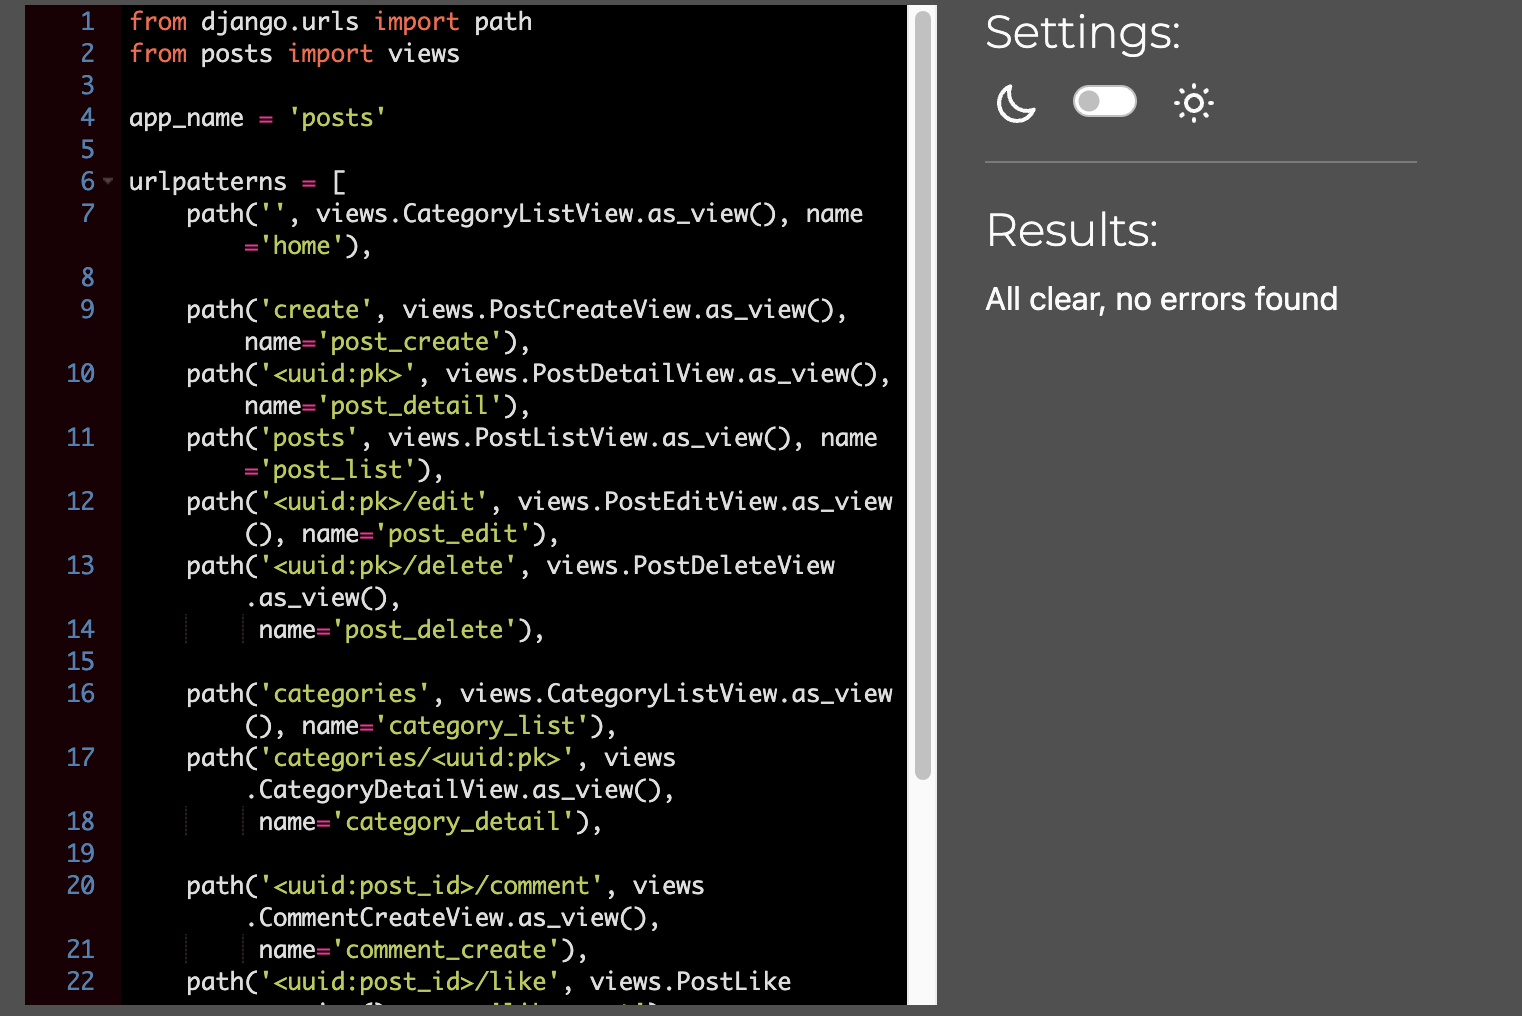
- PEP8 Python Validator
- BUGS
- User Story Testing
- Deployment
- Steps to Deployment:
- In the terminal
- In the setting.py
- In the terminal
- Step 2: Deploying an app to Heroku
- In settings.py
- In the terminal
- Get our static and media files stored on Amazon:
- In Visual Studio Code
- In Procfile
- In Terminal
- In Heroku
- How To Fork The Repository On GitHub
- Cloning And Setting Up This Project
- Credits
- Acknowledgements
I designed this platform with desgin thinking approach. With only the necessary content/information. User can surf the site easily and get the information they are looking for. Please find all my defined user stories here
- As a Site Admin I can approve or disapprove posts so that I can filter out objectionable posts.
- As a Site Admin I can create, read, update and delete posts so that I can manage my blog content.
- As a Site Admin I can approve posts before it is published so that the site content will be consistent.
- As the site admin, I can create or delete categories.
- As the site admin, I can define users as super users.
- As the site admin I can see the users and can delete or add new users if desired.
- As the site admin I can see the all comments from all users and if it is need I can delete it.

- As a Member User I can register an account so that I can manage my posts, comment and like.
- As a Member User I can post/add/edit/delete posts so that I can share and manage my posts.
- As a Member User I can like or unlike a post so that I can interact with the content.
- As a Member User I can leave comments on a post so that I can be involved in the conversation.
- As a Member User I can edit or delete my comment.
- As a Member User I can view my posts status of approval so that I can manage my posts.
- As a Site User I can view a list of posts so that I can select one to read.
- As a Site User I can click on a post so that I can read the full text.
- As a Site User I can view comments on an individual post so that I can read the conversation.
- As a Site User I can view the number of likes on each post so that I can see which is the most popular or viral.
- As a Site User I can register an account and login web site.
- Color Schema The following colors were used for the color scheme. In general, simple and eye-friendly colors were preferred, so that the user could focus more on the content and posts.
Coolorscolor palette.

Google Fonts These three fonts, Bitter, Lato and Roboto, were used on the site. Since the site is generally aimed to be simple, legible and simple font families were chosen.


- Navigation
The navigation bar is very clean and clear. Different menus appear for the site user depending on whether you are logged in or not.
-
Logout Menu Big Size

-
Logout Menu Small Size

-
Login Menu Small Size

-
Login Menu Big Size

-
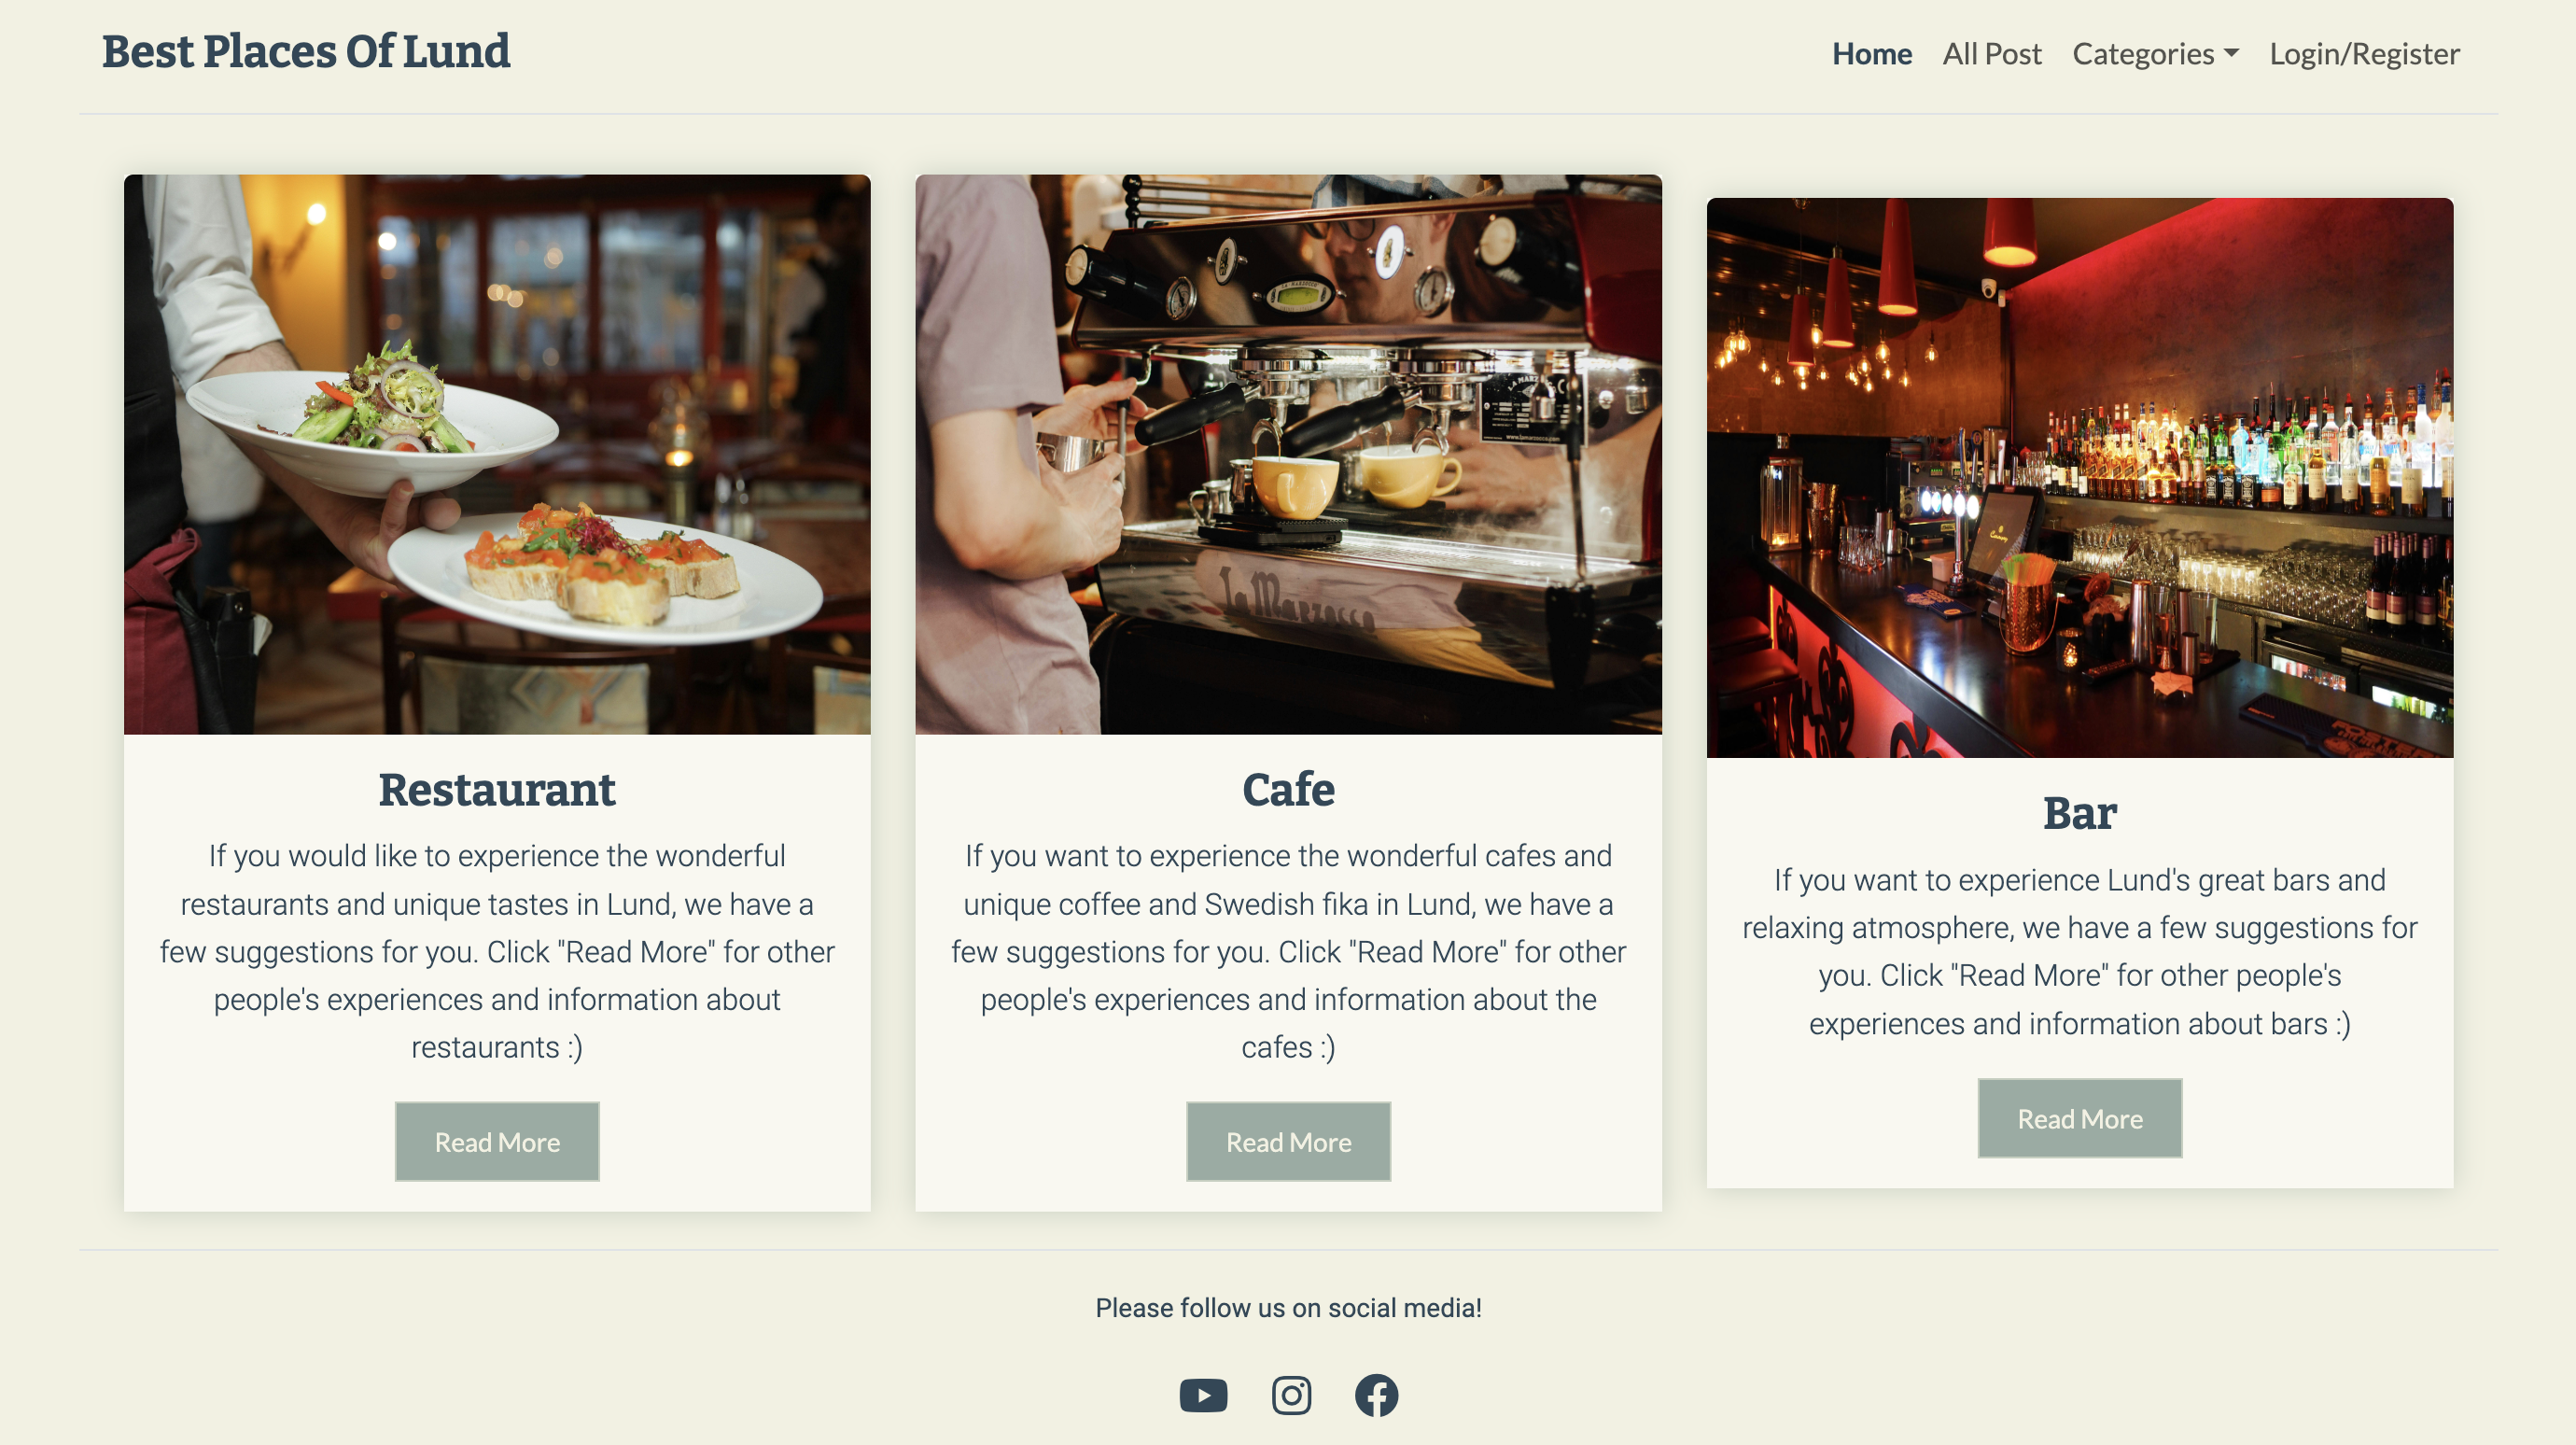
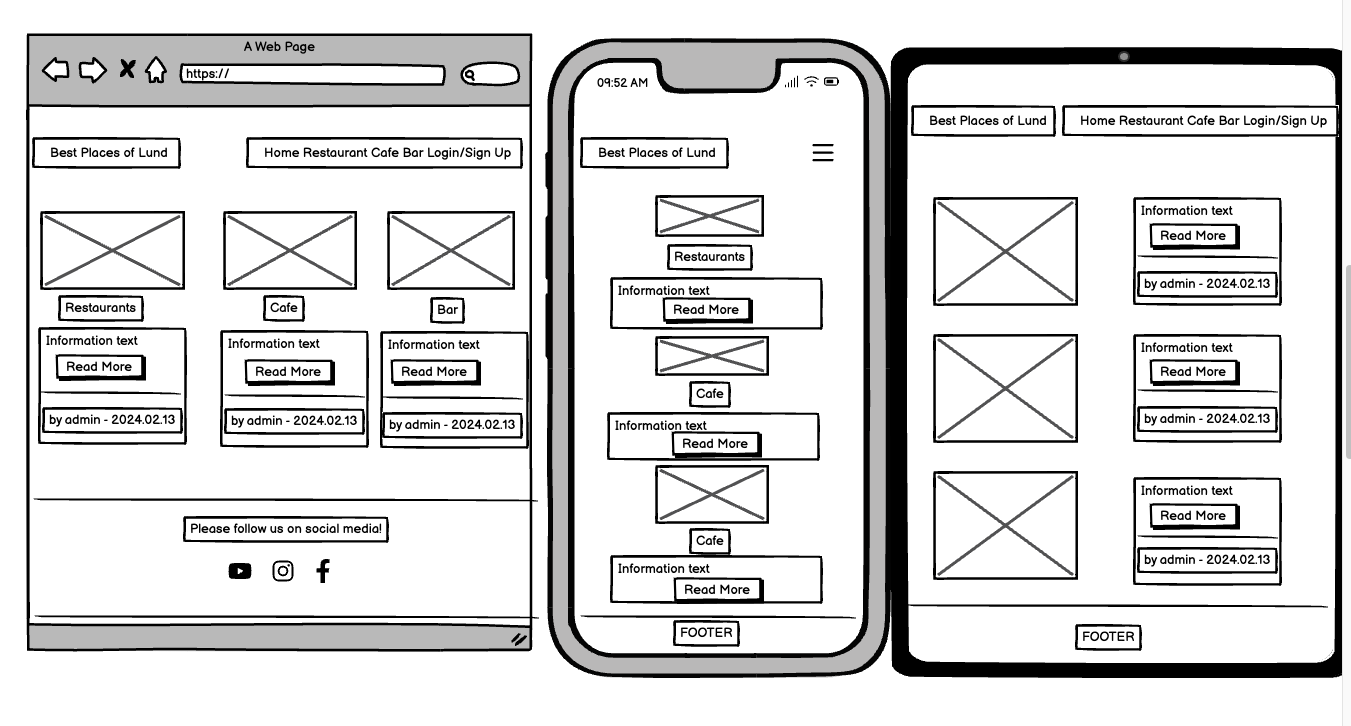
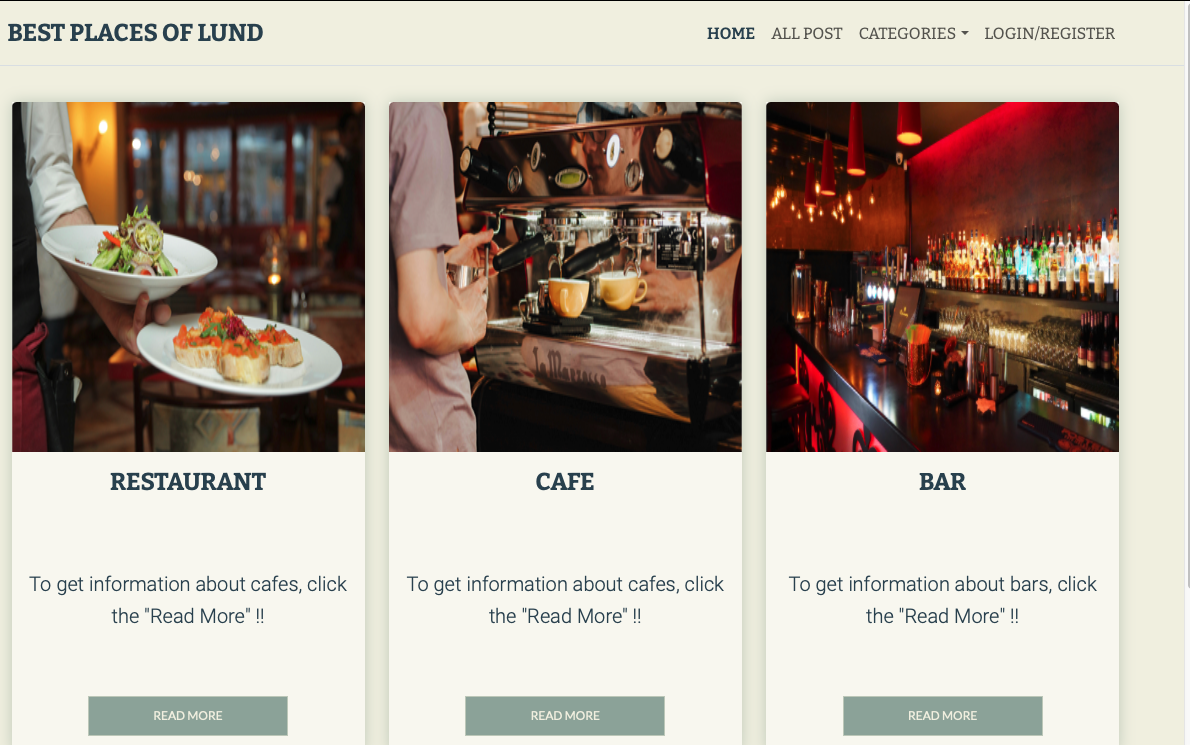
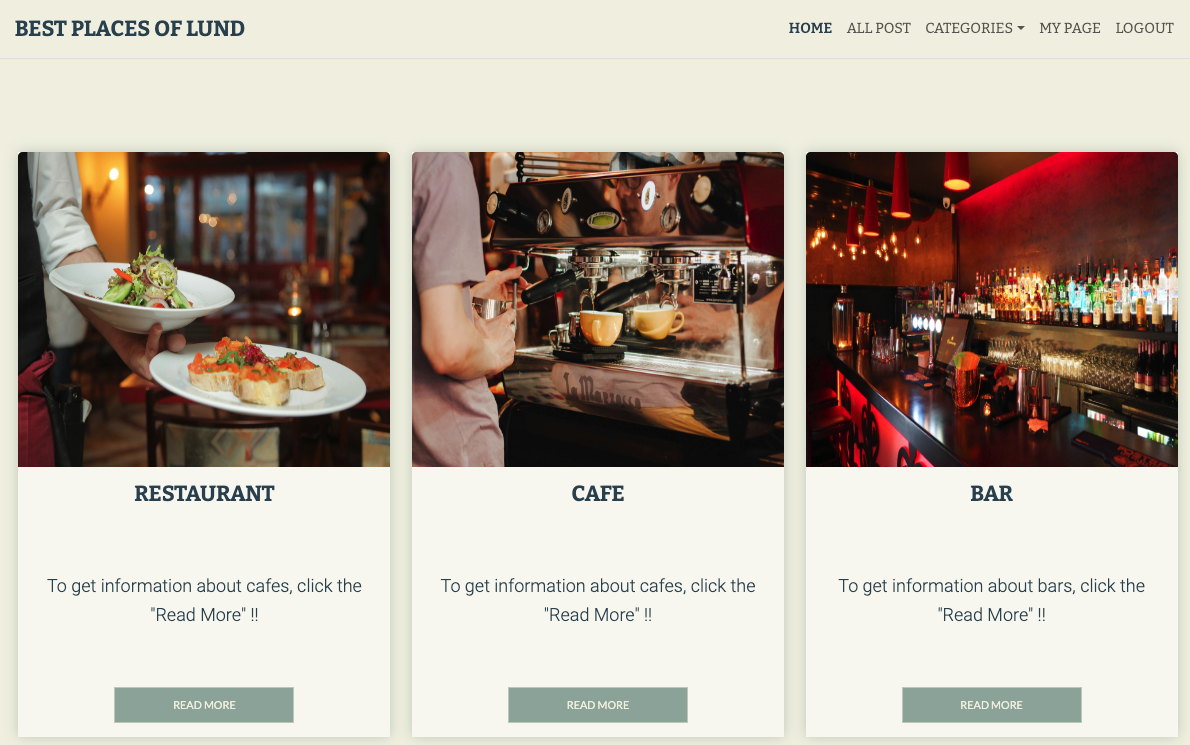
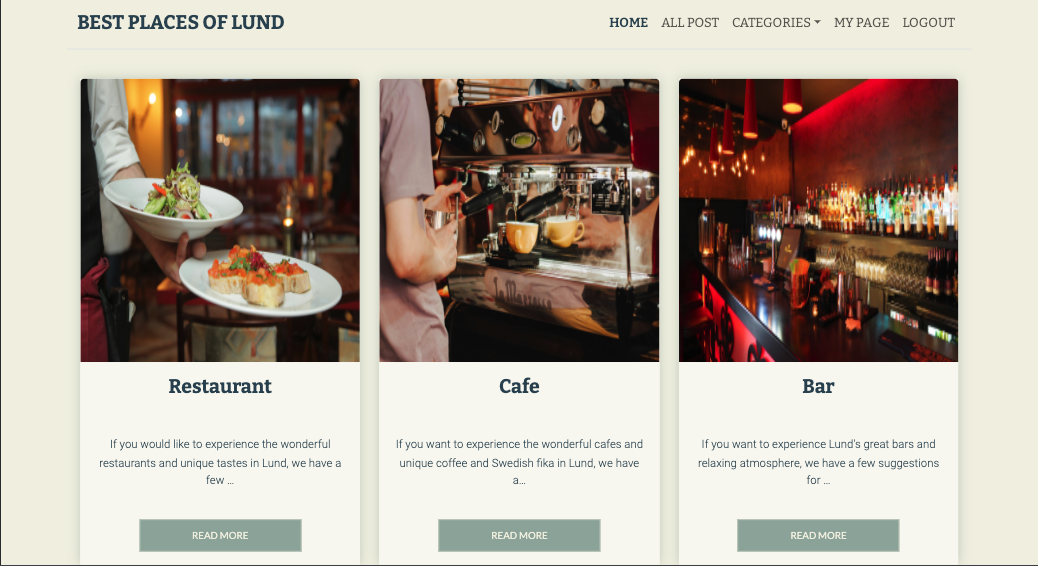
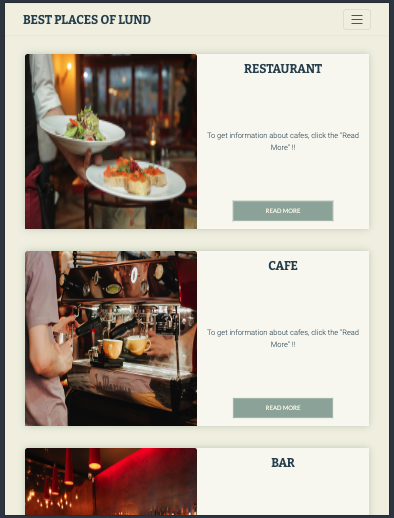
Home Page
- Three posts representing categories were shared on the home page, so that users could access short and clear information about the site, and were supported with visuals. If the user wishes, they can easily list the posts belonging to the relevant category by clicking the button below. A short and clear guidance has been added on the screen so that they can Login/Register and like comments.
-
When the visitor clicks on any category selected, it goes to the relevant category.
-
Anyone who visits the page, whether they are a user or not, can go directly to the category if they click on the "Read More" button on the category posts on the main page.

-
Visitor can create an account by clicking on login/register from the menu or from the button below.

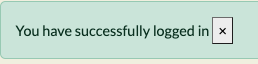
- After logging in, the user is notified with a message.
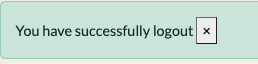
- After logging out, you will be greeted with the same message for logout.
- Edit comment alert
-
Delete comment alert
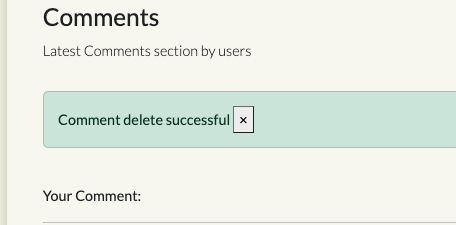
-
Delete comment confirm message


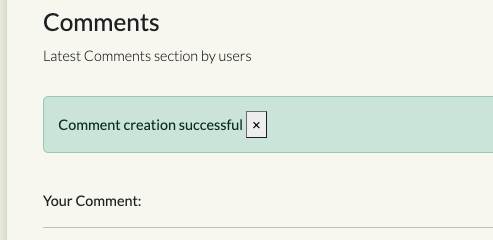
- Comment create alert message

- Register Success
- Post create success
- Post delete success
- Post edit success
In such cases, the user is also informed with alert messages.The user sees these warning messages for 5 seconds and then the messages disappear or the user can close them earlier by pressing the x sign.
-
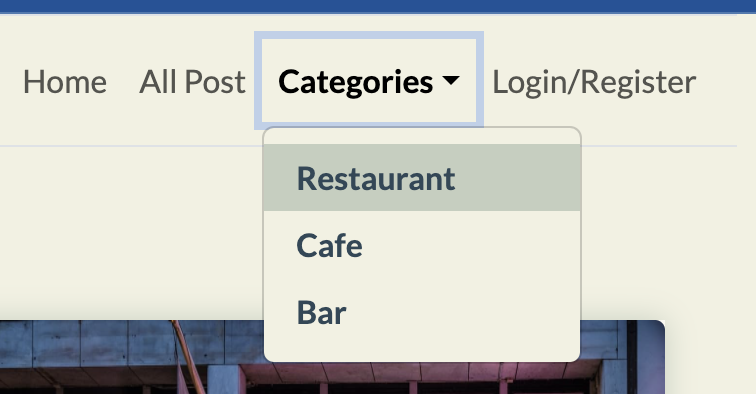
Categories
- When visitors click on the categories option in the menu, we encounter a dropdown menu and from there the visitors can select the option visitor wants and list the relevant posts.
-
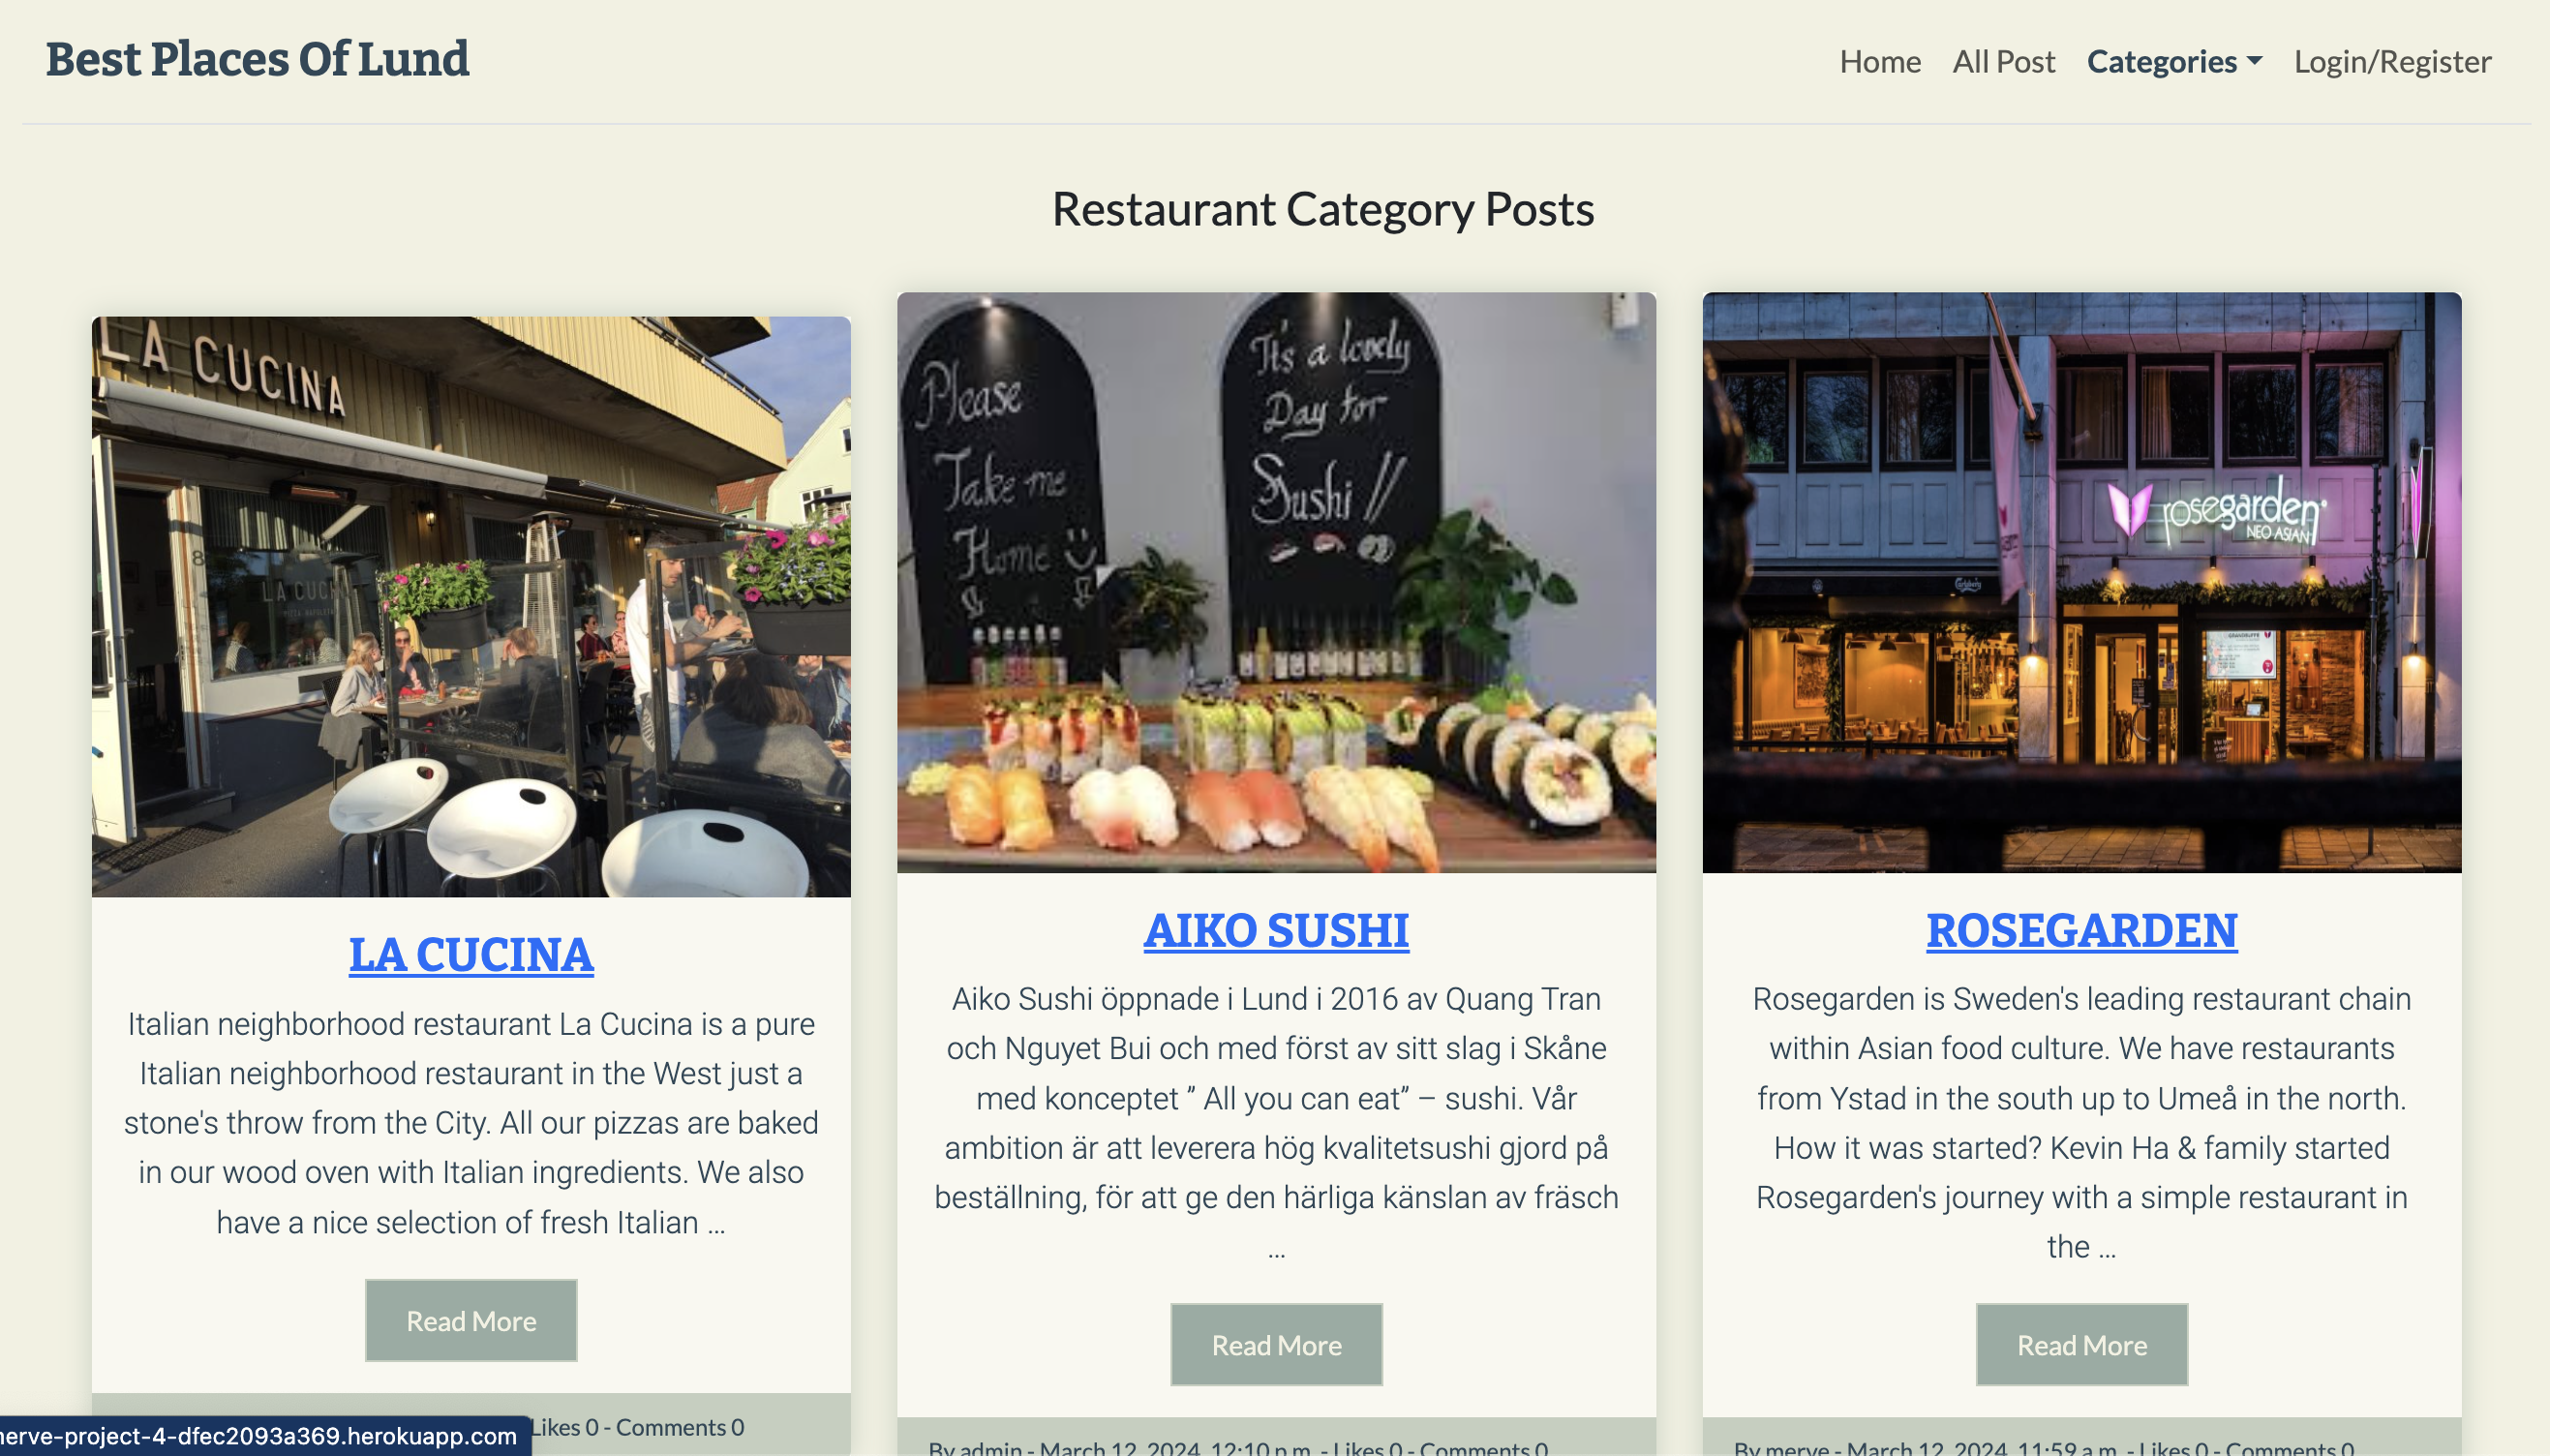
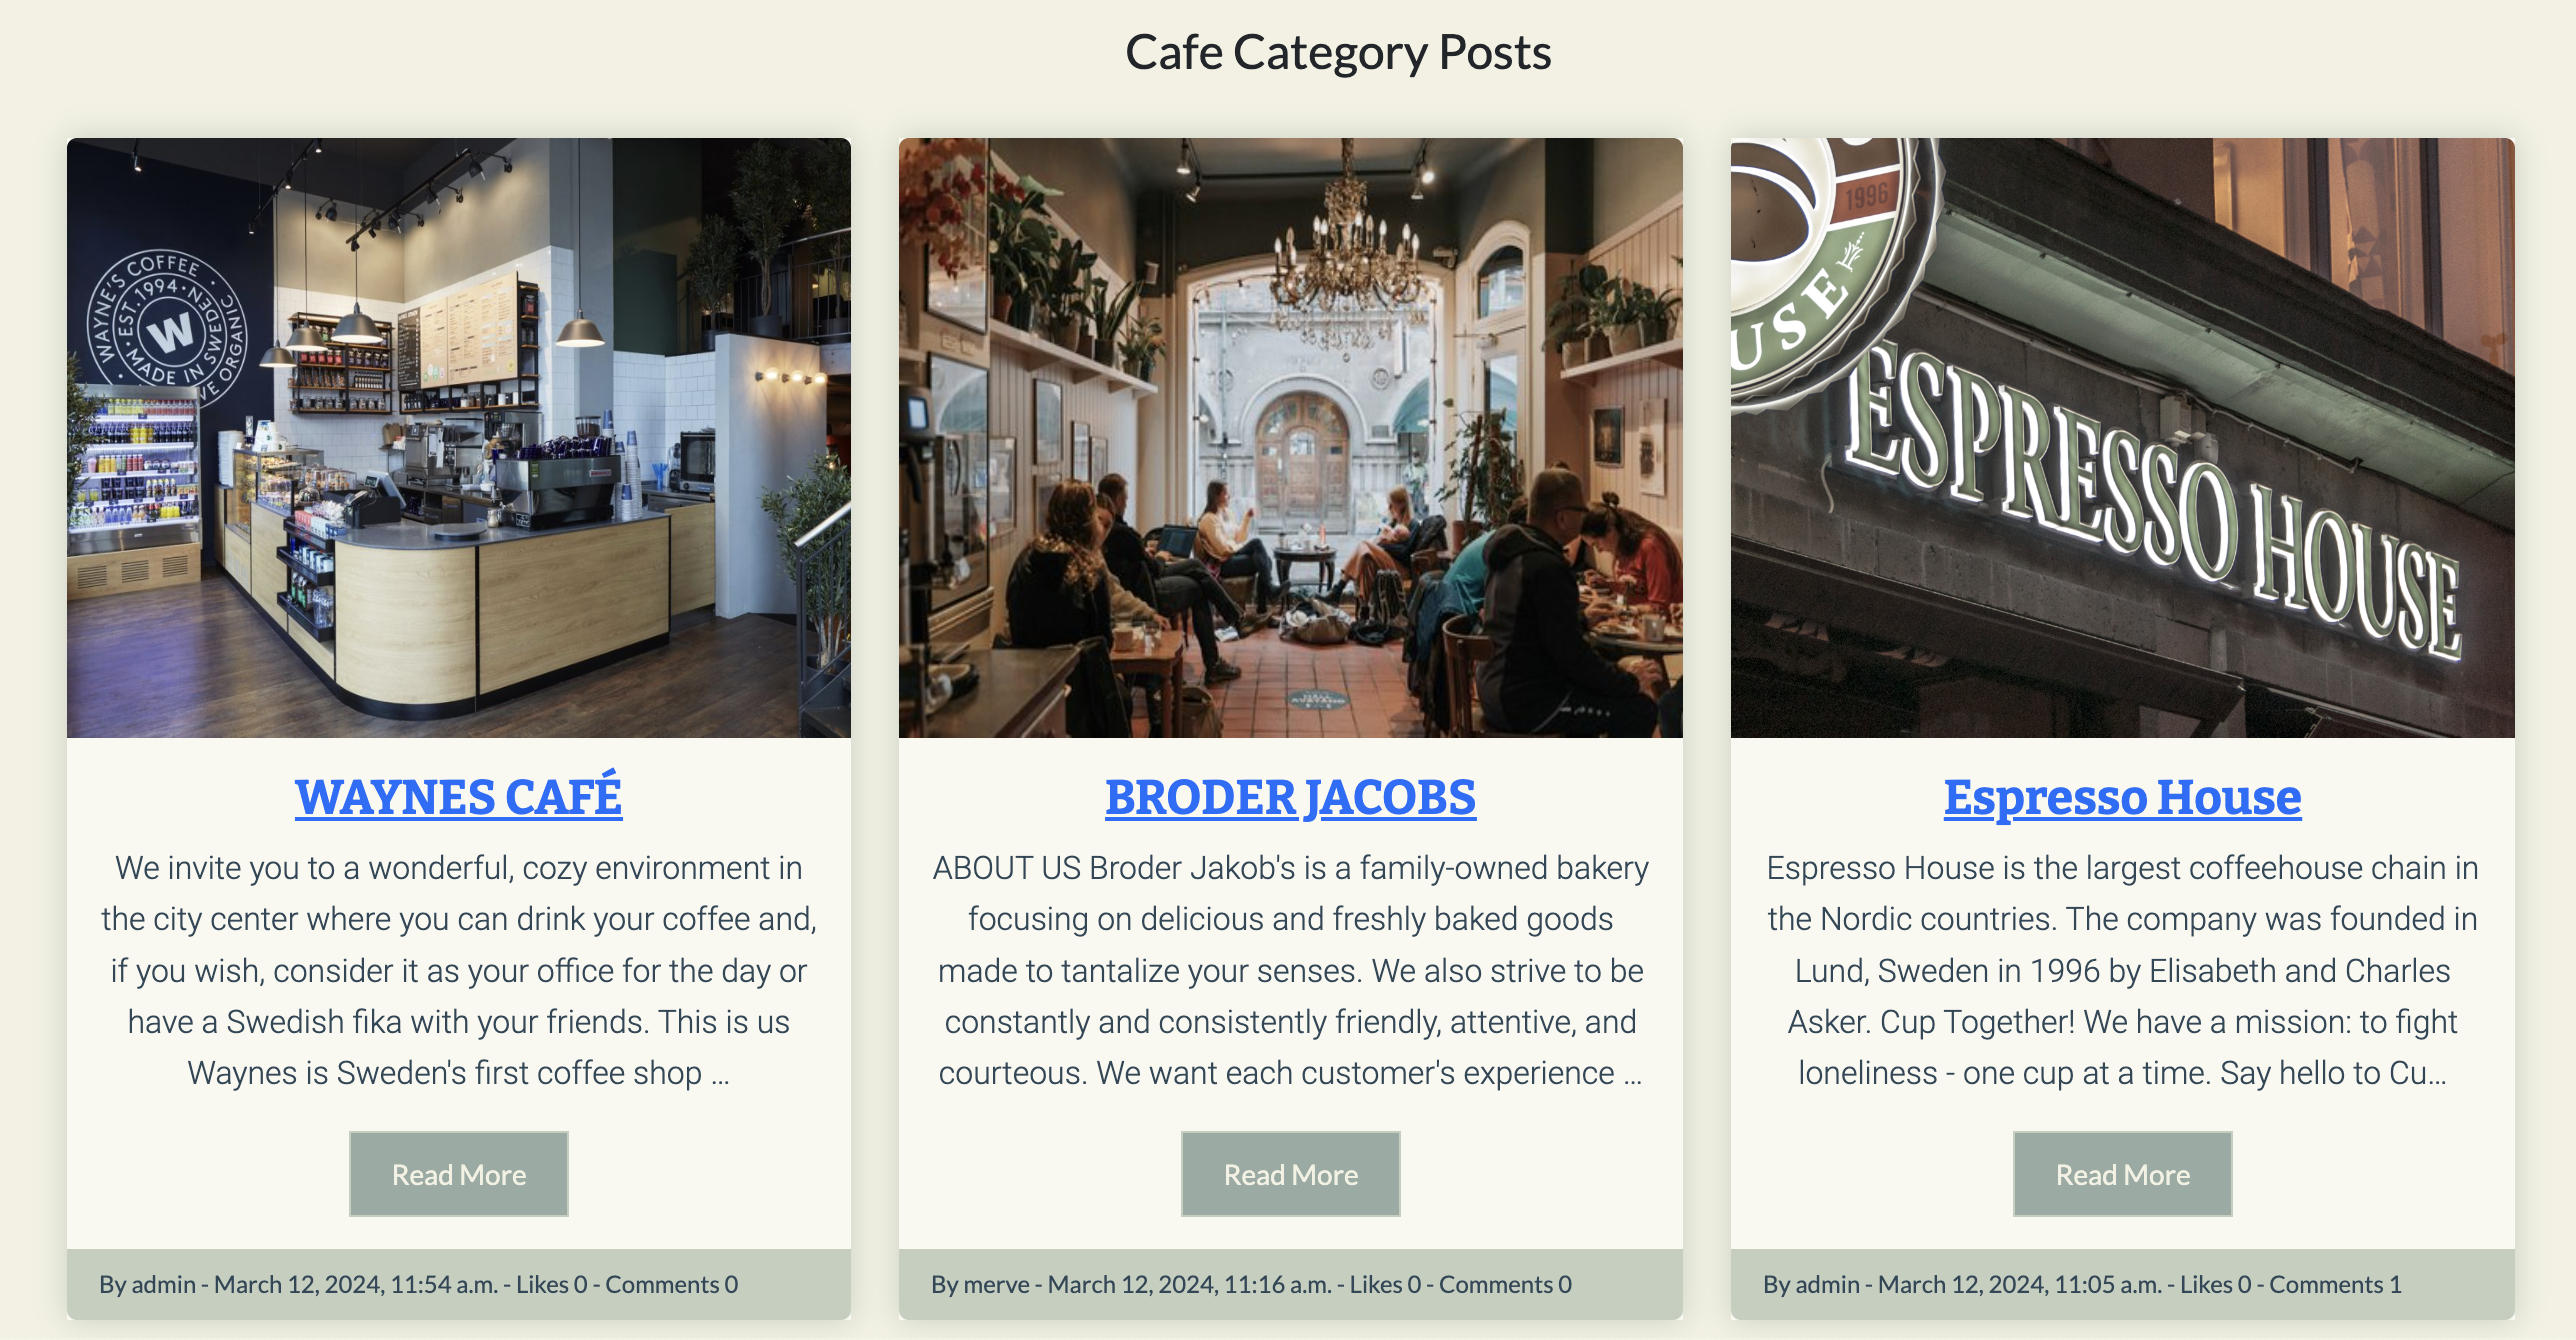
Restaurant/Cafe/Bar Page
- When the relevant category is selected, relevant posts are sorted.
- Restaurant Page
- Cafe Page
- Bar Page

-
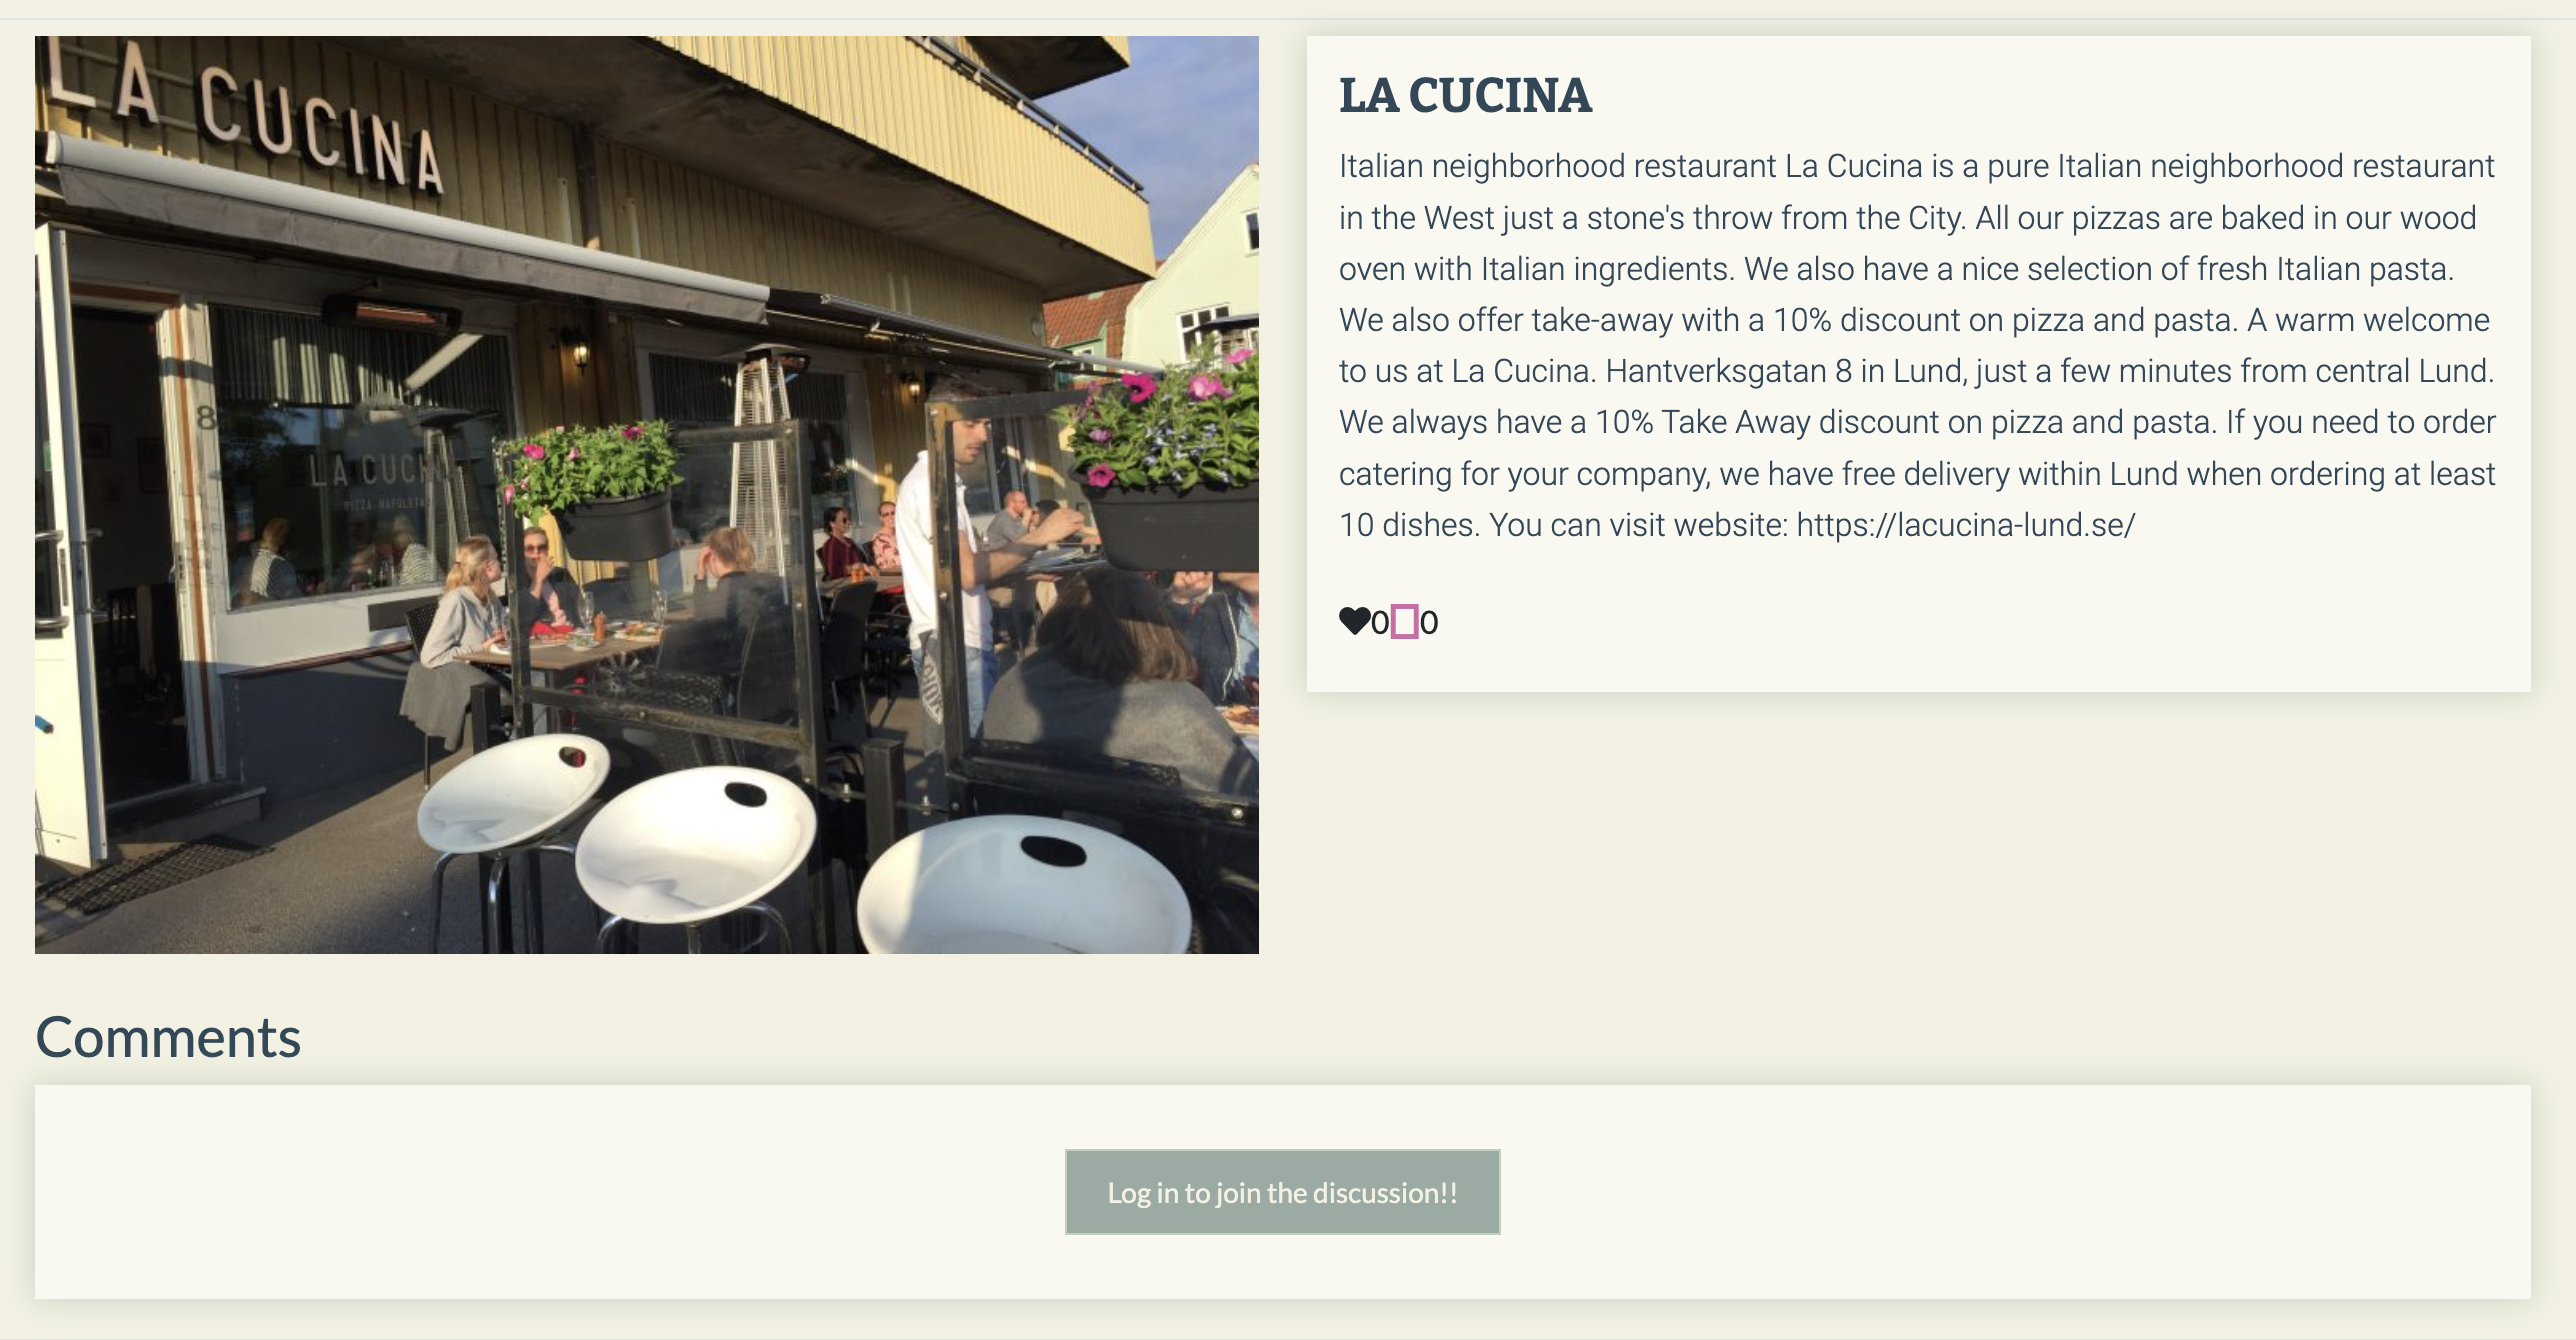
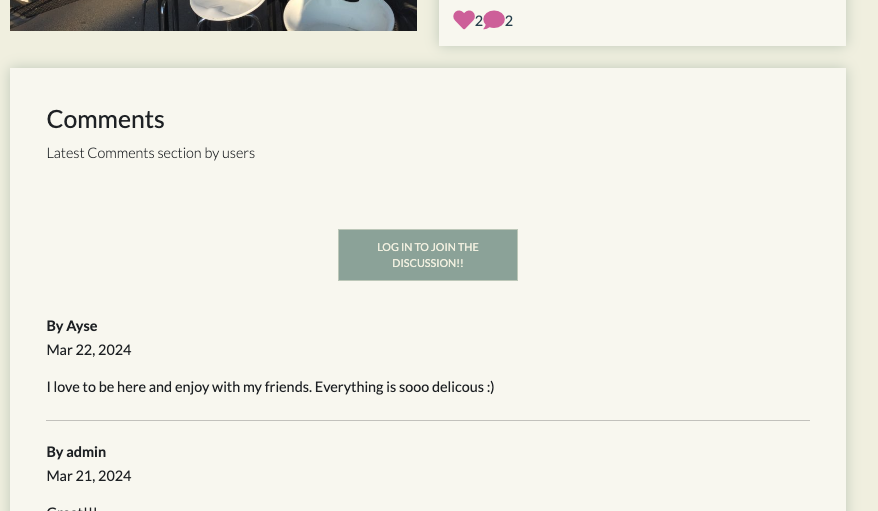
Post Detail Page
- When visitor click on one of the listed posts, it will be seen in detail. If the visitor wants to comment or like, visitor must log in or register.
- If you visit the post detail page without logging in, there is a button that directs you to the login page to log in or register to comment.
-
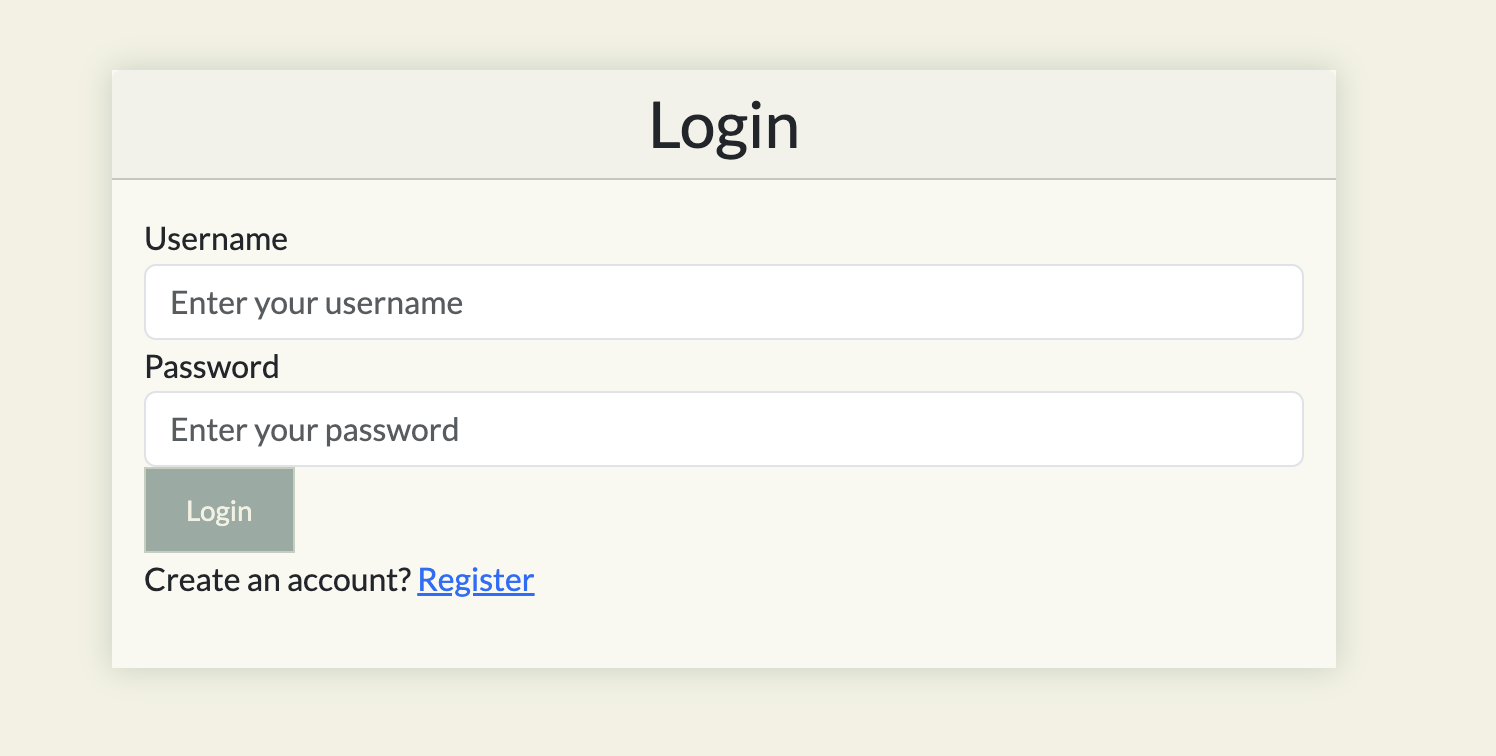
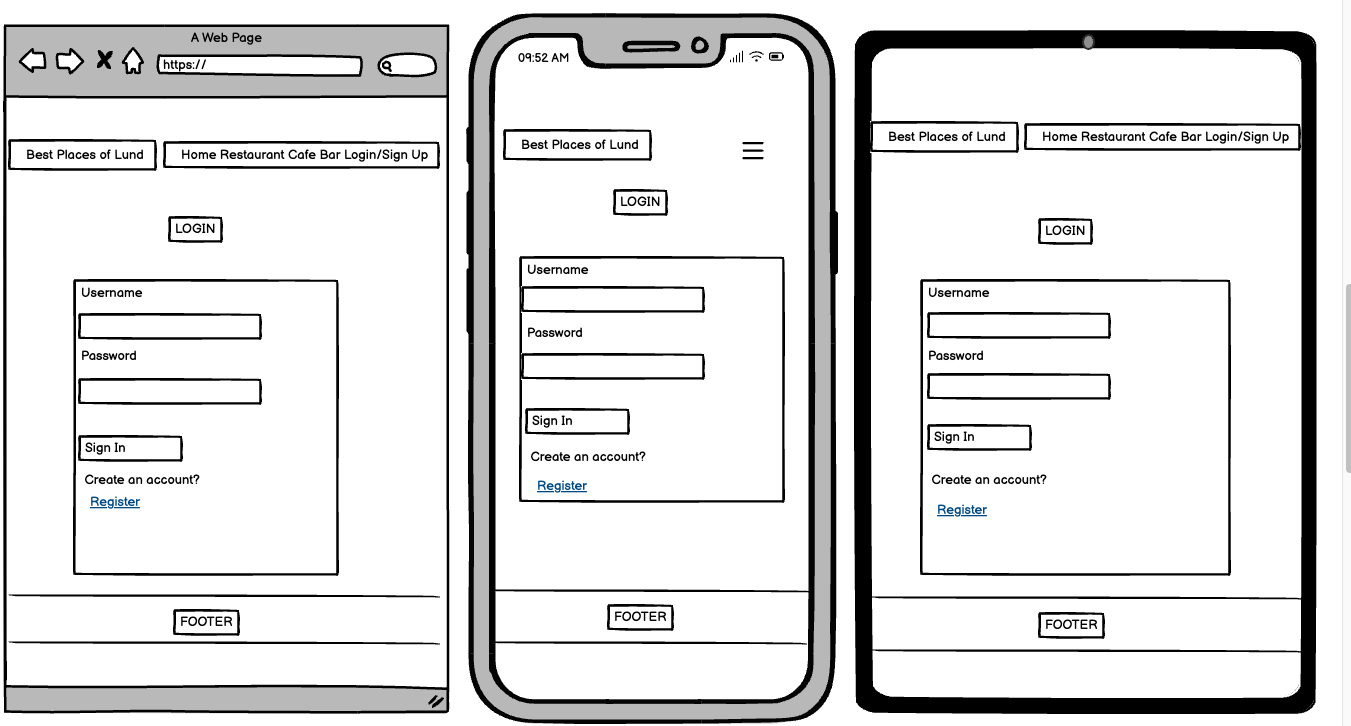
Login Page
- Visitor can login from the Login tab in the menu and comment, like or post can be shared.
-
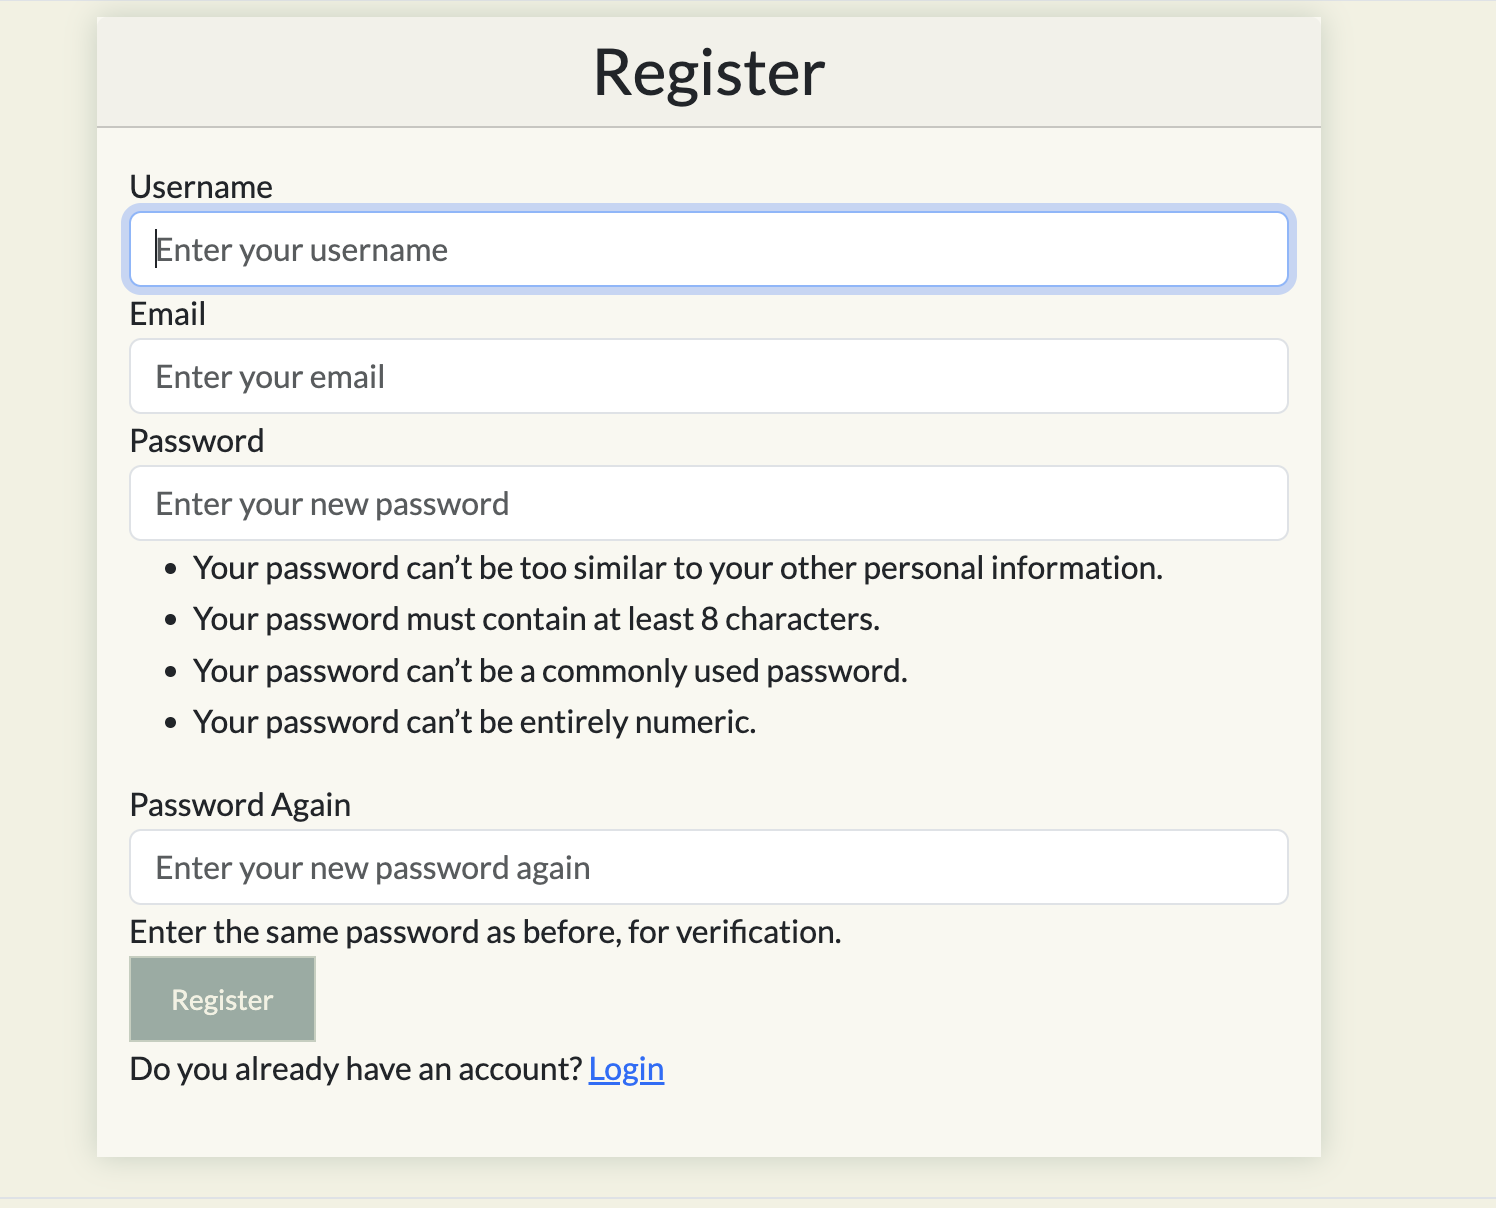
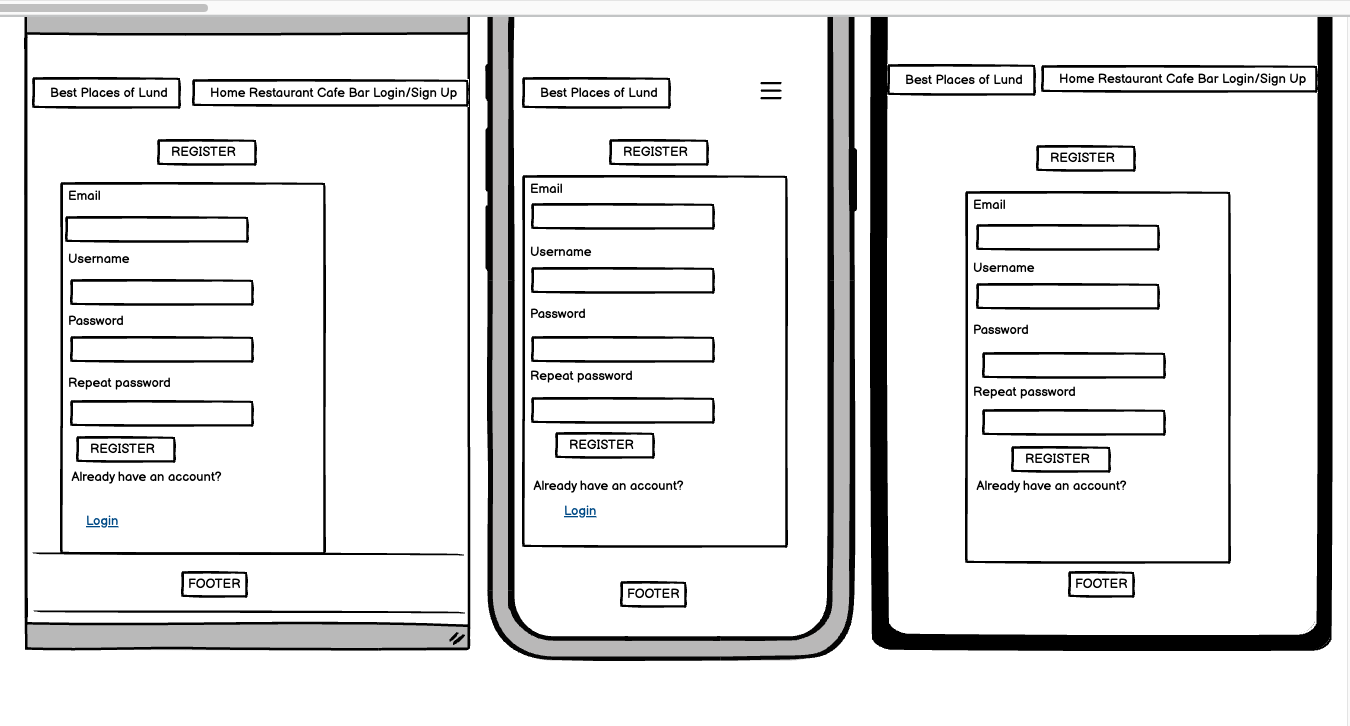
Register Page
- A new account can be created from the register tab in the menu and thus can log in and use user features.
-
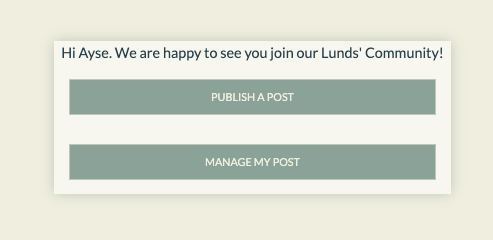
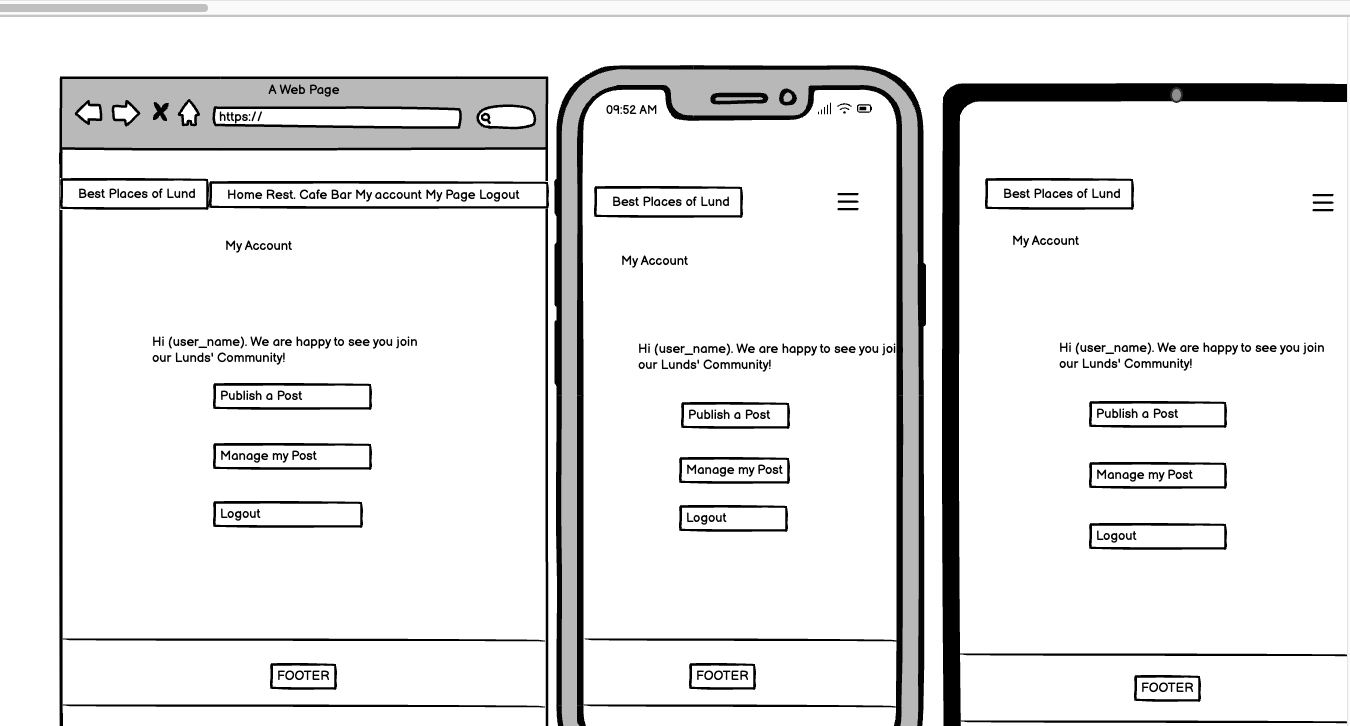
My Page
- On the My page, the user sees 3 buttons to navigate easily.
- User can share new posts, view own posts, and edit or delete them if user wishes when user click the manage my posts button. If user clicks on the title of own post, user can view own post in detail.
- User can log out using the logout button.
-
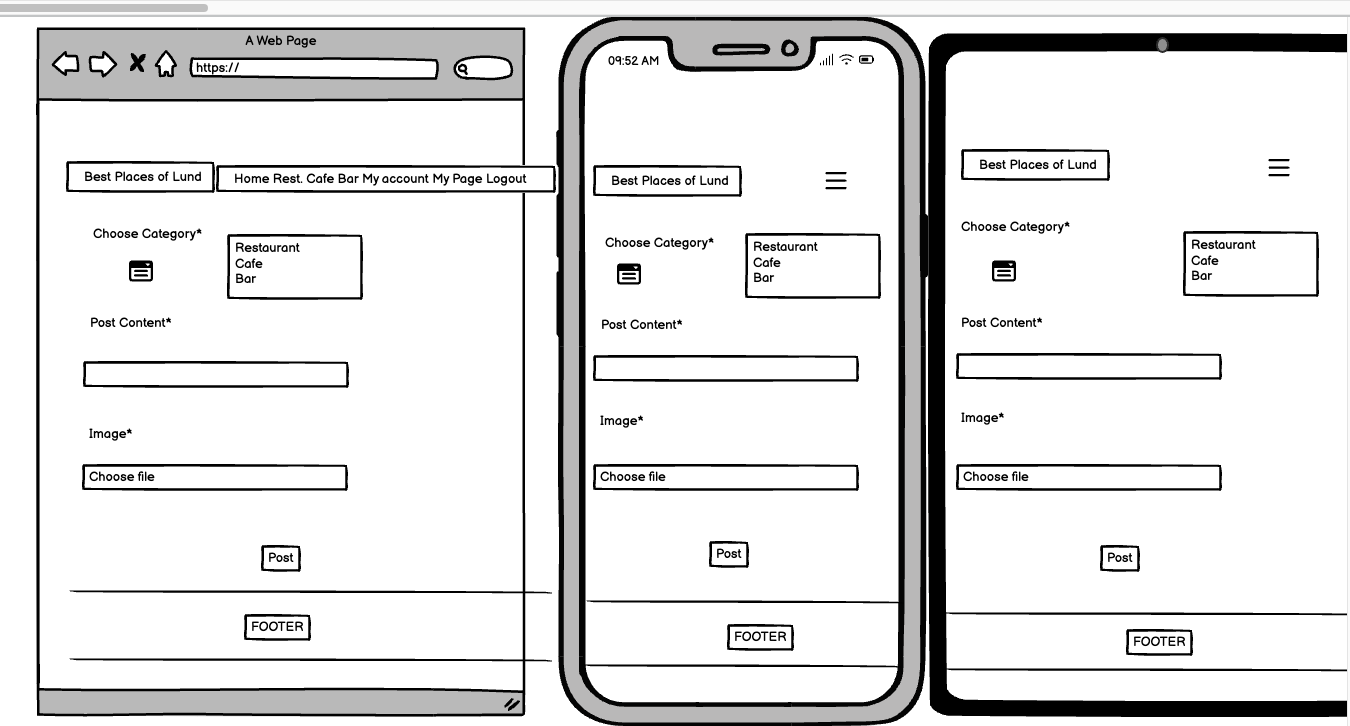
Publish a Post
-
Creating and adding a post by a registered user is possible.
-
The user can publish a post after signing in and from their profile page.
-
The user must enter a title, catogory, content and image.
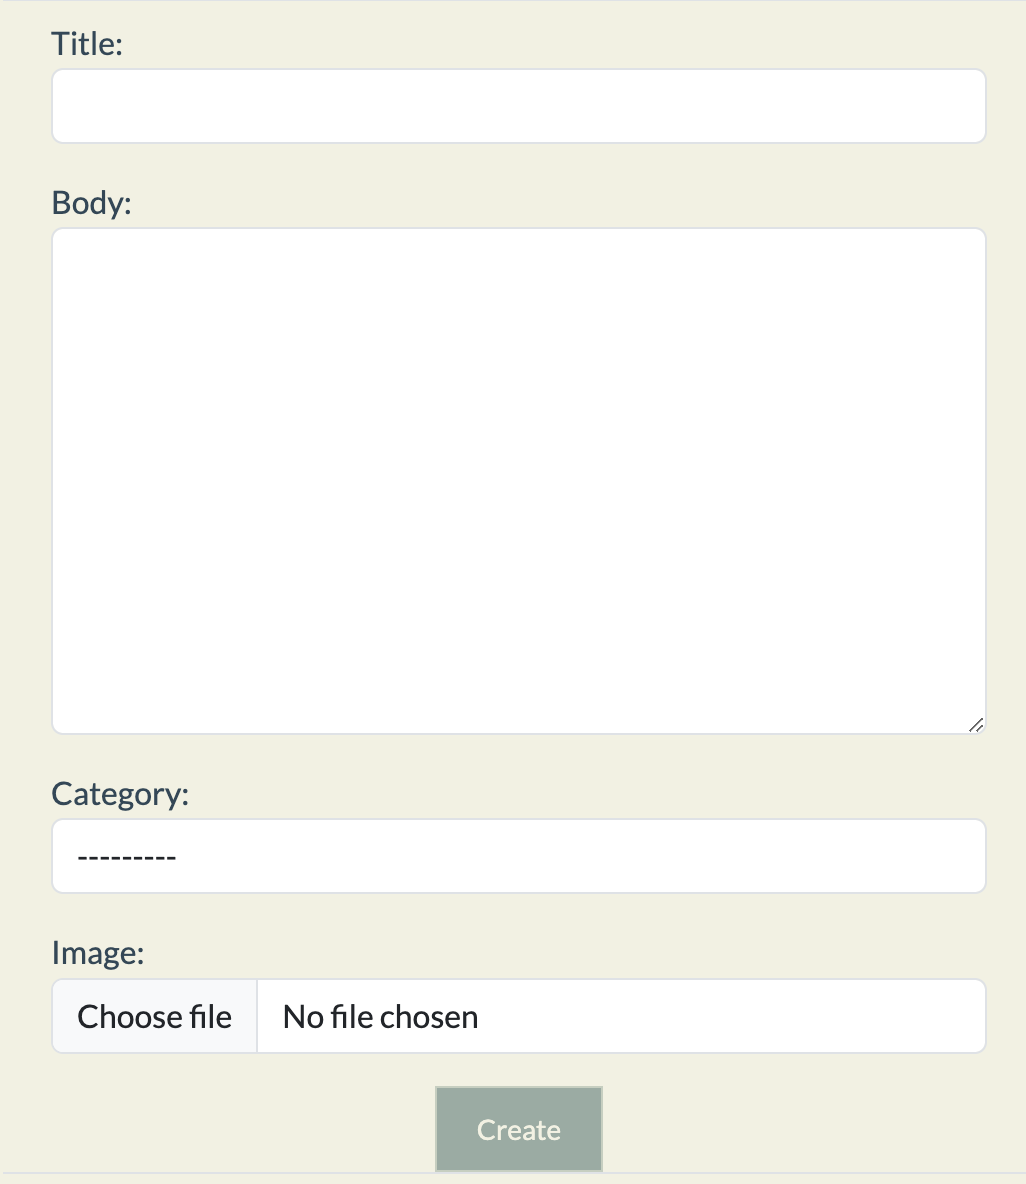
- Once the post is published, the post is submitted for approval to the admin. The submitted post can be viewed/edited/deleted by the owner from 'Manage my posts Page'.
-
-
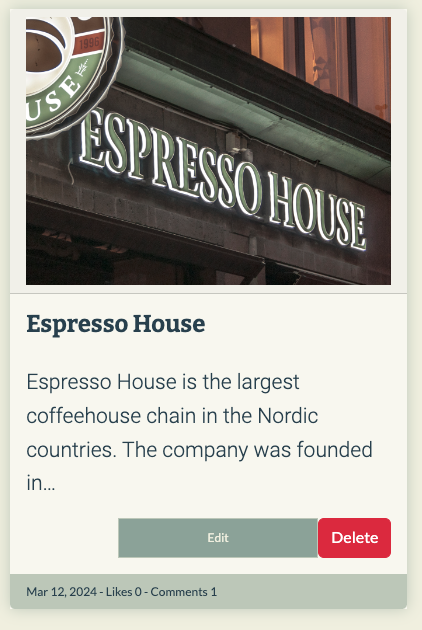
Manage My Posts Page
- The user can see the list of their own posts from 'Manage My Posts' page
- Each post listed has information about that particular post.
- Post title, quote, and submission date/time are available separately for each submission.
- Finally, buttons for editing and deleting options are provided for user management.
- After the post is published, it is submitted to the administrator for approval. The submitted post can be viewed/edited/deleted by its owner from the 'Manage My Post'.
- The user will be informed by message after the edit and delete operations.
-
Edit Page
- The user can select the post user wants to edit and edit it.
- The authenticated and owner of the post can only edit the post.
- The posts that are selected for editing are prepopulated form that is ready for editing.

-
Delete a Post
- The authenticated and owner of the post can only delete the post.
- The posts that are chosen to be deleted asks the user for confirmation by pop-up alert on the window.

-
Like and Comment on a Post
-
All the site visiters can view the comments and the number of likes.
-
The unregistered site visiters cannot view the comment box to write a comment. Once they register, then it is visible for them and they can post a comment on any post they want.
-
Users can comment to all posts.
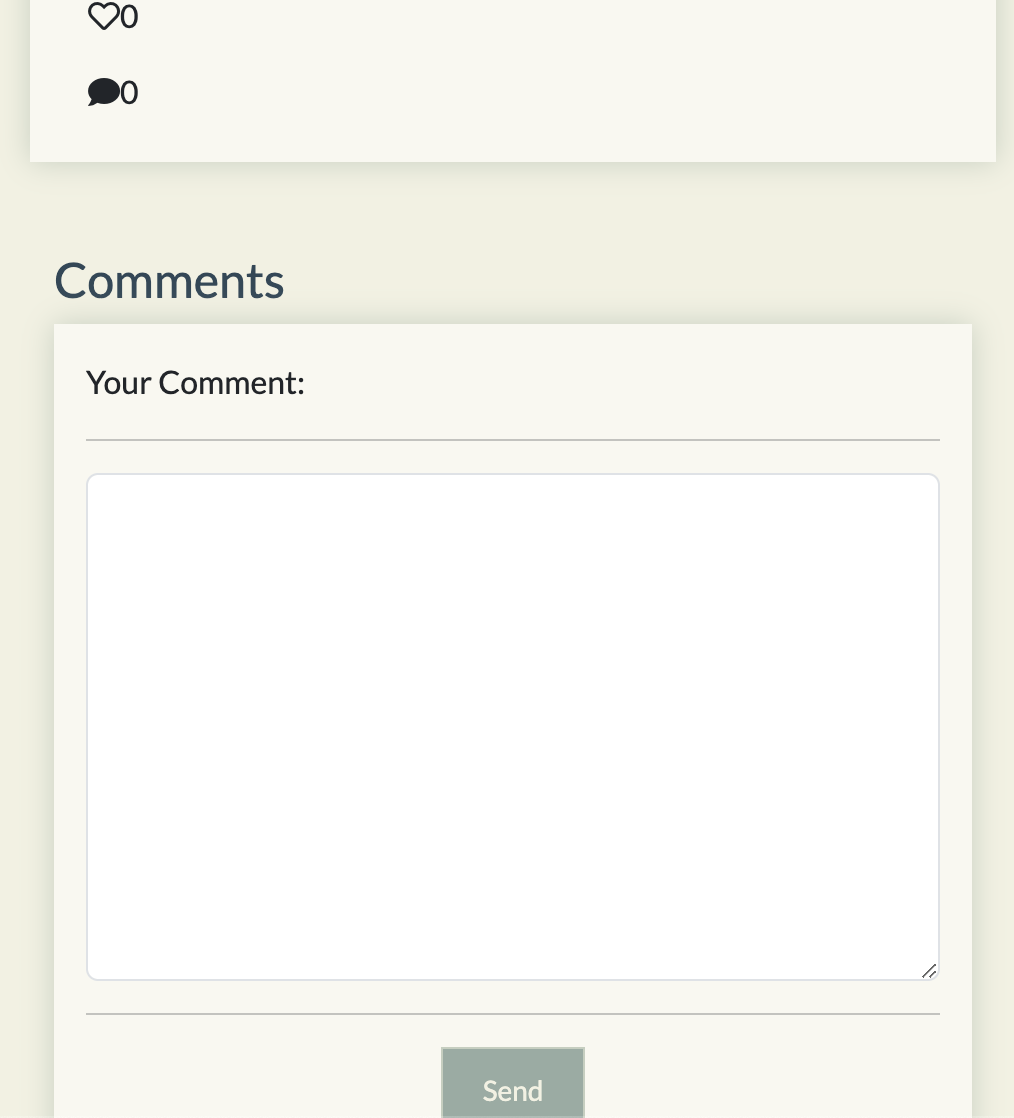
- User can edit or delete own comments and then user can see a message is done.
-
-
Logout
-
The user can logout from Menu and from their accounts page.
-
When the user wants to logout a pop-up modal is triggered for confirmation.
-
The logout modal asks the user if they confirm to logout.
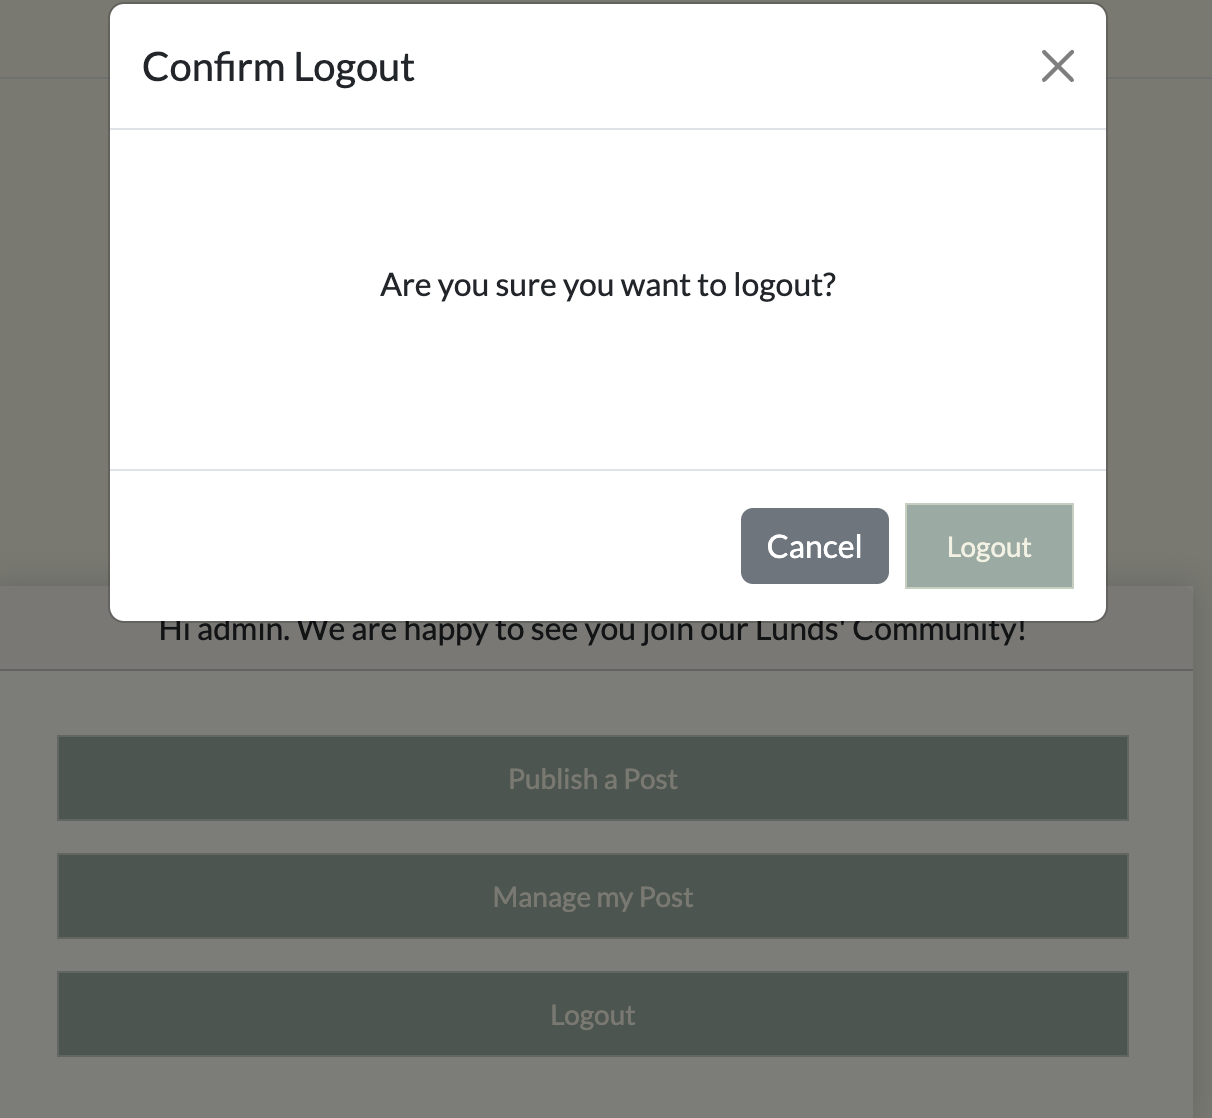
-
When users loggout they will see a message logout is successful like other message login create post, create comment, edit post, edit comment, delete post, delete comment and register.
-
-
Footer
Footer section was designed very simply and understandably. He was directed with icons to follow blog-related pages on social media.


- Connect with Google translate API, so users can submit posts from different languages and also translate to language they want.
- Members can save posts that they like (in save category) and go back to read it later.
- Users can set up their own profile page, add information about themselves, upload a profile picture and connect with other members.
- Create a community group and vote for their own admin/admins to review their posts.
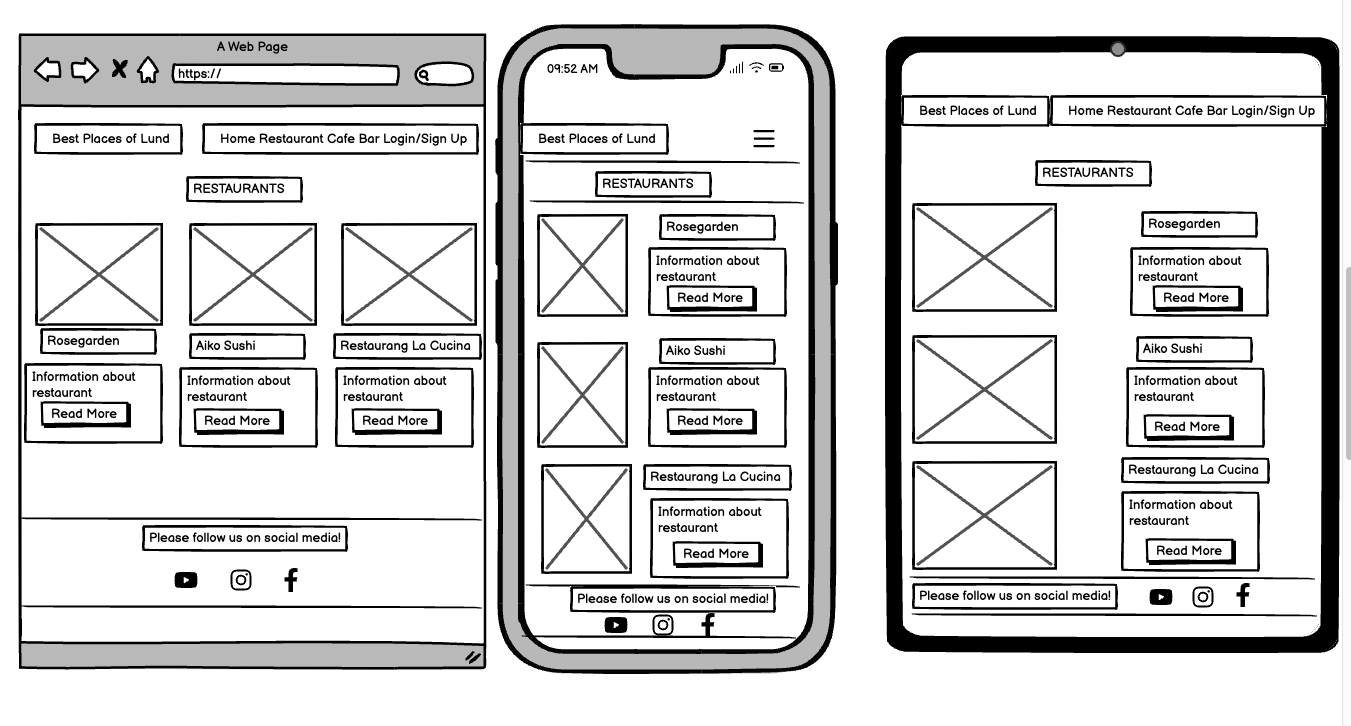
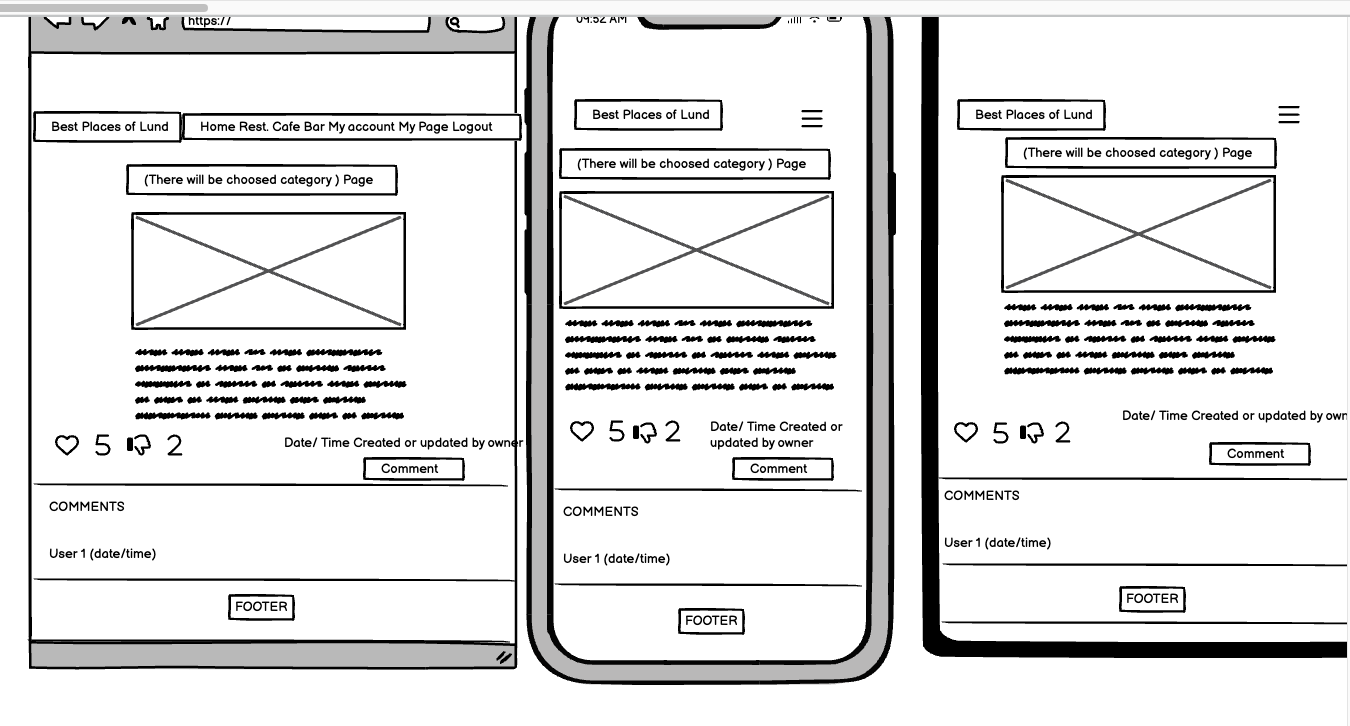
- Each pages wireframes includes mobile(small screen), tablet(medium screen), desktop(large screens).
-
Home Page:
-
Login Page:
-
Register Page:
-
Category Page:
-
Post Page:
-
My Page:
-
Publish Post Page:
-
My Publish Page:
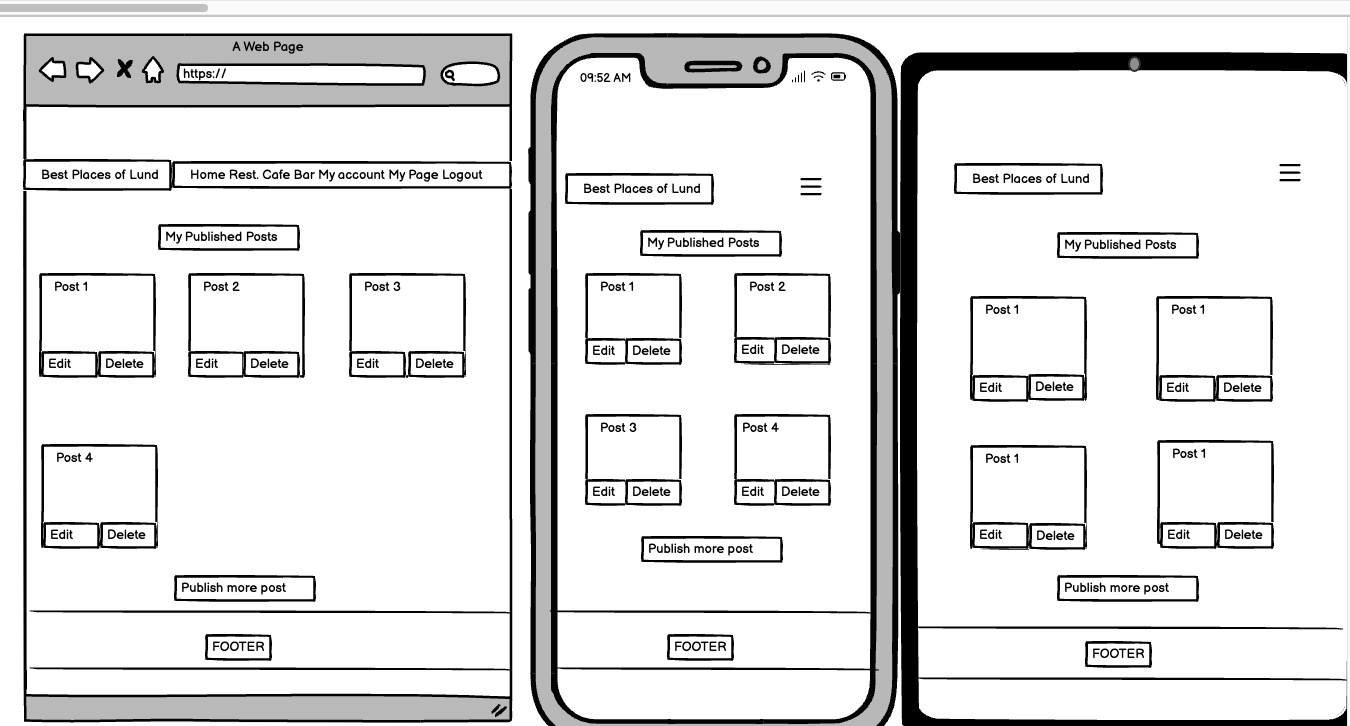
-


The idea behind the structure of Best Places Of Lund was to simply guide users visiting the site in a clear and understandable way. Color confusion and unnecessary information were avoided.
The Best Places of Lund site is divided into two parts: When the user is logged in and When the user is logged in. Depending on the login status, the user is presented with different pages. When the user logs out, user can access the home page, all posts, categories, the detail page where user can read the post details, and the login/register pages. When the user logs in, the home page, all posts, categories, my page, and logout options can be accessed.
Read more about the different choices in the Features section.
pgadmin4- I created database schema with pgadmin4.

Post model handles posts details: title, content, date created/updated, featured image and likes. This post model handles the base for confirming user/author authentication to manage their own posts.
Comment model handles the content of the comment, the username of the person commenting, date/time of commenting.
- HTML
- CSS
- JavaScript
- Python
- asgiref- ASGI is a standard for Python asynchronous web apps and servers to communicate with each other, and positioned as an asynchronous successor to WSGI.
- Bootstrap 5 - grid, layout, columns, cards and forms structure.
- Django - django frameworks to manage apps.
- gunicorn -- Gunicorn ‘Green Unicorn’ is a Python WSGI HTTP Server for UNIX. It’s a pre-fork worker model ported from Ruby’s Unicorn project. The Gunicorn server is broadly compatible with various web frameworks, simply implemented, light on server resource usage, and fairly speedy.
- GitHub - to store the overall project repository.
- Visual Studio Code - used as workspace to do the coding.
- Balsamiq Wireframes - To design the wireframe of the complete project.
- Google Fonts - Used for logo and all the written content.
- Fontawesome - fontawesome icons for social media links and as additional design.
- Heroku - for the deployement of the project.
- Coolors - to choose the color palette and color shades.
- ElephantSQLPostgreSQL - database storage of the models.
- Amazon Web Service - image and static files storage.
- Lighthouse - used for testing site functionality.
- W3C Markup Validation Service - used for HTML testing.
- W3C CSS Validation Service - used for CSS testing
- PEP8 - used for Python files testing.
| Status | Main Website - User Logged Out |
|---|---|
| ✓ | Typing in a incorrect URL on the page loads the 404 error page |
| ✓ | Pasting page that needs authentication loads a forbidden page |
| ✓ | Clicking the nav logo loads the home page |
| ✓ | Click the Home button and all categories are listed home page |
| ✓ | Click on the category you want to see and list the posts |
| ✓ | Click one post and read more detail about this post |
| ✓ | See likes and comments on the post detail page |
| ✓ | If you want to comment, click the join discussion button. |
| ✓ | Clicking the other categories and list their posts |
| ✓ | Clicking the nav bar all posts and lists all posts |
| ✓ | Clicking the login section on nav bar and login page |
| ✓ | Clicking the register section on nav bar create an account |
| ✓ | Clicking the youtube icon on footer and visit youtube |
| ✓ | Clicking the facebook icon on footer and visit facebook |
| ✓ | Clicking the instagram icon on footer and visit instagram |
| Status | Main Website - User Logged In |
|---|---|
| ✓ | Typing in a incorrect URL on the page loads the 404 error page |
| ✓ | Pasting page that needs authentication loads a forbidden page |
| ✓ | Clicking the nav logo loads the home page |
| ✓ | Click the Home button and all categories are listed home page |
| ✓ | Click on the category you want to see and list the posts |
| ✓ | Click one post and read more detail about this post |
| ✓ | See likes and comments on the post detail page |
| ✓ | Clicking the like icon and like post |
| ✓ | Write one comment on comment section and save your own comment |
| ✓ | Clicking comment edit icon and edit or delete your comment |
| ✓ | Clicking the other categories and list their posts |
| ✓ | Clicking the nav bar all posts and lists all posts |
| ✓ | Clicking the my page on navbar and go your page see two option |
| ✓ | Click the publish post button and see create post page |
| ✓ | Click the manage my post button and list your posts |
| ✓ | Click the edit button on post edit your own post |
| ✓ | Click the delete button and delete your own post |
| ✓ | Click the publish post button and see create post page |
| ✓ | Clicking the youtube icon on footer and visit youtube |
| ✓ | Clicking the facebook icon on footer and visit facebook |
| ✓ | Clicking the instagram icon on footer and visit instagram |
| ✓ | Click the logout on navbar and see logout confirmation message |
| ✓ | Click the logout button and see logout successful message |
| Status | Main Website - Admin Logged In |
|---|---|
| ✓ | Clicking the login section on navbar and login as admin |
| ✓ | Clicking the nav logo loads the home page |
| ✓ | Click the Home button and all categories are listed home page |
| ✓ | Click on the category you want to see and list the posts |
| ✓ | Click one post and read more detail about this post |
| ✓ | See likes and comments on the post detail page |
| ✓ | Clicking the like icon and like post |
| ✓ | Write one comment on comment section and save your own comment |
| ✓ | Clicking comment edit icon and edit or delete your comment |
| ✓ | Clicking the other categories and list their posts |
| ✓ | Clicking the nav bar all posts and lists all posts |
| ✓ | Clicking the my page on navbar and go your page see two option |
| ✓ | Click the publish post button and see create post page |
| ✓ | Click the manage my post button and list your posts |
| ✓ | Click the edit button on post edit your own post |
| ✓ | Click the delete button and delete your own post |
| ✓ | Click the publish post button and see create post page |
| ✓ | Clicking the youtube icon on footer and visit youtube |
| ✓ | Clicking the facebook icon on footer and visit facebook |
| ✓ | Clicking the instagram icon on footer and visit instagram |
| ✓ | Click the logout on navbar and see logout confirmation message |
| ✓ | Click the logout button and see logout successful message |
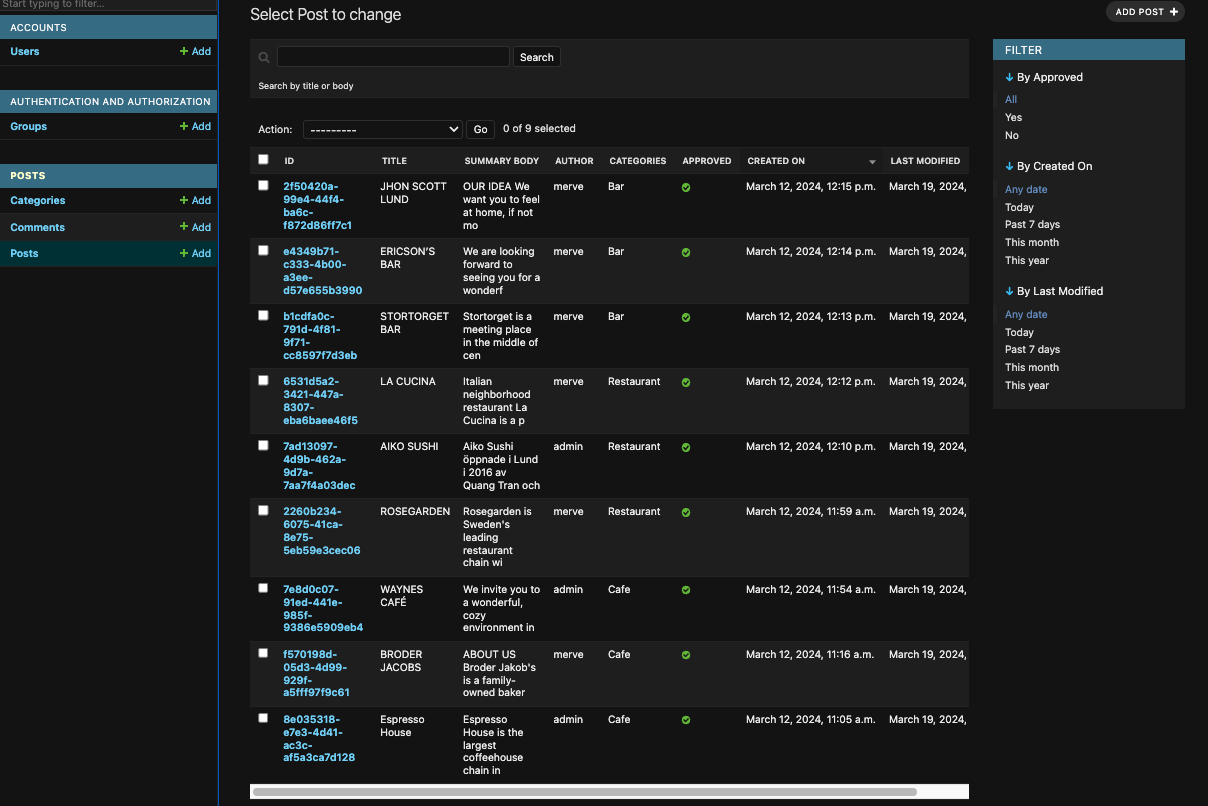
| ✓ | Add the end of the url "/admin" and see django admin panel |
| ✓ | Clicking the categories and delete one category /add category |
| ✓ | Clicking the comments and delete or add comments |
| ✓ | Click the posts on admin panel and create new posts or delete |
| ✓ | Click the posts on admin panel and approve posts, delete, edit |
| ✓ | Click the users on admin panel and create new users |
| ✓ | Click the users on admin panel and change their features |
| ✓ | Clicking the categories and delete one category /add category |
| Status | Create a Post - User Logged In |
|---|---|
| ✓ | Title field is required |
| ✓ | Title field does not accept empty field |
| ✓ | Title field does not accept just spaces |
| ✓ | Content field is required |
| ✓ | Content field does not accept empty field |
| ✓ | Content field does not accept just spaces |
| ✓ | Category field is required |
| ✓ | Category field does not accept empty field |
| ✓ | Images field is required |
| ✓ | Clicking the create post button |
| ✓ | Sending to admin appove |
| ✓ | Clicking the my manage post on my page checking approval posts |
| Status | Create a New User - User Logged Out |
|---|---|
| ✓ | Username field is required |
| ✓ | Username field does not accept empty field |
| ✓ | Email field does not accept just spaces |
| ✓ | Email field is request |
| ✓ | Password field does not accept empty field |
| ✓ | Success flash message is displayed when the user submits the create a new user form |
| Status | Create a Profile Page - User Logged In |
|---|---|
| ✓ | Username field is required |
| ✓ | Username field does not accept empty field |
| ✓ | Email field does not accept just spaces |
| ✓ | Email field is request |
| ✓ | Password field does not accept empty field |
| ✓ | Success flash message is displayed when the user submits the create a register form |
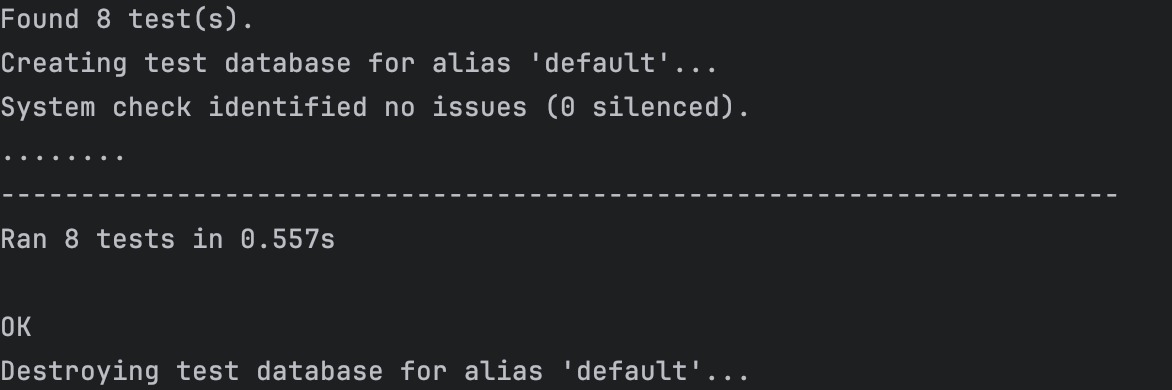
I have used django TestCase for automated testing views, forms and models files.
-
Testing Index/Home page view:
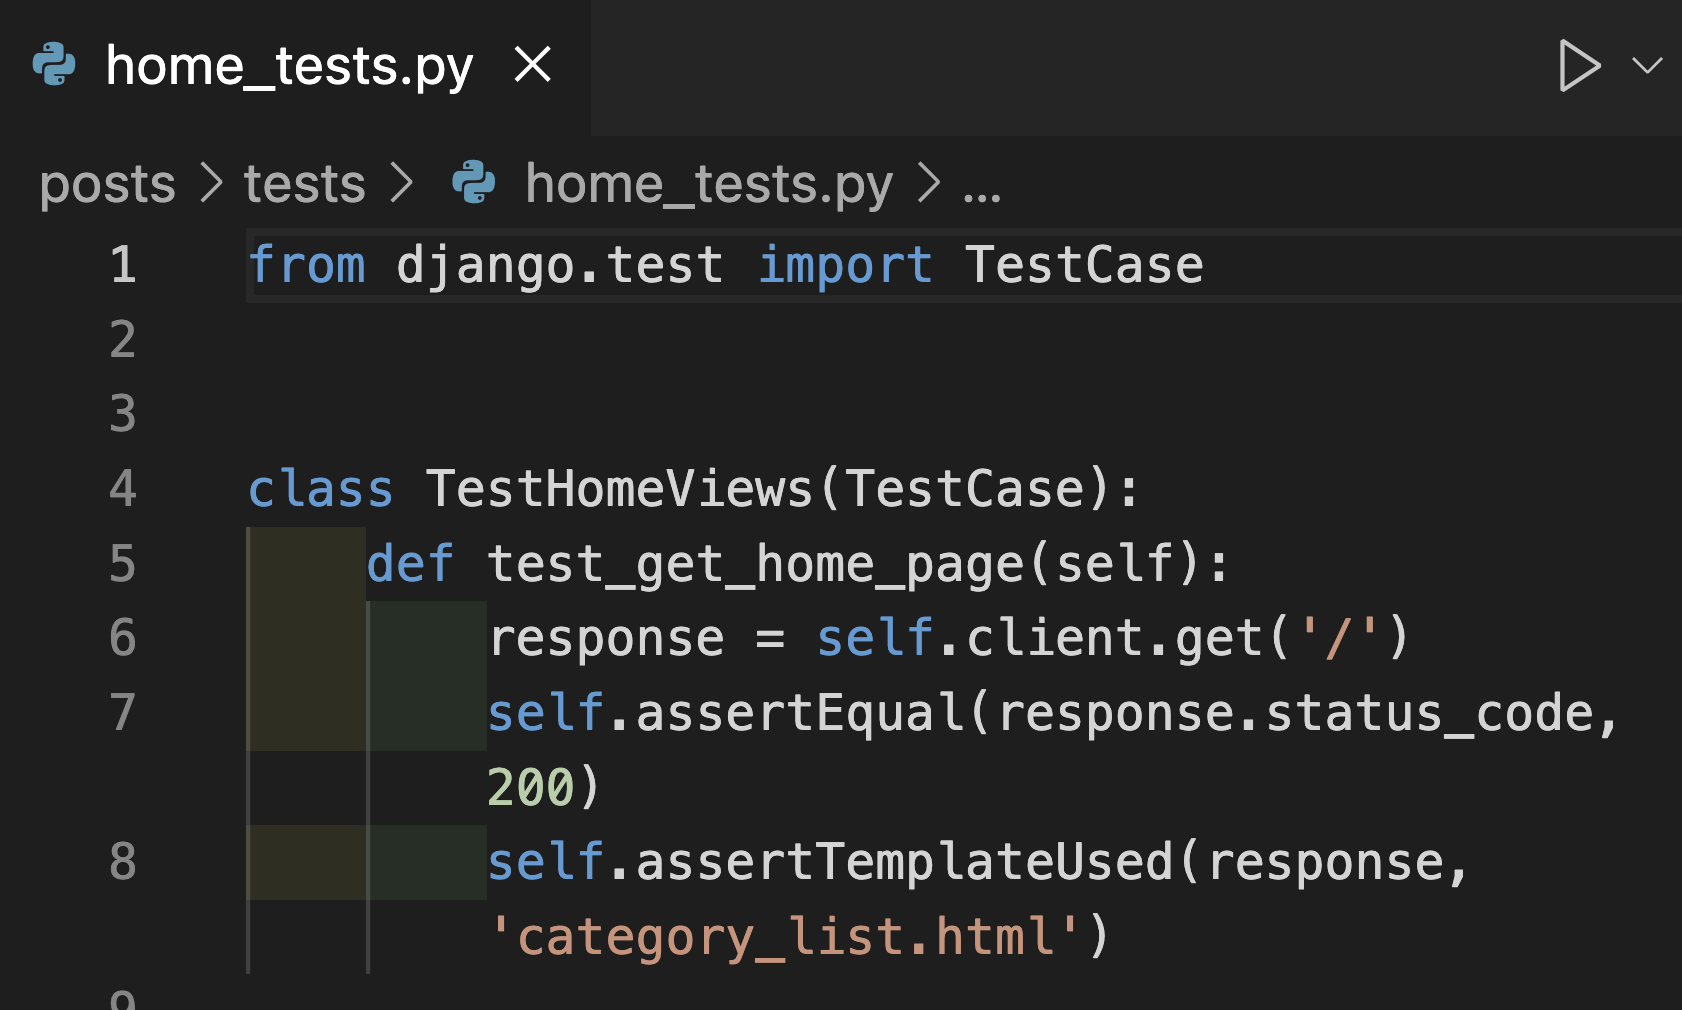
-
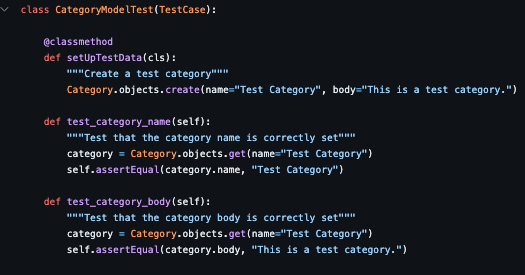
Category Model Test:
-
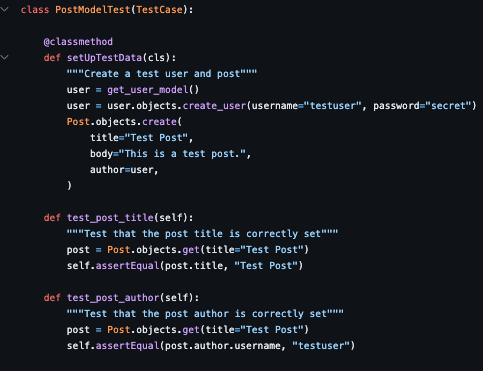
Post Model Test:
-
Comment Model Test:
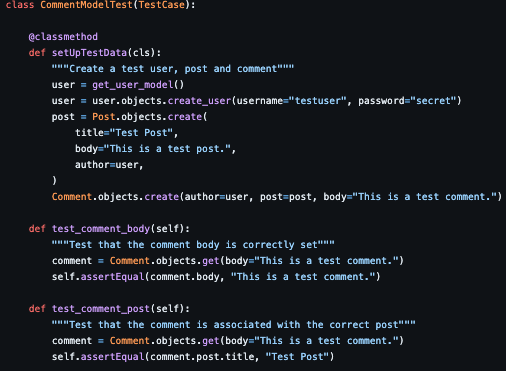
-
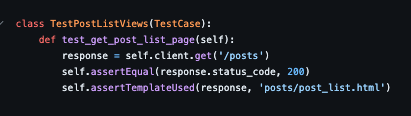
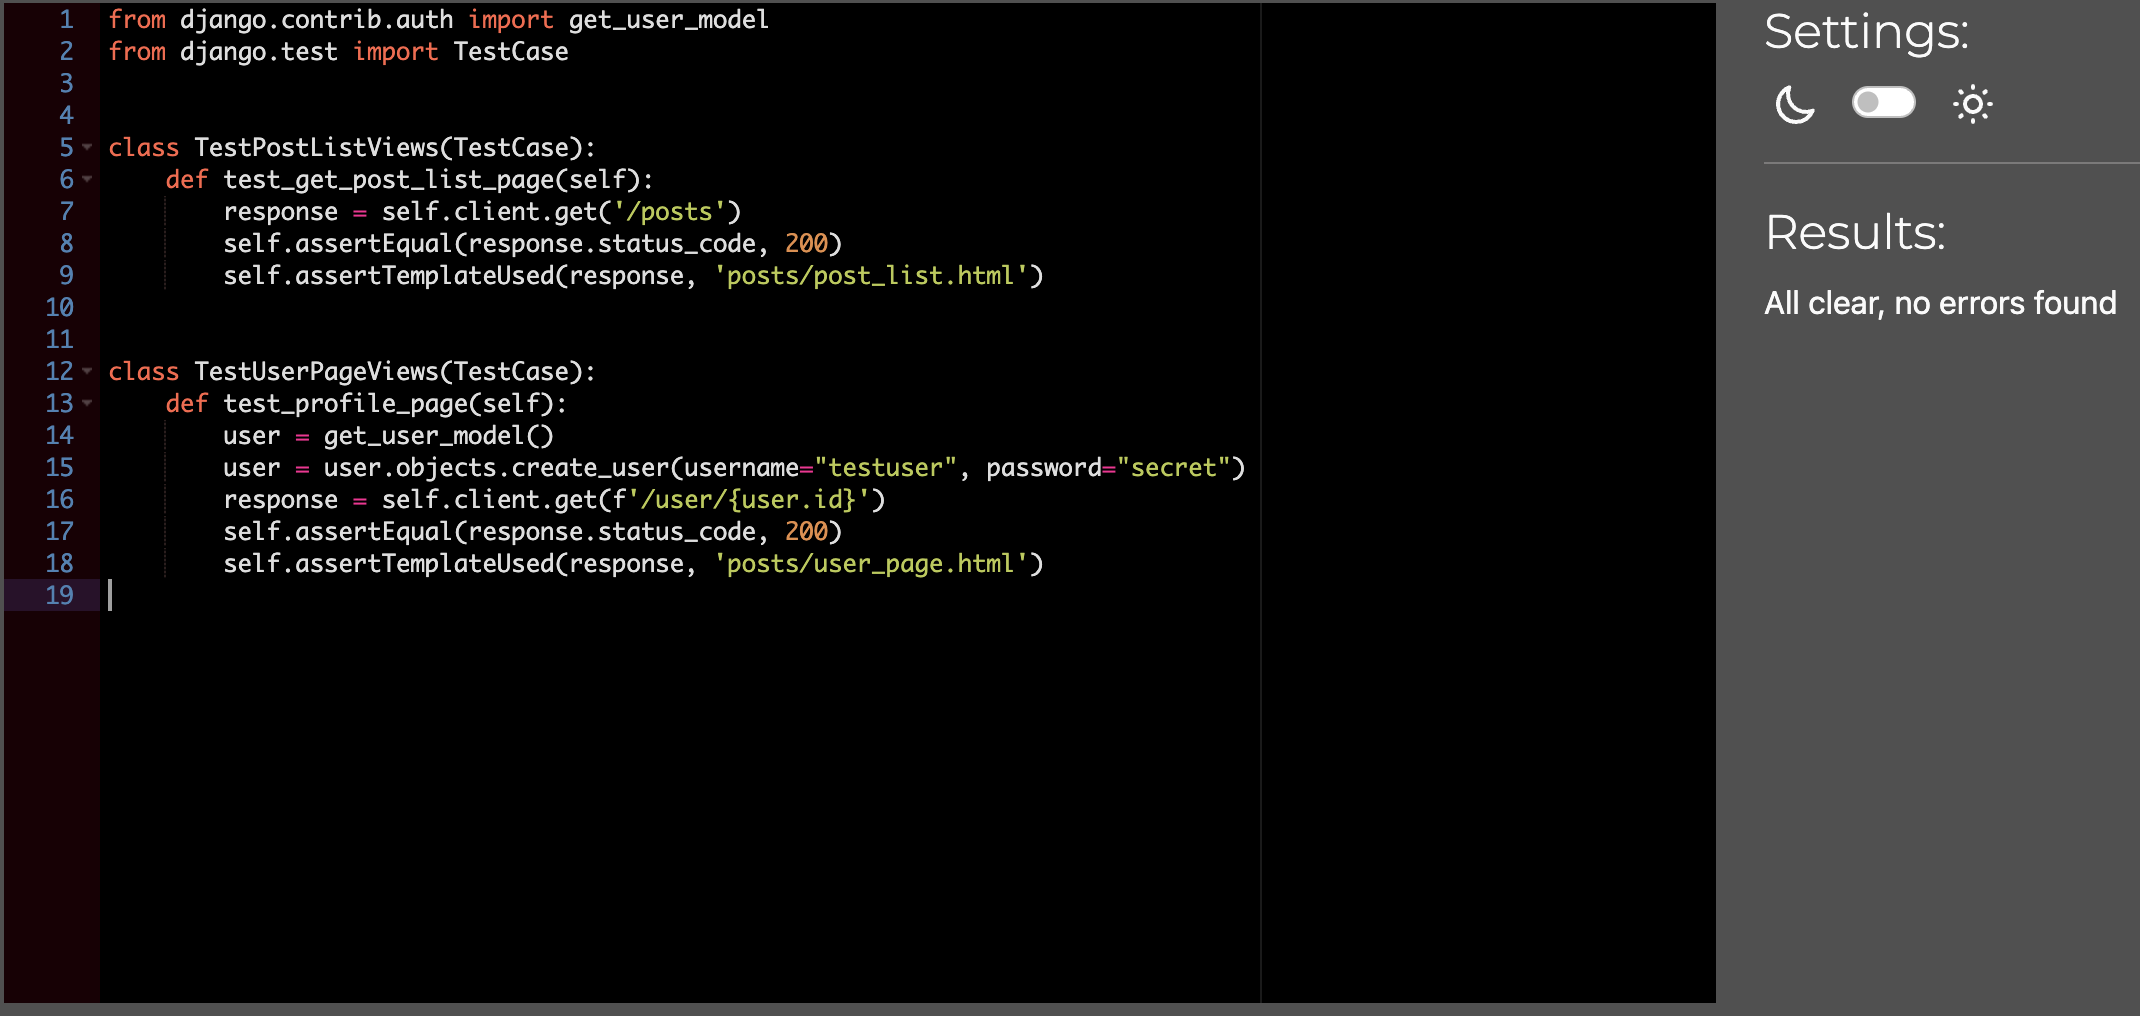
PostList View Test:

-
User Page View Test:
-
Result:


- Lighthouse
- Testing results:

- Testing results:

-
Home Page:
-
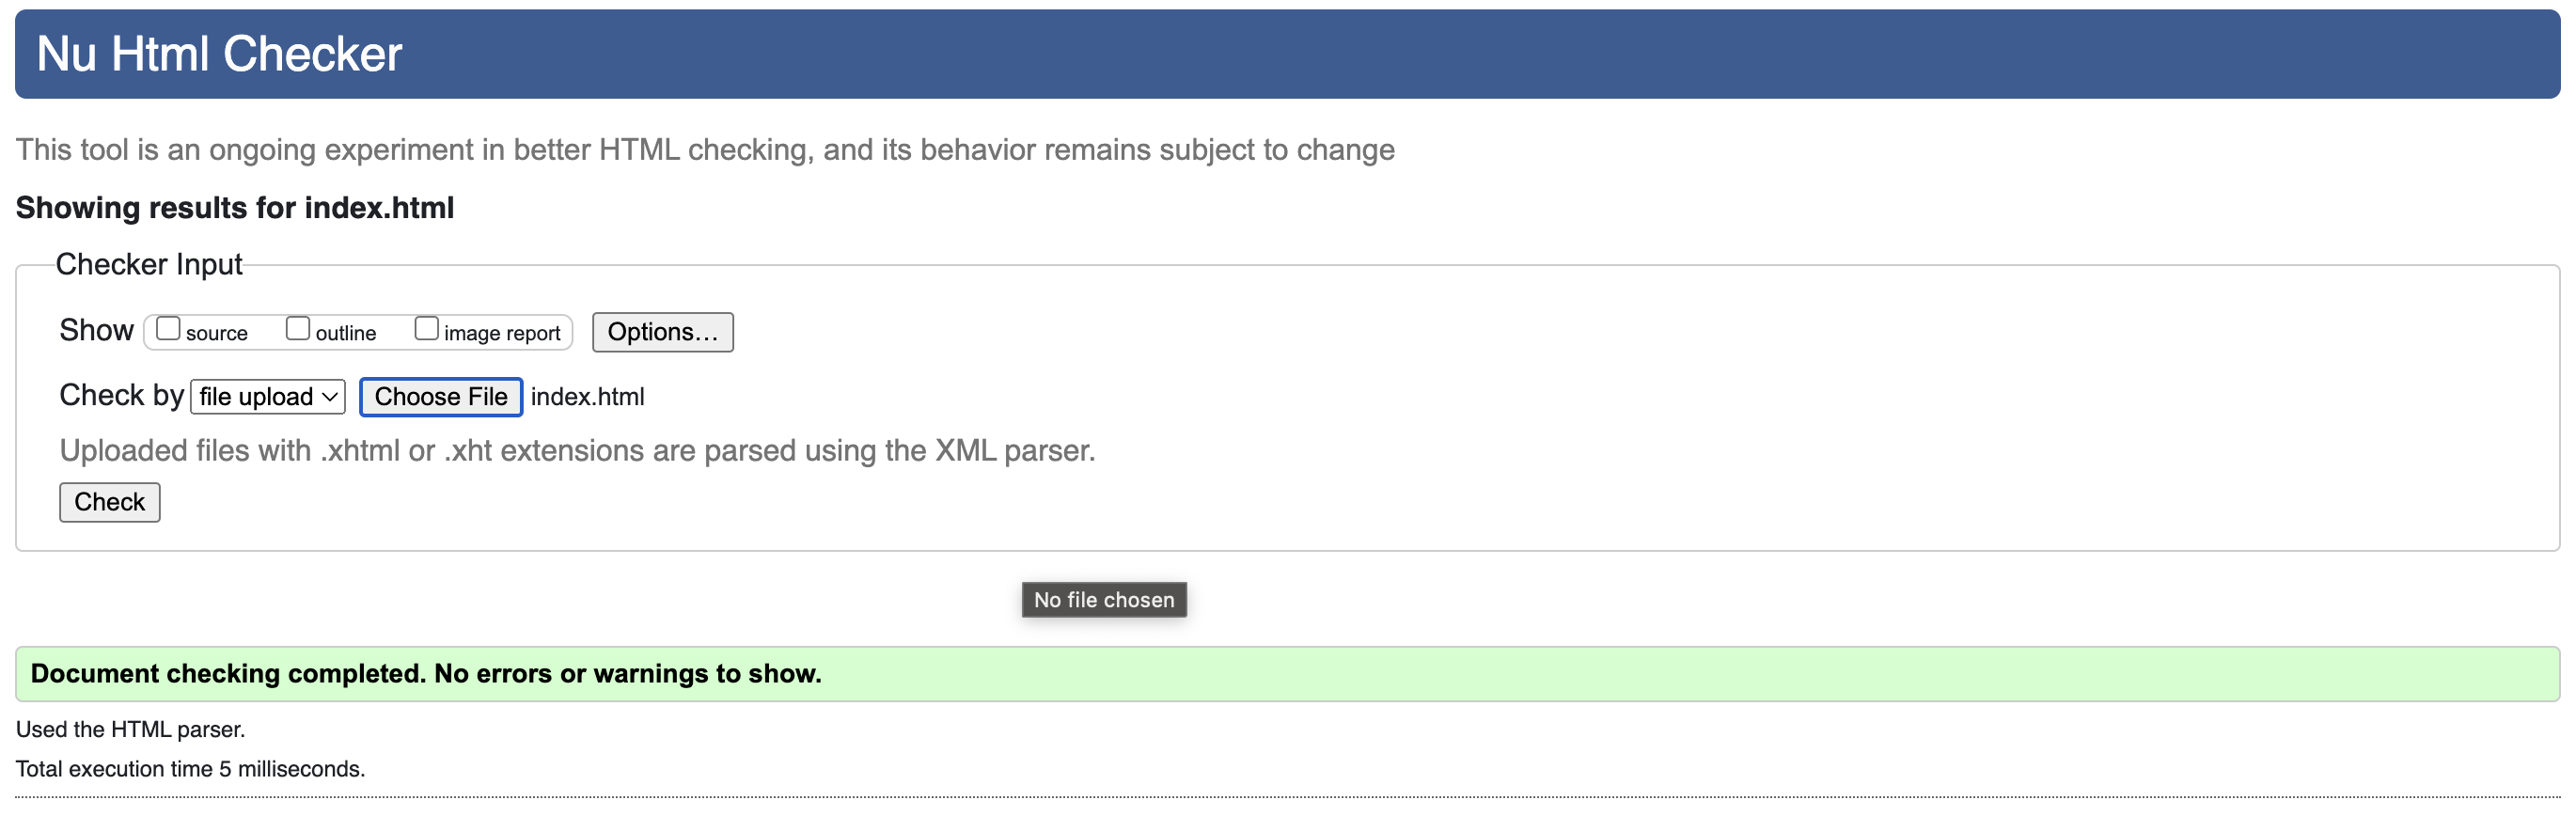
index.html:
-
pages/account/index.html:
-
pages/actions/post-create.html:
-
pages/actions/post-edit.html:
-
pages/actions/posts.html:
-
pages/categories/bar/index.html:
-
pages/categories/cafe/index.html:
-
pages/categories/restaurant/index.html:

The CSS validation results for the files used in the project are as follows:
- Styles.css:

-
No errors or warnings found.
-
models.py:
-
admin.py:

-
posts urls.py:
-
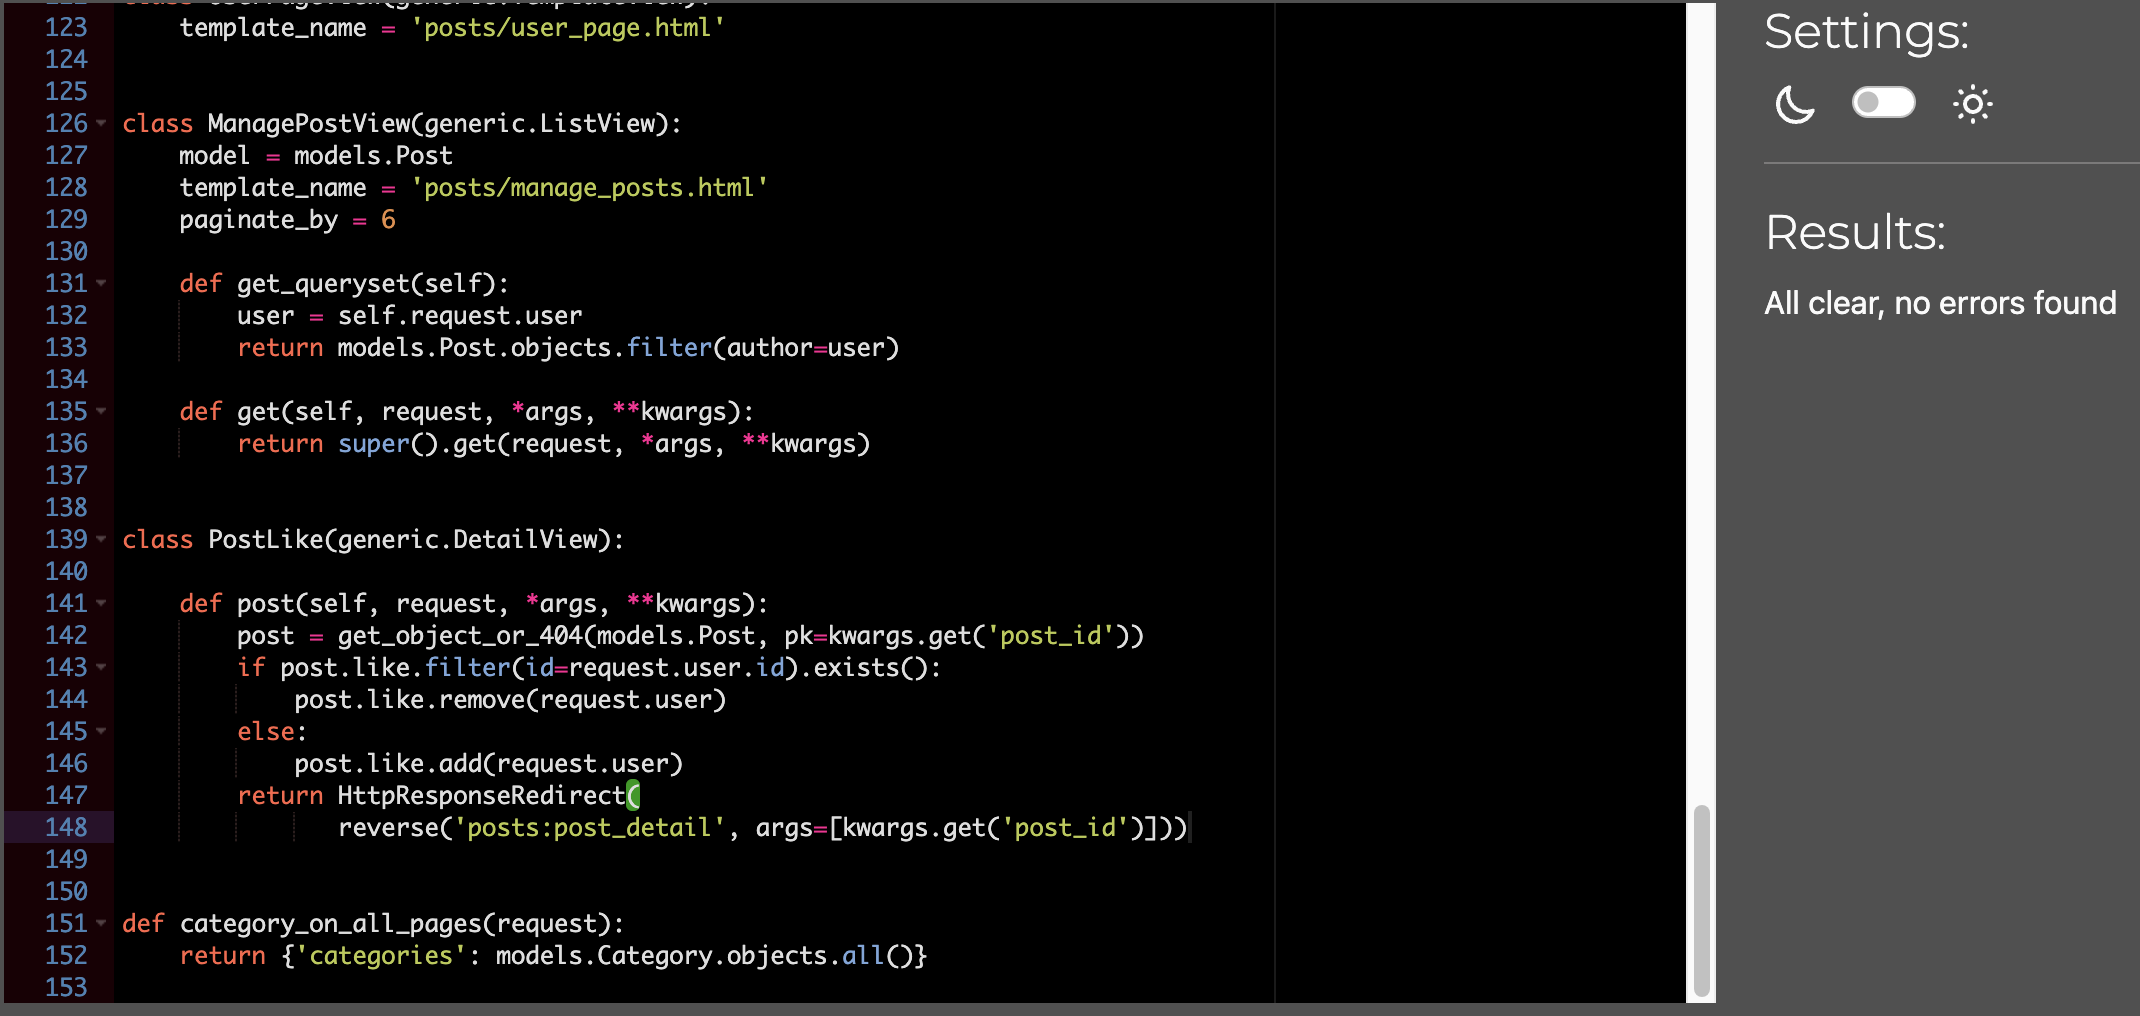
views.py:
-
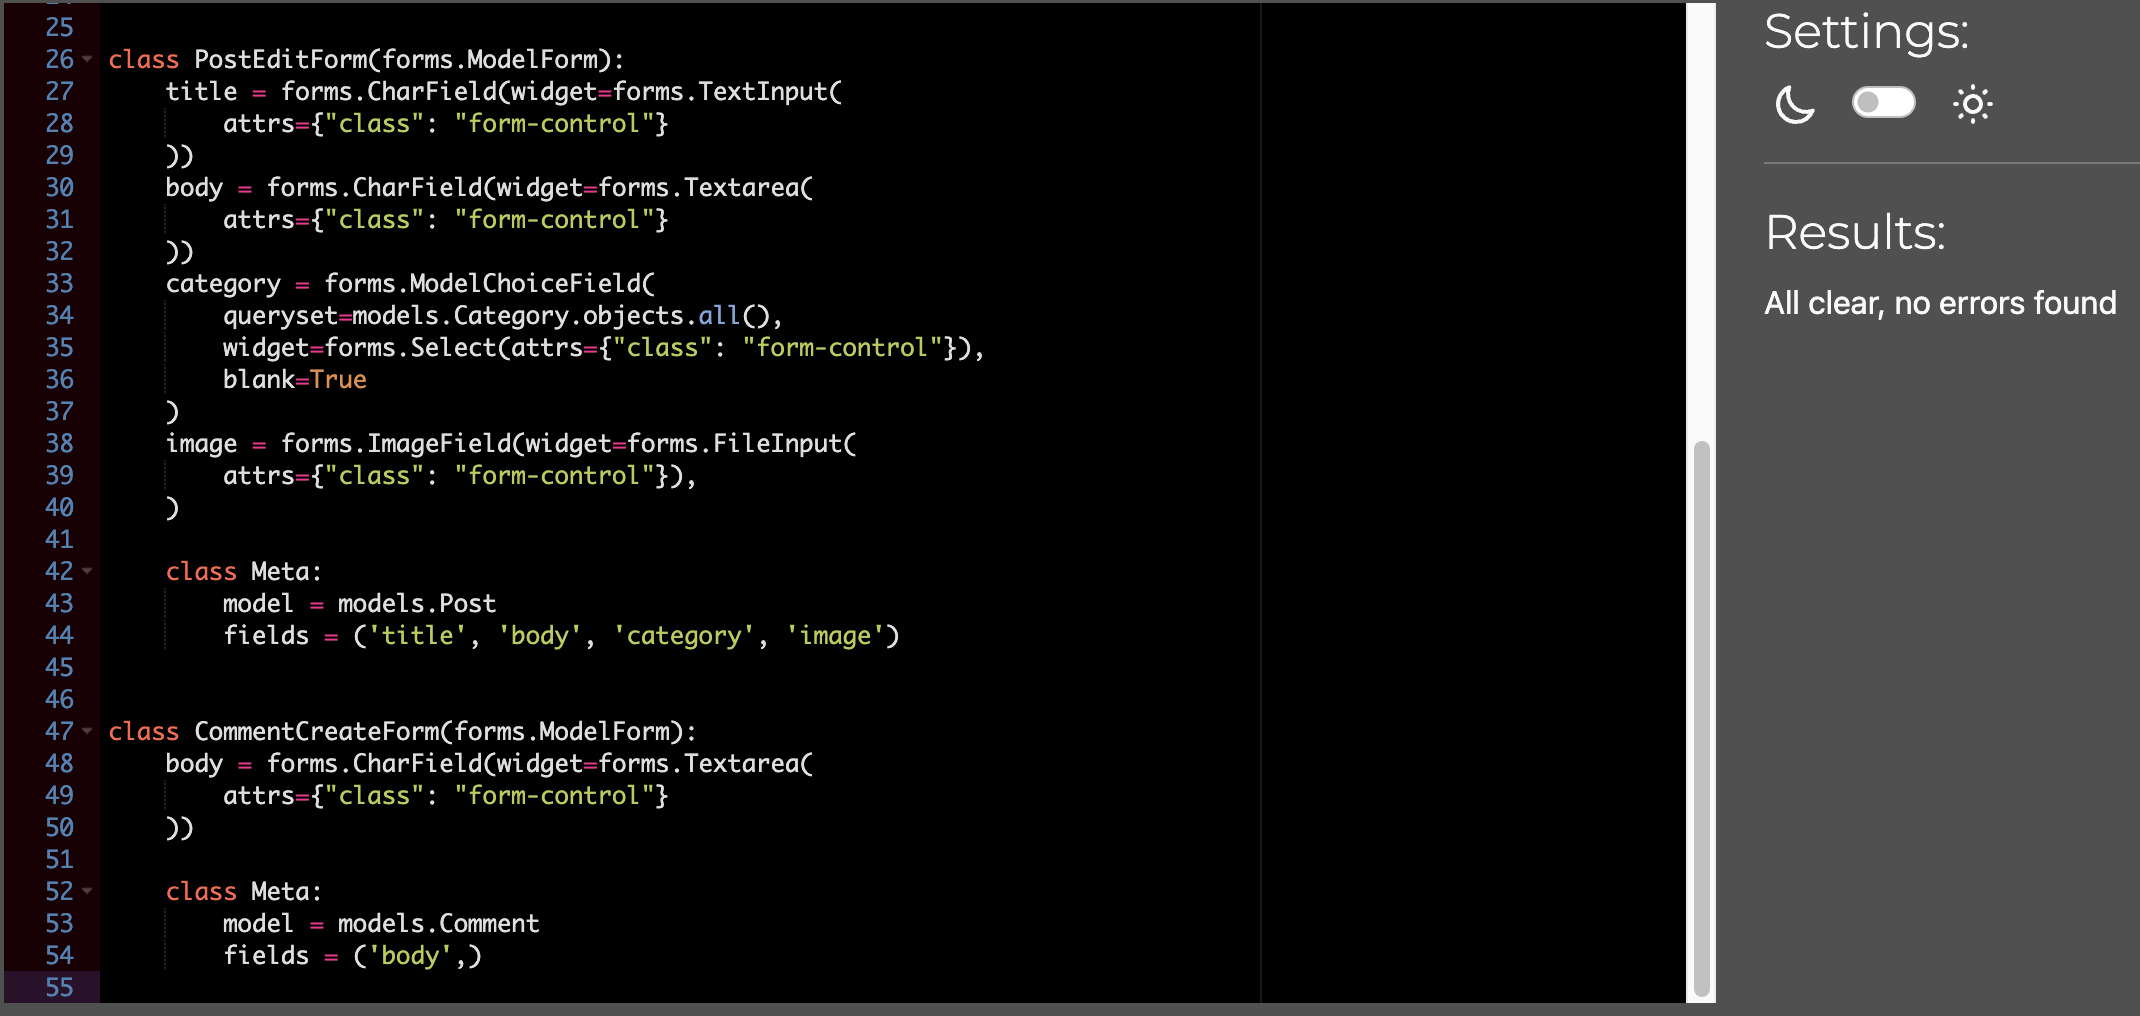
forms.py:
-
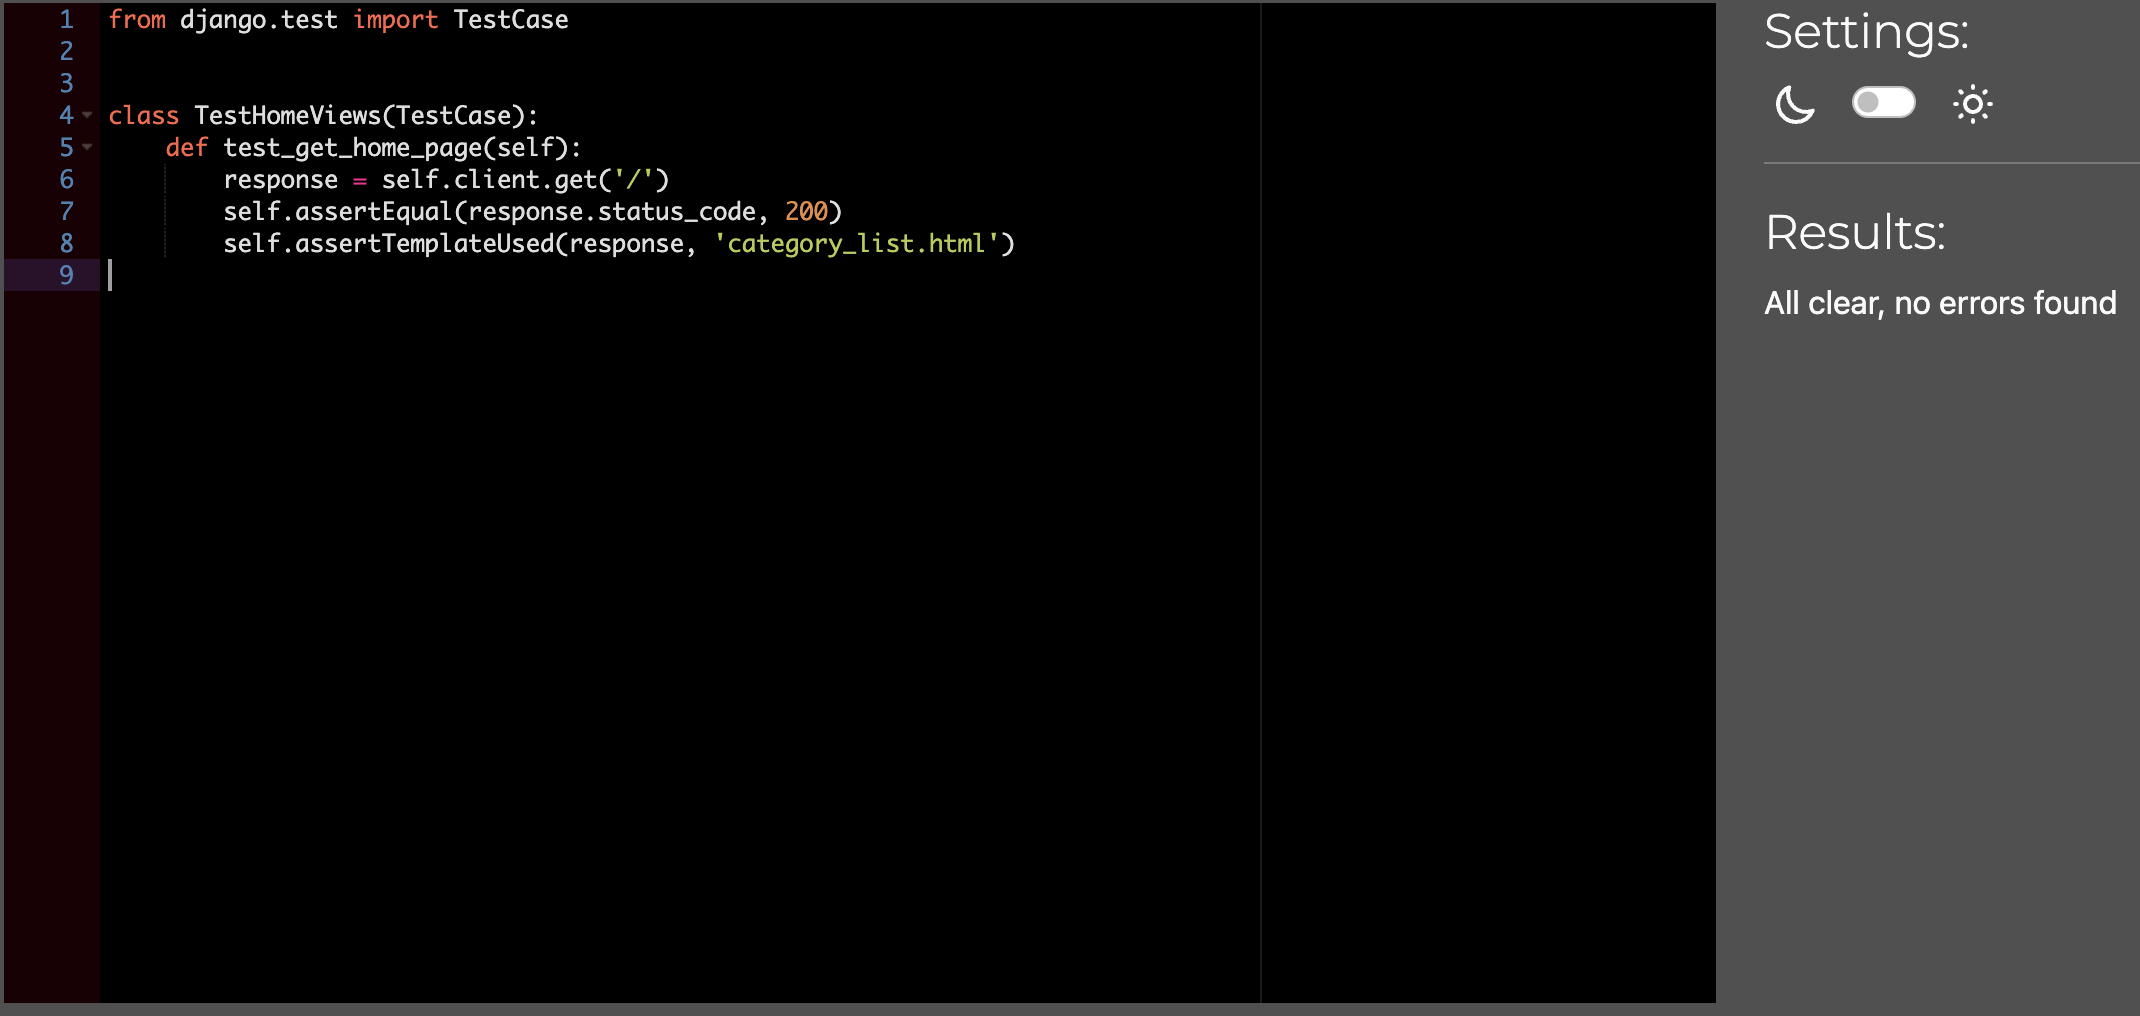
home_tests.py:
-
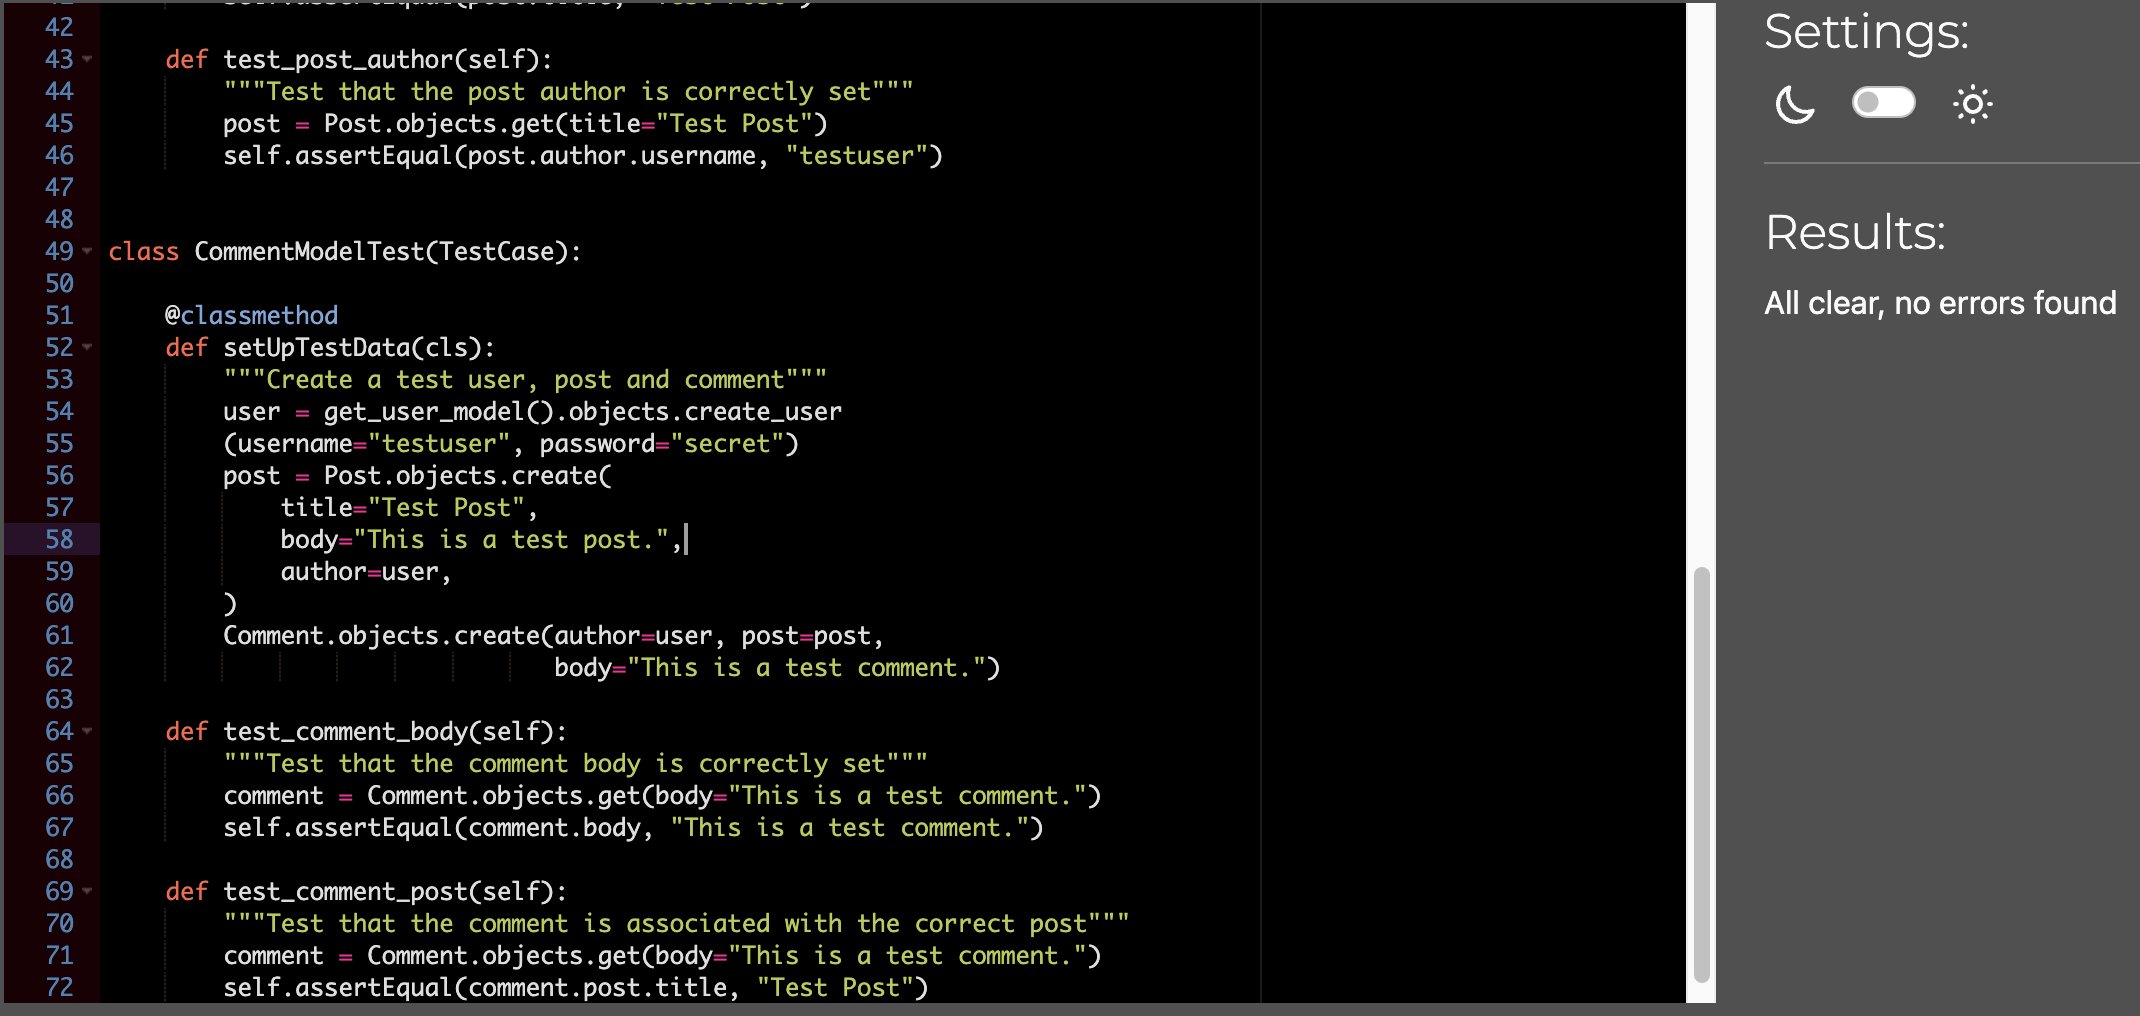
model-tests.py:
-
pages.py-test:
-
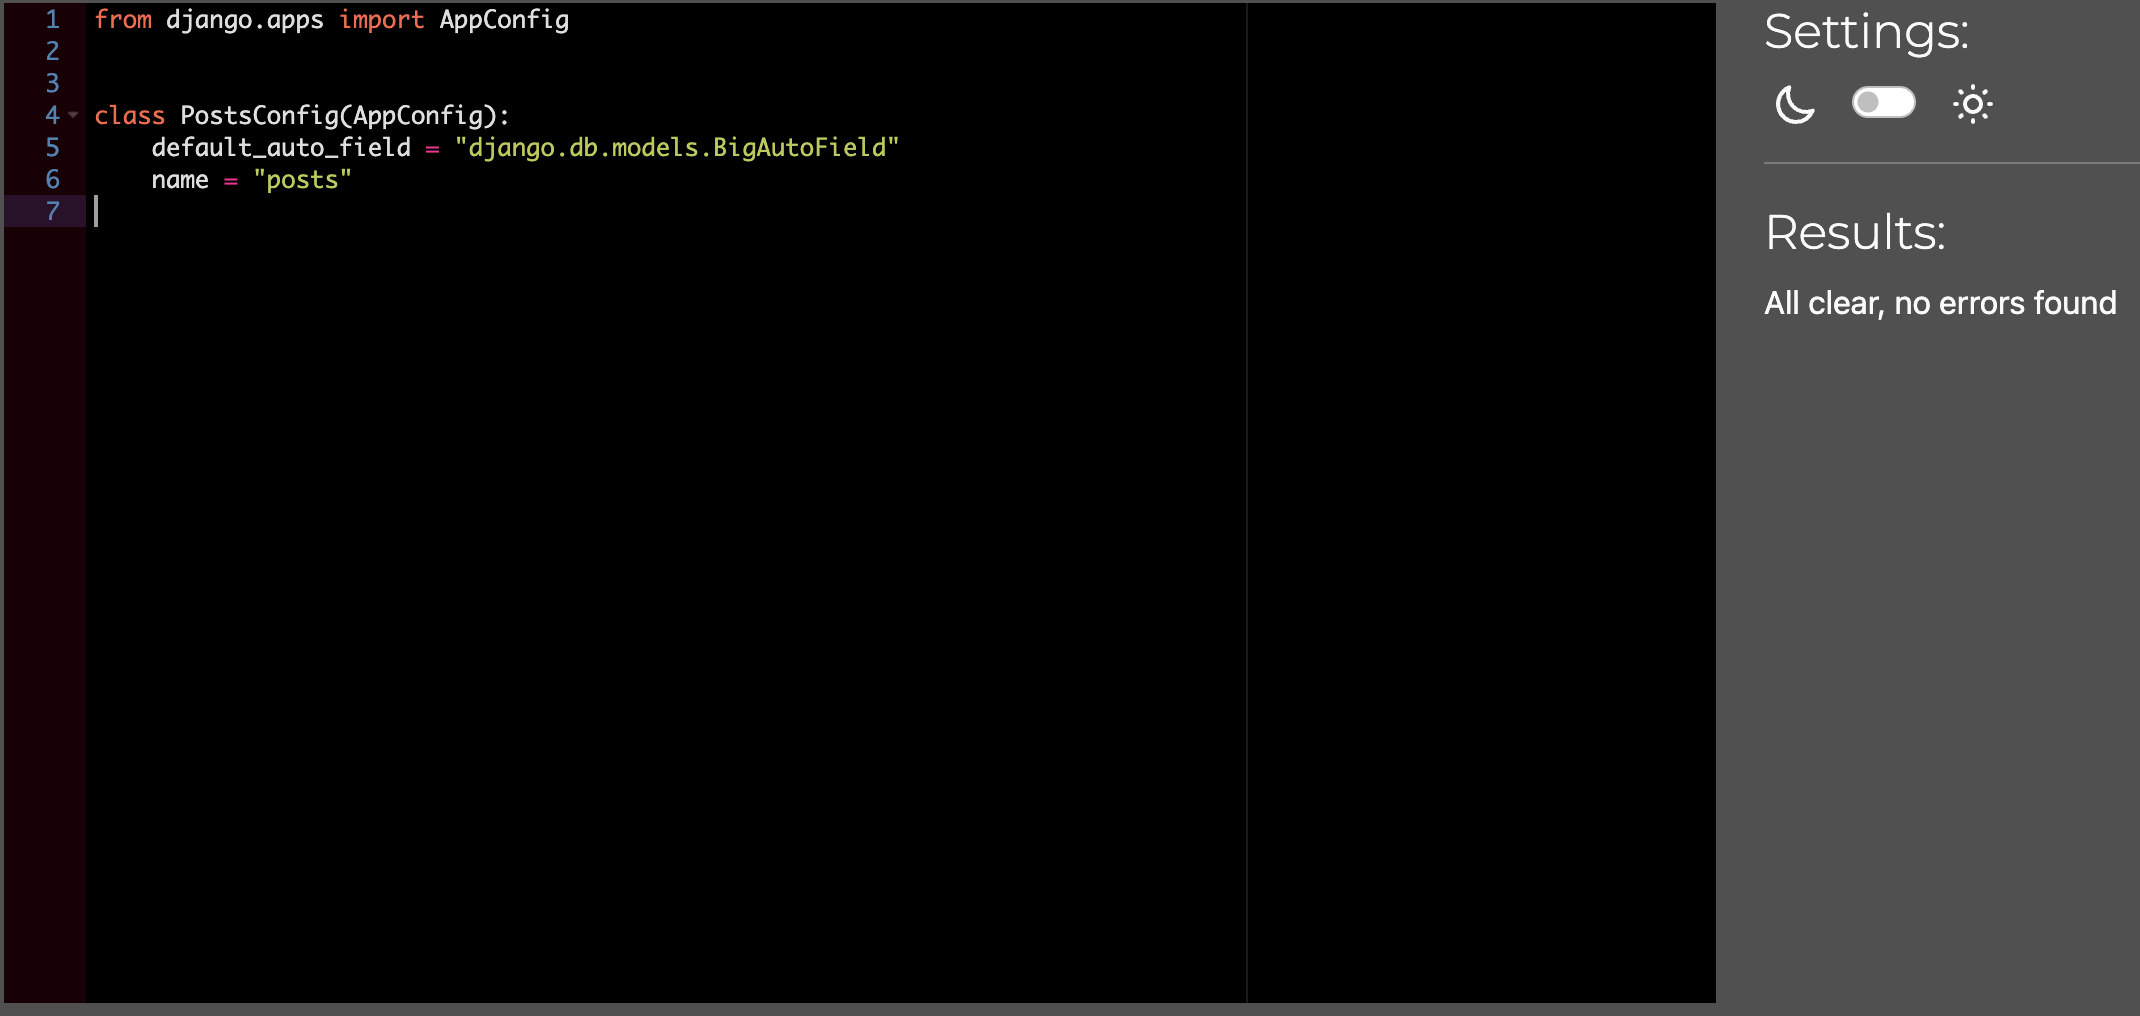
apps.py:

-
asgi.py:
-
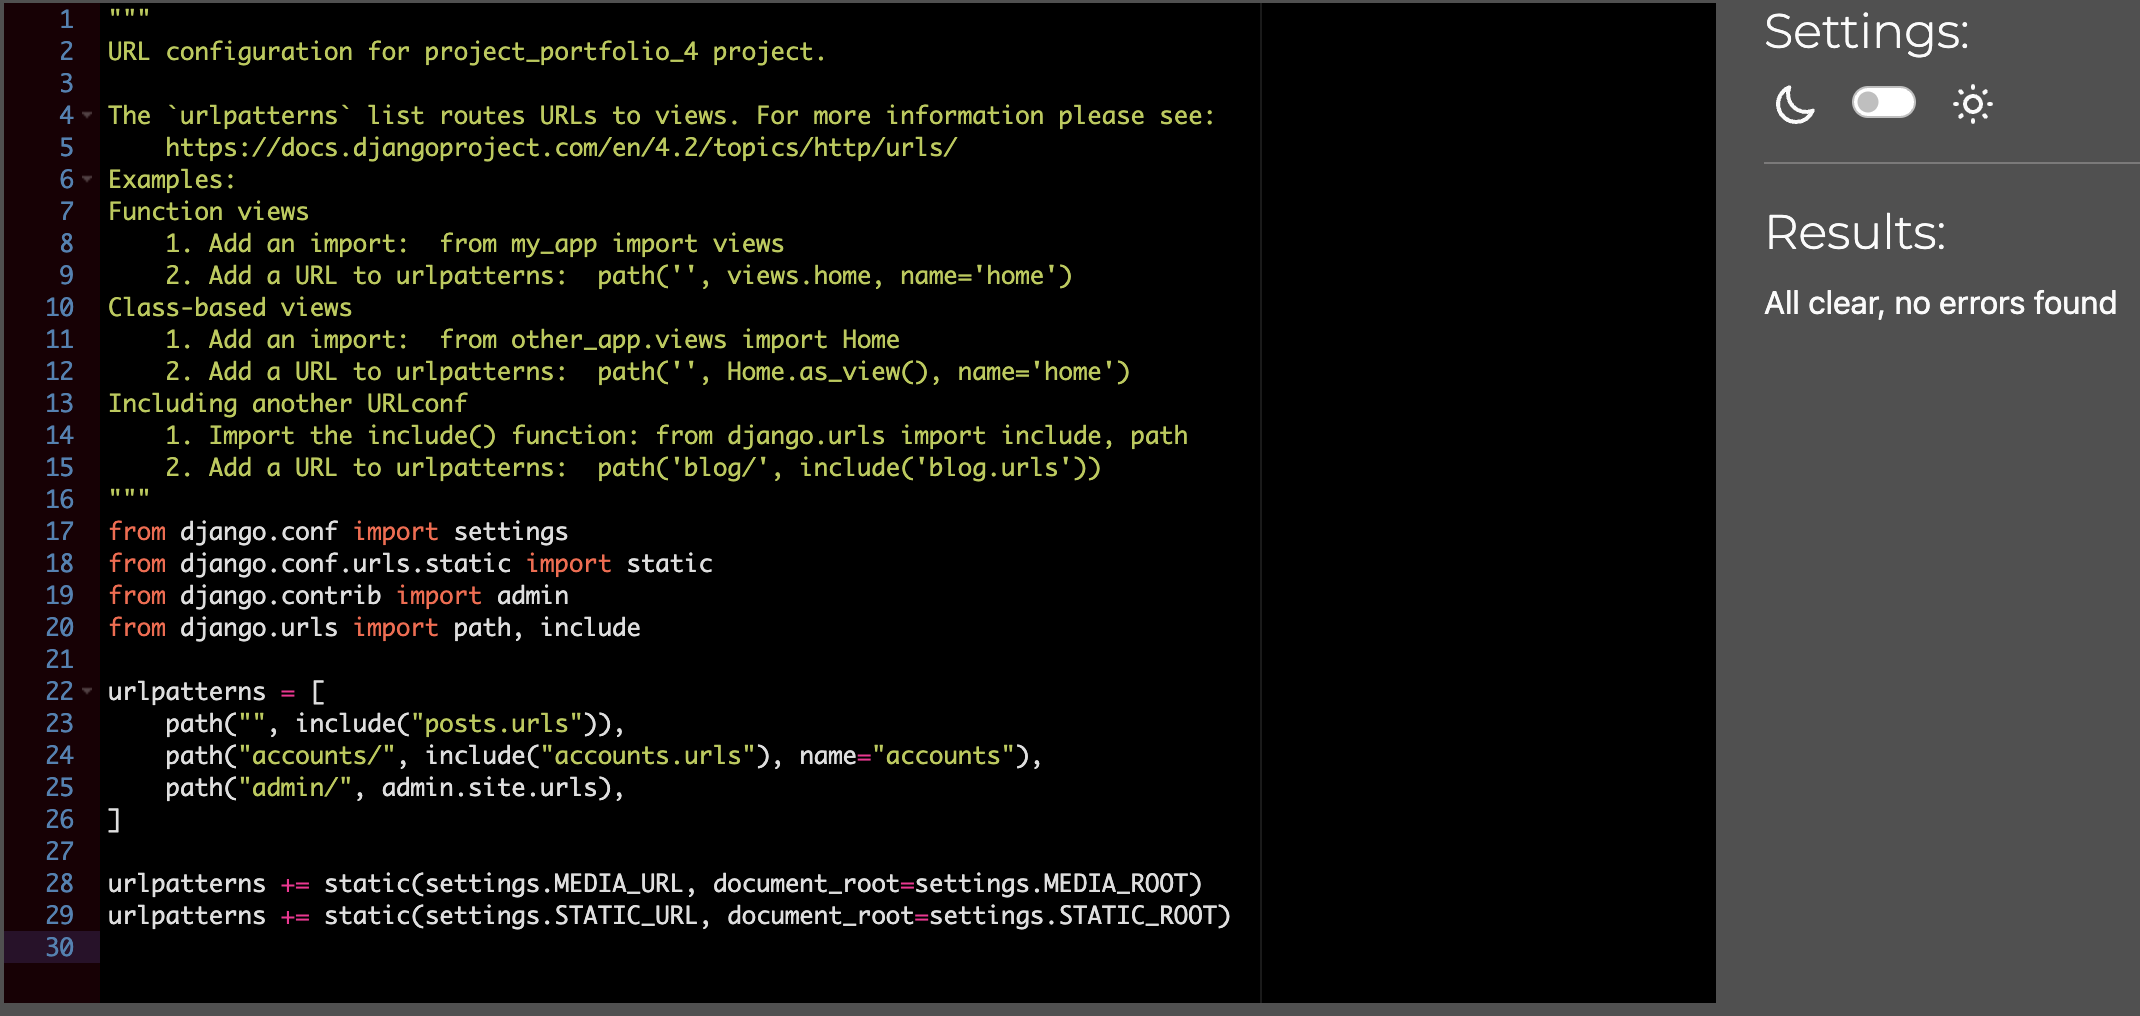
project-urls.py:
-


- I encountered a few errors on restaurant /cafe/bar html files during HTML validator testing and they were resolved.


-
Admin
-
As the site admin, I can access the Django-admin panel and log in as admin by adding "/admin" to the end of the url link and pressing the enter button again.
-
As a Site Admin I can approve or disapprove posts so that I can filter out objectionable posts.
-
As a Site Admin I can create, read, update and delete posts so that I can manage my blog content.
-
As a Site Admin I can aproove Posts before it is published so that the site content will be consistent.
-
Member User
-
As a Member User I can login my account so that I can manage my posts, comment and like.
-
As a Member User I can post/add/edit/delete posts so that I can share and manage my posts.
-
As a Member User I can like or unlike a post so that I can interact with the content.
-
As a Member User I can leave comments on a post so that I can be involved in the conversation.
-
As a Member User I can edit my comment or delete.
-
-
As a Member User I can view my posts status of approval so that I can manage my posts.
-
General User
- As a Site User I can view a list of posts so that I can select one to read.
-
As a Site User I can click on a post so that I can read the full text.
-
As a Site User / Admin user I can view comments on an individual post so that I can read the conversation.
-
As a Site User / Admin I can view the number of likes on each post so that I can see which is the most popular or viral.
-
As a Site User I can register an account and login if I want to share post or comment.
-
Browser Compatability
-
Checked and verified that the site works on different browsers.
-
Safari:
-
-
Chrome:
-
-
Responsiveness Testing
- Desktop-Large Screen sizes:
- Ipad - Medium Screen sizes
- Mobile - Small Screen Sizes:


This project was deployed to Heroku. "Heroku is a cloud platform that lets companies build, deliver, monitor and scale apps."here
- Steps to open account in Heroku:
- Signup here if you do not have an account already.

- After you fill in all the information for account and sign in, you will be on Dashbord. Here is where you will create an application.
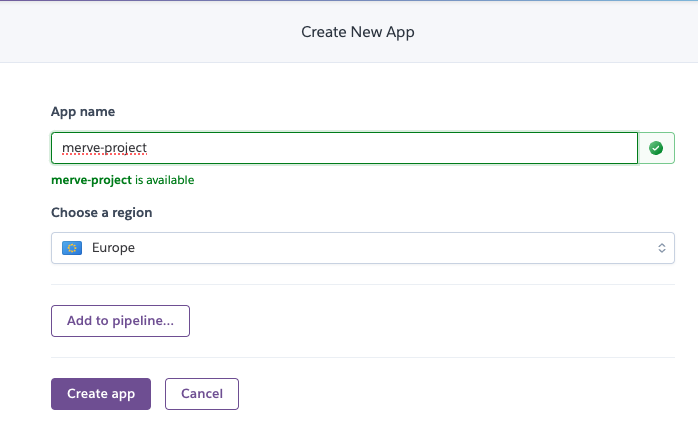
- Click on New => Create new app.
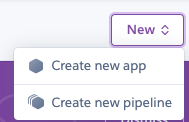
- Choose a name to your application and select location that you are based.


I have followed Code Institute's Django Blog Cheat Sheet steps to follow, create and deploy the project on Herokuapps.
- Step 1: Installing Django and supporting libraries
- Install Django and gunicorn: pip3 install django gunicorn
- Install supporting libraries: pip3 install dj_database_url psycopg2
- Create requirements file pip3 freeze --local > requirements.txt
- Create Project django-admin startproject PROJ_NAME . (Don’t forget the . )
- Create App python3 manage.py startapp APP_NAME
- Add to installed: apps ‘APP_NAME’,
- Migrate Changes: python3 manage.py migrate
- Run Server to Test: python3 manage.py runserver
- Create the Heroku app
- Attach the database
- Prepare our environment and settings.py file
- Get our static and media files stored on
-
Create new Heroku App
-
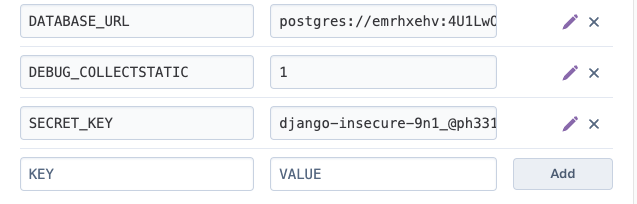
Copy DATABASE_URL - Located in the Settings Tab, in Config Vars, Copy Text


- Add Database url link as confiq vars on Heroku from ElephantSQL

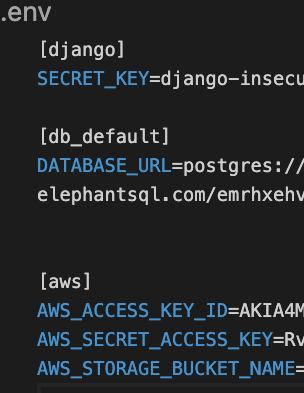
- Create new env.py file on top level directory
-
Import os library : import os
-
Set environment variables: os.environ["DATABASE_URL"] = "Paste in Heroku DATABASE_URL Link"
-
Add in secret key: os.environ["SECRET_KEY"] = "Make up a randomSecretKey"
-
In Heroku.com
- Add Secret Key to Config Vars: SECRET_KEY, “randomSecretKey”
- Reference env.py
- Remove the insecure secret key and replace - links to the secret key variable on Heroku
- Replace DATABASES Section (Comment out the old DataBases Section) - links to the DATATBASE_URL variable on Heroku
- Make Migration: - python3 manage.py migrate
- Copy your Amazon_URL from Amazon Dashboard
- Add Amazon URL to env.py - be sure to paste in the correct section of the link
- Add Amazon URL to Heroku Config Vars - be sure to paste in the correct section of the link
- Add DISABLE_COLLECTSTATIC to Heroku Config Vars (temporary step for the moment, must be removed before deployment)


- Add Amazon Libraries to installed apps (note: order is important)
- Tell Django to use Amazon to store media and static files. Place under the Static files Note
- Link file to the templates directory in Heroku. Place under the BASE_DIR line
- Change the templates directory to TEMPLATES_DIR. Place within the TEMPLATES array
- Add Heroku Hostname to ALLOWED_HOSTS
- Create 3 new folders on top level directory
- media, static, templates
- Create procfile on the top level directory
- Procfile
- Add code
- web: gunicorn PROJ_NAME.wsgi
- Add, Commit and Push
- git add .
- git commit -m “Deployment Commit”
- git push
- Deploy Content manually through heroku/
- E.g Github as deployment method, on main branch


Before the final Deployement: Remove the "DISABLE_COLLECTSTATIC" from Heroku Config vars, and Change Debug to "False" in settings.py
It is possible to do a independent copy of a GitHub Repository by forking the GitHub account. The copy can then be viewed and it is also possible to do changes in the copy without affecting the original repository. To fork the repository, take these steps:
After logging in to GitHub, locate the repository. On the top right side of the page there is a 'Fork' button. Click on the button to create a copy of the original repository.
- Github Fork


To clone and set up this project you need to follow the steps below.
-
When you are in the repository, find the code tab and click it.
-
To the left of the green GitPod button, press the 'code' menu. There you will find a link to the repository. Click on the clipboard icon to copy the URL.
-
Use an IDE and open Git Bash. Change directory to the location where you want the cloned directory to be made.
-
Type 'git clone', and then paste the URL that you copied from GitHub. Press enter and a local clone will be created.
-
Github Create Local Clone

- To be able to get the project to work you need to install the requirements. This can be done by using the command below:
- pip3 install -r requirements.txt - This command downloads and install all required dependencies that is stated in the requirements file.
- The next step is to set up the environment file so that the project knows what variables that needs to be used for it to work. Environment variables are usually hidden due to sensitive information. It's very important that you don't push the env.py file to Github (this can be secured by adding env.py to the .gitignore-file). The variables that are declared in the env.py file needs to be added to the Heroku config vars. Don't forget to do necessary migrations before trying to run the server.
- python3 manage.py migrate - This will do the necessary migrations.
- python3 manage.py runserver - If everything i setup correctly the project is now live locally.
- Setup env.py

-
The contents in the posts were taken from the relevant websites.
-
These site links are attached to the post detail page.
-
Some content was written only by me.
-
Photos used were taken from www.pexels.com
-
and some photos were taken from websites, they are free
-
Coolors color palette.

-
Amazon web service I used AWS and I followed this page to implement it. How to implementAWS to project
-
The links I added below belong to their own websites related to the posts shared on the blog page. The content and free photographs from these pages were used.
-
Template for read.me provided by Code Institute (with some additional changes that my mentor Precious Ijege) suggested.
This project was created for Portfolio Project #4 (Full-Stack Tolkit) - Diploma in Full Stack Software Development Diploma at the Code Institute. I would like to thank my mentor Precious Ijege for relevant feedback during the project.
Merve COSKUN, 2024