Command-line tool for downloading data from the SPSM project's PostgreSQL database server.
- Create a virtual Python environment with version 3.11 of Python.
- Activate the environment.
- With the environment activated, install this tool using the following command:
$ pip install git+https://github.com/medialab/spsm-database-api.git- Test your installation with the below command. (It's normal if it takes 1-2 seconds for the tool to boot up / respond.)
$ spsm --helpUsage: spsm [OPTIONS] COMMAND [ARGS]...
Options:
--database TEXT
--host TEXT
--port INTEGER
--username TEXT
--password TEXT
--help Show this message and exit.
Commands:
download
upload
For all data transfers to and from the project's PostgreSQL server, you'll need two things:
- A terminal running in the background, in which the remote PostgreSQL server's port is being forwarded to a port on your computer. (The default forwarded port is
54321.) - A user profile on the server, which has been granted permissions to select from tables.
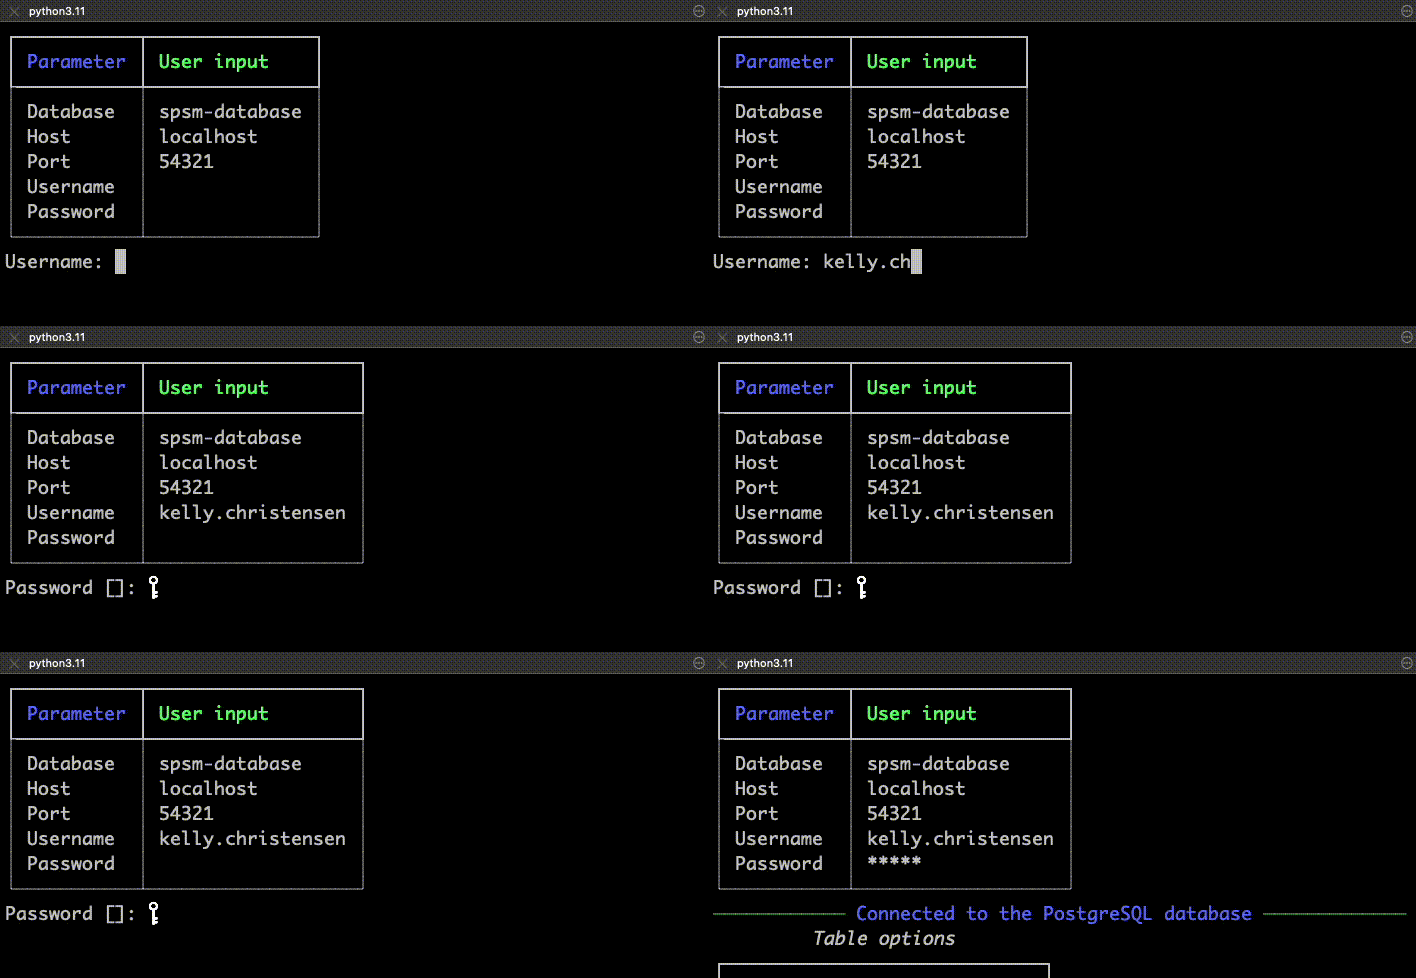
Then, once you launch one of the tool's commands (spsm download or spsm upload), you'll be prompted to input your connection details.
The simplest way to get started is to enter the command spsm download and let the tool guide you through configuring all the options.
-
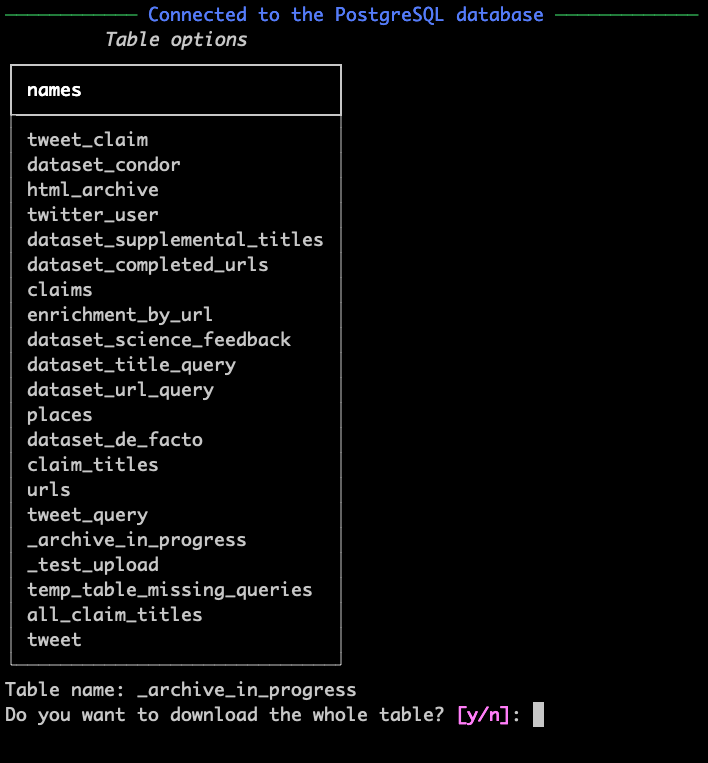
Once connected, you will be presented with a list of the tables in the database and prompted to enter the name of the table you want to download.
-
Then, you will be asked if you want to download the entire table or only certain columns from the table.
- If you entered
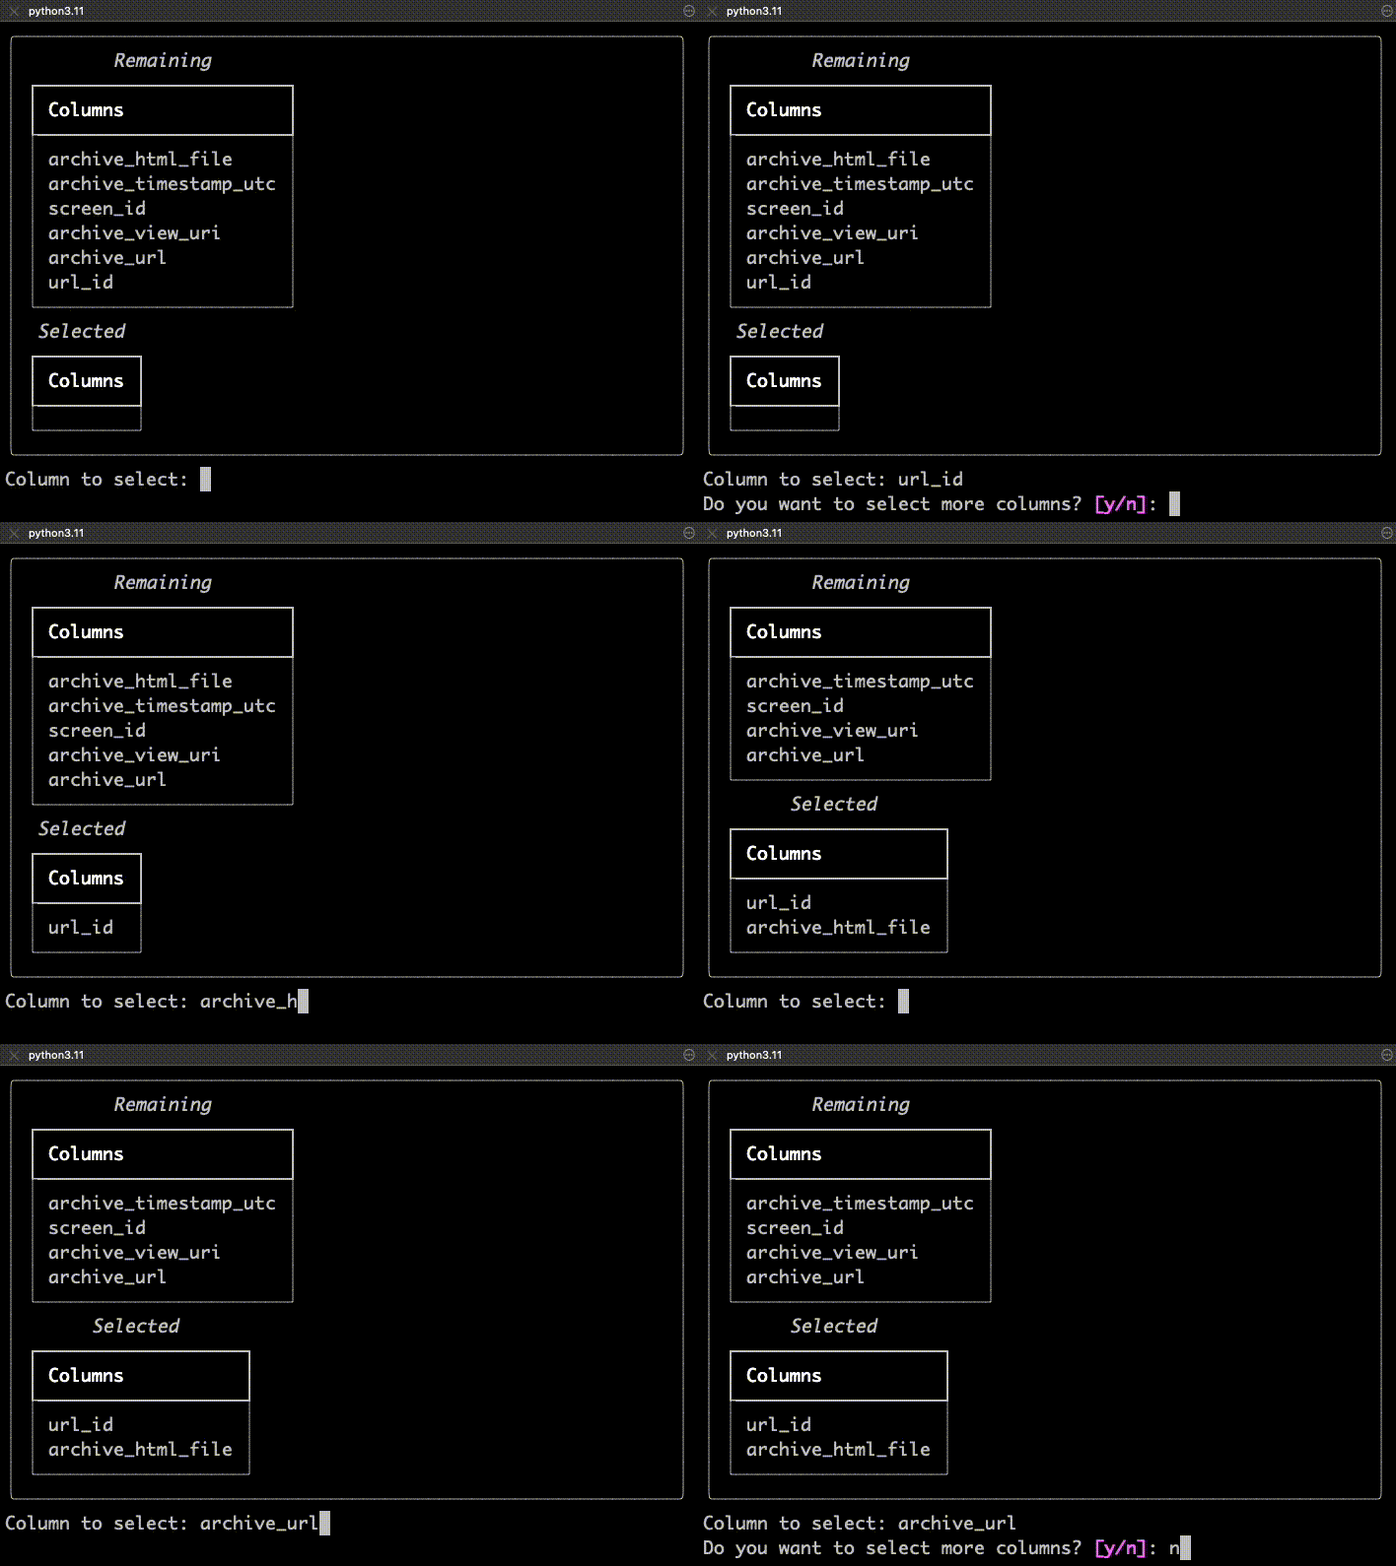
nfor "no," meaning you want to download only part of the table / some of its columns, you will be presented with a list of the table's columns and prompted to select which ones you want to include in your download.
Note: Downloading only some of the columns is helpful if, for example, the table has a text column that you're not interested in analyzing at the moment. By not selecting the text column, and only selecting the relevant columns, your download will go faster.
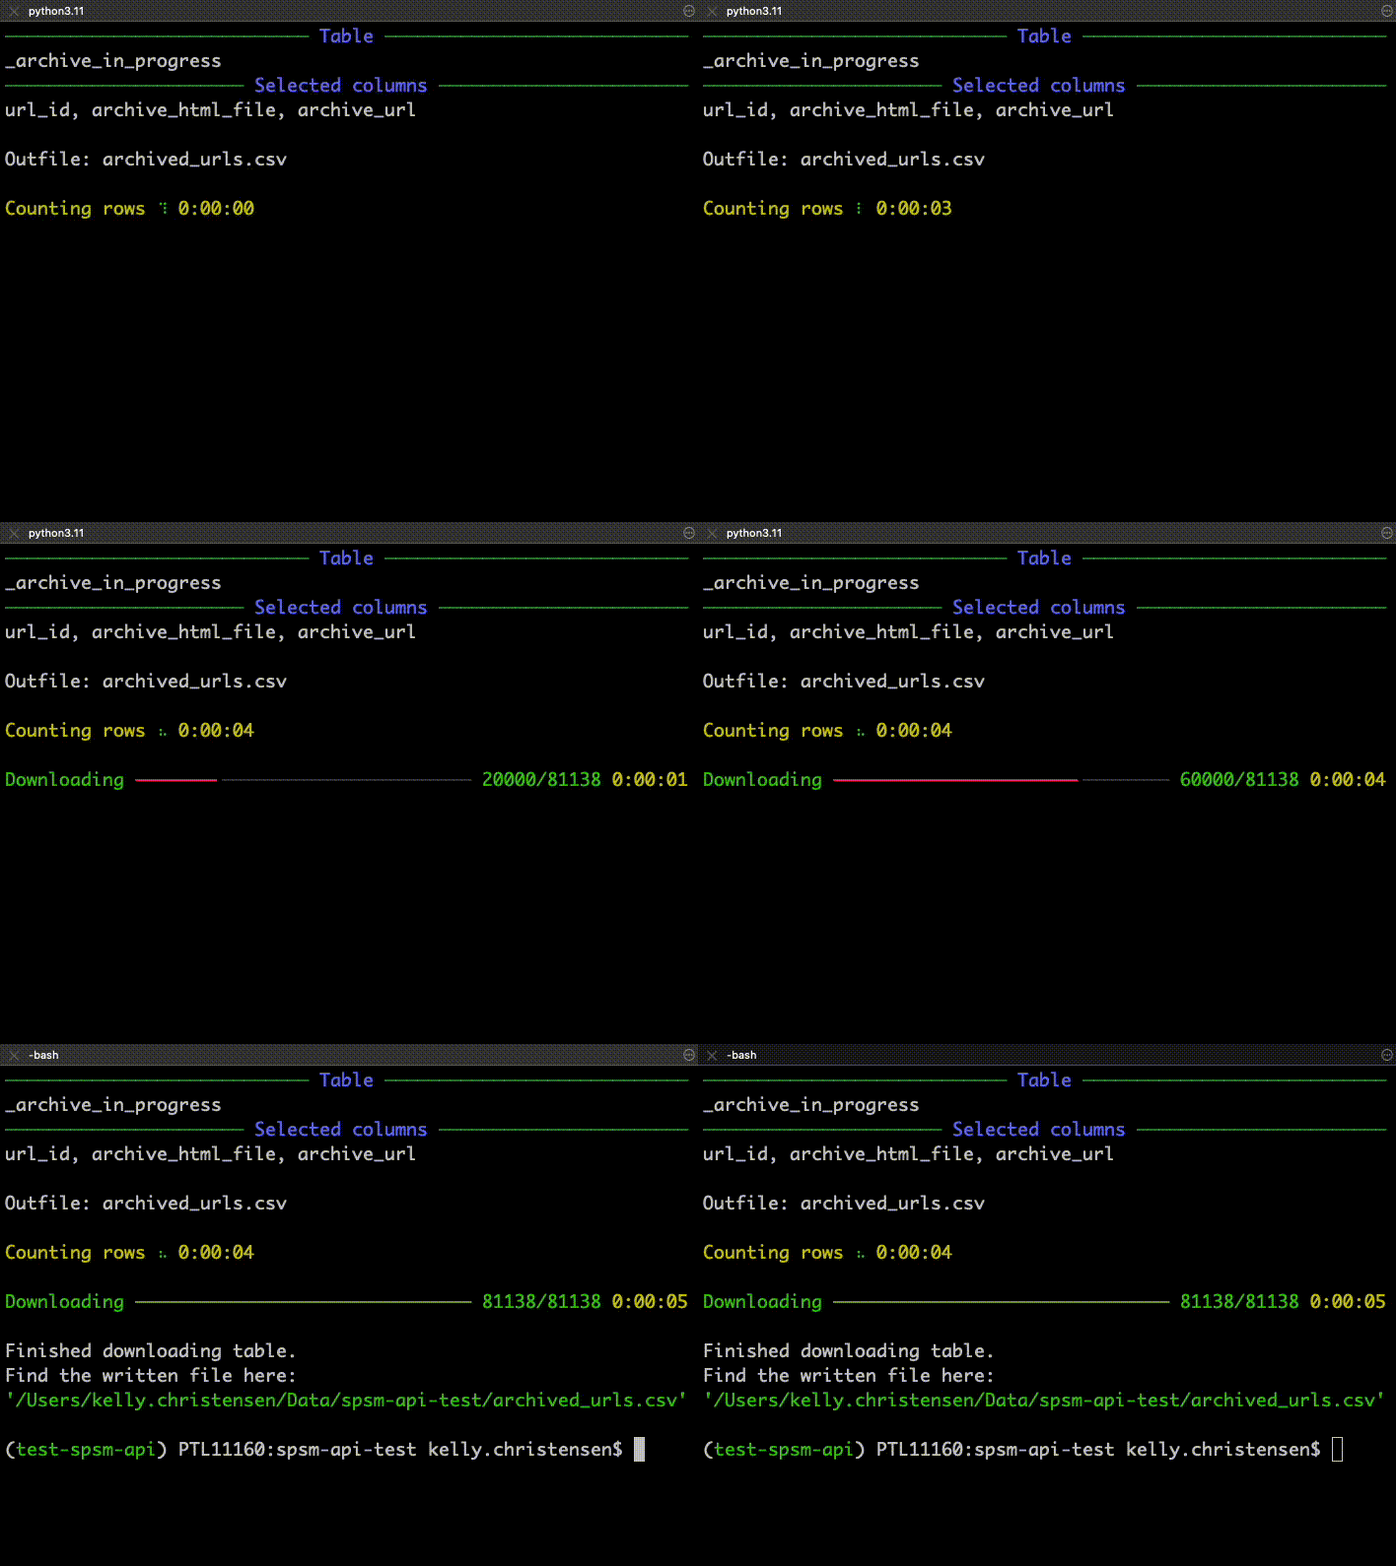
- Finally, you'll be reminded of your choices and prompted to provide a path to the CSV file in which you want to write the downloaded table.
That's it! 🎉 You downloaded a table from the remote server onto your local computer.
If you don't want to be prompted, you can enter all the information directly as options after spsm download. However, this only works if you're downloading the entire table, which you signify with the flag --select-all. Otherwise, you'll still be prompted to confirm which columns you want to select.
$ spsm --username "YOUR.USERNAME" --password "YOUR-PASSWORD" download --table "TABLE-NAME" --select-all --outfile "OUTFILE"Using this tool, you can create a new table in the database from a CSV file that you have locally on your computer.
Note: To alter and/or update existing tables with new data, you'll need more complex SQL that this tool isn't designed to manage.
Before you upload your new table data, you'll need to map the data's columns to data types. You'll also need to declare which column in your data contains unique values and is never empty, in other words, which one can serve as the new table's "primary key" column. (Note: For the moment, the tool does not support composite primary keys, made from the combination of multiple columns.)
The table schema needs to written in a human-readable file format called YAML. At the root level (with no indentation), the YAML file contains the following 2 pieces of information.
pk: The name of the table's primary key columncolumns: A list of all the columns in the CSV / new table, paired with their data type. Below the root-levelcolumns, the information is indented by 2 spaces.
table-schema.yml
pk: id
columns:
  id: int
  name: string
  date: datetime
Each column must be assigned one of the following data types:
intorintegertextvarchar(N)(the N represents an integer, denoting the length of the varying characters, e.g.varchar(20))floatboolorbooleandatedatetimeinterval
The simplest way to upload a new table is to enter the command spsm upload.
-
First, as with downloading data, you'll connect to the database.
-
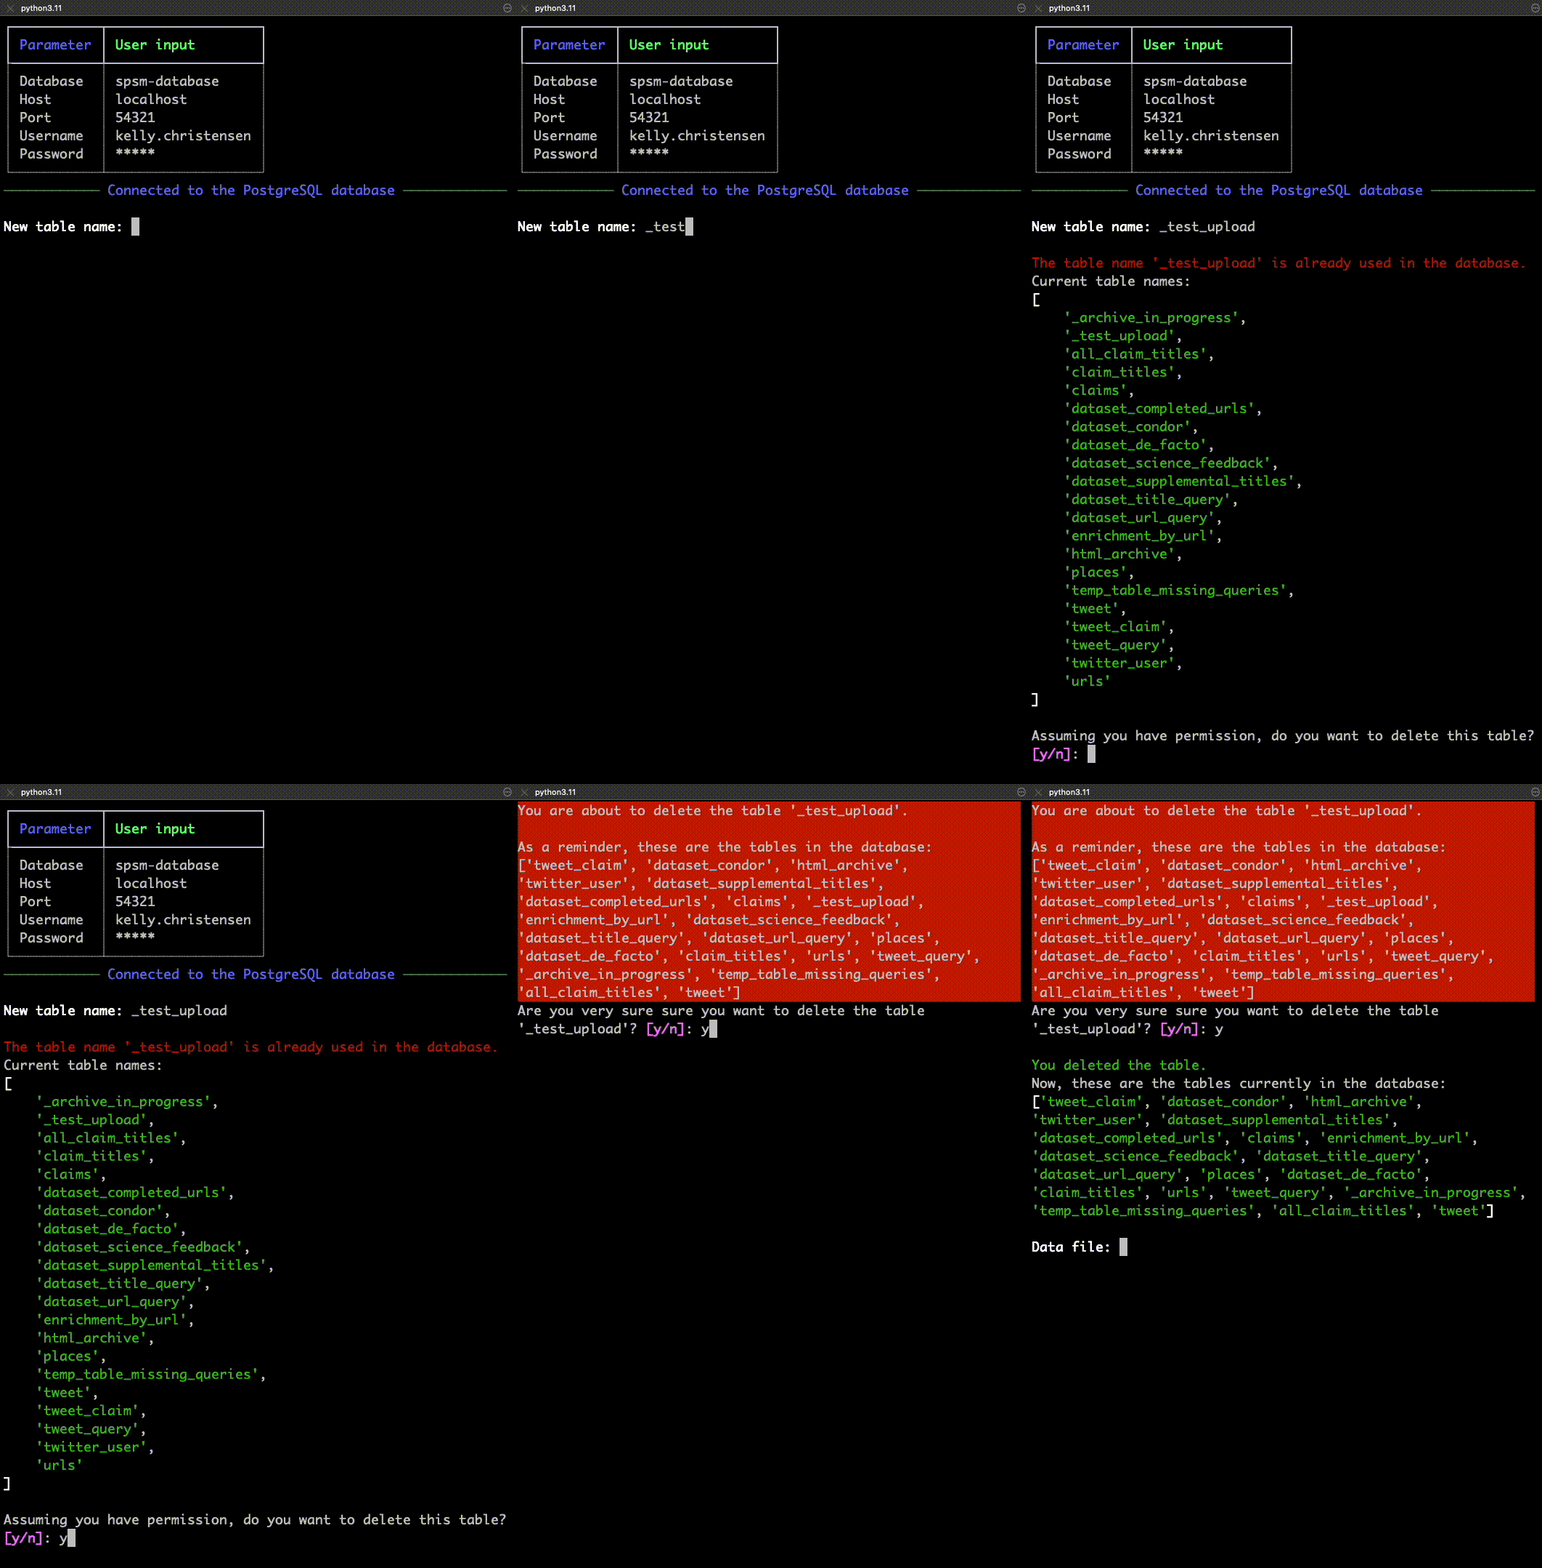
Once connected, you'll be prompted to name your new table.
-
Table names must begin with an underscore or a letter. They cannot begin with a number. In the SPSM database, tables names are consistently written in "snake case," meaning underscores separate words.
-
If the table name you want to use is already in use, you'll be asked if you want to delete the existing table. If you have the permission to delete the existing table (i.e. if you previously created it, for your own analytical needs), you'll be asked for a second and final time if you want to delete it. If again you say yes (
y), your preferred table name will be used to create a new table.
-
- Once your table name is validated, you'll be prompted to give the name of the CSV file and the YAML configuration file that you've prepared in advance.
That's it! 🎉 Once you've entered the file names, the tool will run some preliminary tests of the data you've input then it will try to upload it into the database.
The validation tests include the following:
-
Test 1 : Making sure your YAML configuration file named all the columns that the tool identified in the CSV.
Using the following 2 files as examples, this test would fail because the YAML configuration file declares only 2, not all 3, of the columns in the CSV file.
table-schema.ymlpk: id columns: id: int name: varchar(250)
table-data.csvid,name,date 1,John Oliver,2024-02-19 17:31:03.178218 2,Jon Stewart,2024-02-19 17:31:22.332499 -
Test 2: Making sure the primary column, which you declared in the YAML configuration file, does not have any cells that are empty in the CSV file.
The validation tests do not include checking to see that the data in the CSV file's columns matches the data types you declared in the YAML configuration file. If there is a discrepancy, it's likely the script will crash with an sqlalchemy.exc.StatementError. For the moment, the only solution is to be more careful about making sure the data in the CSV looks like / can be parsed as the data types declared in the YAML configuration file. As a general principle, the script should not be responsible for autonomously modifying your data to compensate for discrepancies between what you declare you want the table to look like (the YAML configuration file) and what data you provide to the table (the CSV file).

