OpenWRT SFTP & BitTorrent server
This guide is intended to walk a user through building a router-based multi-user SFTP & BitTorrent (using Transmission) server with OpenWRT. You should have a working router running OpenWRT (and LuCI) before starting. Upon completion, you will have a router with seedbox capabilities. SFTP users (that you manage) will be able to download files from shared directories without having router shell access.
Don't need BitTorrent transfers? Skip the Transmission section and transfer local data to the SFTP server via Samba.
NOTE!
- This guide assumes you are familiar with command-line terminals and VIM or another command-line text editor
- Text within brackets such as [username] are variables to be replaced at your discretion
- All commands are to be run as the root user (use
sudo -iafter disabling root SSH access)
Prerequisites
Hardware
- USB storage drive formatted EXT4 (NTFS-3G is a stable read/write NTFS driver, but is too slow for this implementation)
- USB swap drive formatted SWAP (optional)
Software
Via SSH, update OPKG (Open PacKaGe Management).
opkg updateSetup
Replace Dropbear with OpenSSH
Dropbear doesn't work with openssh-sftp-server, so we will replace it with OpenSSH to create a multi-user SFTP server.
- Via LuCI, change Dropbear port to something other than 22 (I used 44)
- Connect to router via Dropbear SSH on the new port
- Install OpenSSH (and SFTP)
opkg install openssh-server openssh-sftp-server- Enable & start OpenSSH
/etc/init.d/sshd enable/etc/init.d/sshd start- Log out of Dropbear SSH and reconnect with OpenSSH (using port 22 now)
- Stop & disable Dropbear
/etc/init.d/dropbear disable/etc/init.d/dropbear stop- Via LuCI, delete the Dropbear instance
Users and groups
Add OpenWRT users
- Install necessary packages to manage users and groups
opkg install shadow-useradd shadow-groupadd shadow-userdel shadow-groupdel shadow-groupmod shadow-usermod- Add users, making sure to add a user to be designated as an administrator to use instead of the root user (repeat for each user)
useradd [username]- Add home directory
mkdir /home- Add user home directories (repeat for each user)
mkdir /home/[username]- Set user passwords - this is necessary because we won't be giving SFTP users shell access (repeat for each user)
passwd [username]Configure shell access for new users
- Add shell access for the administrative user created above
usermod -s /bin/ash [admin_username]- Disable shell access for the SFTP users created above (repeat for each user)
usermod -s /bin/false [sftp_username]Create groups to manage access rights
- Create an administrator group (this will be assigned to the administrative user created above)
groupadd [admin_group_name]- Create a SFTP group (this will be the read-only SFTP-access-only user group)
groupadd [sftp_group_name]Assign groups to users
- Assign administrator group to the administrative user
usermod -G [admin_group_name] [admin_username]- Assign SFTP group to SFTP users (repeat for each user)
usermod -G [sftp_group_name] [sftp_username]Secure SSH access
- Install sudo to allow temporary privileged access
opkg install sudo- Edit
/etc/sudoersto let any user 'sudo' with root password
visudo- Uncomment the two lines below
Defaults targetpw  # Ask for the password of the target user
ALL ALL=(ALL) ALL # WARNING: only use this together with 'Defaults targetpw'- Save and close
/etc/sudoers - Edit SSH configuration file
vim /etc/ssh/sshd_config- Set SSH & SFTP port
Port [your_desired_port]- Disable root SSH access
PermitRootLogin no- Change SFTP server from
Subsystem sftp /usr/lib/sftp-serverto:
Subsystem sftp internal-sftp- Configure chroot for SFTP group
Match Group [sftp_group_name]
        ForceCommand internal-sftp
        ChrootDirectory %h
        AllowTcpForwarding no
        PermitTunnel no
        X11Forwarding no
AllowAgentForwarding no- Save and close SSH configuration file
- Restart SSH
/etc/init.d/sshd restartAt this point you can test SSH and SFTP access for the administrator and other users. Root SSH access is now disabled (use sudo -i as the administrative user to gain sudo privileges) Later on we'll be adding mount points so there's actually a point for SFTP-only users to access the router.
Storage
Connect hardware
Connect your EXT4 USB HDD to the router and if applicable, connect your SWAP formatted USB flash drive. The EXT4 HDD will be used as a network drive to store BitTorrent data in addition to Transmission configuration files.
Install necessary packages
- To read/write EXT4 filesystems
opkg install kmod-fs-ext4- To manage drives, including SWAP
opkg install block-mountConfigure fstab
- Pre-fill fstab with necessary device information
block detect > /etc/config/fstab- Edit fstab
vim /etc/config/fstab- Enable network drive HDD and SWAP (add option to both mount configs)
option enabled '1'- Enable read/write for network drive HDD
option options 'rw'- For the network drive HDD, change target to your naming preference
option target '/mnt/[network_drive]'- Save and close fstab
Grant users directory access
- Within each SFTP user's home directory at
/home/[username], create top-level directories mirroring/mnt/[network_drive]/[shared_directory](repeat for each user and shared directory)
mkdir /home/[username]/[shared_directory]- Link
/home/[username]/[shared_directory]to/mnt/[network_drive]/[shared_directory]on router startup- Edit router startup file
vim /etc/rc.local- Add to
/etc/rc.localbefore theexit 0line (repeat for each user and shared directory)
# Mounts network drive for SFTP users (remember to create /home/[username]/[shared_directory] first)
mount --bind /mnt/[network_drive]/[shared_directory]/ /home/[username]/[shared_directory]/- Restart router
At this point users can (locally) login and access directories on the network drive you gave them access to. Permissions will be set in the next section.
Permissions
We need to ensure permissions are set correctly on the network drive so that the SFTP group cannot write anything to the drive. We should also give the administrator group write access.
- Start by ensuring everything on the drive is initially owned by root
chown -R root:root /mnt/[network_drive]
chmod -R 755 /mnt/[network_drive]
At this point, the SFTP and administrator groups only have read access to the shared directories.
- Assign the network drive to the administrator group
chgrp -R [admin_group_name] /mnt/[network_drive]- Grant write access to the administrator group
chmod -R 775 /mnt/[network_drive]- Now, we need to ensure the administrator group stays assigned for all new files and directories. We make it 'stick' with the sticky bit.
chmod -R g+s /mnt/[network_drive]At this point permissions have been correctly configured. After configuring DDNS, your users will be able to safely access your shared directories.
DDNS
There are many different DDNS options available. Follow the guide here to choose and configure a DDNS client that best meets your needs.
NOTE: Add a firewall exception for SSH/SFTP remote access

At this point your users will be able to access your shared directories remotely by using your DDNS address and SSH/SFTP port.
Samba (optional)
If you're on a Windows-based system, you'll want to access your network drive via Windows File Explorer.
- Install Samba
opkg install luci-app-samba- Configure Samba through LuCI (settings are pretty self-explanatory)
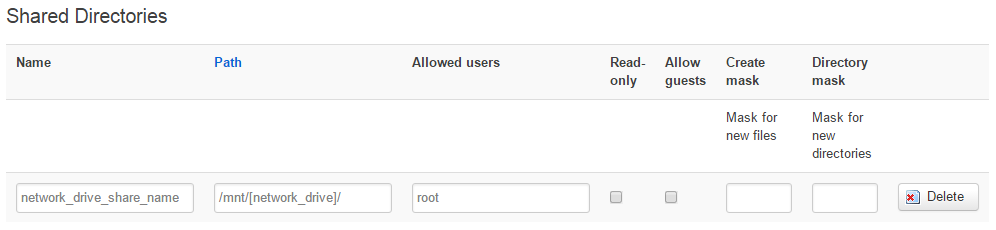
- Edit
/etc/samba/smb.conf.template

vim /etc/samba/smb.conf.template- Add the following lines to
/etc/samba/smb.conf.template
force create mode = 0775
force directory mode = 0775- Remove or comment the following line from
/etc/samba/smb.conf.template(we will be using root to access the drive via your local network)
invalid users = root- Add Samba user(s) (they must exist in
/etc/passwd- I used the root user to keep root ownership of files and directories)
smbpasswd -a [username]NOTE: The password you set here is different than the SSH/SFTP password set for the user.
At this point you can mount your network drive locally in Windows via the "Map Network Drive" feature.
BitTorrent
Configure Transmission client
- Install necessary Transmission packages
opkg install luci-app-transmission transmission-web- Configure Transmission via LuCI to preferred settings (most will depend on your ISP speed)
- Point configuration directory to the network drive
config file directory = /mnt/[network_drive]/transmission- Set the network drive as the download directory
download directory = /mnt/[network_drive]/[specific_directory]- Set umask to 2 (equates to 002) so the correct permissions (775) are set on new files and directories
umask = 2Make sure you configure a RPC username and password for Transmission. Once secured, you can disable the RPC whitelist to enable remote Transmission access (you'll still need to configure a firewall exception for Transmission web interface access).
New content permissions
Files downloaded by Transmission won't mirror the existing file/directory permissions, and Transmission settings don't allow the level of control necessary. To work around this, we create a cron job to update permissions for any new content.
- Add a cron job to OpenWRT via LuCI (System -> Scheduled Tasks)
# Runs every 10 minutes to apply permissions and setgid over /mnt/[network_drive]/ (to account for data created by luci-app-transmission)
*/10 * * * * /bin/chmod -R 2775 /mnt/[network_drive]
Wrap-up
And that's all folks. You can view Transmission web interface documentation here. The number of BitTorrent transfers possible will depend on your specific router and OpenWRT release stability.
I'll add additional information (and potentially some media of the finished product) in the future. Questions or found a bug? Email me at me@matthewtraughber.com or create an issue or pull request.