This component helps you mimick the navigation bar auto scrolling that you see in the facebook, instagram and other apps. Not only that, but with the ability to add an additional extension that scrolls along as well! It is designed for ease of use, and is battle tested in our own Telly app[1]!

[1]: AppStore version doesn't have the latest, though. Coming soon. 😁
[*]: Content are shown for demo purpose only of how this component is used in the Telly app. We hold the right to show those contents as part of our contract with Sony Pictures.
- Features: See what this component has to offer!
- Quick Start: TL;DR people, you'll love this.
- Design Goals: The cherished aspects of this component.
- A Deeper Look: You're invensted in this now and want to make the most out of it.
- How it Works: The deep stuff...
- Remarks: Read this before losing all hope.
- Similar Projects: Similar projects that influenced the project in some way.
- Optional extension view to the
UINavigationBar!

- Auto expand if below threshold

- Auto contract if below threshold

- Very responsive, resilient and robust

- Adjustable expansion resistance

- Plays well with
pushViewController

- Get the component
-
- Add the following to you Podfile
pod TLYShyNavBar
- Add the following to you Podfile
-
Download the project/git submodules, and drag the
TLYShyNavBarfolder to your project.
#import "TLYShyNavBarManager.h"
- I suggest adding it to your pch file, or wherever you want to use the component.
- Write one line of code to get started!!
/* In your UIViewController viewDidLoad or after creating the scroll view. */
self.shyNavBarManager.scrollView = self.scrollView;
IMPORTANT!! If you are assigning a delegate to your scrollView, do that before assigning the scrollView to the TLYShyNavBarManager! To learn more, see below.
If you are building apps in Swift and targeting apps to iOS7 Apples hidesBarsOnSwipe will not work because it is in an iOS 8 feature. As an alternative you can use TLYShyNavBar component in lieu of Apples feature.
To use this component in Swift
- Clone this git repository locally:
git clone https://github.com/telly/TLYShyNavBar.git - Copy the
TLYShyNavBardirectory into your Swift project.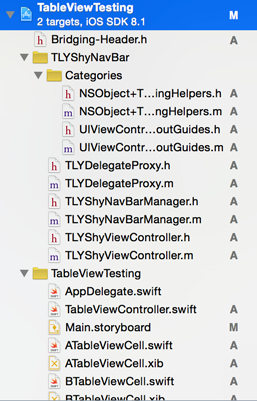
- Create a new header file called
Bridging-Header.hand add the headers fromTLYShyNavBarfolder.see headers below. - Add the bridging header file to the project's build settings. Search
Bridging HeaderinBuild Settingsand addBridging-Header.h.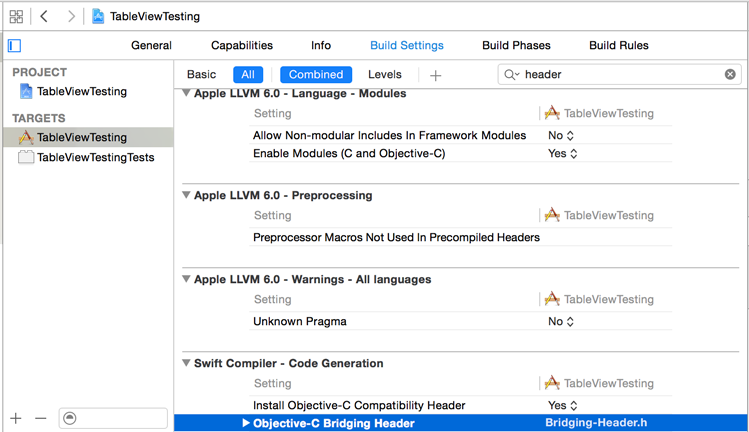


Now your project is setup to use the TLYShyNavBar component. Next all you need to do is set the scrollview property in your UIViewController like it was an Objective-c project.
/* In your UIViewController viewDidLoad or after creating the scroll view. */
self.shyNavBarManager.scrollView = self.scrollView;
#import "TLYShyNavBarManager.h"
#import "TLYShyViewController.h"
#import "TLYDelegateProxy.h"
#import "NSObject+TLYSwizzlingHelpers.h"
#import "UIViewController+BetterLayoutGuides.h"
- Ease of Use: This is the most important, and should never be compromised. Even if compatability breaks or versatility is limited, the component should remain easy to integrate.
- Portable: Less dependencies, lightweight, self-contained, ... etc.
- Compatability: Whenever possible, the component should simply work with whatever you throw at it.
The above example, while small, is complete! It makes the navigation bar enriched with humbility, that it will start getting out of the way when the scroll view starts scrolling. But, you may want to do more than that!
Simply access it within your UIViewController subclass as a property. The property is lazy loaded for you, so you don't have to instantiate anything:
self.shyNavBarManagerYou can assign your own extension view, and it will appear right beneath the navigation bar. It will slide beneath the navigation bar, before the navigation bar starts shrinking (contracting). Adding an extension view is as simple as:
/* Also in your UIViewController subclass */
[self.shyNavBarManager setExtensionView:self.toolbar];When you starting scrolling up (going down the view) or scrolling down (going up the view), you may want the navigation bar to hold off for a certain amount (tolerance) before changing states. (i.e. if the user scrolls down 10 px, don't immediately start showing the contracted navigation bar, but wait till he scrolls, say, 100 px).
You can control that using the following properties on the shyNavBarManager:
/* Control the resistance when scrolling up/down before the navbar
 * expands/contracts again.
 */
@property (nonatomic) CGFloat expansionResistance;      // default 200
@property (nonatomic) CGFloat contractionResistance; // default 0OK, I'll admit that I added this section purely to rant about how this project came together, and the desicion making process behind it.
At a component-user level, this works by adding a category to UIViewController with a TLYShyNavBarManager property. The property is lazily loaded, to cut any unnecessary overhead, and lower the barrier of entry. From the property, you can start customizing the TLYShyNavBarManager for that view controller.
Now, you may start asking, what about the navigation bar? Well, the navigation bar is accessed from the view controller your using the manager in. Let's break that down...
- When you access the
shyNavBarManagerfor the first time, it is created with theselfparameter passed to it, effectively binding theshyNavBarManagerto theUIViewController. - The
shyNavBarManageraccesses theUINavigationBarthrough the assignedUIViewController.
... And that is how the basic setup is done!
When you call setExtensionView:, it simply resizes an internal container view, and adds your extension view to it. There is no magic here, just simple, single view extension.
This one was a pain... First, the experiments that this project went through included:
- Observing the contentOffset property
- Adding self as a
UIGestureRecognizertarget - Adding a
UIPanGestureRecognizerto the scroll view. - Make the user implement
UIScrollViewDelegate, and send us the events.
The above didn't yield the perfect experience we were hoping for, except the last one. It did, however, make for redundant code everywhere, and forced the component user to implement the UIScrollViewDelegate. Tha's when the NSProxy happened.
When you assign the scrollView property to the TLYShyNavBarManager, we attach a proxy object to the UIScrollView as the delegate, and then the original delegate to that proxy. The proxy forwards the events we are interested in to the TLYShyNavBarManager, and of course, does everything else normally for the original selector, you won't even notice a thing!
The way the offsets are applied to the navigation bar and extension view is through an elegent linked list implementation. We set the offset to the first node (navigation bar), and ...
-
If it is contracting:
- We pass the contraction amount to the next node, and it returned a residual amount.
-
If we are expanding:
- We process the offset in the first node, and pass the residual to the next node.
It is a simple concept. Say we dragged down by 100 px, and the nav bar was contracted. The navigation bar would take 64 px of that to expand, and then pass the residual 36 px to the next node (extension view) to calculate its offset. The same goes for contracting, but it starts from the last node, all the way up to the navigation bar.
Note: Even though there might be an illusion that the views are expanding and contracting, it's really just a translation (scrolling) of the views. There might be an advantage to actually resizing the bounds, so the extension view doesn't appear behind the navigation bar, for example, so that approach might be explored in the future.
There are downsides in making this component as easy to use as it is. If you have read the how it works section carefully, you'd realize that trying to configure the the shyNavBarManager before it is included in the UINavigationController heirarchy, will break the component, since within the component, we cannot find the navigation bar, and an assert is triggered:
NSAssert(navbar != nil, @"You are using the component wrong... Please see the README file.");Of course, that can be avoided by creating your own TLYShyNavBarManager, like so:
TLYShyNavBarManager *shyManager = [TLYShyNavBarManager new];
shyManager.expansionResistance = 777.f;

/* ... sometime after the view controller is added to the hierarchy  */
viewController.shyNavBarManager = shyManager;