![]()
In this lab, we will create and experiment an end-to-end ML Pipeline. This ML pipeline is supported by an automated infrastructure for training, testing, deploying and integrating ML Models. Furthermore, the model can be deployed in two different environments: DEV environment for QA/Development endpoint and PRD environment for Production endpoint. In addition, we will apply some stress tests to check the ML system scalability and stability. The lab content is also lectured by the ML Operation (MLOps) course in Amazon Machine Learning University (MLU).
You'll need an AWS Account with access to the services above. There are resources required by this workshop that are eligible for the AWS Free Tier if your account is less than 12 months old.
WARNING: if your account is more than 12 months old, you may get a bill. (I launched this pipeline recently and stopped/deleted the system within an hour after it successfully launched, while I got a bill less than $1. If you didn't delete the CloudFormation stack or any active sagemaker instances/hosting endpoints, you may get billed.)
You should have some basic experience with:
- Train/test a ML model
- Python (scikit-learn)
- Jupyter Notebook
- AWS CodePipeline
- AWS CodeCommit
- AWS CodeBuild
- Amazon ECR
- Amazon SageMaker
- AWS CloudFormation
Some experience working with the AWS console is helpful as well.
The following image gives us a high level view of the architecture.
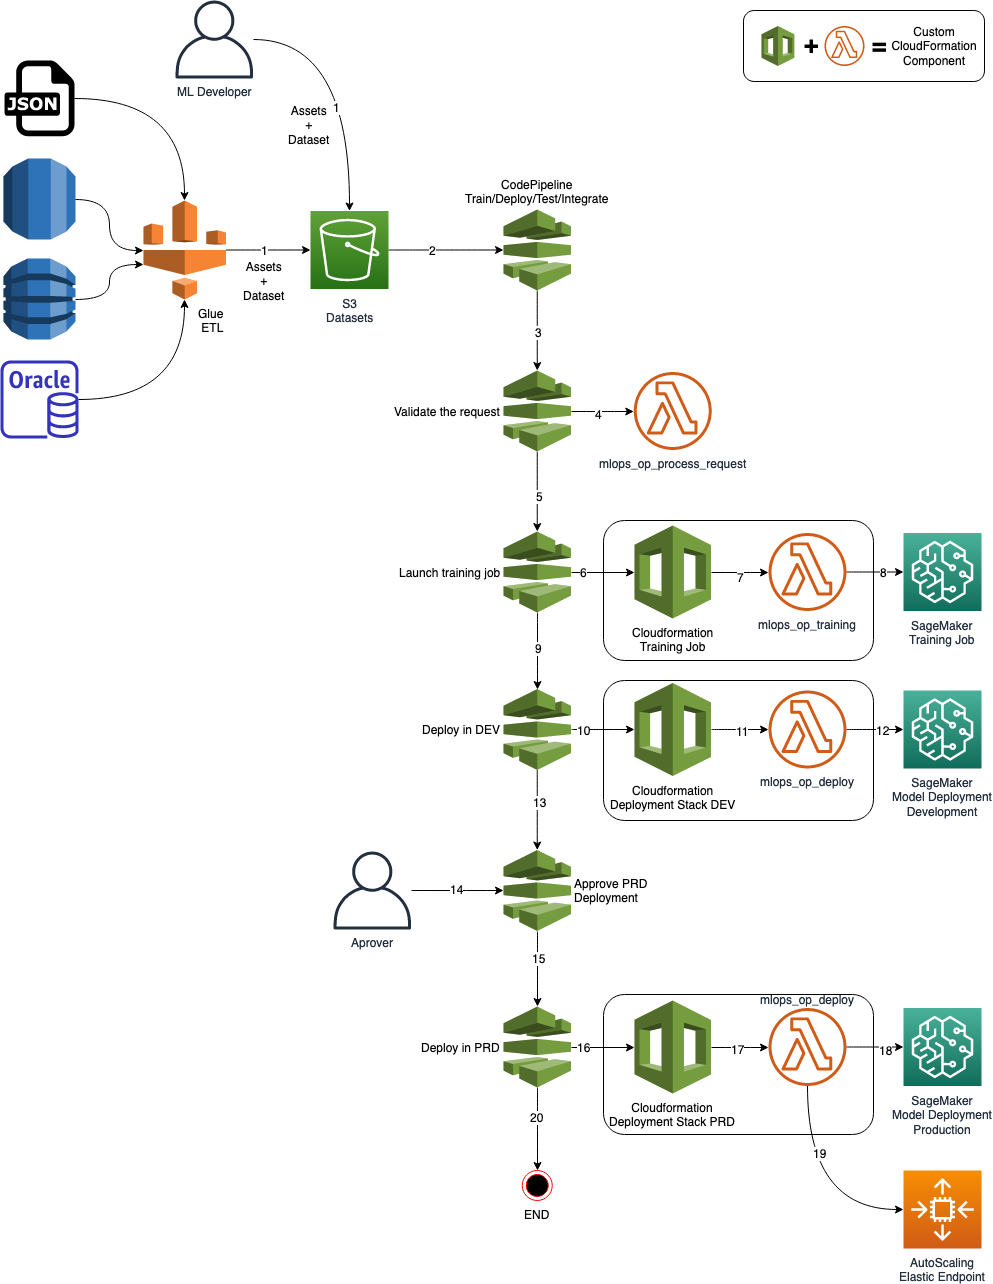
- An ETL process or the ML Developer, prepares a new dataset for training the model and copies it into an S3 Bucket;
- CodePipeline listens to this S3 Bucket, calls a Lambda function for starting training for a job in Sagemaker;
- The lambda function sends a training job request to Sagemaker;
- When the training is finished, CodePipeline gets its status and goes to the next stage if there is no error;
- CodePipeline calls CloudFormation to deploy a model in a Development/QA environment into Sagemaker;
- After finishing the deployment in DEV/QA, CodePipeline awaits for a manual approval
- An approver approves or rejects the deployment. If rejected the pipeline stops here; If approved it goes to the next stage;
- CodePipeline calls CloudFormation to deploy a model into production. This time, the endpoint will count with an AutoScaling policy for HA and Elasticity.
- Done.
The lab is composed of 3 parts:
- In Lab 0, we will create an automated infrastructure via CloudFormation for training, testing, deploying and integrating ML Models.
- In Lab 1, we will train the model (using the built-in XGBoost or the a custom container if you ran the step 2), deploy them into a DEV environment, approve and deploy them into a PRD environment with high availability and elasticity;
- In Lab 3, we will run some stress tests on the production endpoint to test the elasticity and simulate a situation where the number of requests on the ML model can vary.
As we wish to build a repeatable, testable and auditable end-to-end pipeline, we will use CloudFormation, an infrastructure automation platform for AWS, to create all the components required for the exercises.
CloudFormation requires some templates (e.g. .yaml files) to launch a repeatable ML pipeline. Hence, we will need to upload the templates to a S3 bucket as shown below:
First, login to the AWS account and navigate to S3 Buckets main page, and create an S3 bucket (Create Bucket) as below:
- the bucket name is “mlops-launch-template-YOURALIAS” (Please replace YOURALIAS with your own alias, e.g.,
mlops-launch-template-rlhuas shown in the below image); - the S3 bucket region will be us-west-2;
- you don’t need to change other settings but go ahead to “Create bucket”.
Then, we will need to upload the CloudFormation .yaml files into this bucket. We have a set of sample scripts for you - MLOps Labs.zip. This .zip file includes all the CloudFormation .yml files and sub .zip files to automate the overall pipelines. Let's download and unzip the MLOps Labs.zip; Next, we upload the above .yml and .zip files to the S3 bucket you just created. After uploading the files, the S3 bucket looks like:

Now we have the "ingredients" for CloudFormation to use, we can then create our stack to orchestrate the ML Pipeline.
First, Go to CloudFormation at Region us-west-2. Once you are on the main page, click Create stack and the options as below:

Next, choose Templates is ready and Amazon S3 URL. To find the template's S3 URL, go to the S3 bucket you have created above and find the file named MLU_MLOps_Labs_CF.yml.

Then, copy the Object URL as shown above, and paste the Object URL to the field Amazon S3 URL below and click Next.

Once the template is attached, we need to Specify stack details. In this lab, you can take any stack name and fill in the Stack name (e.g., TESTXXX as shown below). In addition, we need to specify the NotebookInstanceSecGroupID as “default”, and also choose any SubNetid except 172.31.*48*.0/20. Last, replace the UserAlias with your own alias. The alias must be identical with YOURALIAS, i.e. the one you used to create S3 bucket above (e.g. rlhu as shown below).

Next step is to Configure stack options. We will leave everything unchanged (as default) and click Next, i.e.,

The last step is to Review XXXX (Your stack name). You only need to scroll down to the bottom of this page, and check the following two IAM checks as below:

You can leave everything else unchanged and click Create stack. It will take about 10 minutes to create the full stacks. After completion, it will show a “CREATE_COMPLETE” under CloudFormation - Stacks.
After the stacks were created, navigate to Sagemaker notebook instances. Here the Sagemaker notebook “MLOps_Lab” should be “InService”. Click Open Jupyter and navigate to the folder MLU-MLOps-lab/lab, you will see the following notebook:

Now, let’s warm up with the fundamental features of Sagemaker (e.g. training, deploying and optimizing a model) by playing with each cell of Jupyter Notebook lab1_TrainDeployTest.ipynb. (If you are already experienced with Sagemaker, you can skip this exercise.)
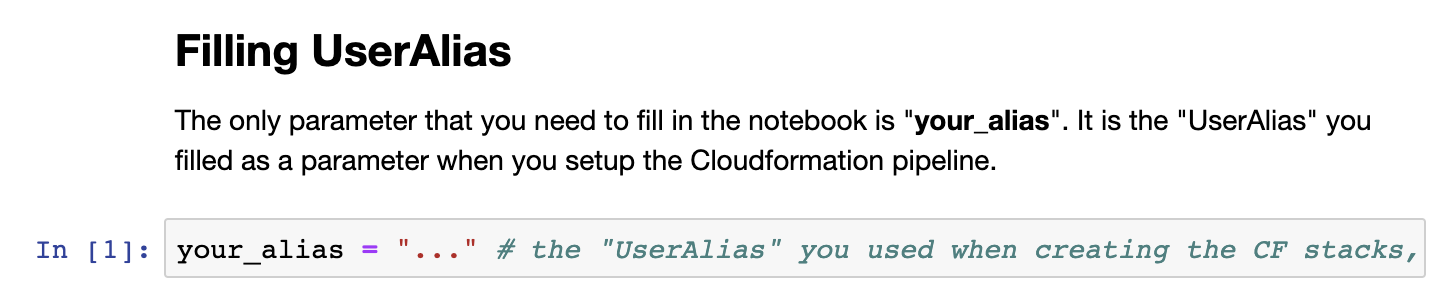
First, navigate to the folder MLU-MLOps-lab/lab and open lab2a_Automate_End-to-End_Pipeline.ipynb. The only parameter you need to modify is the parameter your_alias (as shown below). Make sure you replace it with your personalized alias (i.e., the one you used when in Lab 0.). Then click Restart and Run All to run all the cells in this notebook.
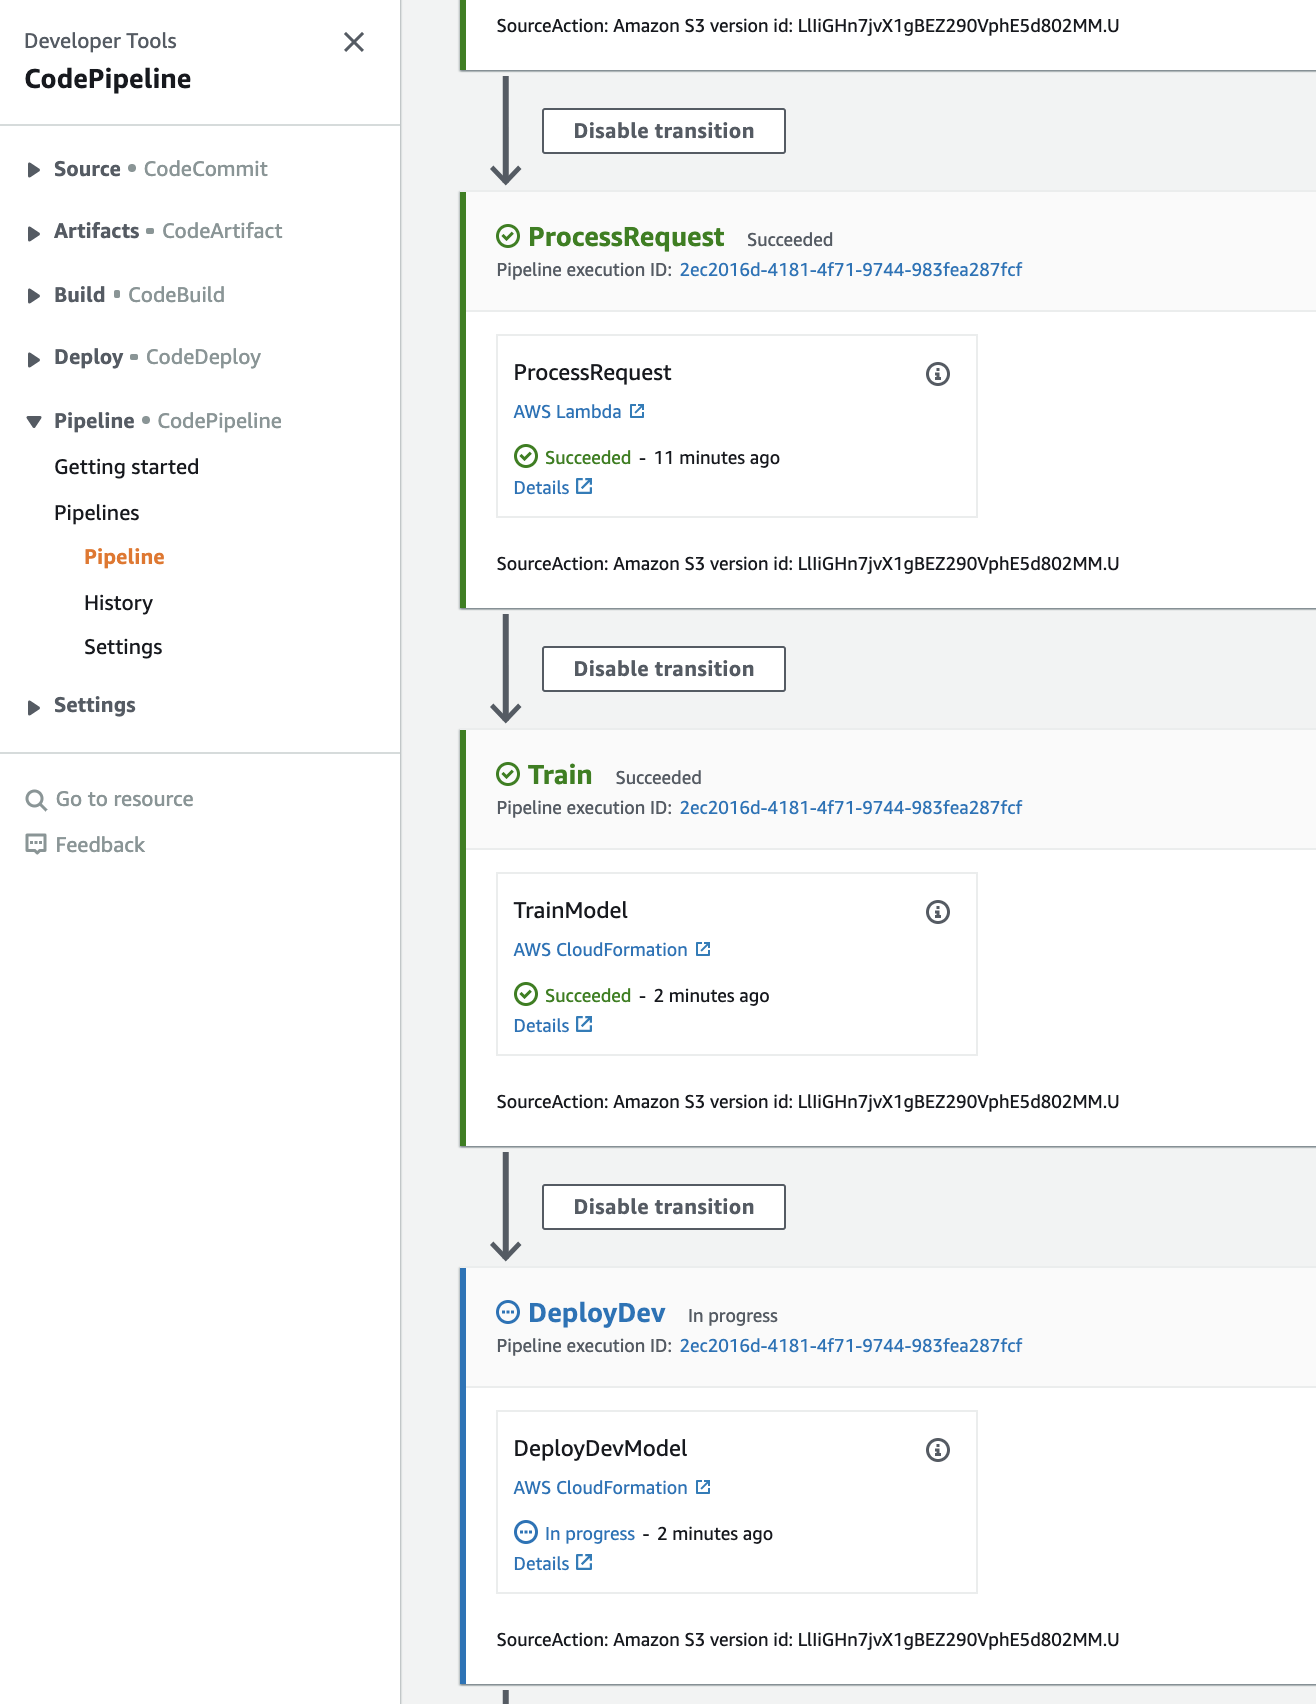
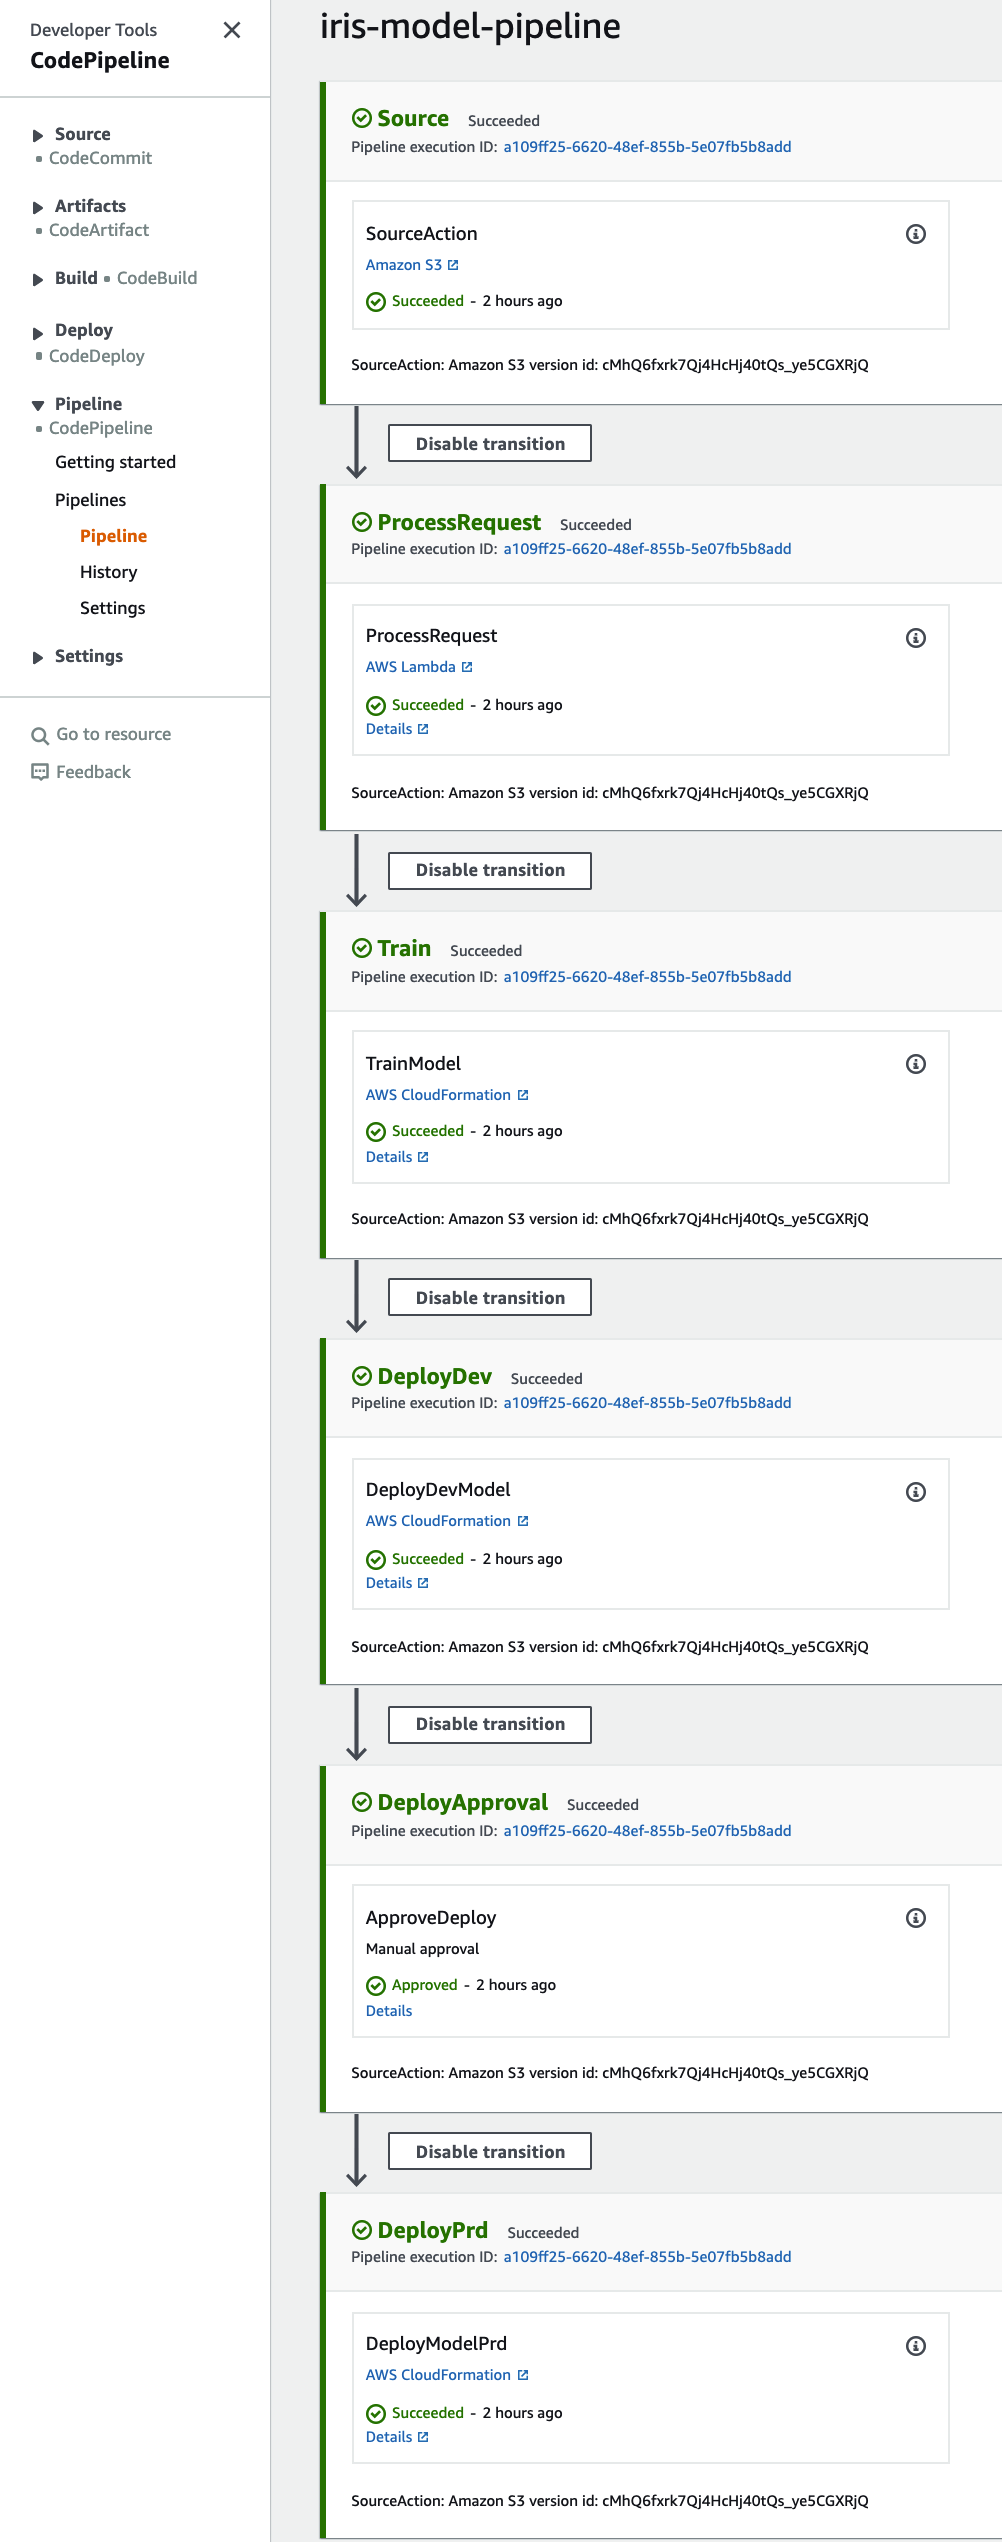
You may wonder "What does this notebook do?" After the s3 bucket get the new data, the MLOps pipeline will be kicked off automatically. It involved the following functions: SourceAction -> ProcessRequest -> Train -> DeployDev -> DeployApproval -> DeployProd.
The pipeline will auto-stop at DeployApproval (if everything goes right), then we need to grant the approval to the pipeline via notebook lab2b_Productionizing_End-to-end_Pipeline.ipynb. You need to click the “Approval” button and it will finish the rest of this ML Pipeline by deploying to the production environment.
A common practice after deploying an end-to-end pipeline is stress testing. Here you can execute stress tests to see how well your model is performing.
First, navigate to the folder MLU-MLOps-lab/lab and open notebook lab2c_Stress_Test.ipynb. Simply follow the instructions on the notebook and run the notebook. After running this stress test script, go to the AWS Console -> Sagemaker, then click on the Endpoint iris-model-production. Under the endpoint iris-model-production , click on the View logs to monitor logs in CloudWatch.
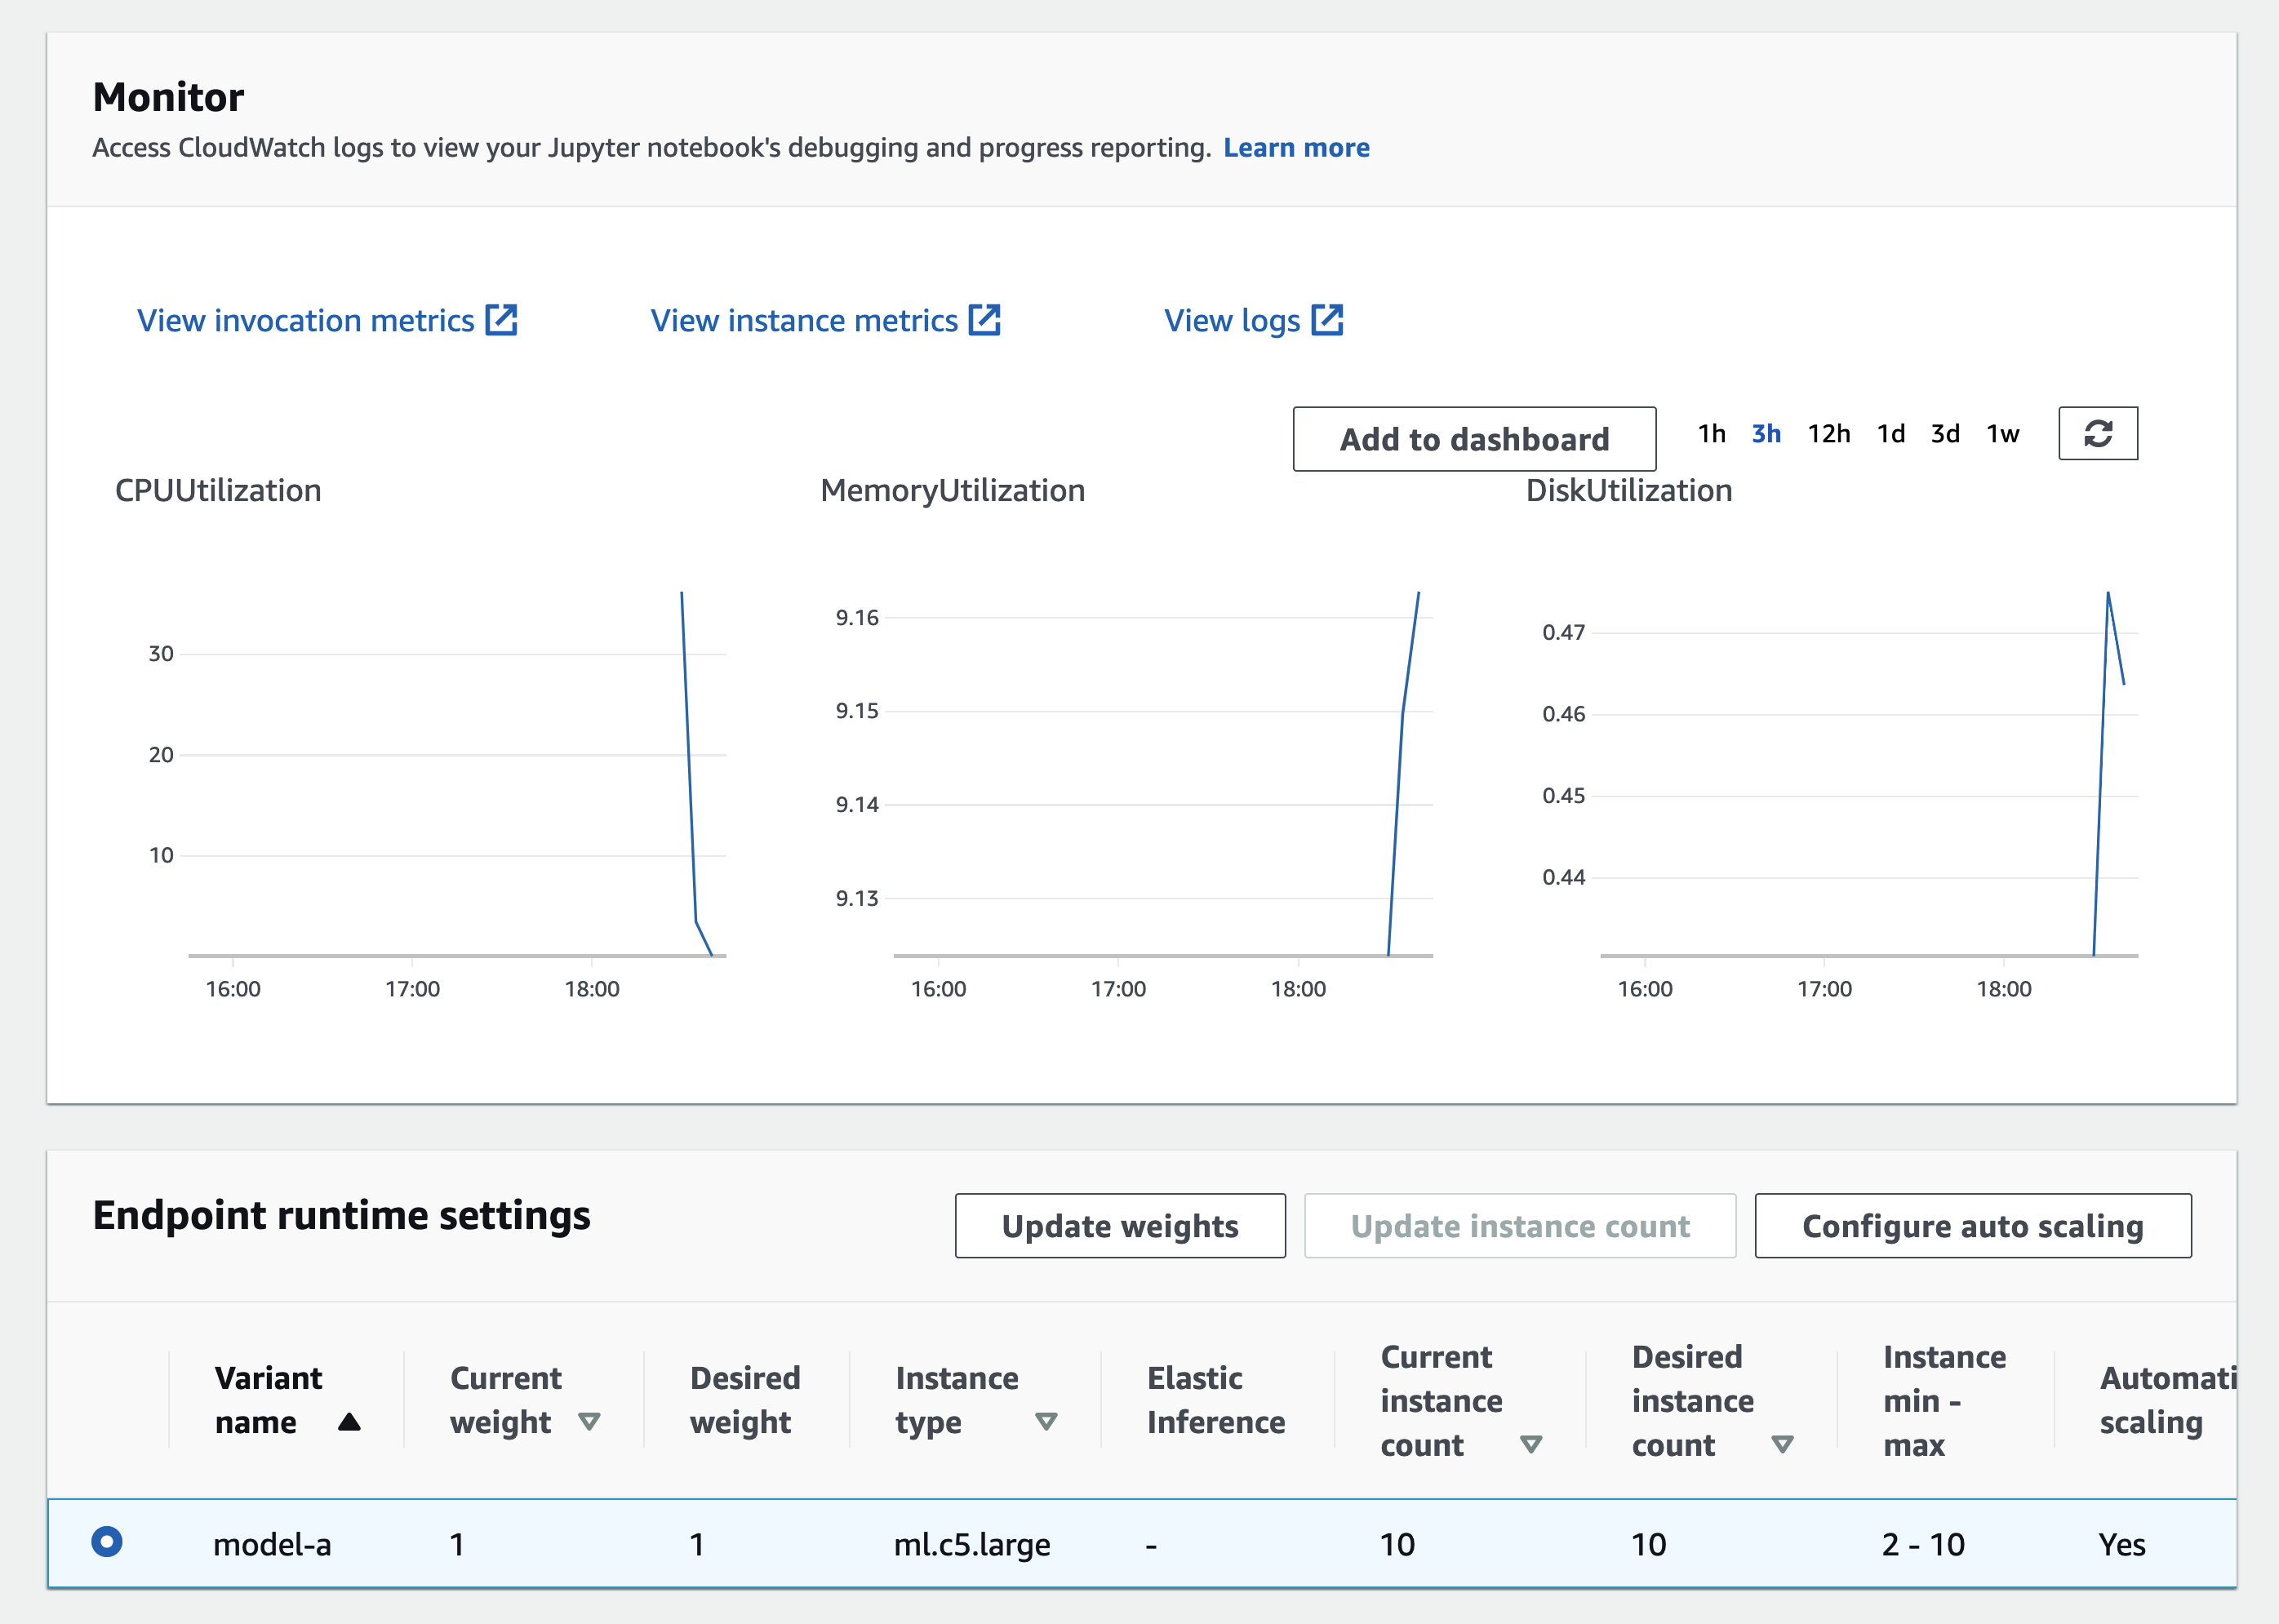
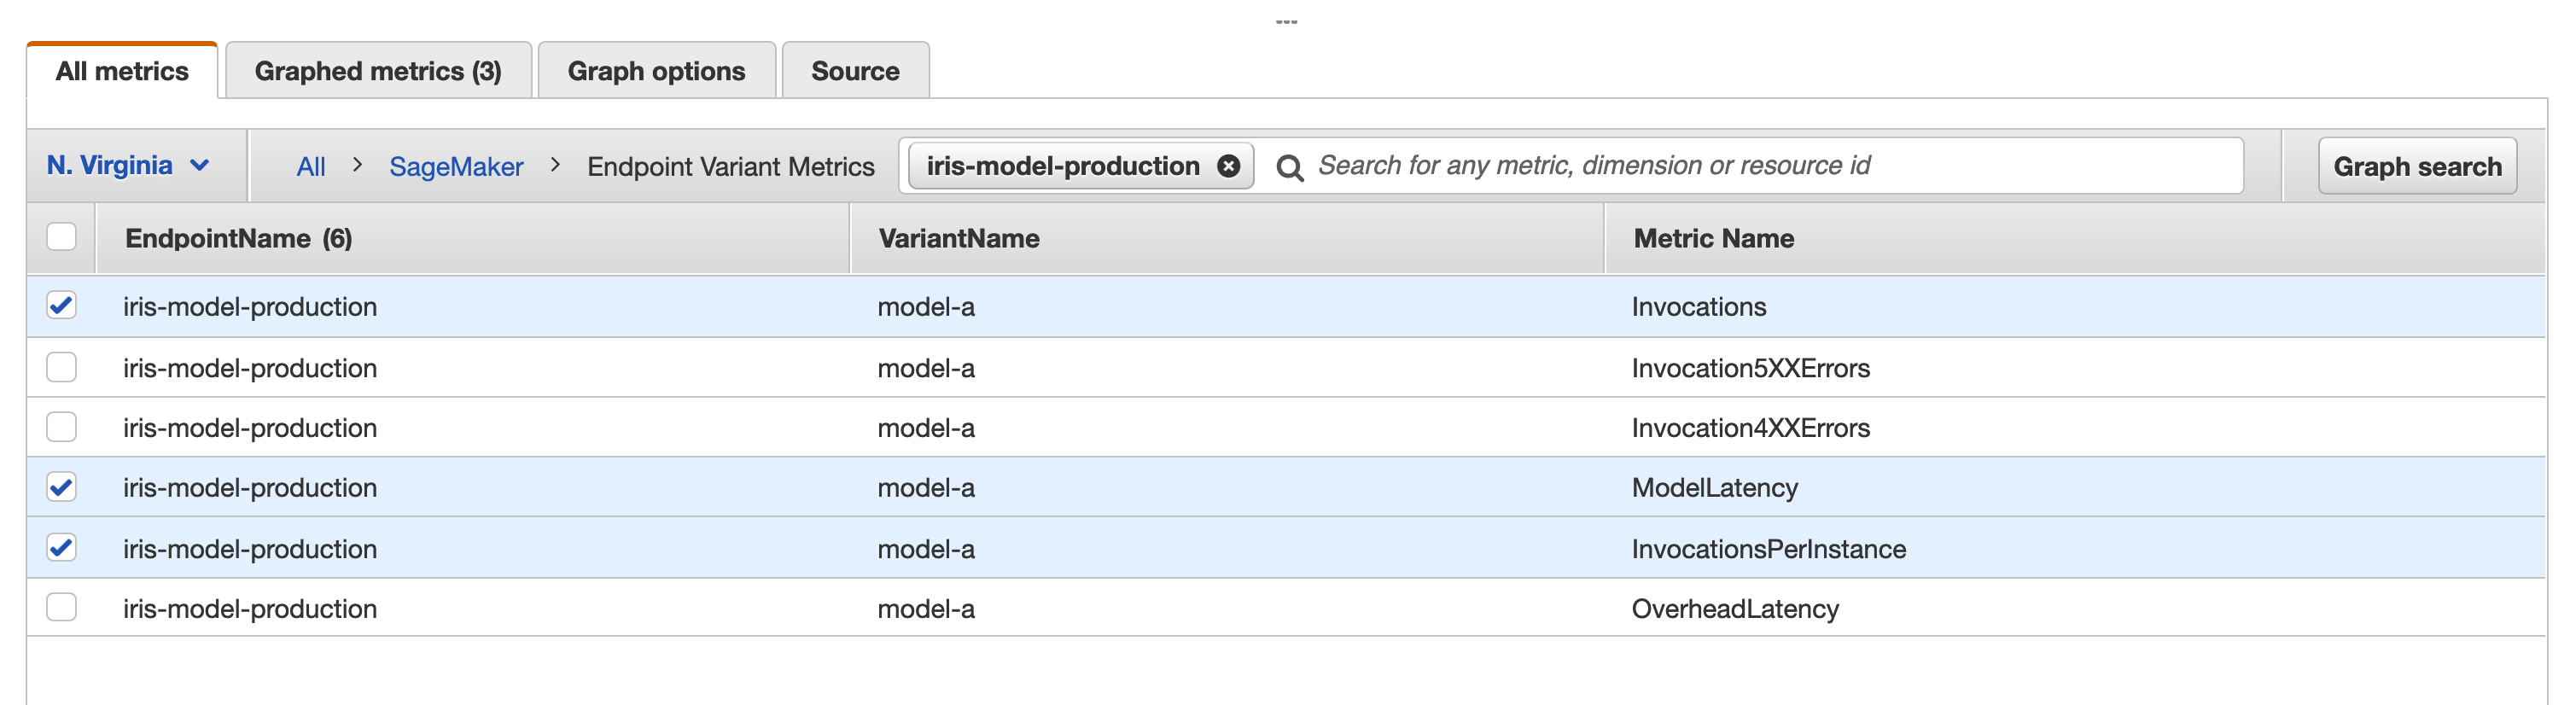
In CloudWatch, we can select multiple metrics to view the instance health and build your monitor graph, such as Invocations, ModelLatency and OverheadLatency as shown below:
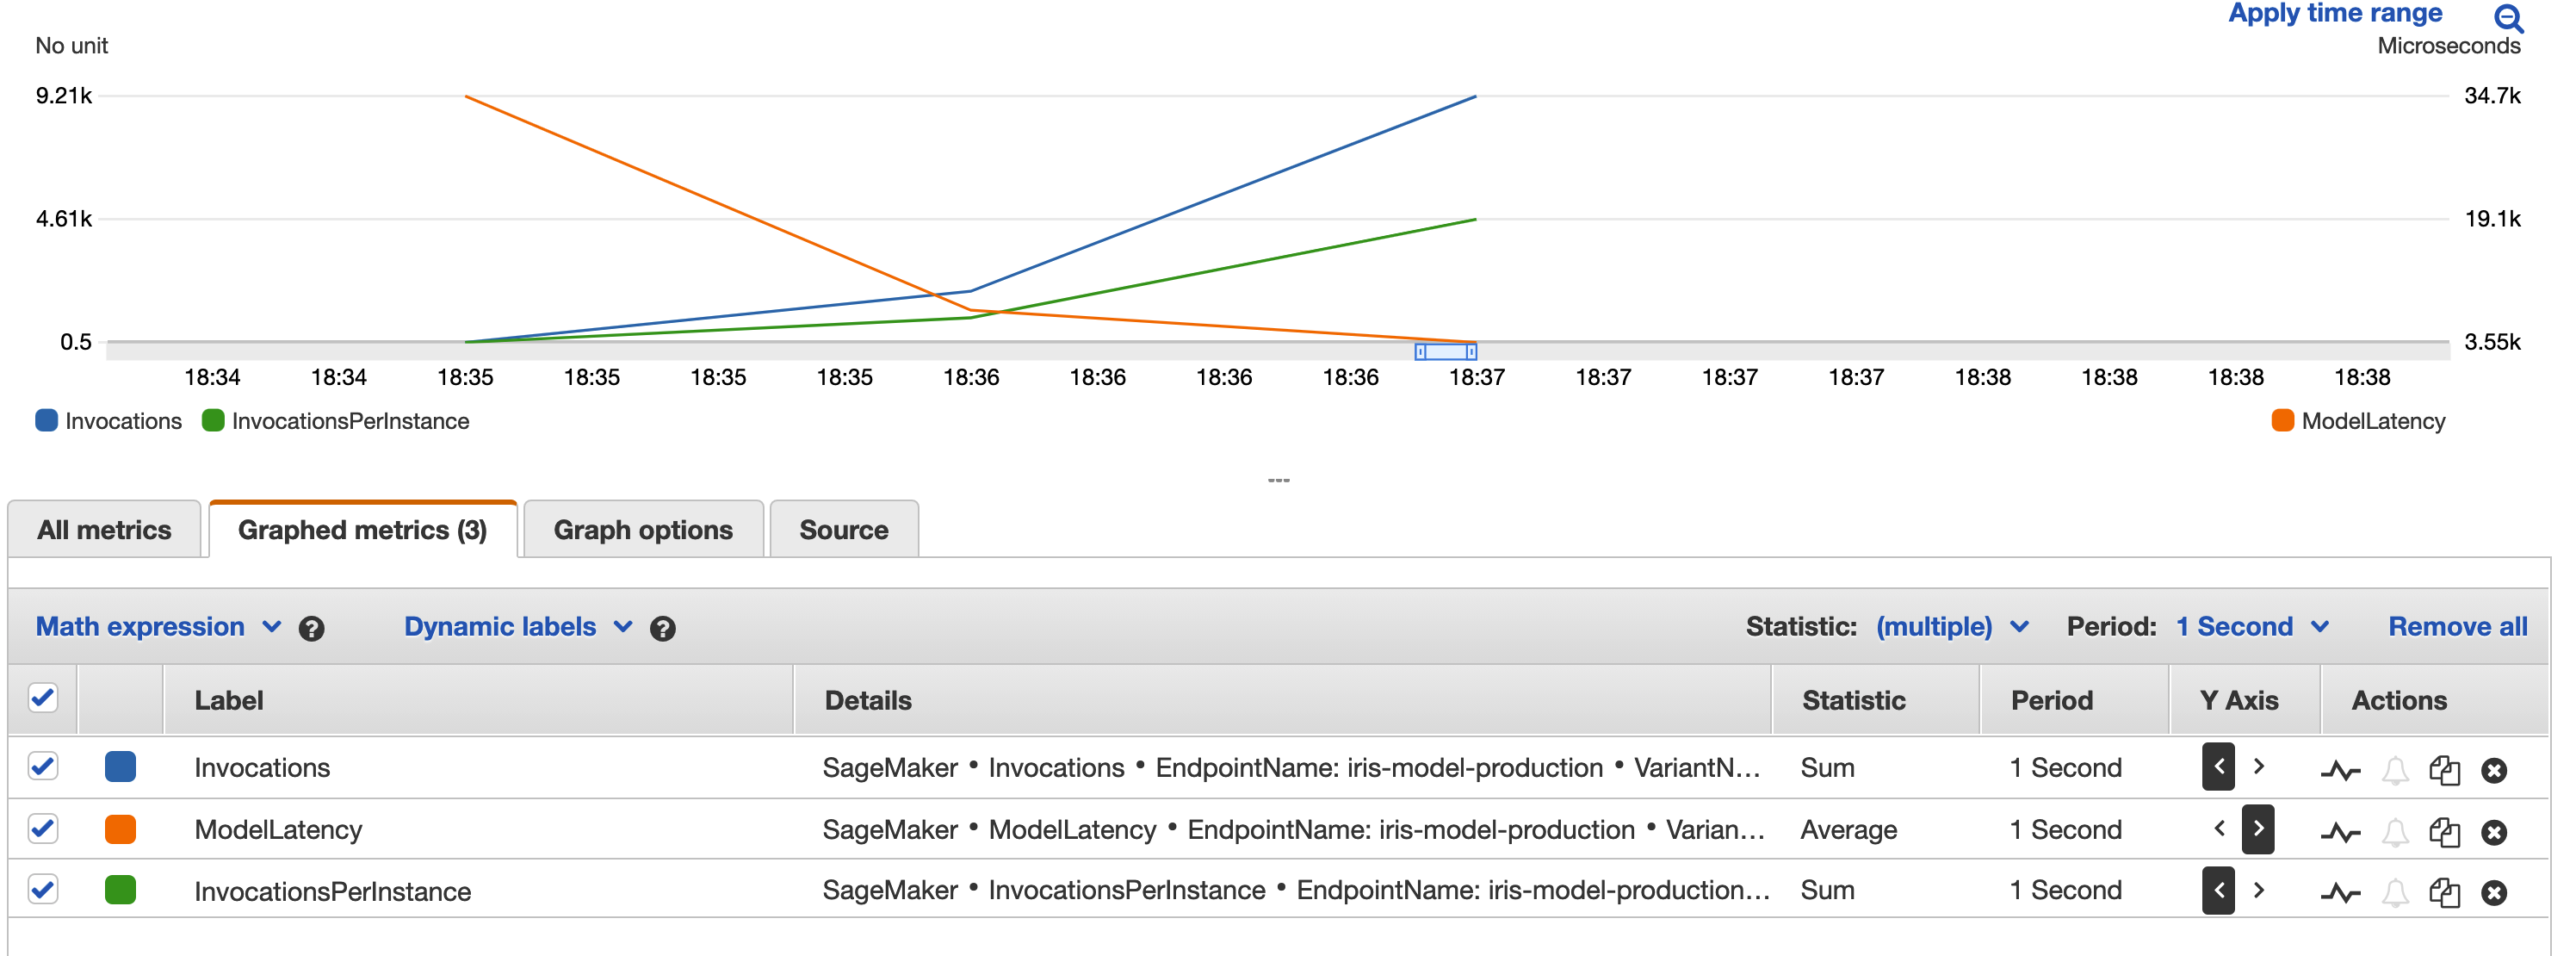
Then modify the quantitative units (column names) Statistic, Period and the Y Axis as below:
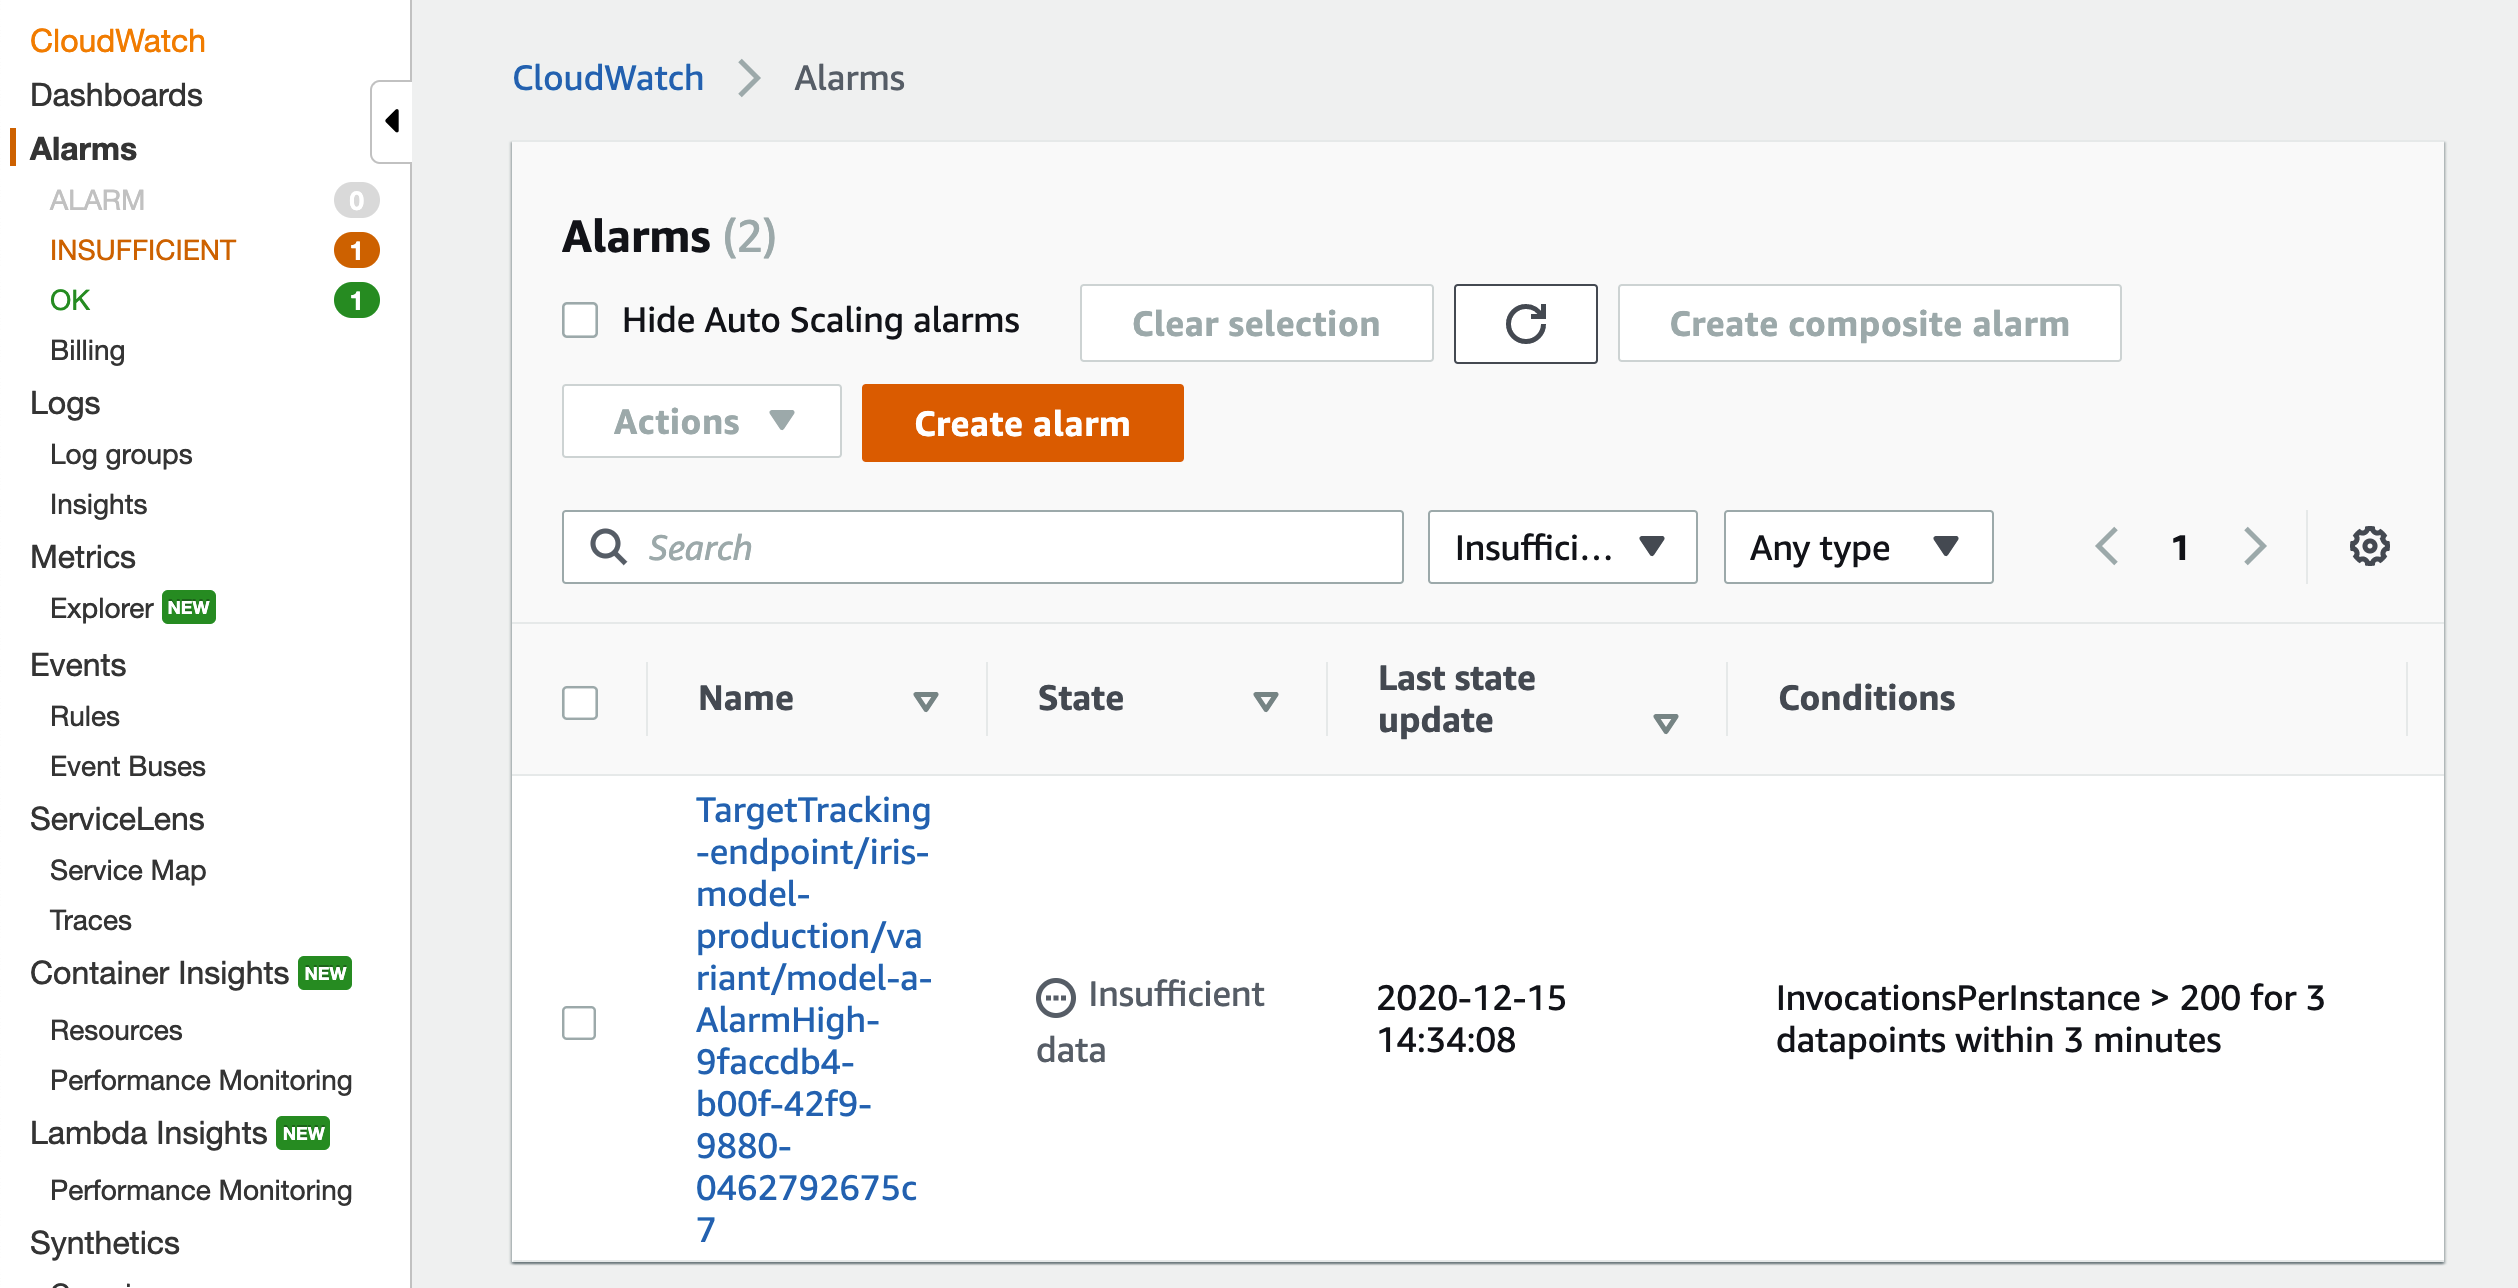
In addition, if the InvocationsPerInstance is too high, the pipeline will autoscale up to 10 instances to accommodate the traffic. You can monitor it under Alarms as below:
First delete the following stacks:
- mlops-deploy-iris-model-dev
- mlops-deploy-iris-model-prd
- mlops-training-iris-model-job
Then delete the stack you created. WARNING: All the assets will be deleted, including the S3 Bucket and the ECR Docker images created during the execution of this whole lab.
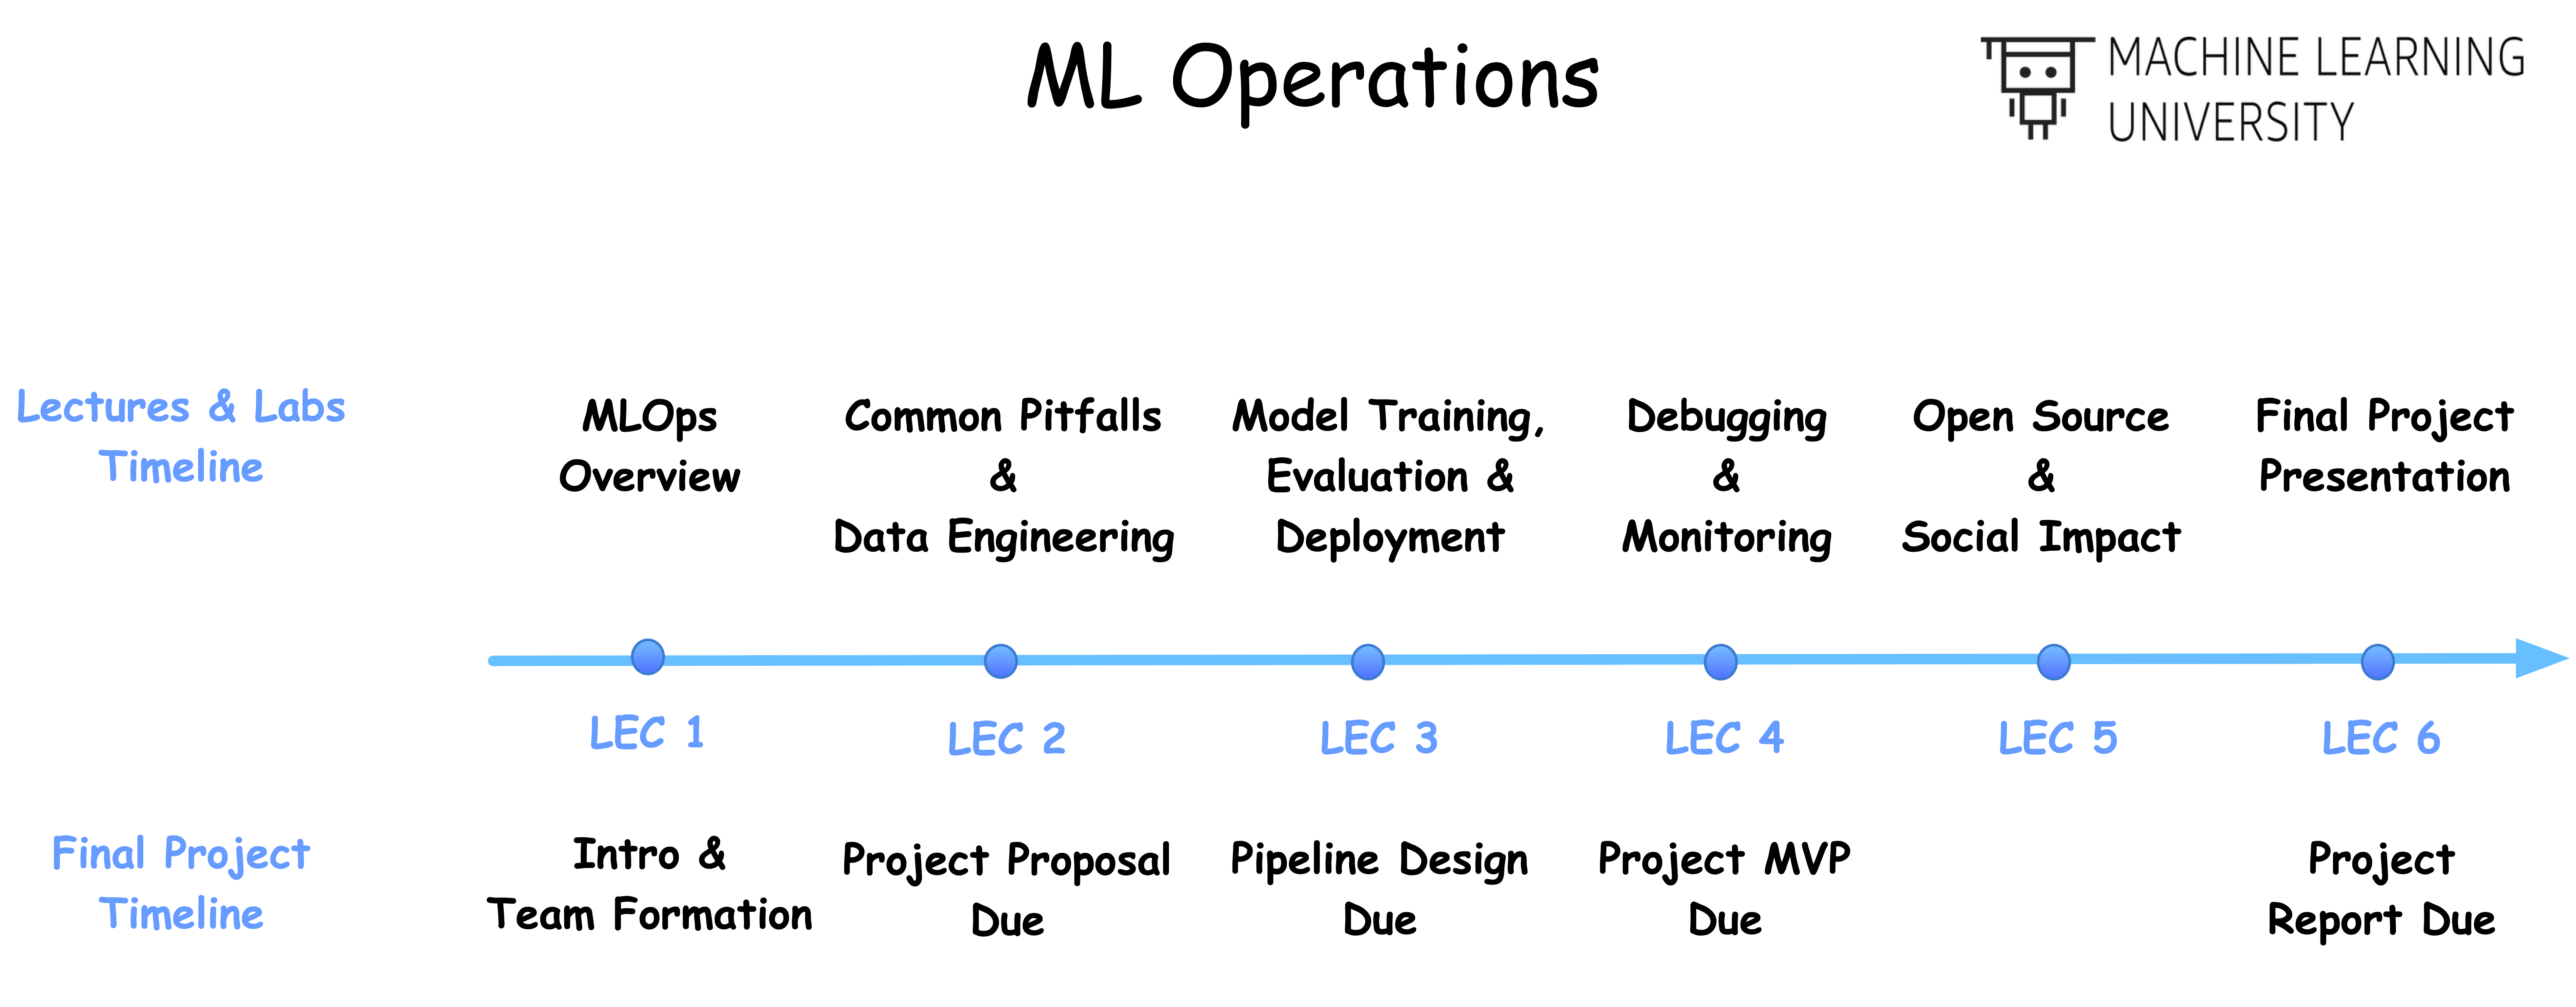
In this course, you will learn how to architect end-to-end ML systems: from initial ML project scoping to data ingestion, from model training and deployment, to model serving, monitoring and maintenance. Through the lectures, we will explore the ML Systems of several key products and services within Amazon to get you inspired with a varied of ML system decisions. Beside, by reviewing some ML pitfalls, we provide some practical solutions for you to debug the ML systems.
We structure the course as following:
- Lecture 1: what components needed for an ML system (via an MiniAmazonGo example)
- Lecture 2: what questions (choices) to ask for each component
- Lecture 3-4: what options (answers to above questions) do you have for each component
- Lecture 5: what consequence to be aware of (monitoring, social impact, etc.)
If you would like to use a customized environment (i.e. rather than Sagemaker built-in ones), you may create a customized Docker image on your own. In this case, you will need to create a Dockerfile with
pip install ...selected packages;- training and inference code.
Then, build the customized doker by running !docker build -f Dockerfile -t ....
Please see sample code about how to create a customized Docker image.
This sample code is made available under a modified MIT license. See the LICENSE file.