帮助Android开发人员将library发布到JCenter。项目中将需要的脚本封装好了,我们只需要配置相关属性即可一分钟上传Library到JCenter。(不包括审核时间)
- 什么是Maven、JCenter、MavenCentral、JitPack、Bintray?
- 准备工作
- 上传Library到自己创建的Maven仓库
- 提交到JCenter
- 一分钟上传Library到JCenter
- License
相信很多人分不清这几个概念究竟代表什么,只知道跟着开源库的引入步骤走,比如要你在项目根目录下的build.gradle中加一个maven地址,然后在module的build.gradle中添加compile。
在用 Eclipse + Ant 组合的时候,我们往往引入一个库都是下载jar包或者aar包放到libs目录下,然后右键添加引用。 But!这并不友好,比如当升级版本库的时候往往需要下载新的包替换引用,非常麻烦。 所以,当升级到Android Studio + Gradle 组合后gradle中提供了可以从远端拉取jar包和aar包引入本地。规则就是:
implementation 'com.codearms.maoqiqi:my-publish:2.0.0' // groupId:projectId:version
但是这个下载源是哪呢,就是Maven仓库。那Maven仓库的地址是什么呢,是不是Android Studio都是从一个仓库获取包呢,这时候就需要了解 JCenter、MavenCentral、JitPack 了。
这3个名词即具体的Maven仓库的地址,他们都是Maven仓库,但是属于不同的服务源。总的来说,只有两个标准的Android library文件服务器:Jcenter 和 MavenCentral,现在JitPack也流行了起来。(比较方便)
从哪引用这几个Maven仓库呢,就是在根目录build.gradle中:
allprojects {
    repositories {
        jcenter() // JCenter仓库
        mavenCentral() // MavenCentral仓库
        maven { url "https://jitpack.io" } // JitPack仓库
    }
}
具体使用哪个要看开源项目把Library传到了哪个仓库。它就会要求你在这加哪个仓库。 起初,Android Studio 选择MavenCentral作为默认仓库。如果你使用老版本的Android Studio创建一个新项目,mavenCentral()会自动的定义在build.gradle中。 但是MavenCentral的最大问题是对开发者不够友好。上传library异常困难。上传上去的开发者都是某种程度的极客。同时还因为诸如安全方面的其他原因,Android Studio团队决定把默认的仓库替换成jcenter。 正如你看到的,一旦使用最新版本的Android Studio创建一个项目,jcenter()自动被定义,而不是mavenCentral()。 我们发现第三个jitpack的写法和前2个不一样,写法是maven {} 里面加入地址,其实这个才是Maven仓库标准引用方法,jcenter和mavenCentral由于是标准的Android仓库,相当于定义了一个别名。
Bintray其实只是一个网站,他们负责维护JCenter这个库,就是说JCenter库是托管在Bintray网站上的。但是Bintray不只只有JCenter库,每个人都可以在上面创建自己的账号,生成自己的Maven仓库。
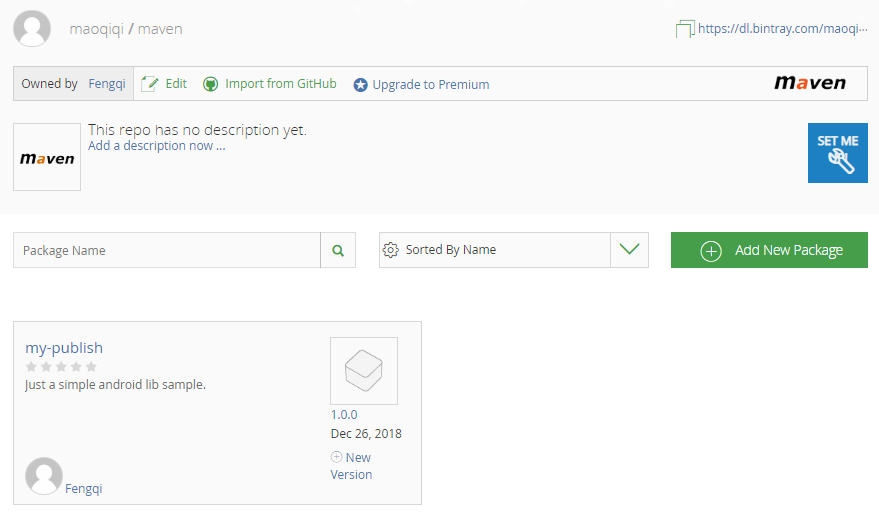
比如我的账号maoqiqi下面创建了一个名叫"maven"的Maven仓库。那我的Maven仓库地址就是https://bintray.com/maoqiqi/maven。当然也可以再build中引入:
maven { url 'https://dl.bintray.com/maoqiqi/maven' }
而JCenter仓库只是Bintray官方账户创建的一个Maven仓库,地址是 https://jcenter.bintray.com 。 其实个人的仓库和JCenter是平级的,只不过JCenter被Android Gradle设为了标准仓库。
上面把所有的概念都介绍清楚了。现在我们来介绍把自己的Library传到JCenter上需要做的准备工作。
发布的前提当然是自己的Library已经完成了。具体怎么写Library就不再赘述。
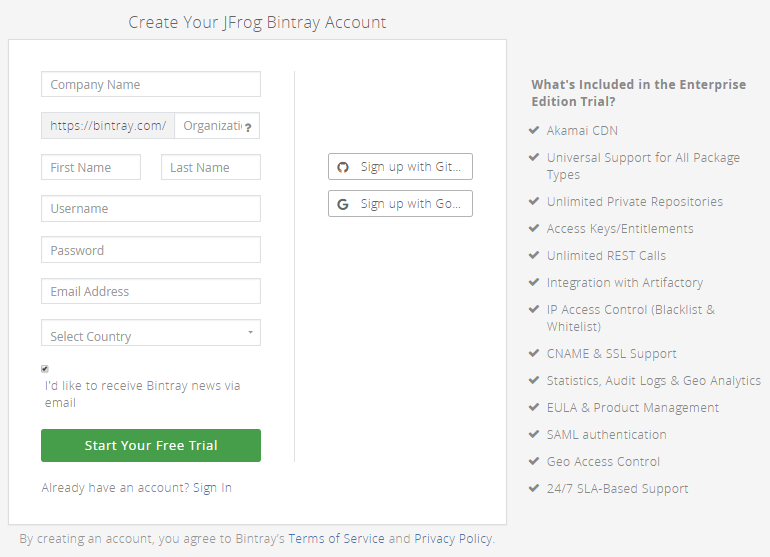
注册组织: https://bintray.com/signup 。
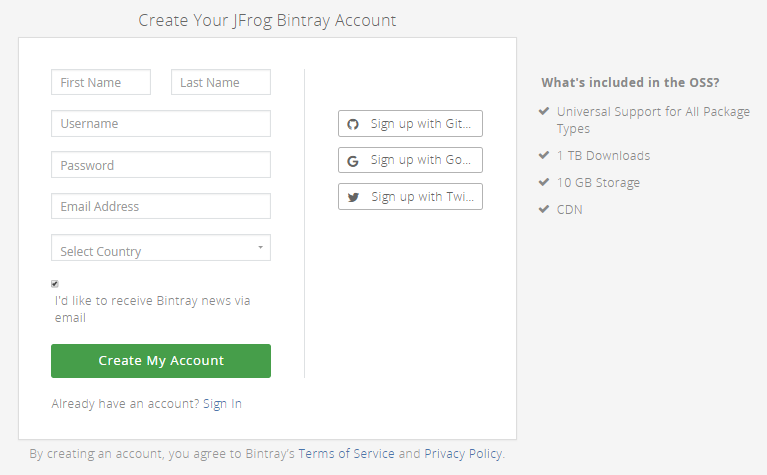
注册个人: https://bintray.com/signup/oss 。
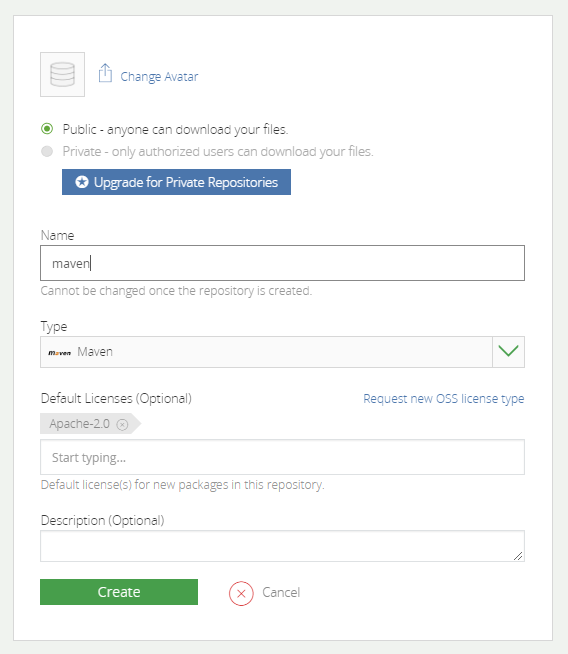
仓库的Name可以写maven(上传的时候不指定的话默认仓库名是maven)。需要注意的是这里的Name要和我们后面上传配置中的artifactId一致,否则会上传失败。
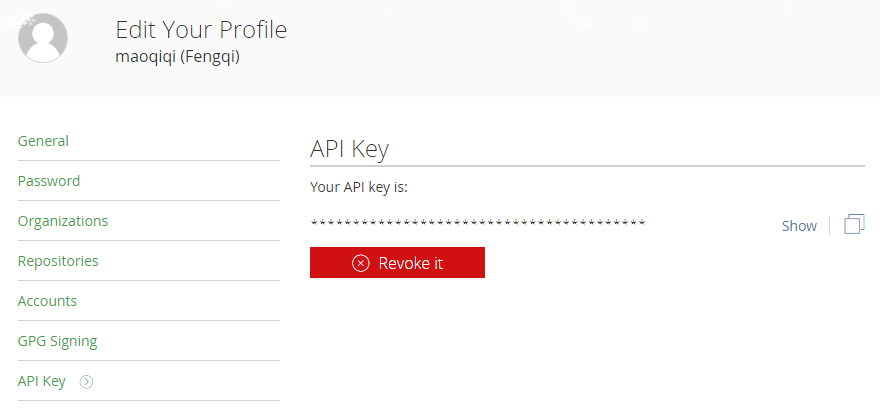
在首页右上角点击Edit Profile进入个人信息编辑页面,接下来点击页面左边列表的最后一项API Key。
APIKEY的查看如下:
根目录build.gradle添加:
buildscript {
    repositories {
        google()
        jcenter()
    }
    dependencies {
        classpath 'com.android.tools.build:gradle:3.2.1'
        classpath 'com.novoda:bintray-release:0.9'
    }
}
Module目录build.gradle添加:
apply plugin: 'com.novoda.bintray-release'

...

publish {
    // Contains the organisation name to use for upload.
    userOrg = 'maoqiqi'
    // [Default: maven] The repository name.
    repoName = 'maven'
    // The group id to use for the upload.
    groupId = 'com.codearms.maoqiqi'
    // The artifact id to use.
    artifactId = 'my-publish'
    // A string with the version to use. Can't end with -SNAPSHOT because bintray doesn't accept snapshots.
    publishVersion = '1.0.0'
    // A short description for this package in bintray.
    desc = 'Just a simple android lib sample.'
    // A string with the url for the website of this project. The Github repo can be used here.
    website = 'https://github.com/maoqiqi/PublishDemo'
}
提交JCenter的groupId和在本地定义的一样,所以本地定义groupId要能标识个人,最好到 https://jcenter.bintray.com 看下有没有重复的包名。
打开Terminal执行上传的命令:
./gradlew clean build bintrayUpload -PbintrayUser=BINTRAY_USERNAME -PbintrayKey=BINTRAY_KEY -PdryRun=false
其中BINTRAY_USERNAME换成Bintray注册的用户名,BINTRAY_KEY换成自己的APIKEY。dryRun是一个配置参数,当为true的时候,会运行所有的环节,但是不会上传。
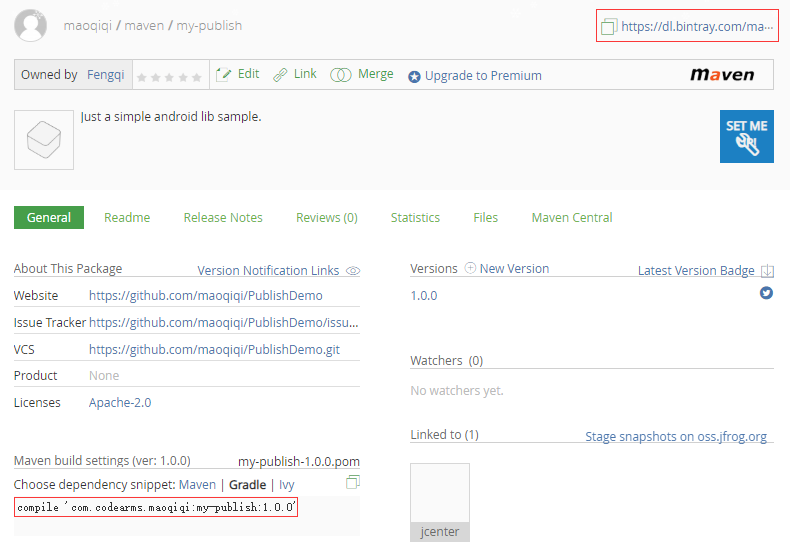
回车执行命令,看到BUILD SUCCESS即上传成功。这时候我们可以打开Maven仓库看到自己提交的项目。
根目录build.gradle添加:
buildscript {
    repositories {
        google()
        jcenter()
    }
    dependencies {
        classpath 'com.android.tools.build:gradle:3.2.1'
        // Gradle Android Maven plugin
        classpath 'com.github.dcendents:android-maven-gradle-plugin:2.1'
        // Gradle Bintray Plugin
        classpath 'com.jfrog.bintray.gradle:gradle-bintray-plugin:1.8.4'
    }
}
Module目录build.gradle添加:
apply plugin: 'com.jfrog.bintray'
apply plugin: 'com.github.dcendents.android-maven'

...

// load properties
Properties properties = new Properties()
properties.load(rootProject.file('local.properties').newDataInputStream())

// read properties
def bintrayUser = properties.getProperty("bintray.user")
def bintrayKey = properties.getProperty("bintray.key")

// set the maven groupId and version
group = 'com.codearms.maoqiqi'
version = '1.0.0'

// This generates POM.xml with proper parameters
install {
    repositories.mavenInstaller {
        pom {
            project {
                packaging 'aar'
                name 'my-publish'
                description 'Just a simple android lib sample.'
                url 'https://github.com/maoqiqi/PublishDemo'
                licenses {
                    license {
                        name 'The Apache Software License, Version 2.0'
                        url 'http://www.apache.org/licenses/LICENSE-2.0.txt'
                    }
                }
                developers {
                    developer {
                        id 'maoqiqi'
                        name 'Fengqi Mao'
                        email 'fengqi.mao.march@gmail.com'
                    }
                }
                scm {
                    connection 'https://github.com/maoqiqi/PublishDemo.git'
                    developerConnection 'https://github.com/maoqiqi/PublishDemo.git'
                    url 'https://github.com/maoqiqi/PublishDemo'
                }
            }
        }
    }
}

// bintray configuration
bintray {
    user = bintrayUser
    key = bintrayKey

    // [Default: false] Whether to run this as dry-run, without deploying
    dryRun = false
    // [Default: false] Whether version should be auto published after an upload
    publish = true
    // [Default: false] Whether to override version artifacts already published
    override = false

    // Package configuration. The plugin will use the repo and name properties to check if the package already exists.
    // In that case, there's no need to configure the other package properties (like userOrg, desc, etc).
    pkg {
        // Mandatory parameters:
        repo = 'maven'
        name = 'my-publish'
        licenses = ['Apache-2.0']
        vcsUrl = 'https://github.com/maoqiqi/PublishDemo.git'

        // Optional parameters:
        // An optional organization name when the repo belongs to one of the user's orgs
        userOrg = 'maoqiqi'
        desc = 'Just a simple android lib sample.'
        websiteUrl = 'https://github.com/maoqiqi/PublishDemo'
        issueTrackerUrl = 'https://github.com/maoqiqi/PublishDemo/issues'
        // labels = ['android', 'library', 'jcenter', 'bintray', 'publish']
        // publicDownloadNumbers = true
        // Optional package-level attributes
        // attributes = ['a': ['ay1', 'ay2'], 'b': ['bee'], c: 'cee']
        // Optional Github repository
        // githubRepo = 'maoqiqi/PublishDemo'
        // Optional Github readme file
        // githubReleaseNotesFile = 'README.md'

        // Optional version descriptor
        version {
            // Mandatory parameters:
            // Mandatory bintray logical version name
            name = '1.0.0'

            // Optional parameters:
            // Optional Version-specific description
            desc = 'Just a simple android lib sample.'
            // Optional Date of the version release. 2 possible values: date in the format of 'yyyy-MM-dd'T'HH:mm:ss.SSSZZ' OR a java.util.Date instance
            released = new Date()
            // Optional version-level attributes
            attributes = ['gradle-plugin': 'com.use.less:com.use.less.gradle:gradle-useless-plugin']
            vcsTag = 'v1.0.0'

            // Optional configuration for GPG signing
            /*gpg {
                // Determines whether to GPG sign the files. The default is false
                sign = true
                // Optional The passphrase for GPG signing'
                passphrase = 'passphrase'
            }*/
            // Optional configuration for Maven Central sync of the version
            /*mavenCentralSync {
                // [Default: true] Determines whether to sync the version to Maven Central.
                sync = true
                // OSS user token: mandatory
                user = 'userToken'
                // OSS user password: mandatory
                password = 'password'
                // Optional property. By default the staging repository is closed and artifacts are released to Maven Central.
                // You can optionally turn this behaviour off (by puting 0 as value) and release the version manually.
                close = '1'
            }*/
        }
    }
    configurations = ['archives']
}

// The following is the task of generating sources.jar and javadoc.jar

// This generates sources.jar
task sourcesJar(type: Jar) {
    // Specify the source code through the from function, which is the default source
    from android.sourceSets.main.java.srcDirs
    classifier = 'sources'
}

// Set the Javadoc
task javadoc(type: Javadoc) {
    source = android.sourceSets.main.java.srcDirs
    classpath += project.files(android.getBootClasspath().join(File.pathSeparator))
}

// This generates javadoc.jar, dependsOn here means that this task will only start after the javadoc complete.
task javadocJar(type: Jar, dependsOn: javadoc) {
    from javadoc.destinationDir
    classifier = 'javadoc'
}

artifacts {
    archives sourcesJar
    archives javadocJar
}
生成maven库所需要的POM文件:
./gradlew install
看到BUILD SUCCESSFUL说明POM文件已经生成,并且在Android studio的Project视图中可以看到javadoc.jar和sources.jar文件。
上传Library库:
./gradlew bintrayUpload
看到BUILD SUCCESSFUL即上传成功。
在我们上传到自己Maven仓库后其实就已经可以引用自己的库了。只要在根目录下的build.gradle加上自己maven地址。
maven { url 'https://dl.bintray.com/maoqiqi/maven' }
然后在app的build.gradle中加上引用即可。
implementation 'com.codearms.maoqiqi:my-publish:2.0.0'
点Sync,可以发现引用成功。
如果能够提交到JCenter就更好了,不再需要定义自己Maven仓库地址,直接compile即可。进入项目页,点击 Add to JCenter 。
然后直接Send就行,最后等待Bintray审核通过。通过后右上方小邮箱按钮会有提示信息,提示审核通过。
JCenter是不提供snapshot版本发布的,如果需要托管snapshot版本,需要在申请时勾上" Host my snapshot build artifacts on the OSS Artifactory at https://oss.jfrog.org "的选项, 这允许您将需要托管的snapshot版本部署到 https://oss.jfrog.org ,并将它们发布到Bintray。
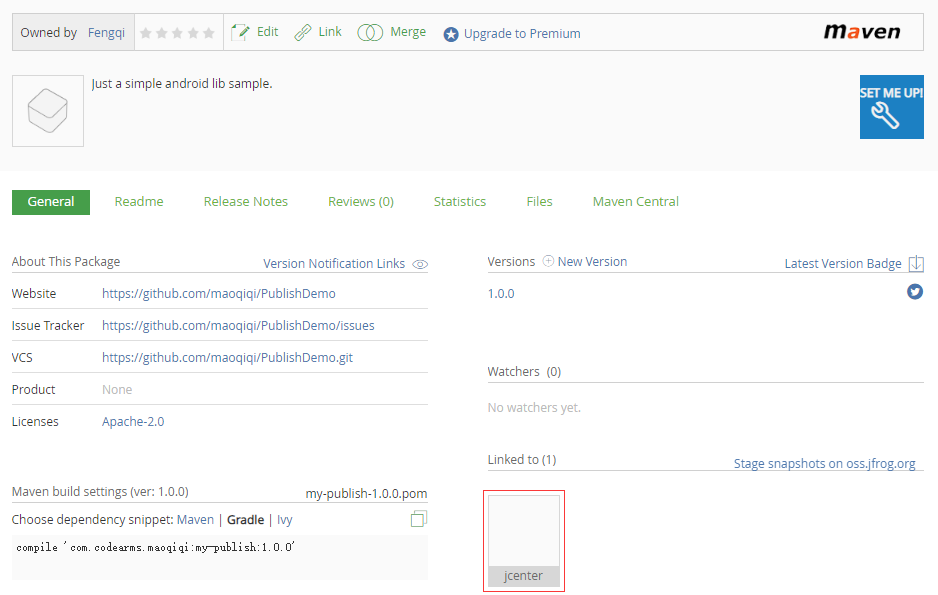
回到项目页信息多了个JCenter图标。
这时候Library就已经成功提交到了JCenter,我们回到项目中将根目录build.gradle中的个人Maven仓库引用删掉,只保留JCenter,Sync。大功告成!!!
该示例已经将需要写的脚本封装好了,我们只需要配置相关属性即可,一分钟上传Library到JCenter。(不包括审核时间哦)
继续在根目录build.gradle添加公共参数:
ext {
    bintray = [
            userOrg : "maoqiqi",
            repoName: 'my-publish',
            groupId : 'com.codearms.maoqiqi',
            website : 'https://github.com/maoqiqi/PublishDemo'
    ]
}
- userOrg:Bintray 的用户名或者组织名
- repoName:Bintray 上建的仓库名
- groupId:项目组Id,通常情况下如果你的包名为 com.example.test ,那么项目组Id就是 com.example 。
- website:项目官方网站的地址,没有的话就用 Github 上的地址,例如:https://github.com/maoqiqi/PublishDemo 。
在local.properties加上以下配置信息:
#bintray
bintray.user=
bintray.key=
- bintray.user:Bintray 的用户名
- bintray.key:Bintray 的 API Key
注意:要将local.properties文件加入忽略列表,以免被提交到Github或其他网站泄露个人信息。
在Module目录下gradle.properties(没有新建该文件)配置项目信息:
#project
projectName=my-publish
projectDescription=Just a simple android lib sample.
- projectName:项目名称,通常情况下如果你的包名为 com.example.test ,那么项目名称就是 test 。
- projectDescription:项目描述
下载 bintray_1.gradle 文件并放到你的项目根目录下。
然后修改你Module目录下的 build.gradle 文件,在最后加上 apply from: '../bintray_1.gradle' 。
打开Terminal执行上传的命令:gradlew bintrayUpload 命令即可。看到BUILD SUCCESS即上传成功。
前面所有步骤走完之后实际上只是上传了你的项目到Bintray而已,并没有被包含在JCenter中,要想提交到JCenter中还需要Bintray的审核。请参考提交到JCenter。
首先配置插件。
跟配置bintray-release插件需要的公共参数信息一致。
在local.properties加上以下配置信息:
#bintray
bintray.user=
bintray.key=

#developer
developer.id=
developer.name=
developer.email=
* bintray.user:Bintray 的用户名
* bintray.key:Bintray 的 API Key
* developer.id:通常是你在开源社区的昵称
* developer.name:姓名
* developer.email:邮箱
注意:要将local.properties文件加入忽略列表,以免被提交到Github或其他网站泄露个人信息。
跟配置bintray-release插件需要的项目信息一致。
下载 bintray_1.gradle 文件并放到你的项目根目录下。
然后修改你的Module目录下的 build.gradle 文件,在最后加上 apply from: '../bintray_2.gradle' 。
请参考执行命令。
前面所有步骤走完之后实际上只是上传了你的项目到Bintray而已,并没有被包含在JCenter中,要想提交到JCenter中还需要Bintray的审核。请参考提交到JCenter。
   Copyright [2018] maoqiqi

   Licensed under the Apache License, Version 2.0 (the "License");
   you may not use this file except in compliance with the License.
   You may obtain a copy of the License at

       http://www.apache.org/licenses/LICENSE-2.0

   Unless required by applicable law or agreed to in writing, software
   distributed under the License is distributed on an "AS IS" BASIS,
   WITHOUT WARRANTIES OR CONDITIONS OF ANY KIND, either express or implied.
   See the License for the specific language governing permissions and
   limitations under the License.


