GraphQL | The Complete Guide
A complete guide about GraphQL, using Node.js, Prisma, authentication, Apollo Client, and more!
1. Basics
1.1. Setup
- GraphQL is nothing more than a specification for how GraphQL works. It's not an implementation. Therefore, before you can use it, you need to pick an implementation that works with the language/stack you're using. With Node.js, GraphQL Yoga is a great option:
$ npm i graphql-yoga. - To take advantage of all the latest JavaScript features such as the ES6 import/export syntax, you should set up Babel (CLI and presets):
$ npm install --save-dev @babel/core @babel/cli @babel/preset-env @babel/node
1.2. Schemas and Queries
-
A great feature of GraphQL is that it's self-documenting. GraphQL APIs expose a schema that describes exactly what operations could be performed on the API and what data could be requested. This prevents the need for manual documentation, and it enables tools like GraphQL Playground to validate the structure of your operations before ever sending the operation to the server.
-
There are three operations that can be performed in GraphQL:
- Query: to fetch data;
- Mutation: to change data;
- Subscription: to watch data for changes.
-
A basic query with
scalar types(single values: ID, String, Int, Float, Boolean),custom typesandarrayswould be as follows: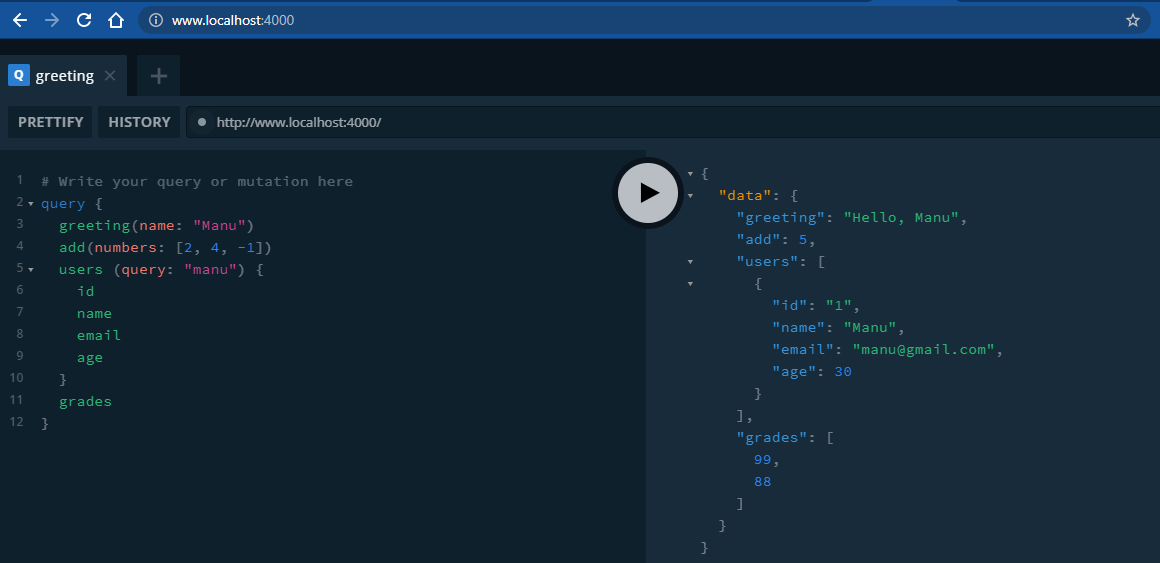
-
When we set a field whose value is one of our custom fields, we need to define a function/method that tells GraphQL how to get it. To do so, we need to define a new route on resolvers that matches with the parent property (e.g.
Post), and set the methods for each of our fields that actually goes to another custom type (e.g.author).

1.3. Mutations
-
To create random UUIDs, you can use the npm package uuid:
$ npm i uuid -
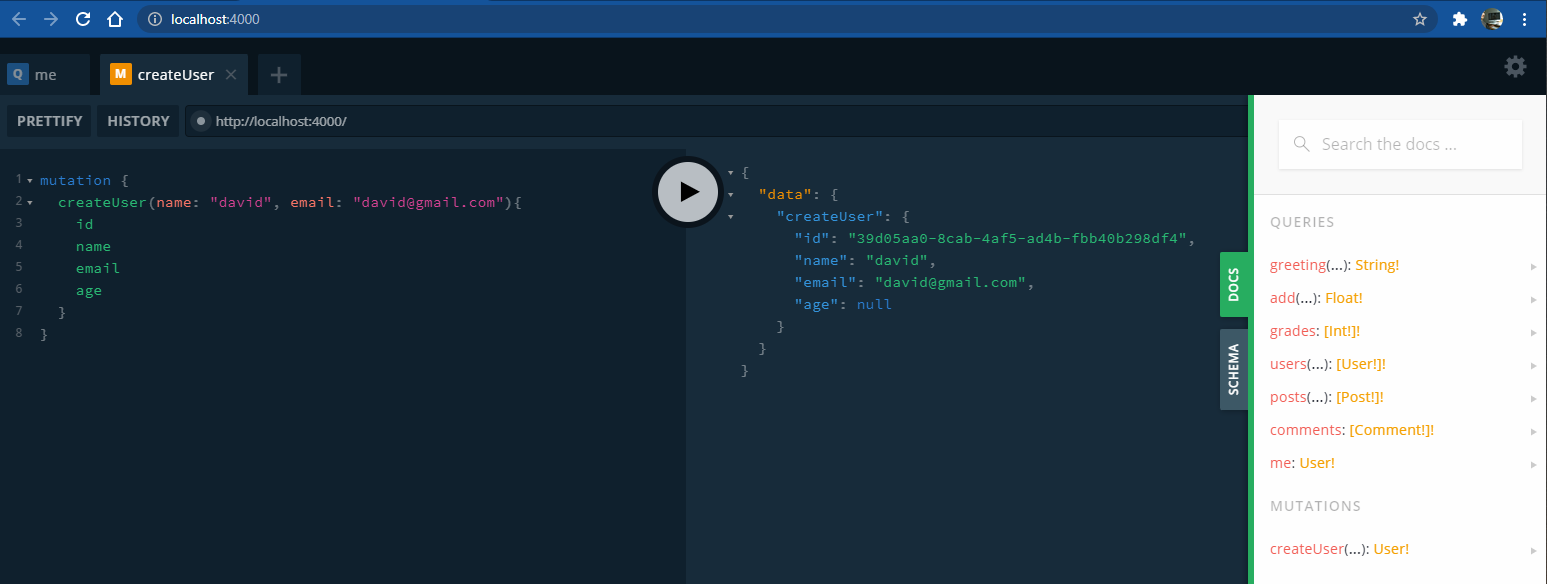
A basic mutation would be as follows:
-
Input types can only have scalar values. So it cannot have a custom (object) type. Example
datainput with typeCreatePostInput: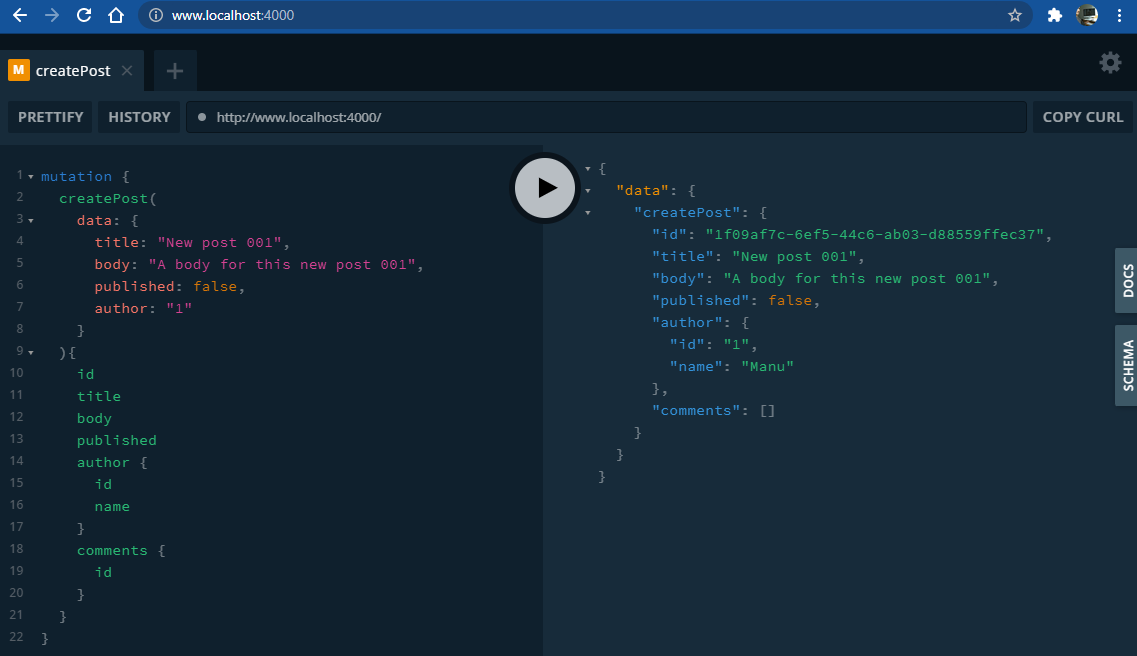
-
When you delete some data you need to delete also the existing related data. For example, if you delete a user, you also have to delete the posts and comments created by that user.
-
You can break the type definitions (
typeDefs) out into their own file which is the preferred approach for a real world production graphQL applications (e.g.schema.grapqhql). -
You can set up
contextfor the application that will be shared across your app like the mock data (db). -
NOTE: By default,
nodemonlooks for files with the .js, .mjs, .coffee, .litcoffee, and .json extensions. However, you can specify your own list with the-e(or--ext) switch like so:nodemon src/index.js --ext js,graphql --exec babel-node


1.4. Subscriptions
-
GraphQL subscriptions use web sockets behind the scenes which keeps an open channel of communication between the client and the server. This is super useful for chat apps and real time ordering apps.
-
GraphQL Yoga comes with a simple npm package, GraphQL subscriptions, that lets you wire up GraphQL with a pubsub system (like Redis) to implement subscriptions in GraphQL:
PubSubinstance is a simple pubsub implementation, based onEventEmitter;- You must implement your Subscriptions type resolver, using the
pubsub.asyncIteratorto map the event you need, e.g.count; pubsub.publishis what allows to publish new data to all of the subscribers. The first argument is the channel name that must match it up exactly with the supported channel, e.g.count, and the second argument will be an object (aligned with theSubcriptiontype in theschema.graphqlwith the data that should get sent to the client.
2. Database Storage
- Prisma is a GraphQL specific ORM (Object Relational Mapping) that makes it easy to integrate data storage into your GraphQL apps
- Prisma setup
- Upgrade from Prisma 1
2.1. Setup
-
You can create a Postgres DB:
-
Locally with Docker (
graphql-prisma/docker-compose.yml):$ docker-compose up -d$ docker ps
-
Production (free) with Heroku:
- Create an app;
- Add a resource/datastore:
Overview > Add-ons > Heroku Postgres (Hobby Dev); - The credentials can be found in the
Settingstab of the created datastore.
-
-
You can use a GUI like the pgAdmin:
Add New Server:- General: any name, e.g.:
Heroku Pg; - Connection: copy and paste the info from the previous datastore -
host,database,usernamepasswordand tickSave password?.
- General: any name, e.g.:
- Look for your DB name under
Servers > Heroku Pg > Databases (2k) > [databaseName]
-
Duplicate the existing folder/project (
graphql-basics) and rename it tographql-prisma, for example. -
Add the Prisma CLI as a development dependency to your project:
$ npm i -D prismaand check if all is set up:$ npx prisma -v. -
Set up your Prisma project by creating your Prisma schema file template with the following command:
$ npx prisma init. -
Change the
DATABASE_URLfor the HerokuURIdatastore in the.envgenerated file. -
Prisma Migrate is an imperative database schema migration tool that enables you to keep your database schema in sync with your Prisma schema as it evolves and to maintain existing data in your database. Please install first the Prisma Client to avoid console errors:
$ npm i -D @prisma/client- If you're doing the Docker approach, you can run:
$ npx prisma migrate dev --name "init" - If you are using Heroku, currently prototyping and don't care about the generated migration files, you can also run:
$ prisma db push --preview-feature
- If you're doing the Docker approach, you can run:
-
Prisma Studio is a visual editor for the data in your database:
$ npx prisma studio. -
PostgreSQL uses deterministic collation by default, which means that filtering is case-sensitive. To support
case-insensitivefiltering, use themode: 'insensitive'property on a per-field basis. -
In
2.26.0and later, you can define referential actions on your relation fields. Referential actions determine what should happen to a record when a related record is deleted or updated. In the following example, addingonDelete: Cascadeto the author field on the Post model means that deleting the User record will also delete all related Post records. Further Infoauthor User @relation(fields: [authorId], references: [id], onDelete: Cascade, onUpdate: Cascade)
3. Authentication with GraphQL
-
We need to change the application
contextto a function with a single argument that contains the information about the request where the authorization header lives. Now we can access therequestin the resolver methodscontext: (request) => ({ pubsub, prisma, request, }),
-
GraphQL fragments give you a reusable way to define a selection set, no longer you will have to list out all the fields for a user, post or comment every time you define your selection sets.
query {
  users {
    ...userFields
    posts {
      id
      title
    }
  }
}

fragment userFields on User {
  id
  name
  email
}
IMPORTANT: Fragments approach (fragmentReplacements) is no longer needed for Prisma 2+
withFiltershelper is useful when publishing data to subscribers to make sure that each subscriber gets only the data it needs.
4. Production Deployment
4.1. Prisma Cloud
-
The Prisma Data Platform (Early Access) helps developers collaborate better in projects that are using the open-source tools. One of its main features today is an online data browser.
-
NOTE: The difference in
Prisma2is that you no longer need the additional Prisma server to handle database access. Prisma is not a Backend as a Service or a GraphQL API generator. Prisma is a simply an ORM replacement which will give you tools to access your database. Then you can make any kind of APIs using the data retrieved by Prisma. That might be a GraphQL API, gRPC API or a REST API.
4.2. Heroku
- Install Heroku CLI:
$ npm i -g heroku - Log in Heroku:
$ heroku login - For
Customizing the build process, you can find all the needed information [here] (https://devcenter.heroku.com/articles/nodejs-support#customizing-the-build-process){ "heroku-postbuild": "babel src --out-dir dist --copy-files" }- You can test it out with:
$ npm run heroku-postbuild
- You can test it out with:
- Create Heroku app through the terminal:
$ heroku create - Add the variables:
$ heroku config:set ${variable in the format 'kEY=value'} -a ${name of your app} - Check the current variables:
$ heroku config -a ${name of your app} - Set the remote:
$ heroku git:remote -a ${name of your app} - To deploy your app within a subfolder, from the main folder run:
$ git subtree push --prefix ${name subfolder} heroku main-->$ git subtree push --prefix graphql-prisma heroku main
5. Apollo Client and Testing
5.1. Apollo Client
-
Create a basic project with a
/srcfolder that contains an HTML and a JS file. -
Install some useful dependencies:
$ npm init -y- ParcelJS is a web application bundler that offers blazing fast performance utilizing multi-core processing, and requires zero configuration. It comes with a module system and Babel support.
$ npm i -D parcel-bundler{ "start": "parcel src/index.html" } - Apollo isn't a single library but a collection of libraries for both the client and the server. One of them is Apollo Boost which is a zero configuration client that gives you everything you need to send GraphQL queries and mutations to a GraphQL server.
$ npm i apollo-boost graphql
5.2. Testing
-
-
Install Jest as dev dependency:
$ npm i -D jest -
Set up the
globalSetupandglobalTeardown -
Install the same dependencies as for Apollo client and the cross-fetch that will be used for the polyfill:
$ npm i apollo-boost grapqhl cross-fetchimport 'cross-fetch/polyfill'; import ApolloClient, { gql } from 'apollo-boost';
-
-
Create the DB for test as a new schema, e.g.
test. You will need to change theDATABASE_URLin the.envfile, and run the prisma command:$ npx prisma migrate dev -
IMPORTANT:
- To be able to reuse the different parts of our app, we need to split it in three main parts:
index.js,server.jsandprisma.js --runInBandallows us to run all tests serially in the current process, rather than creating a worker pool of child processes that run tests.{ "test": "env-cmd -f ./config/test.env jest --watch --runInBand" }
- To be able to reuse the different parts of our app, we need to split it in three main parts:
-
GraphQL variables provide a better way to set up dynamic values in your operations:

