This is a neural network that predicts a drone's local position from the raw IMU, Barometer, and Magnetometer measurements. No GPS, camera or any other sensor is needed. This system works with the PX4 autopilot using MAVROS in realtime.
If you need to dive deeper into the science behind DeepNav, you can download the paper preprint
https://arxiv.org/abs/2109.04861
please cite as
@misc{abdulmajuid2021gpsdenied,
      title={GPS-Denied Navigation Using Low-Cost Inertial Sensors and Recurrent Neural Networks},
      author={Ahmed AbdulMajuid and Osama Mohamady and Mohannad Draz and Gamal El-bayoumi},
      year={2021},
      eprint={2109.04861},
      archivePrefix={arXiv},
      primaryClass={eess.SP}
}
-
This is a beta release, to avoid crashes, don't use it for flight control as an alternative to the tradional EKF/GPS. Instead, you are welcome to test, enhance or compare it to other estimators.
-
Good results were obtained on quadrotors running in auto modes and using Pixhawk4. Other controllers, frames, and modes will probably result in a reduced accuracy.
-
The system was tested on Ubuntu 18.04 and Ubuntu 20.04, both with TensorFlow 2.2.0
-
You don't need a GPU to run DeepNav, you only need it to train it.
-
The median accuracy in the validation set is currently about 34 meters. In some flights, the error is less than 3 meters, in other flights it is much larger. Recommendations on geting the best results can be found in the paper.
If you don't want to apply any modifications and use the trained network as it is, follow these steps. Otherwise, go to "Advanced Usage" below.
-
To test in a real flight, you need a ready-to-fly drone with Pixhawk4 running PX4 (or you can just test on a saved log)
-
A companion computer to run the network, you can use the ground station laptop instead.
-
TensorFlow 2.2.0 and MAVROS.
-
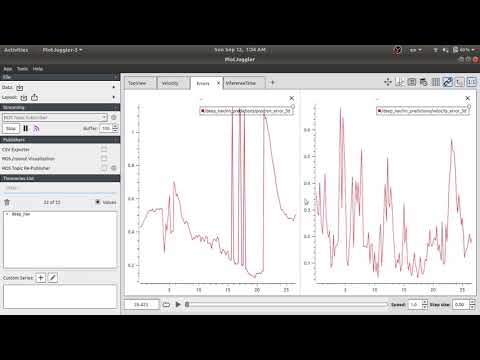
A realtime visualization tool to compare the results to the ground truth. I recommend PlotJuggler.
-
$ git clone https://github.com/majuid/DeepNav.git -
Copy the directory
/DeepNav/msgto yourmavroscatking workspace, ex.~/catkin_ws/src/mavros/mavrosand edit these necessary files then build yourmavrosworkspace -
Download the trained network here and extract it to
/DeepNav/DeepNav_results/ -
Download the sample log here and extract it to
/DeepNav/DeepNav_data/ -
Source your catkin workspace, ex.
$ source ~/catkin_ws/devel/setup.bashand start ros
$ roscore -
Open a new terminal tab (Ctrl+Shift+T in gnome) and activate the conda environment where you installed tensorflow (if you made one) then source the catkin workspace again
-
Start the network
$ cd ../realtime_inference$ ./run_inference.py 6 100note:
6is the trial folder in which the tf_model is saved and100is thewindow_sizefor that model -
Wait until this message is displayed:
you can start publishing mavros sensor messages nowthen repeat step 5, then
$ ./replay_log_csv.py 0057_5.12note:
0057_5.12is the log folder inside/DeepNav_data/flight_csvs -
When this message is displayed:
mavros messages are now being publishedthe network will start creating a window from the recieved sensor measurements, and messages like this will be displayed in the
run_inference.pyterminal tab:window size: 1 counters: {'imu': 6, 'mag': 2, 'alt': 2} -
When this window becomes equal to the model's
window_size, inferenece will start, and this message will be displayed inrun_inference.pytab:*first prediction*then messages like this will appear alternating with the
window_sizemessage:inference_time : 0.1191554230026668 -
Now the network predictions are being published to
/deep_nav/nn_predictionsros topicyou can visualize the predictions by running
$ rosrun plotjuggler plotjuggler -n -l PlotJuggler_layout.xml
all the steps from the previous section will be performed, except the sample log download step will be replaced by the following
-
Download a log from the PX4 Flight Review Database and place it in
/DeepNav/DeepNav_data/ulg_files. You can also use your own log. For convenience, give the log name a prefix, for example,c07ba992-c8a4-4f1f-a7ab-bd4661680a6d.ulgbecomes0001_c07ba992-c8a4-4f1f-a7ab-bd4661680a6d.ulg, the long hash will be stripped later. -
Convert the binary ulg file into multiple csv files
$ cd /DeepNav/preprocessing$ ./ulog2csv.pyThis creates a folder with the name of this log's prefix in the
/DeepNav_data/flight_csvsdirectory. You will supply the name of this folder toreplay_log_csv.py
notes:
-
A new version of the PX4 logger saves the EKF states in an
.._estimator_states.csvfile instead of.._estimator_status.csvyou'll need to modify its name in/flight_csvsyourself to proceed smoothly (i will account for this in a future update) -
The network is trained to make inferences at 5 Hz, so if the
estimator_statusfile has the ground truth EKF values at a different rate, this might result in the prediction and truth plots in the visualizer to have issues, this won't affect the prediction quality itself, only the visualization.
-
Edit
/DeepNav/preprocessing/downloader_options.yamlto define criteria for the logs to be downloaded from the flight review database -
Start the download, this might download hundreds of gigabytes to your machine, depending on the filters you set in the previous step
$ cd preprocessing$ ./logs_downloader.py -
Convert all the logs to csv files
$ ./ulog2csv.py -
Combine the csv files of each log into a single csv
$ ./combine_csvs.pythis creates
all_down_positions.pdfin/DeepNav/DeepNav_datadirectory, you can manually inspect the down positions to determine the duplicate or corrupted logs. You can then typedeletein front of their names inflight_names.csvin the same directory. You can also type a start time and/or end time (in minutes) in the second and third columns in front of any flight name to trim its ends. -
Run the trimmer based on your manual inspection
$ ./manual_trimmer.py -
Split the dataset into training and validation sets (85% : 15%)
$ ./split_dataset.py -
Now you can modify the network hyperparameters in
DeepNav.pyand run a new training session$ ./DeepNav.pyThe current parameters in the script are far from ideal. I put values to allow the script to run quickly for you to make sure that postprocessing works fines. If the script exits without errors (like a missing dependancy), you can uncomment the tuned architecture and hyperparameters. A training session takes about 5 hours on Nvidia RTX 2070 Super.
Running DeepNav.py will create a /trial_### directory in the /DeepNav/DeepNav_results directory
This created directory will contain the trained model in TF_SavedModel and Keras formats, training and validation sets individual flights results, training and validation summaries, weights checkpoints (if you want to use early stopping), and loss history.