Sometimes, while doing your job, you gotta also find the right person to help you out. This person could be a student, intern etc. Whenever you send out an opening, applicants come in huge numbers with impressive resumes and skill sets. It is often important to shortlist a few handful of candidates, who can be interviewed further. To filter out the best candidates you may ask applicants to complete certain coding tasks. Such tasks are great to evaluate the technical insights of the candidates. However, they may focus only on certain aspects of your project. From a broader perspective, you can agree that it is equally important that the selected candidate is well familiar with the wide array of technologies used in your project. A way to do that is by leveraging the already existing online training materials available on websites like edX, Coursera, Udemy etc. Such courses have been created by experts and can help establish minimum competency for aspirants applying to work with you.
MOOC-CA is a platform that can help evaluators validate that the applicants have completed certain tasks on such online training platforms. It is composed of a Chrome Extension and a Server. The evaluators publish their version of the chrome extension and setup the server. The aspirants install the chrome extension and make submissions to the server. The evaluators can then view the submissions made by the applicants and shortlist their best picks in an easier and more organized way.
Here is a presentation from CERN IT Lightning Talks #17 where MOOC-CA was presented on 8 Nov 2018.
The MOOC-CA server for evaluators to allow students/aspirants to create accounts, register their OAuth2 clients, submit their progress. The evaluators can view the submissions made by students through the Django Admin interface available the /admin
#Setup Instructions
-
Clone the repository
-
Go to ./docker-compose.yml and specify values for the following environment variables
- EMAIL_HOST: SMTP server address
- EMAIL_HOST_USER: Email address to be used for sending emails from the Django app.
- EMAIL_HOST_PASSWORD: Password of the above mentioned email
- EMAIL_PORT: The SMTP port on the SMTP server to which the Django app should connect when sending emails.
- SECRET_KEY: The secret key for the Django application to be used in settings.py
- MOOC_CA_HOST: FQDN of server where the container is hosted. For development, use localhost.
- MOOC_CA_DEBUG: If true, will print debug messages on the HTML pages if errors occur. Not recommended for production. For example,
environment: - "EMAIL_HOST=smtp.gmail.com" - "EMAIL_HOST_USER=somethings@gmail.com" #Allow less secure apps to access the account, if using gmail. - "EMAIL_HOST_PASSWORD=some_password" - "EMAIL_PORT=587" - "SECRET_KEY=9n5v_uwn+880+53w_avj&fp!ul=wf^jlls7t+v5f^z4553i98" - "MOOC_CA_HOST=ec2-52-29-88-219.eu-central-1.compute.amazonaws.com" - "MOOC_CA_DEBUG=False" -
Start the database and Django containers:
docker-compose up -
Create a superuser account to access the Django Admin app.
docker-compose run web python3 manage.py createsuperuser -
The application is deployed and ready to use. Login through the /admin page. Then head to the Evaluator section to see the applicants and the Tasks submitted by them.
-
Go to the Sites section of your admin page and add a new site that matches the fqdn of the server where you host the MOOC-CA application.
-
Update SITE_ID=2 in settings.py inside WLCG_GSoC_Task_Server directory.
-
You are all set!
- Head over to
/accounts/registerand fill up the registration form. - You will receive an email from the configured SMTP server with the activation link. Click on the activation link. For localhost, you might want to replace the hostname of the server to localhost instead of the app name.
- Once you have activated your account, you can login
/accounts/login/
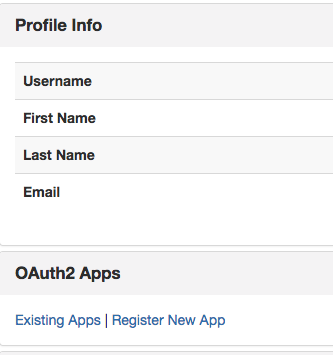
- From the profile view, in the OAuth2 Apps section, click on Register New App whick takes you to
/oauth/applications/register/
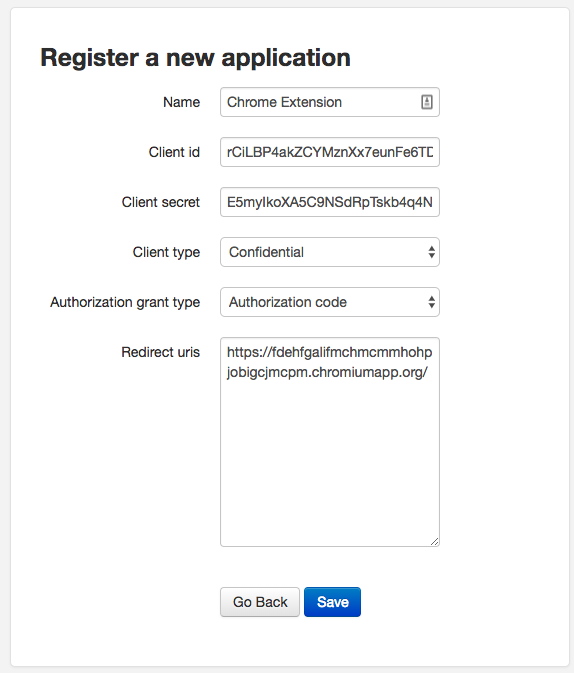
- Use the following guidelines to fill up the form
| Parameter | Value |
|---|---|
| Name | Any name you prefer |
| Client Type | Confidential |
| Authorization grant type | Authorization Code |
| Redirect uris | Paste the value of Redirect uri mentioned in Step 2.7. Please make sure you do not forget to include the trailing backslash ( / ) in the url. |
- Copy the values of Client ID and Client Secret presented on the 'Register a New Application' form. They need to be added to the MOOC-CA Chrome Extension Options Page.