| page_type | languages | products | description | urlFragment | ||
|---|---|---|---|---|---|---|
sample |
|
|
A code sample demonstrating issuance and verification of verifiable credentials. |
verifiable-credentials |
This code sample demonstrates how to use Microsoft's verifiable credential preview to issue and consume verifiable credentials.
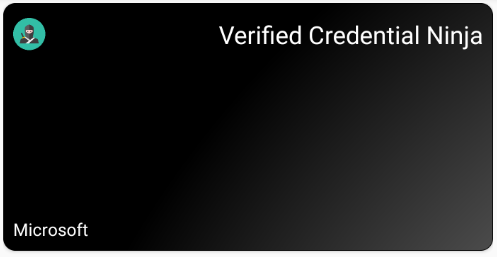
Welcome to Verifiable Credentials, powered by Azure. In this hello world code sample, we'll teach you to issue your first verifiable credential: a Verified Credential Ninja Card. You'll then use this card to prove to a verifier that you are a Verified Credential Ninja, mastered in the art of digital credentialing.
There are two ways to run this code sample.
- Run the code as-is. The sample is set up to issue anyone a Credential Ninja Card, using a issuer in the cloud run by Microsoft.
- Set up your own issuer, and change the code to use that issuer to issue a verifiable credential. Our documentation describes how to set up your own issuer.
Read on for more instructions, and good luck ninjas!
NOTE: Verifiable Credentials are currently in an invitation-only preview. Only approved participants in the preview will be able to set up their own issuer. Furthermore, Verifiable Credentials must not be used for production use cases at this time. Please contact us if you would like to join the preview.
This repository contains two NodeJS servers: an issuer website, and a verifier website. These two websites represent the participating parties in a verifiable credential exchange:
Each website in this code sample is intentionally plain. They contain only a single page, the home page, that displays a QR code and shows a message. We've kept the code as simple as possible to help you keep the focus on the verifiable credentials implementation. You'll notice the code in both websites is very similar. The files in this repo are organized as follows.
issuer                    The website acting as the issuer of the verifiable credential.
issuer/README.md          Instructions for running the issuer website.
issuer/app.js             The simple NodeJS server containing all code.
issuer/issuer_config/     Contains the example rules and display files used in the creation of this code sample.
issuer/public/            Contains HTML and javascript files used in the issuer website.
verifier                  The website acting as the verifier of the verifiable credential.
verifier/README.md        Instructions for running the verifier website and consuming a verifiable credential.
verifier/app.js           The simple NodeJS server containing all code.
verifier/generate.js      A simple script that helps you generate a DID for your website.
verifier/public/          Contains HTML and javascript files used in the issuer website.
Running this code sample will require:
- NodeJS version
10.14or higher installed on your machine. - Git installed on your machine.
- An Android device.
- An Azure subscription where you have access to create Azure key vaults.
To run this code sample with your own issuer, you will require a few more things:
- An Azure Active Directory tenant, with a free trial of Azure AD Premium.
- An Azure subscription where you have access to create Azure storage accounts.
- An identity provider, such as Azure AD or Azure AD B2C, that will authenticate users that receive verifiable credentials.
Refer to our documentation for more instructions on creating your own issuer.
The code in this sample demonstrates proper usage of the VC SDK, which is available on NPM:
npm install verifiablecredentials-verification-sdk-typescript
The VC SDK provides classes and functions for implementing verifiable credential exchanges. This includes issuing credentials, requesting credentials from users, validating credentials, registering decentralized identifiers, and more. The VC SDK is currently in preview; you should expect breaking changes to occur with each release.
In addition to the VC SDK, this code sample will use the Microsoft Authenticator mobile app for Android. The README for each website provides instructions on installing Authenticator. Verifiable credential support in Authenticator is not available for iOS at this time.
This project welcomes contributions and suggestions. Most contributions require you to agree to a Contributor License Agreement (CLA) declaring that you have the right to, and actually do, grant us the rights to use your contribution. For details, visit https://cla.opensource.microsoft.com.
When you submit a pull request, a CLA bot will automatically determine whether you need to provide a CLA and decorate the PR appropriately (e.g., status check, comment). Simply follow the instructions provided by the bot. You will only need to do this once across all repos using our CLA.
This project has adopted the Microsoft Open Source Code of Conduct. For more information see the Code of Conduct FAQ or contact opencode@microsoft.com with any additional questions or comments.

