The purpose of this project is to train a neural network that predicts the steering angle of a car simulator as it traverses a course. This is done not by using deterministic rules but rather by cloning behaviour. Data is collected by driving the car simulator around the course. A network is then trained on this data. A successful outcome is achieved when the car traverses the course in autonomous mode without it ever leaving the course.
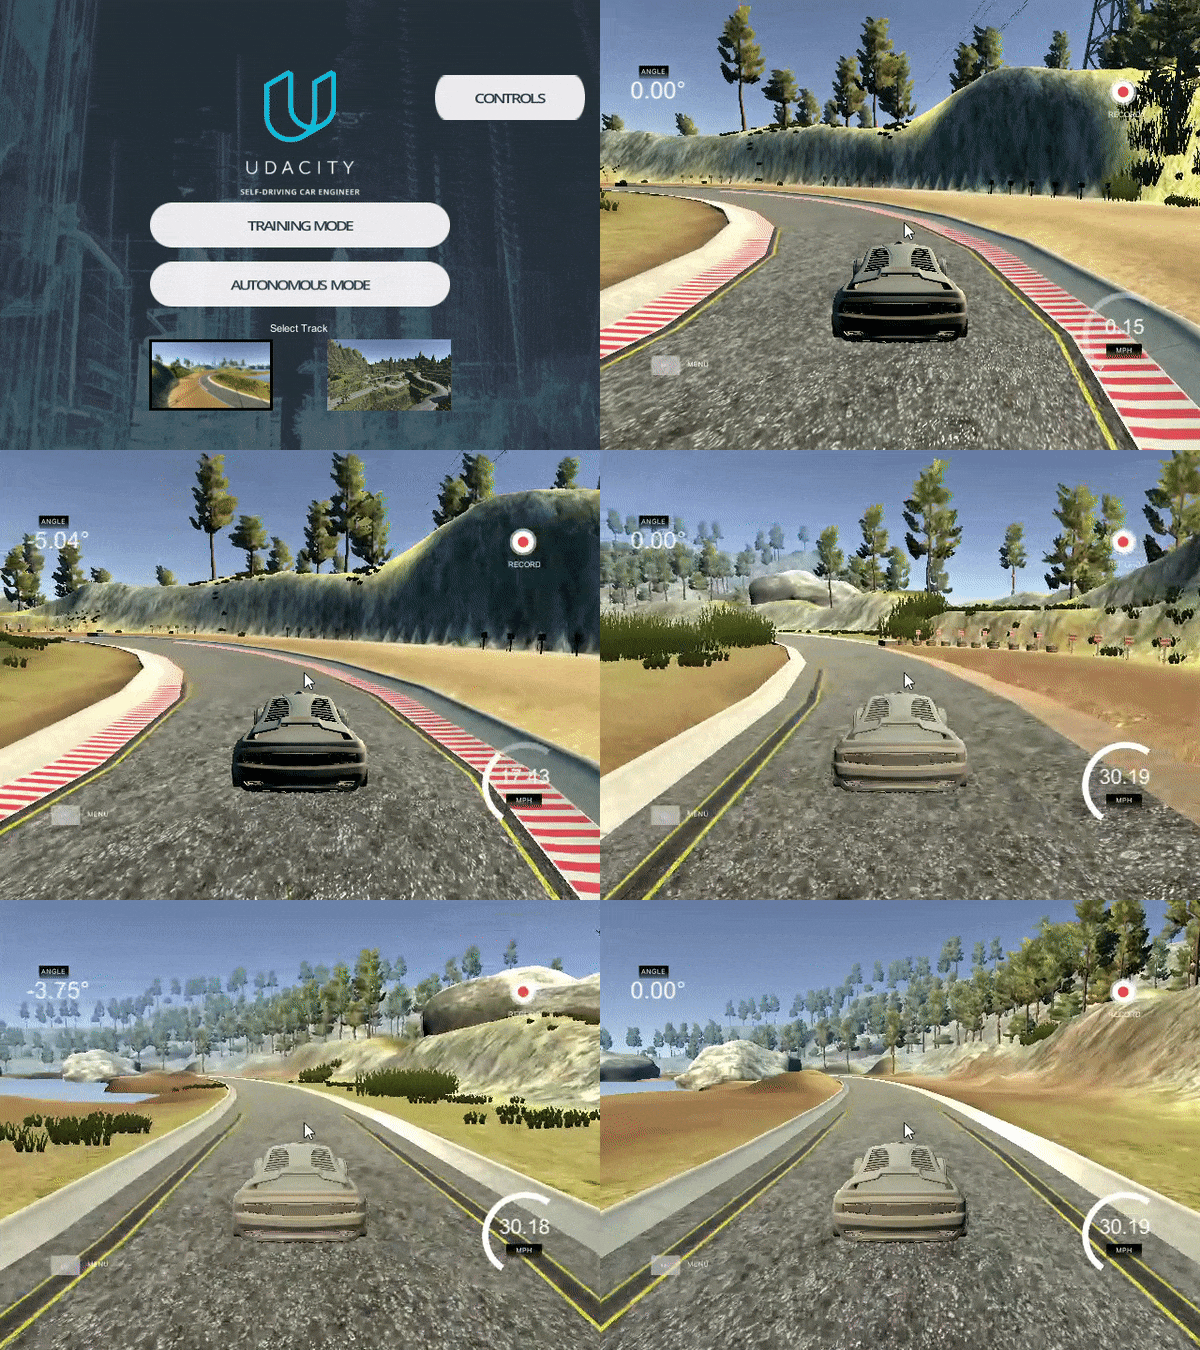
The car simulator is provided by Udacity along with a python program that can send the steering angles (and speed) to the simulator. The simulator provides a image captured by a dash camera that the trained network will then use to predict the correct steering angle.
Here is a gif showing you how the manual simulator works:
My project includes the following files:
- clone_combo.py containing the script to create and train the model
- drive_smooth.py for driving the car in autonomous mode (Changes made to the initial script)
- model_clone_combo.h5 containing a trained convolution neural network
- CarND_Term1_P3.md containing the project write up
- Track1_Video.mp4 video showing the successful run in autonomous mode
The car can be run in autonomous mode by putting the simulator in autonomous mode and starting the script using this command from the project directory: python drive_smooth.py model_clone_combo.h5
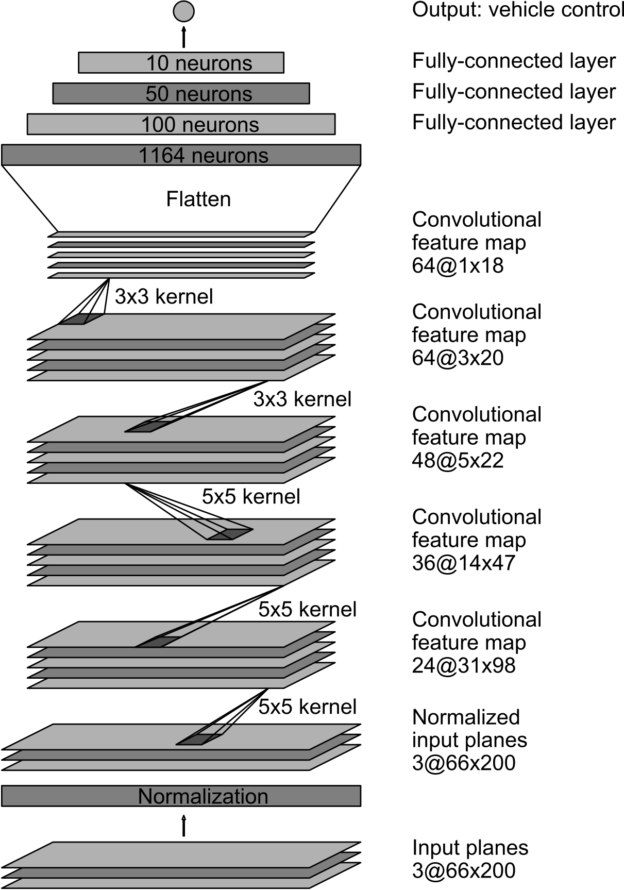
Before I started working on this project I have been following and reading about behavioural cloning in general. I made up my mind to start of by using the NVIDIA model as detailed in this blog: https://devblogs.nvidia.com/parallelforall/deep-learning-self-driving-cars/
The NIVIDA architecture consists of 9 layers, including a normalization layer, 5 convolutional layers, and 3 fully connected layers. The input image is split into YUV planes and passed to the network.
Initial tests with this architecture and the Udacity training set performed extremely well. In fact, once I had the network trained with 5 epochs, it managed to complete a round on the track in autonomous mode. This NVIDIA architecture is an extremely valuable one. In my conclusion, I will discuss why I think this is the case.
However, this is a learning experience, so I did not stop my project at this point. I decided to experiment with two approaches:
1.) Augment images in pre-processing with hough lines 2.) Combine two good networks into one
For the hough lines experiment, I used my previous project Lane line detection pipeline, slightly adjusted, in order to draw the lane lines onto the image before it is fed to the network. The result of this was both positive and negative. The car performed worse in autonomous mode, as it was rapidly swerving between the road edges and twice crossed the road edge. One theory on why this might be the case is due to processing power required versus available. One more thing I will discuss in my conclusion. However, the model performed better on track 2, compared to a standard NVIDIA model without hough lines. Or in other words. the hough lines addition helped the model generalise more.
The combination approach proofed to be very interesting.
For my second model I chose a model presented by https://www.comm.ai The model consists of 7 layers, including a normalisation layer, three convolutional layers and two dense layers.
I combined the two models by performing the normalisation layer and then splitting the network into two. Each side running the NVIDIA and comma.ai network respectively up to the point where the network is flattened. I then concatenate the two flattened layers and perform 3 dense layers on that resulting in a single output. I added dropout layers, kernel_regularizers and RELU activation on both networks and also on the combined network. To combat over training and to introduce nonlinearity
I chose these two networks as they try and map two distinct features. The NVIDIA architecture seems to be really good at detecting the road edges and lines and the comma.ai is designed to detect the road surface.
A big difference noted on the new architecture is the fact that slightly more epochs are needed to train the model. (Used to be about 5 epochs and this increased to 7 or 8)
Final model summary:
The model was trained and tested on different datasets.
The model used an adam optimizer, so the learning rate was not tuned manually.
As with almost all modelling exercises, it is crucial to provide the network with a really good set of training data. Even with the simulator, it remains difficult to get a good training set.
The training set needs to contain a good balance of smooth driving and recovery data for when the car gets it wrong. It must also not contain too much data as you then run the risk of the network "memorising" the track instead of cloning behaviour. (ie over training to the point where it fails to generalise)
Using an anlogue controller, I captured two laps of track 1
trying to drive as smoothly as possible and sticking
to the middle of the road.

I then recorded the vehicle recovering from the left side and right sides of the road back to center so that the vehicle would learn to handle situations for when this would occur.
I combined my training data with the set from Udacity. The data contains three images; center , left and right representing images taken from cameras situated in the center, left and right of the dash.
I used the images from teh left and right cameras as well in my data by adding and subtracting 0.15 from the angle, representing the correction the car needs to take if it were in fact centered on the left and right camera.
and then augmented it further by adding random distortion in the form of adjusting the brightness, adding a random shadow to the image, and randomly shifting the horizon.
Here are three augmented images with a green line showing the actual steering angle.
Note that only the training data is augmented, the validation data is left as is.
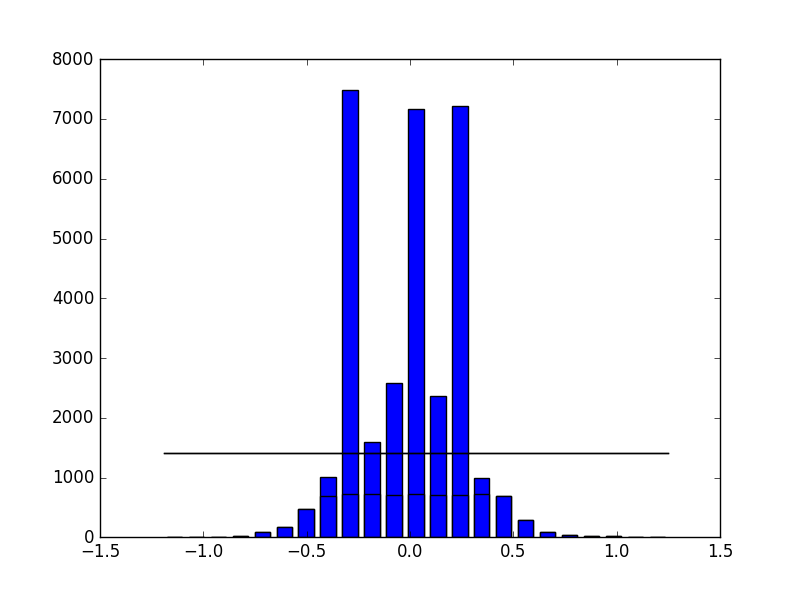
Inspecting the histogram of steering angles show that there is an inbalance in steering angles in teh training data.
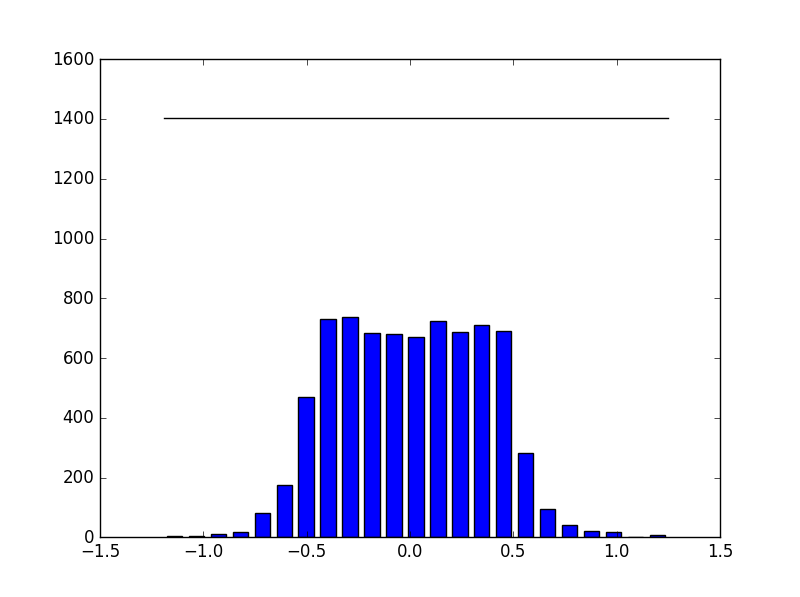
I correct this by randomly removing images from the over balanced bins.
The result of this action:
Before: (32307,) (32307,)
After: (7633,) (7633,)
Train: (7251,) (7251,)
Test: (382,) (382,)
The number of data points decreased from 32 307 to 6 577. I split the remaining 6577 data points into a training set of 6 248 and a validation set of 329.
The model trains fairly quickly on my hardware. Each epoch taking about 177 seconds and I trained on 8 epochs.
Epoch 1/8
185s - loss: 0.6193 - val_loss: 0.2026
Epoch 2/8
171s - loss: 0.1246 - val_loss: 0.0775
Epoch 3/8
171s - loss: 0.0715 - val_loss: 0.0582
Epoch 4/8
172s - loss: 0.0570 - val_loss: 0.0458
Epoch 5/8
171s - loss: 0.0500 - val_loss: 0.0446
Epoch 6/8
167s - loss: 0.0453 - val_loss: 0.0432
Epoch 7/8
166s - loss: 0.0422 - val_loss: 0.0392
Epoch 8/8
165s - loss: 0.0393 - val_loss: 0.0351
The model gets to a state where it will navigate track one very quickly, however, I train to epoch 8 as it gives me a smoother ride.
This model along with a few small changes to drive.py results in a very robust experience on track 1. It completes the track without ever touching the sides and the lines. It is also able to recover quickly when I take over and deliberately drive the car at steep angles to the side.
In the attached image you will see one lap successfully completed and then a few scenarios of where I try and confuse the car.
This project has been an awesome experience. I got to a working state within a few hours, but ended up spending almost 20 more hours, playing and experimenting with techniques.
The power of using existing networks are immense as proven by the NVIDIA model and makes me very hopeful for future leaps in innovation in this space.
My model performed really well on track one but fails miserably on track two. To combat this I would either try and darken my images more, or just collect data from track two as well.
Adding my own lane detection failed but I would like to try this method again after we have finished the next project. I wonder about how intense pre-processing and the subsequent lag due to computing will affect autonomous driving.


