A tool for extracting, viewing, editing and re-inserting the various data found in the Landstalker ROMs and disassembly.
This tool can work with any of the six publicly available ROM dumps, as well as with my other project: Landstalker Disassembly
Work-in-progress documentation here.

 |
 |
|---|---|
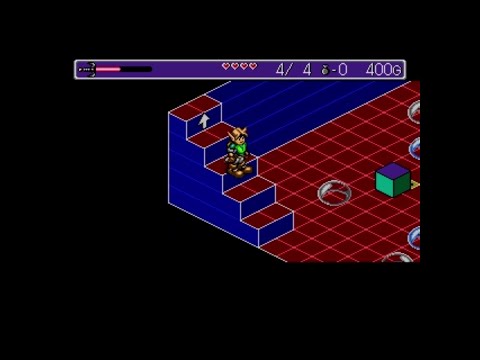
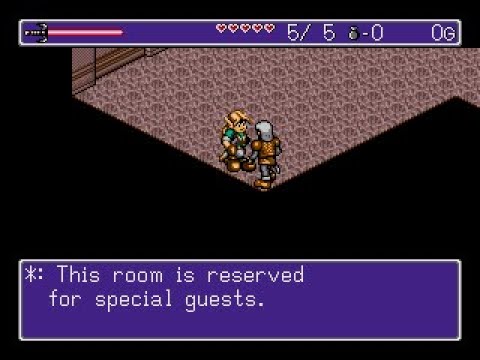
| Map and Sprite Editing Demo, version 0.3.4 | Text, Graphics, Room and Entity Editing Demo, version 0.2 |
| Asset | Viewable | Editable | Notes |
|---|---|---|---|
| Strings | ✔️ | ✔️ | Custom character sets to be added. |
| Character Script | ❌ | ❌ | ROM format reverse engineered. |
| Shop Script | ❌ | ❌ | ROM format reverse engineered. |
| Tiles | ✔️ | ✔️ | |
| 2D Maps | ✔️ | ✔️ | |
| Misc Graphics (Fonts, etc.) | ➖ | ➖ | 90% complete. Still need to understand end credit font. |
| Palettes | ✔️ | ✔️ | |
| Blocksets | ✔️ | ✔️ | |
| 3D Maps | ✔️ | ✔️ | Editor UI could be better optimised. |
| Heightmaps | ✔️ | ✔️ | |
| Room Entity Placement | ✔️ | ✔️ | |
| Room Warp Placement | ✔️ | ✔️ | |
| Chest Contents | ✔️ | ✔️ | |
| Room Character Scripts | ✔️ | ✔️ | |
| Room Flags | ✔️ | ✔️ | |
| Room Graphic Transitions | ✔️ | ✔️ | |
| Entity Properties | ✔️ | ✔️ | |
| Entity Behaviours | ✔️ | ✔️ | |
| Triggers | ❌ | ❌ | ROM format reverse engineered. |
| Room Triggers | ❌ | ❌ | ROM format reverse engineered. |
| Cutscenes | ❌ | ❌ | ROM format reverse engineered. |
| Sprite Frames | ✔️ | ✔️ | |
| Sprite Animations | ✔️ | ✔️ | |
| Audio Samples | ❌ | ❌ | |
| Music | ❌ | ❌ |
In addition to build-essential (compiler and make), the following libraries are required:
It is recommended to have the following installed in addition to the above, in order to build assemblies:
- git
- wine
- kega-fusion
- Download the wxWidgets v3.2+ source from the official website. Extract the contents of the tar file to a suitable location.
- Install the prerequisites (see the README.md file in the wxWidgets source). For Debian/Ubuntu, you will need to run this command:
# apt install libgtk-3-dev libgl1-mesa-dev libglu1-mesa-dev libgstreamer-plugins-base1.0-dev libcurl4-openssl-dev libwebkit2gtk-4.0-dev libpng-dev - Create a build directory:
$ cd wxWidgets-3.2.2.1
$ mkdir gtkbuild
$ cd gtkbuild
- Run the configure script as follows:
Add the
$ ../configure --with-gtk --disable-shared
--enable-debugoption for a debug build. - Build the source: (this can take some time)
$ make -j8
- Install the built libraries:
sudo make install
sudo ldconfig
- Download the yaml-cpp source from GitHub. Extract the contents of the tar file to a suitable location.
- Make sure cmake is installed. For Debian/Ubuntu, you will need to run this command:
# apt install cmake - Create a build directory:
$ cd yaml-cpp
$ mkdir build
$ cd build
- Run cmake as follows:
Add the
$ cmake ..
-D CMAKE_CXX_FLAGS_DEBUG='-g -D_GLIBCXX_DEBUG'option for a debug build. - Build the source:
$ make
- Install the built libraries:
sudo make install
sudo ldconfig
build using the Makefile by calling make
$ makeTo build with debug symbols, use pass the DEBUG=yes parameter to make
$ make DEBUG=yesYou will need to download and build the WxWidgets 3.2.2+ library (https://www.wxwidgets.org/). Download the Windows ZIP version and extract somewhere convenient (e.g. the root of the C: drive). Note that the final extracted path cannot contain spaces.
Navigate to the extracted WxWidgets sources and go to the build\msw directory. Open the wx_vc16.sln solution file. Go to the "Build" menu and select "Batch Build...". In the batch build window, click the "Select All" button and then click "Build" (note that this will take some time). Once all files have been built, exit out of Visual Studio.
Finally, we need to add an environment variable to tell Visual Studio where to find the WxWidgets files. Open the Start menu, right click on "Computer" and select "Properties". Click on "Advanced System Settings" and then "Environment Variables". Add a new System Environment Variable named WX_WIN, and set its value equal to the full path to the WxWidgets directory (e.g. "C:\libraries\WxWidgets-3.2.2"). Click OK and exit out of the system properties windows.
Make sure that Visual Studio has been restarted so that it picks up the new environment variable.
You will need to obtain the LibPng 1.6.37 library - this can be found at https://download.sourceforge.net/libpng/lpng1637.zip. You will also need the ZLib source, download this from https://www.zlib.net/zlib-1.2.11.tar.gz.
Extract both archives to a common directory (e.g. C:\libraries). Once extracted, you should have a "lpng1637" folder and a "zlib-1.2.11" folder. Rename the zlib folder to "zlib" (i.e. remove the version from the folder name).
Navigate to lpng1637/projects/vstudio and open the zlib.props file with a text editor. Change the <TreatWarningAsError> value from true to false. Save the file.
Next, open the vstudio.sln file. You will be prompted to upgrade the solution file to the latest version - choose "Yes". Once converted, go to the "Build" menu and select "Batch Build...". In the batch build window, click the "Select All" button and then click "Build". Once all files have been built, exit out of Visual Studio.
Finally, we need to add an environment variable to tell Visual Studio where to find libpng. Open the Start menu, right click on "Computer" and select "Properties". Click on "Advanced System Settings" and then "Environment Variables". Add a new System Environment Variable named LIBPNG_PATH, and set its value equal to the full path to libpng (e.g. "C:\libraries\libpng1637"). Click OK and exit out of the system properties windows.
Make sure that Visual Studio has been restarted so that it picks up the new environment variable.
-
Download and install CMake from the CMake Website.
-
Download the yaml-cpp source as a zip file from GitHub.
-
Extract the contents of the zip file to a suitable location (e.g. C:\libraries). Rename the yaml-cpp folder to
yaml-cpp(i.e. remove the version from the folder name). -
Open a command prompt window and navigate to the extracted files:
cd \libraries\yaml-cpp -
Create a build directory:
mkdir build
cd build
-
Run cmake as follows:
cmake -G "Visual Studio 17 2022" -A Win32 .. -
Build the Debug and Release versions of the library:
cmake --build . --target ALL_BUILD --config Debug --parallel 8
cmake --build . --target ALL_BUILD --config Release --parallel 8
-
Go to the "Build" menu and select "Batch Build...". In the batch build window, select the first four
ALL_BUILDconfigurations and then click "Build" (note that this will take some time). Once all files have been built, exit out of Visual Studio. -
Finally, we need to add an environment variable to tell Visual Studio where to find the yaml-cpp libraries. Open the Start menu, right click on "Computer" and select "Properties". Click on "Advanced System Settings" and then "Environment Variables". Add a new System Environment Variable named YAMLCPP_PATH, and set its value equal to the full path to yaml-cpp (e.g. "C:\libraries\yaml-cpp"). Click OK and exit out of the system properties windows.
Open the VS2019 solution file in landstalker_gfx\VC2019. Make sure that the appropriate configuration has been set (e.g. "Debug x86") and hit Ctrl+Shift+B to build.