A lot of existing scripts to read graphics from windows into Python do not work for windows that are both hardware-accelerated (such as PS Remote Play) and obscured by other windows (always useful when wanting to run in the background). Here is one that does! Scripts provided in Python and C++ (user's choice).
- PS Remote Play Software: https://remoteplay.dl.playstation.net/remoteplay/lang/gb/index.html
- PC running Windows with Python installed. Tested working with Windows 10/11, Python 3.10/12.
Streaming software is not required.
- Create a new PSN account ("the second account"). This will be used to host the Remote Play session to decrease lag. You will still be able to use your main account to actually play the game!
- While logged into the second account, go to Settings > Users and Accounts > Other > Enable Console Sharing and Offline Play.
- Switch users (don't log out) back to your main account.
- Install PS Remote Play on your PC using your platform. Only tested on Windows.
- Run the PS Remote Play software on your PC and sign into it using the second account.
- Connect to your PS5 by following the instructions in the app. This can take a few minutes.
- Press a button on your controller to bring up the "Who's playing?" box - select your main account.
- To remove the "Remote Play Connected" banner at the top of the screen, on your PS5 main account, go to Settings > System > Language and choose any other language, then change it back to your own language. This seems to be a workaround for a bug rather than an actual feature so this may not be necessary in future.
- You should now see the live video feed on your PC in PS Remote Play, and be able to play using the controller on your main account. Keep the Remote Play window active (not minimised - just put it behind whatever other windows you need to look at).
- In Python, install the libraries NumPy, PyWin32 and OpenCV. The
pipcommand is:pip install numpy opencv-python pywin32 - Copy and run the Python code in
record_window.py(using this filename) to test it out. If all goes well you should see your gameplay live in an OpenCV window.
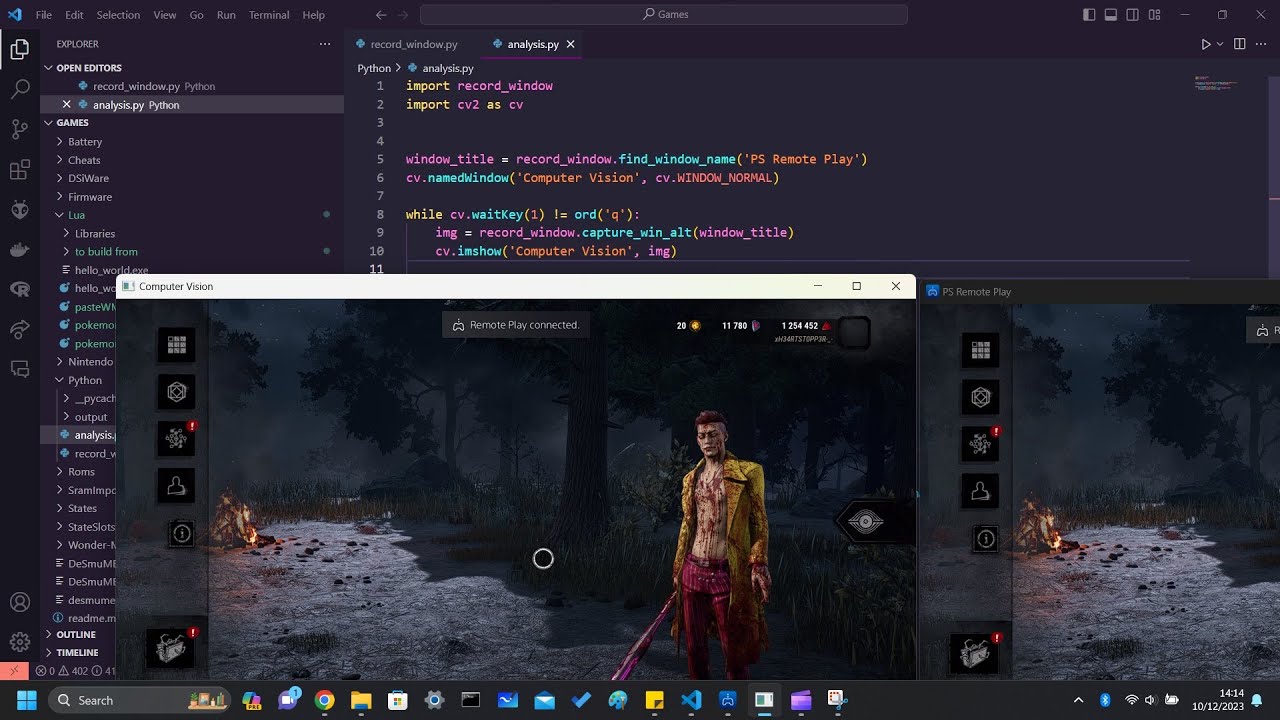
To use the code in your larger project, use it as a Python module:
import record_window
import cv2 as cv


window_title = record_window.find_window_name('PS Remote Play')
cv.namedWindow('Computer Vision', cv.WINDOW_NORMAL)

while cv.waitKey(1) != ord('q'):
    img = record_window.capture_win_alt(window_title)
cv.imshow('Computer Vision', img)I followed the steps in the first 3 minutes only of this video, except for the OBS/Streamlabs part.
The latency is low with PS Remote Play. The resolution depends on your internet connection but is usually pretty good. The frame rate is usually not as high as the source but should be 30+ FPS. It's good enough that you can play even fast-paced games by watching the stream instead of your TV.
You can get even faster processing by using C++ instead of Python. I have provided an equivalent version of the python script here in C++ at record_window.cpp. Installing opencv in C++ requires building the library from scratch however which is not as beginner friendly as python. Great for computer vision applications (object detection etc).
By changing the name of the window that is recorded in the code, you can capture any other window too. I have tested it with some Steam games, as well as regular Windows apps. However capturing DeSmuME (Nintendo DS emulator) gameplay produced poor results, with frequent white flashing of the screen. Changing the frame skip options did not seem to improve it so this remains unfeasible right now.