Installation guide for Lenovo Smart Frame, specifically for an electrical outlet for a clean install.
The Lenovo Smart Frame comes with an enormous power adapter that won't sit flush for any wall mounted install.
I was unable to find a 1-gang recessed outlet that fit my specific needs, and 2-gang recessed outlets were too large.
What I found that works is an Eaton 1210W outlet which will allow the large adapter to sit vertical in the outlet, assuming you're on a 20A circuit. Datacomm media plate is recessed, but still small enough in dimensions to be covered by the Lenovo Smart Frame itself, but deep enough so that the adapter doesn't stick out.
- Arlington Industries 38RAST (for old work retrofit)
- Alternatively: Bridgeport 38ACDS (for old work retrofit)
- Alternatively: Halex 25803 Flex Cut-in Snap lock connector (for old work retrofit)
- 12/2 Metal clad cable
- wire nuts, local electrician preferred over push-in connectors (alternatively reddit electricians suggest Wago)
- 1/2" knock-out seals
- 4-40 x 3/8" screw
- Klein fishing rod
- Wiss tin snips for working with metal clad (MC)
- Klein wire stripper
- Klein outlet tester
- 3M electrical tape
- Zircon stud finder


In general, to make a new electrical outlet, you want to plug into an existing circuit that's directly below is the easiest way to go.
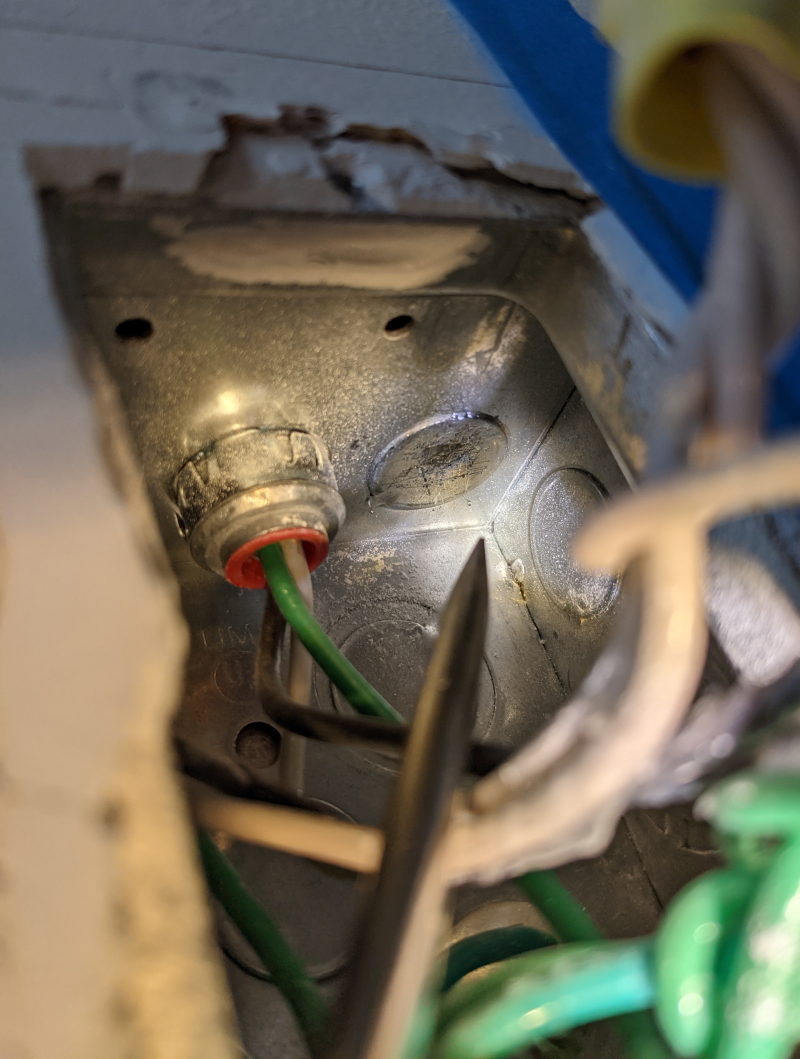
One of the challenges in a multifamily setting compared to traditional single-family residential is dealing with metal electrical boxes.
To run new metal clad 12/2 cable into an electrical box requires opening up a 1/2" knock out.
This is oftentimes easier said then done given then tight quarters. Traditional approaches are with a hammer and a flat head screwdriver or awl.
But if that doesn't work, then a right angle drill adapter with a self-driving screw works as well to give you a handle to pop out the knock out with.
Screw in a self-driving sheet metal screw with a right angle drill adapter from either Milwaulkee or Dewault

Pry open the knockout with the drilled in screw

You can use an awl and hammer or flathead screwdriver and hammer to put the connector into the 1/2" knockout.

The Arlington 38RAST in the 1/2" knockout.


The adapter plug is roughly 2" tall by 3 1/8" long.
And it requires 30W of power, 1.5A x 20V.


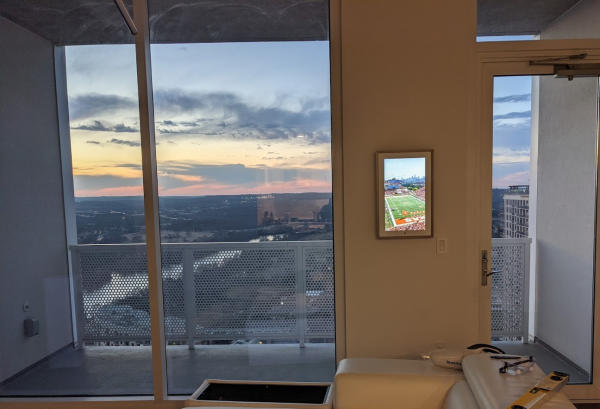
After pics (hidden power cable)
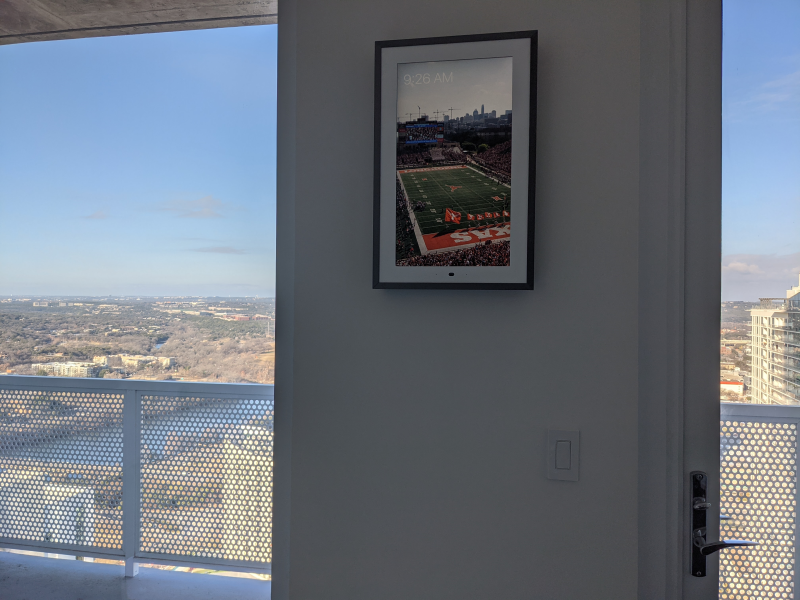

After a friend commented that the frame was too high, I did some research and found that the rule of thumb for picture hanging is the center of the picture should be around 57 to 61" from the floor. Apparently Christie's gallery standard is 1.55m which is 61". Therefore, to lower the positioning of the frame requires some spackling, sanding, and paint.

When carving out the cutout in the drywall to fit the recessed media outlet, you may find that the insulation is not as densely packed as you'd like for thermal and noise insulation. Or the electrician may pull out some insulation to make fishing inwall easier. Since you have an opening in the wall, it's a rare opportunity to improve the insulation. And if you watch too many DIY videos, you start getting inspired. YouTube
You should also measure the thickness of your drywall while you have it cut open.
That way in the future if you need to do patch work for whatever reason, you can buy the right width.
In my case, it's 5/8" thick drywall. The terms drywall and sheetrock are used interchangeably.

You'll want a 5 gallon bucket and lid. Cut a 1" hole in the topic of the bucket. The Greenfiber insulation is designed to be blown-in via a machine. But you can fluff it up using a drywall mud or paint mixing attachment. Cut out some of the fiber and put it in the bucket, and then blend it with the drywall/paint mixing drill bit. After it's blended, I found a 2 cup pet food scoop to be perfect for shoveling insulation into the walls. Wear a mask and goggles when blending and filling, it'll get a little messy with lots of particles in the air.


In certain cases, if you have really thick insulation or your Romex or metal clad (MC) gets caught on something within the wall while fishing, you may need to cut another hole to help fish the MC thru. To patch this utility hole, you can use backer boards, or a California patch, or both.
Cutting open a 4" x 4" hole to help facilitate fishing MC thru the wall.

Countersink the screws so that the head of the screw is below the surface of the drywall so it won't stick out.

Spackled the screw holes just to make sure everything we be flush before mud

Purchase coarse thread screws, don't buy fine thread screws if using a wooden backing.

Test fit of the California patch before mudding
