(scroll down for compiler instructions)
The goal of this project was to implement a PBR rendering engine using Java and OpenGL. To create this application I used the LWJGL native OpenGL ES bindings for Java to interface with Google's ANGLE OpenGL ES implementation used in chrome as the backend for WebGL. The reason I chose Java and ANGLE as my development environment is for the universal compatibility of the Java language and the OpenGL ES API. Every major platform supports both in some way so this rendering engine can be repurposed at some point for mobile development or even console development.
My source code repository is available here: https://github.com/LAX1DUDE/cs50-final-project
If the pictures do not load you can access a copy of this doc here: [https://github.com/LAX1DUDE/cs50-final-project/blob/master/DESIGN.md]
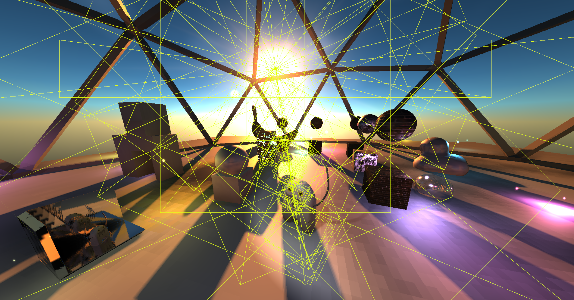
I will be using a program called RenderDoc to display real screenshots of every render target used in the game while it's running. RenderDoc injects a layer between the Java code and OpenGL so it can intercept draw calls and display debug information related to them in a GUI.

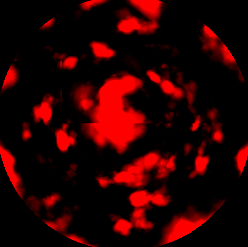
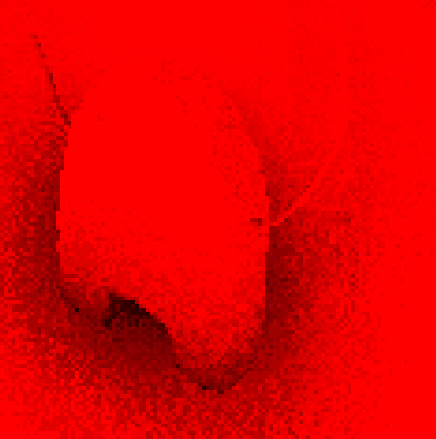
Cloud Map Update
The first thing the game does is update a single tile of a paraboloid map containing the cloud information for rendering the PBR clouds in the sky. The tile is created by raytracing a GPU accelerated Worley Noise algorithm. A seam is visible in the screenshot because the clouds are moving and the tiles have only partially been updated. The clouds are triple buffered so the actual cloud maps used by the sky mesh is only updated once every tile in the back buffer has received an update, and then the two front buffers are crossfaded by the pixel shader
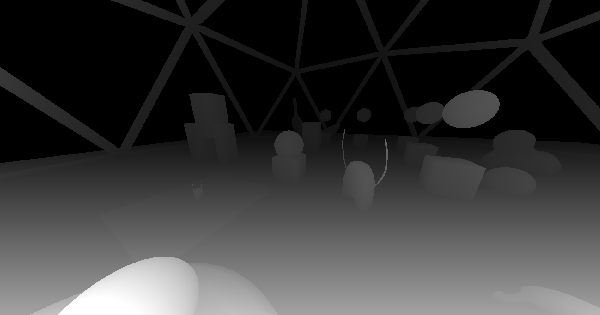
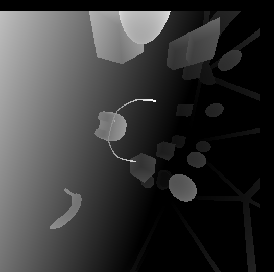
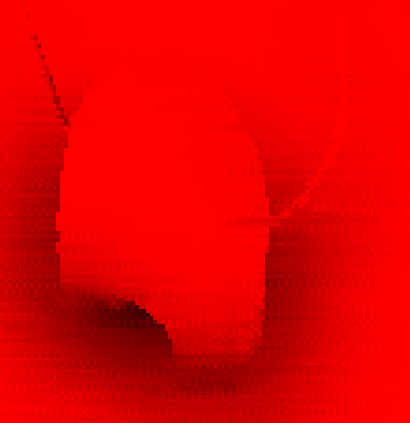
Depth Prepass
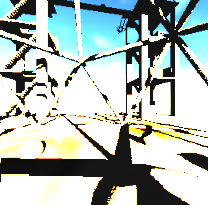
Next, all solid geometry is rendered to a depth buffer, outputting the distance each pixel is from the viewer. This is done for optimization so the depth test mode can be set to GL_EQUAL when the main color pass is performed to avoid rendering obstructed geometry. The depth buffer is reversed (0 is far, 1 is near) because floating point integers have more precision when closer to 0, which greatly reduces Z-fighting for distant geometry. A stencil buffer is also generated, acting as a mask for which pixels will be filled with sky later.
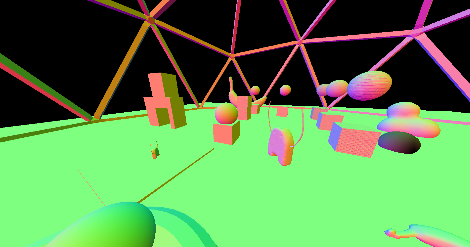
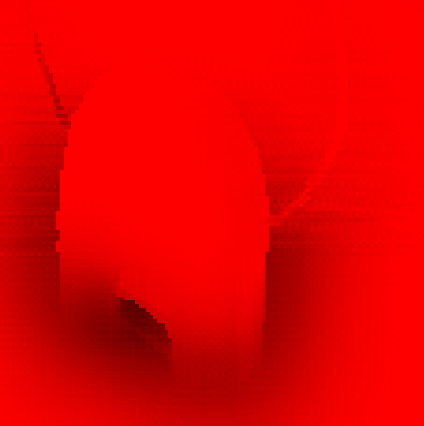
Geometry Buffer Generation
My engine uses deferred rendering technique rendering to three render targets simultaneously, a target storing each pixel's diffuse color, a target storing each pixel's normal vector (the direction it faces), and a target storing the material properties of each pixel (as RGBA, representing the material metalness, roughness, specular, ssr). These are generated in a single pass
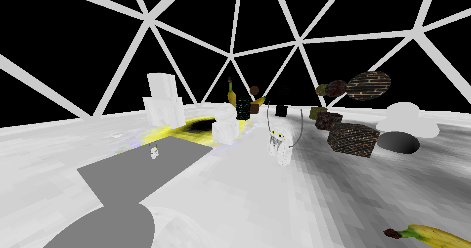
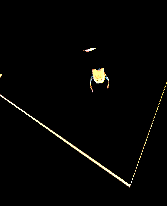
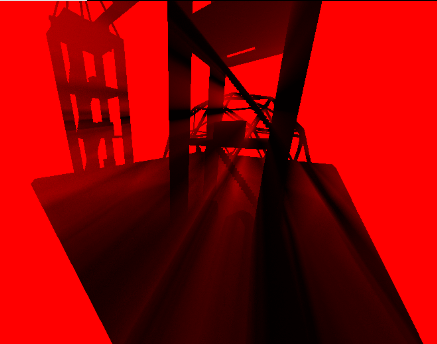
An example of obstructed geometry detected through the depth prepass can be seen here, while the rendering pass has only partially completed:

Shadow Map Generation
Next, the scene is rendered four times from the perspective of the sun to a depth buffer. This is used later to calculate which pixels are obstructed by shadows from the sun. It is rendered from progressively farther distances from the flycam to maintain shadow quality at short distances and long distances simultaneously
Then shadow maps are rendered for every shadow casting light in the scene to a tile in a large depth buffer atlas
Sun Shadow Calculation
This step uses the four depth buffers rendered from the perspective of the sun to calculate which pixels are obstructed by a shadow
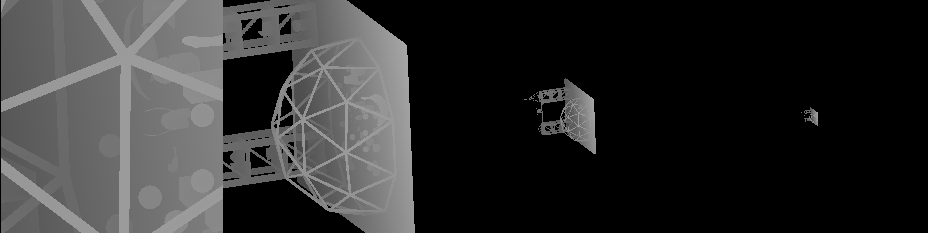
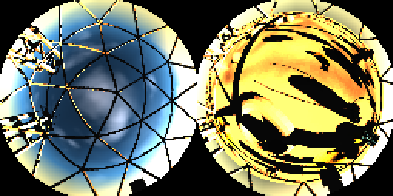
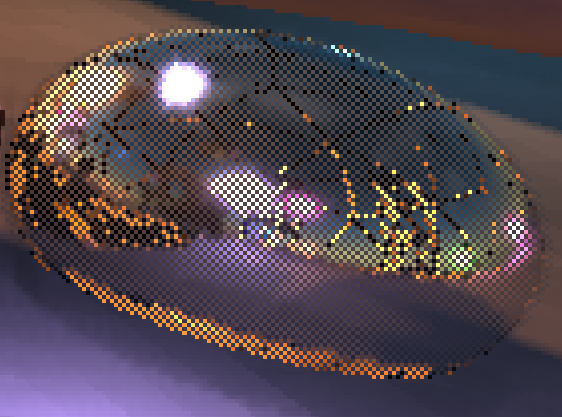
Cube Map Generation
To calculate reflections later, the scene is rendered six more times to six faces of a cube, using forward rendering. The shadow maps and cloud maps are used to render shadows and the sky and sun in the background. The render target uses linear color space stored as 16-bit floats

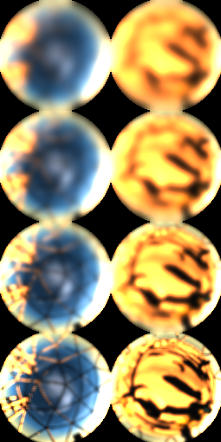
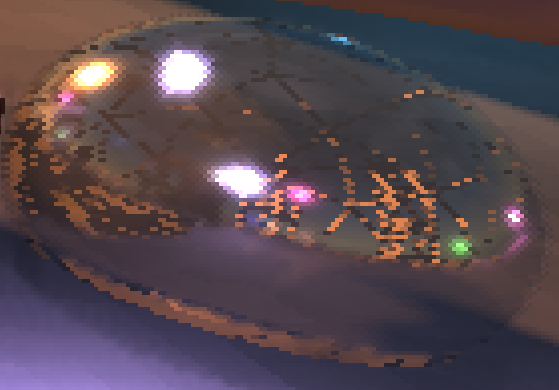
Dual Paraboloid Generation
The cubemap is converted to a dual paraboloid map and then it is repeatedly blurred and blitted to a texture atlas for later use when compositing materials
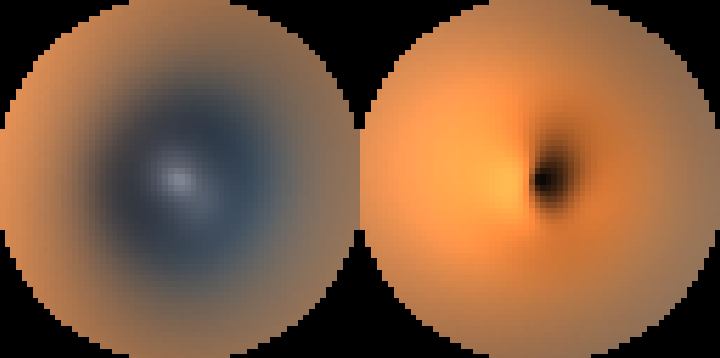
Irradiance Map
The irradiance map is recalculated once per second as it is a very compute-intensive process if PBR is the priority. It is used to calculate global ambient illumination
Screen Space Ambient Occlusion
Ambient occlusion is calculated at half resolution, at first a noisy result is produced but it is then blurred by a two pass depth-aware shader to produce a clean result

Light source calculations
The blend mode is set to GL_ONE + GL_ONE (Add every rendered pixel's values to the value of the pixel already in the buffer) and then every light source's diffuse and specular component is calculated and rendered to the buffer sequentially, calculating the final lighting value of every pixel
Screen Space Reflections
The previous frame's color and depth buffer is raytraced and screen space reflection values are calculated for every pixel
This is done at half resolution for optimization
Buffer Combination
The diffuse, normal, material, depth, light diffuse, light specular, ambient occlusion, the cube map, the irradiance map, the blurred dual paraboloid maps, the screen space reflection buffer, and a lookup helper texture are all passed to a large shader that does a lot of math to produce a composited PBR image in linear color space
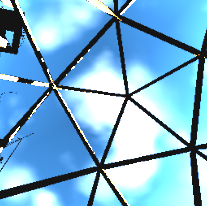
Sky
The cloud maps and a night sky texture are used to create a sky. The sky is a tessellated octahedron hemisphere, the atmospheric scattering is calculated per vertex here instead of per fragment to accelerate things.
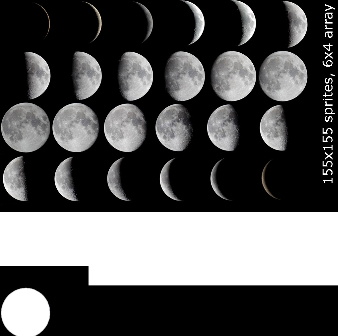
Moon
The moon is not visible here, but it is rendered using the GL_ONE blend mode using a texture atlas. The text is just a note I left for myself
Light Bulbs
The different light sources get drawn over the scene as little light bulbs for realism. Instancing is used for acceleration as there are dozens of light sources in frame
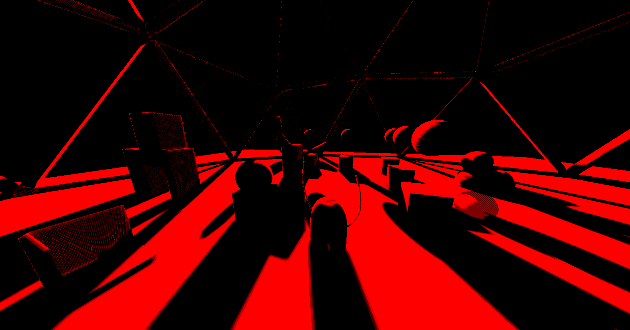
Light Shafts
A light shaft map (also called volumetric lighting, or godrays) is generated by raytracing the sun's first and second shadow map
Fog
The blend mode is set to add and fog is blended over the scene. The light shaft map is used to selectively darken areas of fog for light shaft effects
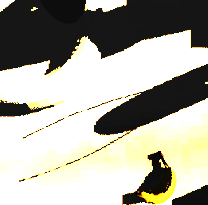
Semi transparent geometry
Some of the spheres in the scene were drawn dithered, in a checkerboard pattern. These checkerboard patterns are now healed using data stored in the diffuse buffer's alpha channel, to produce transparent geometry.
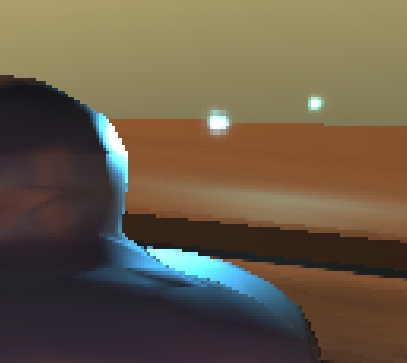
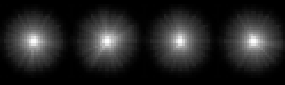
Lens Flares
Lens flares for the sun are now drawn using a single draw call
Bloom and Exposure Calculation
The buffer is repeatedly downscaled and blurred in multiple different passes to produce two blurred versions of the scene, one at a quarter resolution and one at an eight with more blur. These are blended over the scene to simulate bloom and reflections within the camera.
Tonemapping
Finally, the Uncharted 4 operator is used to convert the linear 16-bit floating point HDR colors to 8-bit sRGB colors. This is done in a single pass.
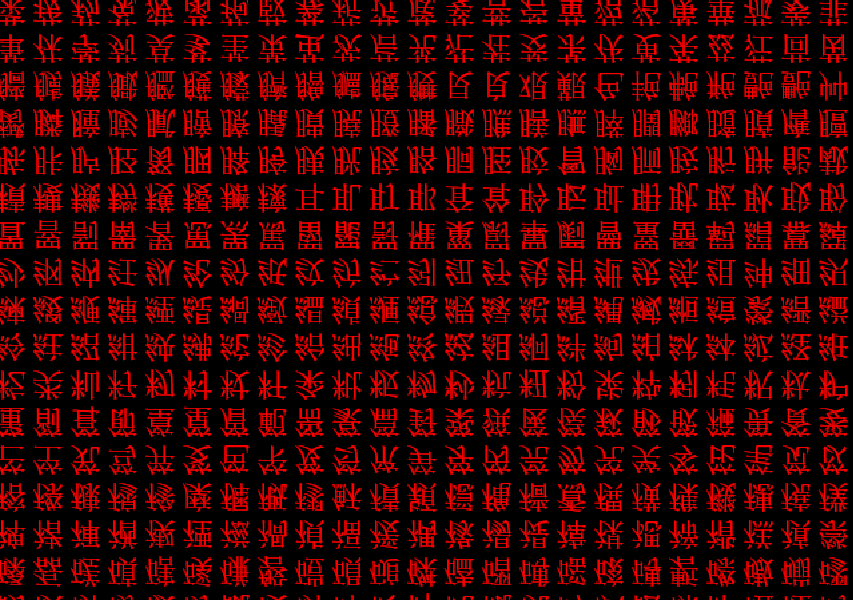
Text
The debug text is drawn using a large unicode texture atlas generated with a class in the tools directory, containing a bitmap of every unicode codepoint. The letters are each drawn as single meshes using premultiplied alpha and instancing.

Wireframe:

Unicode:

Texture Atlas:
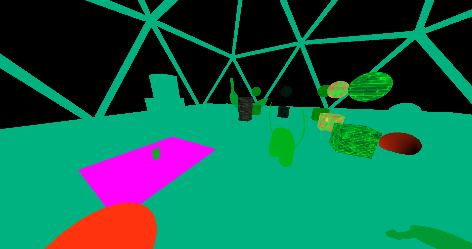
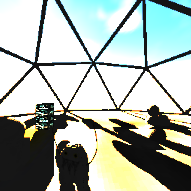
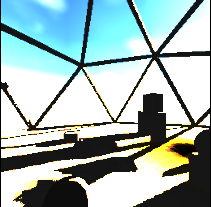
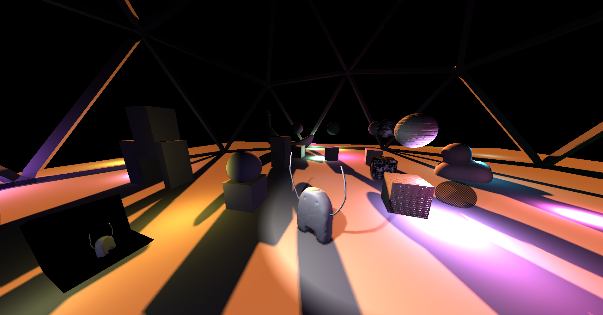
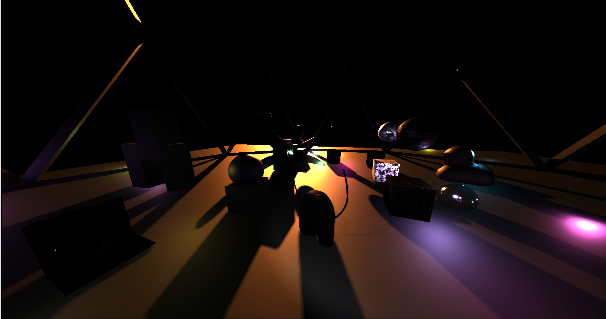
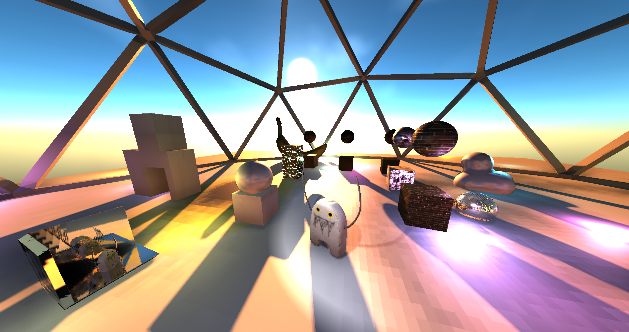
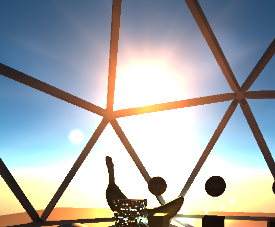
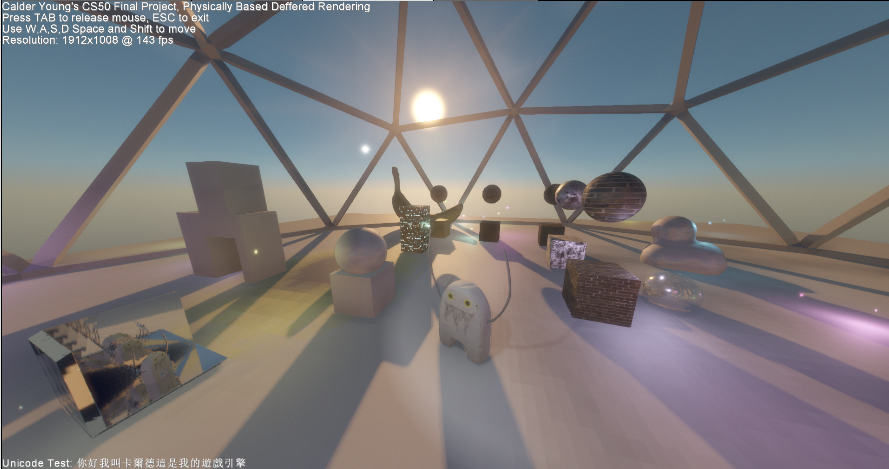
Completed Frame
To debug or compile this project, import the client directory as a Gradle project in Eclipse. Then create a run configuration with the following program arguments: --debug --dev-assets ../assets_dev --platform opengl. Also, set the working directory of the run configuration to either the windows or the mac or the linux directory of the client directory depending on the platform, so the program can load the correct native libraries.
The source code can be found in src/main/java. The packages in this directory are:
net.lax1dude.cs50_final_project- Utility classes, do not depend on client side resourcesnet.lax1dude.cs50_final_project.client- Core classes for whatever application will eventually be built on top of the rendering enginenet.lax1dude.cs50_final_project.client.main- Contains the main class and launch dialog boxnet.lax1dude.cs50_final_project.client.renderer- Contains all classes required for renderingnet.lax1dude.cs50_final_project.client.opengl- Contains simple java wrapper objects for different opengl object types for convenience
To configure the renderer, check net.lax1dude.cs50_final_project.client.GameConfiguration. It has variables to adjust the GLSL compiler settings, shadowmap resolutions, the cloud map resolution, screen space reflection quality, the far plane, and flags for enabling and disabling ambient occlusion, volumetric sunlight, bloom, soft shadows, cloud movement, and screen space reflections.
To configure the scene, create a custom instance of RenderScene and populate the different variables with custom values. There are linked sets for adding and removing ObjectRenderer, LightRenderer, and ShadowLightRenderer objects to the scene.
There is a tools application for generating vertex data from wavefront obj files, generating new fonts atlases from truetype font files, and compositing textures for use with the g-buffer material system from individual texture files for every material variable. Import the tools directory as a java project into eclipse.