Analyze IoT sensor data with machine learning and advanced analytics
This code pattern demonstrates the use of Jupyter notebooks to interact with IBM Db2 Event Store -- from the creation of database objects to advanced analytics and machine learning model development and deployment.
The sample data used in this code pattern simulates data collected by real industry IoT sensors. The IoT sample data includes sensor temperature, ambient temperature, power consumption, and timestamp for a group of sensors identified with unique sensor IDs and device IDs. A simple IBM Streams flow is used to stream the sample data from a CSV file to an Event Store table.
Db2 Event Store is an in-memory database designed for massive structured data volumes and real-time analytics, built on Apache Spark and Apache Parquet Data Format. The solution is optimized for event-driven data processing and analysis. It can support emerging applications that are driven by events such as IoT solutions, payments, logistics and web commerce. It is flexible, scalable and can adapt quickly to your changing business needs over time. Db2 Event Store is available in a free developer edition and an enterprise edition that you can download now. The enterprise edition is free for pre-production and test, please visit the official product webpage for more information.
Note: Db2 Event Store is built with IBM Watson Studio
After completing this code pattern, you’ll understand how to:
- Interact with Db2 Event Store using Python and a Jupyter notebook.
- Use IBM Streams to feed data into Db2 Event Store.
- Visualize data using Matplotlib charts.
- Build and test a machine learning model.
- Deploy and use the model with Watson Machine Learning.

Flow
- Create the Db2 Event Store database and table.
- Feed the sample IoT dataset into Db2 Event Store.
- Query the table using Spark SQL.
- Analyze the data with Matplotlib charts.
- Create and deploy a machine learning model.
Running Db2 EventStore in Cloud Pak for Data (CPD)
If you have a Cloud Pak for Data instance deployed, please follow the Cloud Pak Readme to run Db2 EventStore in CPD. Otherwise, continue with the following steps to deploy the components locally.
Steps
- Clone the repo
- Install the prerequisites
- Create an IBM Db2 Event Store database and table
- Add the sample IoT data
- Query the table
- Analyze the data
- Create and deploy a machine learning model
1. Clone the repo
Clone the db2-event-store-iot-analytics repo locally. In a terminal, run:
git clone https://github.com/IBM/db2-event-store-iot-analytics2. Install the prerequisites
Install Event Store
Note: This code pattern was developed with EventStore-DeveloperEdition 1.1.4
- Install IBM® Db2® Event Store Developer Edition on Mac, Linux, or Windows by following the instructions here.
Install IBM Streams
Note: This is optional if you prefer to use the provided Jupyter notebook to load the data.
-
Install the Quick Start Edition(QSE) Docker image for IBM Streams 4.3.1 by following the instructions here.
-
Download the toolkit for Event Store Developer Edition 1.1.4 here.
-
Extract the contents of the toolkit. For example, you can make a
toolkitsdirectory in the hostdir that you mapped to a local dir when installing the Quick Start Edition and extract the files into that directory.mkdir $HOME/hostdir/toolkits tar -zxvf streamsx.eventstore_1.2.0-RELEASE.tgz -C $HOME/hostdir/toolkits/
3. Create an IBM Db2 Event Store database and table
The Db2 Event Store database and table can be created with one of the Jupyter notebooks provided. Refer to the notebook comments if you need to drop your existing database or table.
Use the Db2 Event Store UI to create and run a notebook as follows:
- From the upper-left corner
☰drop down menu, selectMy Notebooks. - Click on
add notebooks. - Select the
From Filetab. - Provide a name.
- Click
Choose Fileand navigate to thenotebooksdirectory in your cloned repo. Open the Jupyter notebook file namedEvent_Store_Table_Creation.ipynb. - Scroll down and click on
Create Notebook. - Edit the
HOSTconstant in the first code cell. You will need to enter your host's IP address here. - Run the notebook using the menu
Cell ▷ Run allor run the cells individually with the play button.
4. Add the sample IoT data
Generate the data
This repository includes a generated sample IoT dataset in CSV format that contains 1 million records. The sample CSV dataset can be found at data/sample_IOT_table.csv.
Alternatively, a CSV dataset containing a user-specified number of records can be generated with the provided Python script at data/generator.py. A Python environment with pandas and NumPy installed is required to run the script.
cd db2-event-store-iot-analytics/data
python ./generator.py -c <Record Count>
Stream the data into Event Store
If you have installed IBM Streams, use a streams flow to feed the sample data into Event Store. Otherwise, a data feed notebook has been provided as a shortcut.
Click to expand the data feed instructions for IBM Streams or for the Jupyter notebook. Choose one:
Use an IBM Streams flow
-
Use VNC to connect to your IBM Streams QSE at vnc://streamsqse.localdomain:5905
Tip: On macOS, you can use Finder's menu:
Go ▷ Connect to Server...and connect tovnc://streamsqse.localdomain:5905, and then in your session useApplications ▷ System Tools ▷ Settings ▷ Devices ▷ Displaysto set the displayResolutionto1280 x 1024 (5:4).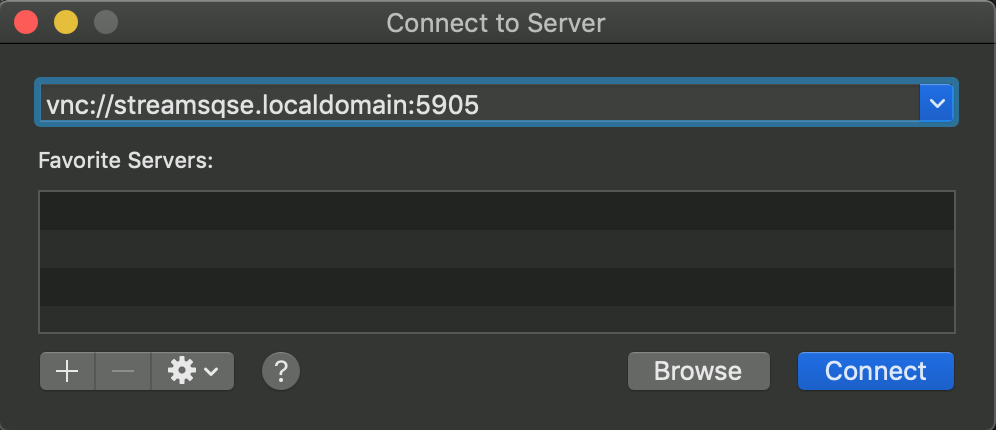
-
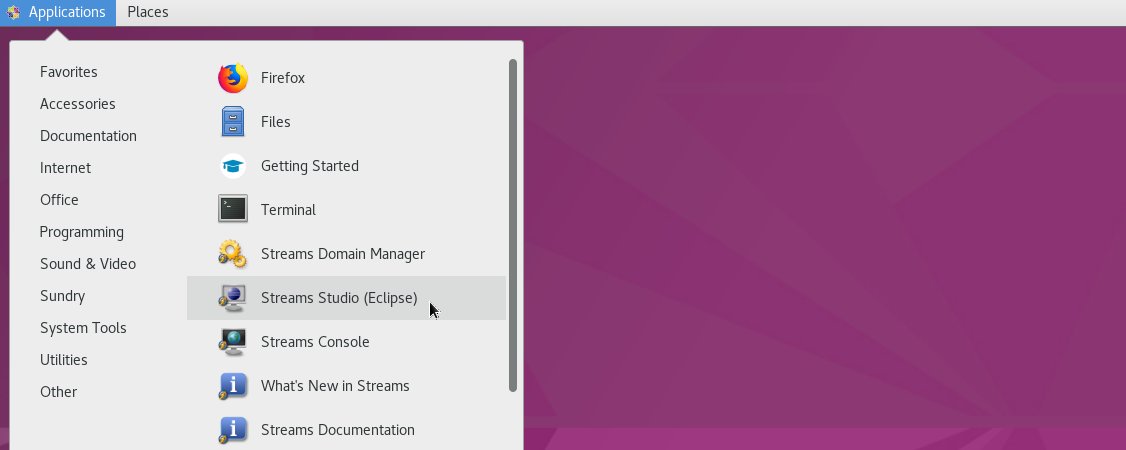
Launch Streams Studio
-
Create a new project
-
Select a workspace
-
If prompted to "Add Streams Domain connection", use the
Find domain...button to selectstreamsqse.localdomain. -
Use the upper-left pulldown to create a new project. When prompted to
Select a wizard, useIBM Streams Studio ▷ SPL Project, hitNext, provide a name, and hitFinish.
-
-
Replace the Event Store toolkit
-
Using the
Project Explorertab, expand your new project, right-click onDependenciesand selectEdit Dependencies. Removecom.ibm.streamsx.eventstoreversion 2.0.3. This is a newer version that does not work with our 1.1.4 Developer Edition of Event Store. -
Using the
Streams Explorertab, expandIBM Streams InstallationsandIBM Streamsto showToolkit Locations. Right-click and selectAdd Toolkit Location.... Use theDirectory...button and add the/home/streamsadmin/hostdir/toolkitsdirectory (where you extracted the the streamsx.eventstore_1.2.0-RELEASE.tgz toolkit). -
Back in the
Project Explorertab, right-click onDependenciesand selectEdit Dependencies,Add, andBrowse. Selectcom.ibm.streamsx.eventstore 1.2.0and hitOK. Now we are using the downloaded version that works with our 1.1.4 Developer Edition and ignoring the newer version.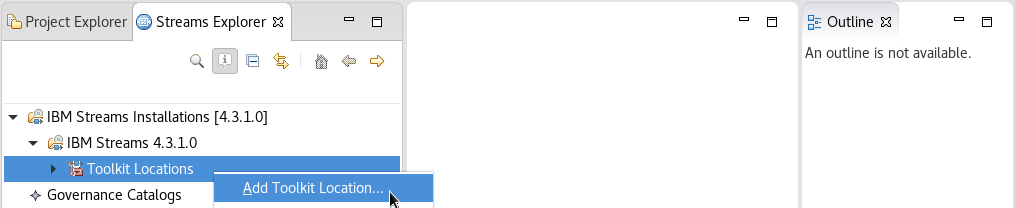
-
-
Create your file source
-
Copy the
data/sample_IOT_table.csvfile from your cloned repo to your hostdir. -
In the
Project Explorertab, right-click on your project and selectNew ▷ Main Compositeand create a defaultMain.spl.
-
Using the SPL Graphical Editor for
Main.spl, drag-and-drop theToolkits ▷ spl ▷ spl.adapter ▷ FileSource ▷ FileSourceinto theMainbox.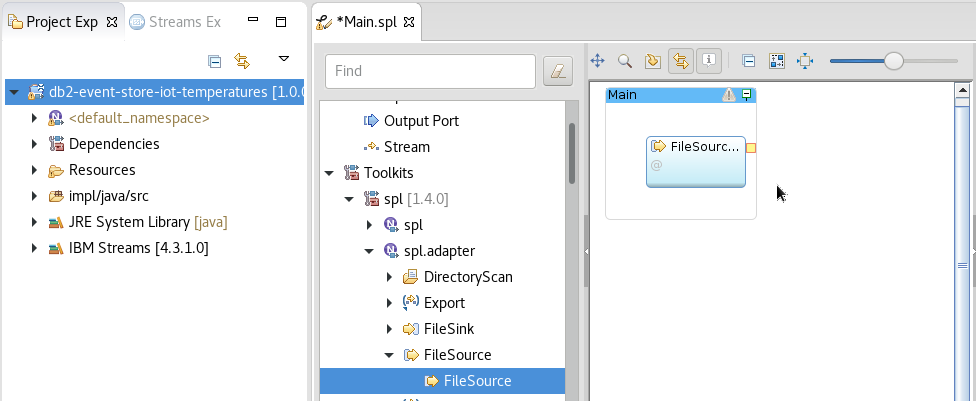
-
Double-click the FileSource box, select
Paramin the left sidebar, and edit the value to set it to"/users/streamsadmin/hostdir/sample_IOT_table.csv"(where you put the data file). Add aformatparameter and set the value tocsv.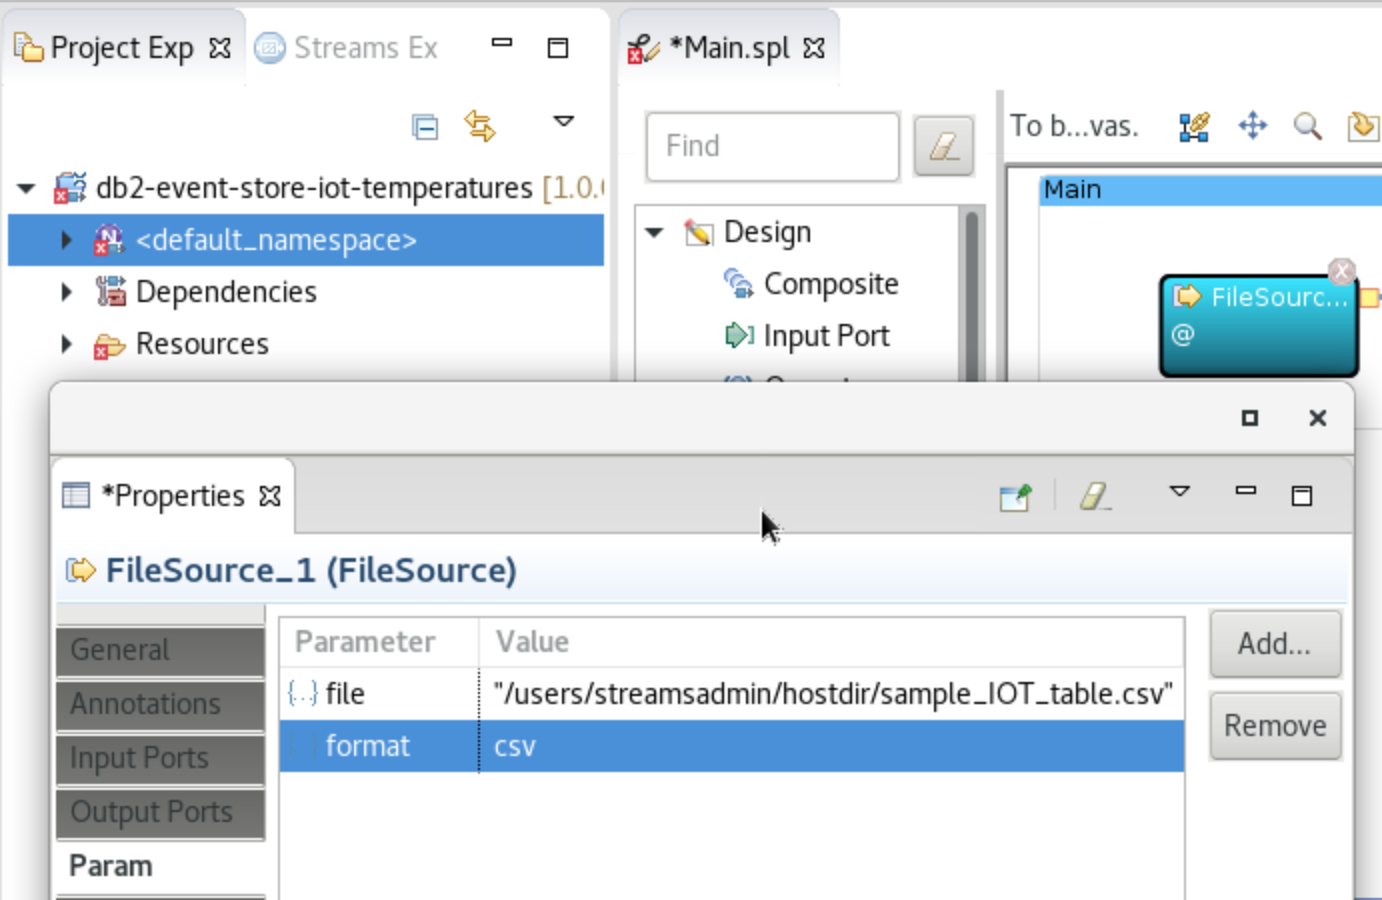
-
Select
Output Portsin the left sidebar. Remove the<extends>row. Click onAdd attribute.... Add attributes and types to create an output stream schema matching the contents of the CSV file and the Event Store table. The attribute names here don't matter, but the types do. Follow the example below.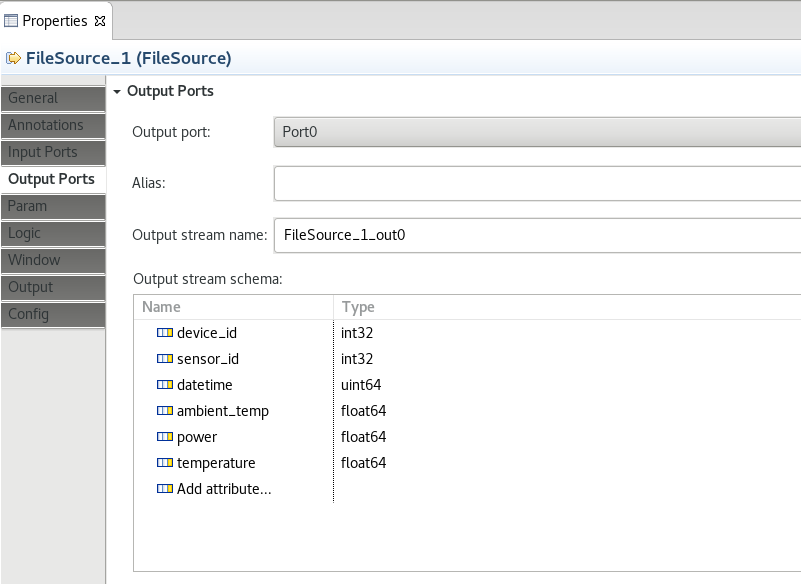
-
Close and save the FileSource properties.
-
-
Create your Event Store Sink
-
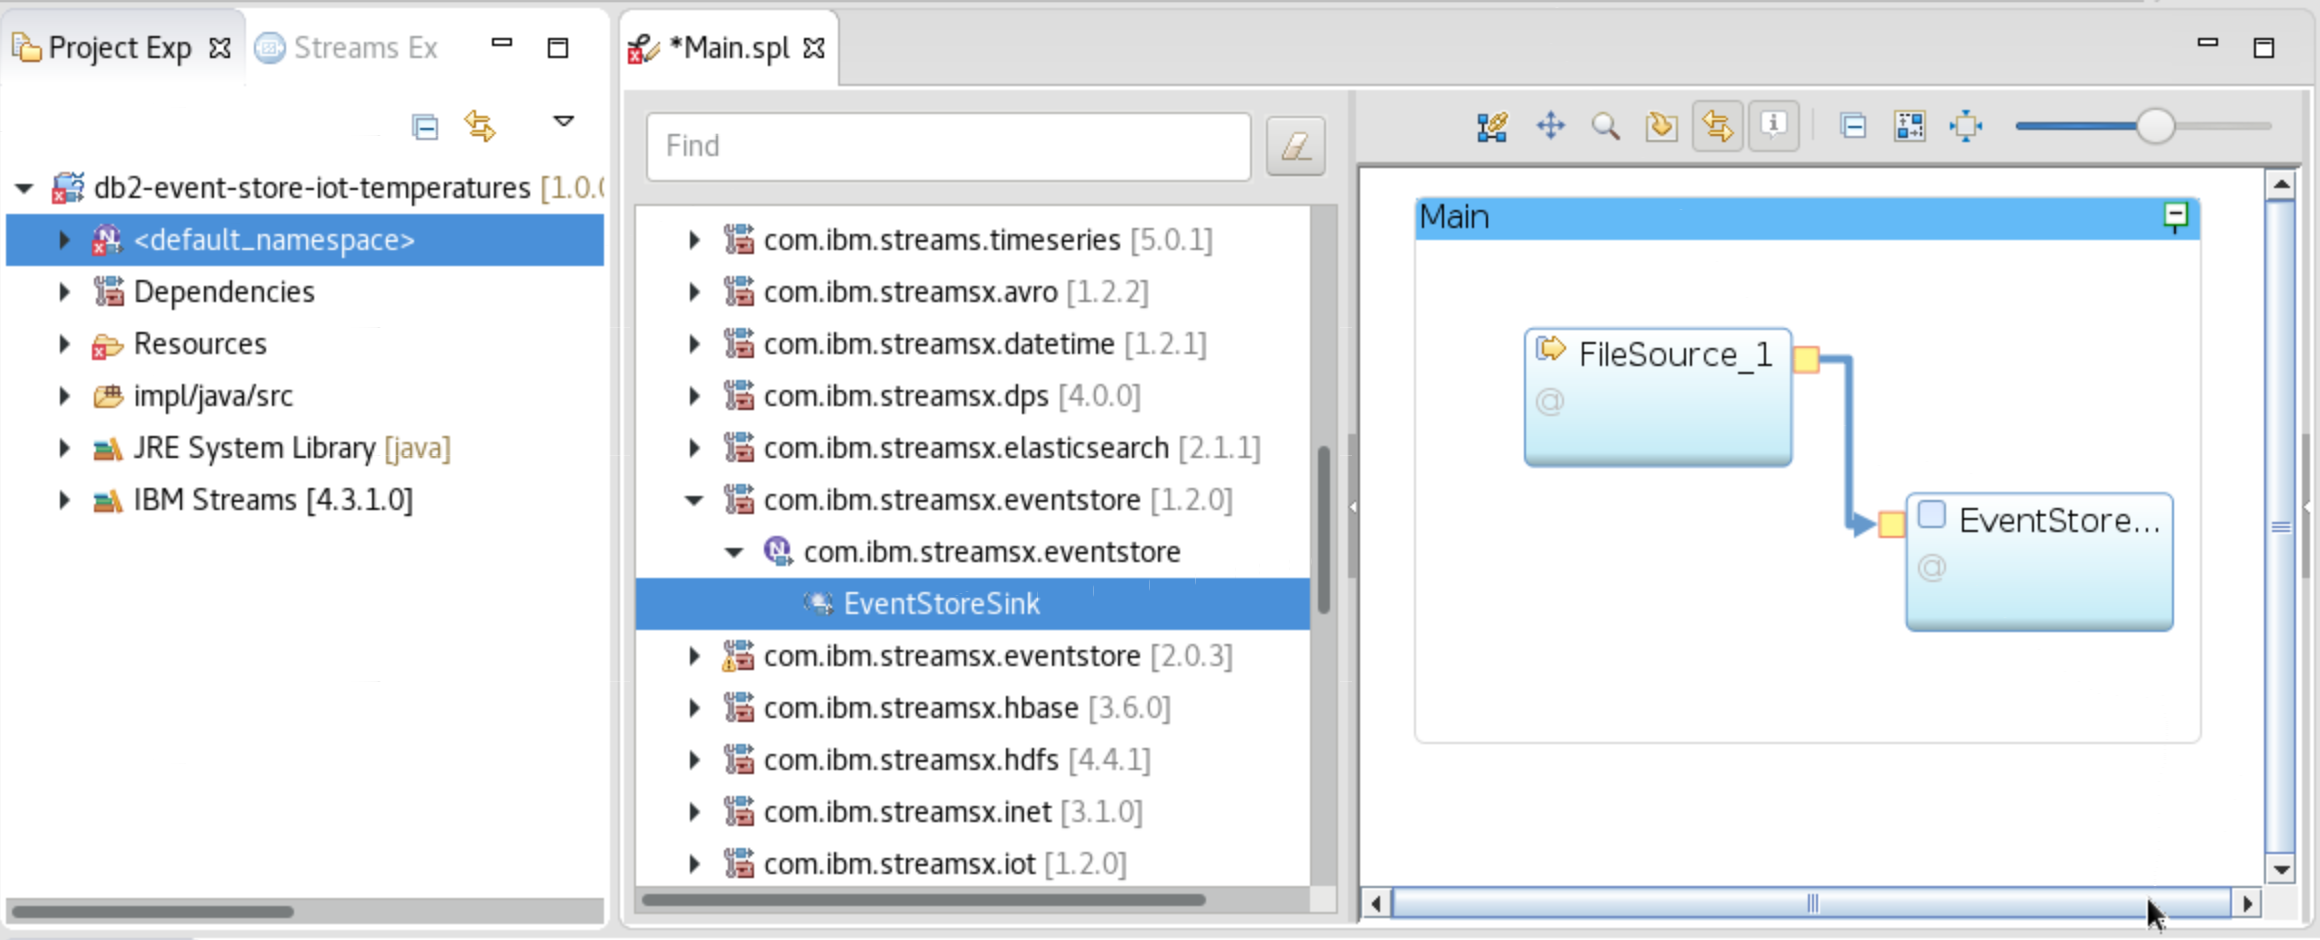
Using the SPL Graphical Editor for
Main.spl, drag-and-drop theToolkits ▷ com.ibm.streamx.eventstore ▷ com.ibm.streamx.eventstore ▷ EventStoreSinkinto theMainbox (be sure to grab the 1.2.0 version). -
Use your mouse and drag from FileSource output tab to the EventStoreSink input tab.
-
Double-click the EventStoreSink box, select
Paramin the left sidebar, and edit the values to set the connectionString, databaseName and tableName as shown below (but substitute your own Event Store IP address). Close and save.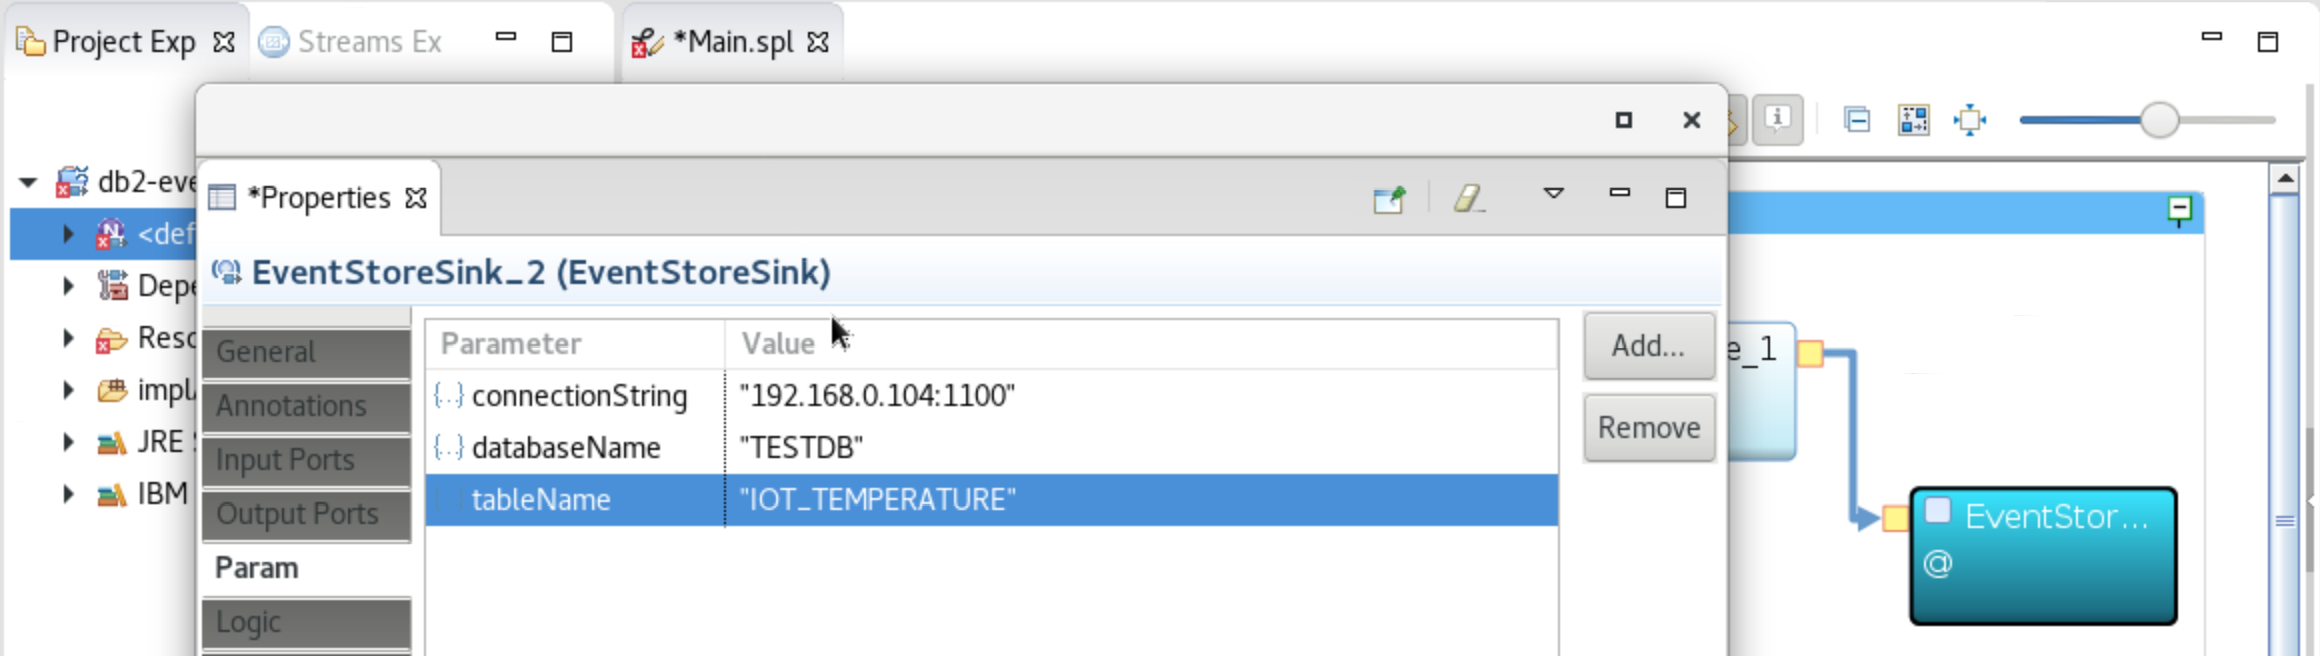
-
-
Launch
-
Save all your changes and let the build finish.
-
Right-click on your application (
Main) andLaunch ▷ Launch Active Build Config as Standalone.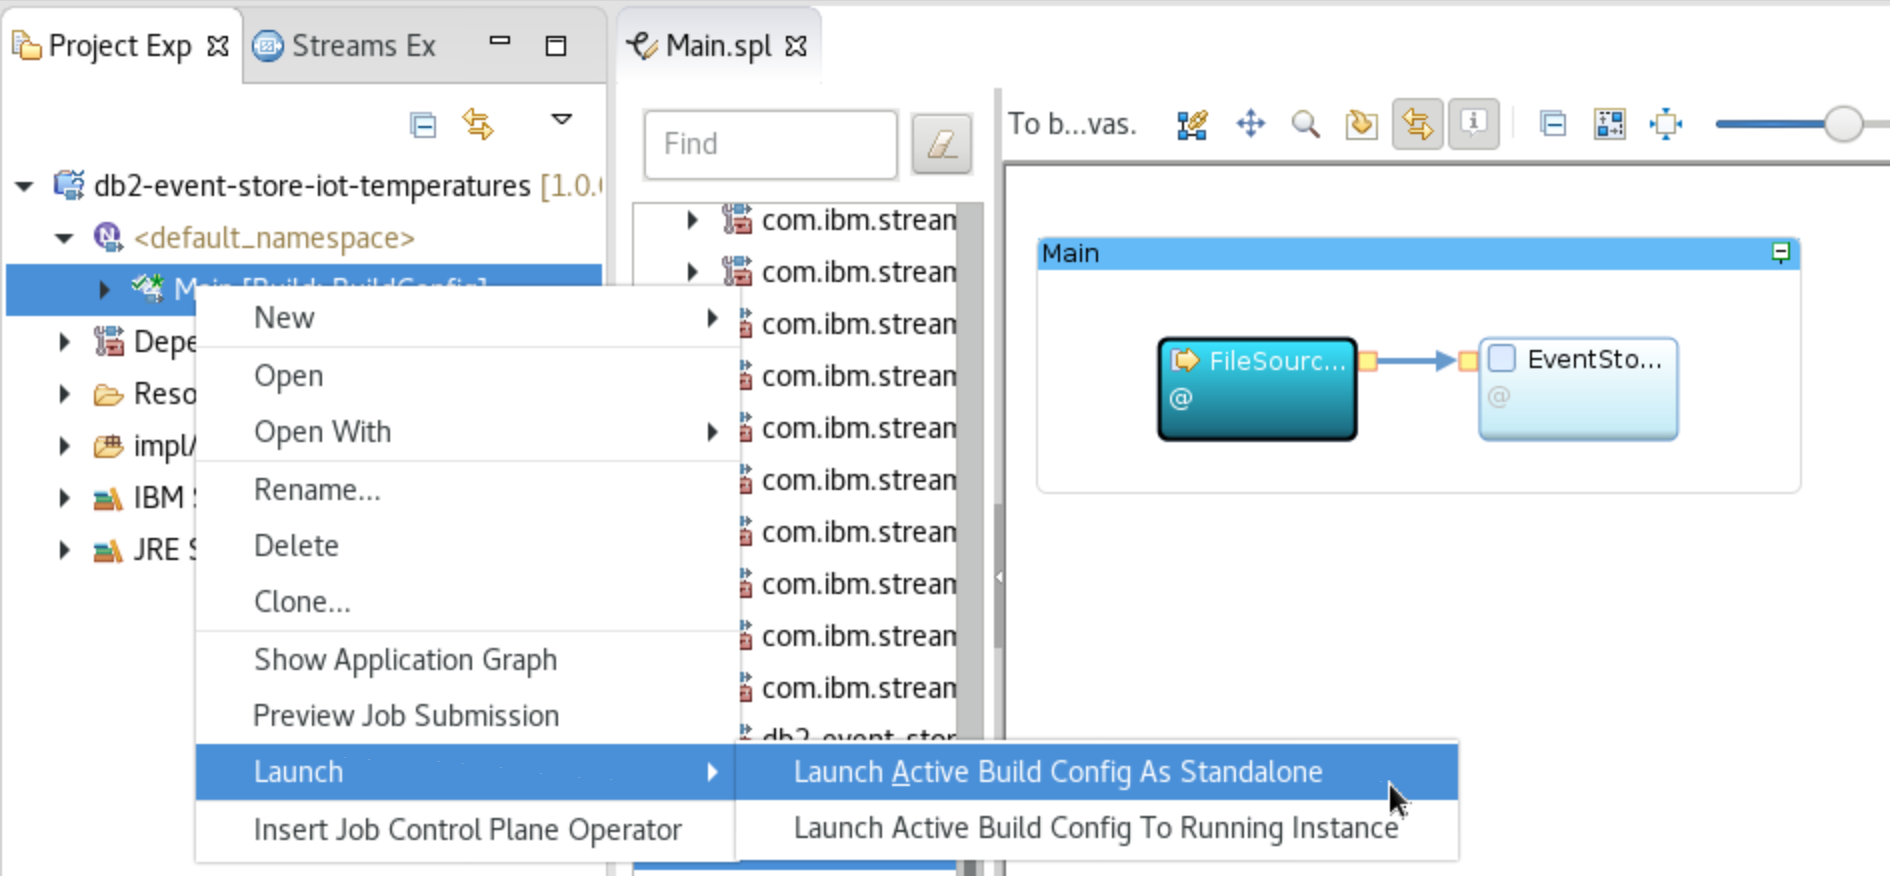
-


Use the Jupyter notebook to load the data
Use the Db2 Event Store UI to add the CSV input file as a data asset.
-
From the upper-left corner
☰drop down menu, selectMy Notebooks.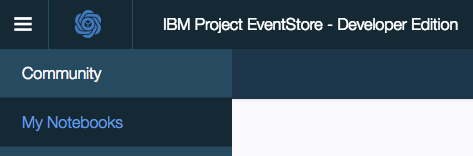
-
Scroll down and click on
add data assets.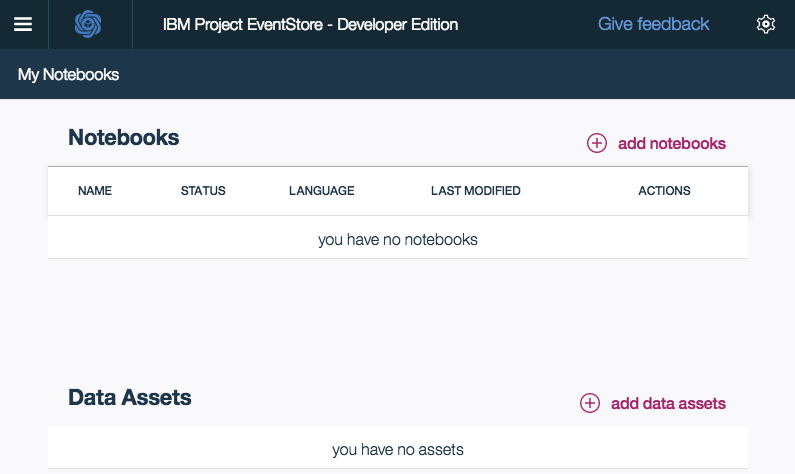
-
Click
browseand navigate to thedatadirectory in your cloned repo. Open the filesample_IOT_table.csv.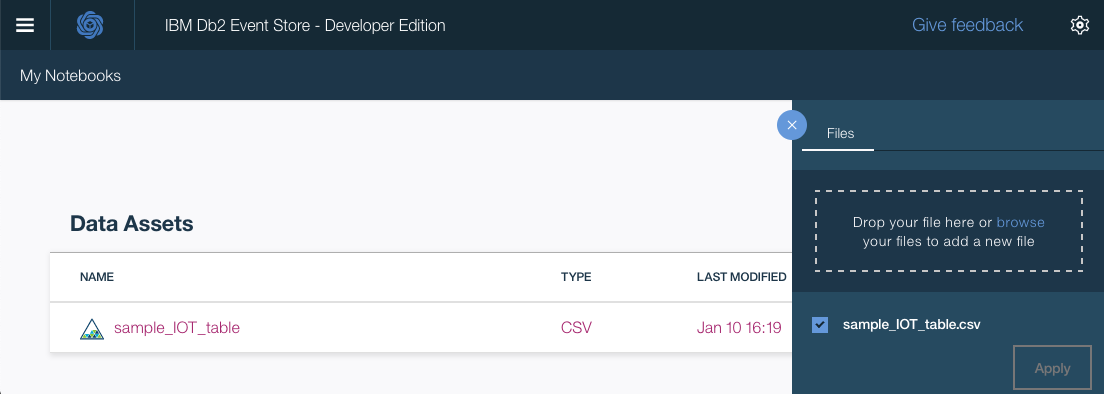


Follow the same process as above to add and run a notebook. This time choose the file named Event_Store_Data_Feed.ipynb.
The notebook loads the table with one million records from the CSV file that you added as a project asset.
5. Query the table
Follow the same process to add and run a notebook. This time choose the file named Event_Store_Querying.ipynb.
This notebook demonstrates best practices for querying the data stored in the IBM Db2 Event Store database. Verify that you have successfully created and loaded the table before continuing.
6. Analyze the data
Next, run the data analytics notebook. Use the file Event_Store_Data_Analytics.ipynb.
This notebook shows how the IBM Db2 Event Store can be integrated with multiple popular scientific tools to perform various data analytics tasks. As you walk through the notebook, you'll explore the data to filter it and example the correlation and covariance of the measurements. You'll also use some charts to visualize the data.
Probability plots, box plots, and histograms for temperature data

Scatter plots to show the relationship between measurements

7. Create and deploy a machine learning model
This section demonstrates building and deploying a machine learning model. The notebook uses Spark MLlib to build and test a prediction model from our IoT temperature sensor data. At the end, it demonstrates how to deploy and use the model.
Load the notebook, using the file Event_Store_ML_Model_Deployment.ipynb.
If you are using the Enterprise Edition of Db2 Event Store, the notebook will deploy the model using Db2 Event Store which is built with Watson Studio Local. You can run the notebook as is.
If you are using the Developer Edition of Db2 Event Store, you need an IBM Cloud Watson Machine Learning service instance to complete the deployment. You'll need to run the following steps to deploy:
- Sign in and create the service here.
- Create an API key or IAM token using the instructions here. Keep this key/token handy for the next step.
- Scroll down to the section titled With Db2 Event Store Developer Edition plus Machine Learning on IBM Cloud, save the model with metadata.
Set your apikey and url in the
wml_credentialssection like so
wml_credentials = {
  "url": "https://us-south.ml.cloud.ibm.com",
  "apikey": "<apikey>"
}

- The notebook will pip install watson-machine-learning-client. After the install, you usually need to restart your kernel and run the notebook again from the top.
Once the model is built and deployed, you can easily send it a new measurement and get a predicted temperature (one at a time or in batches).
Given a new data point
new_data = {"deviceID" : 2, "sensorID": 24, "ts": 1541430459386, "ambient_temp": 30, "power": 10}The result returns a predicted temperature
predictions: [48.98055760884435]Sample output
See all the notebooks with example output here.
License
This code pattern is licensed under the Apache License, Version 2. Separate third-party code objects invoked within this code pattern are licensed by their respective providers pursuant to their own separate licenses. Contributions are subject to the Developer Certificate of Origin, Version 1.1 and the Apache License, Version 2.