We've set up the project structure for you, so once you download the files, you should be able to run each project and its tests individually! And now we have step-by-step guides on how to run tests or a main() method.
Set up your tests | Detailed Troubleshooting | Run main methods
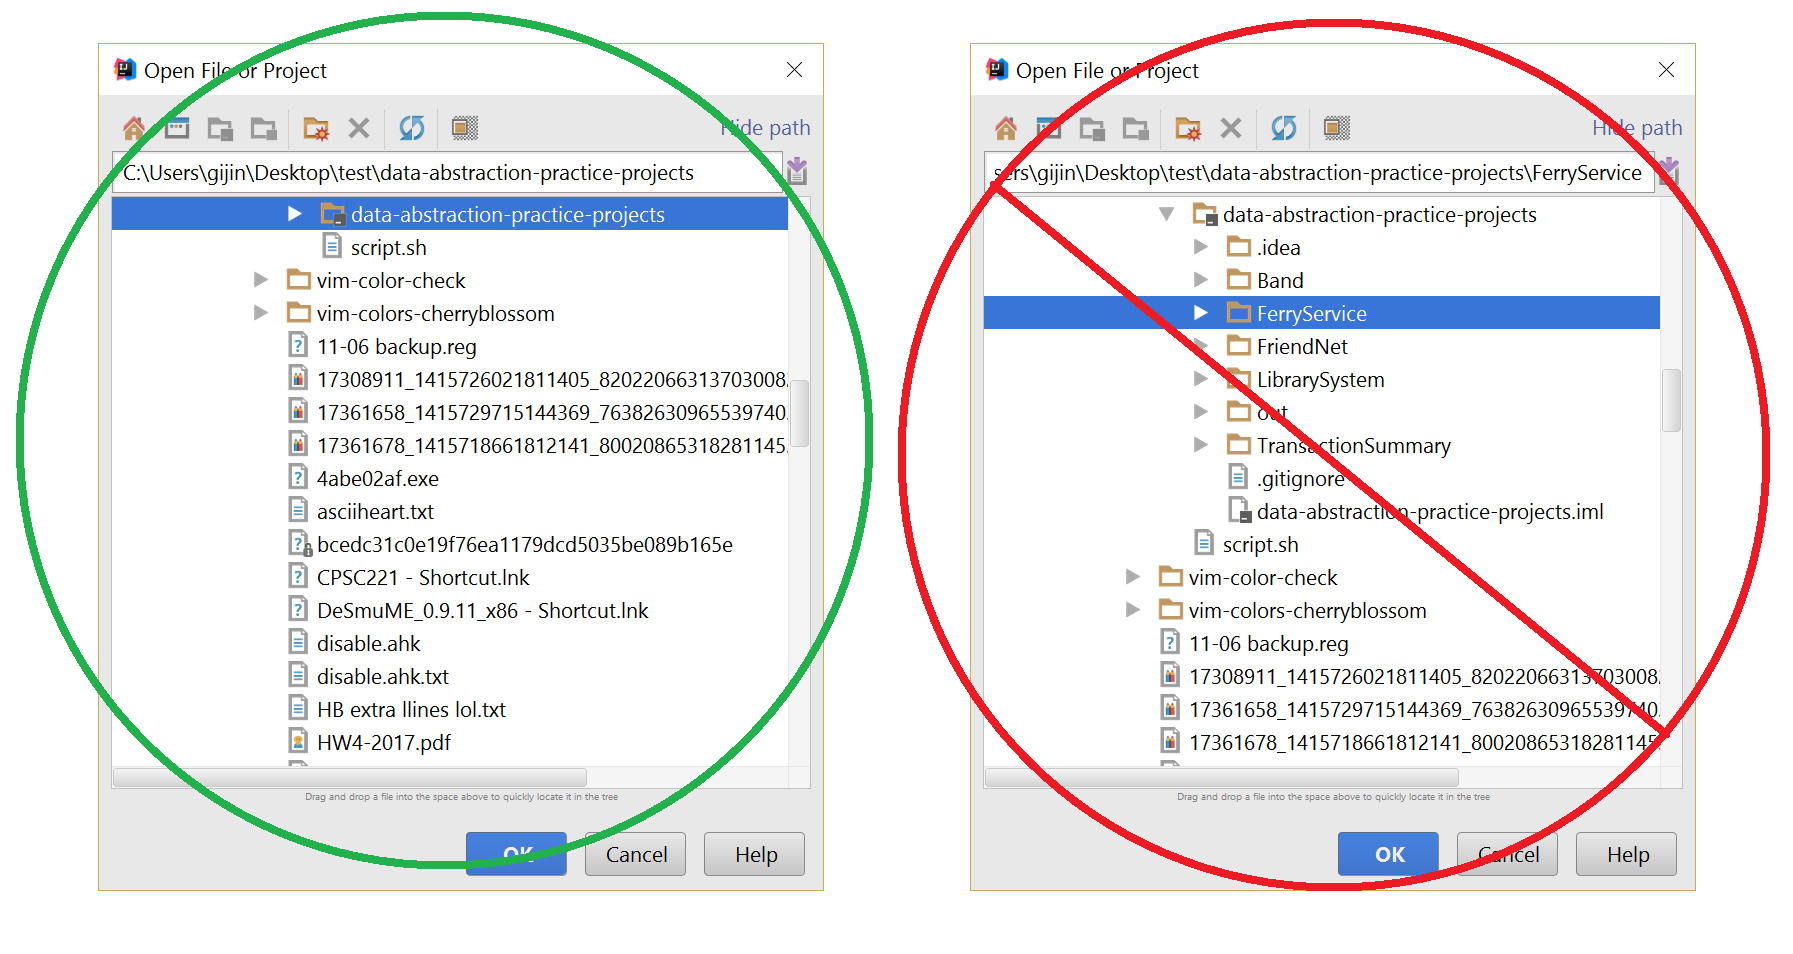
You MUST not open an individual project, or bad things might happen! We are not responsible for what may ensue in the event that you disobey. (Just kidding - make a post about it on the discussion board if you do run into problems.) That is to say, open the project with the same name as the GitHub repo.
Short answer: probably not
Long answer: Our repositories should have .gitignore files, which should prevent you from committing unwanted residue of your workspace specific to your machine (e.g. workspace.xml, .idea folder). Of course, you're free to add these files to git if you want, since you'll probably only be pushing and pulling to your own repositories for this course. However, it's better practice to leave your git repos clean and free of version- or machine-specific information.
- Open your project in IntelliJ. (Don't be afraid of the vintage 15.0.2 edition used in these screenshots!)

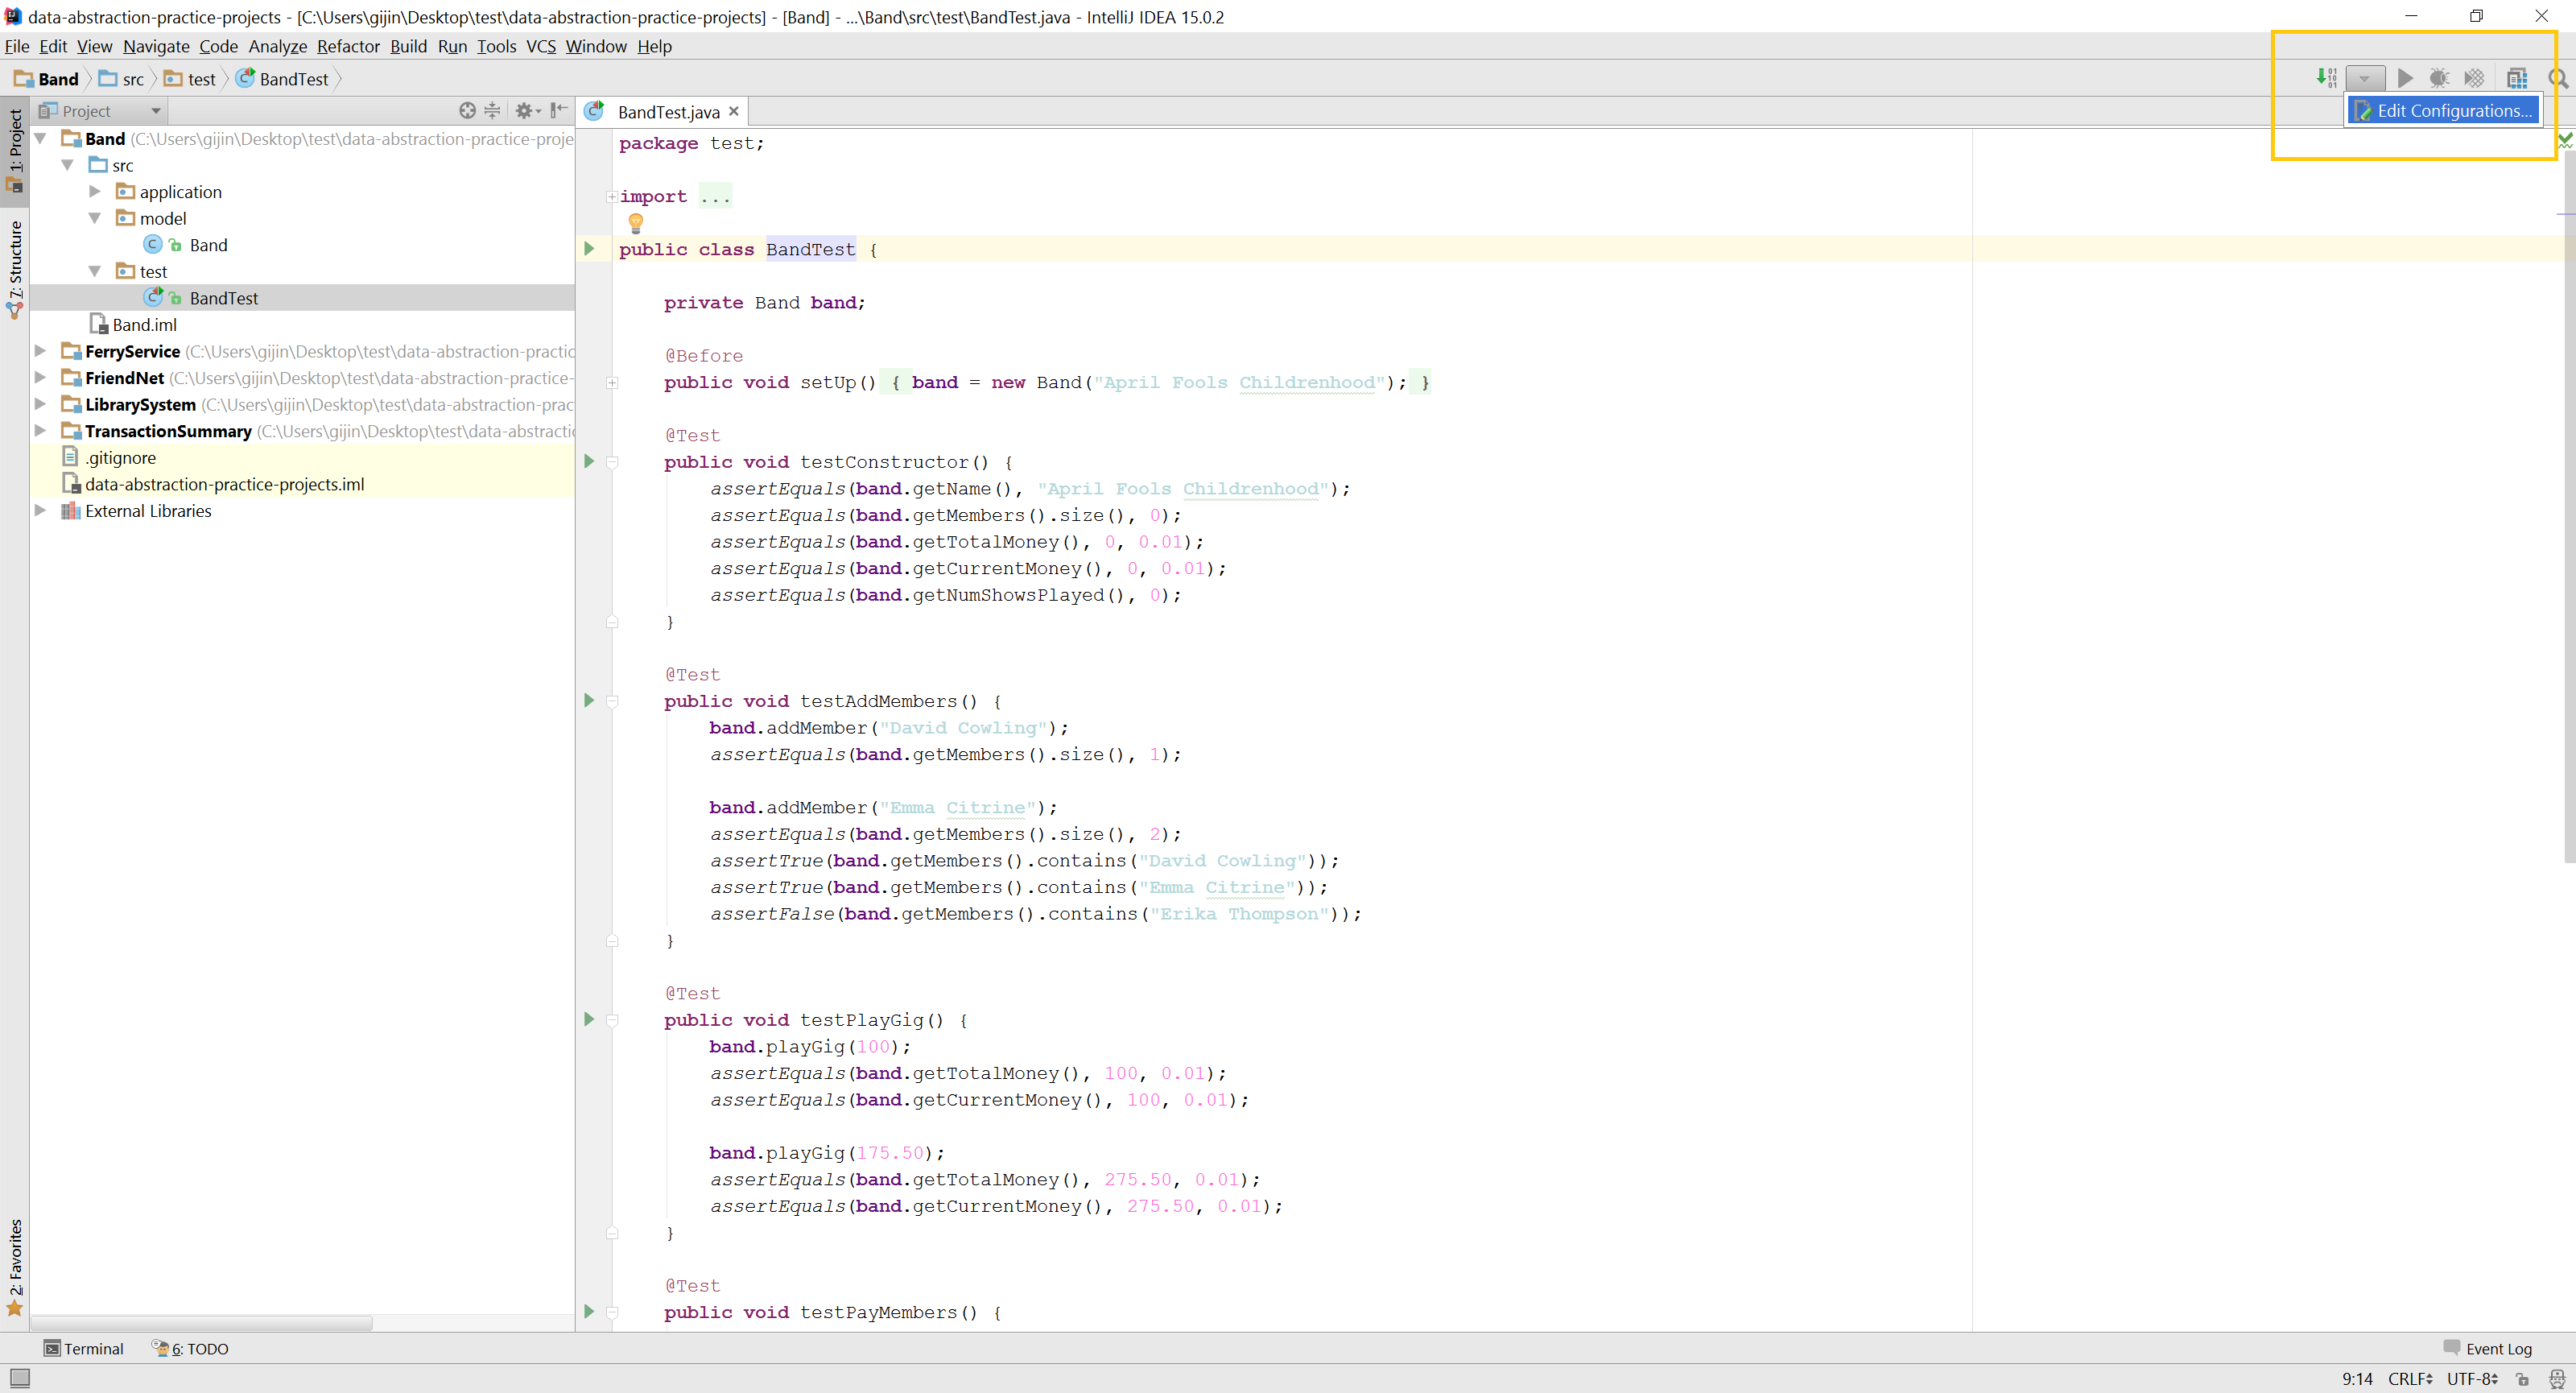
- If the Project Structure sidebar doesn't open automatically, just click the sideways 1. Project button at the far left. If the 1. Project button does not appear at all, just press ⌘ + 1 on macOS, or Ctrl + 1 on Windows.

- Go to the top right, and click the greyed-out down-facing triangle. Edit Configurations will appear. Click on it.
- Pour yourself a cup of coffee.
- This step is optional, but it definitely helps me feel like a programmer.
- A new window! Click the green plus and select JUnit from the dropdown.

- Now you'll get this window with some red error messages.

- Go to "Use classpath of module" and select the module you want to test. For me in this tutorial, I'm working on Band, so let's choose that.

- Then, go up to "Class".

- Choose the class wherein the tests live.

- Alternatively, you can change the Test Kind field from "Class" to "All in directory". That way you can specify the entire test folder to be run at once.

- Here's what it looked like once I configured the tests for each project.

- Once you're done, hit Apply or Ok. Now you can run your tests with the little green triangle! When you want to switch test suites, just click on the same drop-down (that once was an upside-down triange and now has a name) and select your desired test suite.

Done!

If your project has a main directory and/or Main class, you'll be able to run the main() program.
- Right-click on the Main class and click on
Run Main.main()or some variant of it.

- A console window should pop up. You're able to type into it and give input.

You can also now run it by selecting Main and hitting the green arrow at the top.