A variation on https://docs.microsoft.com/en-us/samples/azure-samples/mxchip-iot-devkit-pnp/sample that adds an interface to the MXChip classic firmware in order to report (fake) location data.
The location is reported over a PnP interface (urn:contoso:position:1) whose detailed definition can be queried from the server as it is exposed thanks to the urn:azureiot:ModelDiscovery:ModelDefinition interface.
Simulated location telemetry consists of ~320 different points tracing a route from Seattle, WA to Redmond, WA.
To complete the steps in this article, you need the following resources:
- A DevKit device.
- An Azure IoT DPS instance with at least one Azure IoT Hub associated to it, created in one of the regions that have IoT Plug-and-Play Public Preview support, i.e. North Europe, Central US, or Japan East.
-
Download the latest pre-built MXChip PnP Asset Tracker firmware for the DevKit device from GitHub.
-
Connect the DevKit device to your development machine using a USB cable. In Windows, a file explorer window opens on a drive mapped to the storage on the DevKit device. For example, the drive might be called AZ3166 (D:).
-
Drag the mxchip_pnp_asset_tracker.bin file onto the drive window. When the copying is complete, the device reboots with the new firmware.
NOTE:
If you see errors on the screen such as No Wi-Fi, this is because the DevKit has not yet been connected to WiFi. -
On the DevKit, hold down button B, push and release the Reset button, and then release button B. The device is now in access point mode. To confirm, the screen displays "IoT DevKit - AP" and the configuration portal IP address.
-
On your computer or tablet, connect to the WiFi network name shown on the screen of the device. The WiFi network starts with AZ- followed by the MAC address. When you connect to this network, you don't have internet access. This state is expected, and you only connect to this network for a short time while you configure the device.
-
Open your web browser and navigate to http://192.168.0.1/. The following web page displays:
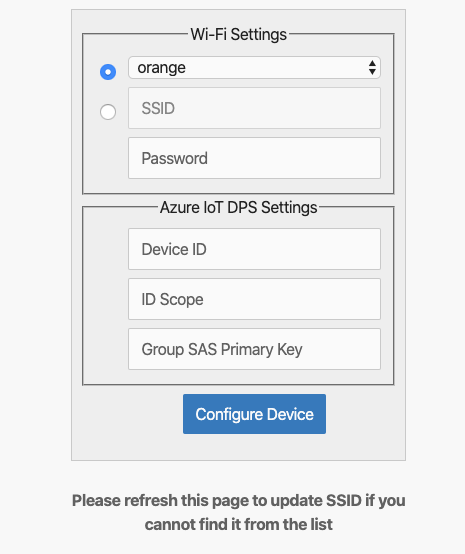
On the web page, enter:
- The name of your WiFi network (SSID).
- Your WiFi network password.
- The connection details: the Device ID that you can choose yourself, and the Scope ID and Group SAS Primary Key you made a note of previously.
NOTE:
Currently, the IoT DevKit only can connect to 2.4 GHz Wi-Fi, 5 GHz is not supported due to hardware restrictions. -
Choose Configure Device, the DevKit device reboots and runs the application:
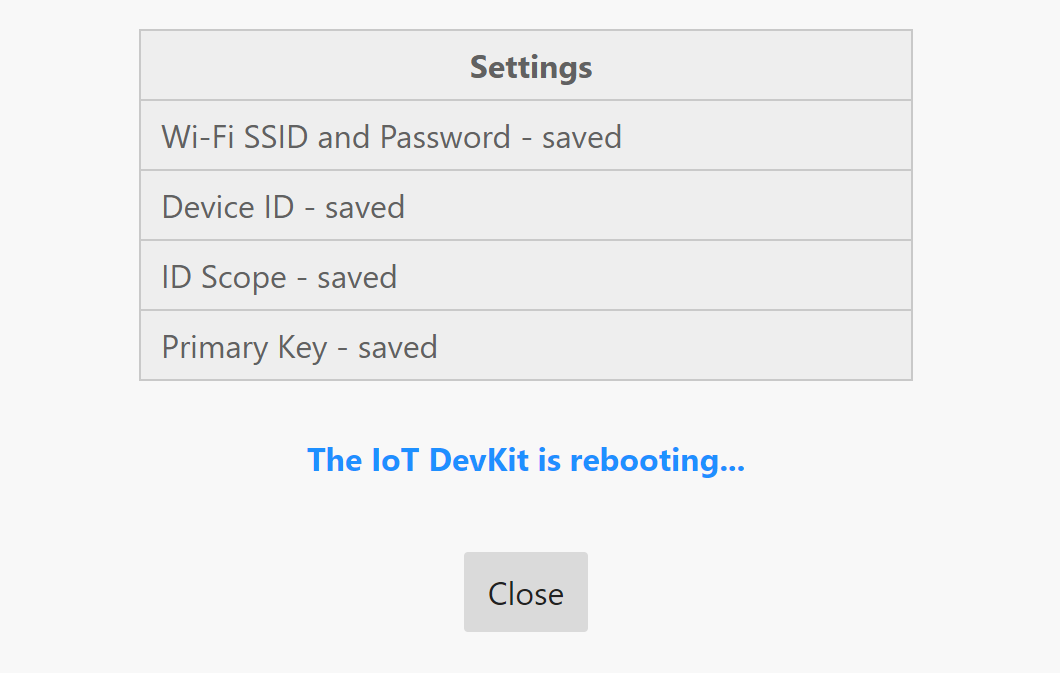
The DevKit screen displays a confirmation that the application is running:
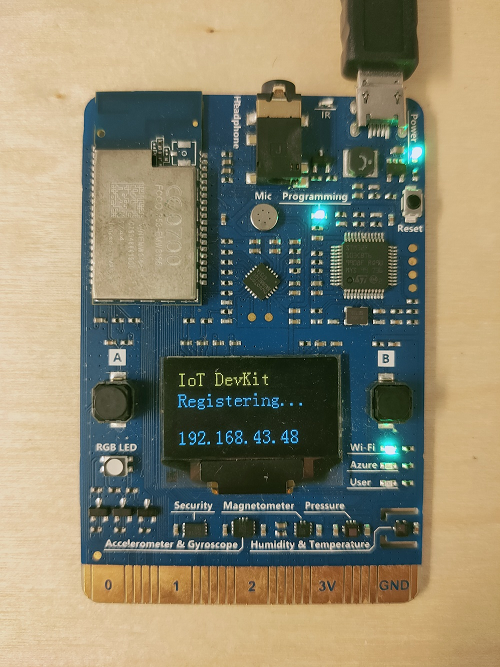


The DevKit first registers a new device in the IoT Hub associated to your Device Provisioning Service, and then starts sending data.
TODO explain how to connect with VS Code and Azure IoT Explorer.