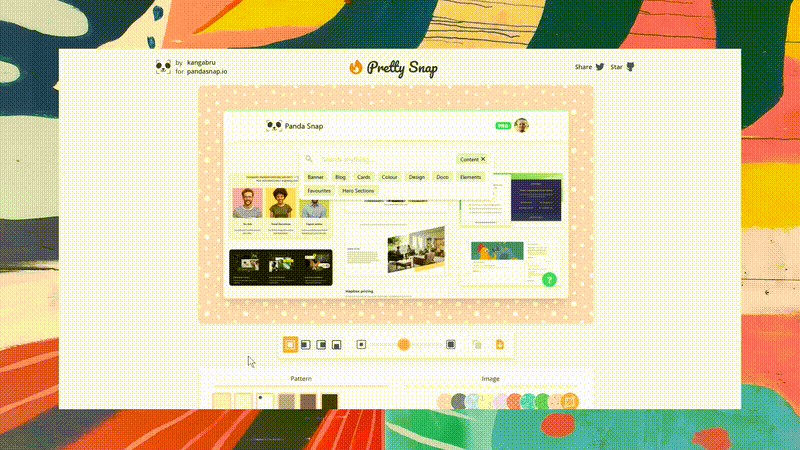
👋 Introduction
Make your screenshots pop with beautiful backgrounds. Use them for:
- Product screenshots on landing pages
- Social media summary cards (e.g. Twitter or FB)
- Simply sharing screenshots on social media
🍕 Develop
Get started without external APIs. Access on localhost:1234.
npm install
npm start
(Optional) Unsplash API
Click to expand
Pretty Snap uses the Unsplash API to get images and Cloudflare Workers to proxy API requests signed with an Unsplash access key.
Both service provide a generous free tier which you can use for development and production.
Setup Unsplash:
- Create an Unsplash app
- Copy the Unsplash
Access Keyvalue
Note: Requests are limited to 50 per hour until your API key is approved for production
Setup a Cloudflare worker:
- Create a Cloudflare worker
- Manually paste
cloudflare/worker.jscode into the online console - Open the worker's settings and add this environment variable:
Variable Name Value ACCESS_KEYThe Unsplash Access Keyvalue from the previous step
Test the API
- Open the Cloudflare worker's online console
- Append
/api/search?query=natureto the generated url - Run the request
- A 200 response with Unsplash JSON data should display
Use the API
- Copy the generated base url of your Cloudflare worker
- e.g.
https://<prefix>.<user>.workers.dev
- e.g.
- Create a
.envfile (you can use.env.exampleas a template) - Set the value of
URL_APIto the worker's url- e.g.
URL_API=https://<prefix>.<user>.workers.dev
- e.g.
- Set the value of
DEV_USE_APItotrueor remove it completely - Delete the Parcel generated
.cachefolder - Rebuild the app
🌍 Deploy
Pretty Snap is deployed statically and uses the Cloudflare worker as an API.
- Deploy statically via a provider like Netlify.
- Set the build command to
npm run buildand output directory todist - Set the environment variable
URL_APIto the Cloudflare work base url- The
DEV_USE_APIvariable can be ignored
- The
(Optional) Use the API on the same domain
Click to expand
Cloudflare allows workers to run on the same domain even when hosted on an external server.
- Open the Cloudflare
DNStab and configure DNS as follows:Type Name Content TTL Proxy status CNAME some-domain.com<subdomain>.netlify.appAuto Proxied CNAME wwwsome-domain.comAuto Proxied - Open the Cloudflare
Workerstab and add the following routeRoute Worker *some-domain.com/api*<select your worker>
Pretty Snap should still render when visiting some-domain.com but XHR requests to some-domain.com/api will now hit the worker. You now have a server and API running on the same domain but hosted in 2 locations 🤯
🐼 Sponsors

Design faster by 'snapping' images to create a personal design collection.
It's the best design orientated snipping tool - it's free too!