The Java version that is used for the examples demonstrated on the Spark Shell is Java 8 (specifically "adoptopenjdk8" openjdk ). This can be installed on your machines using the below commands
brew tap AdoptOpenJDK/openjdk
brew install --cask adoptopenjdk8
Please also note that for the above command to work, homebrew package manager should be installed on your machines. Please refer to this link to install it.
The Python version used is the latest version that comes with Anaconda (it is most simple and hassle-free, isn't it ?). So go to the anaconda link here and install the latest version most suitable for your machine processor.Once done, open a terminal, type "python" and hit Enter. It should start a python shell.
The Apache Spark version that I used for the examples demonstrated use version 3.0.2. You can set it up on your local machine using the following steps
- Please download the file named
spark-3.0.2-bin-hadoop2.7.tgz(It should be ~ 200MB) from this link at a preferred location on your machine - Extract / Un tar it to get a folder by the name "spark-3.0.2-bin-hadoop2.7".
tar –xvzf spark-3.0.2-bin-hadoop2.7-hive1.2.tgz - Set up the location of the folder extracted in step 2 as your
SPARK_HOMEin your.bash_profileor.zshrcfileexport SPARK_HOME="<YOUR_PREFERRED_LOCATION>/spark-3.0.2-bin-hadoop2.7 - Add the
binfolder of SPARK_HOME to the path.export PATH="$JAVA_HOME/bin:$SPARK_HOME/bin) - You should be good to go now. Echo SPARK_HOME
echo $SPARK_HOMEfrom your terminal. You should be able to get the path to your spark installation location. - Open a new terminal and type
$SPARK_HOME/bin/spark-shell. The spark shell should start with Spark version 3.0.2.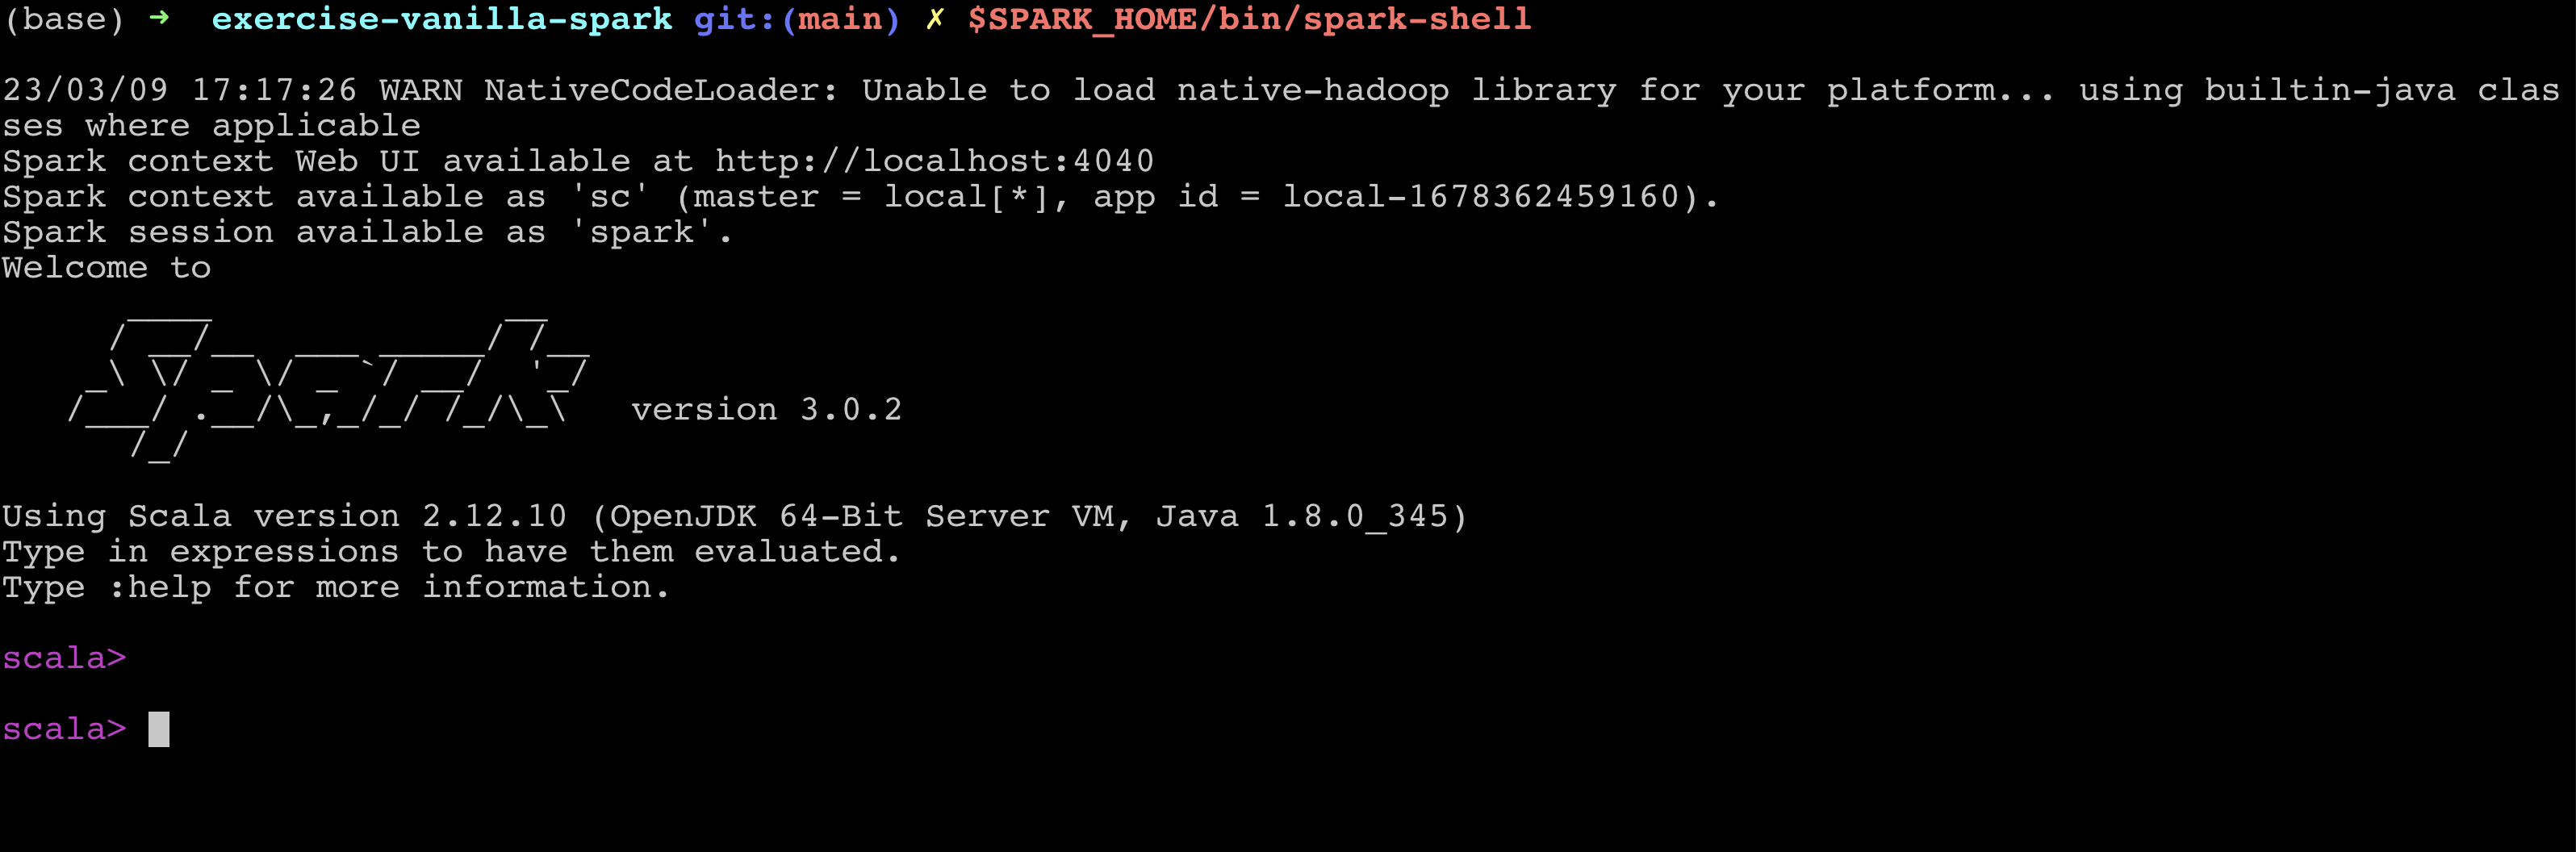
- The same can be done for pyspark
$SPARK_HOME/bin/pyspark. Please note that in order for pyspark to work, you need to have python installed on your machines as mentioned above. 

- Please install PyCharm community edition from this link.
- Clone this repo on the location of your choice on your machine.
- Open the Repo in Pycharm.
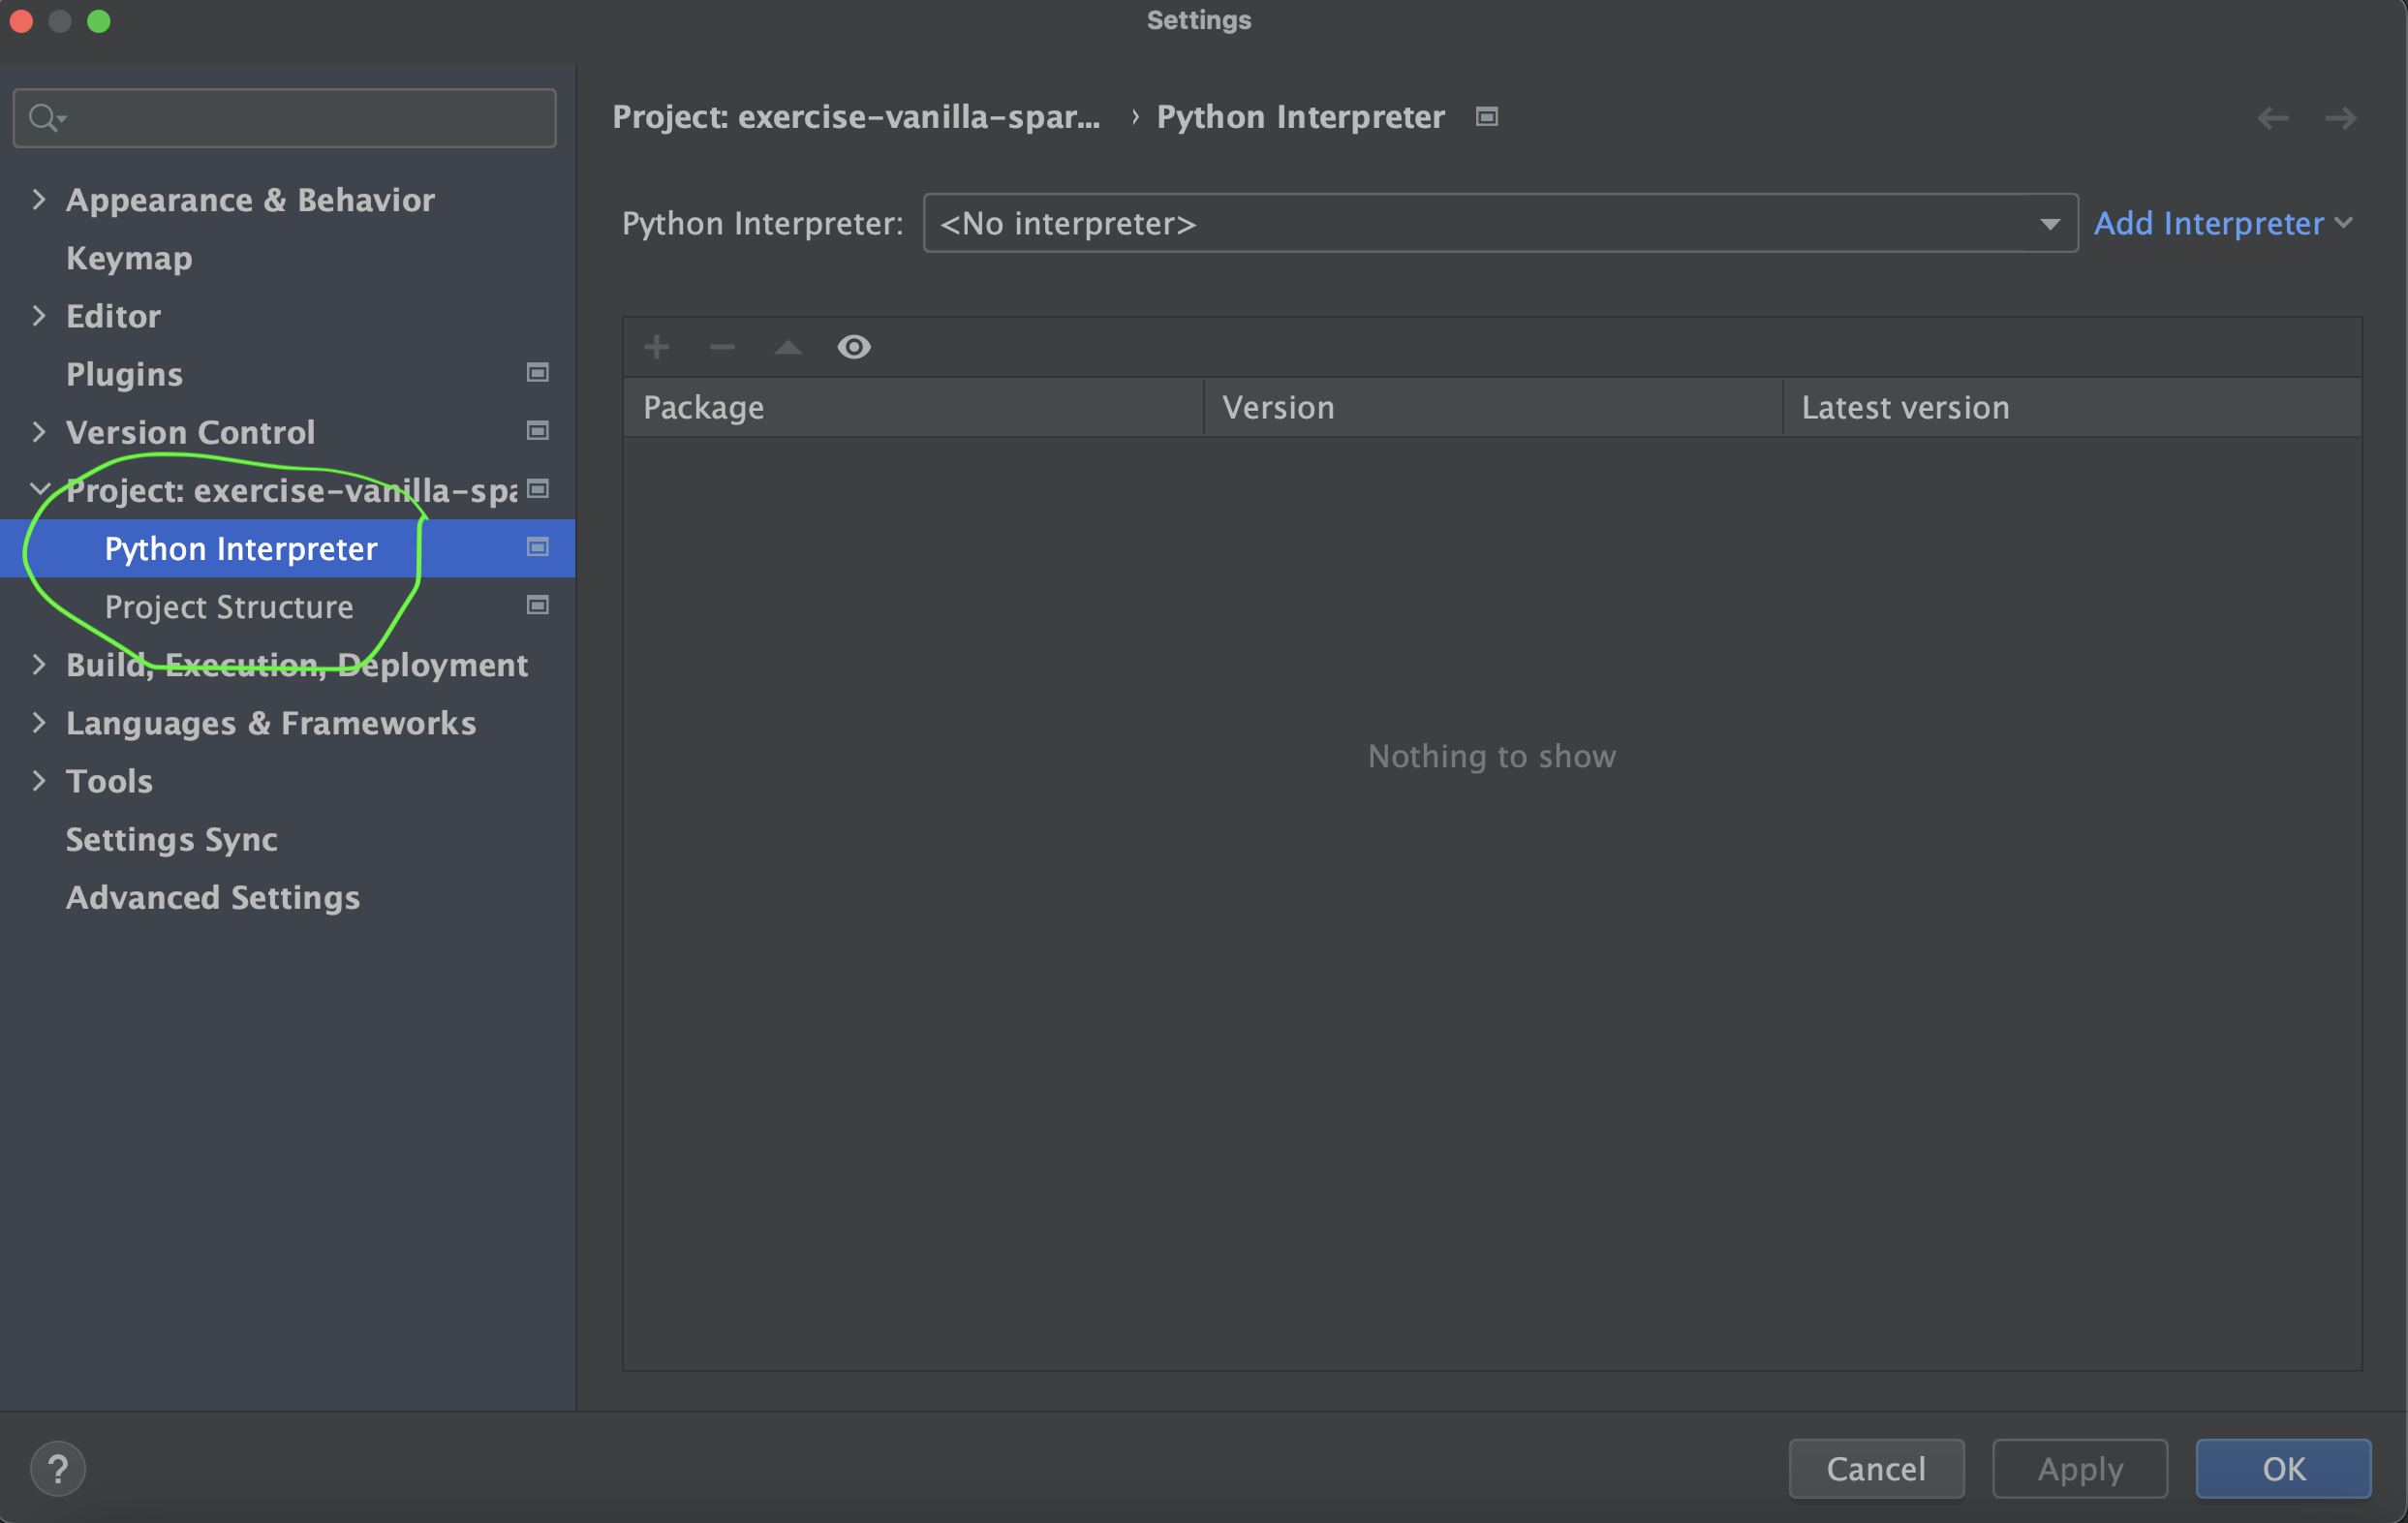
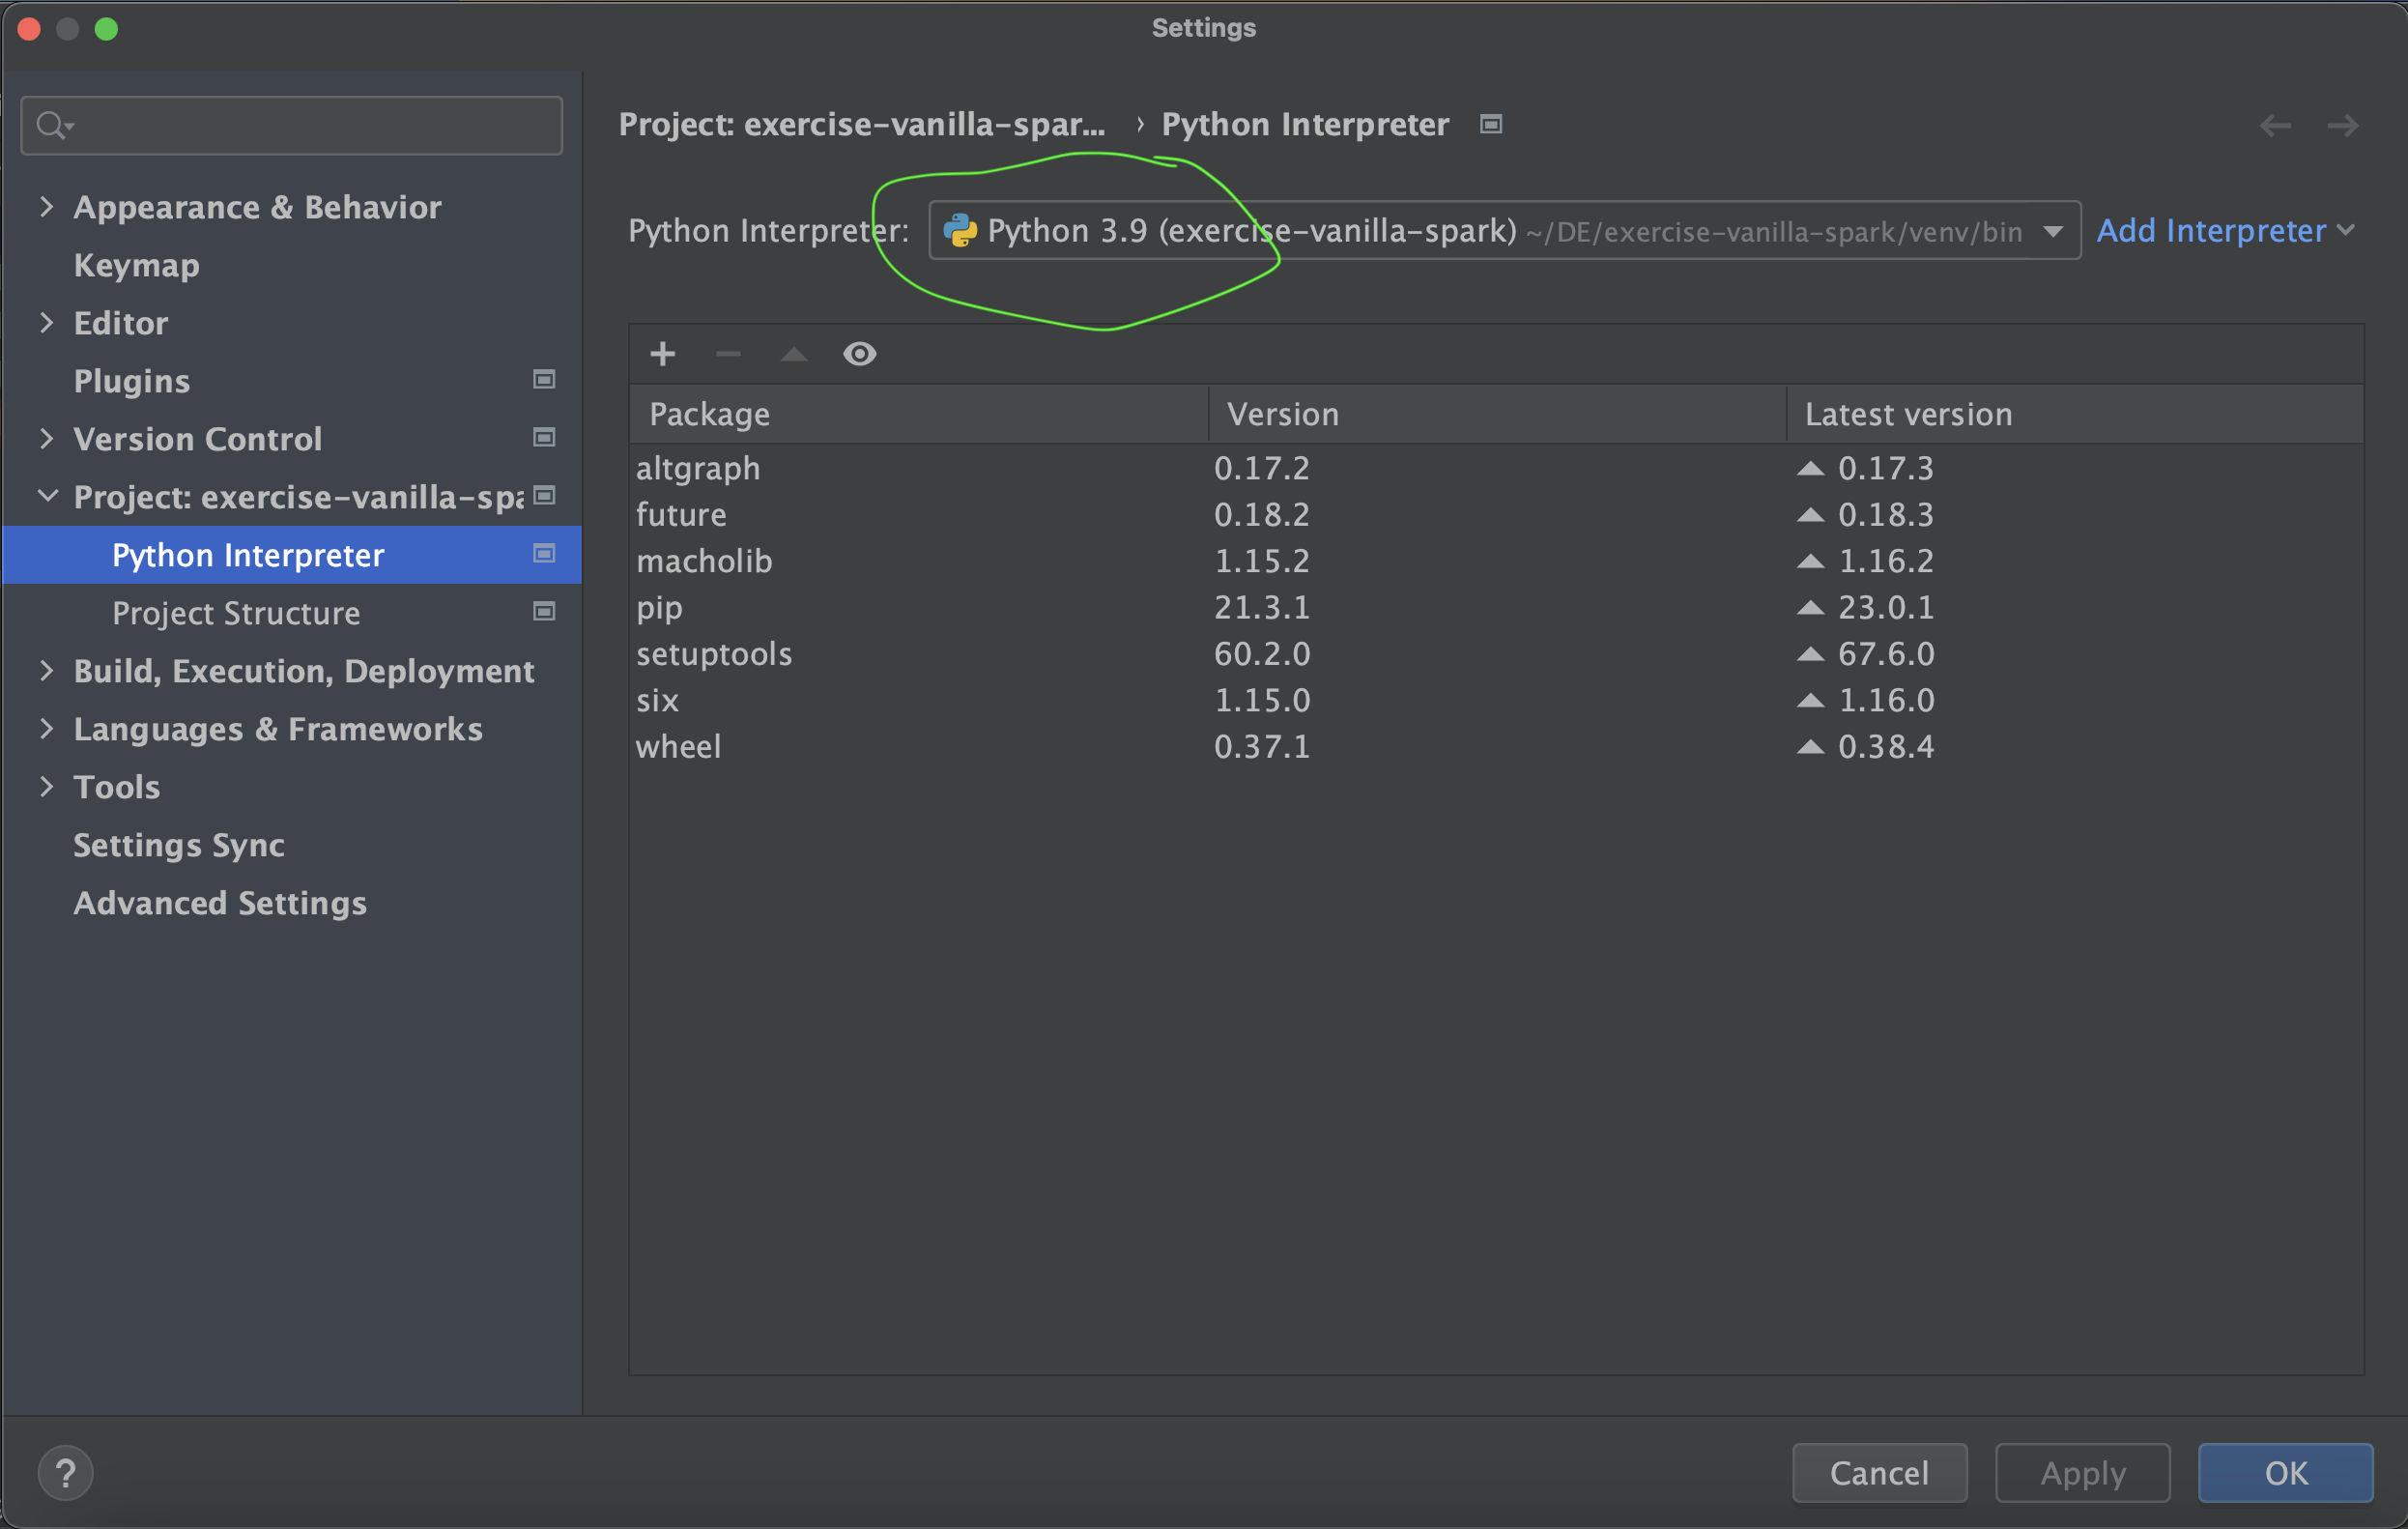
- Go to your Pycharm Settings, select your project and select the Python Interpreter option.
- Make sure that you select No Interpreter from the
Python Interpreterdropdown and click Add Interpreter and select Add Local Interpreter.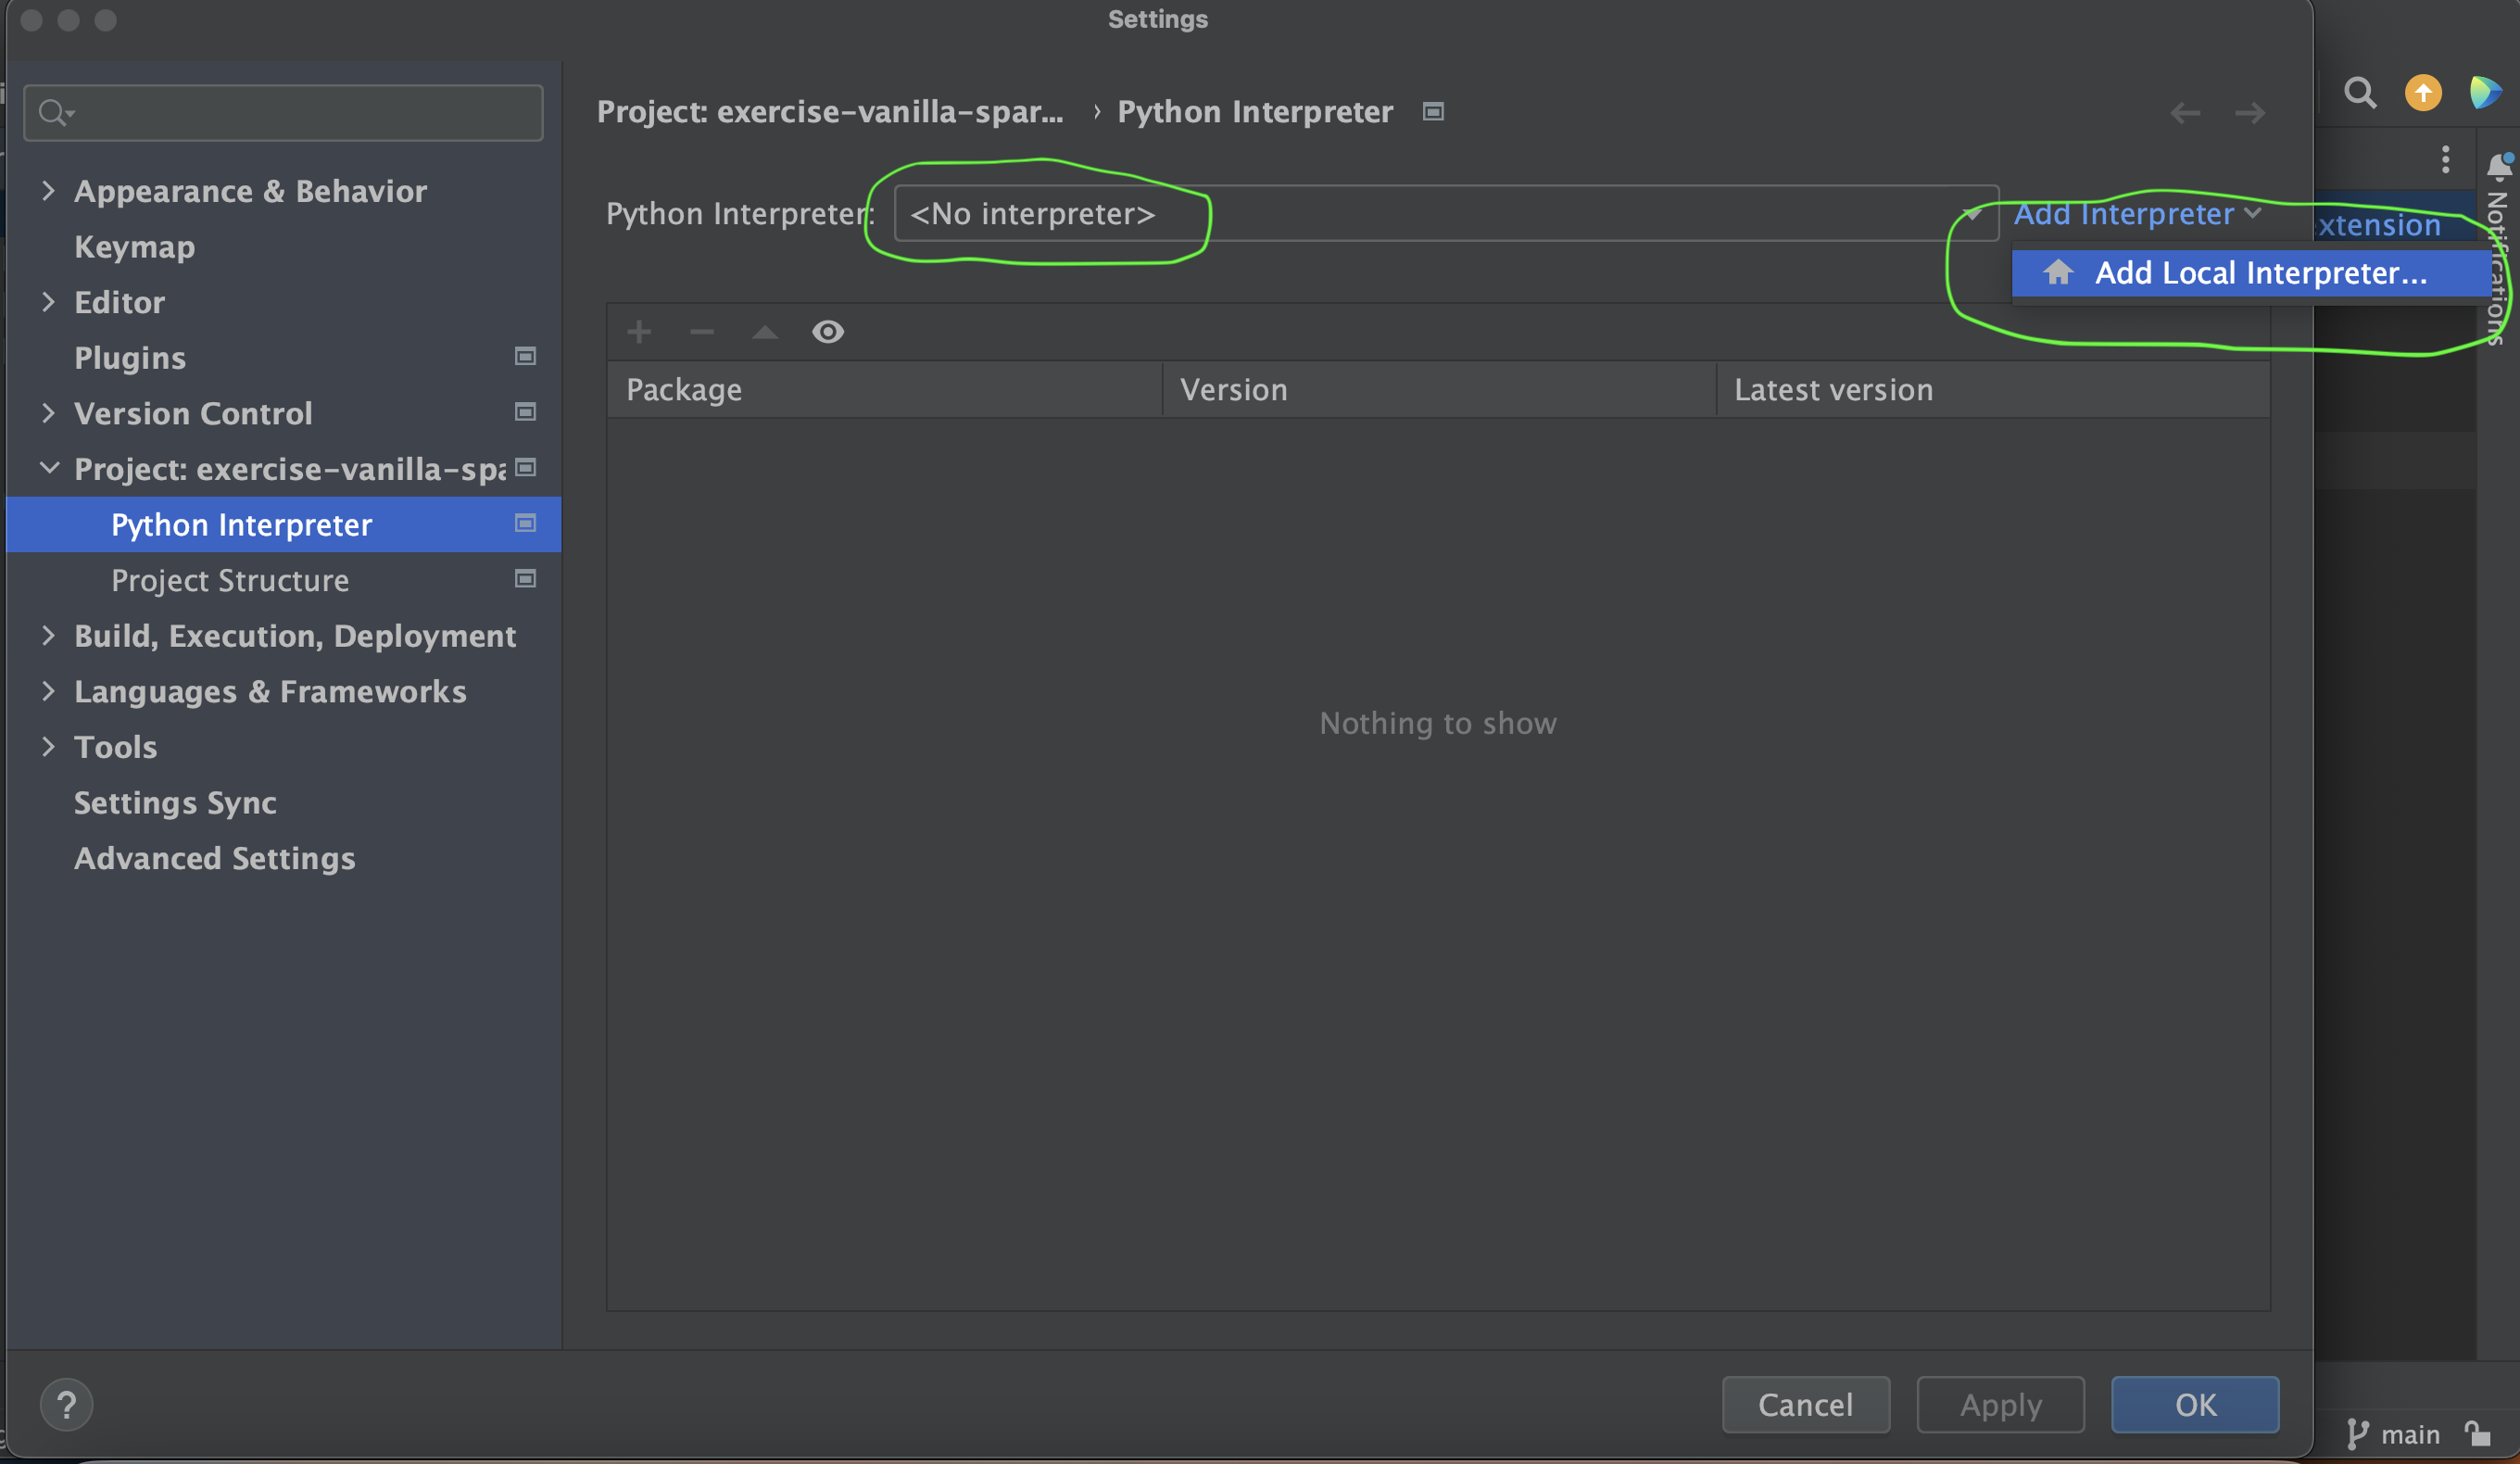
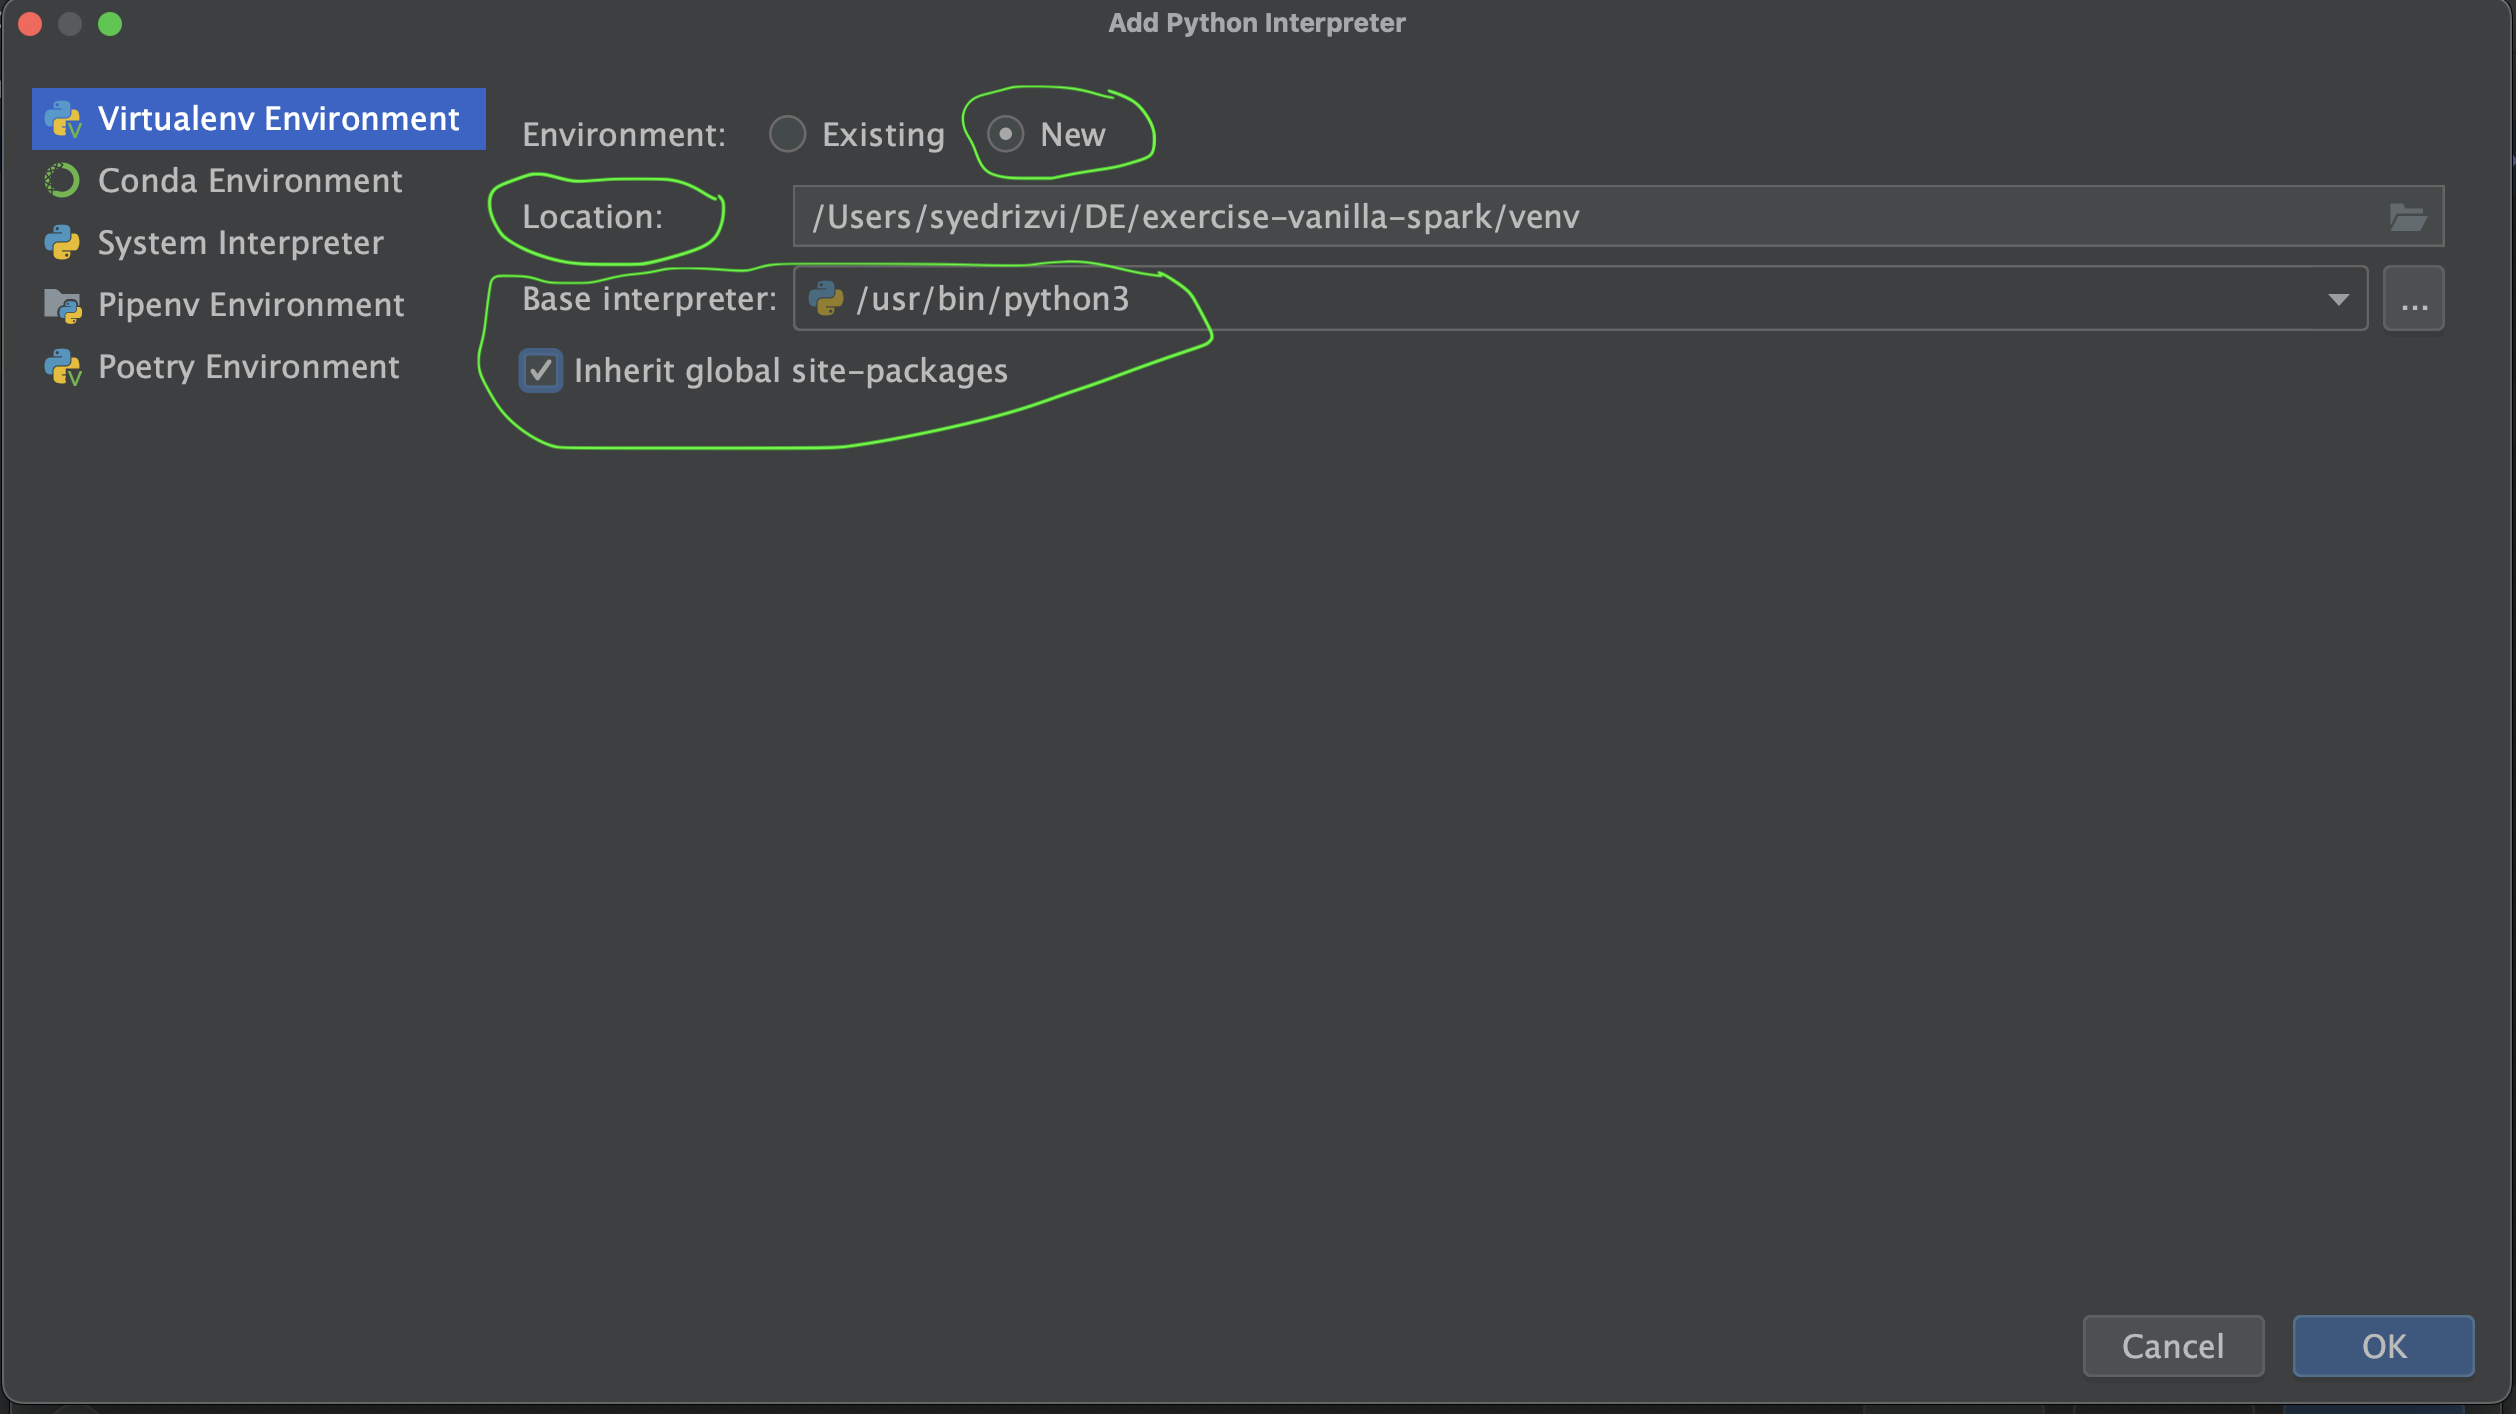
- A dialog box will Pop up. Select the option of Virtualenv Environment.
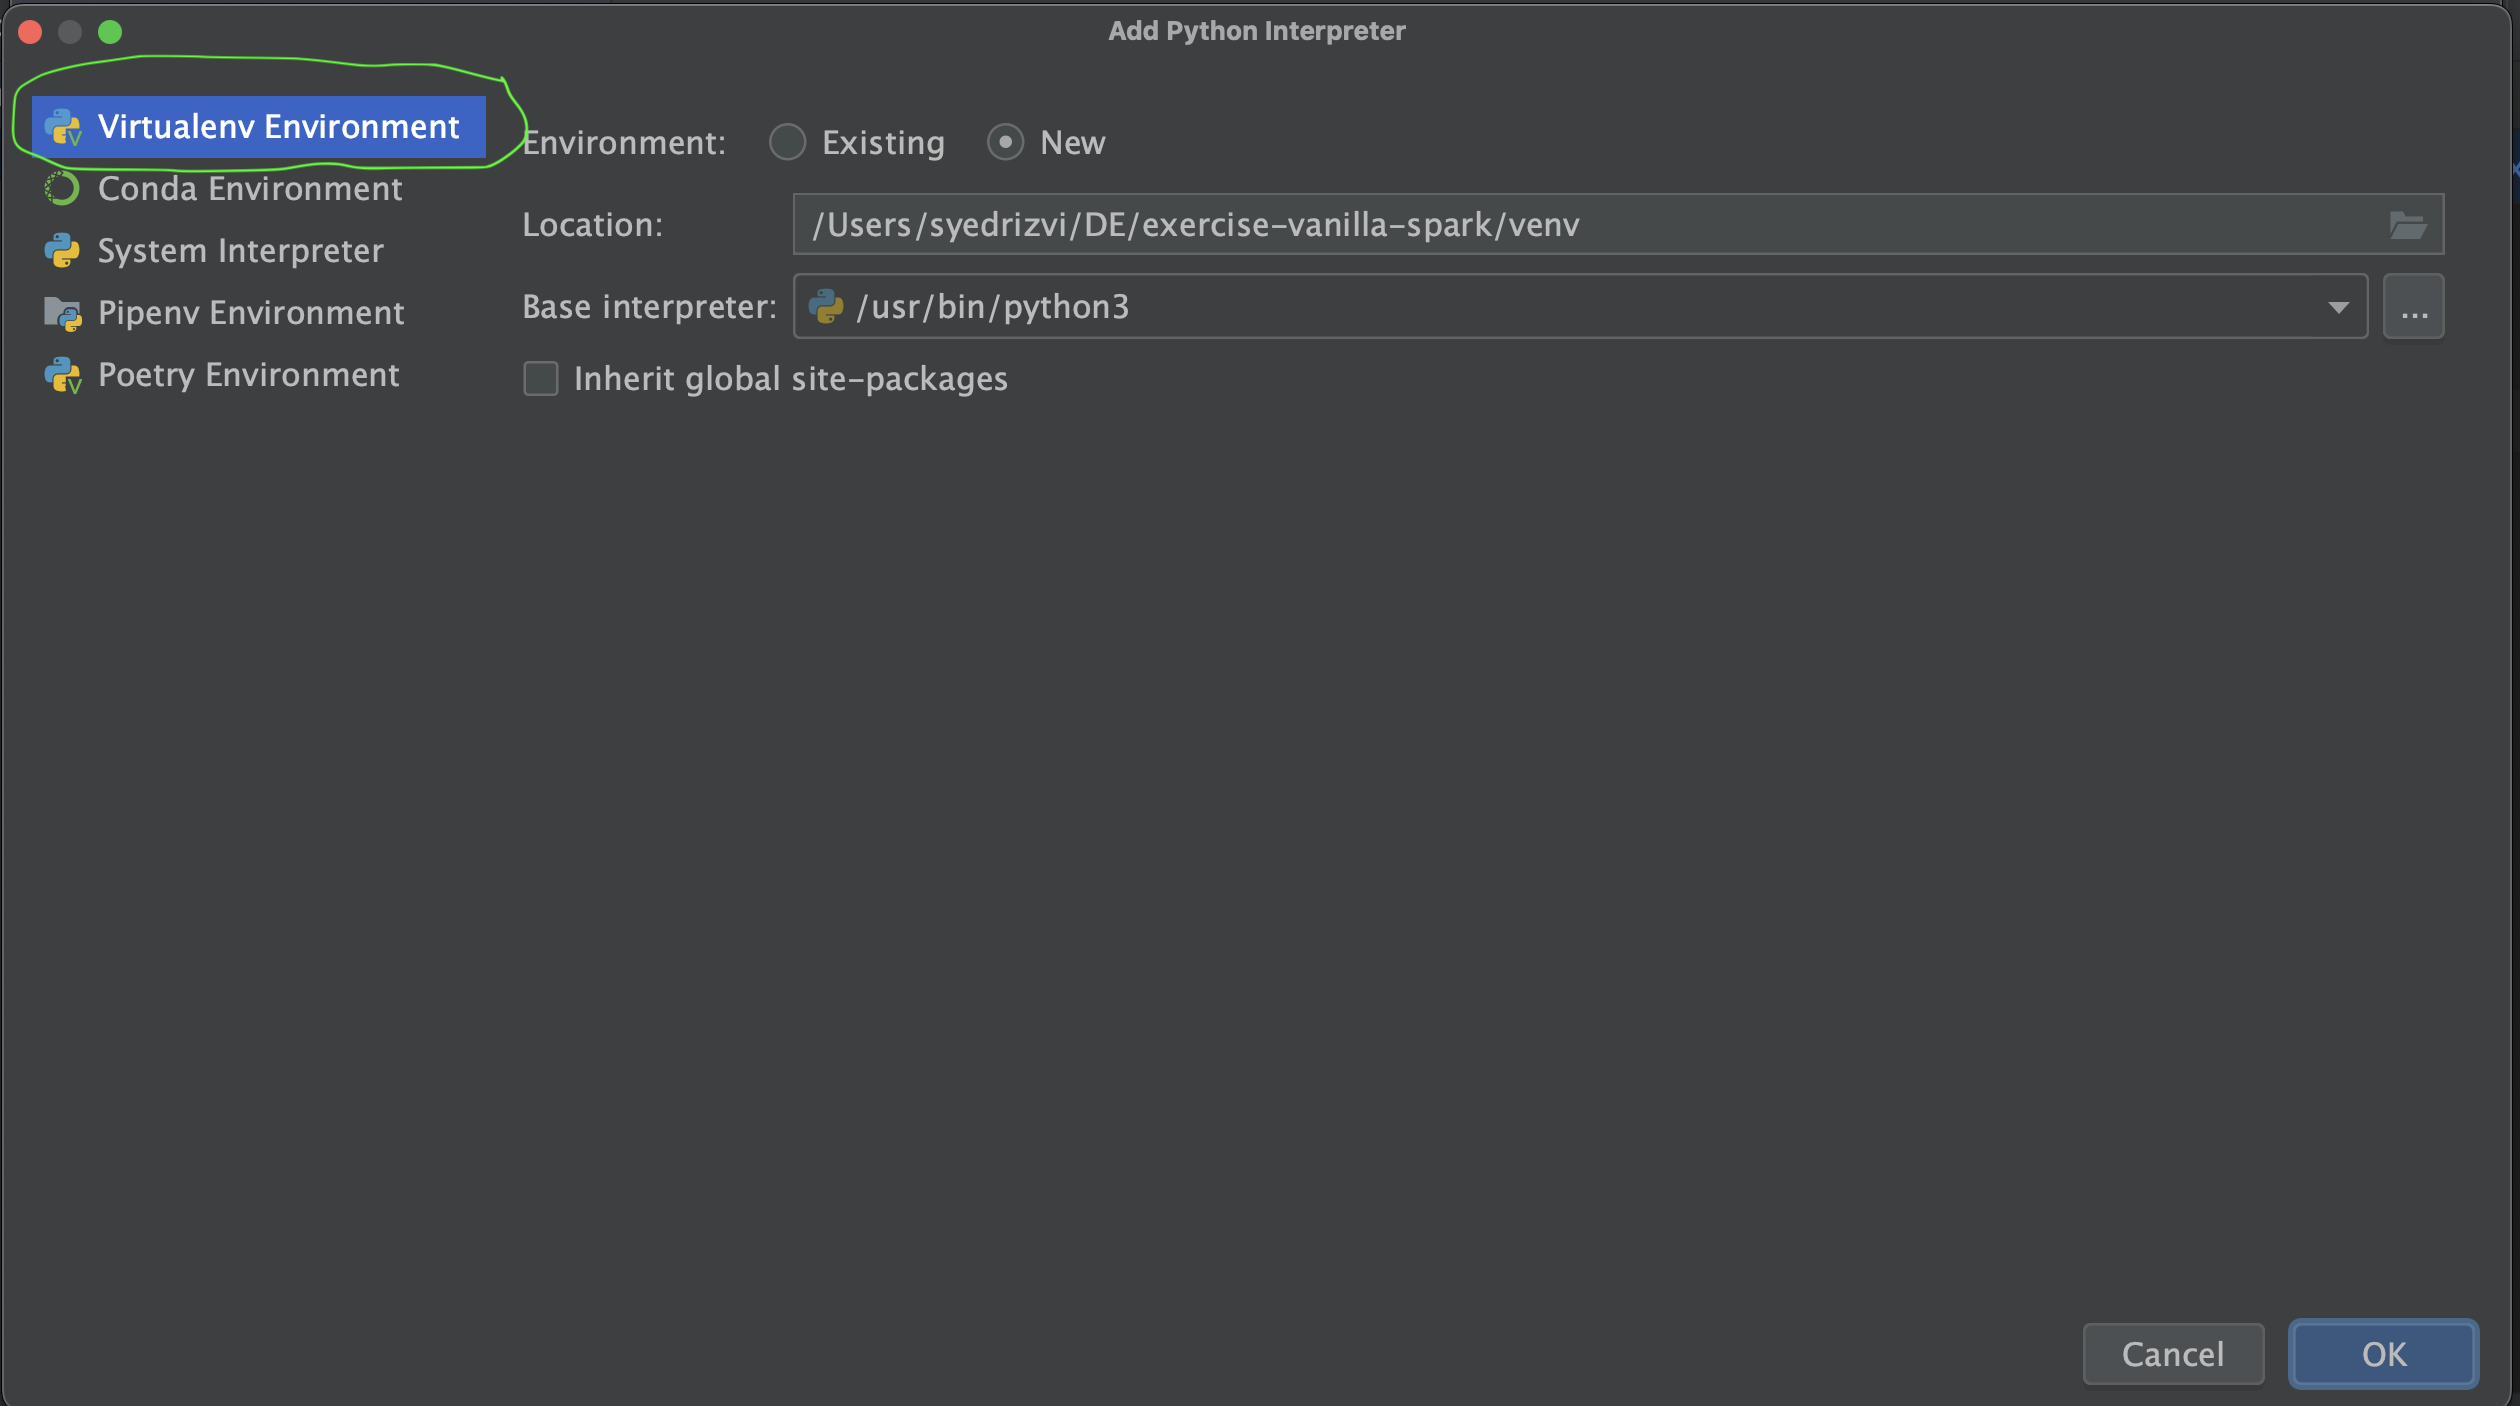
- In the options on the right-hand side of the same dialog box, select Environment as New, Location as any suitable location to save python "venv" folder on your local machine, leave the Base Interpreter as default and select Inherit global site packages checkbox.
- This should set up your Python Virtual Env for this repo. Double-check your Python Interpreter from Setting again and make sure that your newly created Python interpreter is selected for the project.
- Now if your Python Interpreter is created and selected as per the instructions above, you should get a message like
Package requirements 'pyspark...' etc. are not installed. Click on the install requirement link to install the plug-ins required for this repo. These plug-ins are listed down in therequirements.txtof this repo.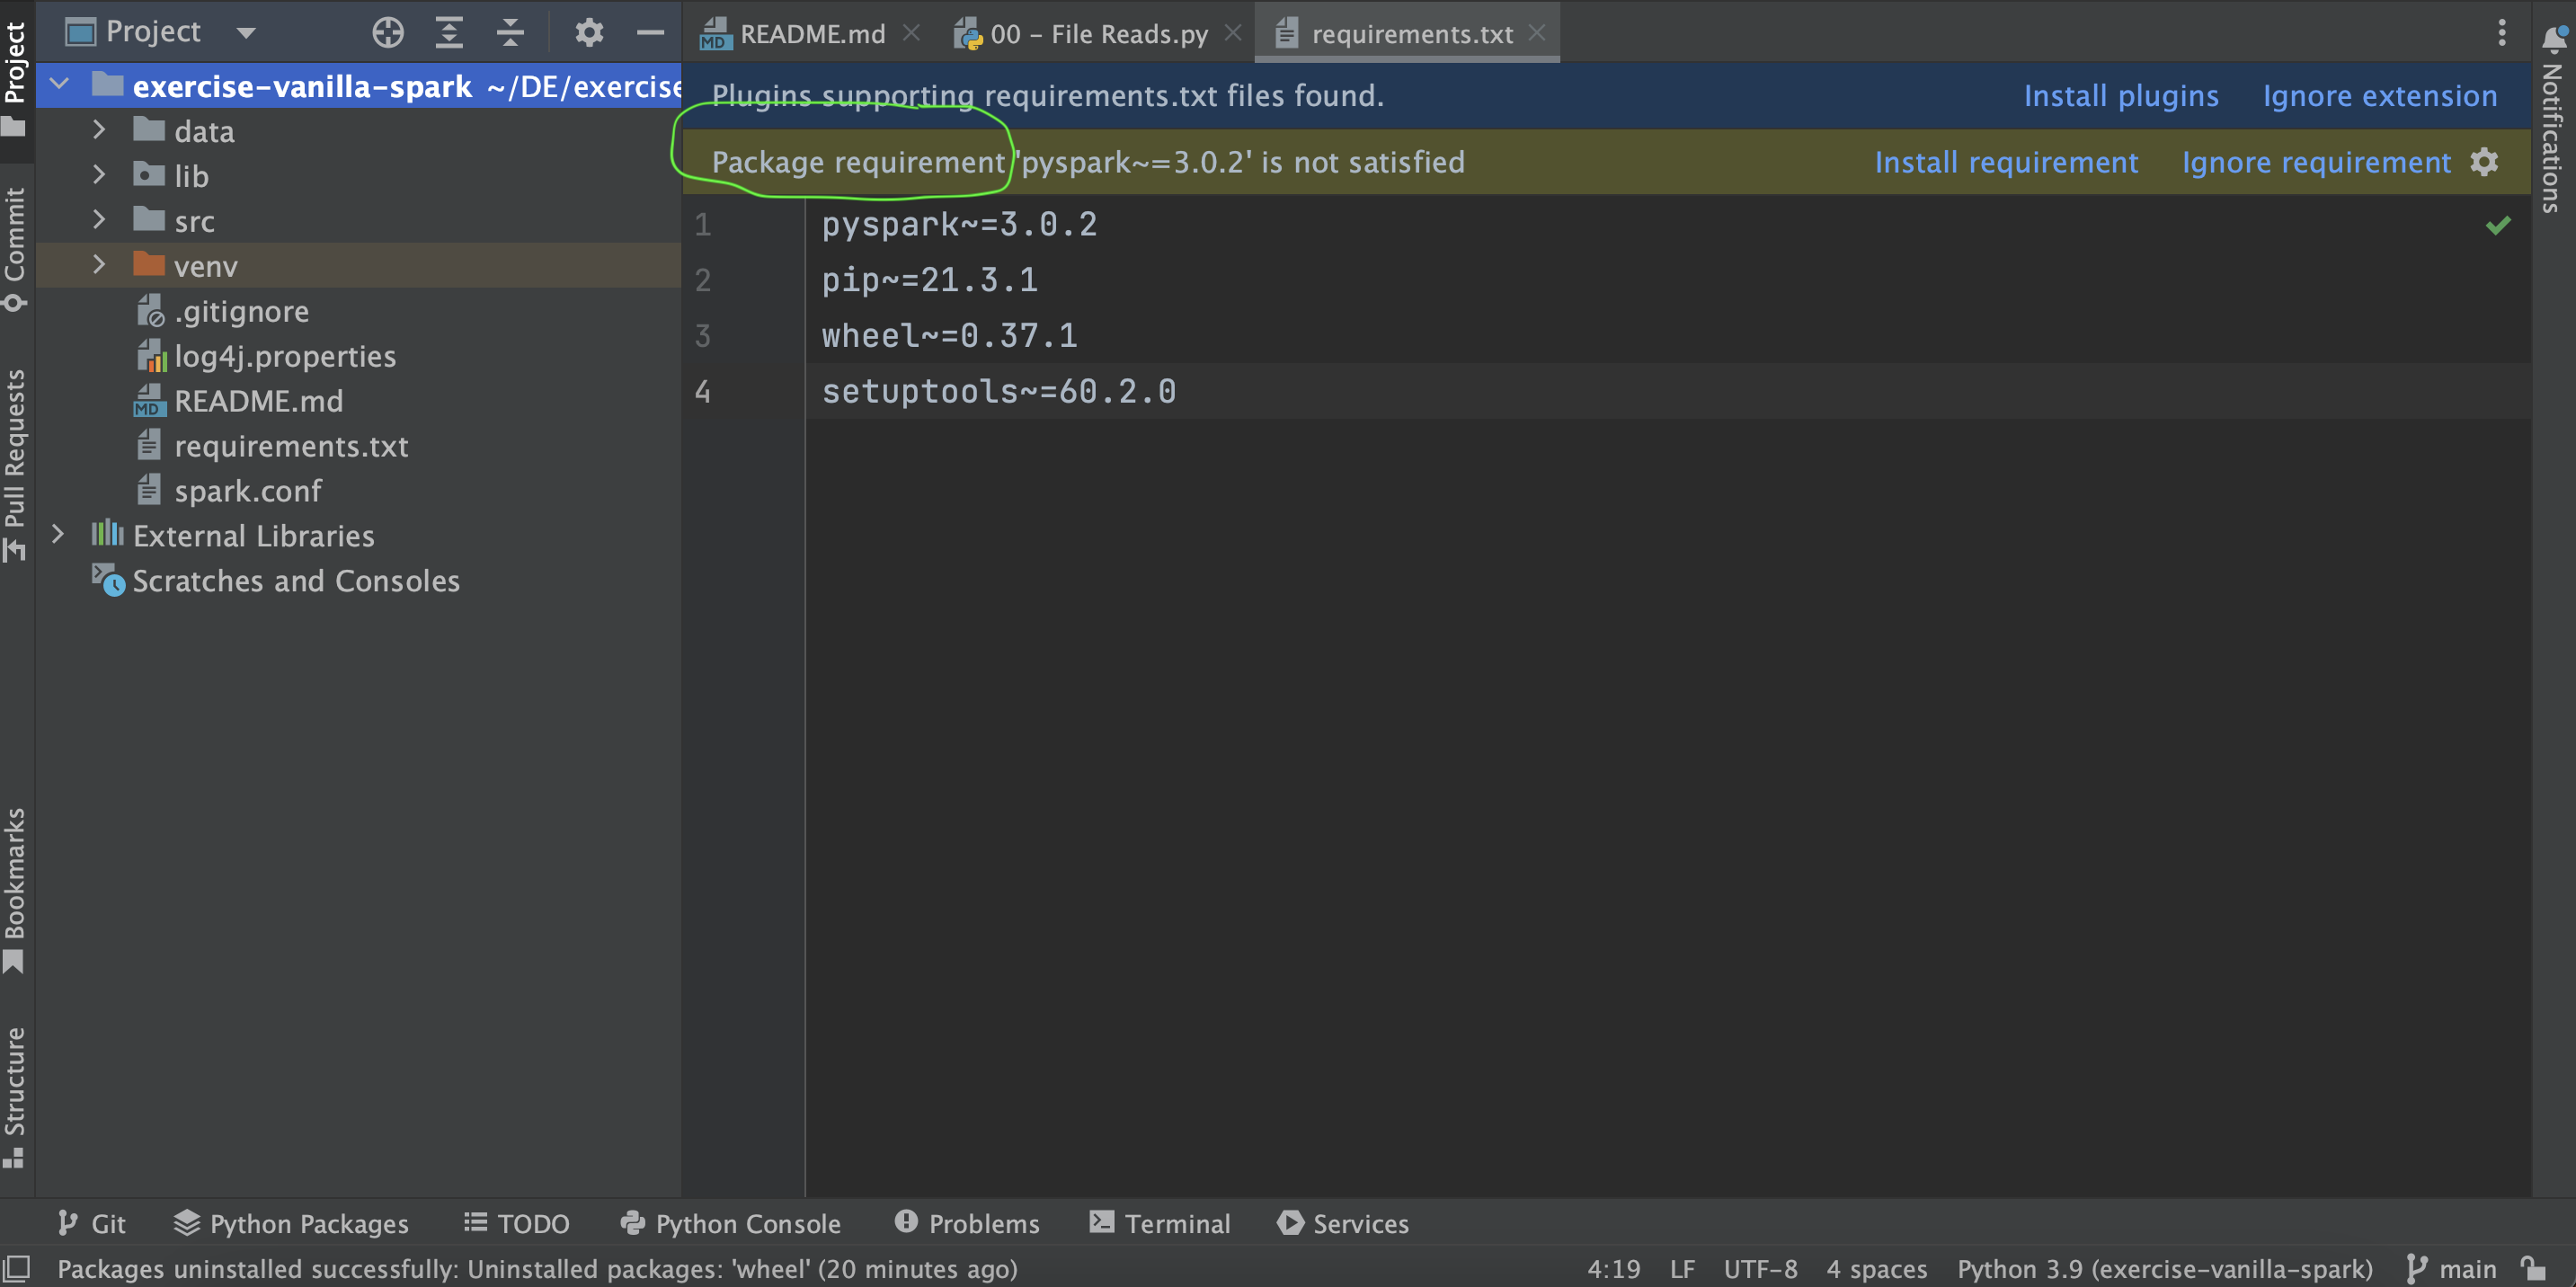
- You are all set now to run your first program of this repo. Open source file
00 - File Reads.pyfrom the SRC folder of this repo and run it. It should give you the desired output of the dataframe as shown below.


PS: Please note that you don't need a separate Apache Spark installation on your local machine to run the examples of this repo from Pycharm. The PySpark plug-in you have configured above should be sufficient.