A cam-streaming carbot controlling from a web browser using Nodejs with Raspberry pi and Arduino.
- Raspberry pi
- Camera board
- Usb Wifi dongle
- Arduino
- DC Motors
- H bridge
- Sensors
- Firmata (Arduino)
- Nodejs
- Jhonny-five
- Socket.io
The first thing we need to do is flash an Arduino board with the Firmata protocol. For this "experiment" we use a modified sketch for the Firmata that's woks well with proximity sensors and servo.
In src/sketch.ino is the file ready for upload to the board. To archive this yo can use the ino command line tool.
Yo can installed with yum or apt-get.
$ yum install arduinoThe picocom command line tool will helps us with serial communication.
$ wget https://picocom.googlecode.com/files/picocom-1.7.tar.gz
$ tar -xvzf picocom-1.7.tar.gz
$ cd picocom-1.7
$ sudo make
$ sudo make install
Once you installed all the dependencies above, install ino using pip or easy_install
$ pip install inoEdit the file ino.ini with the specs of your board and the serial port.
[build]
board-model = mega2560

[upload]
board-model = mega2560
serial-port = /dev/ttyACM0

[serial]
serial-port = /dev/ttyACM0
Build the file in src/sketch.ino
$ ino buildUpload
$ ino uploadThe Arduino board is ready now to use Nodejs with Jhonny-five. Make sure you have the latest build of nodejs and npm in the Raspberry pi.
$ npm installConnect the arduino to the rpi then run:
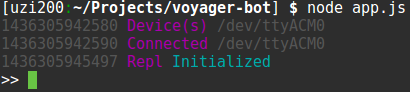
$ node app.jsYou should see this:
Setup a static http server in app.js
app.listen(8000, function () {
    console.log('Http server listening on port %d', 8000);
});
That will serve the index.html which hold the Socket client.
For handle browser events we use jQuery and keypress in order to detect when a key is pressed then and do a socket emit.
"keys": "up",
"on_keydown": function() {
    console.log("Client: Going forward");
    socket.emit('goForward');
From the server side we listen to the emit usingsocket on
socket.on('goForward', function(){
    console.log("Server: Going forward! ");
    // Do something
});Containers are a really good idea for Iot projects because we can isolate our app on a kernel level and that means portability across machines, rapid application deployment, those are crucial processes for Iot projects.
But Docker, which is a de facto standard, does not support ARM. So it is not yet support for Raspberry pi, fortunately some hackers make a Docker Image for Raspberry Pi, they called Hypriot.
Install Hypriot in your Raspberry pi. See this guide
Now login into your pi.
Get the repo
$ git clone https://github.com/juliocesar-io/voyager-bot.gitcd voyager-bot
Build the image
$ docker build -t <your_tag_name> .
Connect the Arduino(Flashed with Firmata) to the Raspberry pi.
Run the container
$ docker run --device=/dev/ttyACM0 <your_tag_name>
Notice that we flag the --device=/dev/ttyACM0 it's important to define this, it won't work if you don't use the correct port, check it with lsusb.
See the result in your browser,
http://<container_ip>:3000