NDV Hour of Code 2017
December 5, 2017
Intro
Today we are going to be learning about making websites. Our goal is to create a personal website using HTML and CSS and then upload it to the Internet for everyone to see!
Technologies
You are going to learn about a few different technologies to help you on your way to web-fame. Here is a reference of them in case you get confused:
-
HTML + CSS: two languages used to describe what is on a website. They describe the elements such as images and text as well as the style of them (color, font, etc).
-
VSCode: a 'Text Editor' (like Word or Pages, except for writing code)
-
GitHub: a website used to put code you make on the Internet. It can also be used to upload a simple website, which is how we will use it.
-
Codeacademy: a website with free and paid programming tutorials. While a lot of the advanced ones are paid, many of the beginner ones are free and a great place to get your feet wet
Outline
- Creating a personal site using Codeacademy
- Improving your site locally using VSCode
- Uploading the site to GitHub pages
- Bonus: Fotune telling with JavaScript
1. Creating a personal site using Codeacademy
Using your favorite web browser open this tutorial from Codeacademy. Follow the tutorial and when you are done proceed to part 2.
NOTE: In 5. Adding Style of the tutorial there seems to be a bug where it won't let you continue. Copy, then delete everything except your <style> tags to get the tutorial to let you continue. When you are on the next step re-paste what you copied from before.
2a. Setting setting up VSCode
Just to recap step 1: HTML is a language that a web browser uses to draw websites. You give the browser HTML and it draws a website. Inside the <style> ... </style> tags, you wrote an additional language, CSS. The web browser uses that to style the HTML you've given it (centering, changing fonts, changing colors, etc). CSS is always written in the <style> ... </style> tags in a .html file
Codeacademy had a built in section of its website that rendered the code you had written, but any web browser can actually do that as well. To see this in action we need to do a couple things.
First, we need a program to edit our HTML, just like you were able to on the Codeacademy webste. There are lots of programs that can do this, but a great one for both Mac and Windows is Visual Studio Code by Microsoft. Head over to VSCode's site and download it.
Once you've downloaded it, open it up and close out of the initial Welcome page that pops up. Then go to File -> New File (hotkey cmd + n).
You should have a blank text file right now. Go back to your window from CodeAcademy and copy and past all of your code into the new file you just created. When you've done that, go to File -> Save As... and save the file as index.html on your desktop.
Note: The .html extension at the end of the file name is important, don't forget it! This tells your computer and web browser that this is a file is a website.
Once you've saved your file, go ahead and double click the file on your desktop. It should automatically in a web browser (if it doesn't, try right clicking and hit open with -> Safari).
You should now see the website you made in the web browser. You are 1 step closer to having your personal site on the Internet, nice work!
Before making this website public, however, it could really use some cleanup. I'm definitely not a designer, but I wouldn't exactly write home to mom about this. Lets make a few changes.
2b. Site improvement
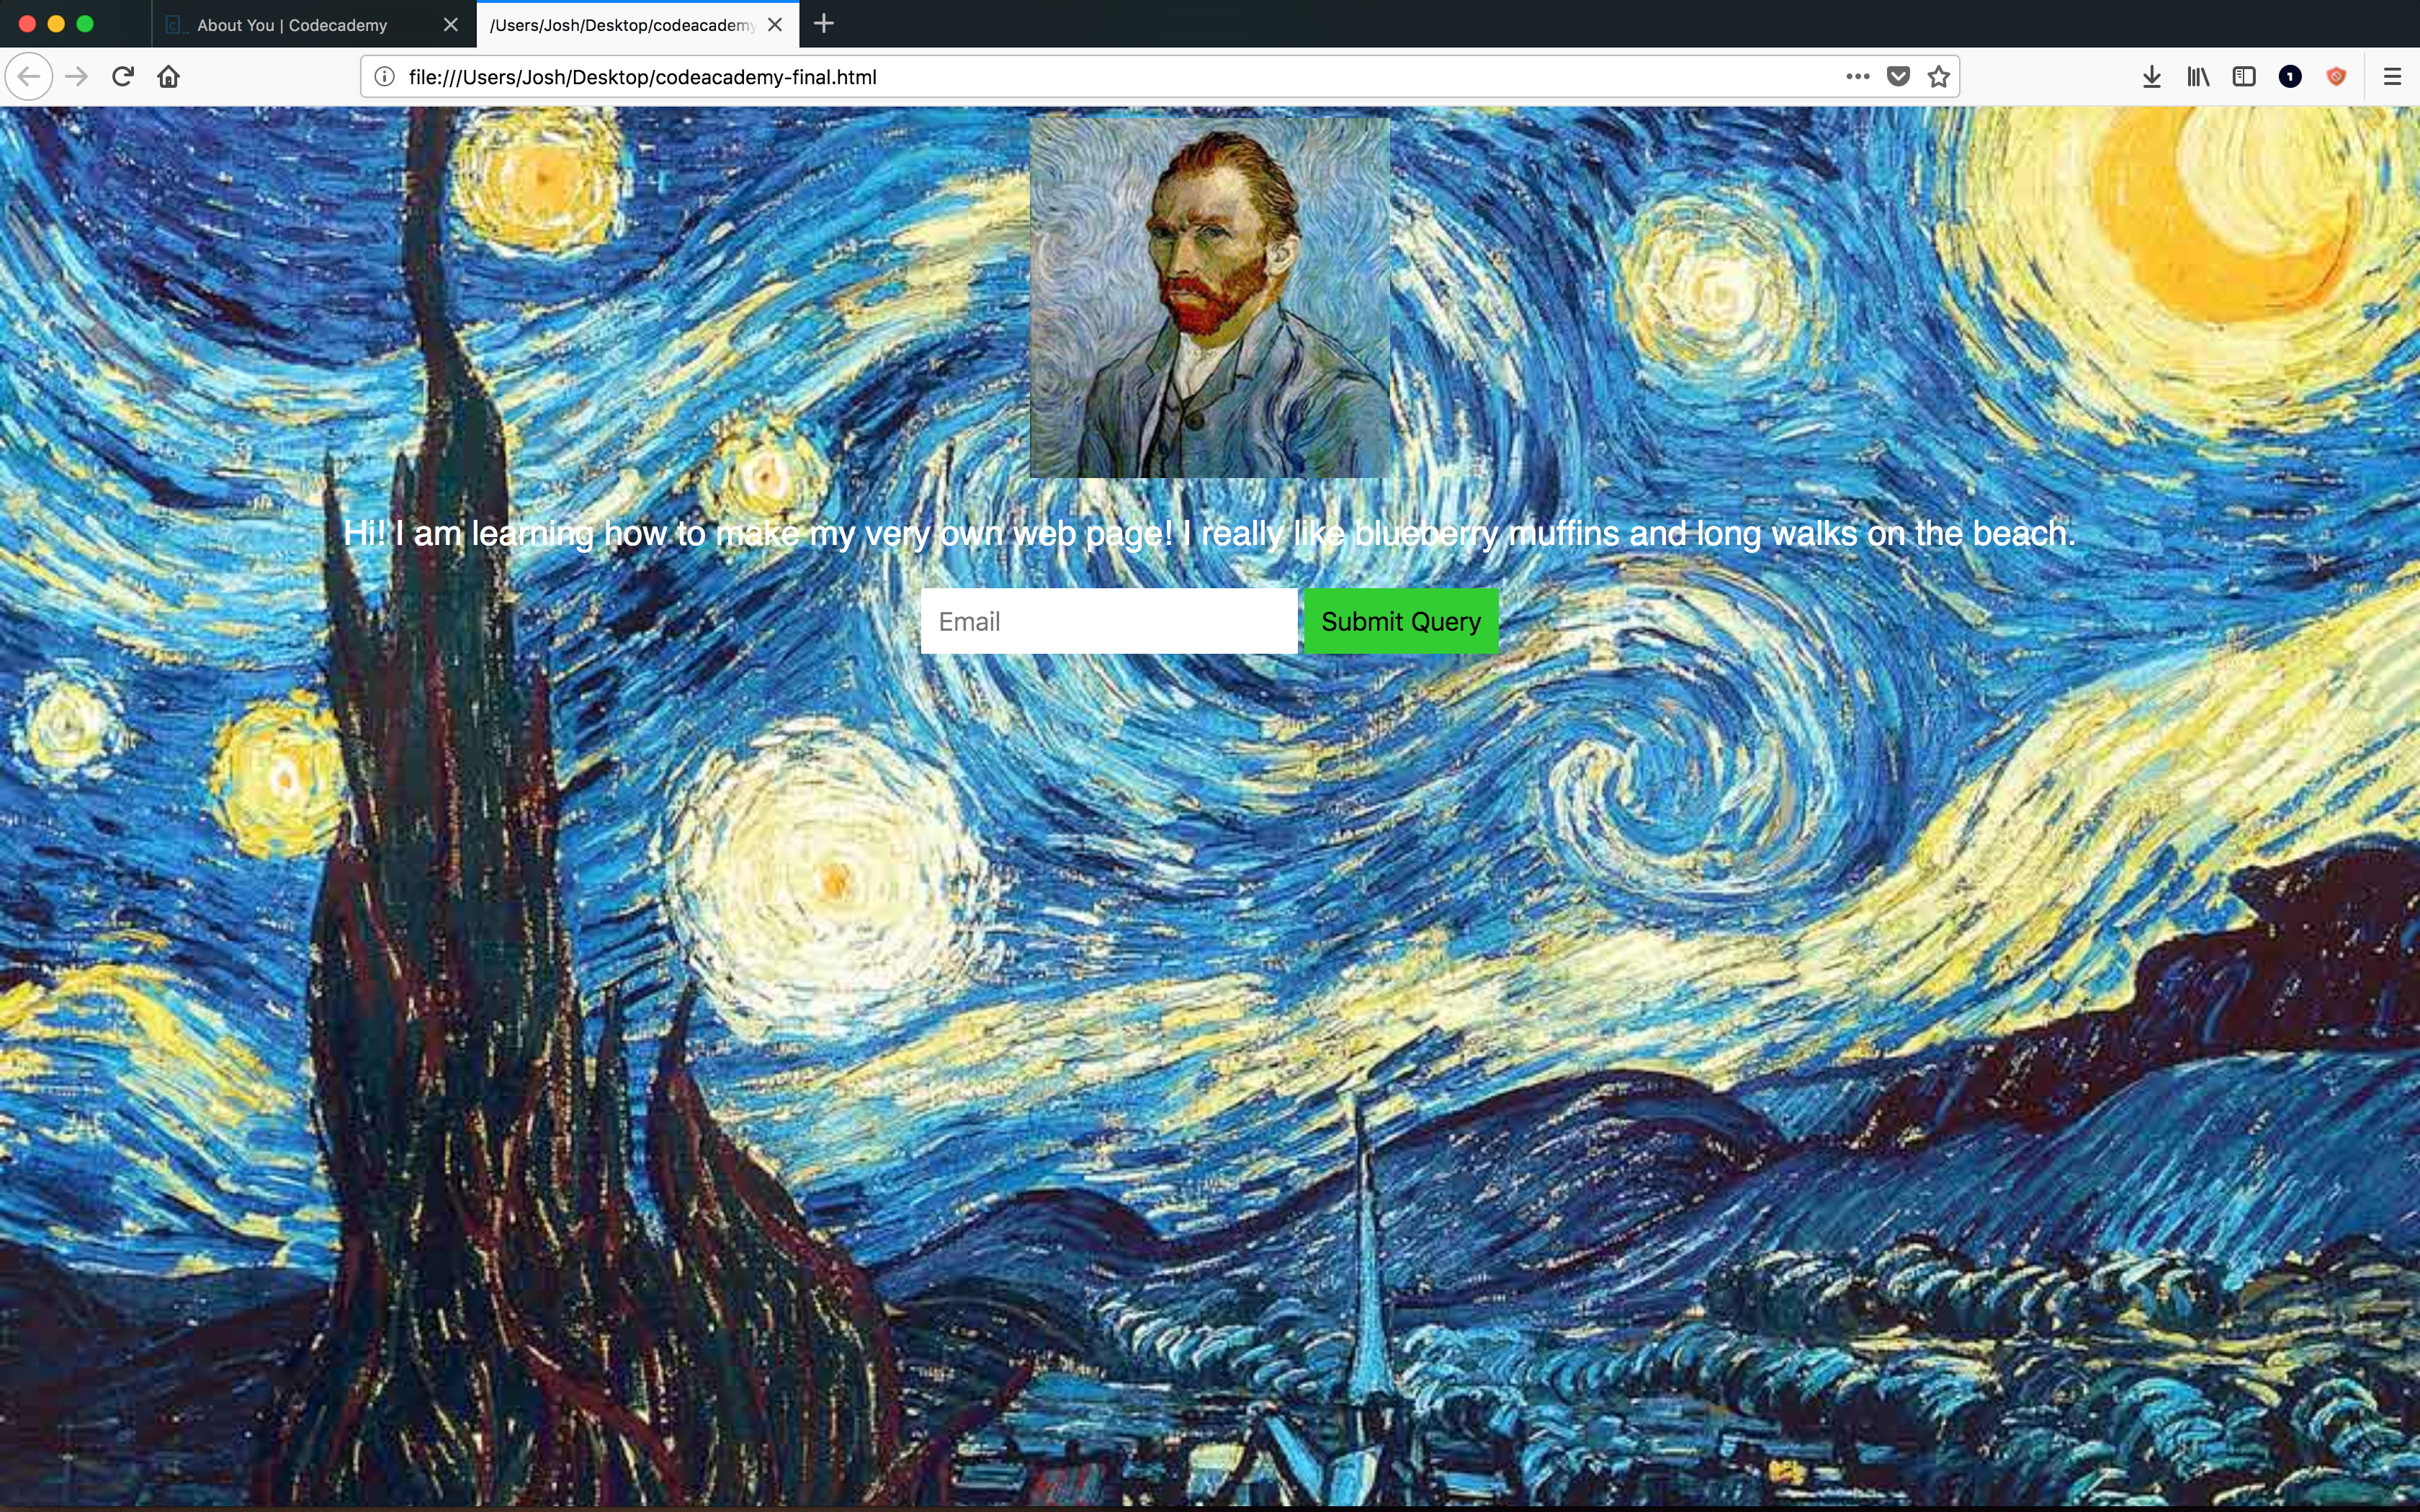
Right now the site looks like this:
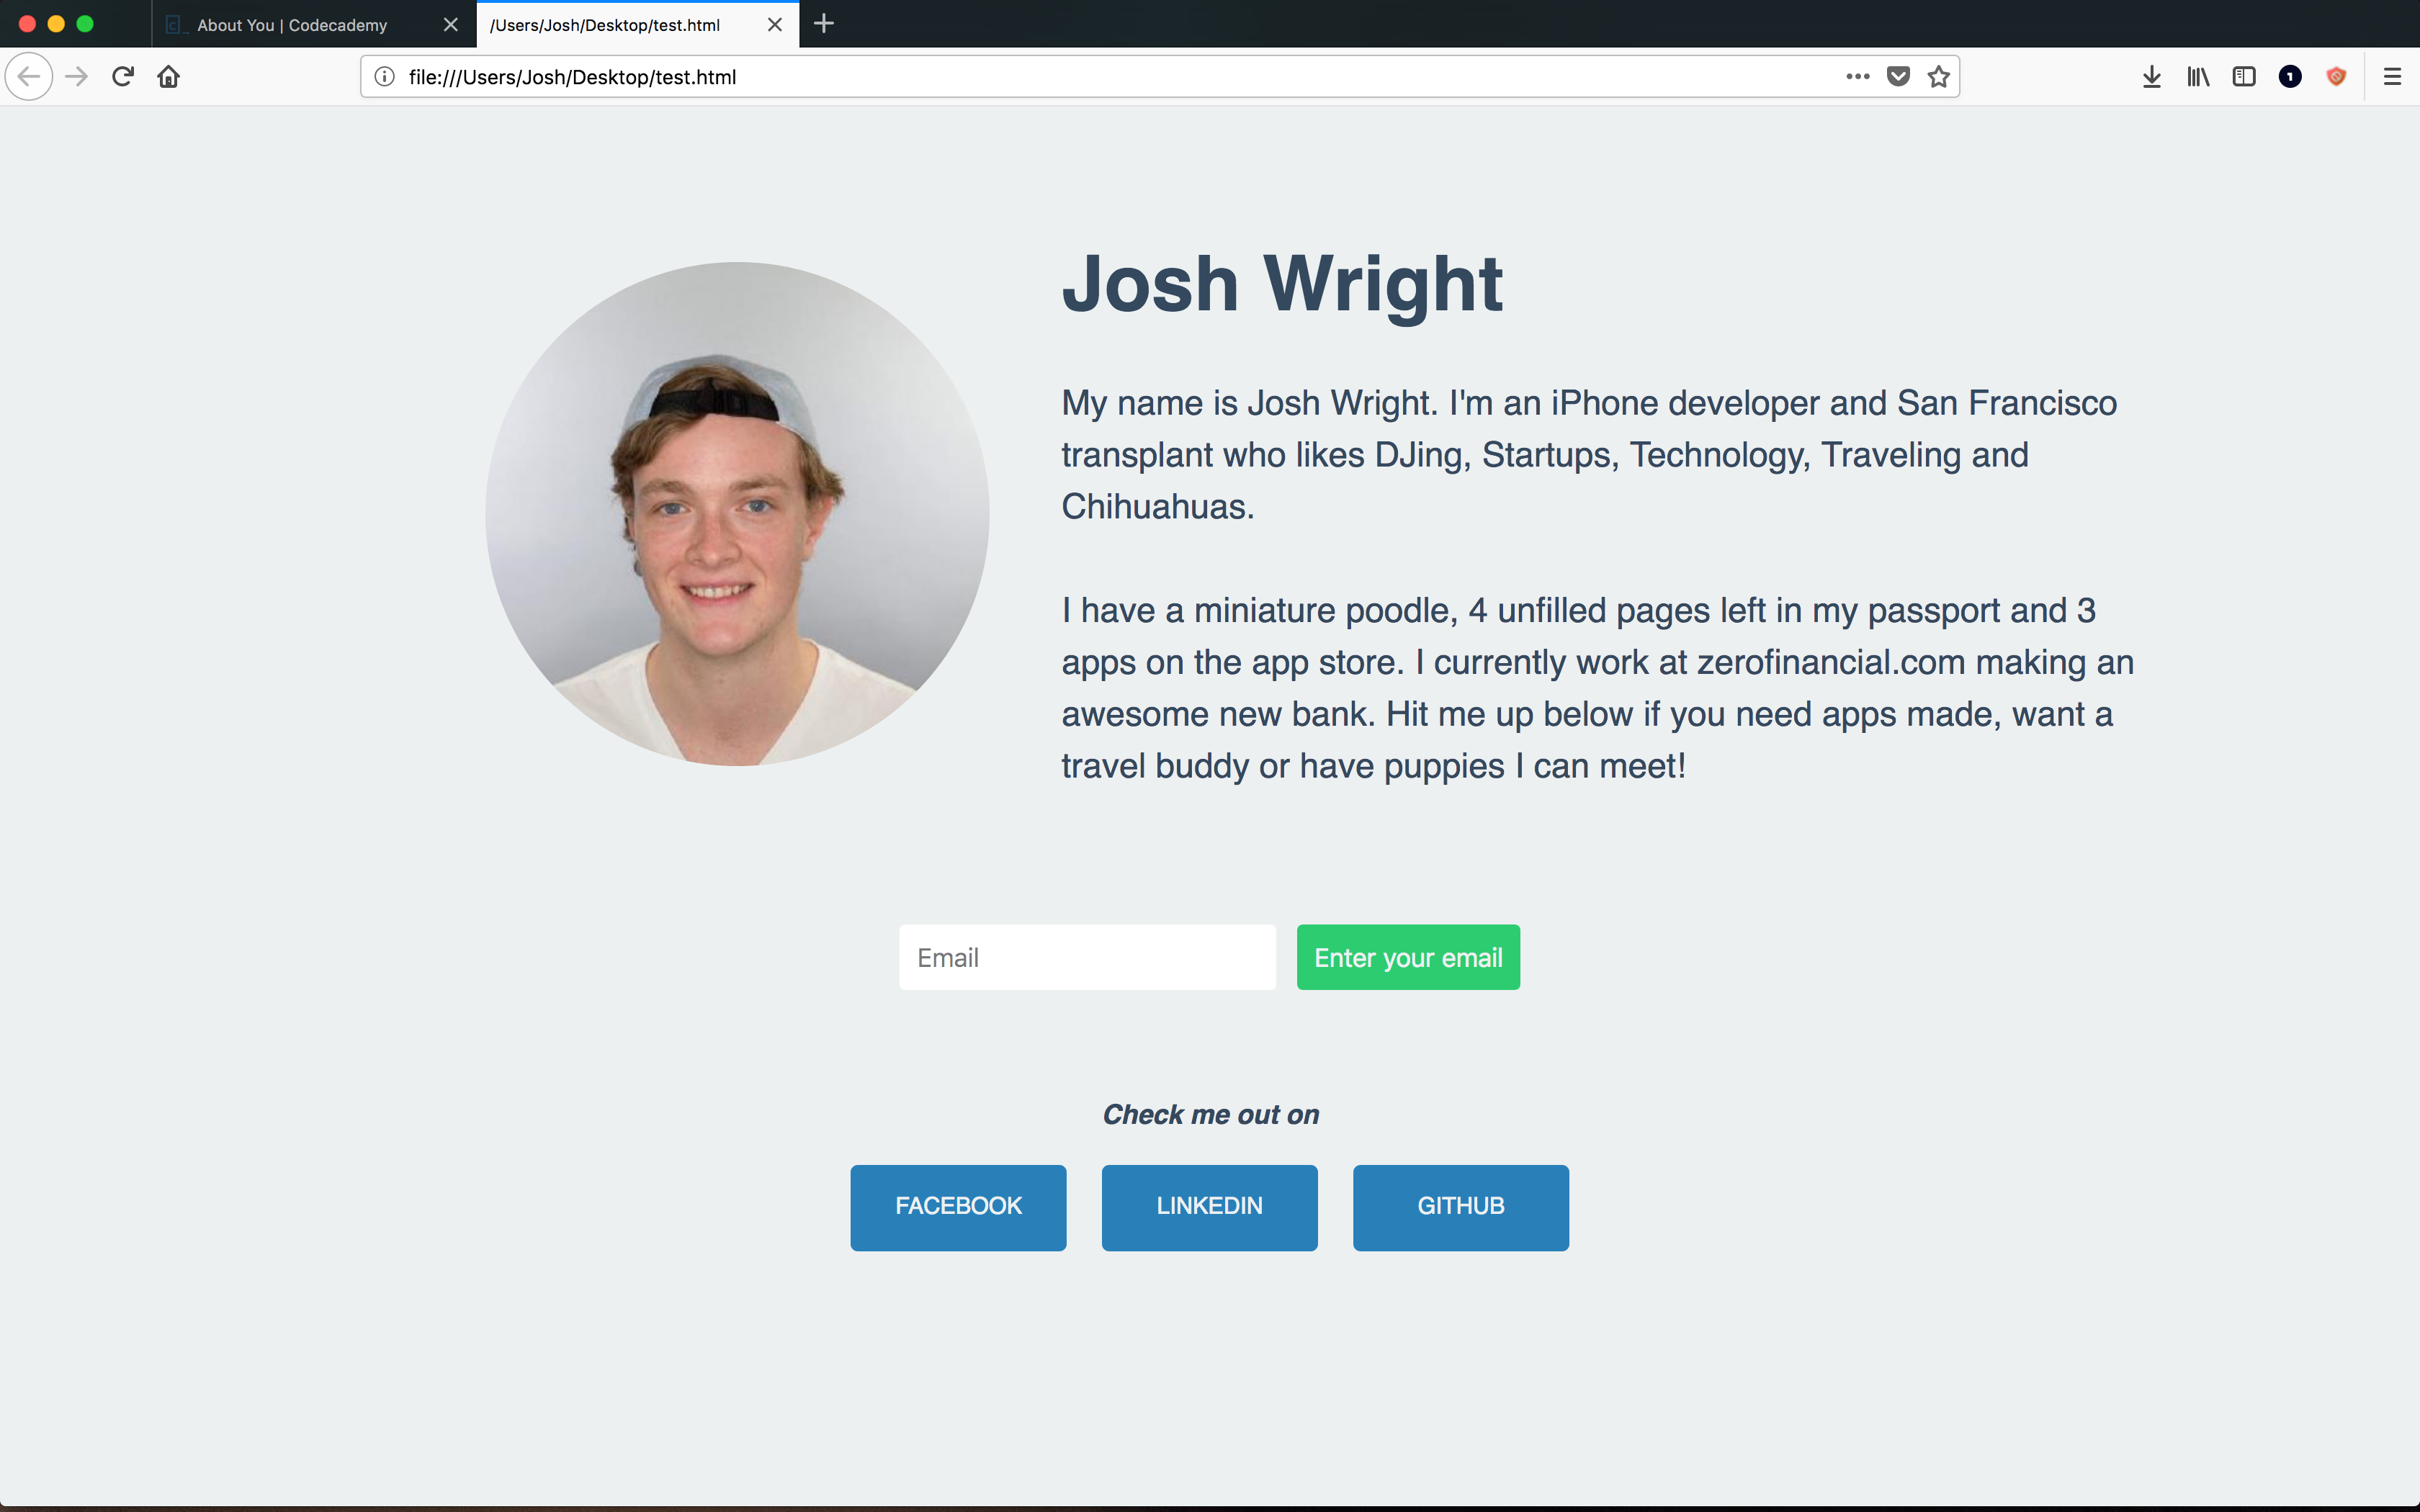
After this section your site will look a little more presentable:
If you followed along with the codeacademy tutorial, the stuff inside your <body> tags should look like this:
<body>
    <img src="https://codecademy-content.s3.amazonaws.com/courses/web-beginner-en-3pc6w/images/avatar.jpg" height="250" width="250">
    <p>Hi! I am learning how to make
    my very own web page! I really like
    blueberry muffins and long walks on
    the beach.</p>
    <input placeholder="Email" type="email">
    <input type="submit">
</body>
Lets get started by organizing this a little. In HTML you can use the <div> tag to wrap sections of your site. Looking at the second website screenshot above there are roughly 3 seconds of the site; the 'info' section (image and text) the 'input section' (enter your email) and a new 'links' section. Lets create a <div> for each of those sections, inside the <body>:
<body>
    <div>
        <img src="https://codecademy-content.s3.amazonaws.com/courses/web-beginner-en-3pc6w/images/avatar.jpg" height="250" width="250">
        <p>Hi! I am learning how to make
        my very own web page! I really like
        blueberry muffins and long walks on
        the beach.</p>
    </div>
    <div>
        <input placeholder="Email" type="email">
        <input type="submit">
    </div>
    <div>
        <!--> Nothing here yet <-->
    </div>
</body>
Note that it's typical to use indentation to keep things easy to follow.
CSS classes: as you saw in the Codeacademy tutorial, you can style custom elements such as p with p { } sections in your style. You can also use 'classes' to accomplish the same thing. After an element name type class="className" and you can now style that element (any any others of that class) with a .className { } style block. Lets add a class for each of our sections:
<body>
    <div class="info">
        ...
    </div>
    <div class="input">
        ...
    </div>
    <div class="links">
        ...
    </div>
</body>
Lets also add a couple of extra items to our profile. Lets add your name in <h1> blocks, before the paragraph and after the image.
<body>
    <div class="info">
        <img src="https://codecademy-content.s3.amazonaws.com/courses/web-beginner-en-3pc6w/images/avatar.jpg" height="250" width="250">
        <h1>Josh Wright</h1>
        <p>Hi! I am learning how to make
        my very own web page! I really like
        blueberry muffins and long walks on
        the beach.</p>
    </div>
    ...
</body>
We can also take a moment to updated the <p> tag with a description of yourself. Use <br/> inside the <p></p> tags to add a new line or two (like hitting enter/return in Word).
<body>
    <div class="info">
        ...
        <p>
            My name is Josh Wright. I'm an iPhone developer and San Francisco transplant who likes DJing, Startups, Technology, Traveling and Chihuahuas.
            <br/>
            <br/>
            I have a miniature poodle, 4 unfilled pages left in my passport and 3 apps on the app store. I currently work at zerofinancial.com making an awesome new bank. Hit me up below if you need apps made, want a travel buddy or have puppies I can meet!
        </p>
    </div>
    ...
</body>
Also lets update that photo to an actual picture of you. If you aren't sure what a url to a photo of you online is, try going to facebook or twitter, right clicking your profile picture and selecting View Image or View Image Source. Then copy that url and paste it into the <img> tag src part. Bump the height and widths up to 350 each as well.
<body>
    <div class="info">
        <img src="https://avatars1.githubusercontent.com/u/6025554?s=400&u=4e2f99146f3c0bd66c59bdb0ae66480c80a58758&v=4" height="350" width="350">
        ...
    </div>
    ...
</body>
Finally, lets add the links to the bottom. You can add a hyperlink using the <a> tag with the 'href' attribute like so: <a href="www.linklocation.com">Link Title Here</a>. Lets add a title in <h3> tags and at least three of those to various profiles you have on the web, inside the <div> of class "links". Lets give each of these links a class of "link"
<body>
    ...
    <div class="links">
        <!-- The <i> tags a text italicized -->
        <h3><i>Check me out on</i></h3>

        <!-- Put your own social media profiles and titles here -->
        <a class="link" href="https://www.facebook.com/joshuawright11">FACEBOOK</a>
        <a class="link" href="https://www.linkedin.com/in/joshlwright/">LINKEDIN</a>
        <a class="link" href="https://github.com/joshuawright11">GITHUB</a>
    </div>
</body>
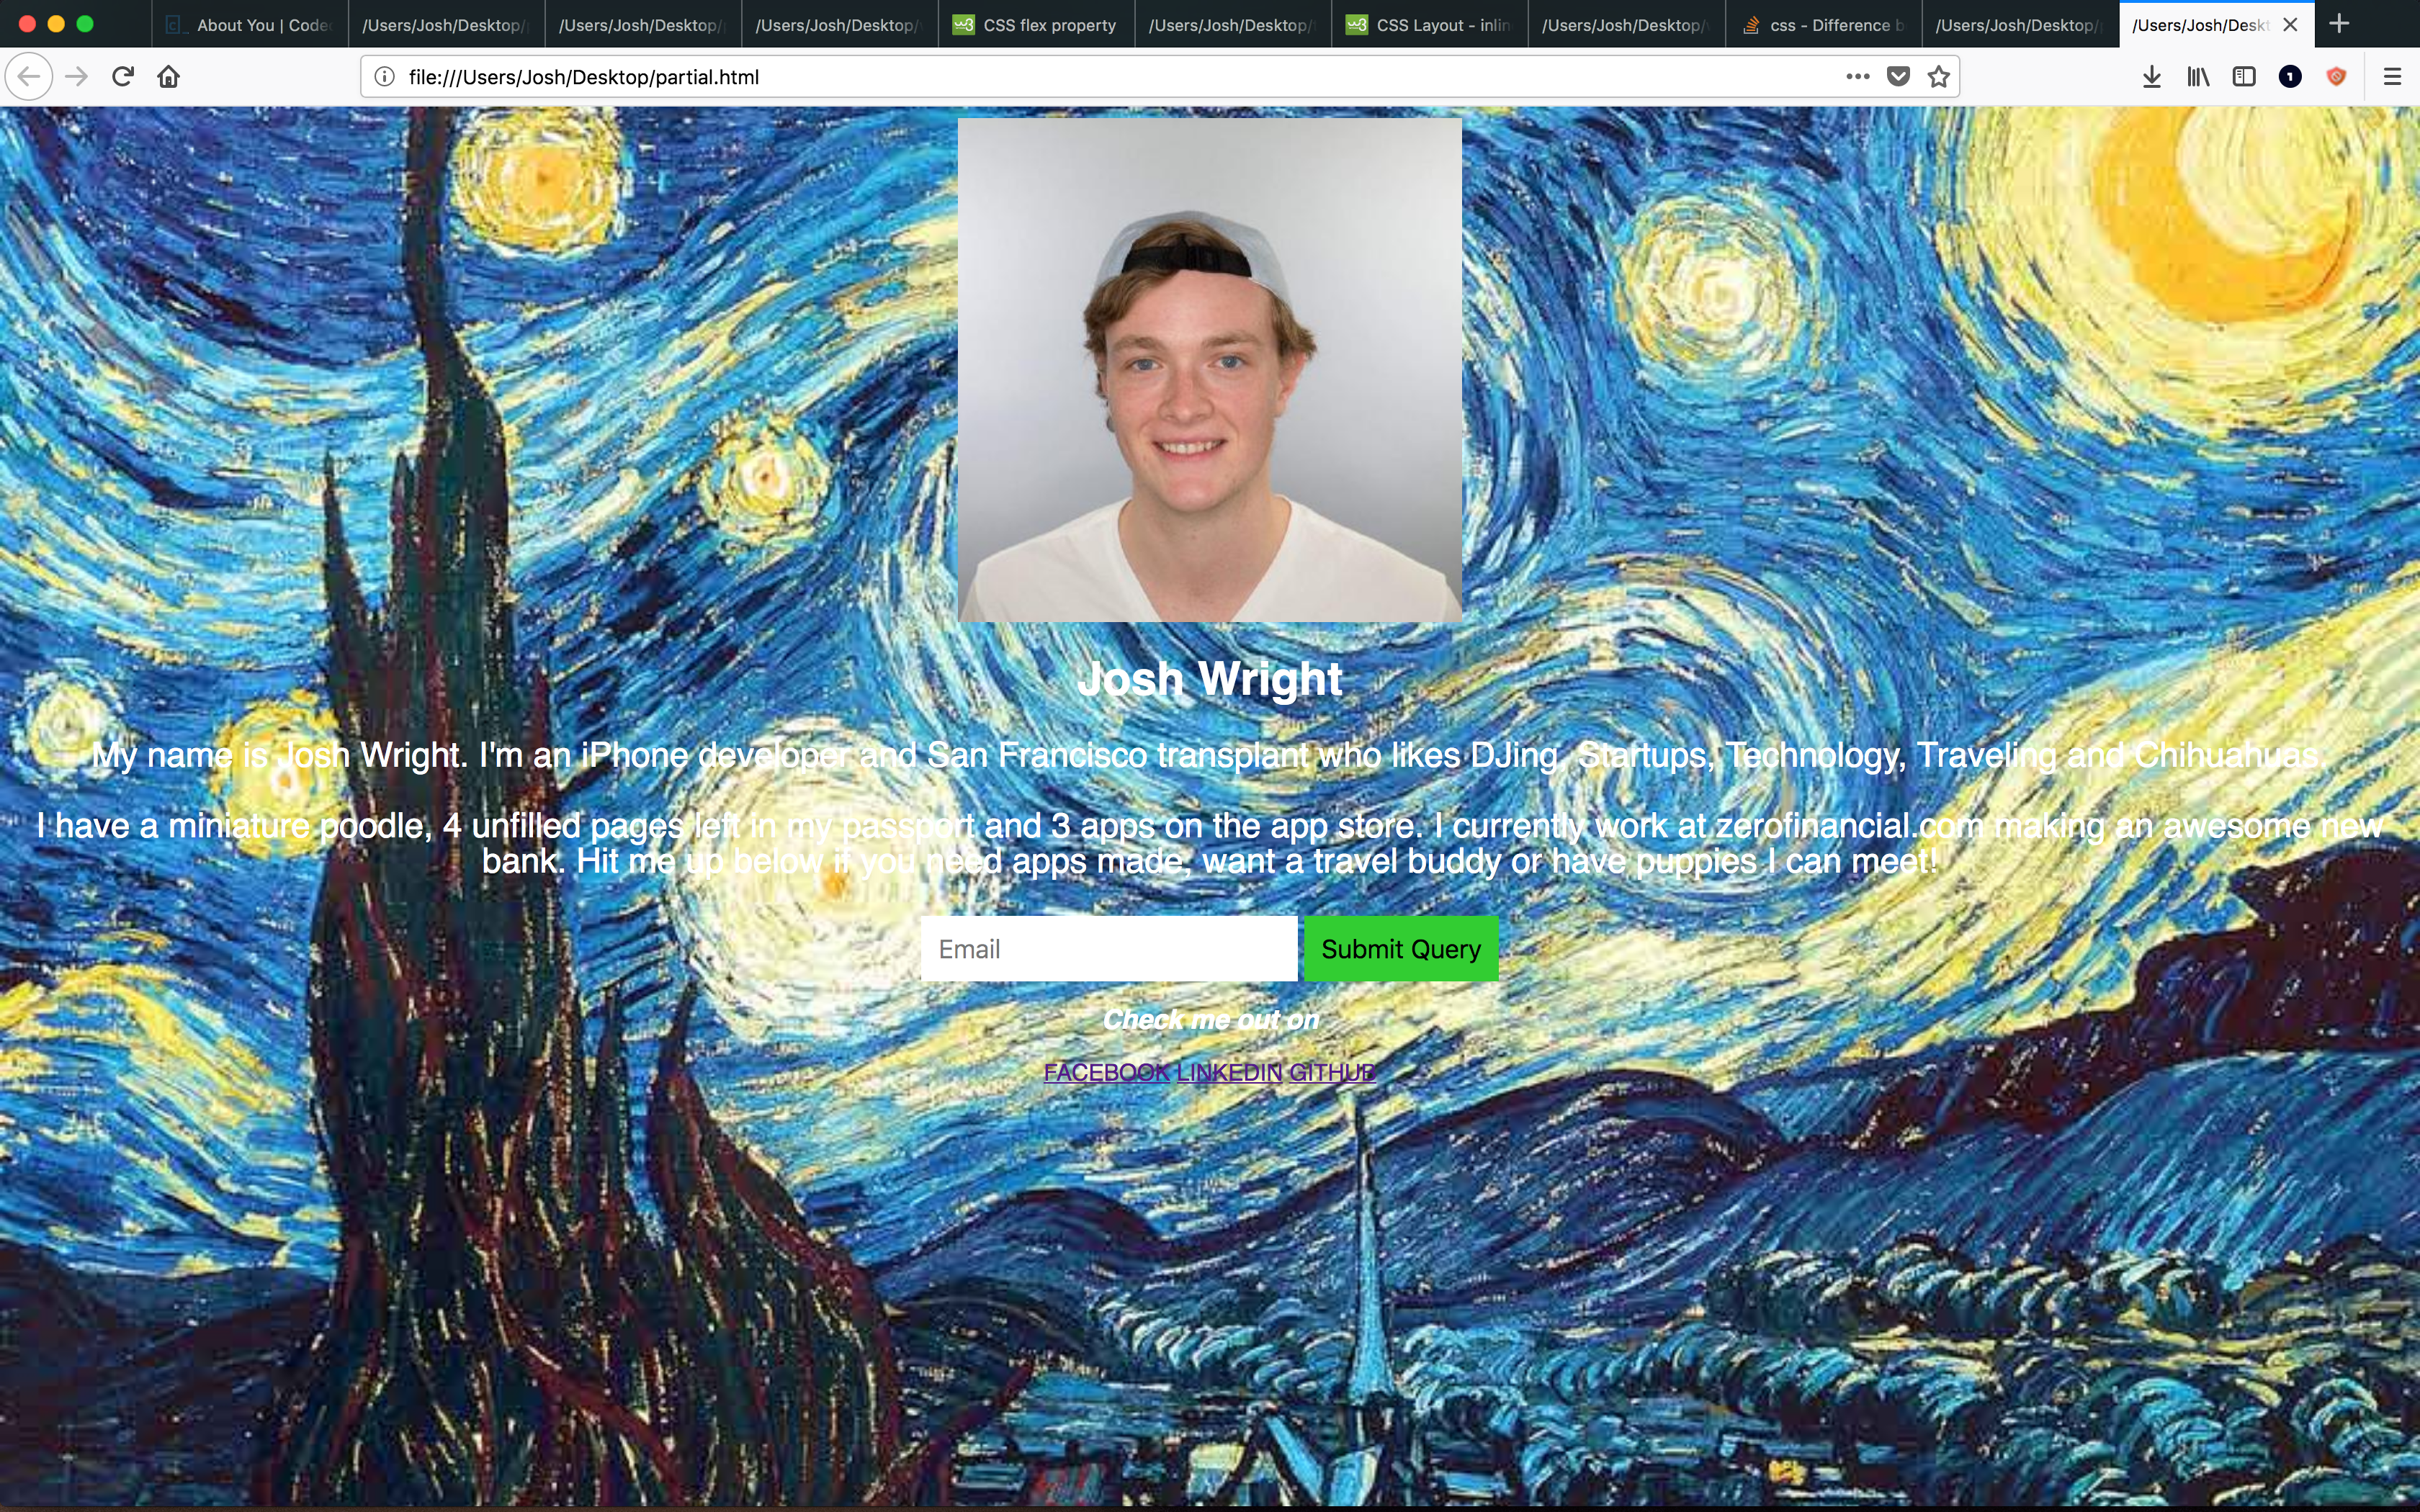
Alright, thats about every element in the second site from above. We're done, right? Save this file and open it up in the web browser...
Well, we can see the new elements, but they are pretty much unreadable and look pretty lousy. In the next section we will clean style everything to look nice with CSS.
By the way, your index.html should look something like this right now.
2c. Styling with CSS
Note: CSS can be a little tricky/unintuitive at first, so if you don't understand everything in this next section that's okay! Just do your best to follow along and see if you can figure out whats going on.
First things first lets kill the background image. Nothing against Van Gough, but its a little much. Lets set it to a solid color as well as remove some unnecessary features. Also change the colors and fonts of the p and h1 elements:
Replace the body and p styles with the following:
<head>
    <style>
        body {
            background: #ecf0f1;
            color: #34495e;
            font-family: Helvetica;
        }

        h1 {
            font-size: 40pt;
        }

        p {
            font-size: 18pt;
            /* an 'em' refers to the height of one character in the text's font*/
            line-height: 1.5em;
        }
        ...
    </style>
</head>

<body>
    ...
</body>Note: CSS uses hex to describe colors. This is a special way of defining a color using a # folowed by 6 letters and numbers. Just not that if you see something like #17afb4 that's just a color.
Lets start by getting the info section looking good. Before writing any style (CSS) lets make one more html change. The info section can really be divided into two sections, left (image) and right (name and description) so lets wrap that content in <div> tags and give those a class of .infoLeft and .infoRight.
...
<body>
    <div class="info">
        <div class="infoLeft">
            <img src="https://avatars1.githubusercontent.com/u/6025554?s=400&u=4e2f99146f3c0bd66c59bdb0ae66480c80a58758&v=4" height="350" width="350">
        </div>
        <div class="infoRight">
            <h1>Josh Wright</h1>
            <p>
                My name is Josh Wright. I'm an iPhone developer and San Francisco transplant who likes DJing, Startups, Technology, Traveling and Chihuahuas.
                <br/><br/>
                I have a miniature poodle, 4 unfilled pages left in my passport and 3 apps on the app store. I currently work at zerofinancial.com making an awesome new bank. Hit me up below if you need apps made, want a travel buddy or have puppies I can meet!
            </p>
        </div>
    </div>
    ...
</body>
CSS has a useful tool called flex that lets you define a container with the display: flex property. Any elements inside this container will now layout proportially based on their own flex property. For example, if we have 2 elements inside a container with flex and element a has flex: 1 while element b has flex: 2, element b will be twice the size of a.
We can use this concept in our info section. Add the following inside your style tags:
<head>
    <style>

        ...

        .info {
            display: flex;  /* 1. */
            margin: 0 auto; /* 2. */
            width: 1330px;  /* 3. */
        }

        .infoLeft {
            flex: 2; /* 4. */
            padding-right: 50px; /* 5. */
        }

        .infoRight {
            flex: 3; /* 4. */
            margin: auto; /* 6. */
        }
        ...
    </style>
</head>
Heres what we did:
-
Set the container to flex
-
Set the container to have a margin (like padding) of 0 on the top/bottom and 'auto' on the left and right (auto means it centers itself). Padding is the space between the content of an element and its edge, whereas margin is the space outside the edge.
Note margin can take 1, 2 or 4 arguments. The syntax is as follows: margin: 4; All (top bottom left right) margins will be 4 margin: 4 8; top/bottom margins will be 4, left/right will be 8 margin: 1, 2, auto, 4; top = 1, right = 2, bottom = auto, left = 4
-
Set the width of the info section to 1330 pixels. This is not a magic number just a size that looked good (most screens are 1920 pixels wide so this gives some nice whitespace on the side).
-
Set the flex values of the two info sub-elements (they will fill their container with a 2:3 ratio infoLeft : infoRight)
-
add some right padding to the infoLeft class (the image)
-
Set all margins of infoRight to 'auto' meaning that the text on the right centers itself nicely.
Save the file and refresh the browser and... it looks... better. Not quite there but getting less painful.
One thing that could be cleaned up is the image; right now it's in an awkward position off to the side.
Clean it up by adding the following:
img {
    display: block;     /* 1 */
    margin-right: 0 0 0 auto; /* 1 */
    border-radius: 50%; /* 2 */
    padding: 100px 0;   /* 3 */
}-
By setting the right margin to
autoand all others to 0 causes the image to hug whatever is to its right (the text).display: blockis needed for this behavior to occur. -
This clips the corners of the image with a radius of 50% of its height (aka makes it a circle)
-
paddinghas the same 1, 2, 4 value syntax asmarginso this adds padding of 100 pixels to the top and bottom of the image.
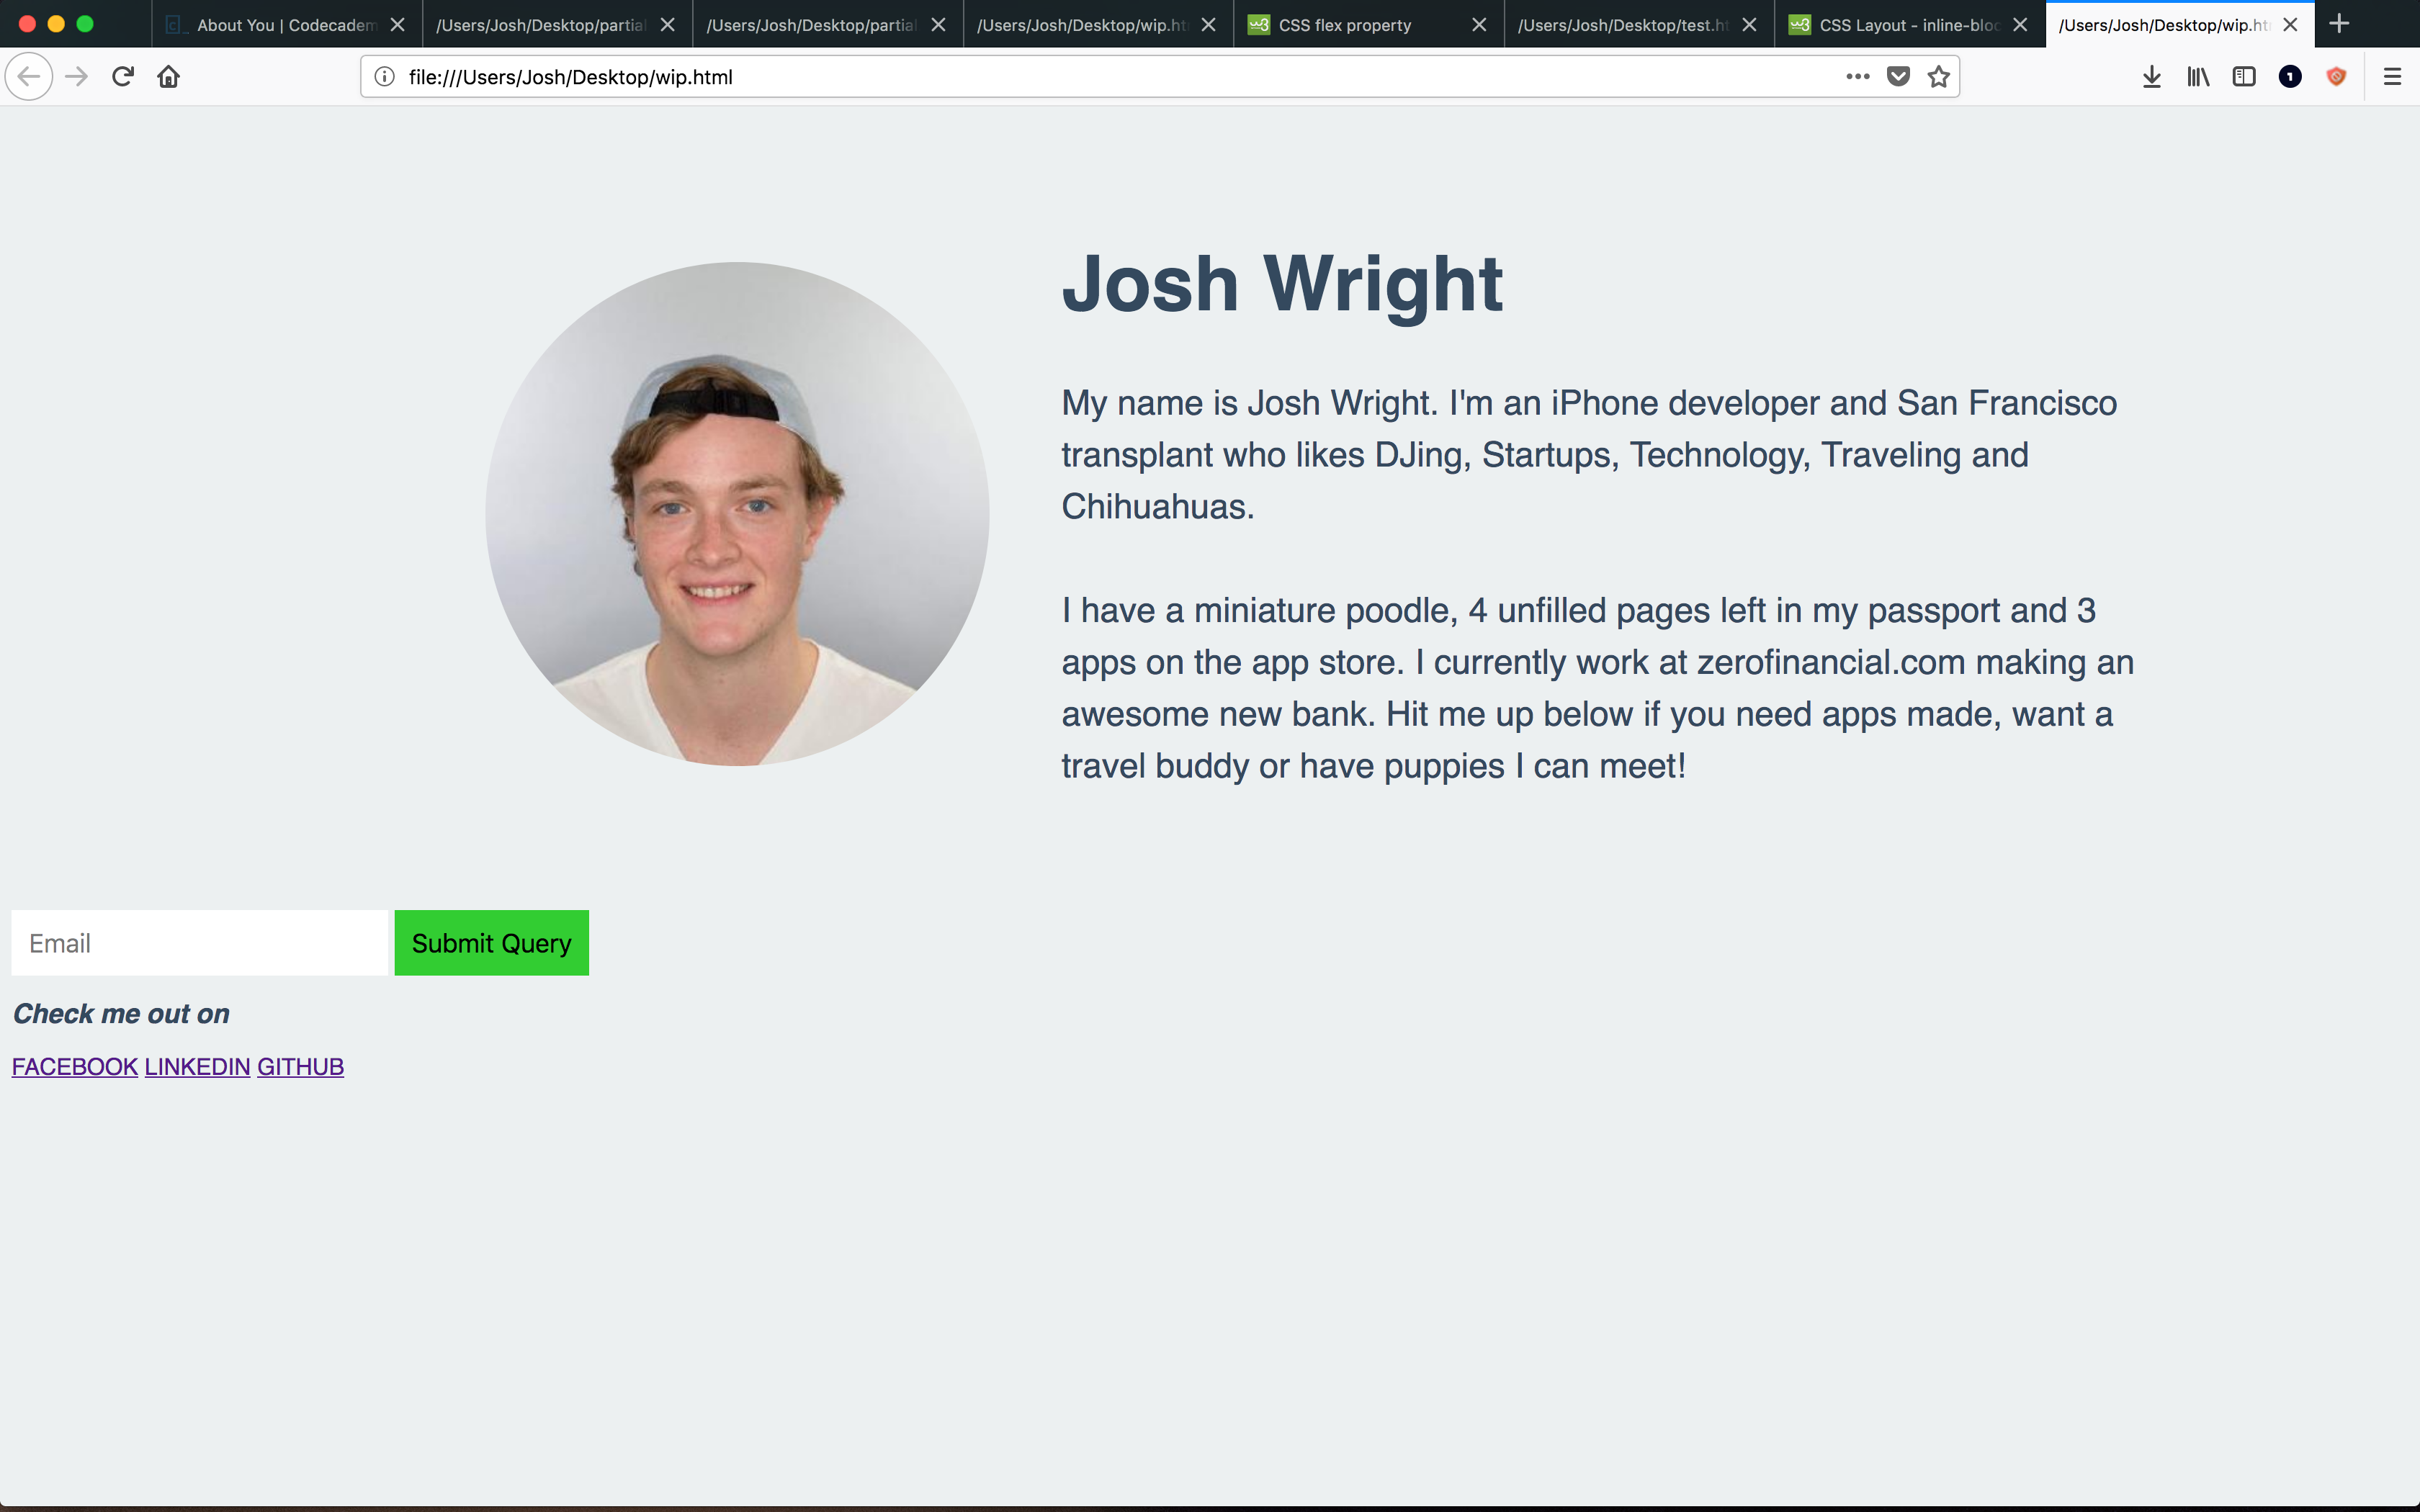
Save, refresh browser and voila! You're site should look something like this at this point:
Not bad!
Now lets clean up the input section. Nothing crazy going on here, we're just adding a corner radius to elements and changing a few colors, fonts, and margins.
Replace all input CSS with the following:
input {
    border: 0;
    padding: 12px;
    margin: 0px 5px;
    font-size: 18px;
    border-radius: 4px;
}

input[type="submit"] {
    background: #2ecc71;
    color: #ecf0f1;
}

.input {
    margin: 10px;
    text-align: center;
    padding: 0 0 60px 0;
}
Hopefully nothing here looks too crazy. We tweak the font sizes and colors of the input elements. We also center the elements on the screen using text-align: center. Note the difference here between input and .input. input refers to any HTML <input> elements. .input refers to the custom "input" class we defined in the HTML (<div class="input">).
Looking good! Last step is to make those links at the bottom look nice. We can center them all by using text-align: center; on the links container.
.links {
    text-align: center;
}
Last step is to make the link buttons themselves look nice. We can get those rounded blue buttons from above by adding the following styles to the .link class:
.link {
    background: #2980b9;
    line-height: 60px;     /* 1 */
    font-size: 12pt;
    width: 150px;
    display: inline-block;  /* 2 */
    margin: 5px 10px;
    color: #ecf0f1;
    border-radius: 5px;
    text-decoration: none; /* 3 */
}
The only things here you haven't seen are:
-
line-height: 60px;: this is used to set the height of the button while keeping the text inside it centered vertically (if the plain old height property was used here the link text would stick to the bottom of the button). -
display: inline-block;: required for the link to expand to fit theline-heightandwidthwe gave it. CSS is weird. -
Clear the underline that links have by default.
And thats it! Save, refresh the browser and you should have your very own shiny website. Nice work!
If you got lost at all along the way and missed a couple of steps the final version of what the site should look like is here.
3: Uploading to the Internet
For this next part you will need to create a free account on GitHub.com. Once you do that, follow the steps to upload a site to GitHub pages to upload your site to the Internet. GitHub is an online host of 'repositories' which are essentially folders of files with code. To view your site via GitHub pages you essentially need to create a repository with a special name and add your website file to it. The link above should describe that in more detail but feel free to ask me for help if you get stuck!
4: BONUS fortune telling with JavaScript
Lets add one more feature to your brand new site. The magic 8 ball is a toy that gives random answers to yes or no questions. The User asks it a question about their future, shakes it and a random answer is chosen out of 20 possibilities. While not exactly a scientifically proven method of telling the future, it's entertaining and perfect for a small coding activity.
In this step we'll reconfigure the input section of our site to take some input in the text field, and when the user hits the button, the website will display a popup with a randomly selected item from a list of possible answers.
The first thing we need to do is add some JavaScript to do this. While CSS and HTML are used for telling the website what to display, JavaScript is used for "doing stuff" and responding to user input. JavaScript is a programming language.
Like CSS needs to be written in <style> ... </style> tags, JavaScript needs to be written in <script> ... </script> tags. Go ahead and add those in after your style but before the closing </head> tag.
<head>
    <style>
        ...
    </style>
    <script type="text/javascript">

    </script>
</head>
Inside this script, we are going to write a function which is a block of code that we can run from our html, when the button is hit.
Inside the script tags add:
<head>
    <style>
        ...
    </style>
    <script type="text/javascript">
        function predictFuture() {
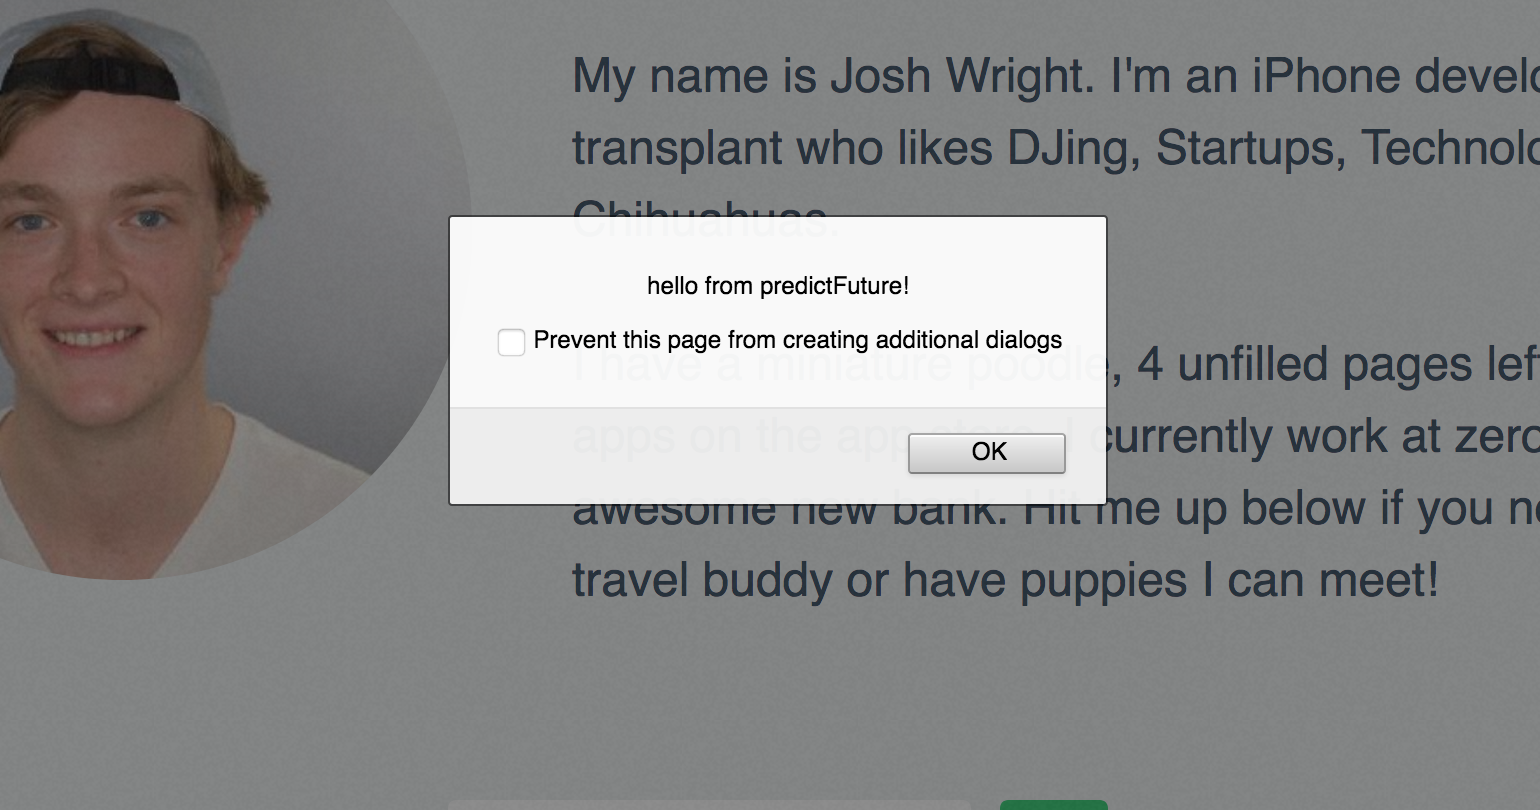
            alert("hello from predictFuture!")
        }
    </script>
</head>
This adds a function predictFuture which we can then run from our html. When called, the function does whatever is inside its curly braces ({ }) which in this case is a simple command: alert() which displays an alert with text. Note that in JavaScript all text must be surrounded by " ". A text inside quotation marks is called a 'String'.
Okay, so now we need to call this fucntion when the user presses a button.
Go ahead and add a little more html to the input section of your site. Alter the text and wrap the two input elements in a <form> tag with specific attributes like so:
...
<div class="input">
    <form action="javascript:predictFuture()">
        <input placeholder="Ask me about your future" type="text">
        <input value="Ask" type="submit">
    </form>
</div>
...
By wrapping the input in a <form> ... </form> with the attribute action="javascript:predictFuture()", we are telling the html to call our predictFuture function when whatever is inside the form submits (in this case when the user hits the "Ask" button).
Save, refresh your browser, and you should see the following when you hit the "Ask" button:
Cool! Now to add the fortune telling part. To feign some mystical knowledge of the future what we are going to do is make a list of preselected answers and pick one of them at random to display in the alert, instead of "hello from predictFuture".
Inside your script tag add the following:
...
<script type="text/javascript">

    var answers = ["It is certain",
                "It is decidedly so",
                "Without a doubt",
                "Yes definitely",
                "You may rely on it",
                "As I see it, yes",
                "Most likely",
                "Outlook good",
                "Yes",
                "Signs point to yes",
                "Reply hazy try again",
                "Ask again later",
                "Better not tell you now",
                "Cannot predict now",
                "Concentrate and ask again",
                "Don't count on it",
                "My reply is no",
                "My sources say no",
                "Outlook not so good",
                "Very doubtful"]

    function predictFuture() {
        alert("hello from predictFuture!")
    }
</script>
...
A var is a variable. A variable is an object that has some information in it that can be referred to later. They can hold text, numbers, or lists of things. What we've done here is create a variable named answers that contains a big list of the 20 potential answers of the original magic 8 ball. So our variable answers is a list of 20 pieces of text.
Our goal is to randomly get one of them in the predictFuture() function and display it to the user. In JavaScript, to get a specific item out of a list such as answers, you use the syntax answer[indexOfTheItem] where index is a number of the item you want to get. To get the first item ("It is certain") we would call answers[0] (note that all counting in programming starts at 0). To get the second item, answers[1], third answers[2], etc.
We don't want a specific number though, we want a random number... in this case between 0 - 19 to represent the 1st - 20th items.
In javascript you can get a random number between 0 and a number by using the following code: Math.floor(Math.random() * 100) (in this case between 0 and 99). We'll use this to pick a random answer from our array.
For the final step, add the following to your script tag:
<script type="text/javascript">

    var answers = [...]

    function predictFuture() {
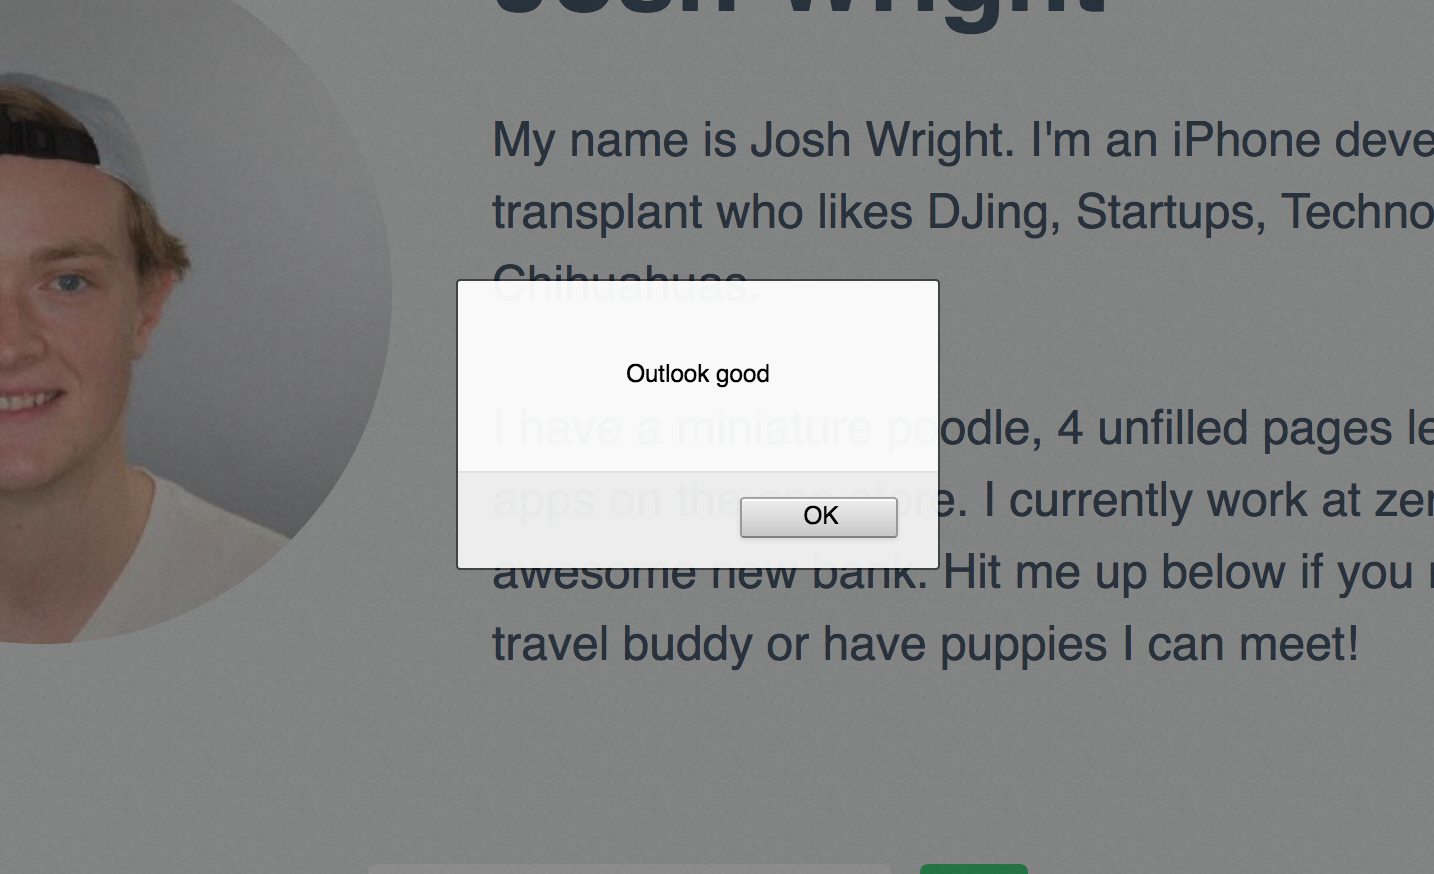
        var response = answers[Math.floor(Math.random() * 20)]
        alert(response)
    }
</script>
This creates a new variable called response every time predictFuture is run. This variable holds a string (piece of text) because we used our random number code to pick a random between 0-19 and then extract that number element from the list of answers.
Save, refresh, hit the button and...
Congratulations! You've just put your first JavaScript program inside your first website.
Save your file and upload to GitHub Pages to make it live.
All Done!
Thanks for sticking through! I hope you enjoyed it and learned a little about programming. If you're interested in learning even more about programming, hit me up at josh@zerofinancial.com and we should chat. You can also check out free learn-to-code websites like Codeacademy or RayWenderlich if you're interested in making mobile apps.
