![]()
![]()


An easy to use blogging platform, with support for Jupyter notebooks, Word docs, and Markdown.

fastpages uses GitHub Actions to simplify the process of creating Jekyll blog posts on GitHub Pages from a variety of input formats.
- Create posts containing code, outputs of code (which can be interactive), formatted text, etc directly from Jupyter Notebooks; Notebook posts support features such as:
- Support for comments, supported natively through GitHub Issues.
- Built-in search.
- Support for customizing the styling of your site.
- Embed Twitter cards and YouTube videos.
- Categorization of blog posts by user-supplied tags for discoverability.
- Create and edit Markdown posts.
- Create posts, including formatting and images, directly from Microsoft Word documents.
- Write posts on your local machine and preview them with live reload.
See below for a more detailed list of features.
- Welcome To
fastpages - Running the blog on your local machine
- Using The GitHub Action & Your Own Custom Blog
- Contributing To Fastpages
- Upgrading Fastpages
- FAQ
- Customizing Fastpages
- Troubleshooting fastpages
-
Generate a copy of this repo by clicking on this link. Name your repo anything you like except {your-username}.github.io.
-
GitHub Actions will automatically open a PR on your new repository ~ 30 seconds after the copy is created. Follow the instructions in that PR to continue.
For a live walk-through of the setup steps (with some additional tips) see this video tutorial of setting up a fastpages blog by Abdul Majed.
Front matter allows you to toggle various options on/off for each blog post, as well as pass metadata to various features of fastpages.
In a notebook, front matter is defined as a markdown cell at the beginning of the notebook with the following contents:
# "Title"
> "Awesome summary"

- toc: false
- branch: master
- badges: true
- comments: true
- categories: [fastpages, jupyter]
- image: images/some_folder/your_image.png
- hide: false
- search_exclude: true
- metadata_key1: metadata_value1
- metadata_key2: metadata_value2
Similarly, in a markdown document the same front matter would be defined like this at the beginning of the document:
---
title: "My Title"
description: "Awesome description"
layout: post
toc: false
comments: true
image: images/some_folder/your_image.png
hide: false
search_exclude: true
categories: [fastpages, jupyter]
metadata_key1: metadata_value1
metadata_key2: metadata_value2
---
Additional metadata is optional and allows you to set custom front matter.
Note that anything defined in front matter must be valid YAML. Failure to provide valid YAML could result in your page not rendering in your blog. For example, if you want a colon in your title you must escape it with double quotes like this:
- title: "Deep learning: A tutorial"
See this tutorial on YAML for more information.
- Replace
Title, with your desired title, andAwesome summarywith your desired summary.
Note: It is recommended to enclose these values in double quotes, so that you can escape colons and other characters that may break the YAML parser.
fast_templatewill automatically generate a table of contents for you based on markdown headers! You can toggle this feature on or off by settingtoc:to eithertrueorfalse.
This option works for notebooks only
- The
branchfield is used to optionally render a link your notebook to Colab and GitHub in your blog post post. It'll default tomasterif you don't specify it in the notebook. - If you do not want to show Colab / GitHub badges on your blog post (perhaps because your repo is private and the links would be broken) set
badgestofalse. This defaults totrue - By default, when you omit this parameter from your front matter, or you set
badges: true, all three badges (GitHub, Binder, Colab) will appear by default. You can adjust these defaults in with thedefault_badgesparameter in Site Wide Configuration Options.-
If only want to hide a badge on an individual post, you can set the front matter
hide_{github,colab,binder}_badge: true. For example, if you wanted to hide the Binder badge for an individual notebook but you want the other badges to show up, you can set this in your front matter:- badges: true - hide_binder_badge: true
-
- Note about Binder: Binder allows you to customize the dependencies and other aspects of the Jupyter Notebook environment for your readers. The easiest way is to add a
requirements.txtfile with common packages you use for all your notebooks at the root of your repository, you can learn more on the official Binder docs.
-
You can have a comma seperated list inside square brackets of categories for a blog post, which will make the post visible on the tags page of your blog's site. For example:
In a notebook:
# "My Title"
- categories: [fastpages, jupyter]
In a markdown document:
---
title: "My Title"
categories: [fastpages, jupyter]
---
You can see a preview of what this looks like here.
- You can toggle the display of tags on/off by setting
show_tagstotrueorfalsein_config.yml:
# Set this to true to display tags on each post
show_tags: trueBlog posting is powered by Utterances, an open-source and ad-free way of implementing comments. All comments are stored in issues on your blog's GitHub repo. You can turn this on setting comments to true. This defaults to false.
To enable comments with Utterances you will need to do the following:
- Make sure the repo is public, otherwise your readers will not be able to view the issues/comments.
- Make sure the utterances app is installed on the repo, otherwise users will not be able to post comments.
- If your repo is a fork, navigate to it's settings tab and confirm the issues feature is turned on.
On social media sites like Twitter, an image preview can be automatically shown with your URL. Specifying the front matter image provides this metadata to social media sites to render this image for you. You can set this value as follows:
- image: images/diagram.png
Note: for this setting you can only reference image files and folders in the /images folder of your repo.
You may want to prevent a blog post from being listed on the home page, but still have a public url that you can preview or share discreetly. You can hide a blog post from the home page by setting the front matter hide to true. This is set to false by default.
It is recommended that you use permalinks in order to generate a predictable url for hidden blog posts. You can also set the front matter search_exclude to false if you don't want users to find your hidden post in a search.
By default, posts are sorted by date on your homepage. However, you may want one or more blog posts to always appear at the very top of your homepage. In other words, you may want certain posts to be "pinned" or "sticky". To accomplish this, specify the sticky_rank front matter in the order you would like your sticky posts to appear. Blog posts that do not set this parameter are sorted in the default way by date after the sticky posts.
For example, consider these three markdown posts (also works for notebooks).
2020-01-01-Post-One.md
---
title: Post One
sticky_rank: 1
---
2020-02-01-Post-Two.md
---
title: Post Two
sticky_rank: 2
---
2020-04-01-Post-Three.md
---
title: Post Three
---
However, since sticky_rank is specified, blog posts will first be sorted by sticky_rank in ascending order, then by date in descending order, so the order of these posts will appear like so:
- Post One
- Post Two
- Post Three
Without sticky_rank the above posts would actually be sorted in reverse order due to the dates associated with each post.
Note: pinning also works for notebooks:
# "My cool blog post"
> "Description of blog post"

- sticky_rank: 2
fastpages comes with built in keyword search powered by lunr.js. You can prevent a blog post or page from appearing in search results by setting the front matter search_exclude to false. This is set to true by default.
It is recommended that everyone personalizes their blogging site by setting site-wide configration options. These options can be found in /_config.yml. Below is a description of various options that are available.
-
title: this is the title that appears on the upper left hand corner on the header of all your pages. -
description: this description will show up in various places when a preview for your site is generated (for example, on social media). -
github_username: this allows your site to display a link to your GitHub page in the footer. -
github_repo: this allows your site to render links back to your repository for various features such as links to GitHub and Colab for notebooks. -
url: This does not need to be changed unless you have a custom domain. Note: leave out the trailing / from this value. -
baseurl: See the comments in/_config.ymlfor instructions ( "Special Instructions for baseurl" on setting this value properly. If you do not have a custom domain, then you can likely ignore this option. -
email: this is currently unused. Ignore. -
twitter_username: creates a link in your footer to your twitter page. -
use_math: Set this totrueto get LaTeX math equation support. This is off by default as it otherwhise loads javascript into each page that may not be used. -
show_description: This shows a description under the title of your blog posts on your homepage that contains a list of your blog posts. Set totrueby default. -
google_analytics: Optionally use a Google Analytics ID for tracking if desired. -
show_image: If set to true, this uses theimageparameter in the front matter of your blog posts to render a preview of your blogs as shown below. This is set tofalseby default. When show_image is set totrueyour homepage will look like this: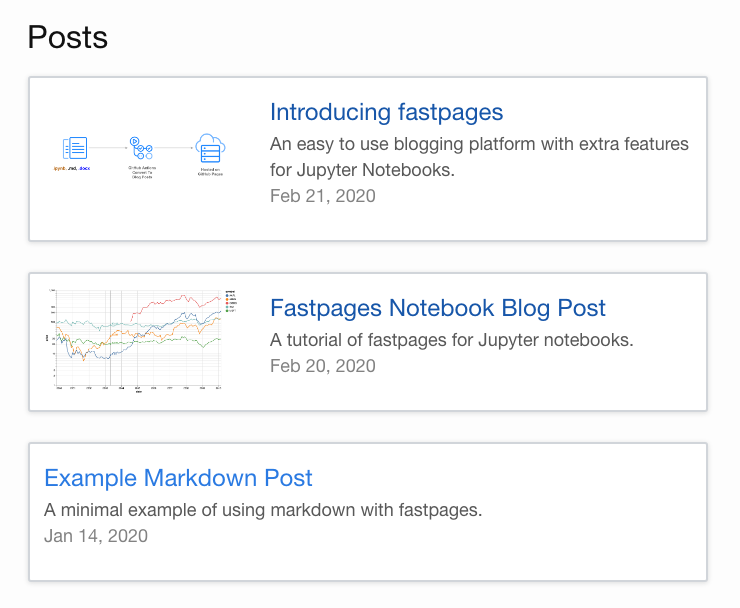
-
show_tags: You can toggle the display of tags on your blog posts on or off by setting this value tofalse. This is set totrueby default, which which renders the following links for tags on your blog posts like this:
-
pagination: This is the maximum number of posts to show on each page of your home page. Any posts exceeding this amount will be paginated onto another page. This is set to15by default. When this is triggered, you will see pagination at the bottom of your home page appear like this:
Note: if you are using an older version of fastpages, you cannot use the automated upgrade process to get pagination. Instead you must follow these steps:
- Rename your index.md file to index.html
mv index.md index.html
- Replace the
GemfileandGemfile.lockin the root of your repo with the files in this repo. - Edit your
_config.ymlas follows (look at _config.yml for an example):gems: - jekyll-paginate paginate: 10 paginate_path: /page:num/
Alternatively, you can copy all of your posts over to a newly created repository created from the fastpages template.
- Rename your index.md file to index.html
-
default_badges: By default GitHub, Binder, and Colab badges will show up on notebook blog posts. You can adjust these defaults by setting the appropriate value indefault_badgesto false. For example, if you wanted to turn Binder badges off by default, you would changedefault_badgesto this:default_badges: github: true binder: false colab: true
-
html_escape: this allows you to toggle escaping of HTML in various components of blog posts on or off. At this moment, you can only toggle this for thedescriptionfield in your posts.
This is set tofalseby default.


fastpages overrides the default syntax highlighting of minima with the Dracula theme.
-
The default highlighting in fastpages looks like this:

-
However, you can make the syntax highlighting to look like this, if you choose:

If you wish to revert to the light theme above, you can remove the below line in _sass/minima/custom-styles.scss
@import "minima/fastpages-dracula-highlight";
-
If you don't like either of these themes, you can add your own CSS in
_sass/minima/custom-styles.scss. See customizing fastpages for more details.


Place the comment #hide at the beginning of a code cell and it wil hide both the input and the output of that cell.
A #hide_input comment at the top of any cell will only hide the input.
Furthermore, the hide input Jupyter Extension can be used to hide cell inputs or outputs, which will be respected by fastpages.
You may want some code to be hidden in a collapsed element that the user can expand, rather than completely hiding the code from the reader.
- To include code in a collapsable cell that is collapsed by default, place the comment
#collapseat the top of the code cell. - To include code in a collapsable cell that is open by default, place the comment
#collapse_showor#collapse-showat the top of the code cell.
In a markdown cell in your notebook, use the following markdown shortcuts to embed Twitter cards and YouTube Videos.
> youtube: https://youtu.be/your-link
> twitter: https://twitter.com/some-link
Adding footnotes in notebooks is a bit different than markdown. Please the Detailed Guide To Footnotes in Notebooks.
-
Save your notebook with the naming convention
YYYY-MM-DD-*.into the/_notebooksor/_wordfolder of this repo, respectively. For example2020-01-28-My-First-Post.ipynb. This naming convention is required by Jekyll to render your blog post.-
Be careful to name your file correctly! It is easy to forget the last dash in
YYYY-MM-DD-. Furthermore, the character immediately following the dash should only be an alphabetical letter. Examples of valid filenames are:2020-01-28-My-First-Post.ipynb 2012-09-12-how-to-write-a-blog.ipynb
-
If you fail to name your file correctly,
fastpageswill automatically attempt to fix the problem by prepending the last modified date of your file to your generated blog post, however, it is recommended that you name your files properly yourself for more transparency.
-
-
Commit and push your file(s) to GitHub in your repository's master branch.
-
GitHub will automatically convert your files to blog posts. It will take ~5 minutes for the conversion process to take place. You can click on the Actions tab of your repo to view the logs of this process. There will be two workflows that are triggered with each push you make to your master branch: (1) "CI" and (2) "GH Pages Status". Both workflows must complete with a green checkmark for your latest commit before your site is updated.
-
If you wish, you can preview how your blog will look locally before commiting to GitHub. See this section for a detailed guide on running the preview locally.
If you are writing your blog post in markdown, save your .md file into the /_posts folder with the same naming convention (YYYY-MM-DD-*.md) specified for notebooks.
Save your Microsoft Word documents into the /_word folder with the same naming convention (YYYY-MM-DD-*.docx) specified for notebooks.
Note: alt text in Word documents are not yet supported by fastpages, and will break links to images.
fastpages does not have a robust way to specify front matter for Word documents. At the moment, you can only specify front matter globally for all Word documents by editing _action_files/word_front_matter.txt.
To specify unique front matter per Word document, you will need to convert Word to markdown files manually. You can follow the steps in this blog post, which walk you through how to use pandoc to do the conversion. Note: If you wish to customize your Word generated blog post in markdown, make sure you delete your Word document from the _word directory so your markdown file doesn’t get overwritten!
If your primary method of writing blog posts is Word documents, and you plan on always manually editing markdown files converted from Word, you are probably better off using fast_template instead of fastpages.
See the development guide.
The fastpages action allows you to convert notebooks from /_notebooks and word documents from /_word directories in your repo into Jekyll compliant blog post markdown files located in /_posts. Note: This directory structure is currently inflexible for this Action, as it is designed to be used with Jekyll.
If you already have sufficient familiarity with Jekyll and wish to use this automation in your own theme, you can use this GitHub Action by referencing fastai/fastpages@master as follows:
...

uses: fastai/fastpages@master

...
An illustrative example of what a complete workflow may look like:
jobs:
  build-site:
    runs-on: ubuntu-latest
    ...

    - name: convert notebooks and word docs to posts
      uses: fastai/fastpages@master

    ...

    - name: Jekyll build
      uses: docker://jekyll/jekyll
      with:
        args: jekyll build

    - name: Deploy
      uses: peaceiris/actions-gh-pages@v3
      if: github.event_name == 'push'
      with:
        deploy_key: ${{ secrets.SSH_DEPLOY_KEY }}
        publish_branch: gh-pages
        publish_dir: ./_site
Note that this Action does not have any required inputs, and has no output variables.
BOOL_SAVE_MARKDOWN: Either 'true' or 'false'. Whether or not to commit converted markdown files from notebooks and word documents into the _posts directory in your repo. This is useful for debugging. default: falseSSH_DEPLOY_KEY: a ssh deploy key is required if BOOL_SAVE_MARKDOWN = 'true'
See the API spec for this action in action.yml
Detailed instructions on how to customize this blog are beyond the scope of this README. ( We invite someone from the community to contribute a blog post on how to do this in this repo! )
Please see the contributing guide.
Please see the upgrading guide.
- Q: Where are the markdown files in
_posts/that are generated from my Jupyter notebooks or word documents? A: The GitHub Actions workflow in this repo converts your notebook and word documents to markdown on the fly before building your site, but never commits these intermediate markdown files to this repo. This is in order to save you from the annoyance of your local environment being constantly out of sync with your repository. You can optionally see these intermediate markdown files by setting theBOOL_SAVE_MARKDOWNandSSH_DEPLOY_KEYinputs to the fastpages action in your.github/workflows/ci.yamlfile as follows:
    ...

    - name: convert notebooks and word docs to posts
      uses: fastai/fastpages@master
      with:
        BOOL_SAVE_MARKDOWN: true
        SSH_DEPLOY_KEY: ${{ secrets.SSH_DEPLOY_KEY }}

...-
Q: Can I use
fastpagesfor Jekyll docs sites or for things that are not Jekyll blog posts? A: At the moment,fastpagesis a highly opinionated solution that works only for Jekyll blog posts. If you want to write documentation for your module or library with Jupyter notebooks, we suggest you use fastai/nbdev which is expressly built for this purpose. -
Q: What is the difference between fast_template and fastpages? Which one should I use? A: Because
fastpagesis more flexible and extensible, we recommend using it where possible.fast_templatemay be a better option for getting folks blogging who have no technical expertise at all, and will only be creating posts using Github's integrated online editor.
fastpages builds upon the minima theme. If you want to customize the styling or layout of fastpages, you can find instructions in minima's README. It is a good idea to read the full contents of the README to understand the directory structure. Furthermore, it is a good idea to have a basic understanding of Jekyll before customizing your theme. For those new to Jekyll, the official docs are a good place to start. Concretely, you can override css in fastpages in _sass/minima/custom-styles.scss.
If you choose to make customizations to fastpages It is possible that customizations you make could collide with current or future versions of fastpages and we recommend doing so only if you feel sufficiently comfortable with HTML and CSS.
Please see the troubleshooting guide.