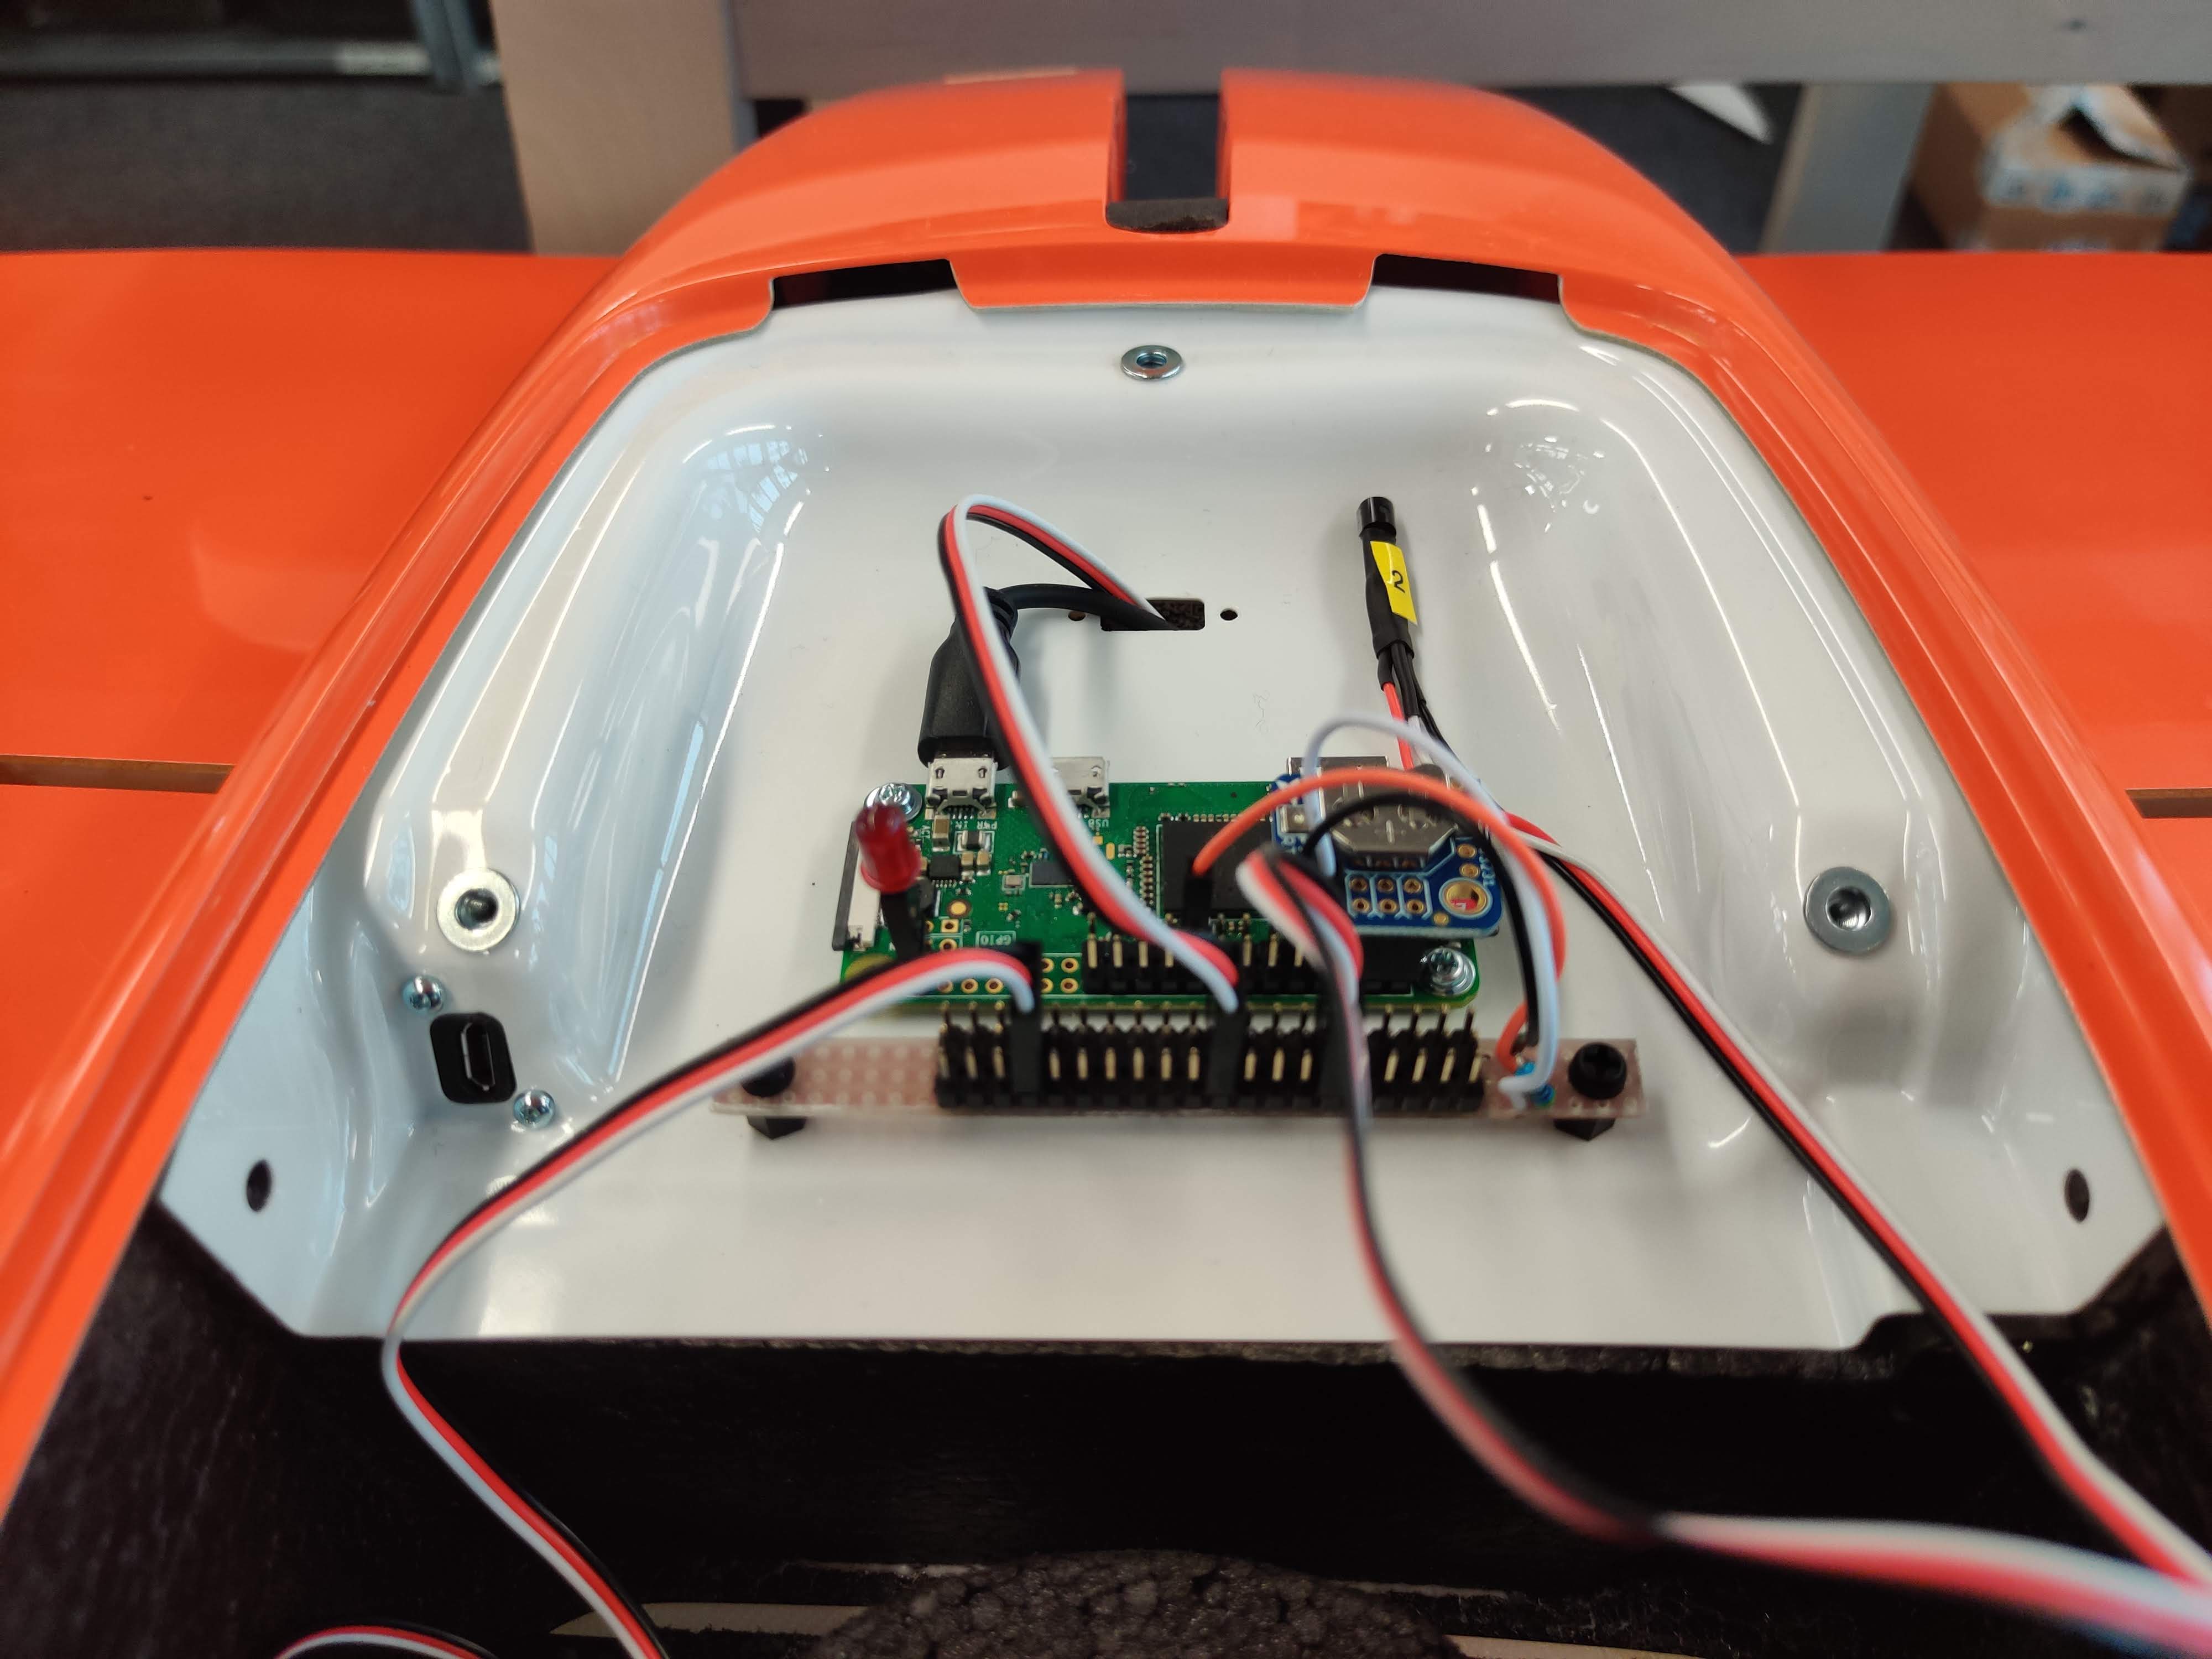
Data Acquisition (DAQ) for 1-wire temperature sensors like the digital sensor DS18S20 or the thermocouple adapter MAX31850K. The TempDAQ was developed as part of an internship at Wingtra by Jonas Lauener.
For any technical questions, please open an issue: https://github.com/jolau/TempDAQ/issues/new/choose
Copyright (c) 2020, Jonas Lauener & Wingtra AG
- Raspberry Pi
- Up to 20 sensor can be connected
- The number of connected sensors influences the sampling rate - with three sensors it takes around 1.03 seconds per reading of all sensors.
- DS18S20: The IC sensor also showed in the picture above:
- Measures Temperatures from -55°C to +125°C
- ±0.5°C Accuracy from -10°C to +85°C
- Resolution is 0.0625°C
- Features a status LED
Raspi VCC (3V3) Pin 1 -----------------------------   VCC    DS18B20
                                               |
                                               |
                                               R1 = 4k7 ...10k
                                               |
                                               |
Raspi GPIO 4    Pin 7 -----------------------------   Data   DS18B20


Raspi GND       Pin 6 -----------------------------   GND    DS18B20
In case you want to setup your own TempDAQ on a Raspberry Pi:
- Enable 1-Wire support as described here: https://learn.adafruit.com/adafruits-raspberry-pi-lesson-11-ds18b20-temperature-sensing/ds18b20
- Run:
pip3 install -r requirements.txt
Make sure that you have enabled 1-Wire.
- Edit temp_daq.py and temp_daq_config.yaml paths in temp_daq.service file to your own needs
sudo systemctl enable [full path to temp_daq.service file]
This automatically links the service and enables it. Replaceenablewithdisableto disable service.
Start with python3 temp_daq.py [full path to temp_daq_config.yaml]
Important: you need to reboot the Raspberry Pi if you replug sensors!
The app logs all connected sensors, but if the sensor id is added to the config file, the configured name will be used for logging.
- Plug in exclusively the sensor you want to identify
- The bash command
w1thermsensor lslists the HWID and Type of the sensor - Enter the HWID in the temp_daq_config.yaml
If the status led is enabled in config, it will glow when running:
- Constant glow: app is started, but not yet fully initialized
- Slow blinking (on time=1s, off time=1s): app is running normally, waiting for next acquisition
- Fast blinking (on time=0.1s, off time=0.1s): temperature acquisition is happening
Short primer on syntax of yaml: https://learnxinyminutes.com/docs/yaml/
storage_directory: "/home/pi/Documents/temp_daq/" # directory where to put output csv files
interval: 10 # log temperature every [x] seconds. If a read-out takes longer as the interval time, the next read-out will be skipped.
status_led: true # enable/disable status led, blinks every time a vibration file is written
status_led_pin: 21  # only read if status_led == true
sensors:
  - name: sensor1 # name of sensor which is used for the output csv
    id: 00000c43b797 # id of sensor
  - name: sensor2
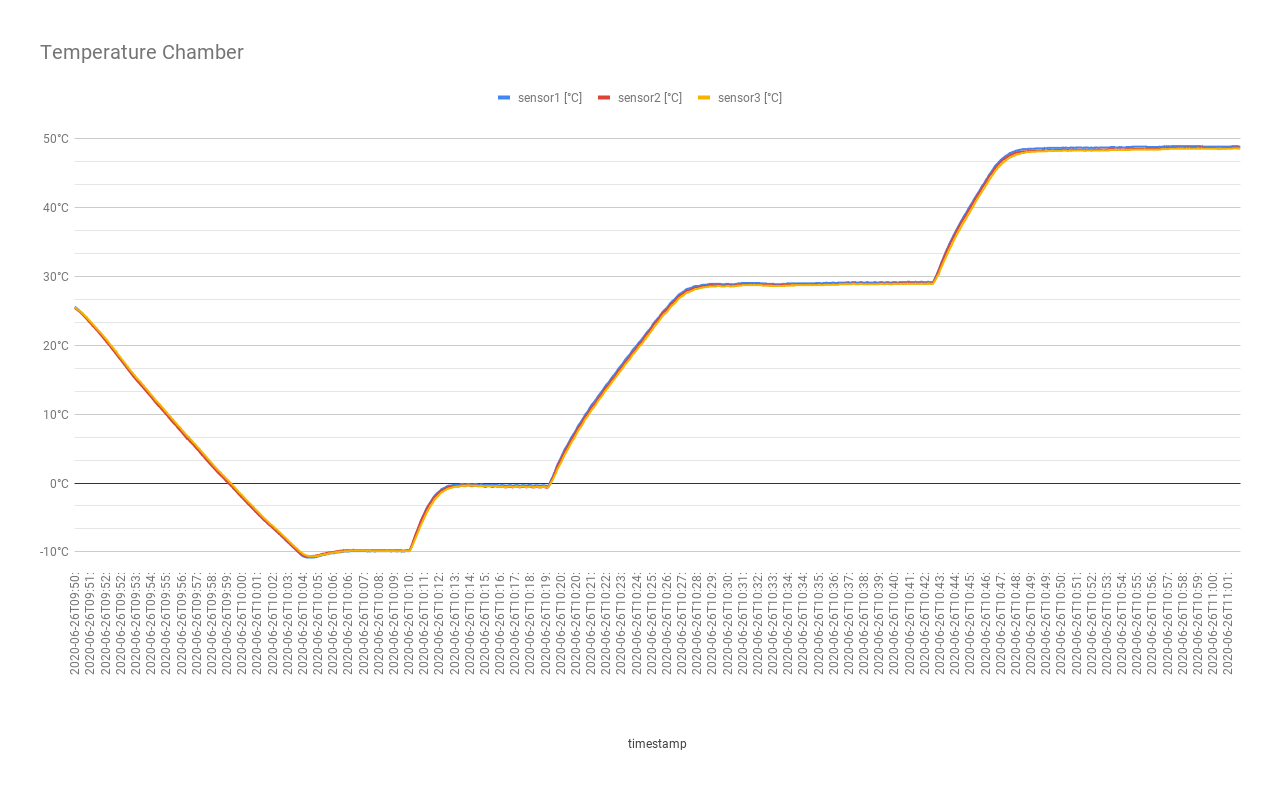
id: 00000c43ed7dTo see how accurate the sensors are, I've put them in the temperature chamber. The chamber did the temperatures -10°C, 0°C, 30°C and 50°C.


