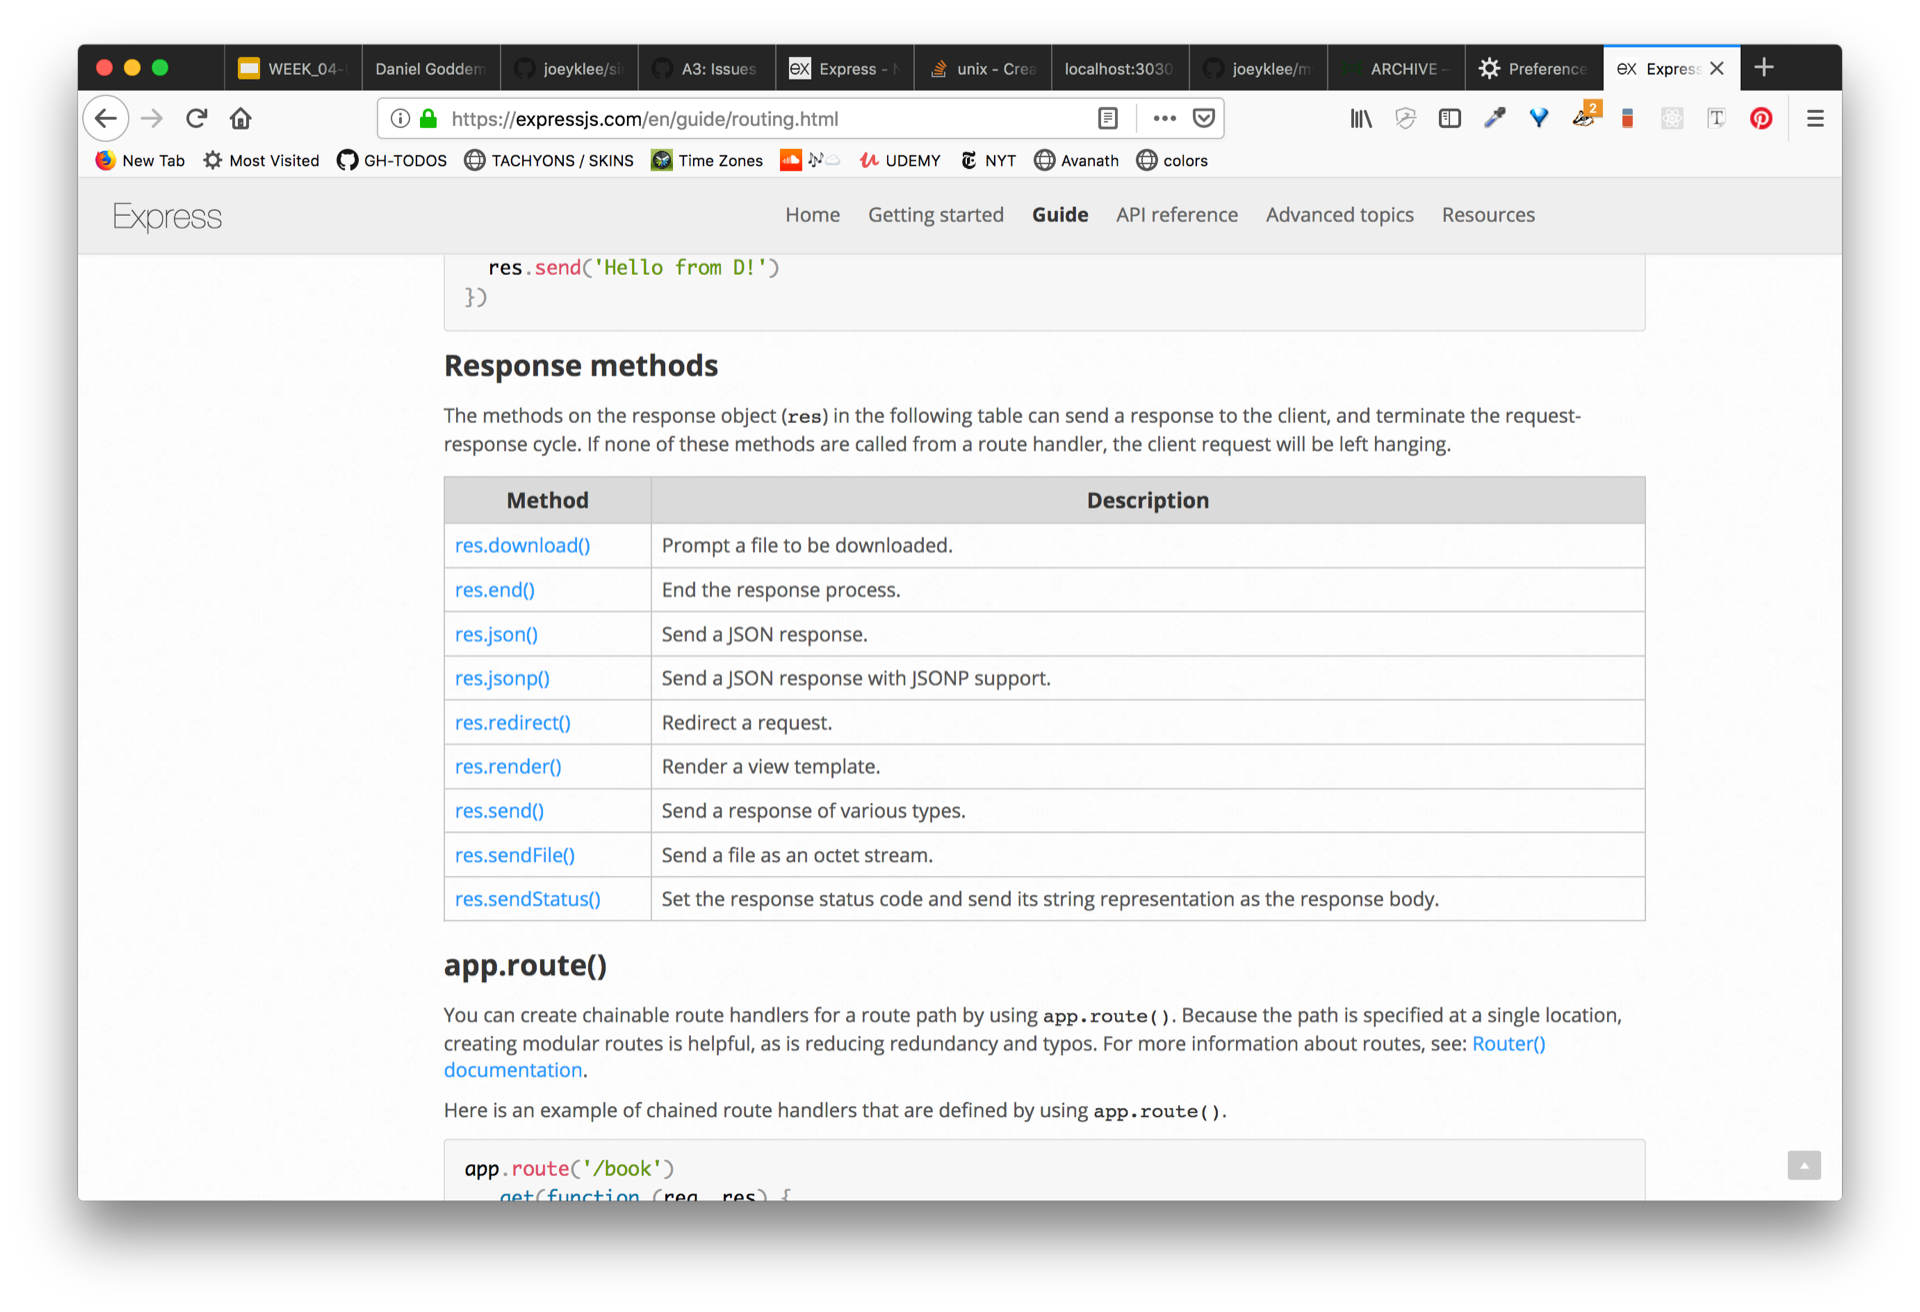
simple api with node.js & express.js for ITP Quant Humanists course
There are a zillion ways to make we applications.
(more desciption)
We're going to make a simple web application from scratch using node.js and express.js that allows us to really understand how client-server side interactions look like when you boil them down to their most basic form (or the best that I can think of).
The goal is to:
- create a server that uses node.js and express to satisfy CREATE, READ, UPDATE, and DELETE on a persistent database - in this case we use NEDB which is a noSQL structure database that is pretty much mongodb but lives in a flat text file (great for prototyping!).
- interact with this server using postman a API testing tool - it's lovely!
- interact with this server on the client side with a simple p5.js sketch.
NOTE: this assumes you have node.js installed on your machine.
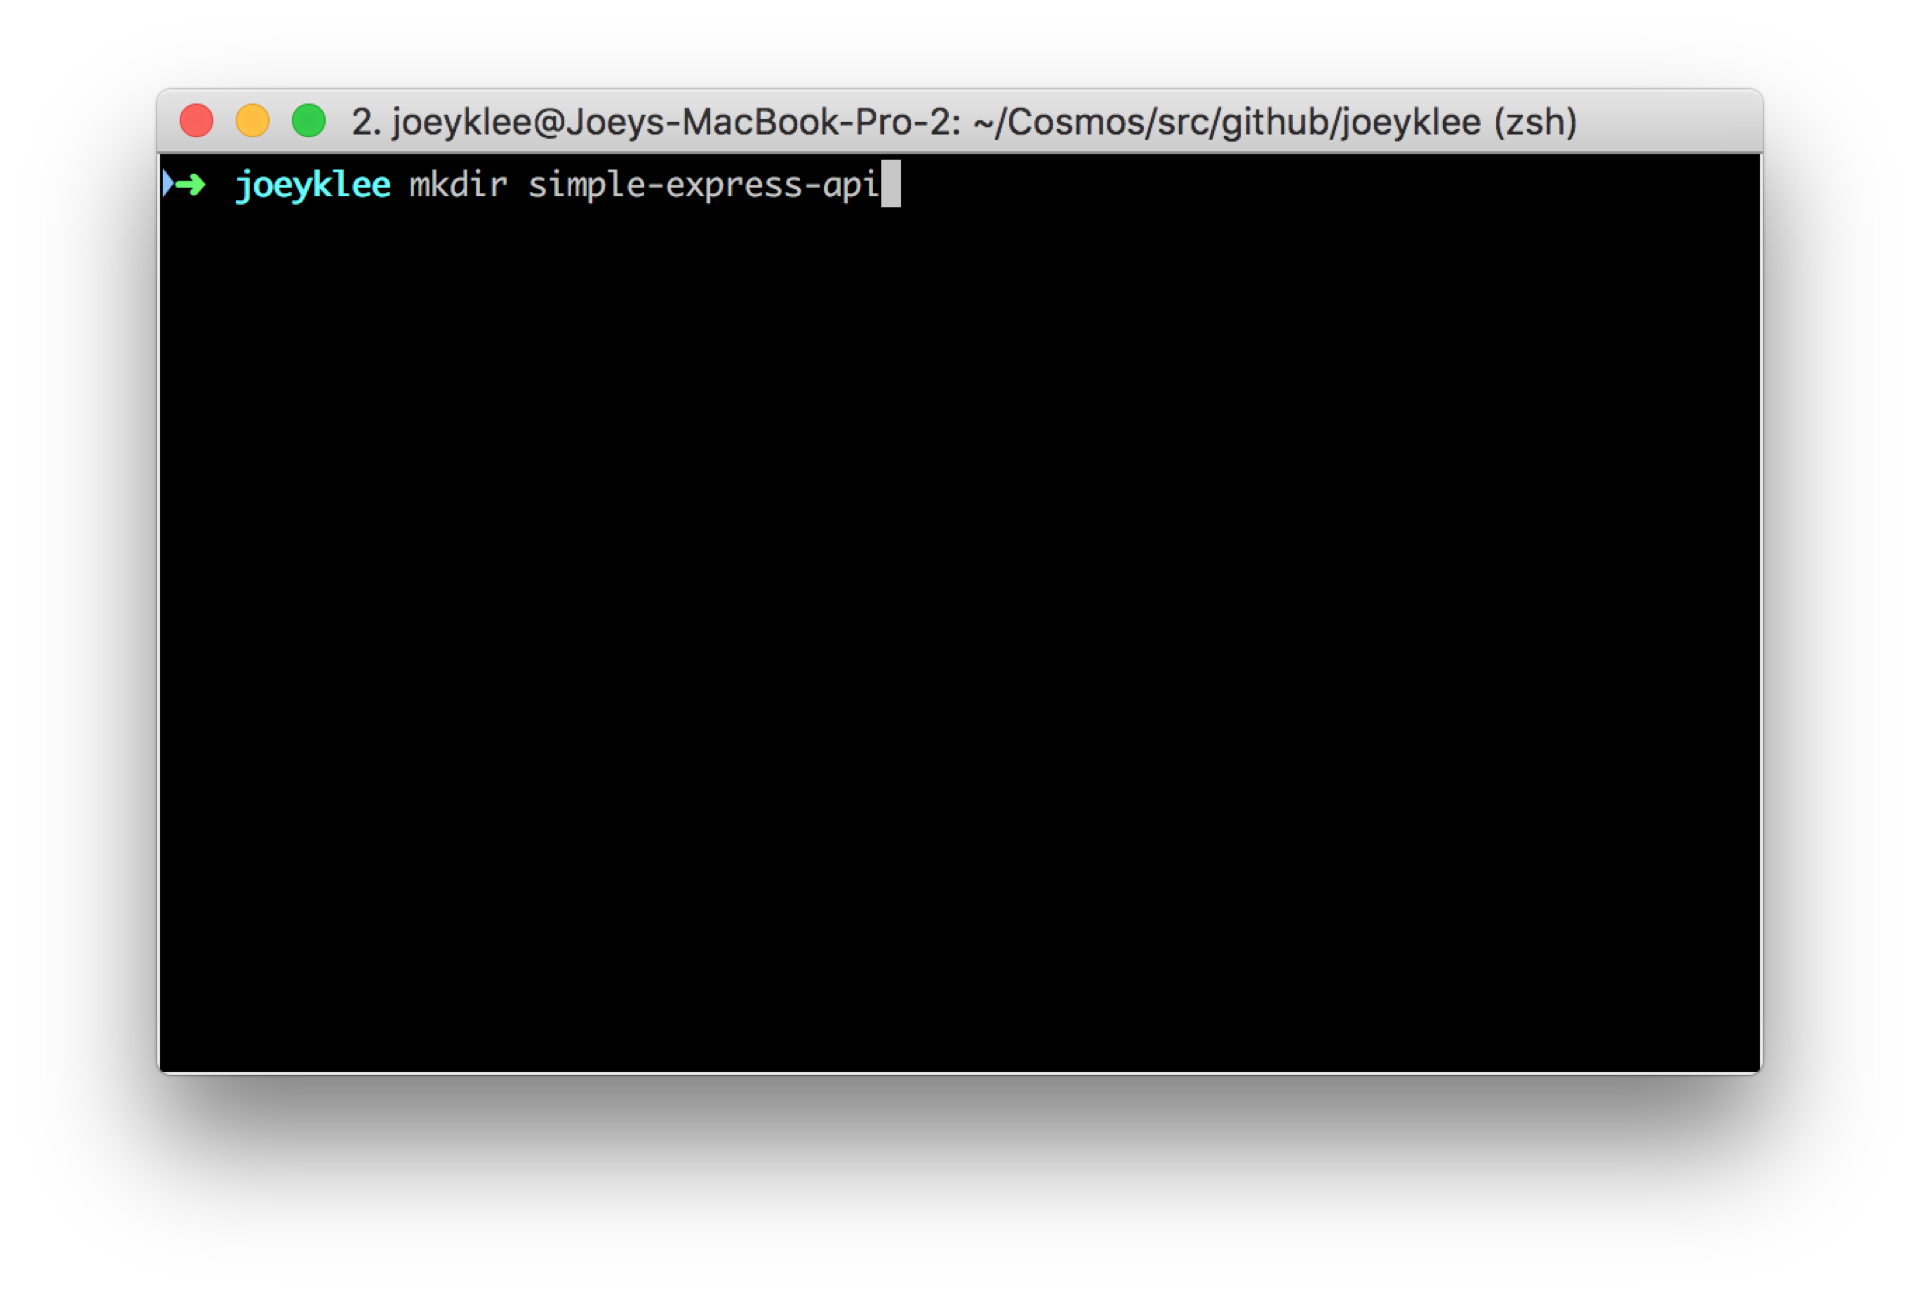
Lets's start by making a new folder. We use the mkdir <folder name> command to make a new folder on your computer. I will be calling my project simple-express-api but you can call it whatever you'd like.
mkdir simple-express-api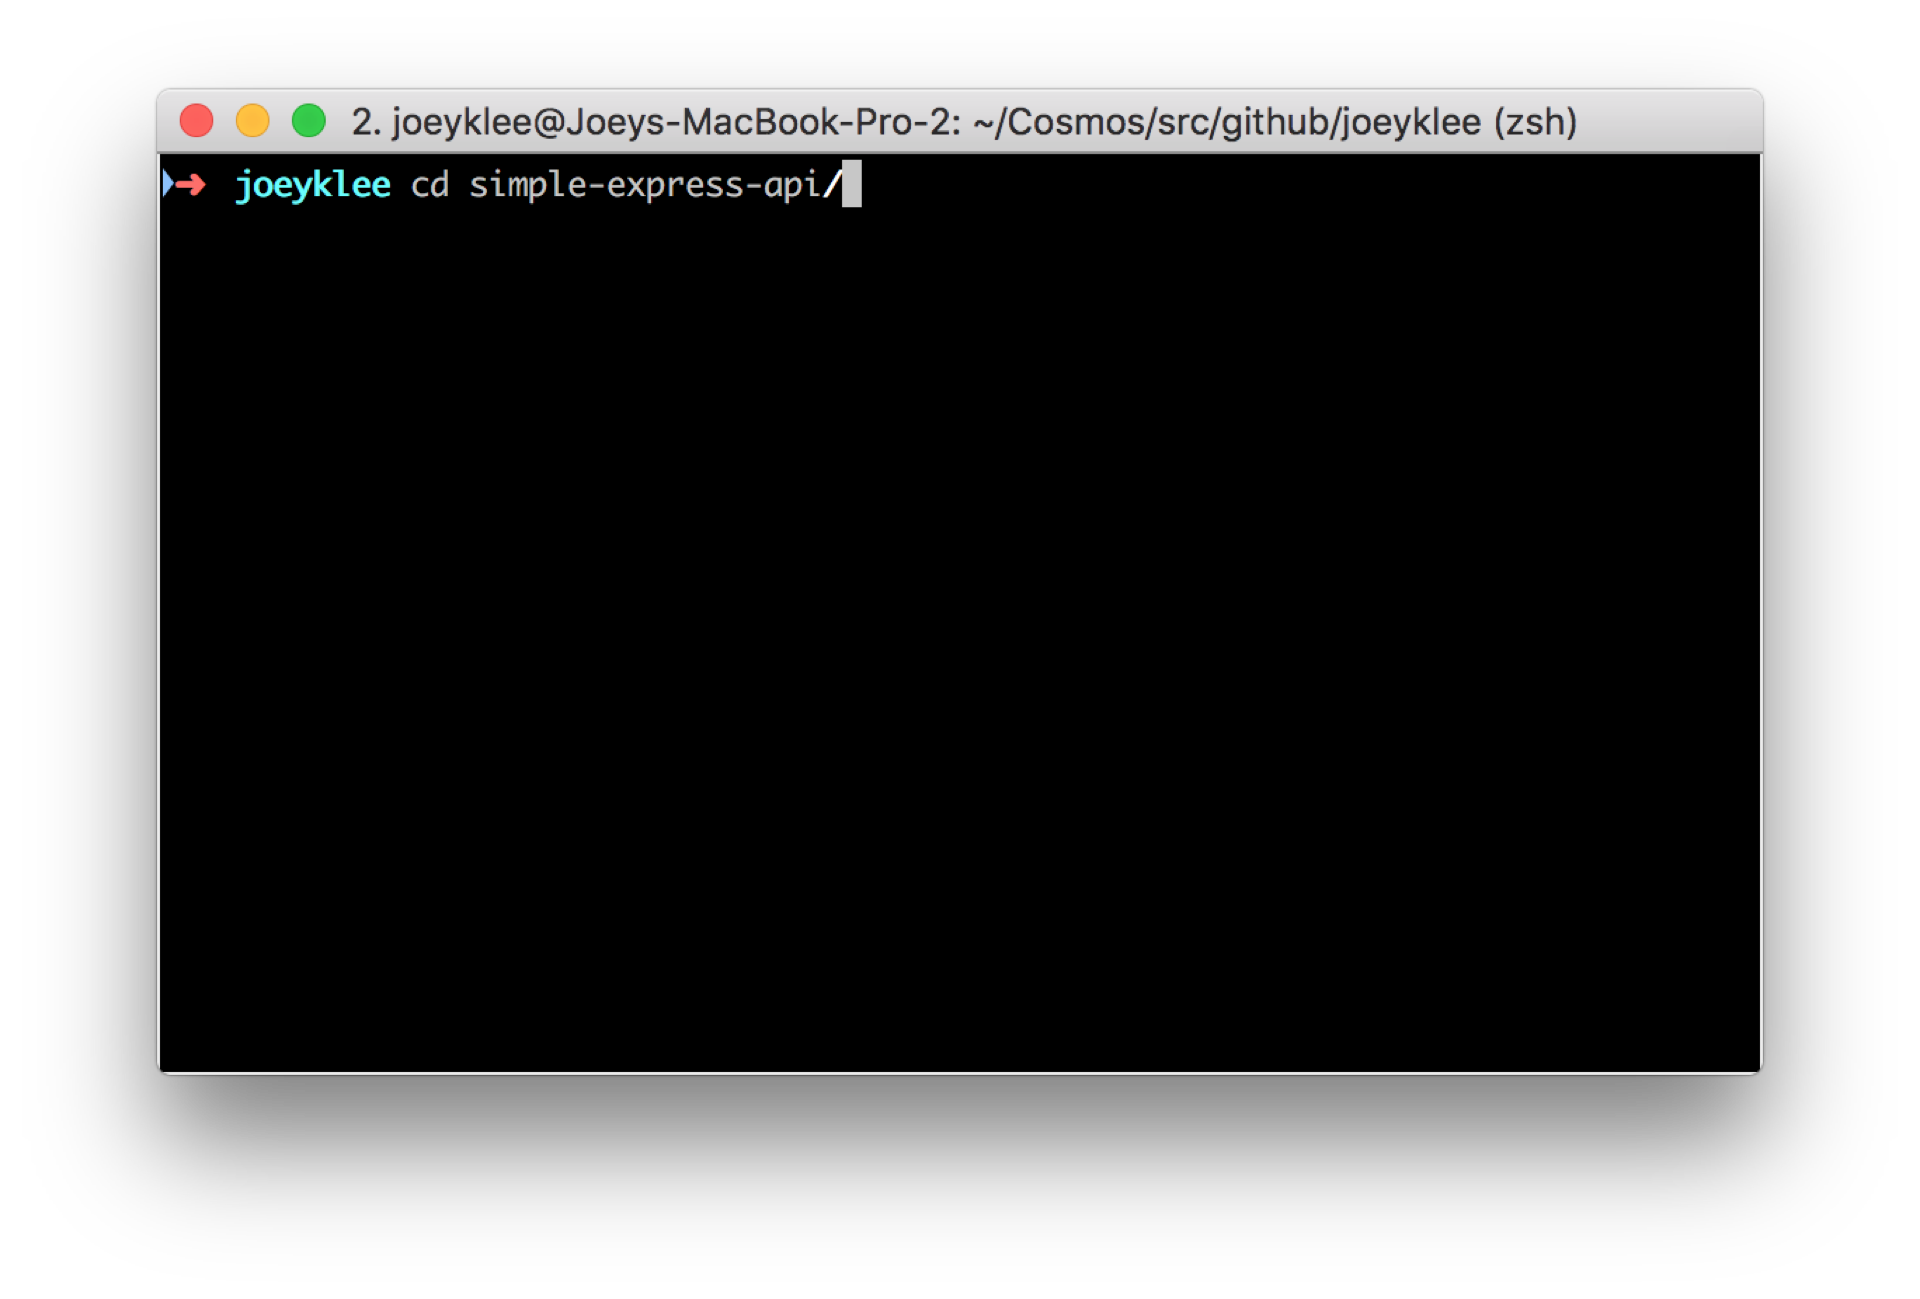 Now change directories using the
 cd </path/to/folder>
cd simple-express-apiIn the next steps we are going to:
- initialize a node.js project using
npm init - install express.js and nedb
- install a few other helpful libraries for building out our application
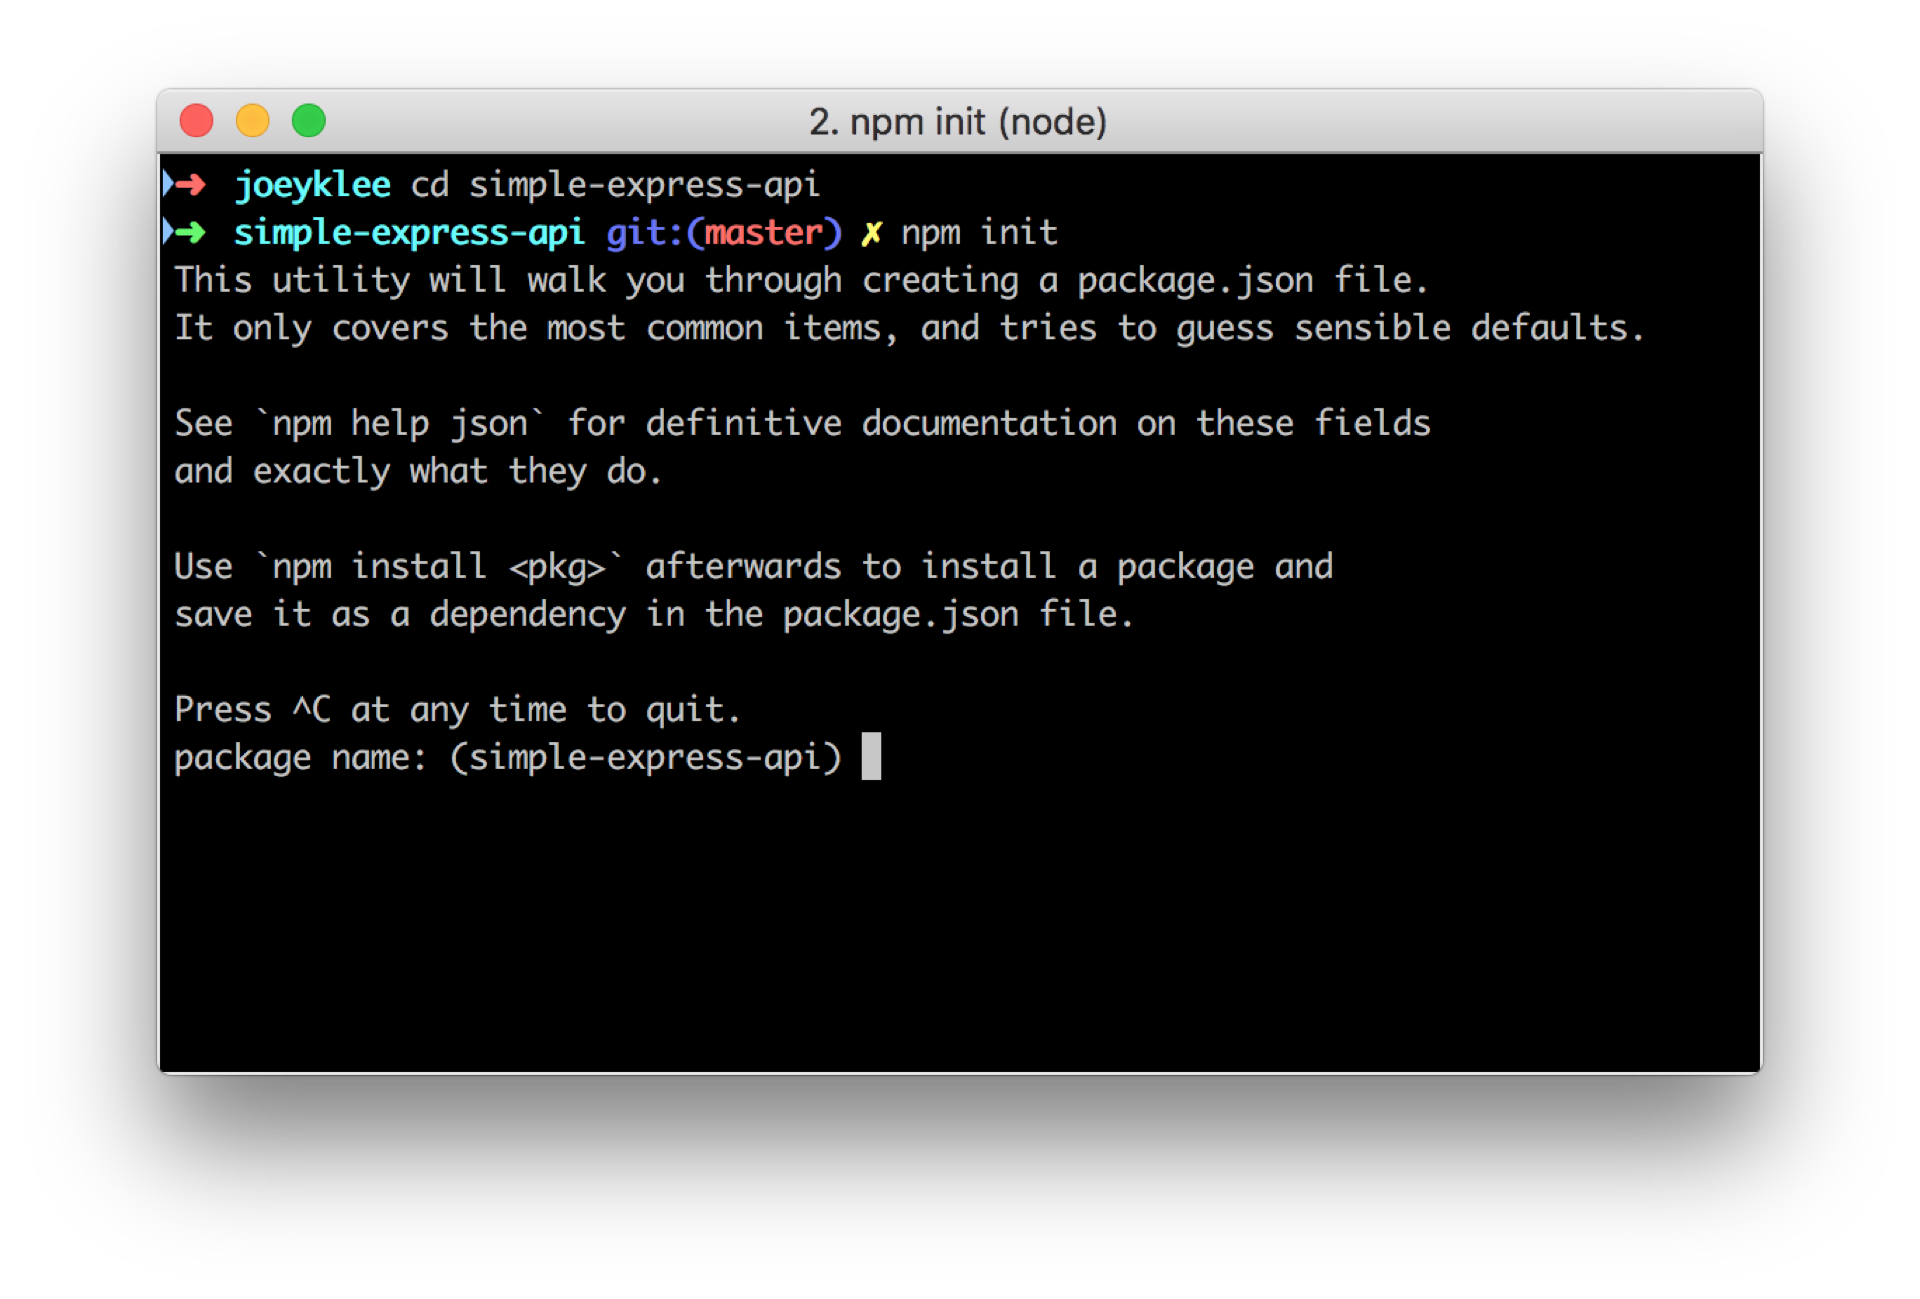
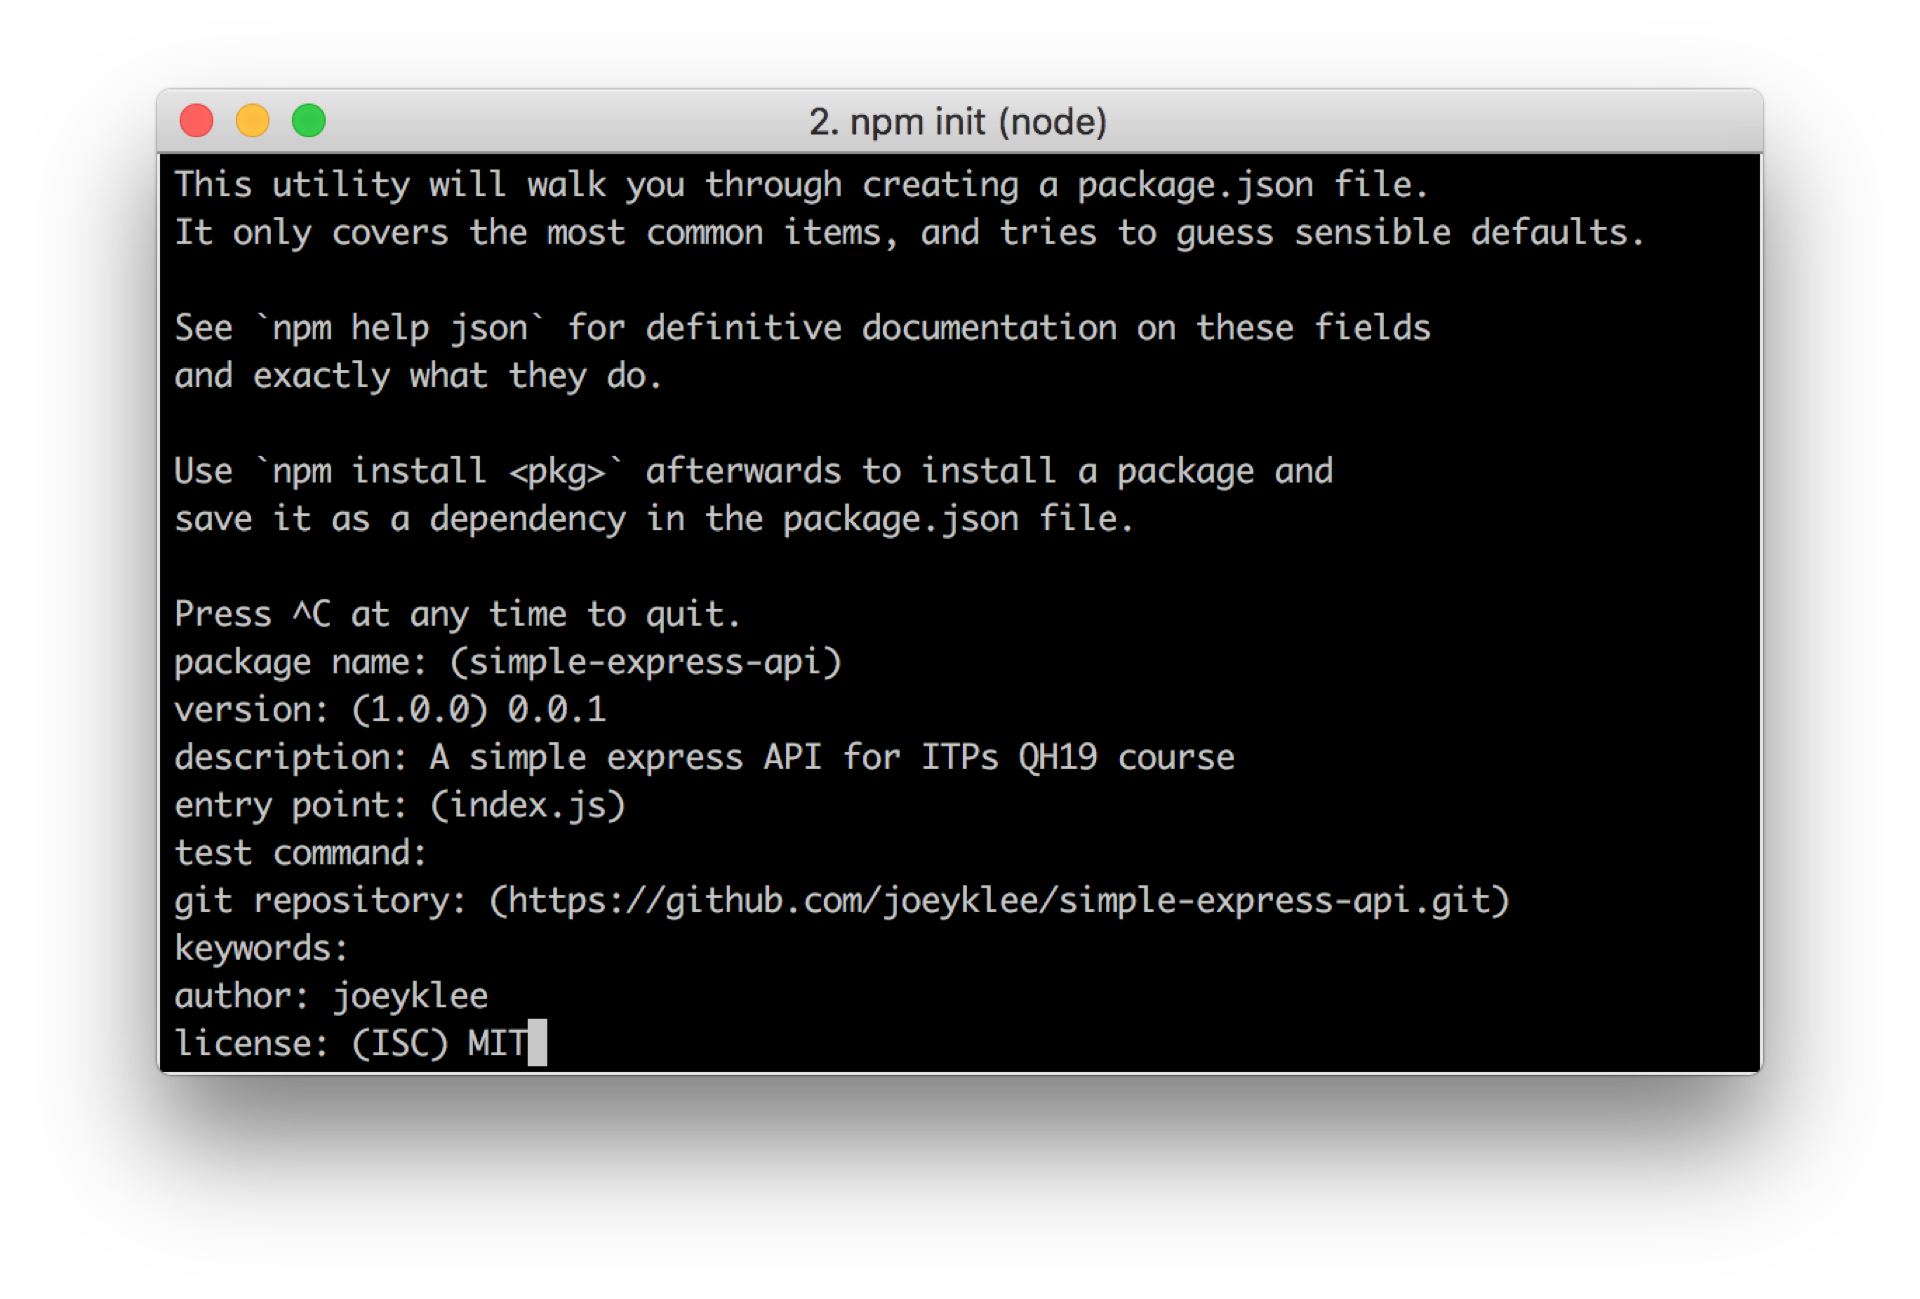
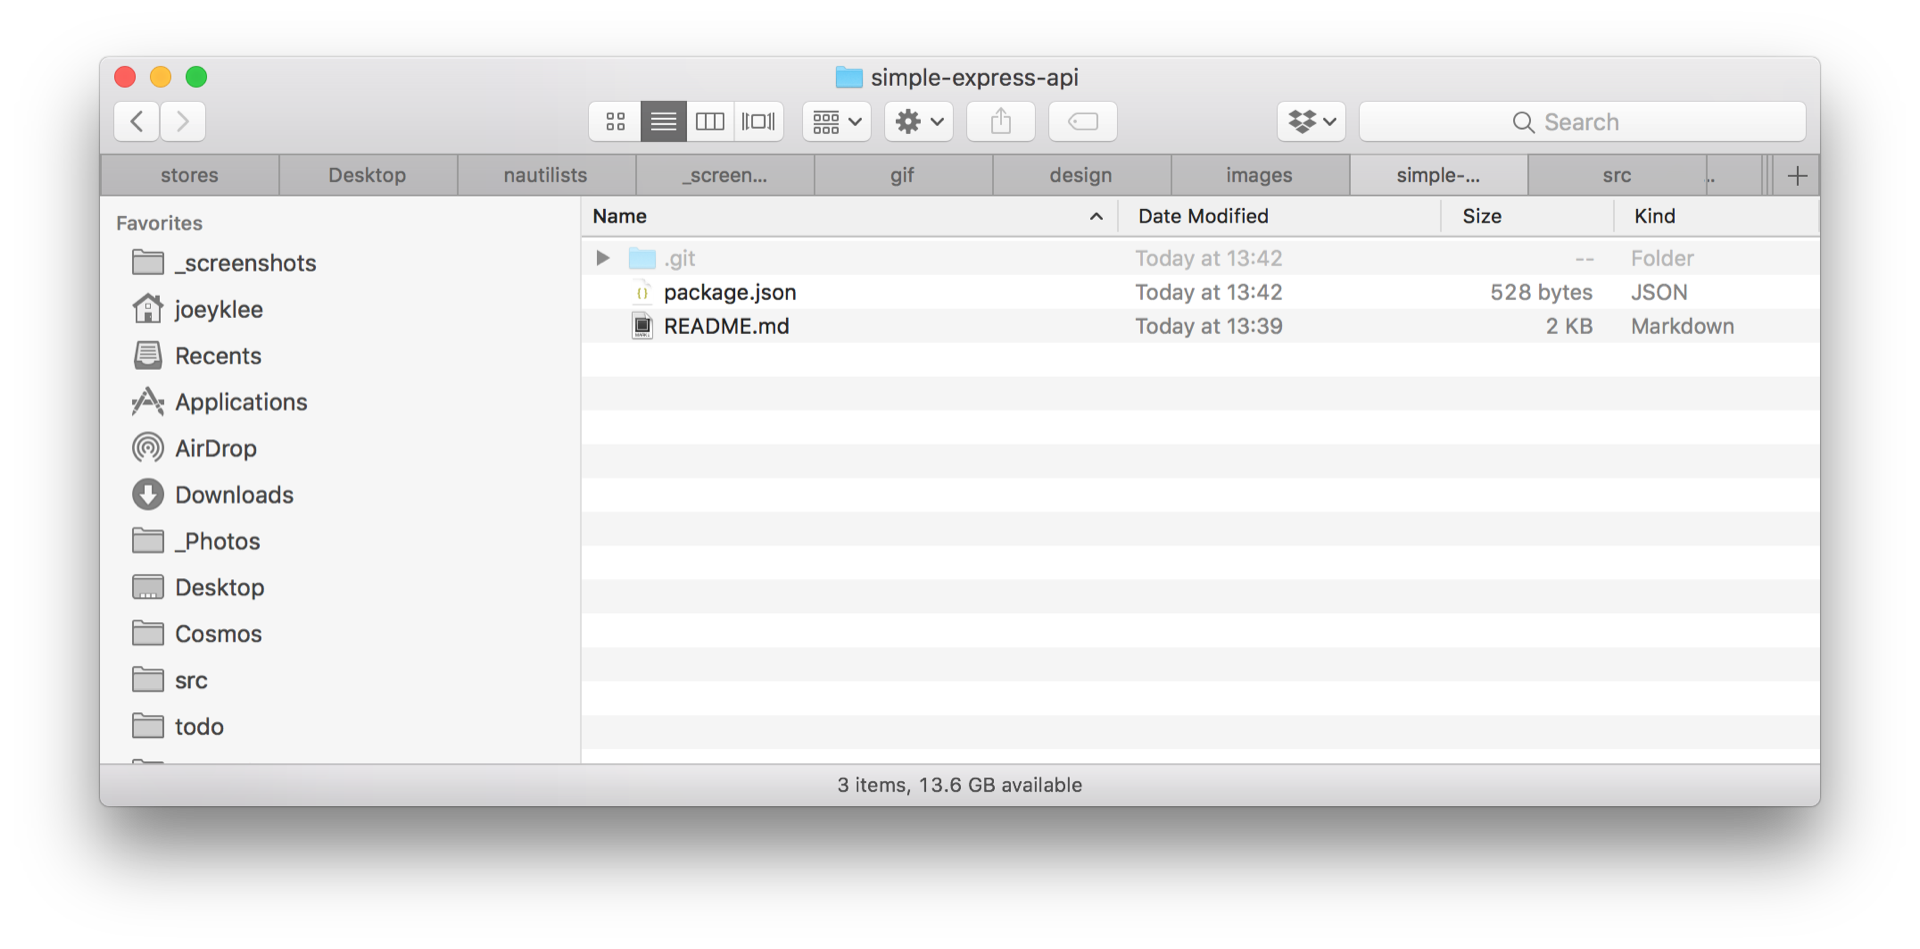
npm initThe command npm init creates a file called package.json that includes all the details of your project. These details include the project name, description, the dependencies which, as you will see, become included in this project whenever you do npm install <library name>. This is what allows others to take your project and run npm install to also get all the dependencies for your project.
You can think of your package.json file (and your README) as the place that contains all the necessary information to get your project up and running.
You can take some time to fill in the details of your project. These details might look like this:
Express is a "thin" layer around node.js. The website calls it a "Fast, unopinionated, minimalist web framework for Node.js". They are not wrong. Express is awesome!
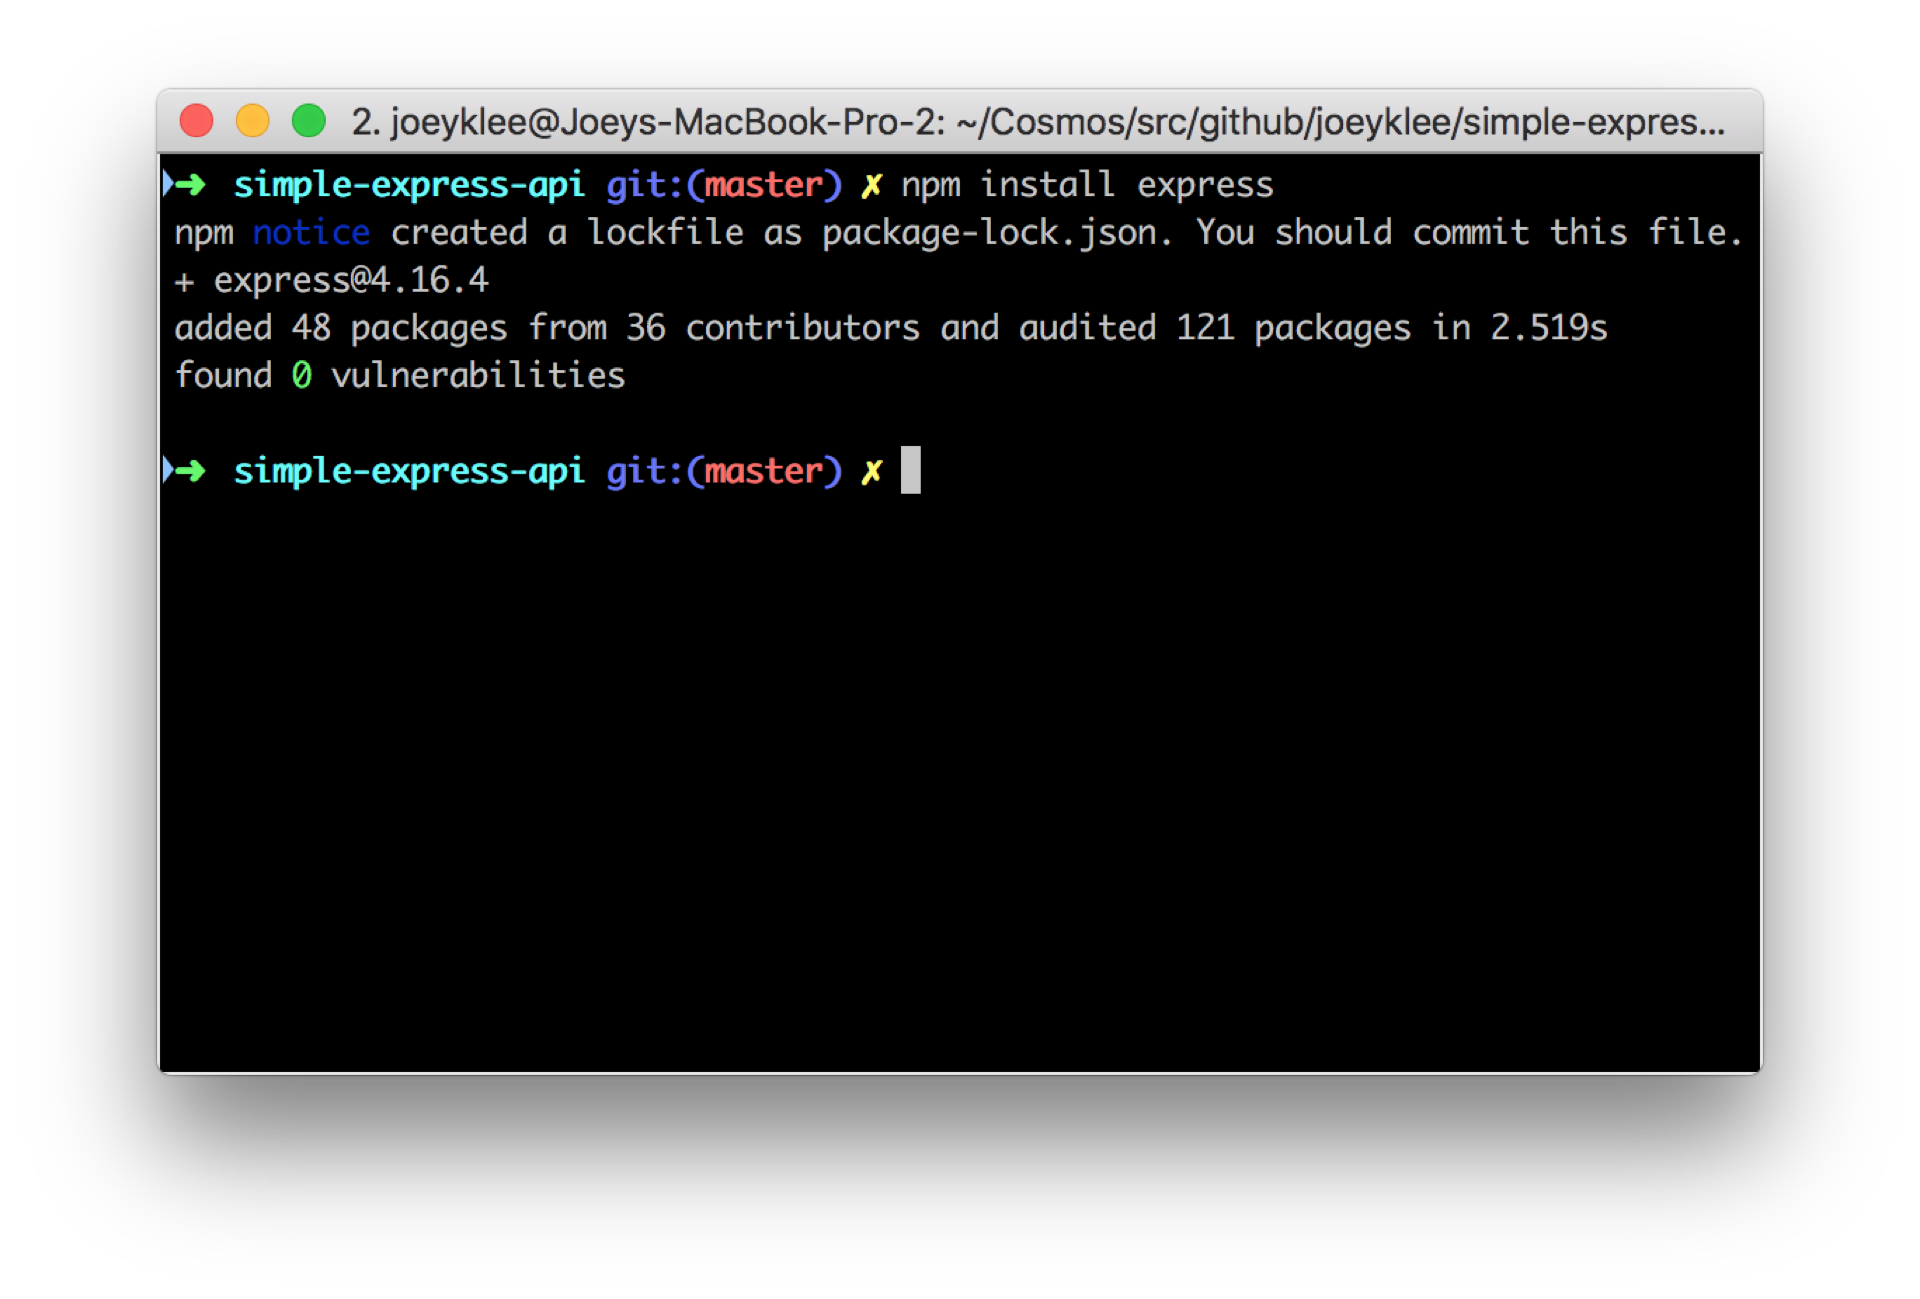
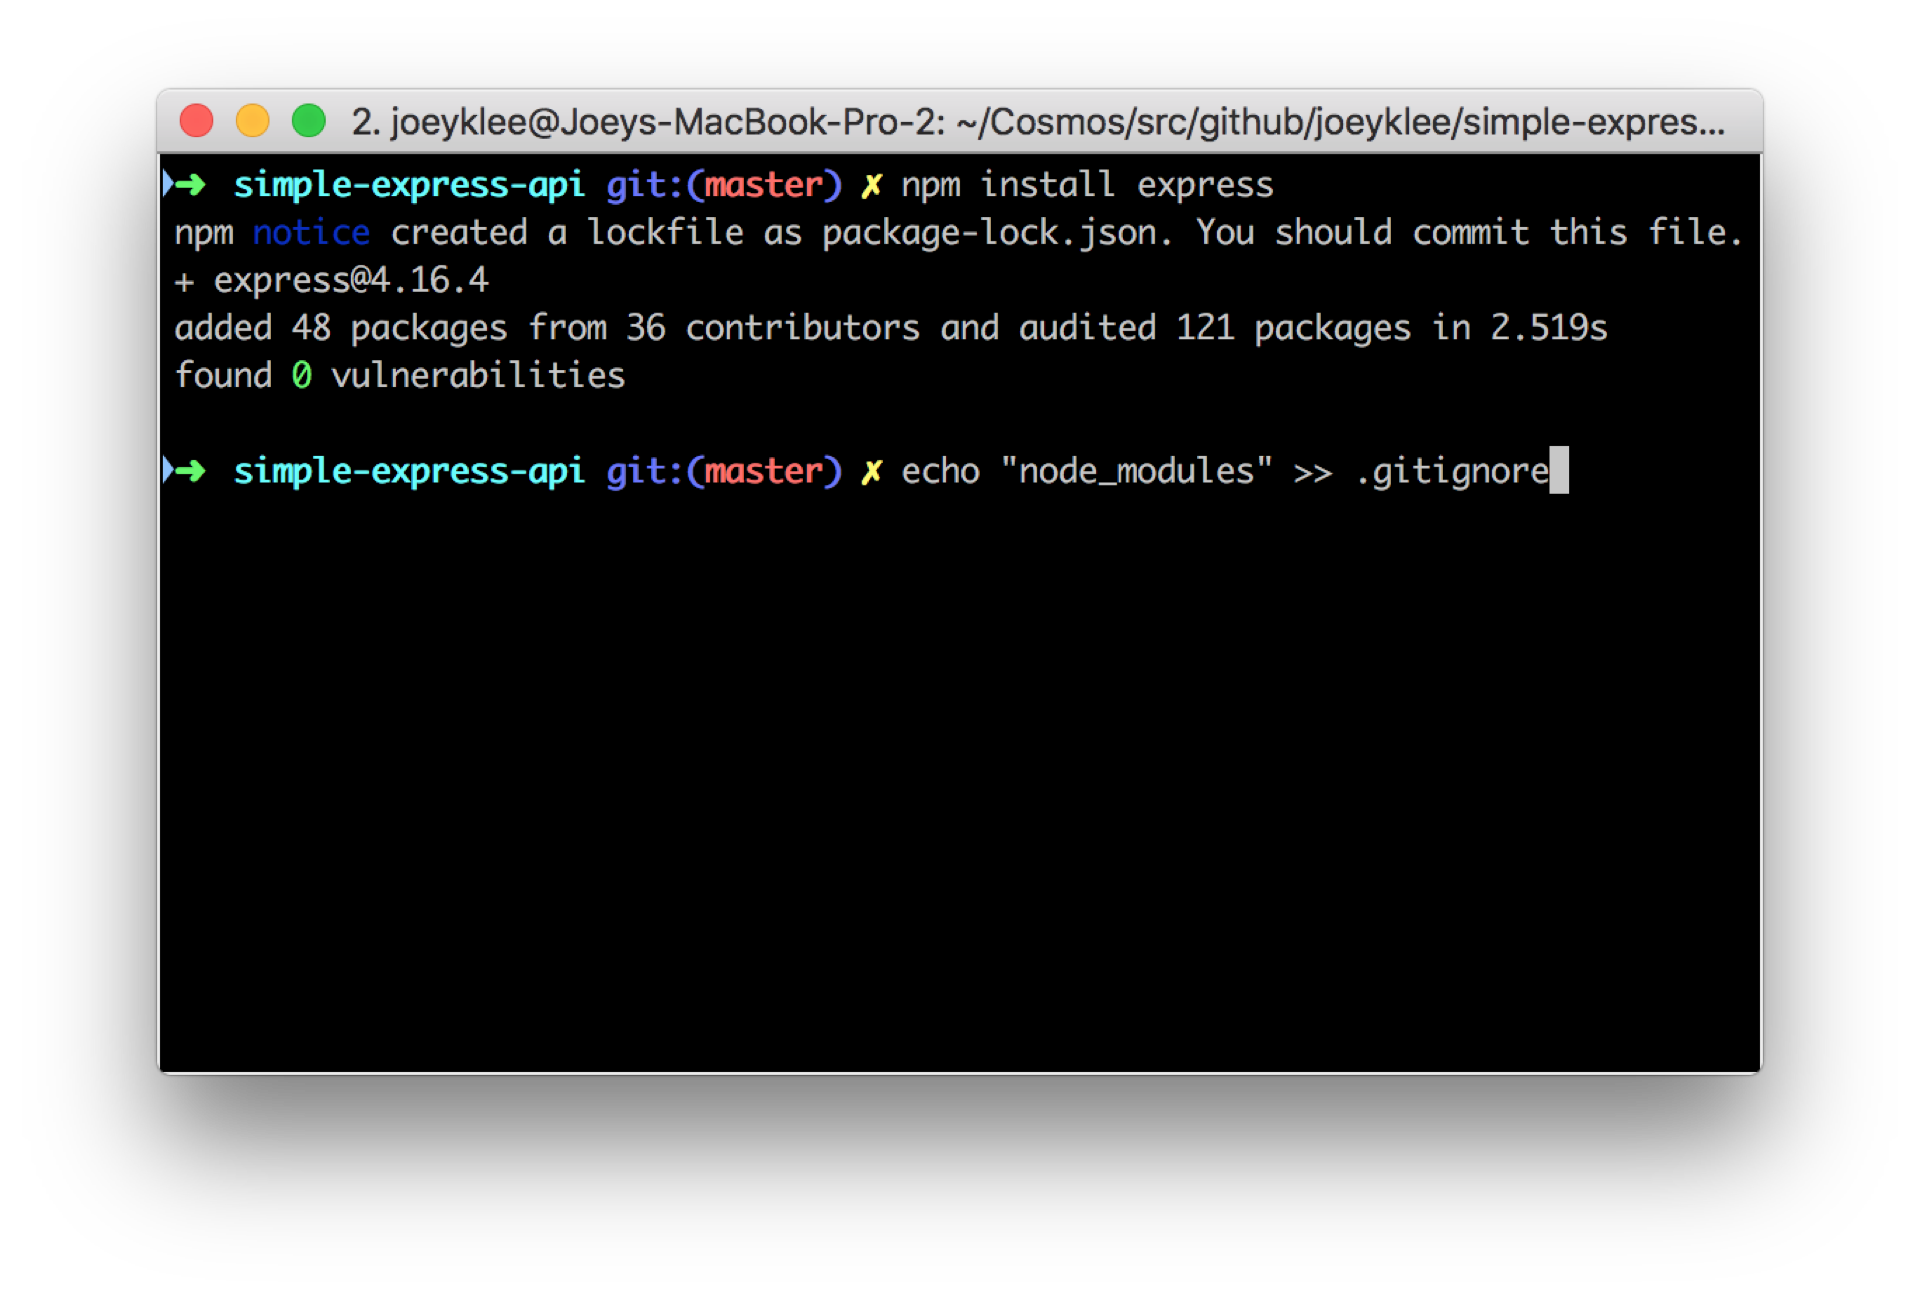
npm install expressYou'll notice that from your terminal you'll see the following message:
simple-express-api git:(master) ✗ npm install express
npm notice created a lockfile as package-lock.json. You should commit this file.
+ express@4.16.4
added 48 packages from 36 contributors and audited 121 packages in 2.519s
found 0 vulnerabilities)
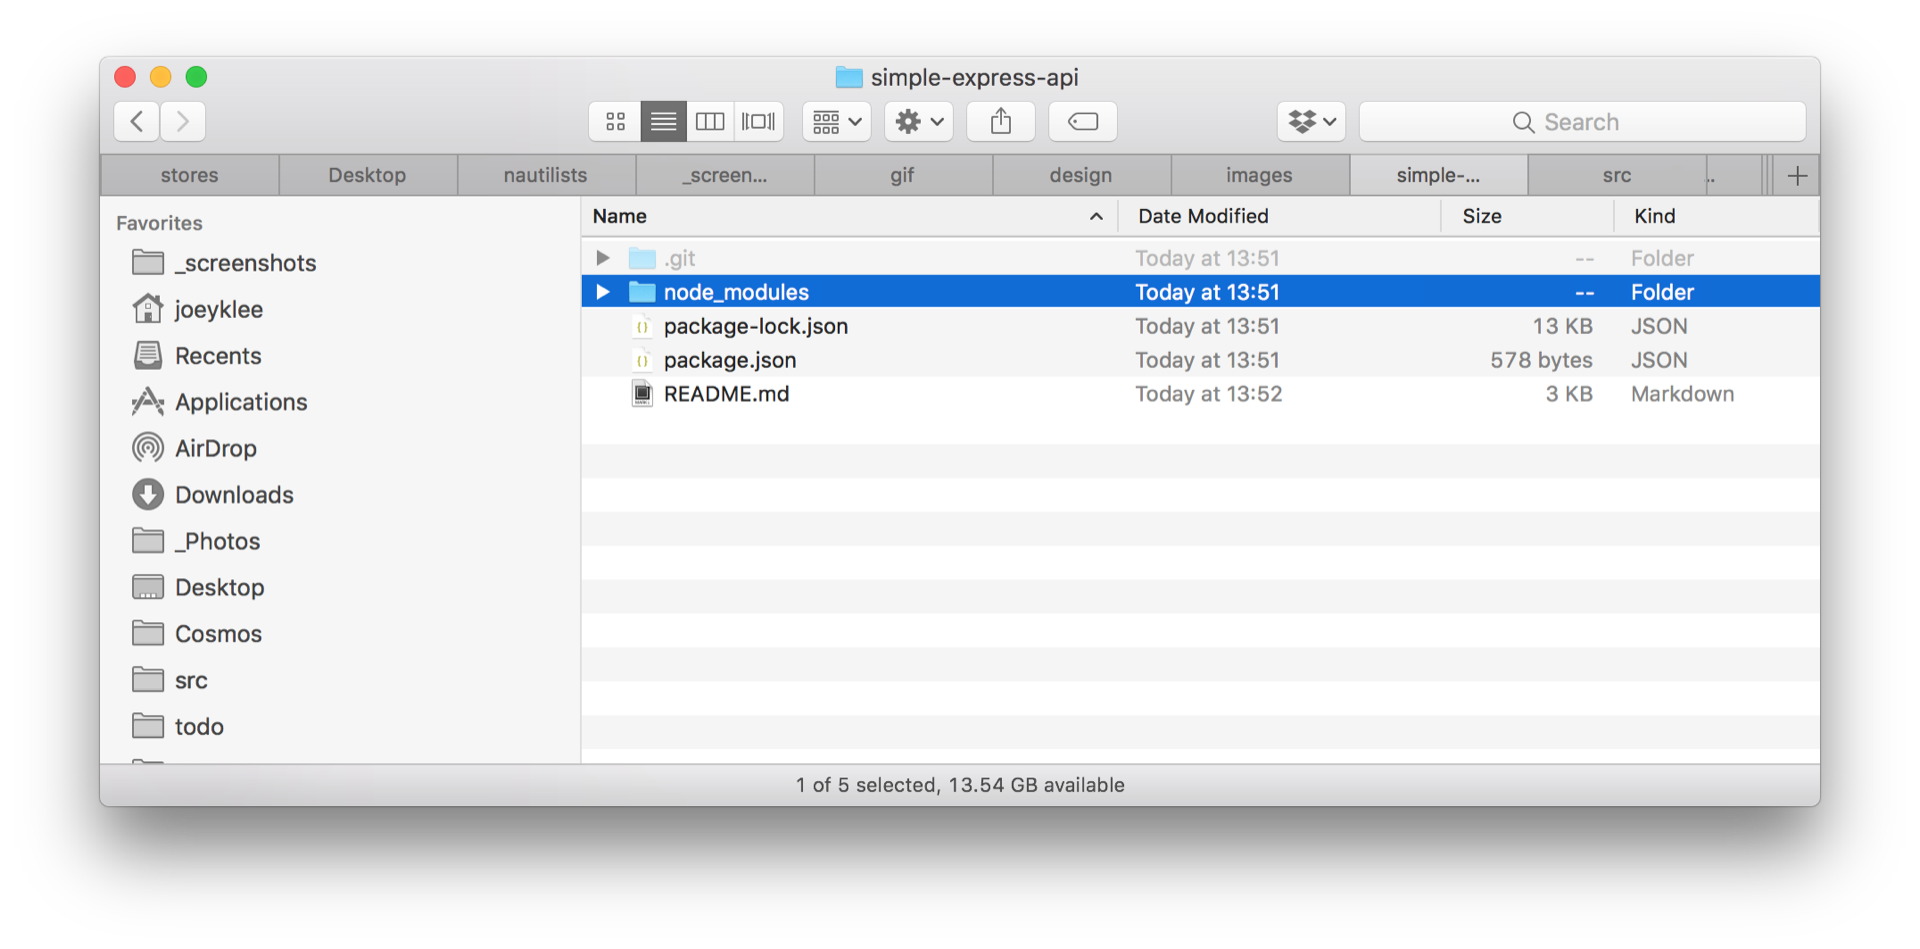
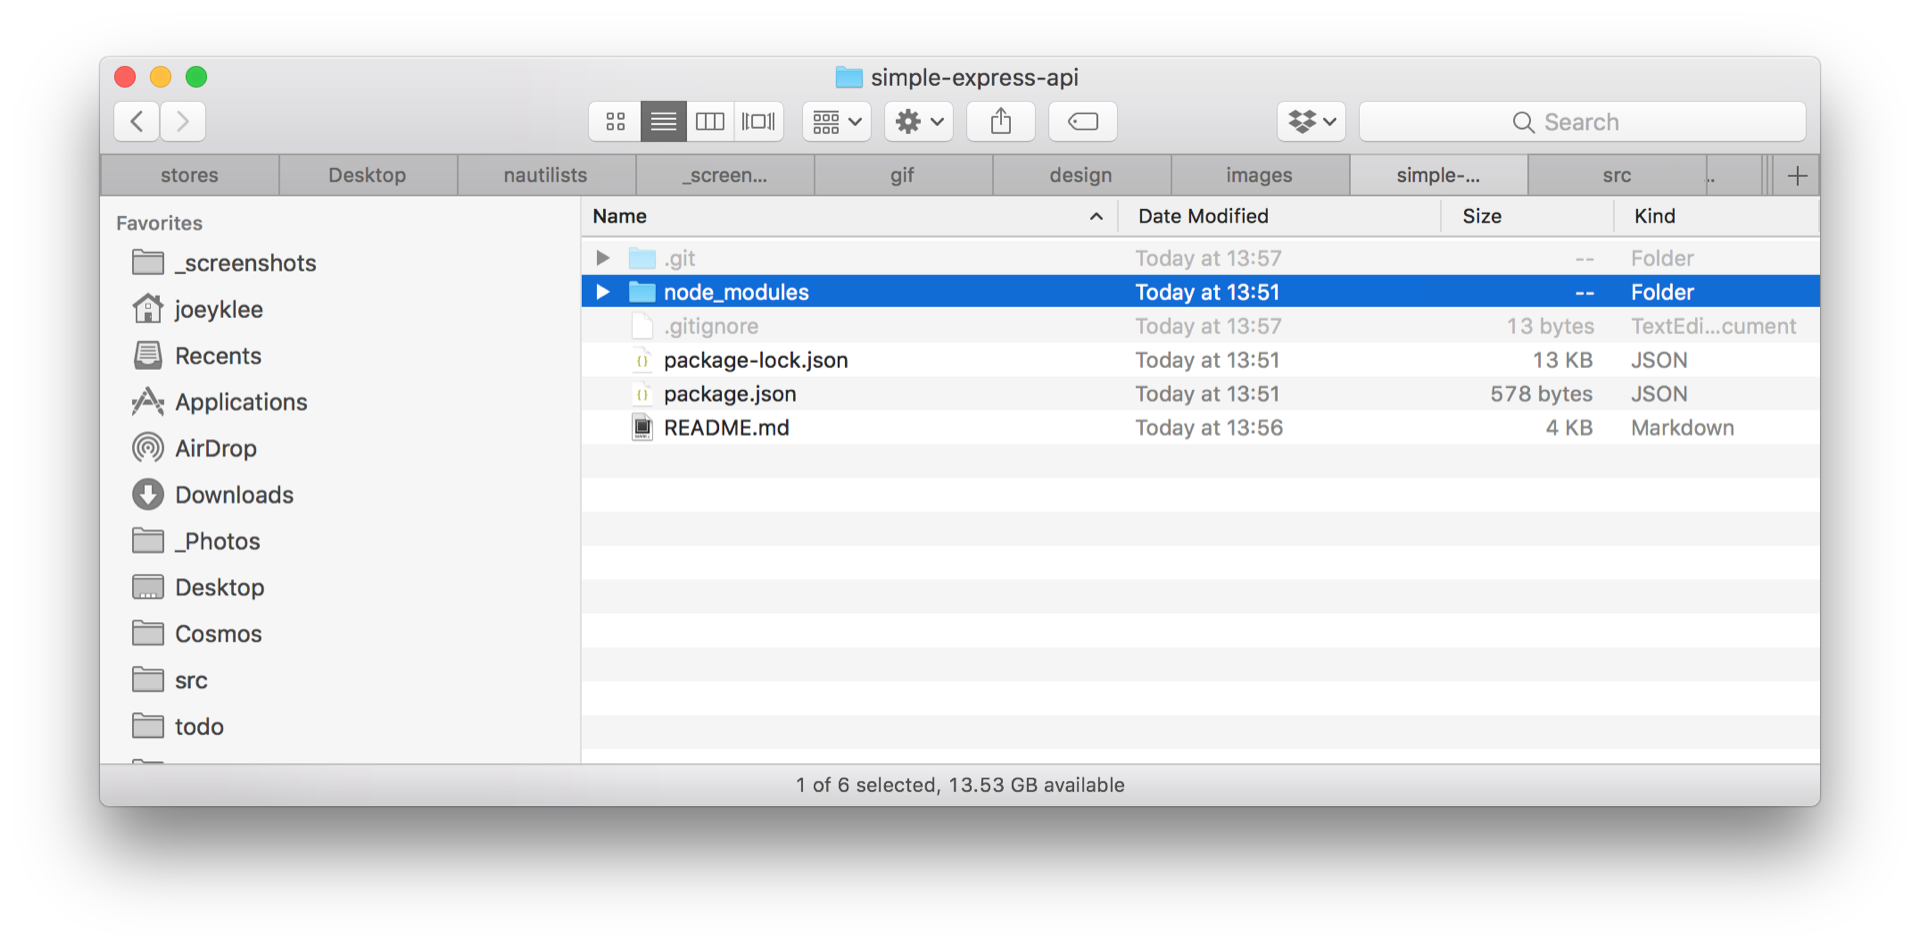
And if you look in your simple-express-api folder, that you've now got a folder called node_modules and it's full of subfolders. These subfolders contain the dependencies that allow Express.js to be Express!
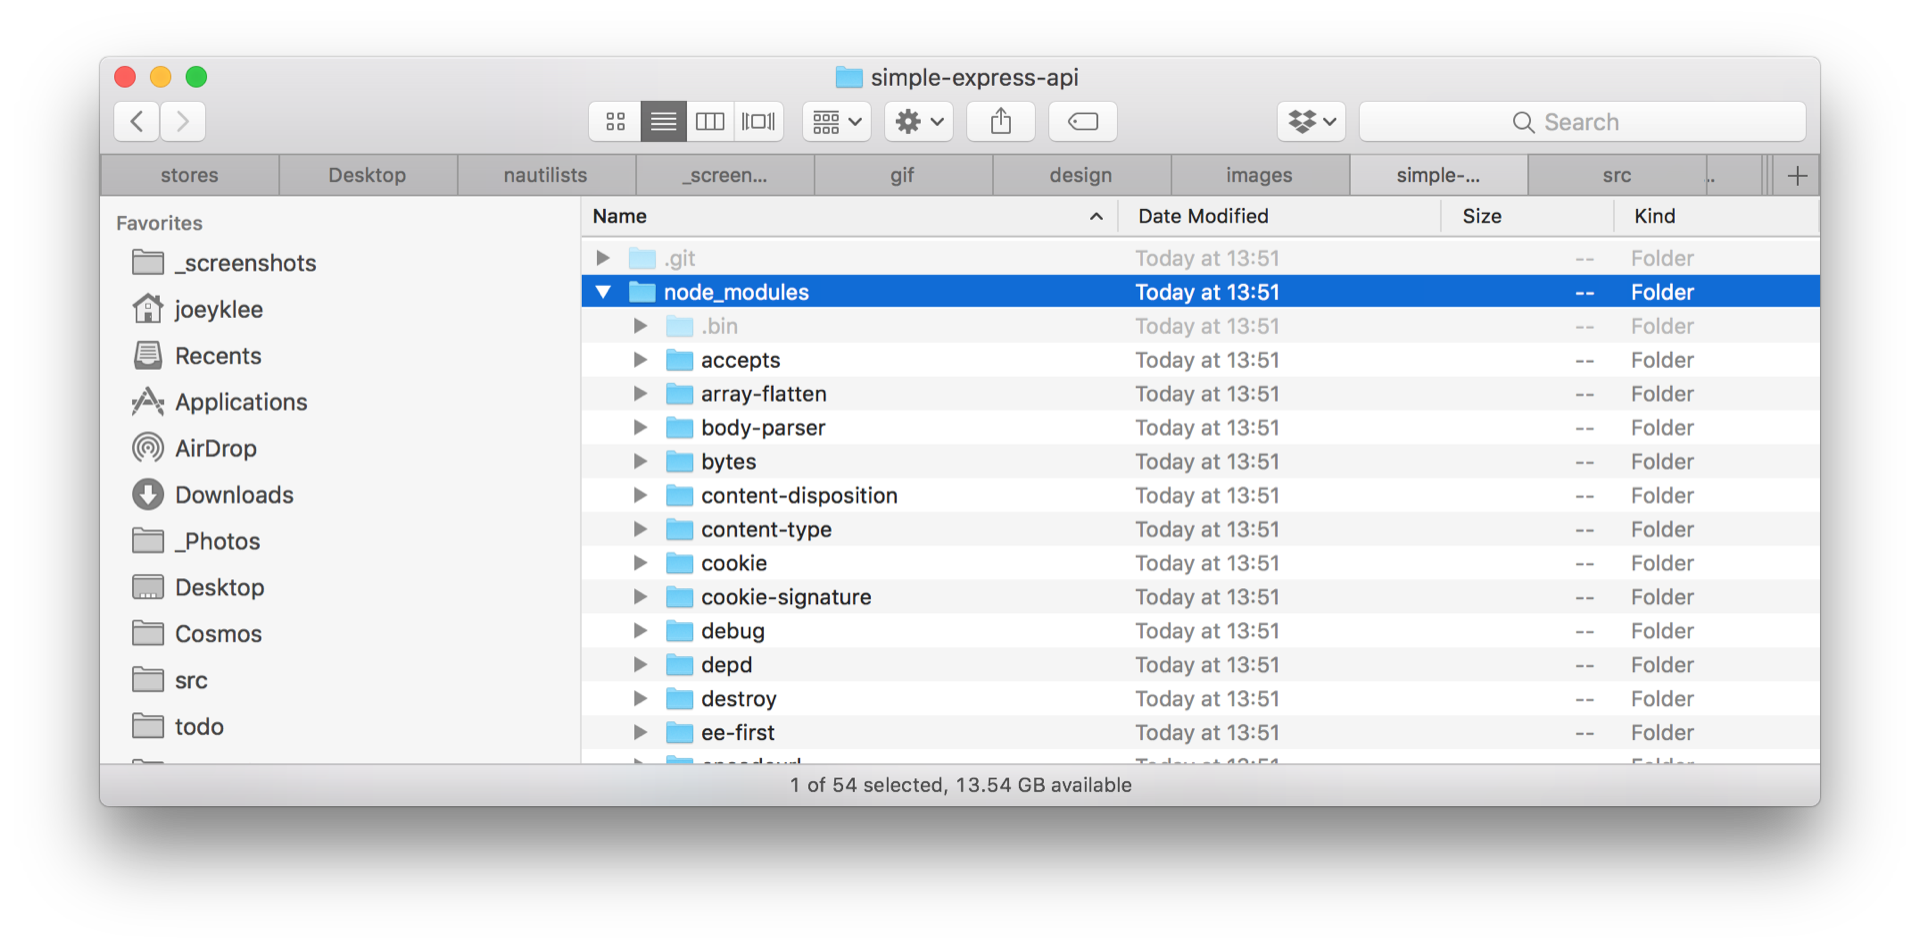
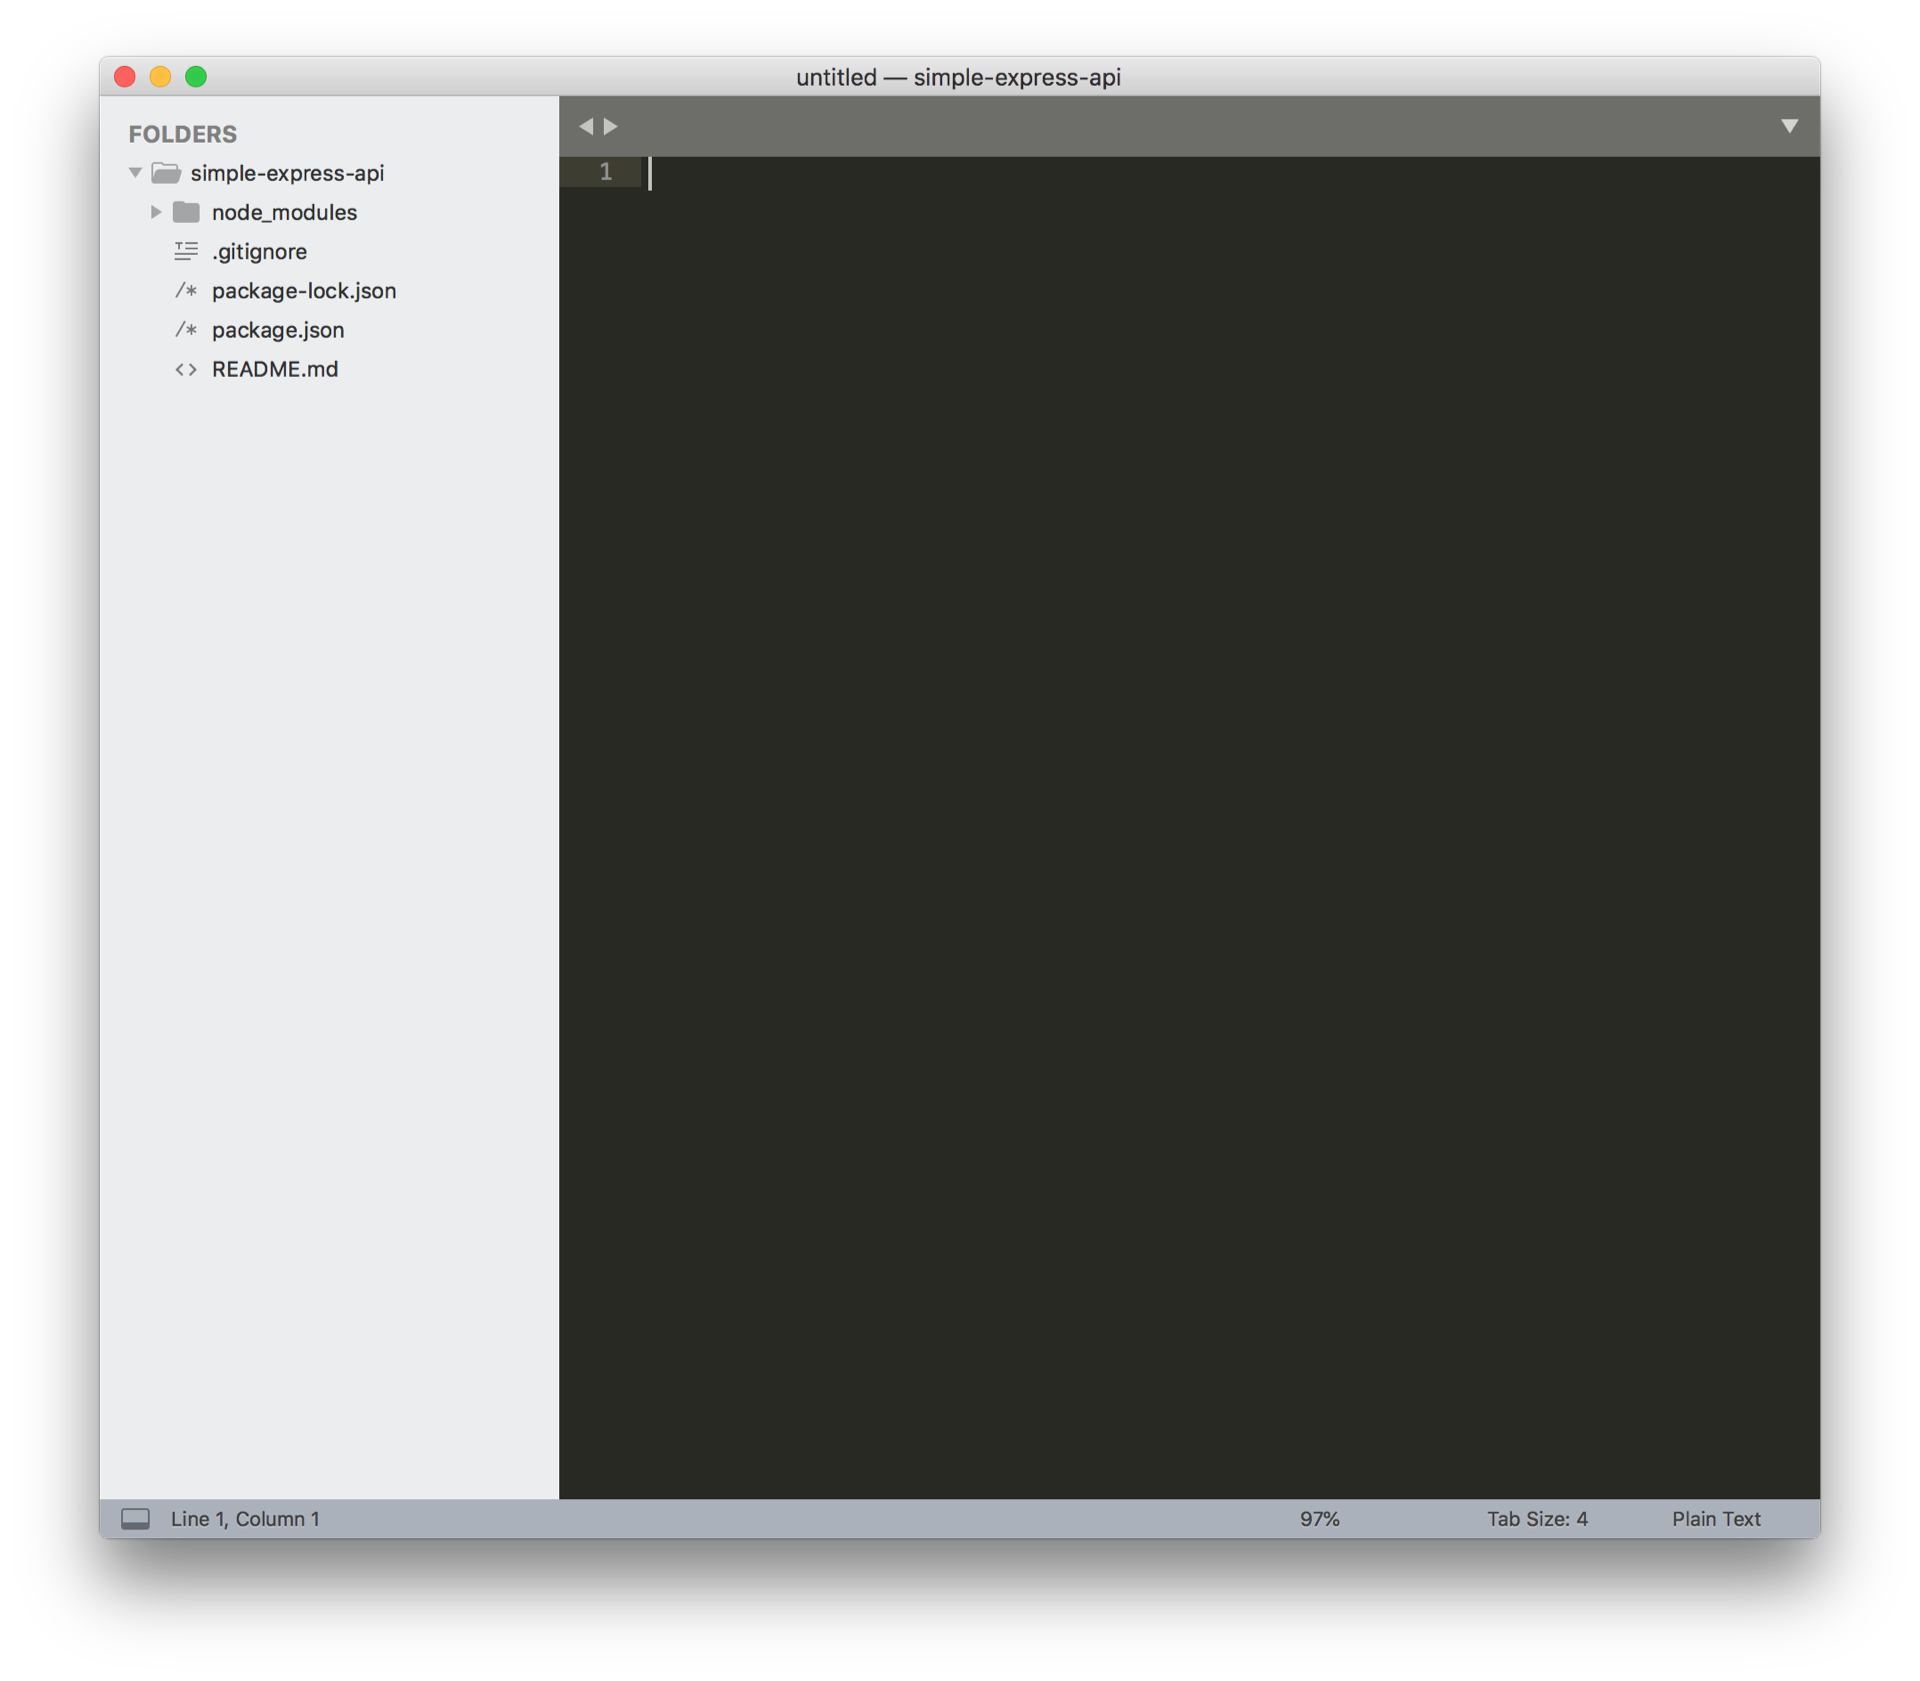
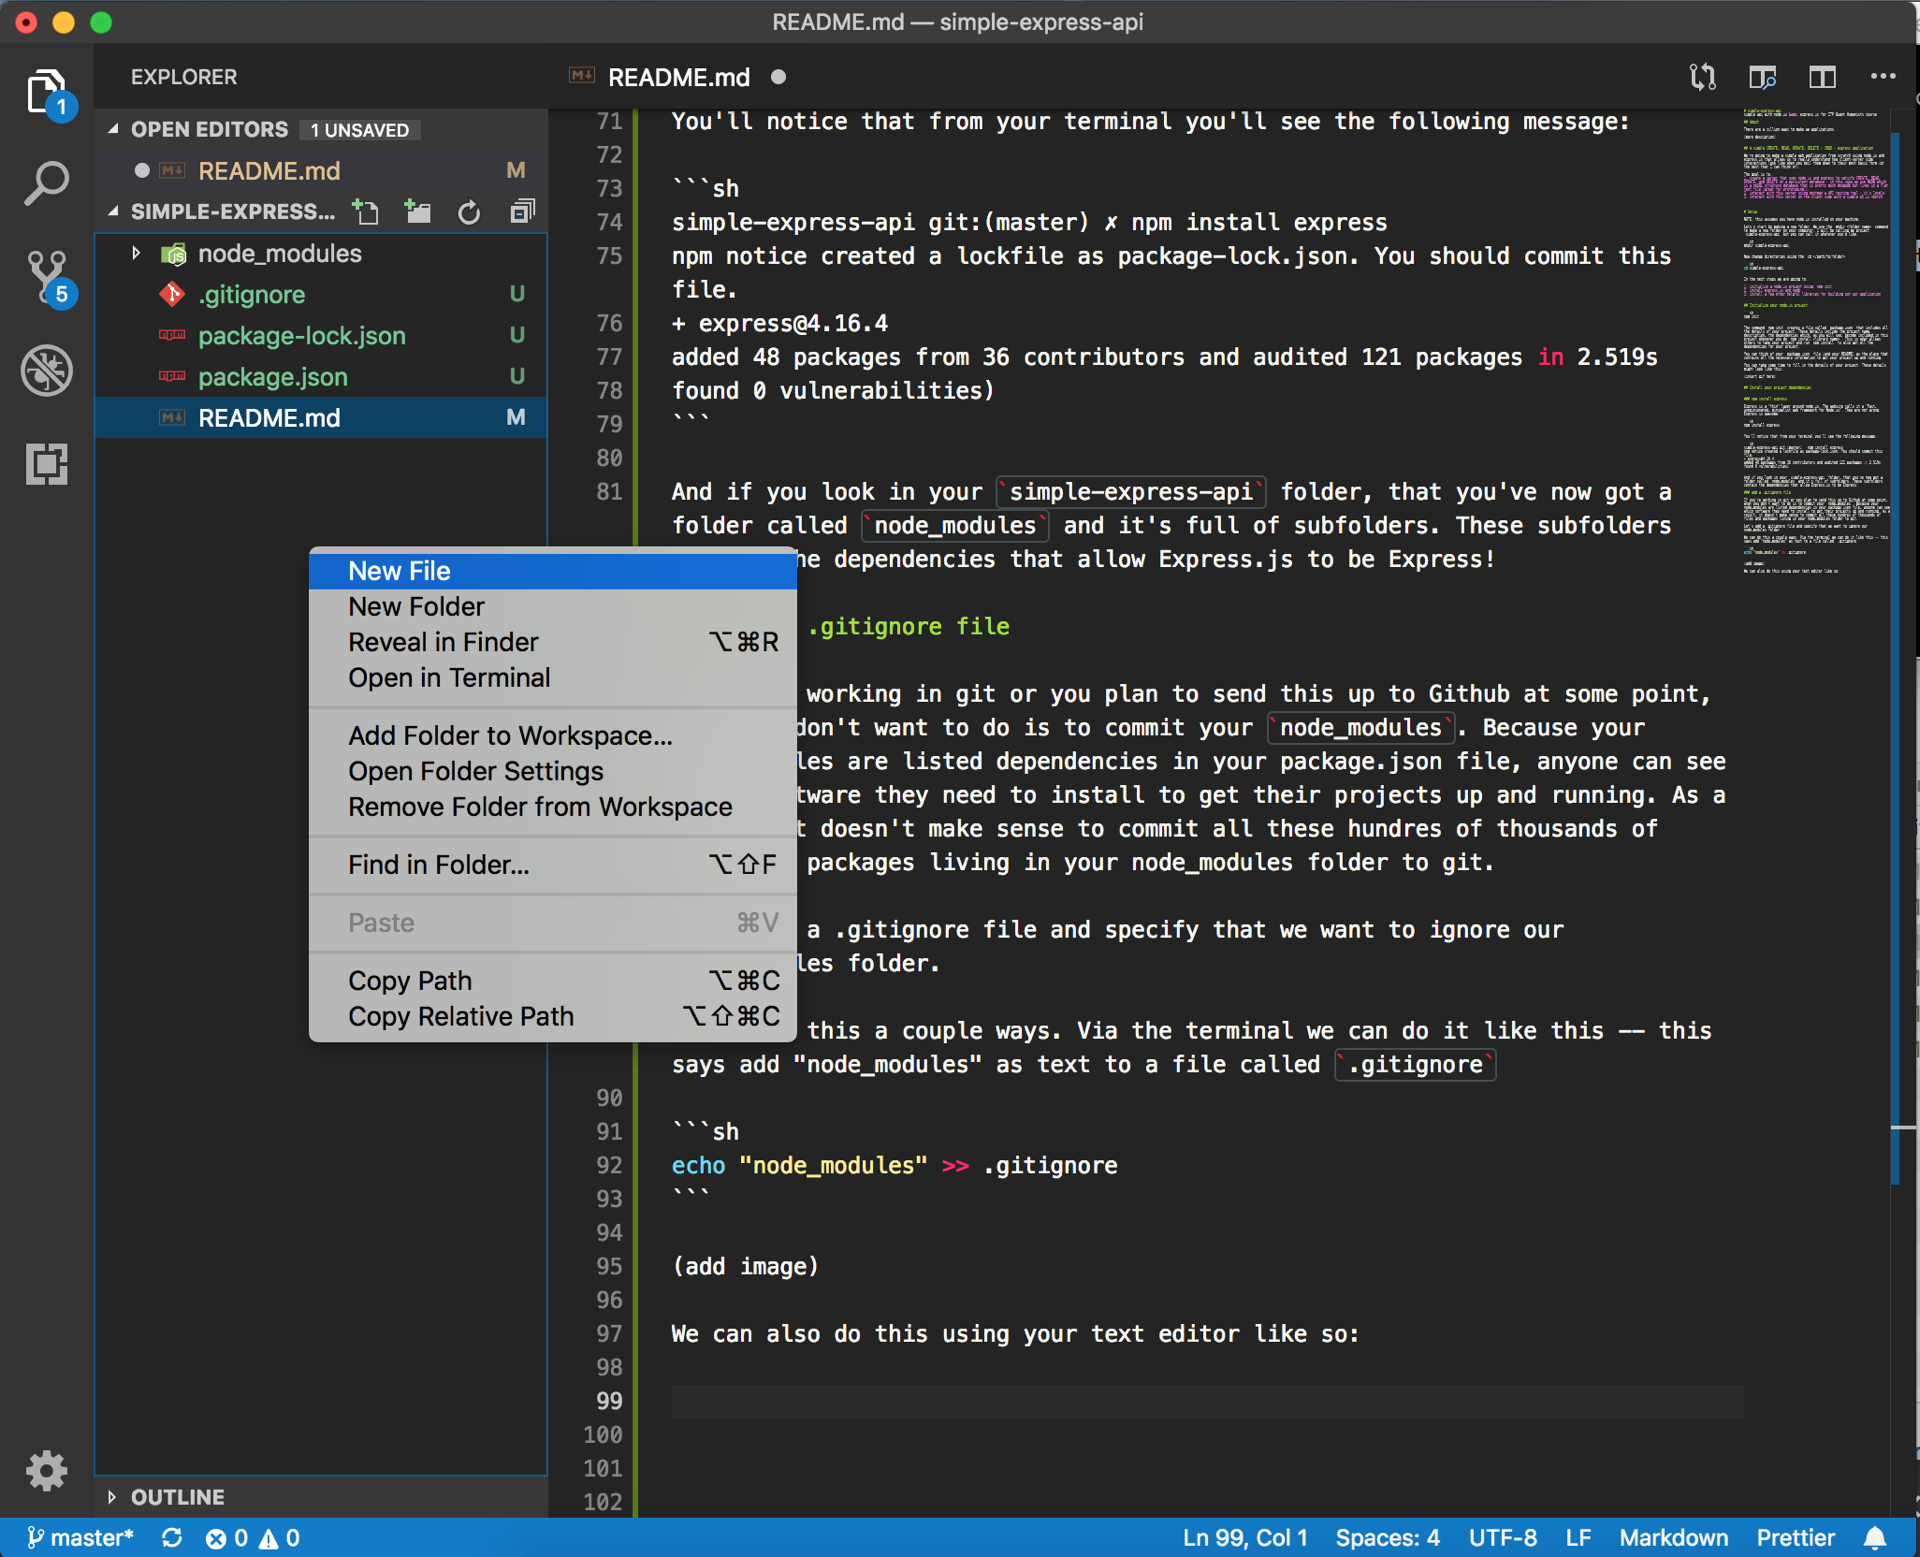
If you haven't already, open up your project folder in your text editor so you can see all the things. I'm using VSCode, but here's what it looks like in sublime text.
If you're working in git or you plan to send this up to Github at some point, what you don't want to do is to commit your node_modules. Because your node_modules are listed dependencies in your package.json file, anyone can see which software they need to install to get their projects up and running. As a result, it doesn't make sense to commit all these hundres of thousands of files and packages living in your node_modules folder to git.
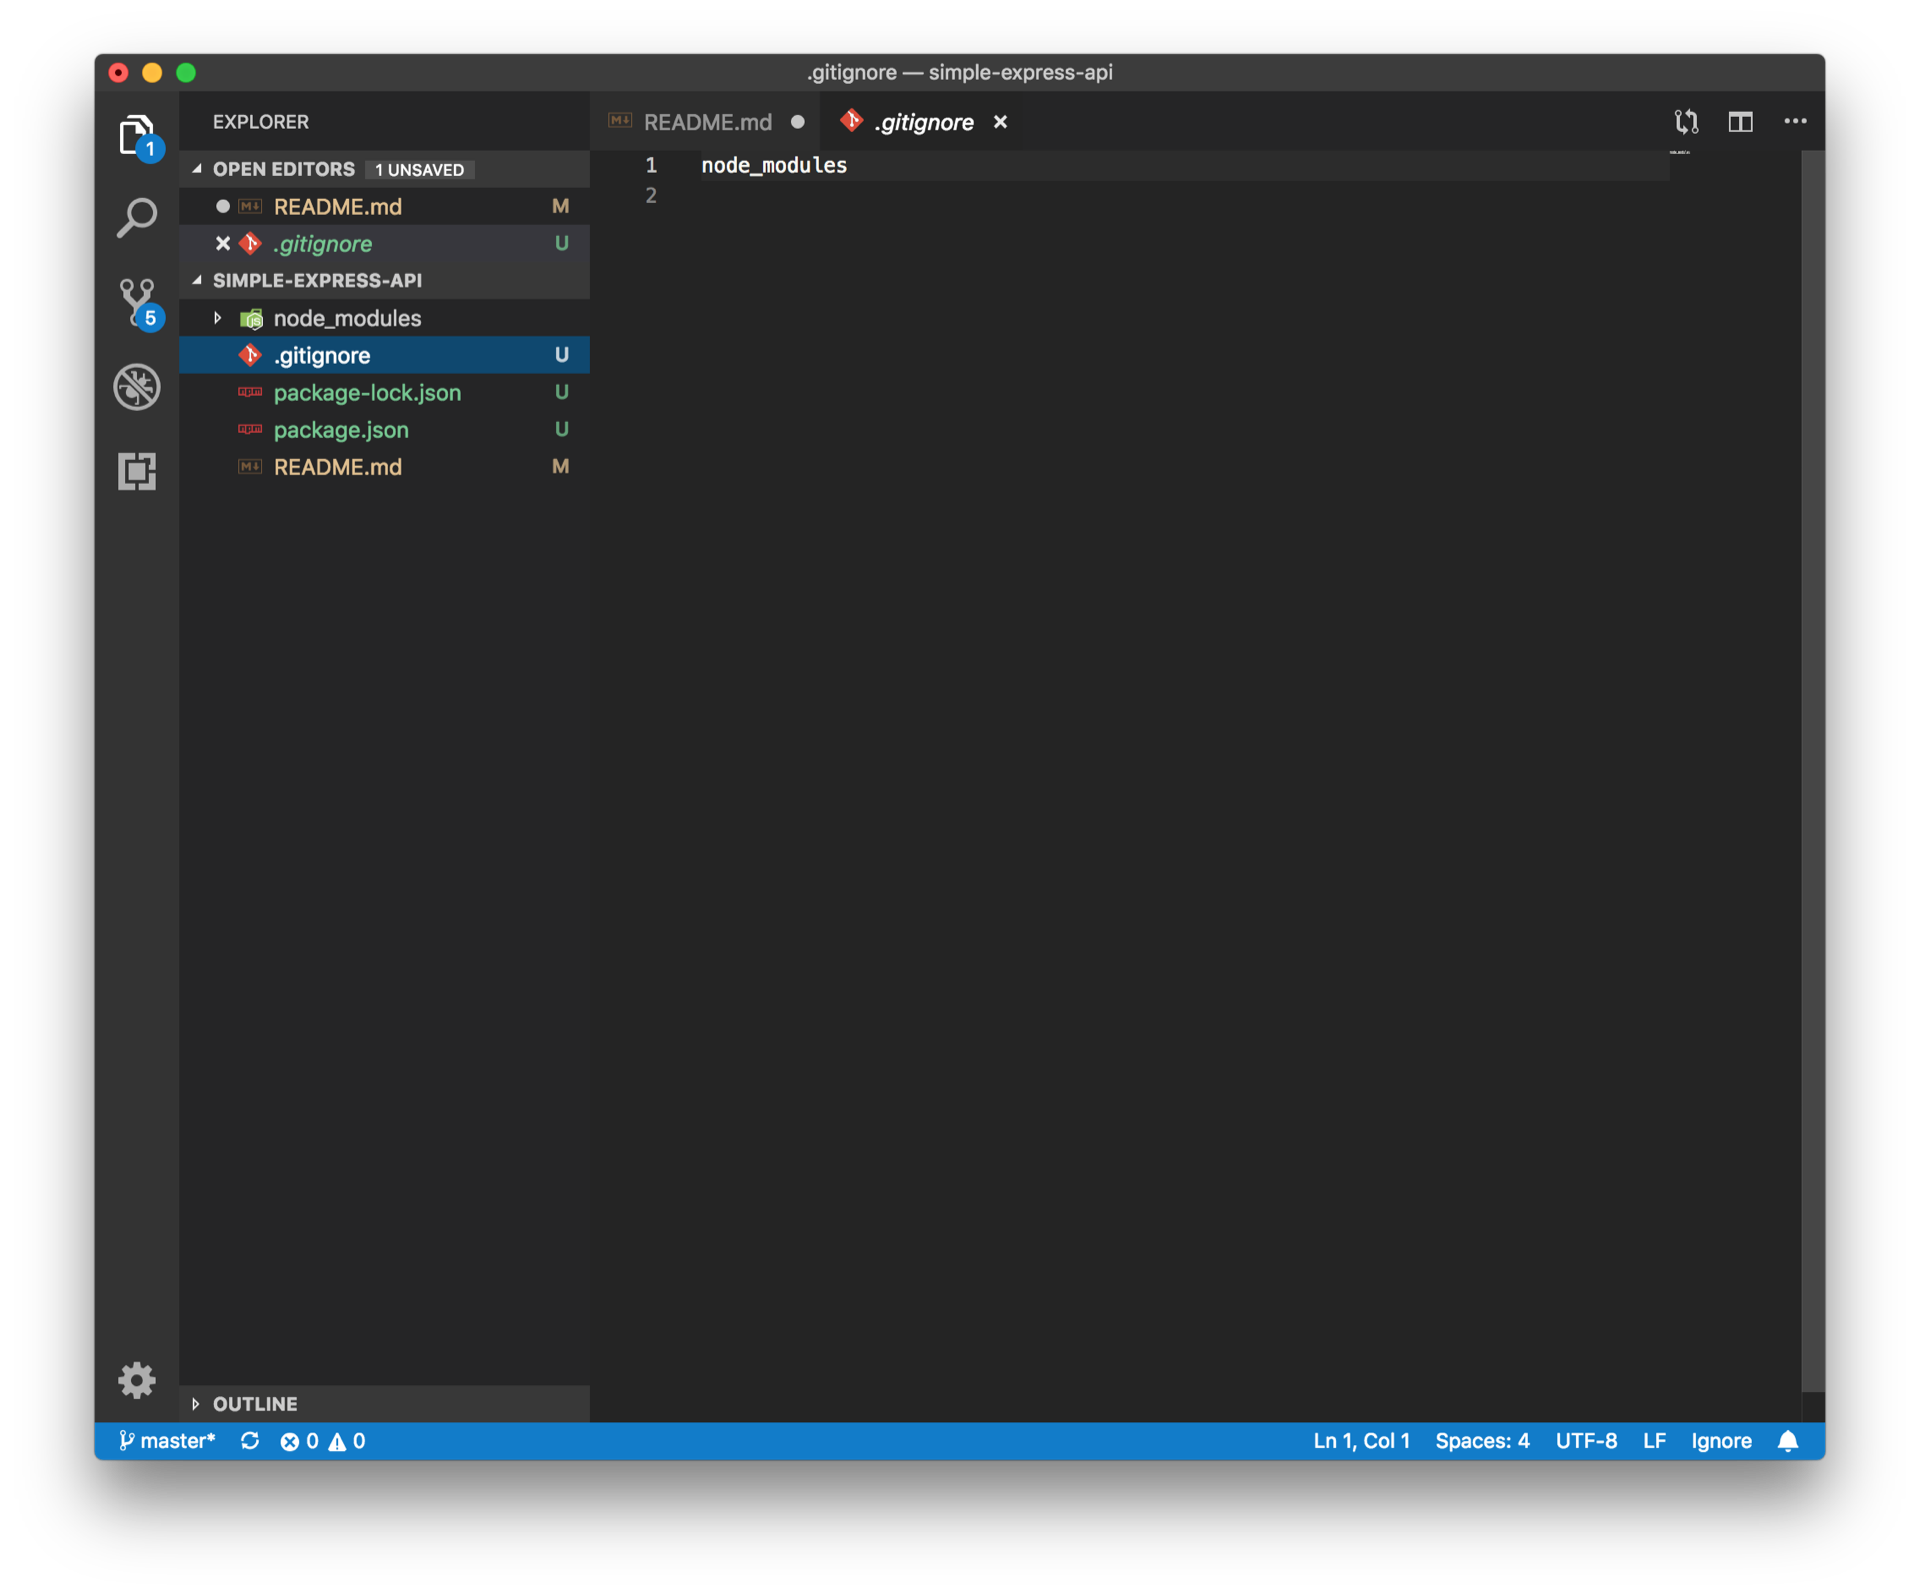
Let's add a .gitignore file and specify that we want to ignore our node_modules folder.
We can do this a couple ways. Via the terminal we can do it like this -- this says add "node_modules" as text to a file called .gitignore
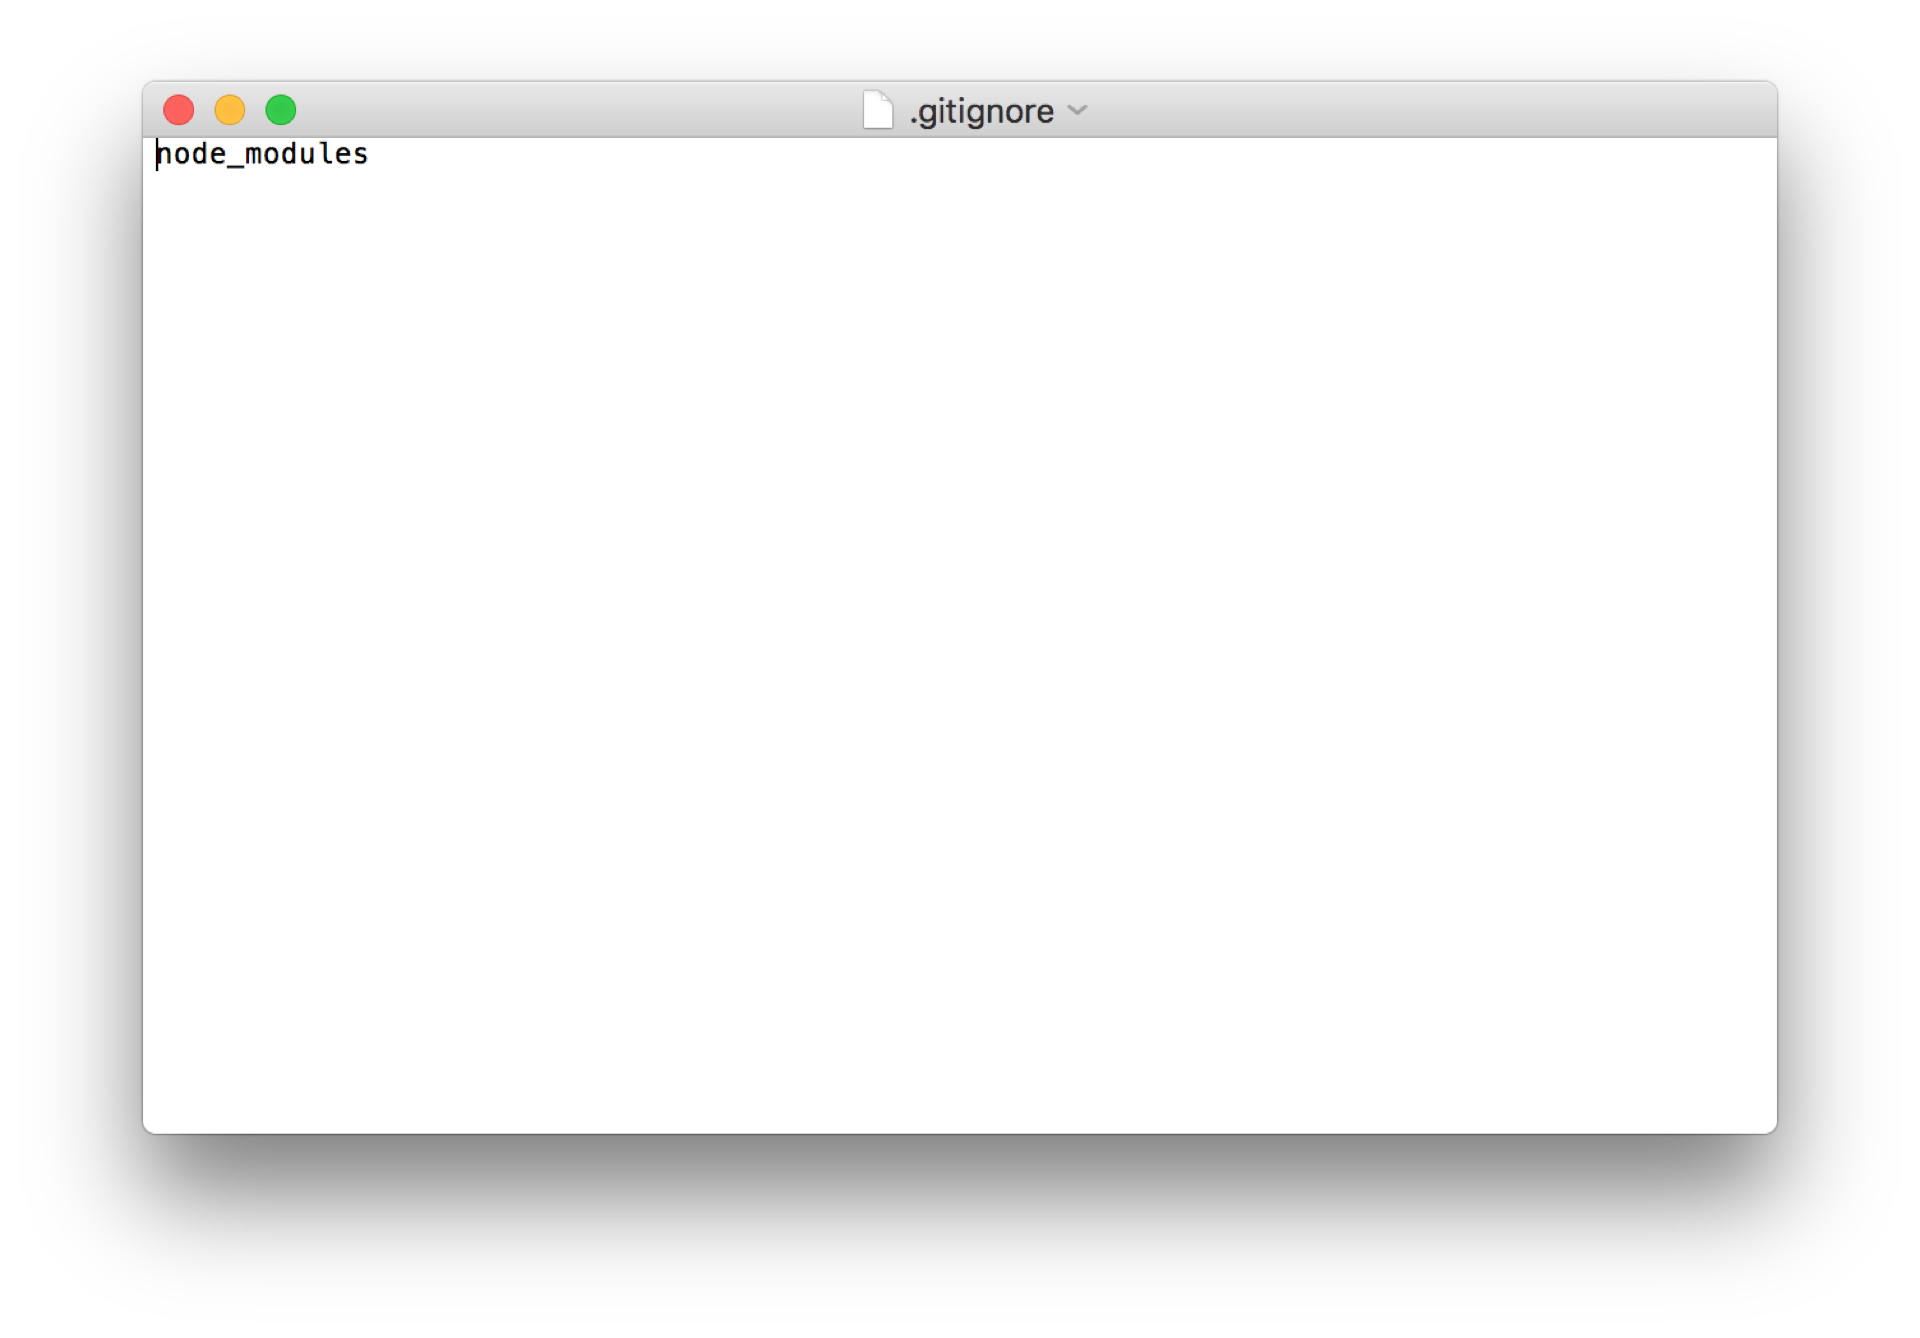
echo "node_modules" >> .gitignoreWe can also do this using your text editor like so:
**we will be adding more dependencies as we move on, but for now, let's keep it as raw as possible. Next step: add your index.js file.
Now it's time to add your server code. Let's add an index.js file. Using the touch <filename> command, we can add a file to the folder.
touch index.jsNow let's open up your index.js file and start by adding the most basic features of an express application.
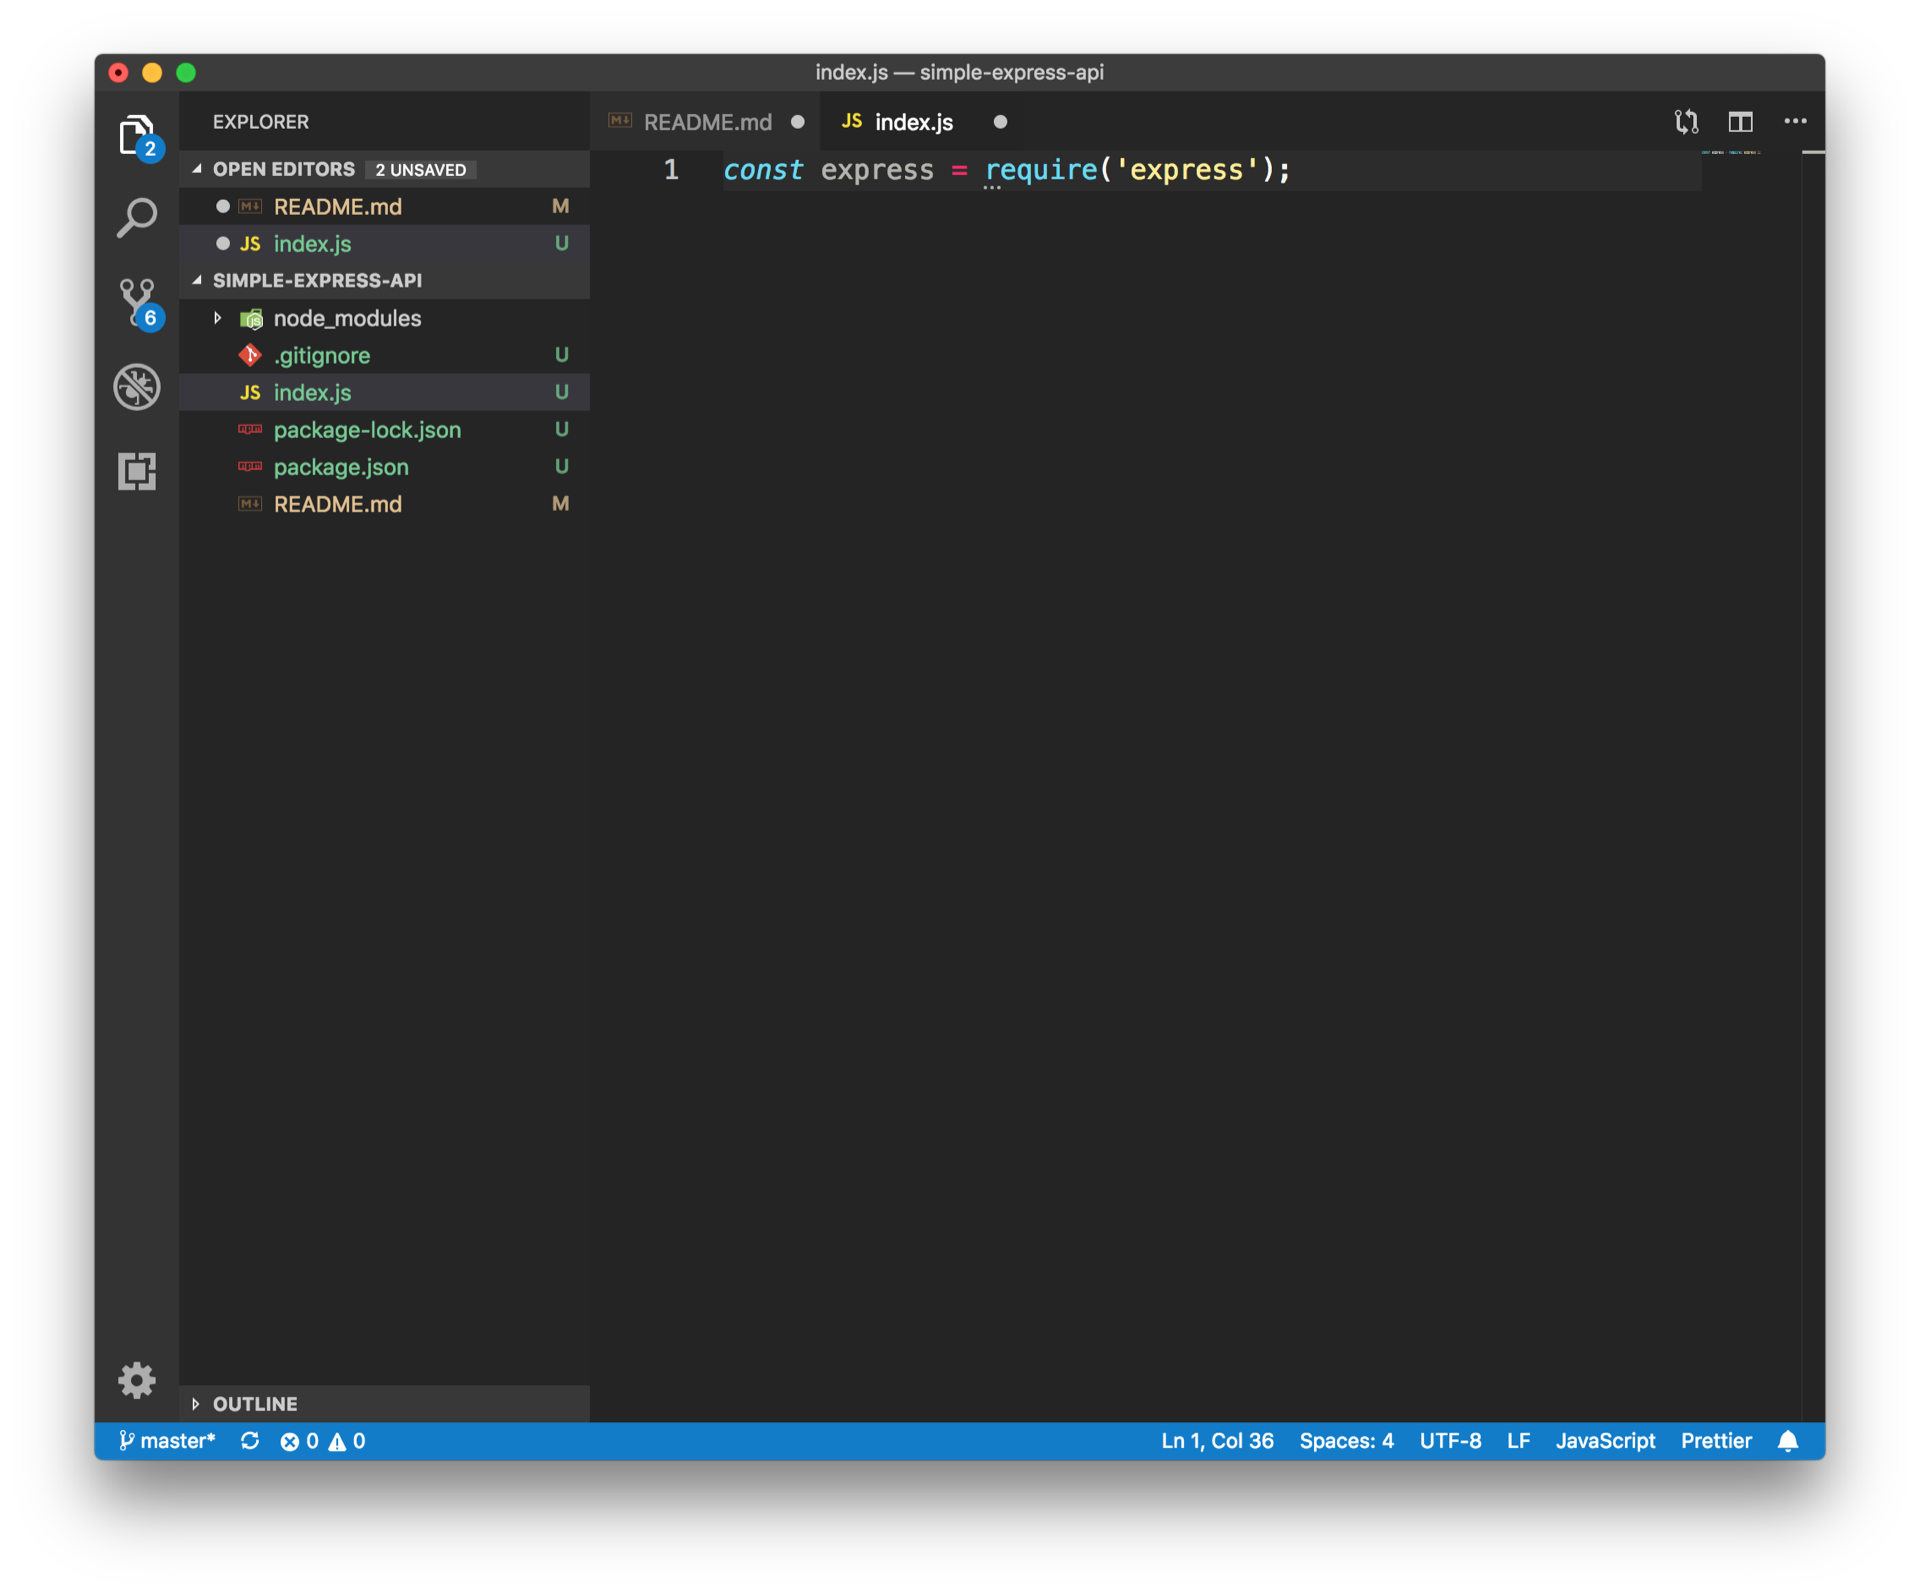
Open up your index.js and require express. const expresss = require('express') tells your application to bring in all the functions of express and make them available
const express = require('express');Initialize your express app to a variable called app. We do this by adding the following.
const express = require('express');

const app = express();Now that we have an express app living in our app variable, we can create our first API endpoint into our server. The following code tells your server:
If a GET request (app.get()...) is made to your server at the baseurl, send the message: "hello lovely person".
const express = require('express');

const app = express();

app.get("/", (request, response) => {
    response.send("hello lovely person");
});In order for our express application to communicate with the outside world, we need to open up a port for requests and responses to be served up! We do this by adding app.listen(<port number>, <callback function>)
const express = require('express');

const app = express();

app.get("/", (request, response) => {
    response.send("hello lovely person");
});

app.listen(3030, () => {
    console.log("check out the magic at: http://localhost:3030")
})
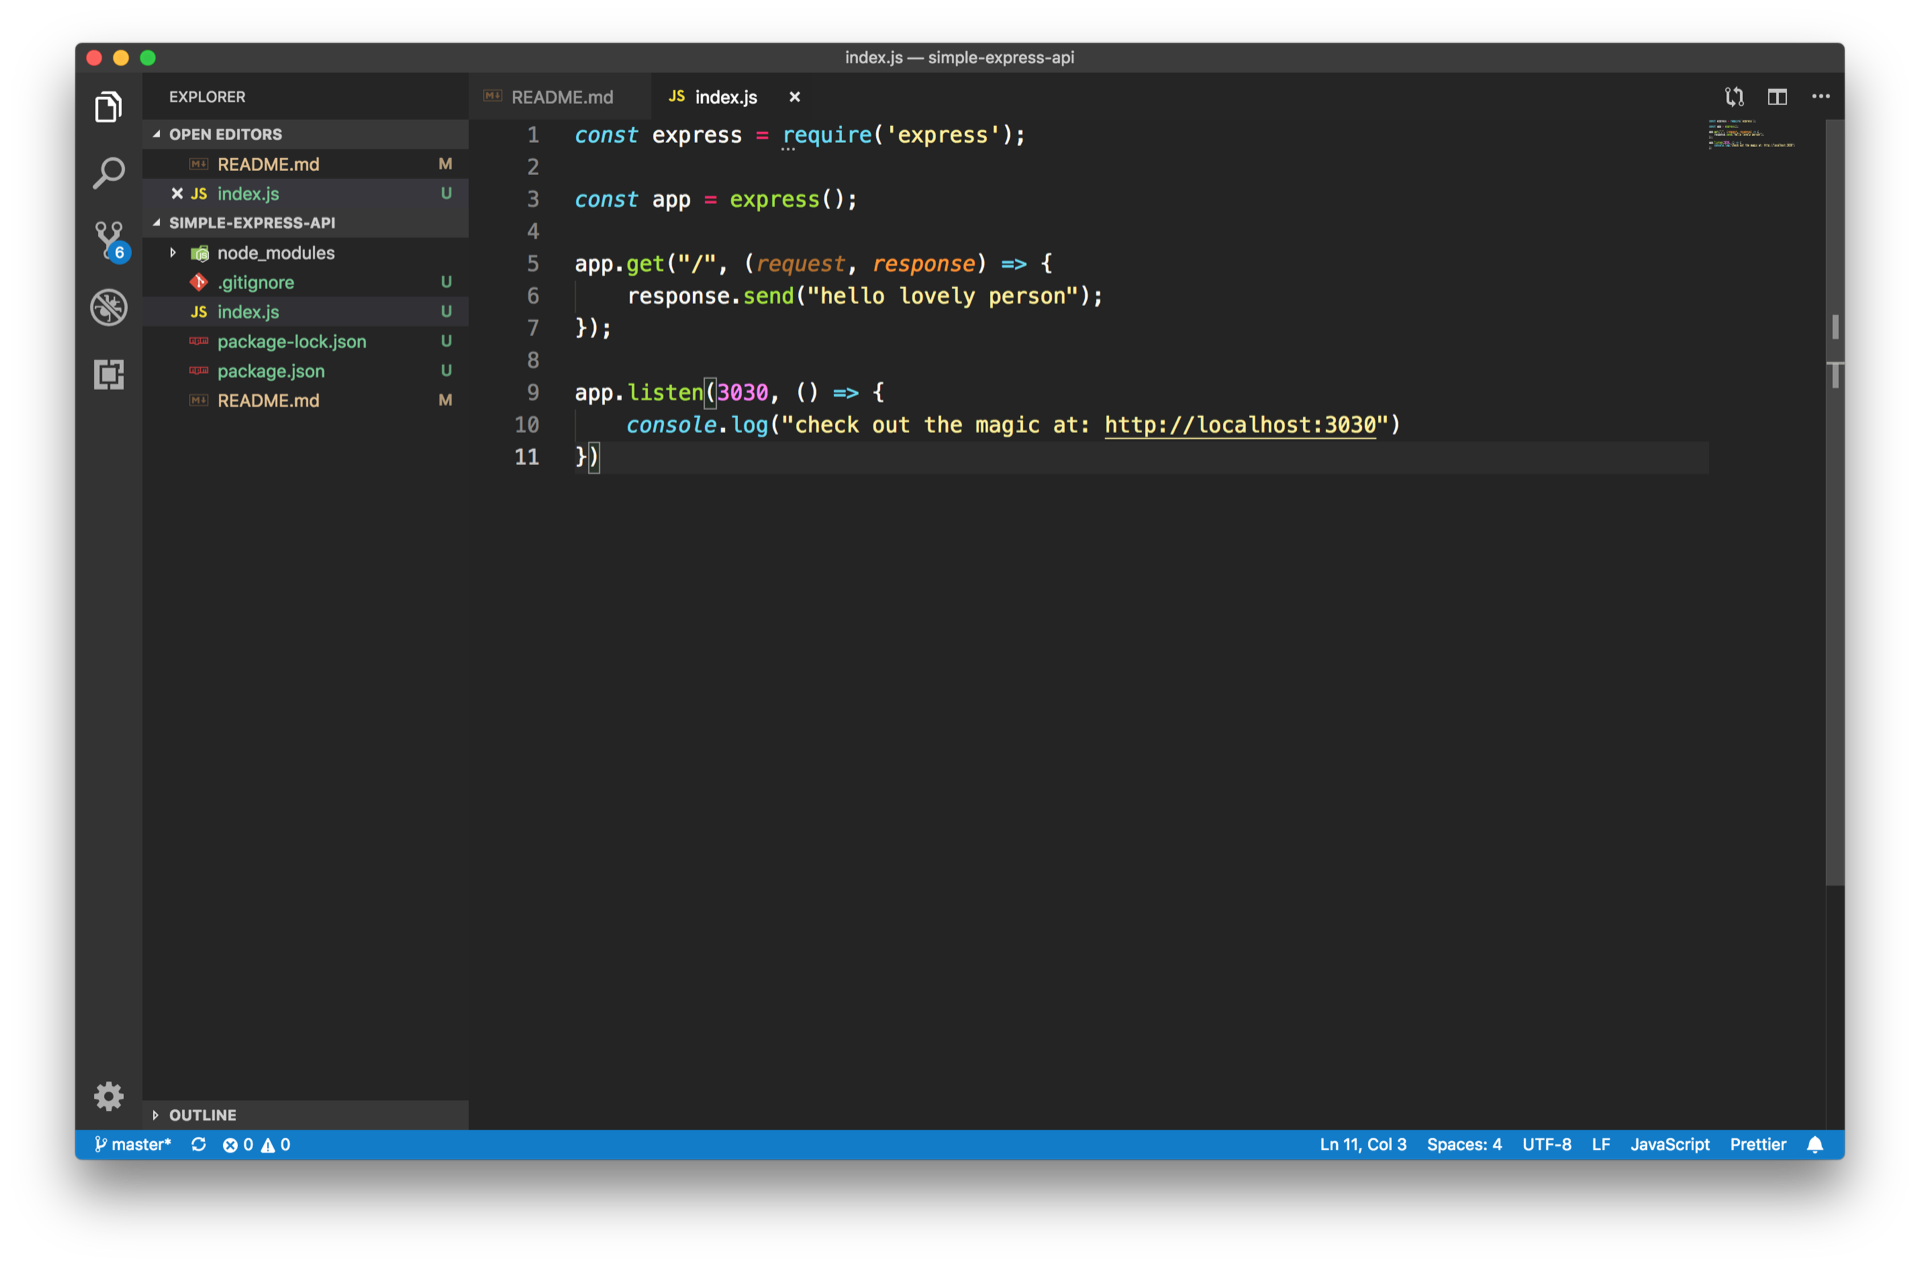
Now we have all the pieces of a super duper simple but functional server side API for GET requests.
Let's test this out.
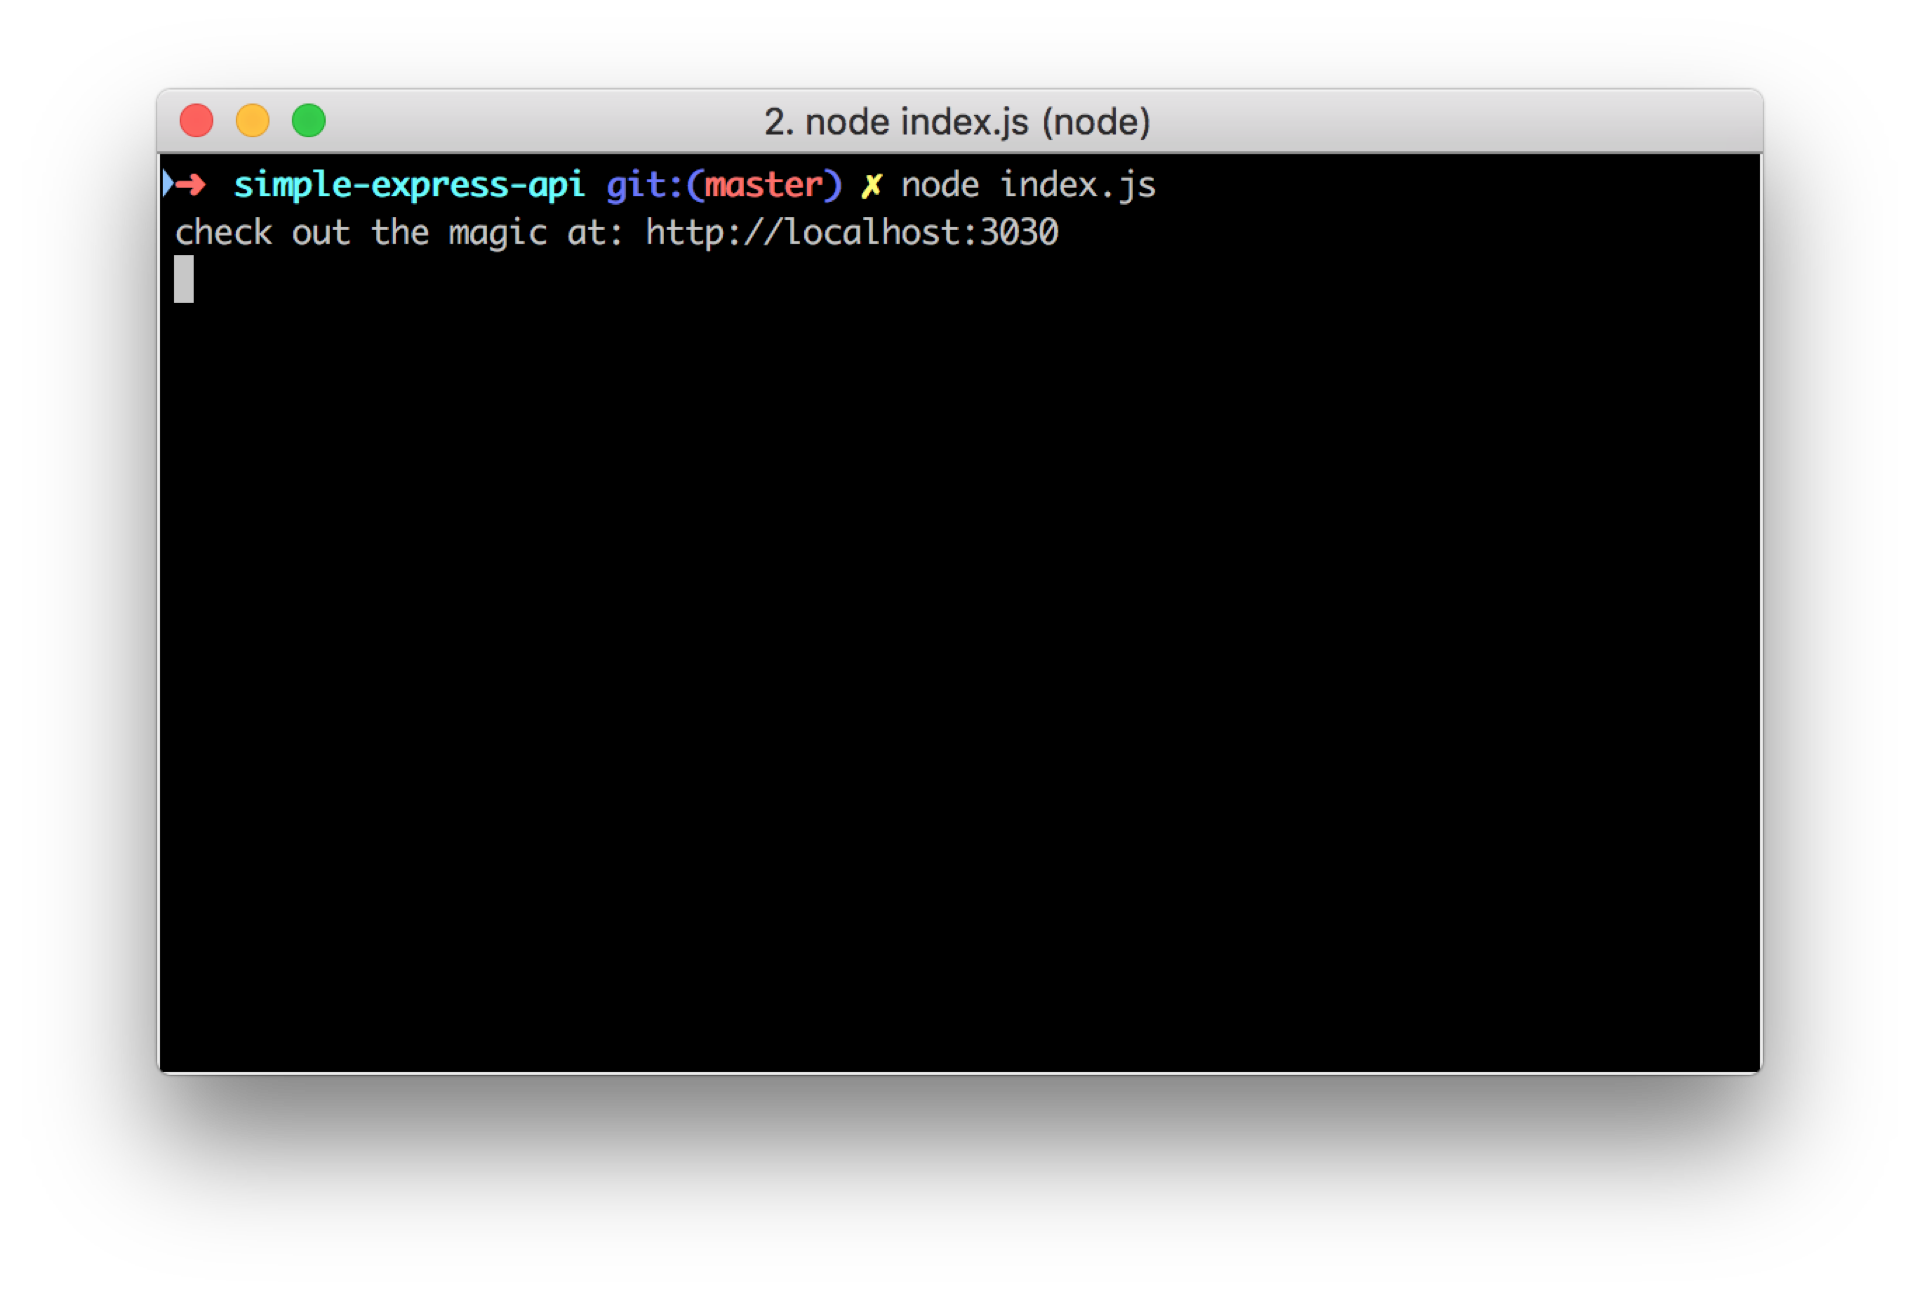
In order to run our application, we can simply run
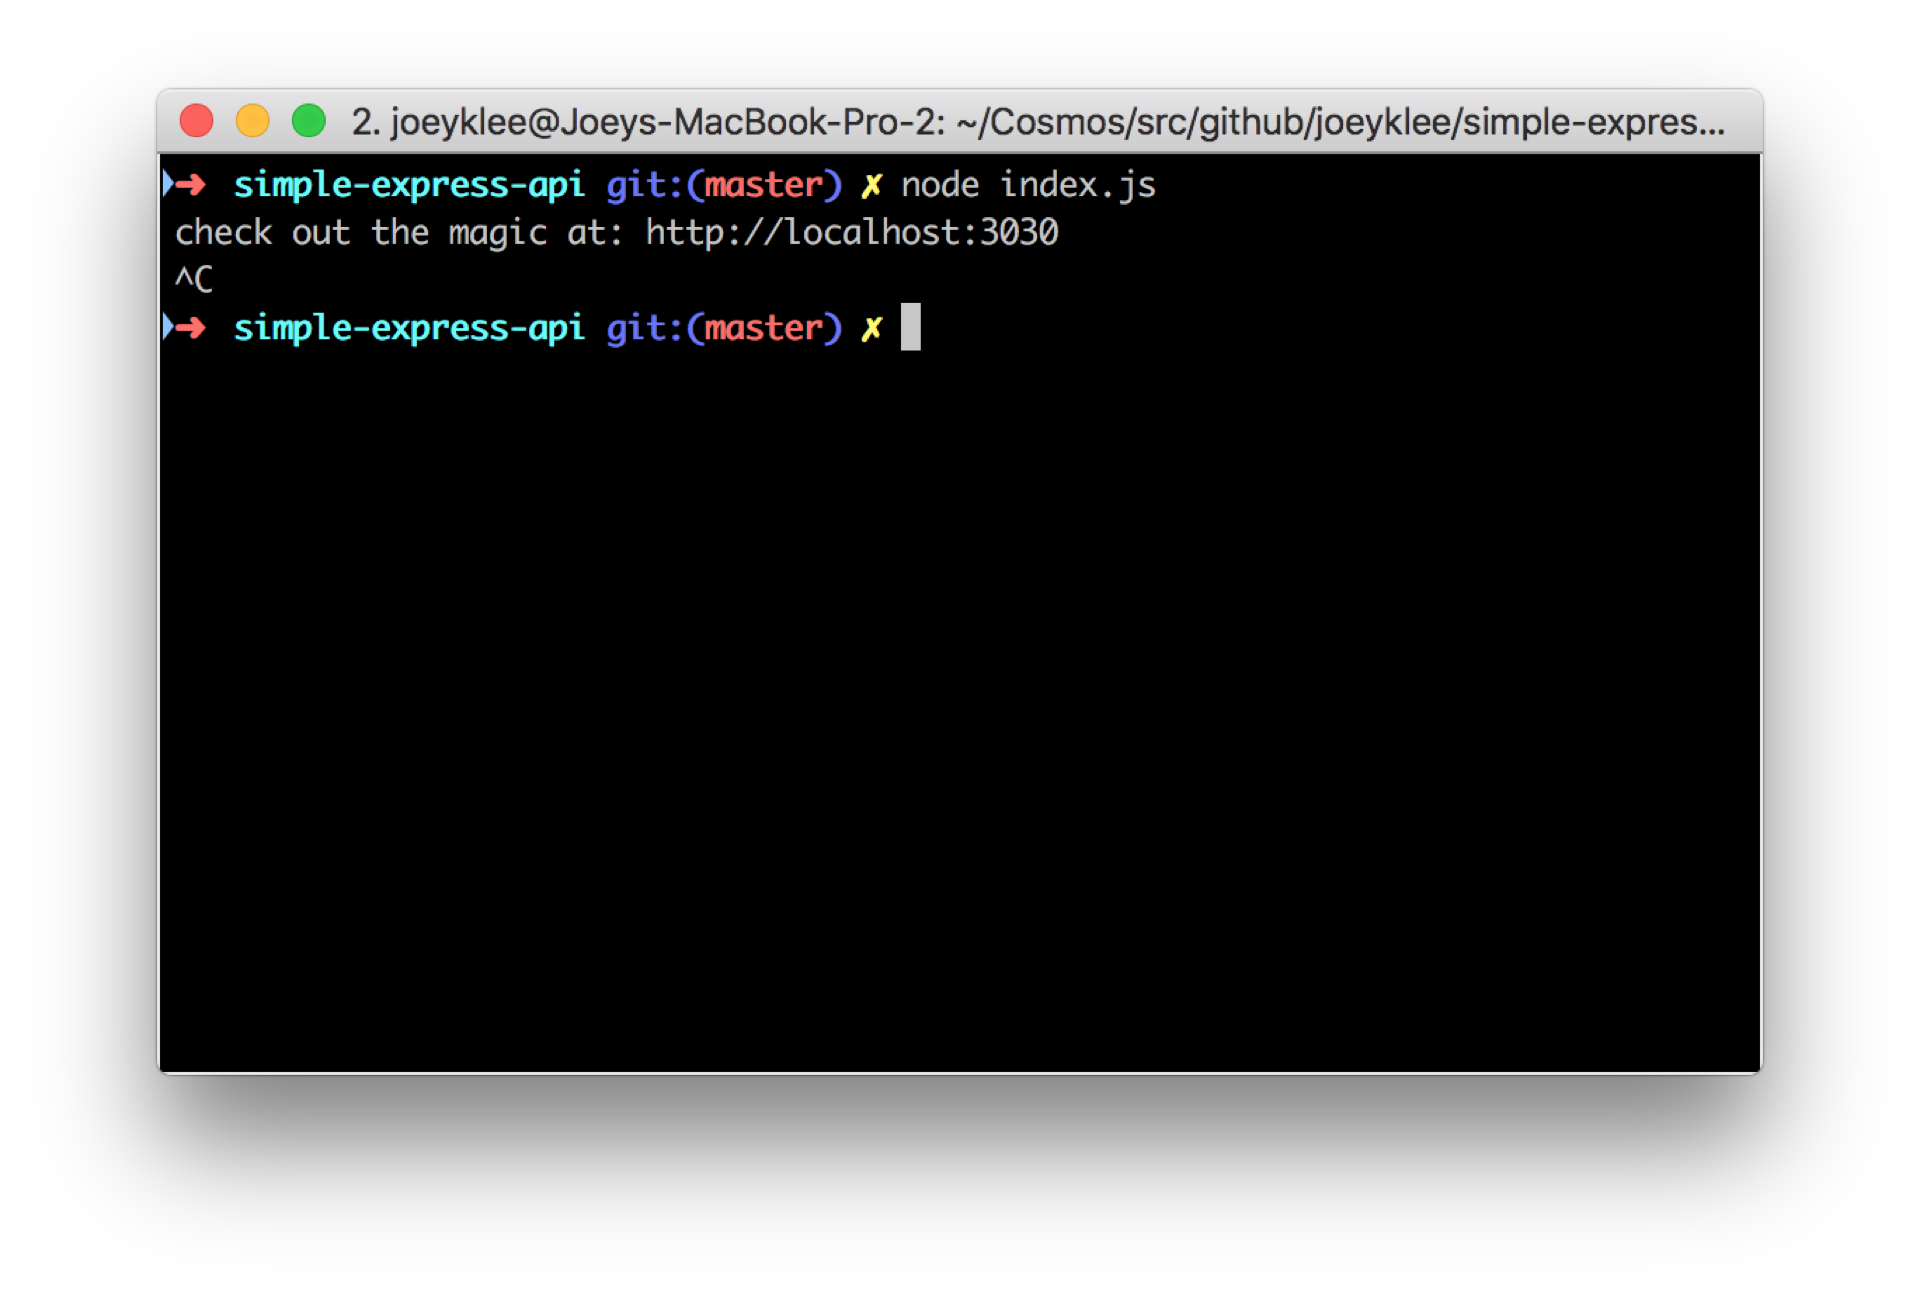
node index.jsIf all is well, we should see the message we wrote above:
check out the magic at: http://localhost:3030Open up in your browser: http://localhost:3030
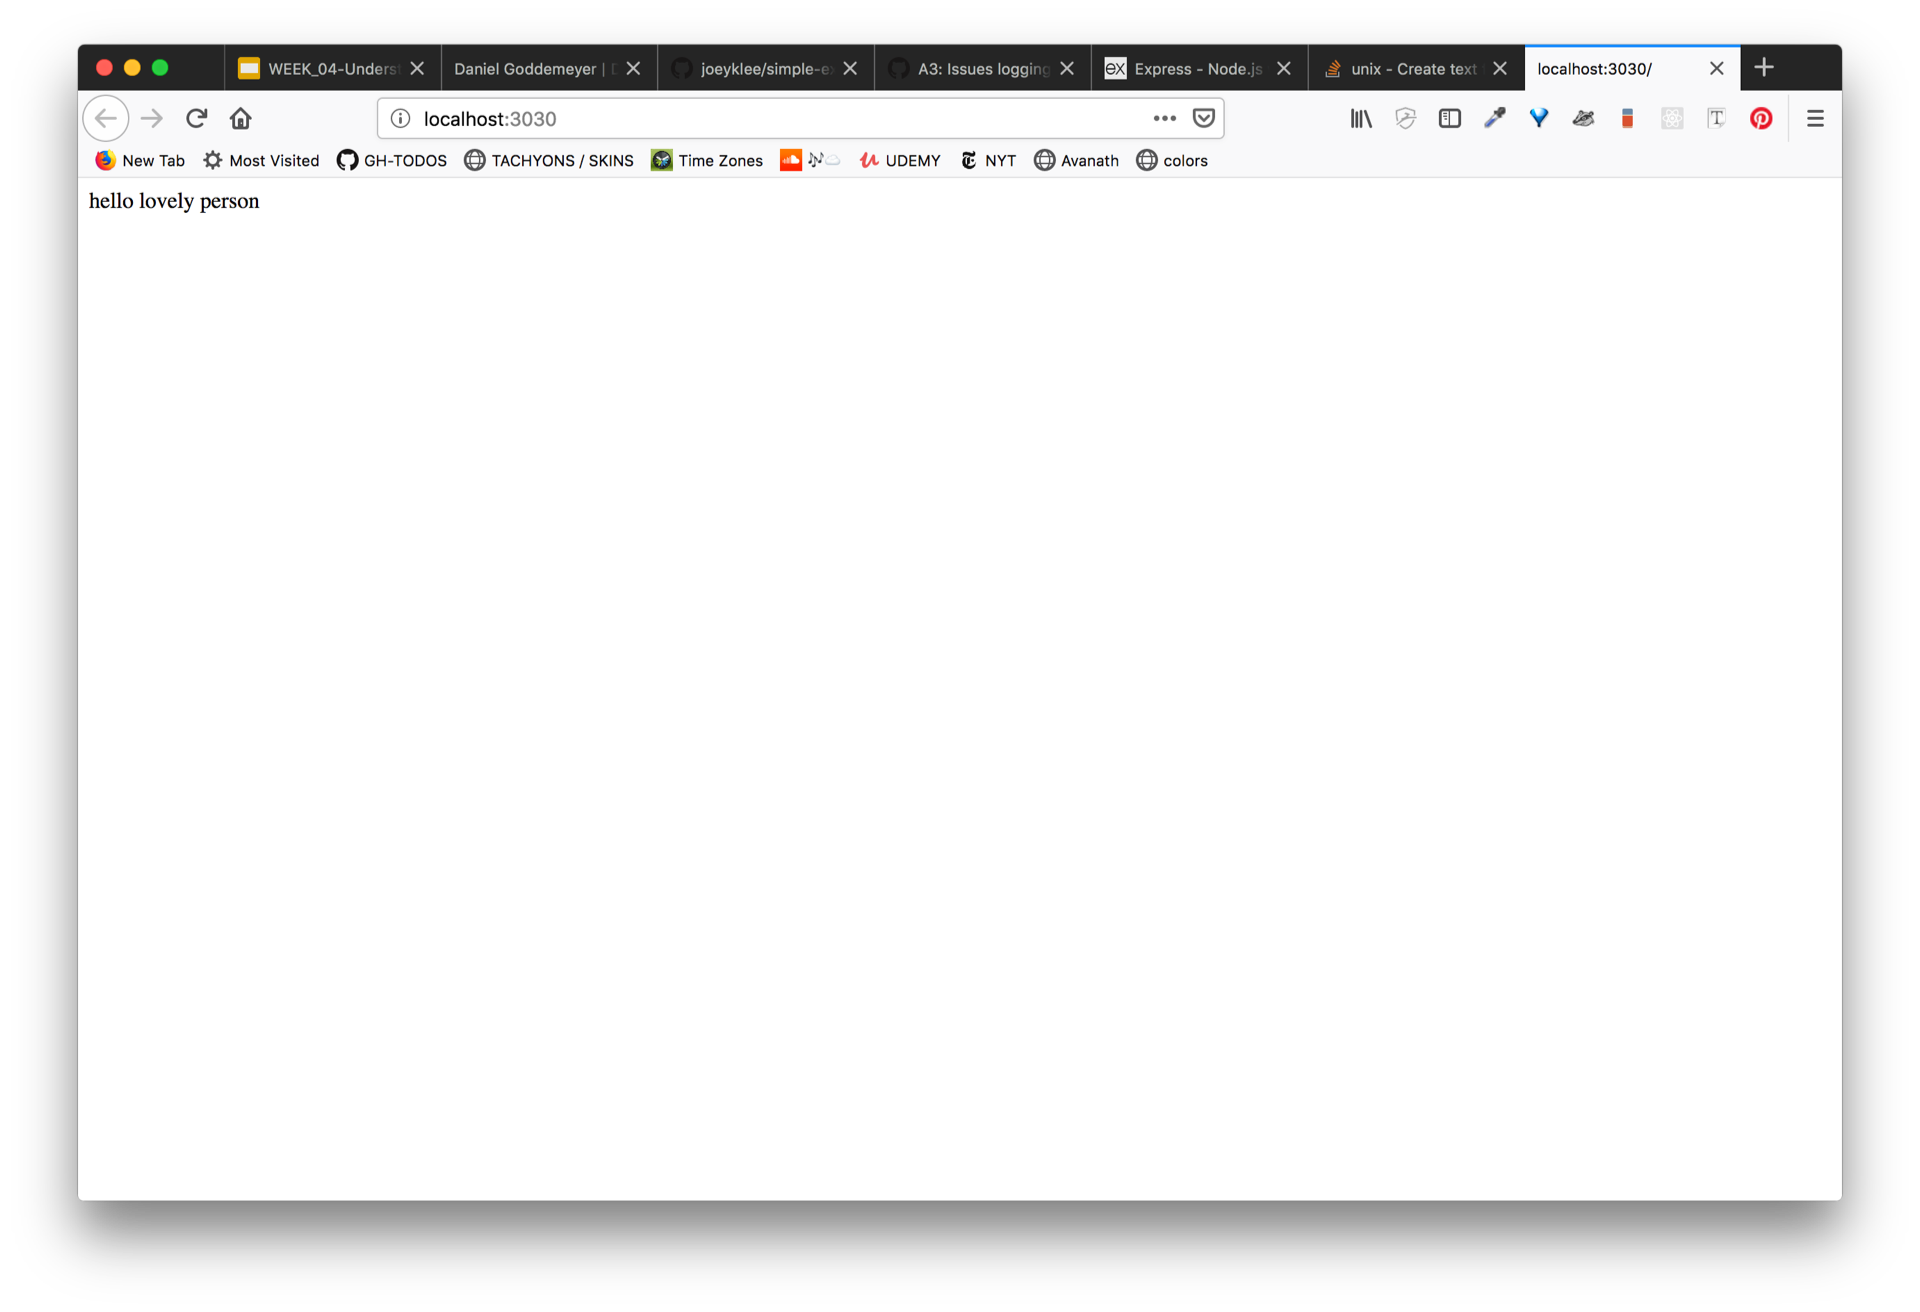
You'll now see our message there: hello lovely person
Now that we know our application works, let's stop it and keep developing, To stop any terminal process, you can use: control + c to stop the server from running.
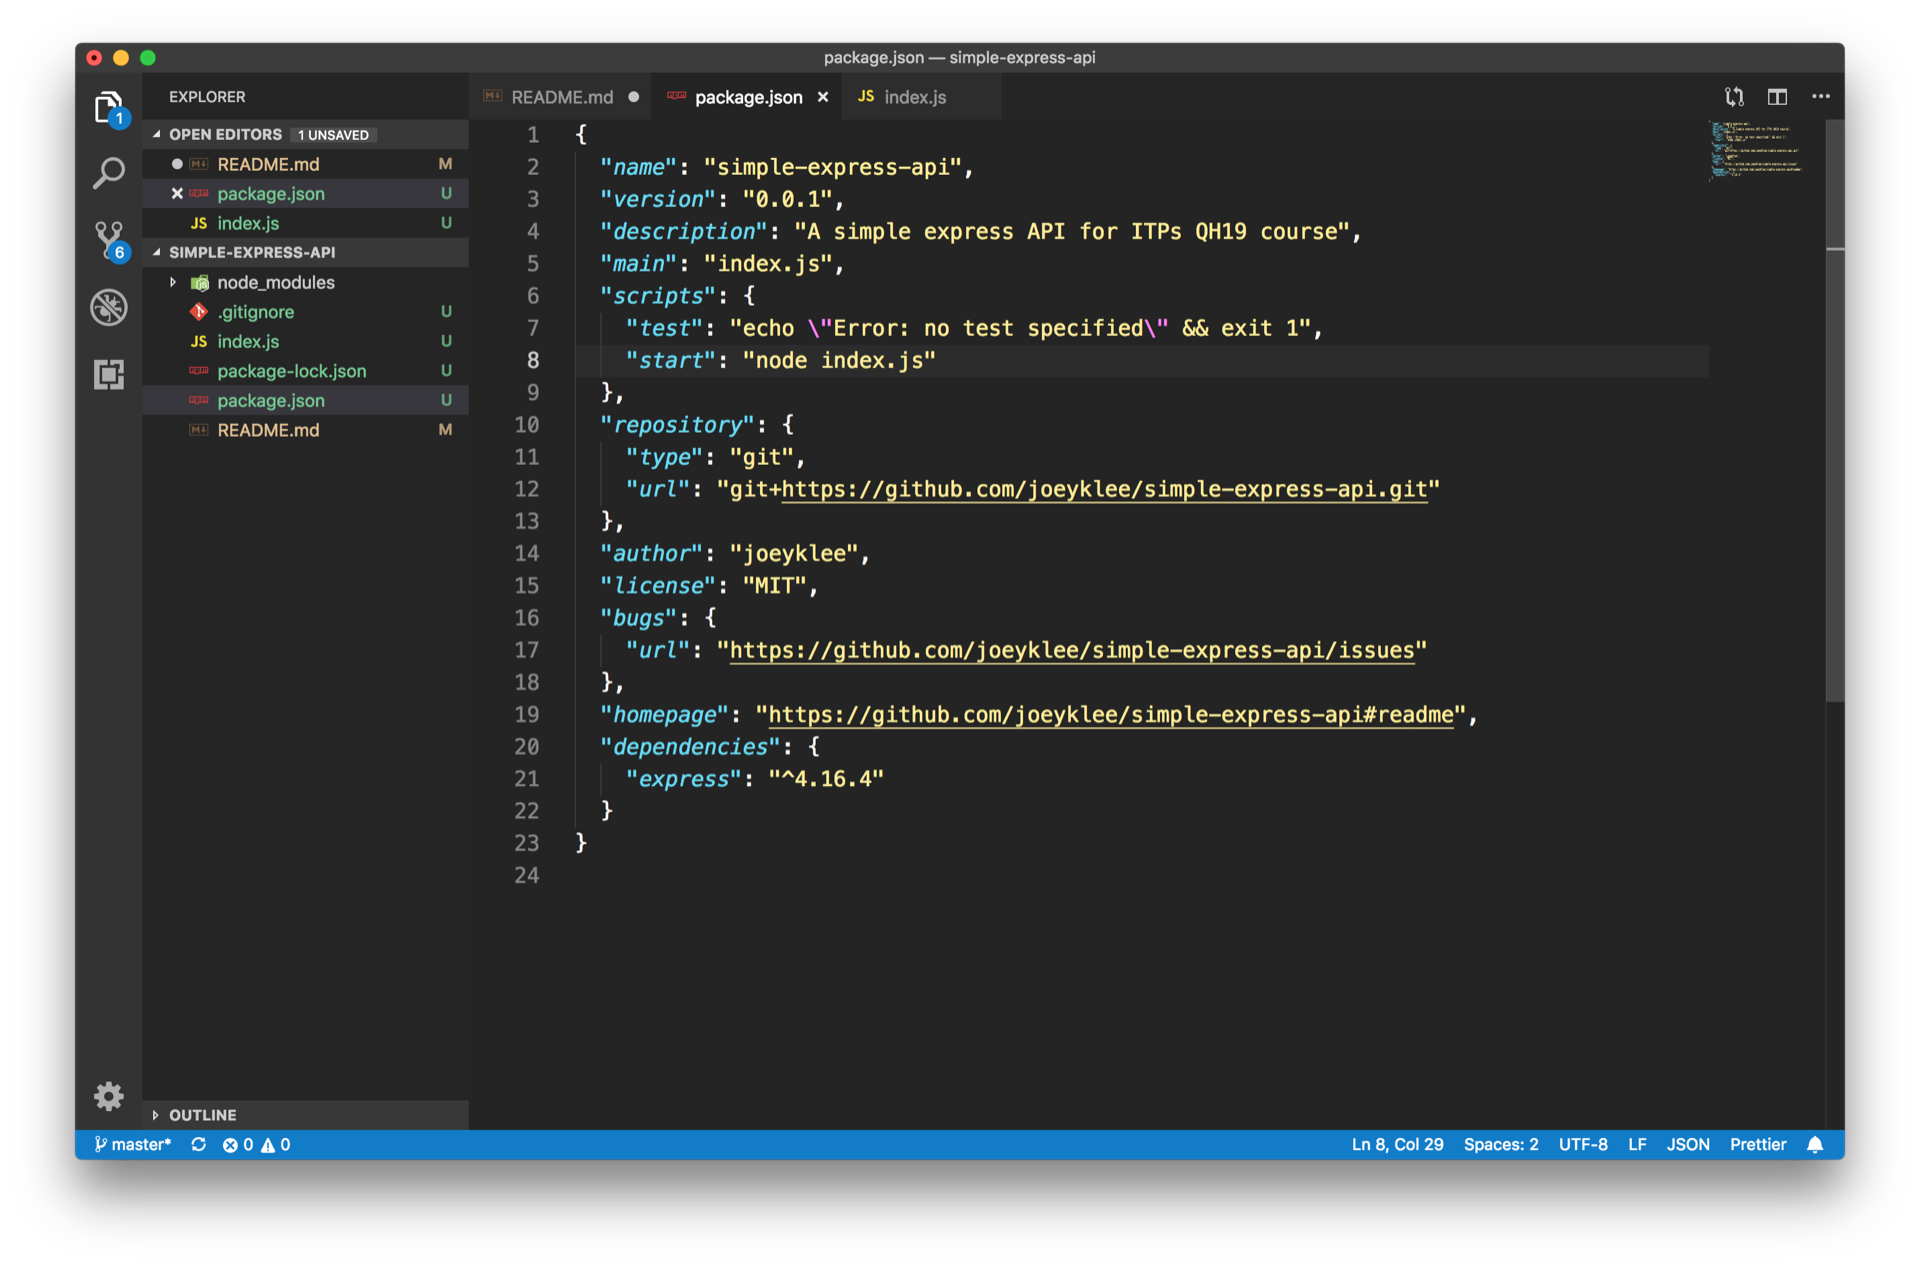
In order to run our application, we can simply run node index.js BUT we want to be really cool and professional so that we (and other people who want to help develop our application) can just grab our projects, run npm install, then npm start to run our application.
To do this we're going to go into our package.json and add under scripts, the following:
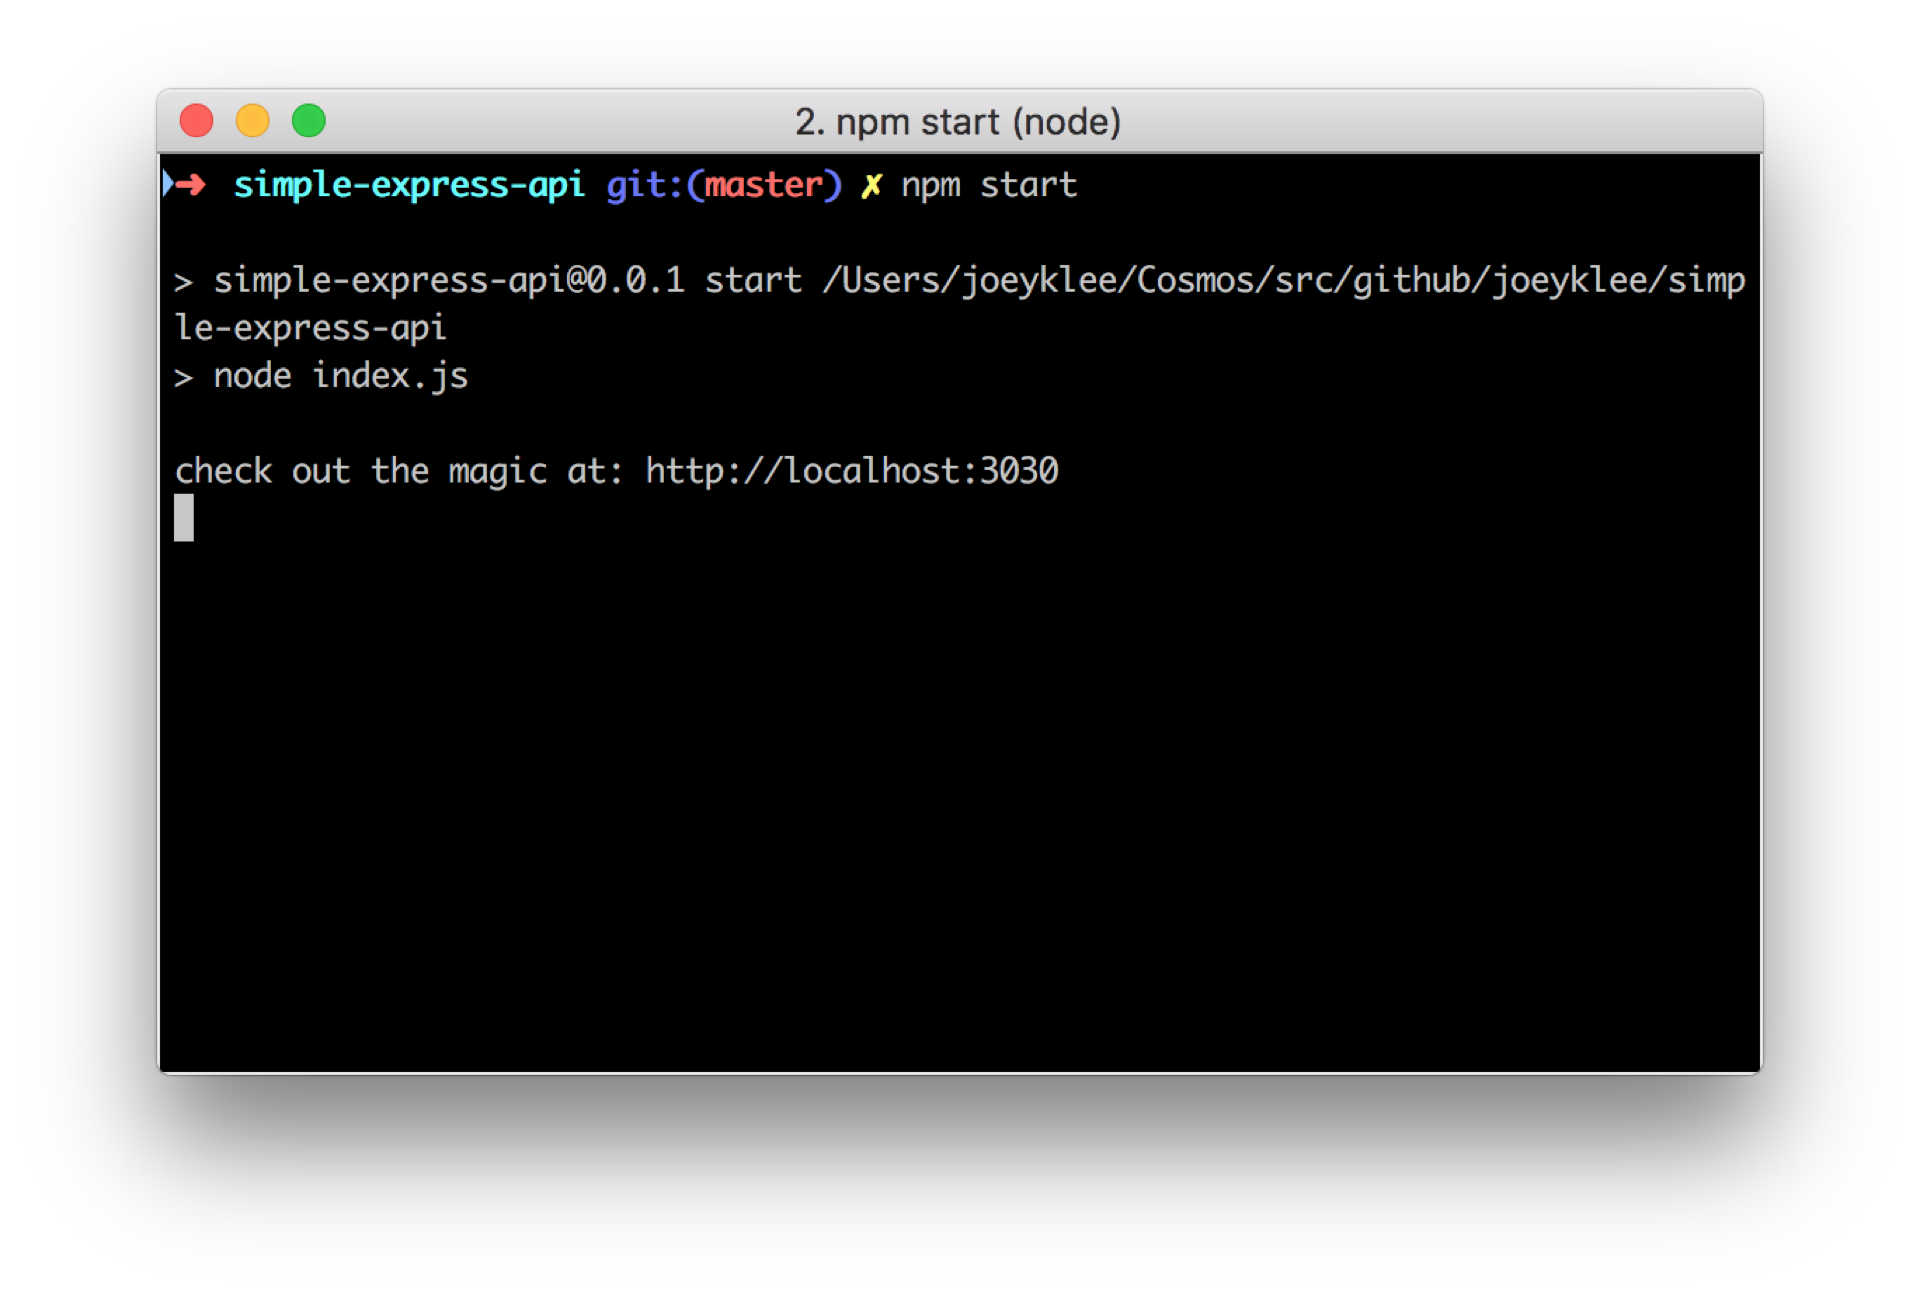
Now if you run in your terminal npm start, it will start up your application:
Being able to run npm start is awesome enough, but the problem is that every time we make a change to our project, we need to stop and start our server again and again. Wouldn't it be nice if our server restarted every time we made a change? (there are instance when this is not preferred, but for now this is good for us).
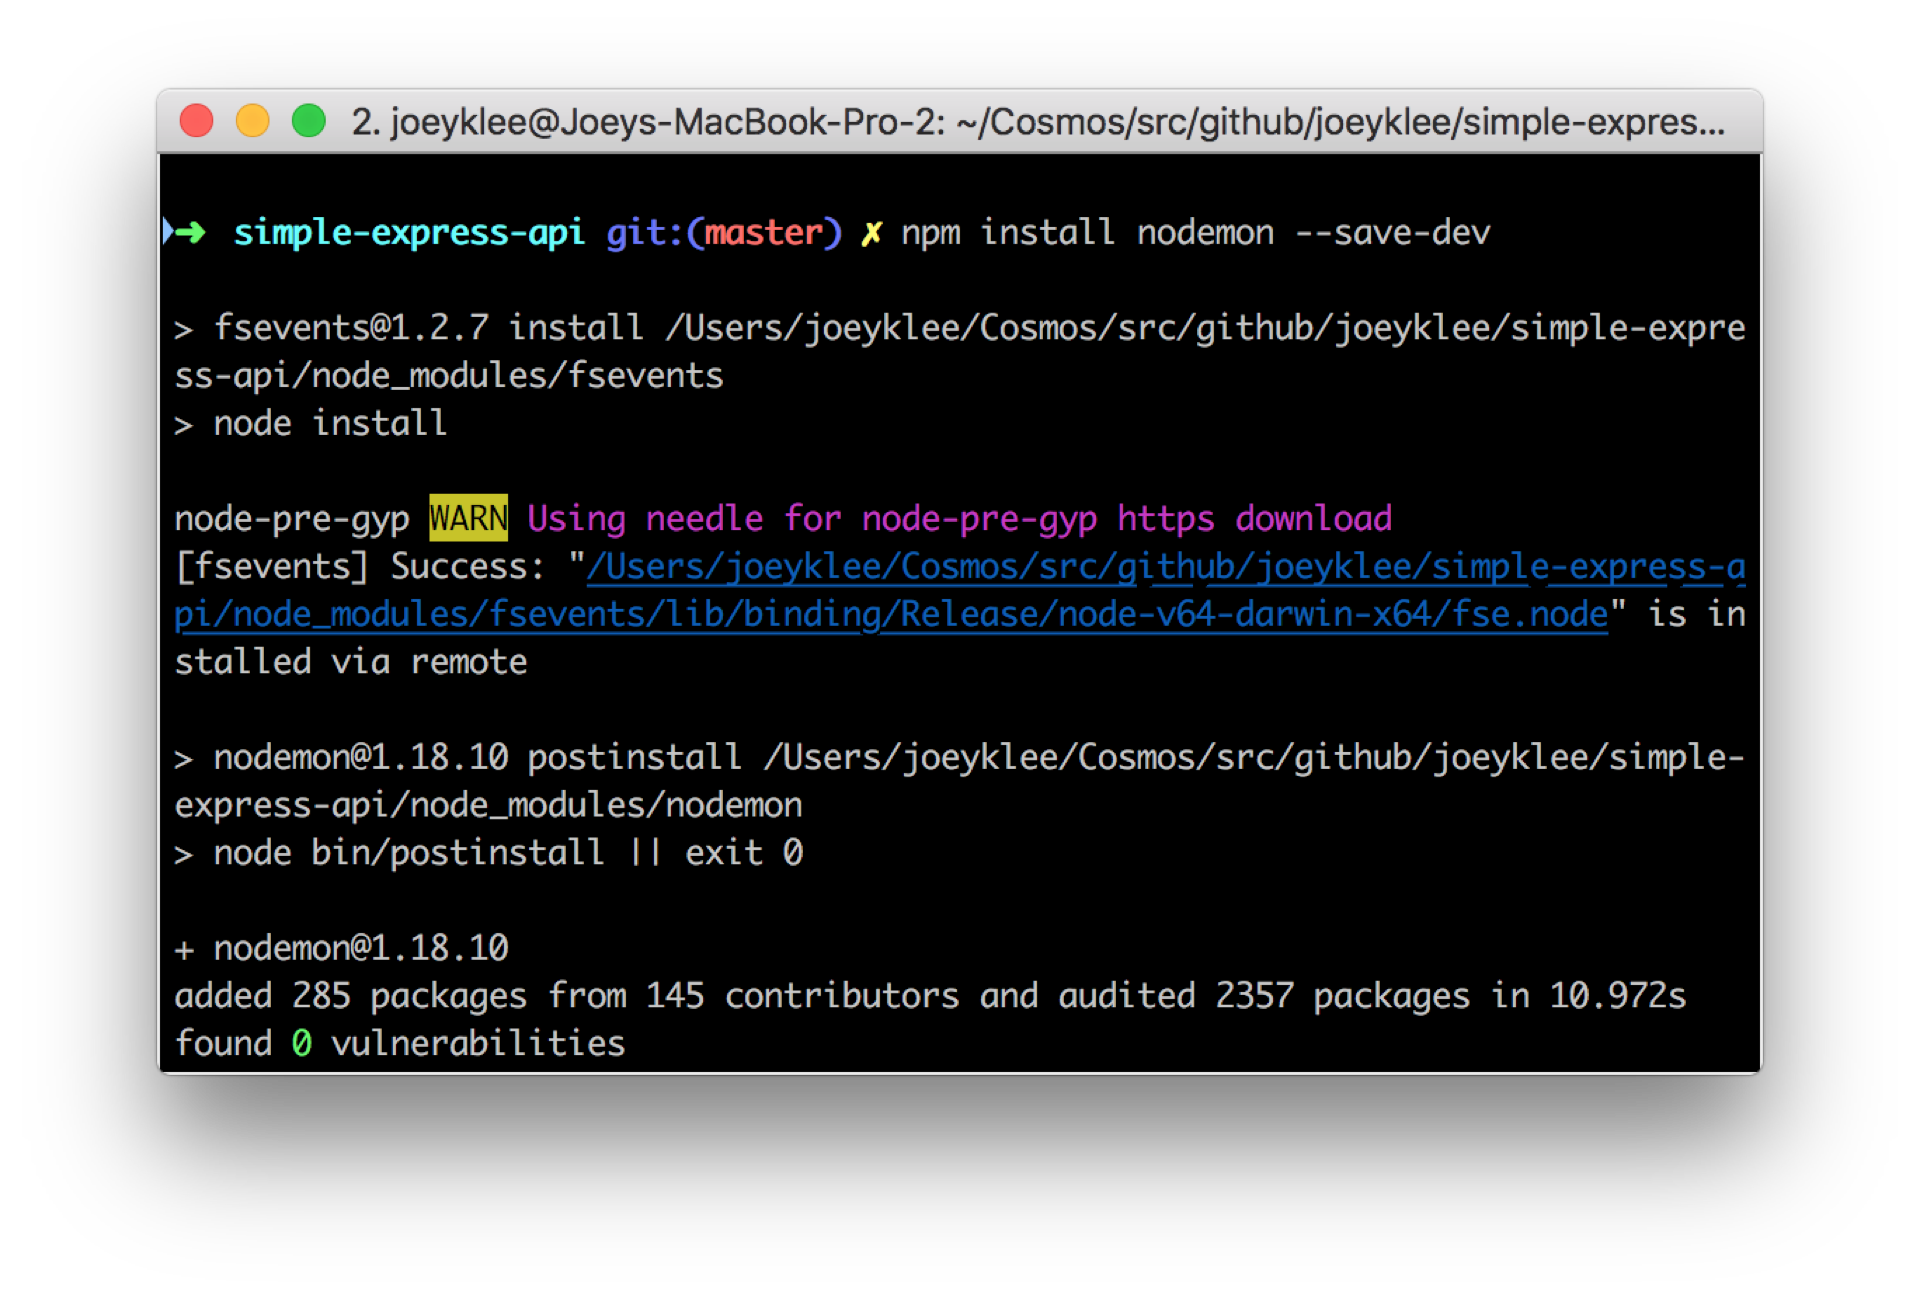
There is a package called nodemon that will take care of this for us. We can add this is a project development dependency by doing:
npm install nodemon --save-devThe --save-dev flag saves this as a dev-dependency which is different from the normal dependencies in that it is only necessary for development of your application, not running it in production.
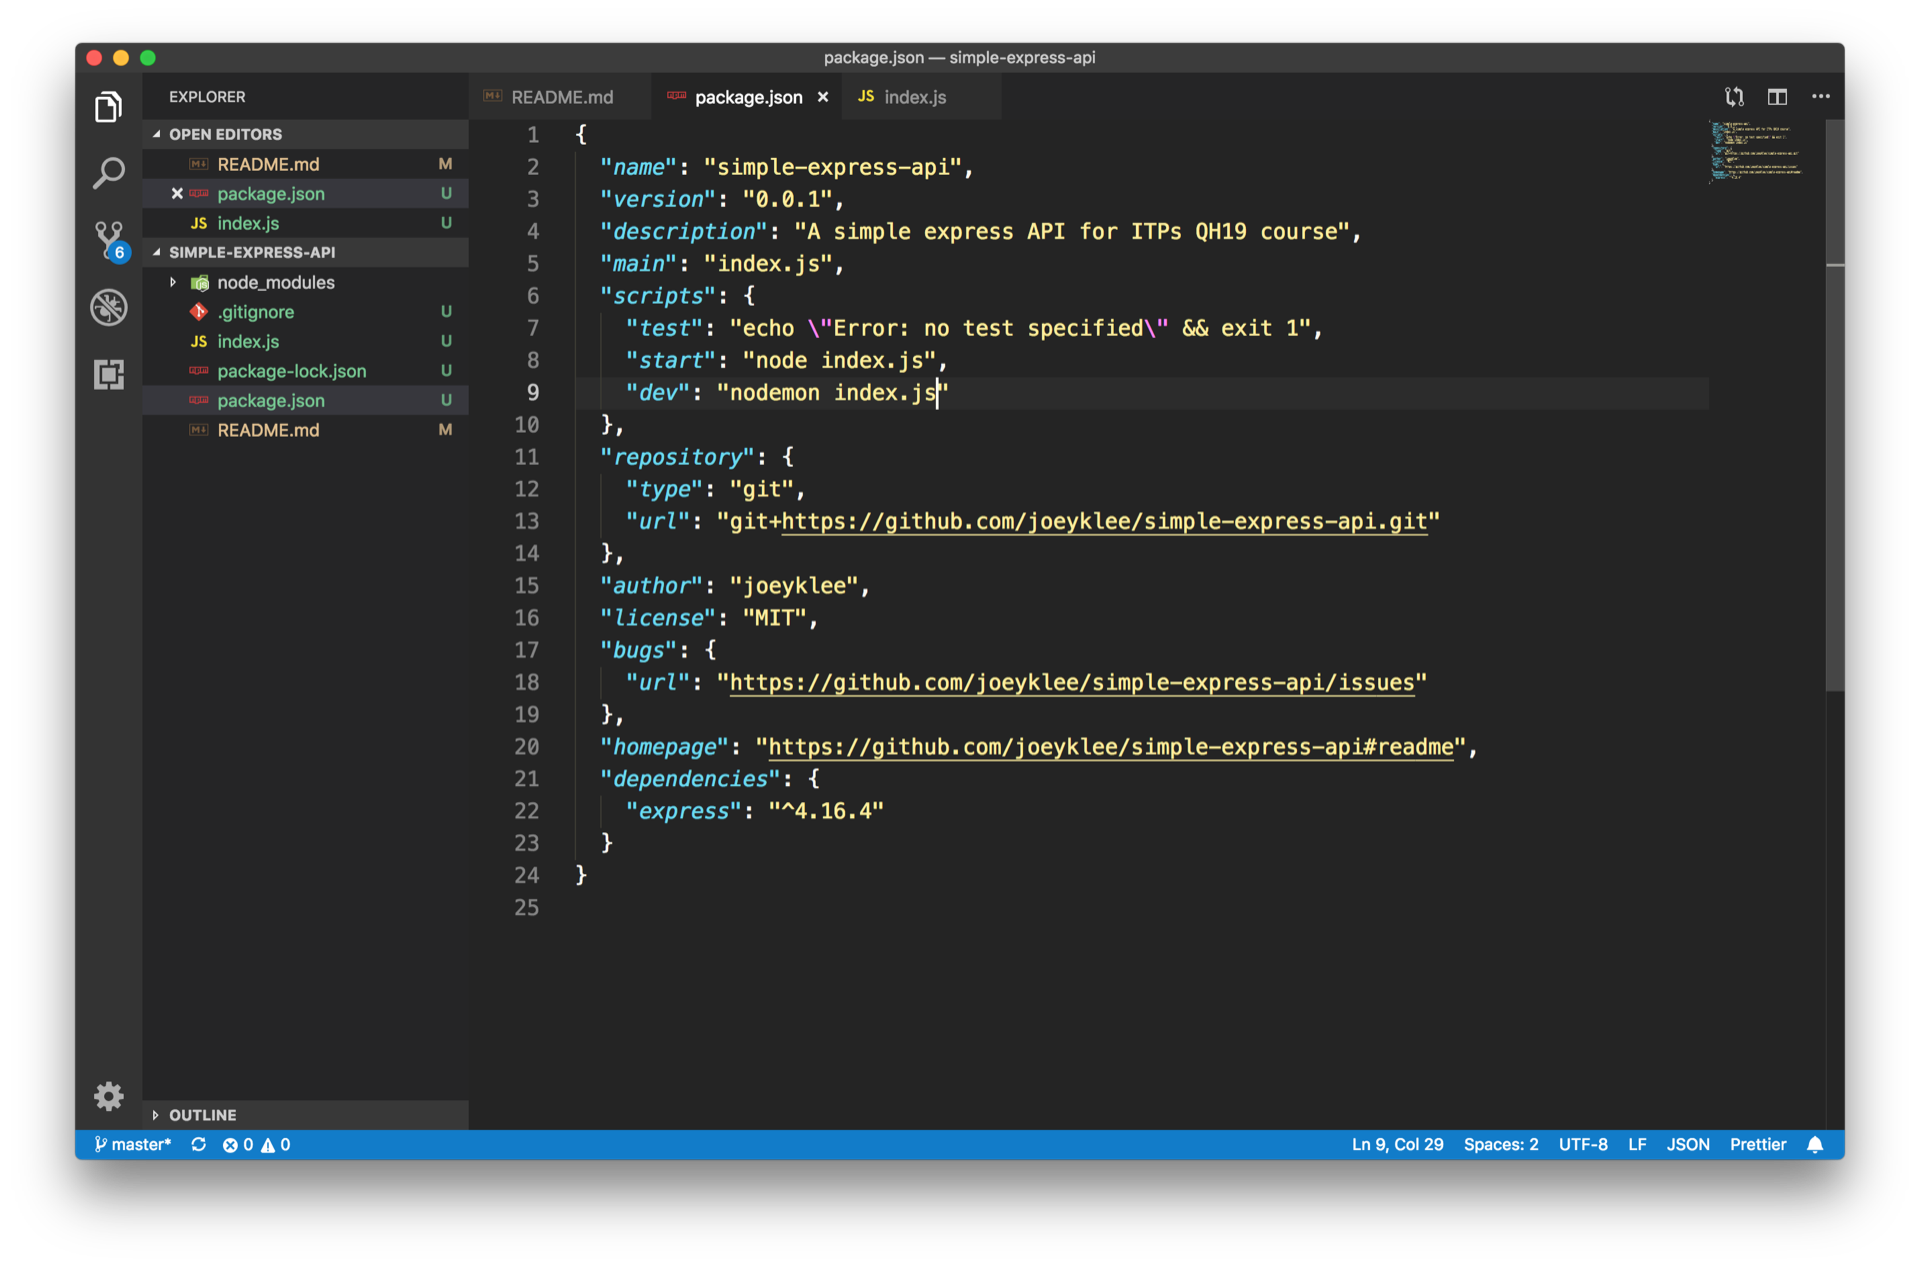
Now we can add to our scripts "dev", like so:
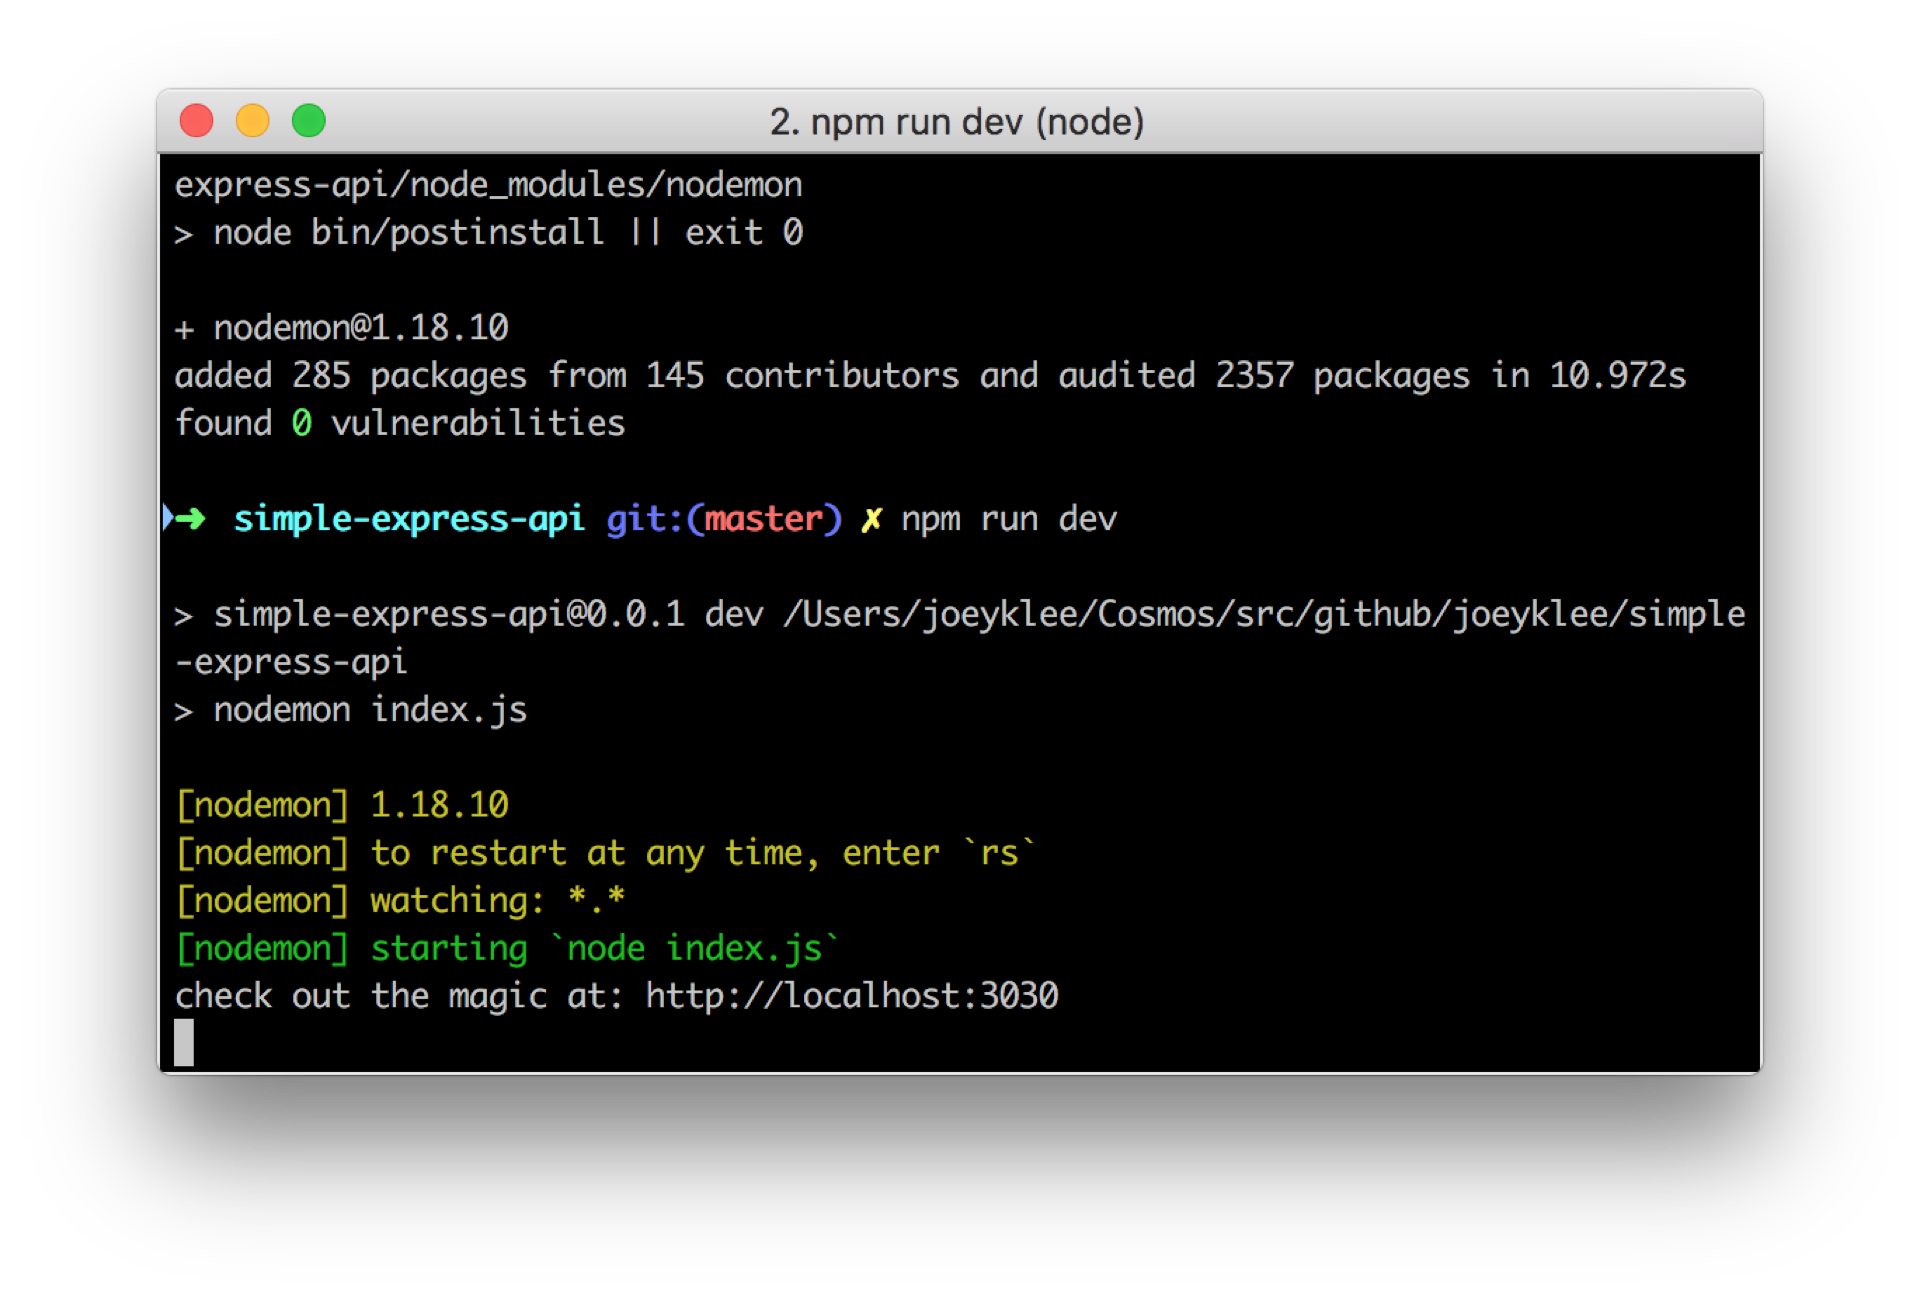
Now if you run npm run dev, your server will tell you that it's "watching ..." which just means that it's watching for any changes to any files in your project directory.
we can also add this available globally -- meaning, you can run nodemon anywhere on your machine -- by doing:
npm install -g nodemon
**If you've made it this far, pat yourself on the back! You're diving into this whole new universe of server side development which can feel very foreign and intimidating, but with practice, you'll be whipping up these little applications like no one's business. Take a break and let's come back to building some of our API endpoints for achieving "CRUD".
Before we add in a simple database, let's just show what it means to build and API for CRUD endpoints for data that's living on the server.
Let's spec it out.
In order to create data on our server, we can accept data that comes in via POST request. We can send data as JSON, text, and a number of other formats. If we require uses to be authenticated in order to create data in our database, we'd require authentication headers etc, but we won't worrry about this for now.
Imagine <route> to be some route to your server for example, at the root url: "/" or at the url endpoint: "/api"
app.post(<route>, (request, response) =>{
    // all your logic for handling posting data to your database and what to do next
})app.get(<route>, (request, response) =>{
// all your logic for getting data from your server and delivering it to your client
})app.put(<route>, (request, response) =>{
// all your logic for updating data on your server and what to do next
})app.delete(<route>, (request, response) =>{
// all your logic for deleting data on your server and what to do next
})Pretty much all APIs have these endpoints for handling the delivery, update, creation, and deletion of data on a server and accessing various functions.
In our application, let's spec our how we want our API to operate. Define some JSON in your index.js file as a way to prototype with the assumption that our data would come from a database of some sort. REMEMBER: this data is in-memory, so if your server restarts, your data will start from it's initial defined state!
let myData = [
    {id:1, color:"red", x:50, y: 200},
    {id:2, color:"orange", x:100, y: 200},
    {id:3, color:"yellow", x:150, y: 200},
    {id:4, color:"green", x:200, y: 200},
    {id:5, color:"blue", x:250, y: 200},
    {id:6, color:"purple", x:300, y: 200}
];
let's add this to our index.js file:
const express = require('express');

const app = express();

let myData = [
    {id:1, color:"red", x:50, y: 200},
    {id:2, color:"orange", x:100, y: 200},
    {id:3, color:"yellow", x:150, y: 200},
    {id:4, color:"green", x:200, y: 200},
    {id:5, color:"blue", x:250, y: 200},
    {id:6, color:"purple", x:300, y: 200}
];

app.get("/", (request, response) => {
    response.send("hello lovely person");
});

app.listen(3030, () => {
    console.log("check out the magic at: http://localhost:3030")
})Express allows us to send data to the client using a number of handy functions. We can send text as we've seen by using response.send but we can also specify that we want to send JSON data by sending our data with response.json(). Let's try this.
const express = require('express');

const app = express();

let myData = [
    {id:1, color:"red", x:50, y: 200},
    {id:2, color:"orange", x:100, y: 200},
    {id:3, color:"yellow", x:150, y: 200},
    {id:4, color:"green", x:200, y: 200},
    {id:5, color:"blue", x:250, y: 200},
    {id:6, color:"purple", x:300, y: 200}
];

app.get("/", (request, response) => {
    response.send("hello lovely person");
});

// our API

// GET - /api
app.get("/api", (request, response) => {
    response.json(myData);
});

app.listen(3030, () => {
    console.log("check out the magic at: http://localhost:3030")
})
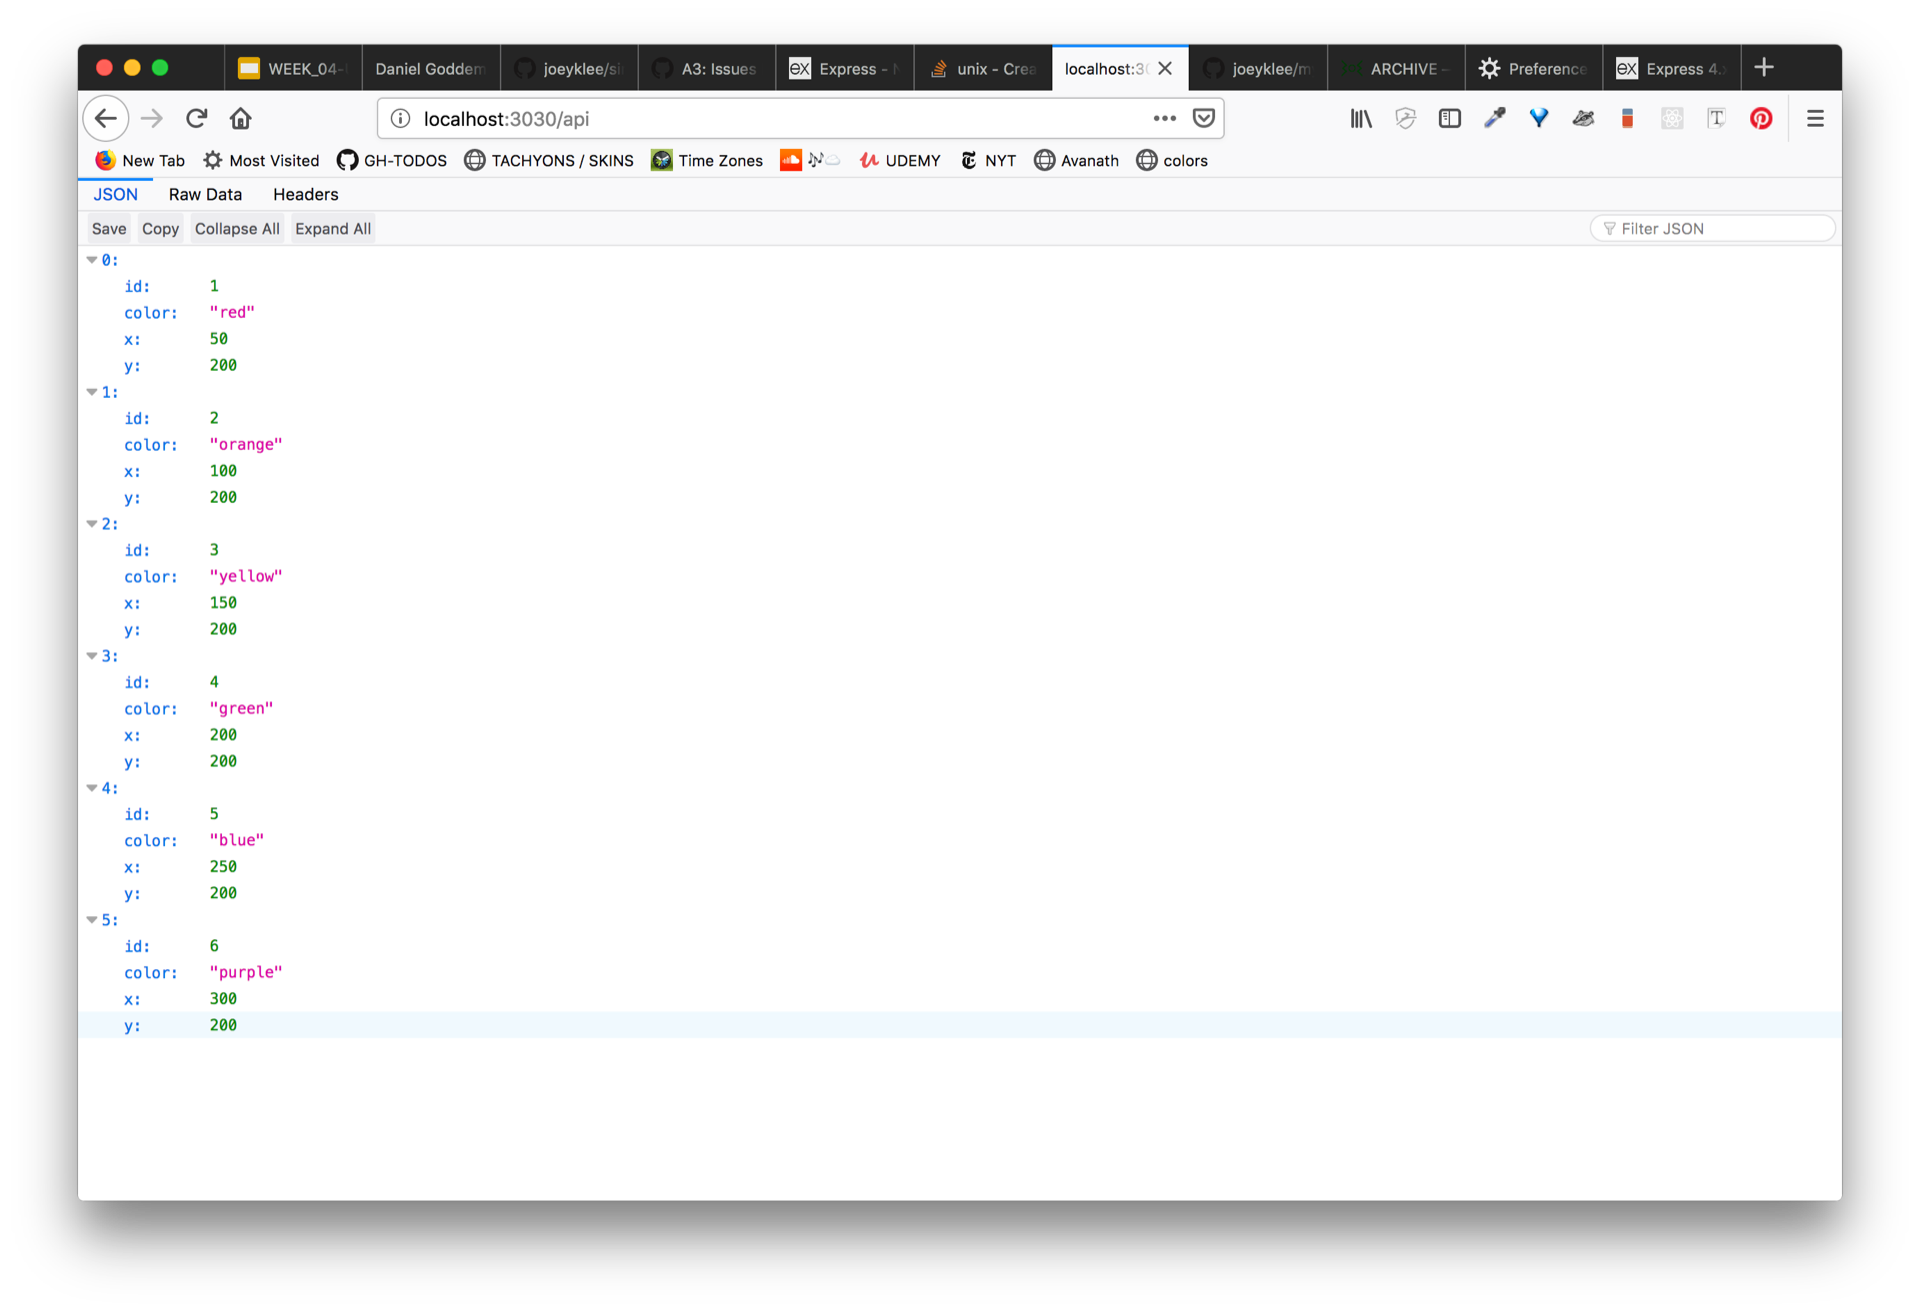
NOW, for the magic moment. Go to http://localhost:3030/api you will see your data rendered in your web browser!
This is totally awesome. Because it means now, we can send data that lives on our server ANYWHERE. It can be accessed via the url we specified for everyone to enjoy.
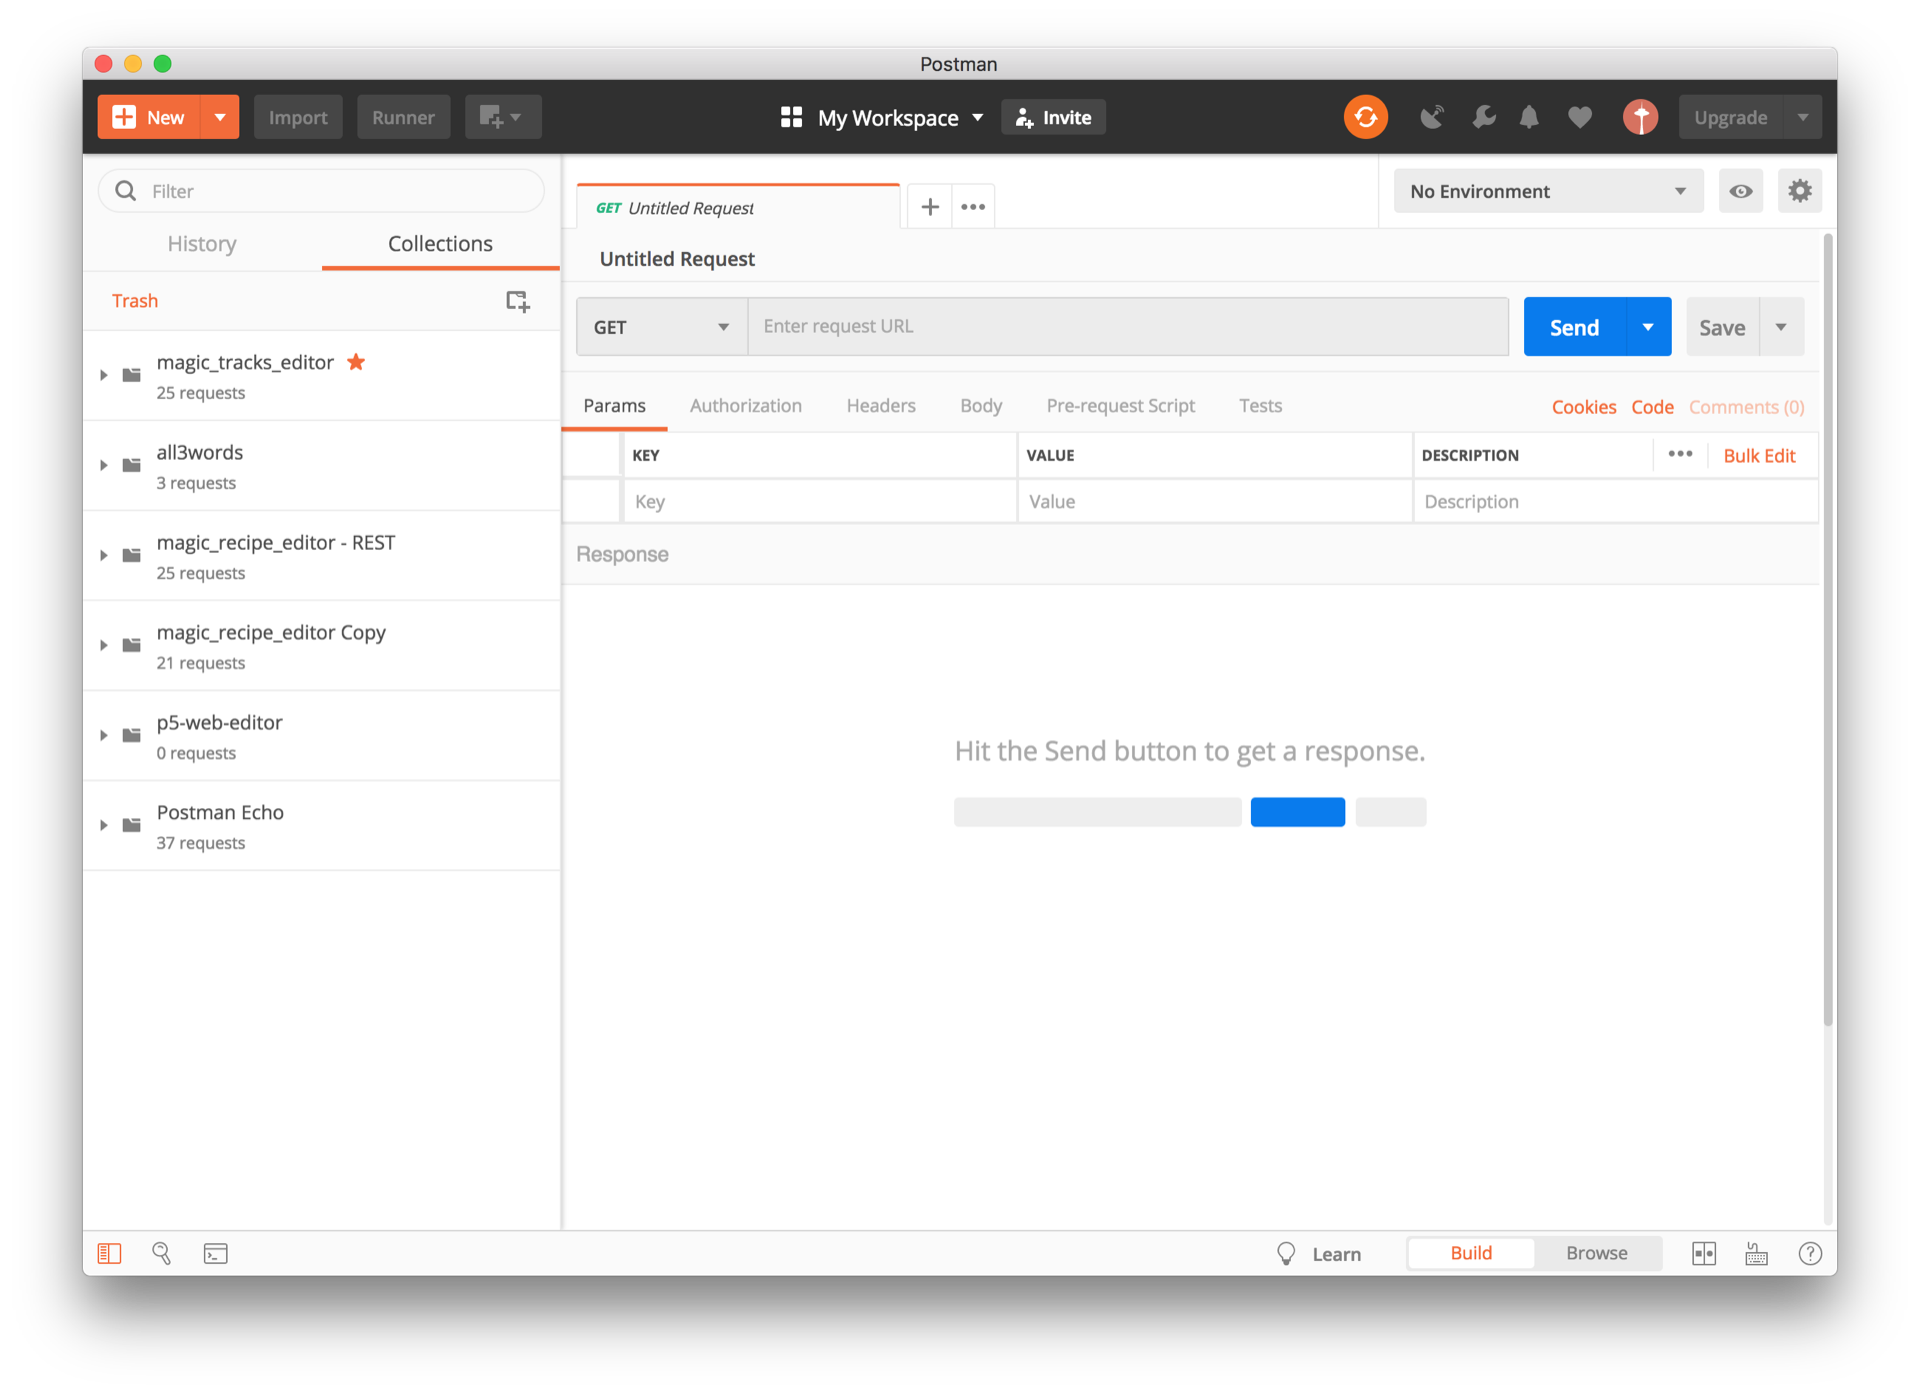
Postman is a tool for API development. It is a user interface for testing your API and gives you lots of handy tools for making this process more visual.
Download Postman so we can use a nice GUI to make a POST request to add some data to our database.
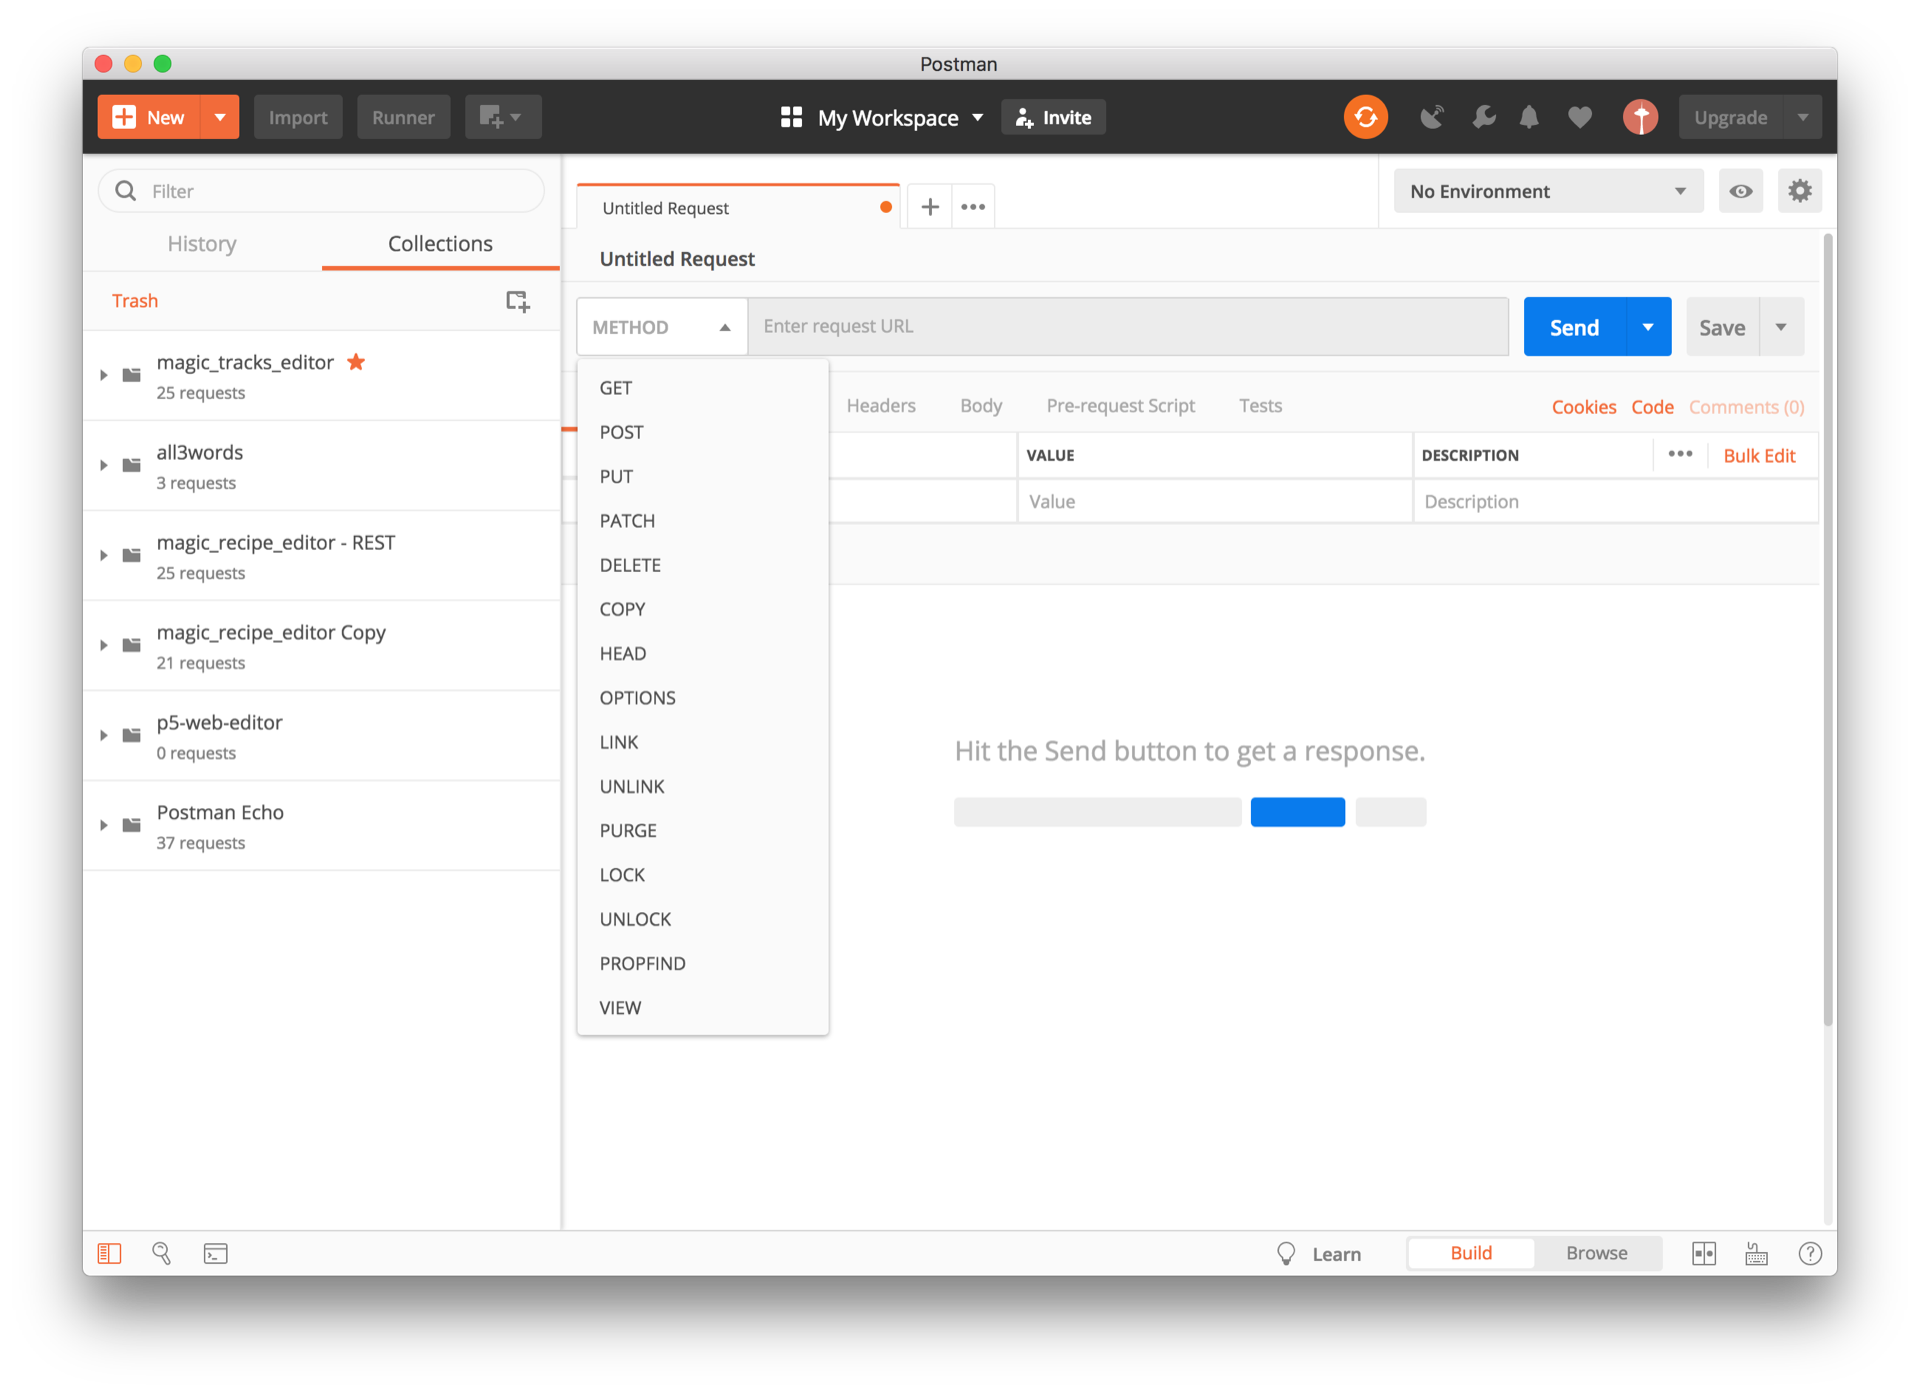
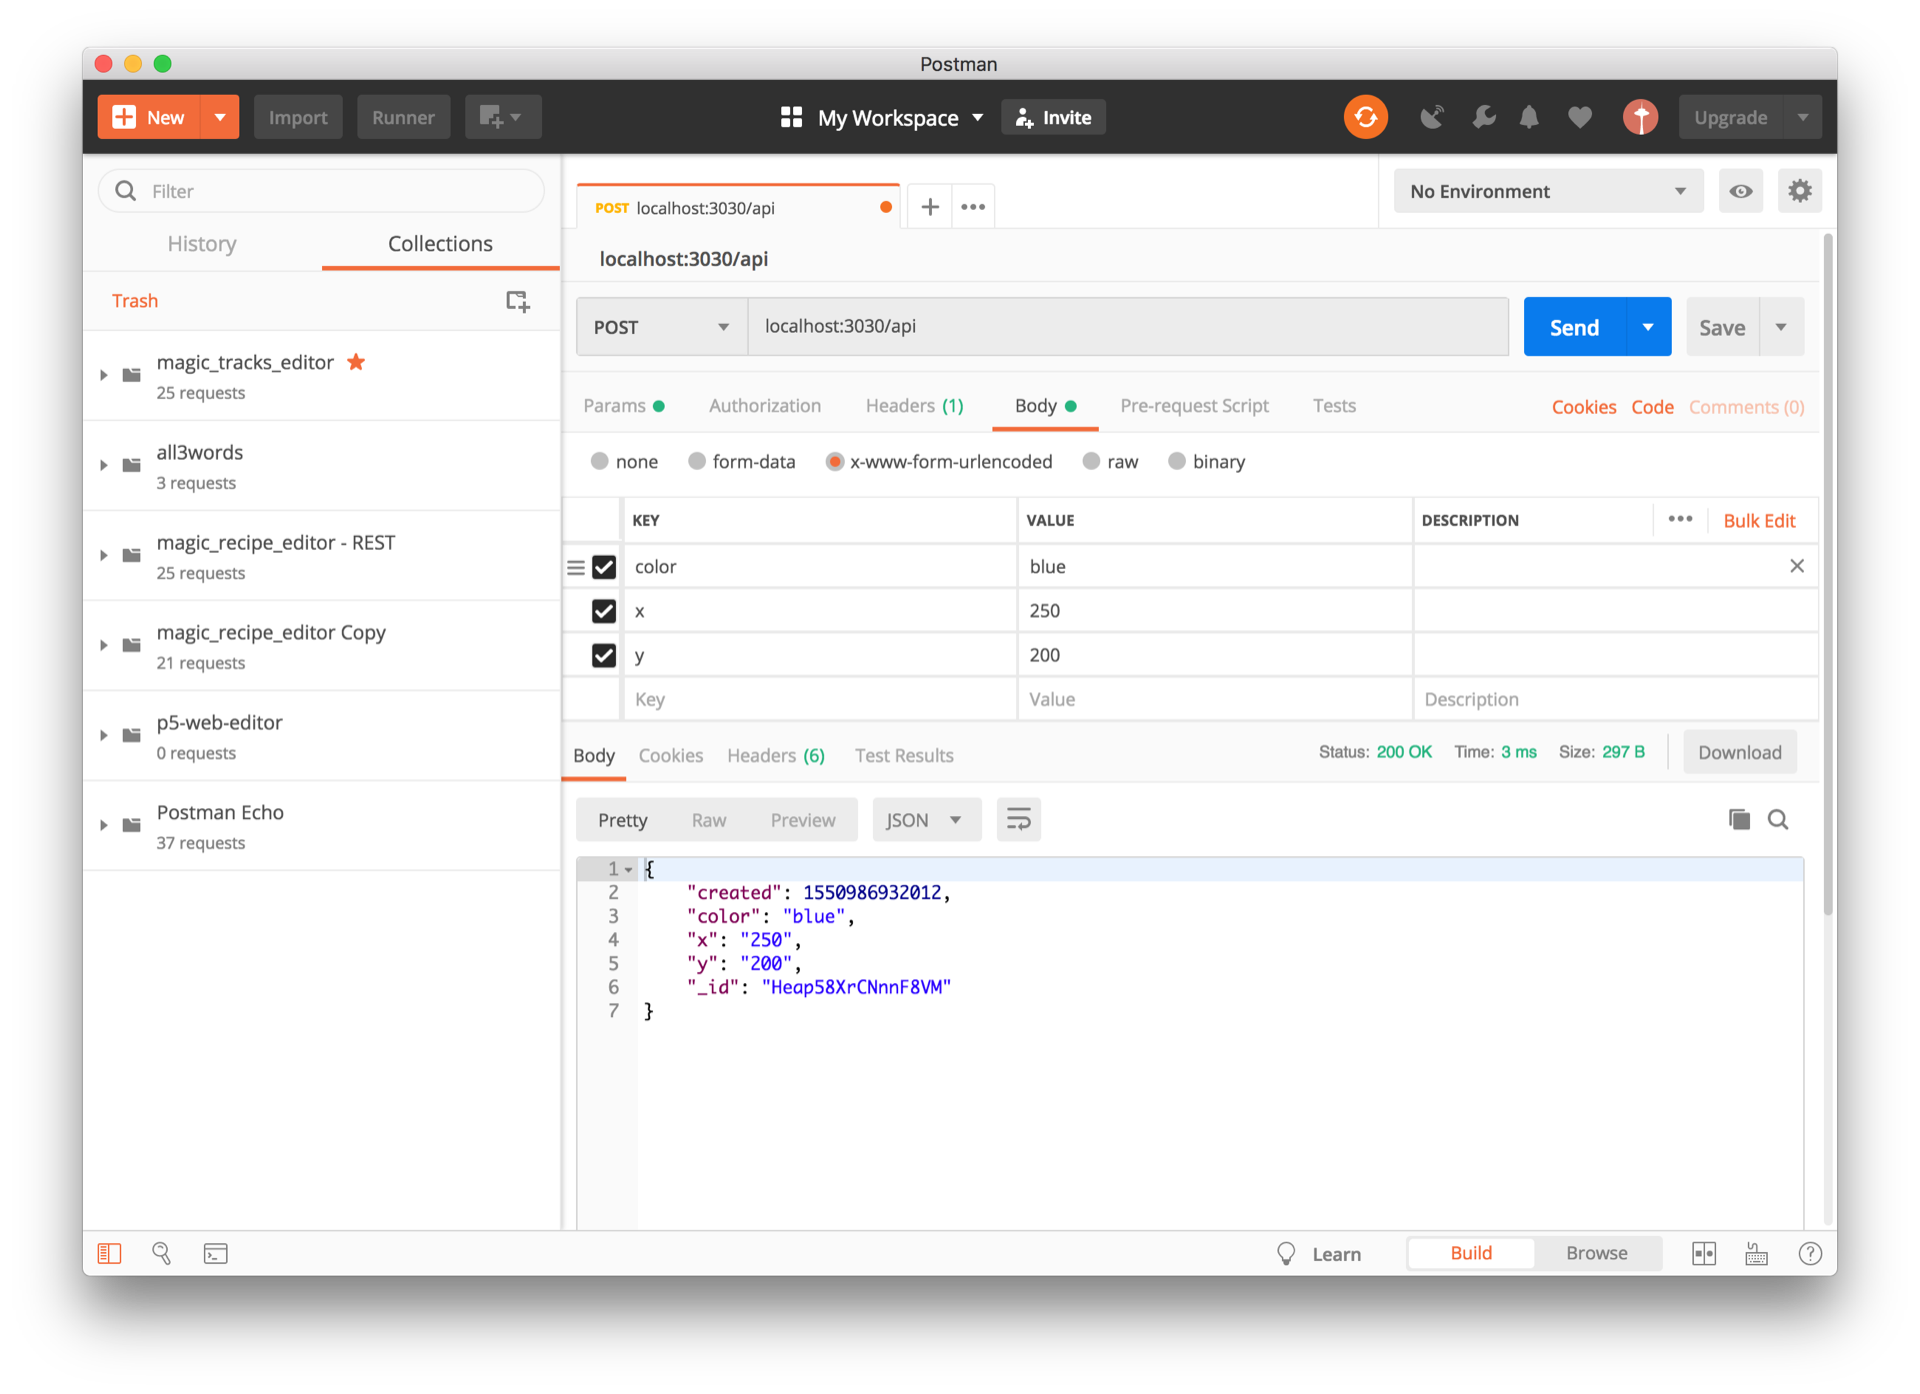
You can see in our postman interface that we have something like this:
You can also see that in our dropdown menu, we have all the API METHODS we'll ever want.
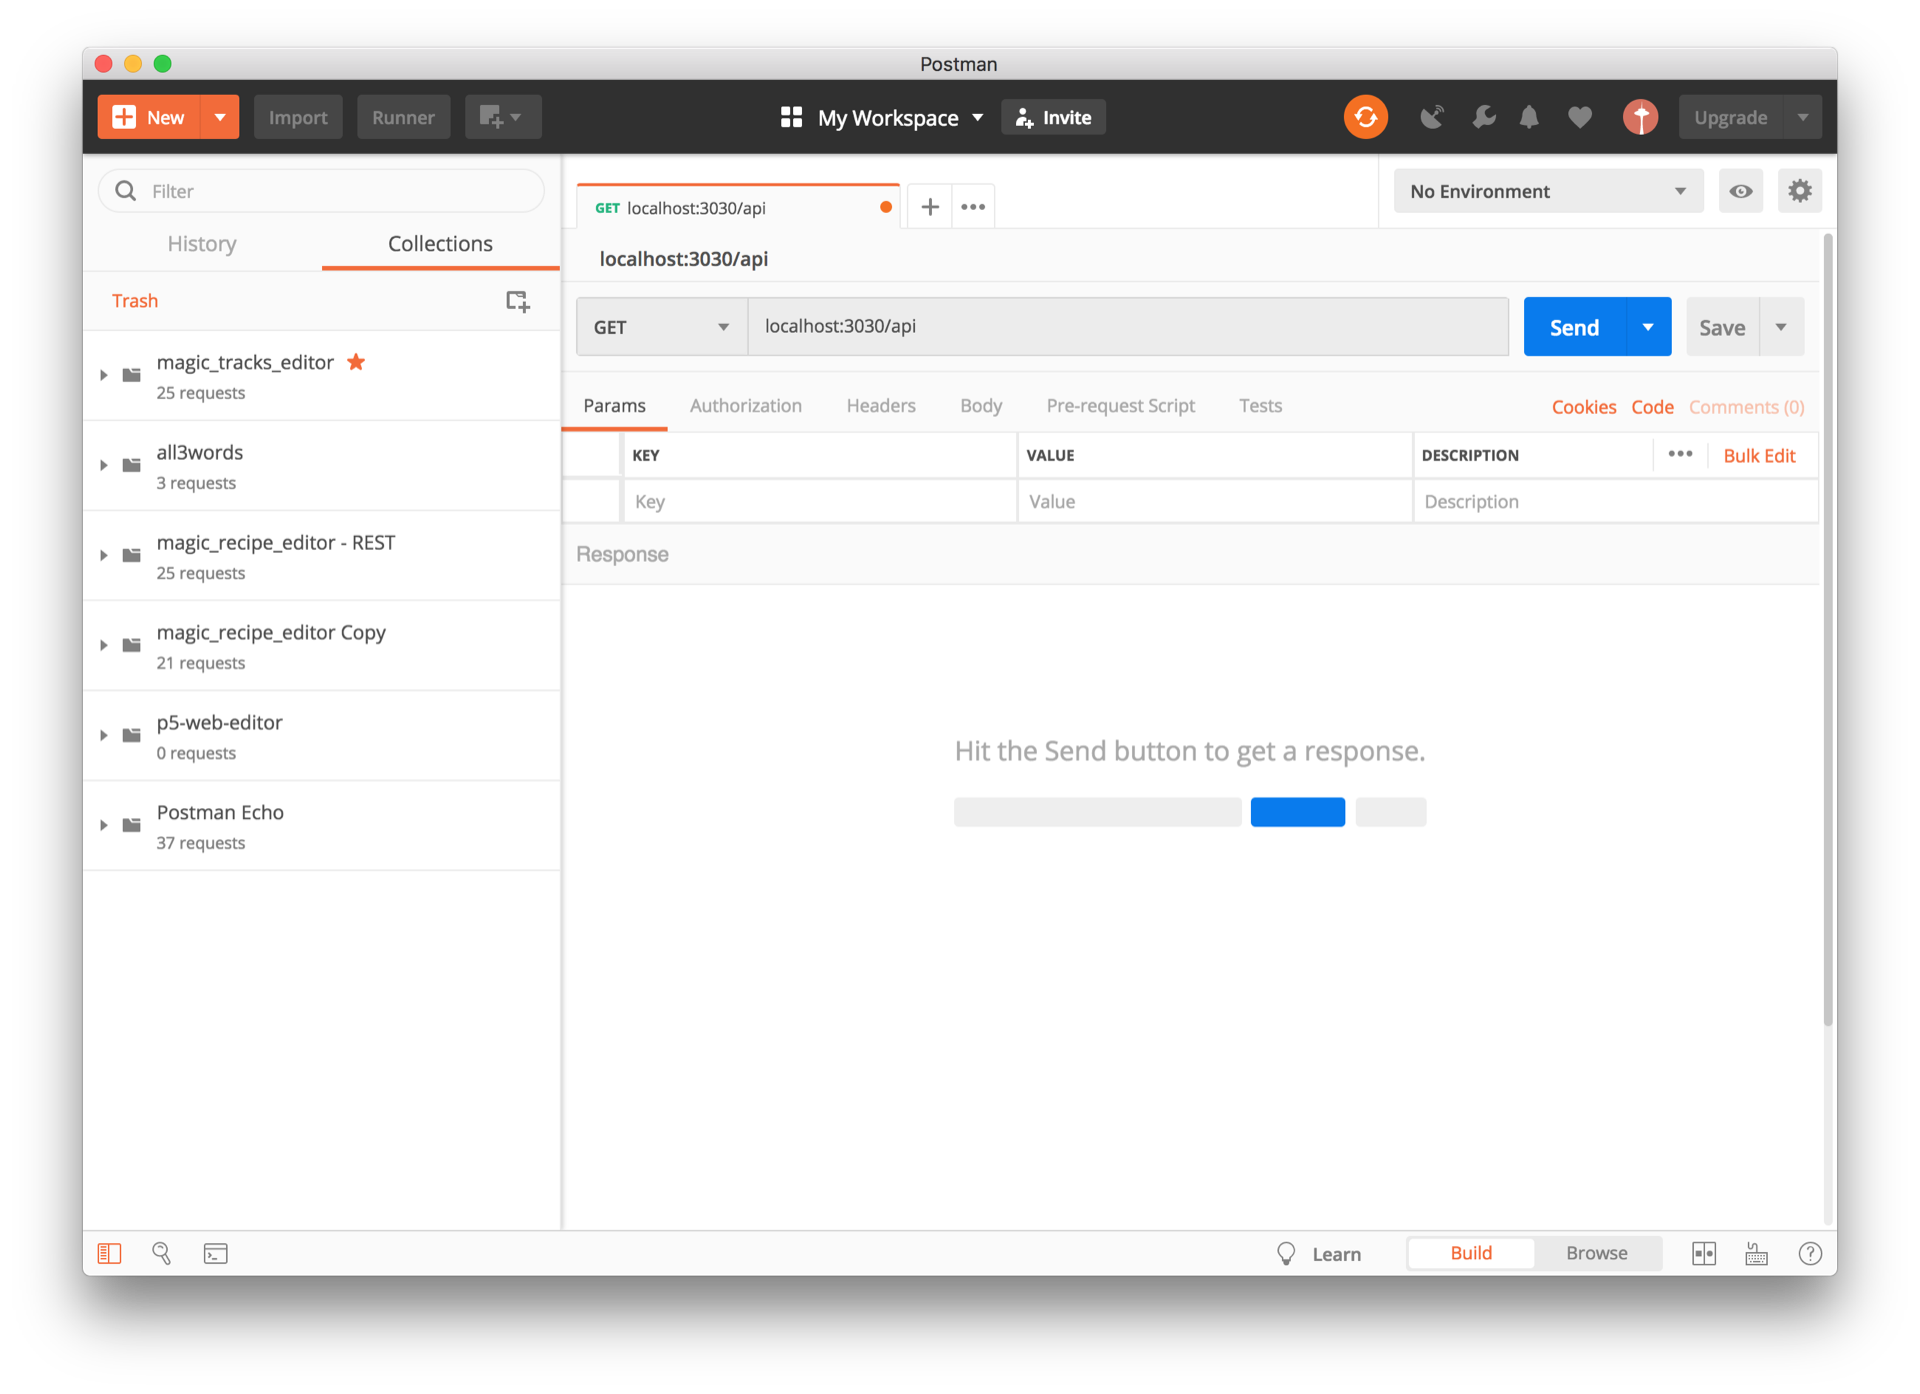
In our postman, let's test our our GET request we just made to see if Postman is working correctly:
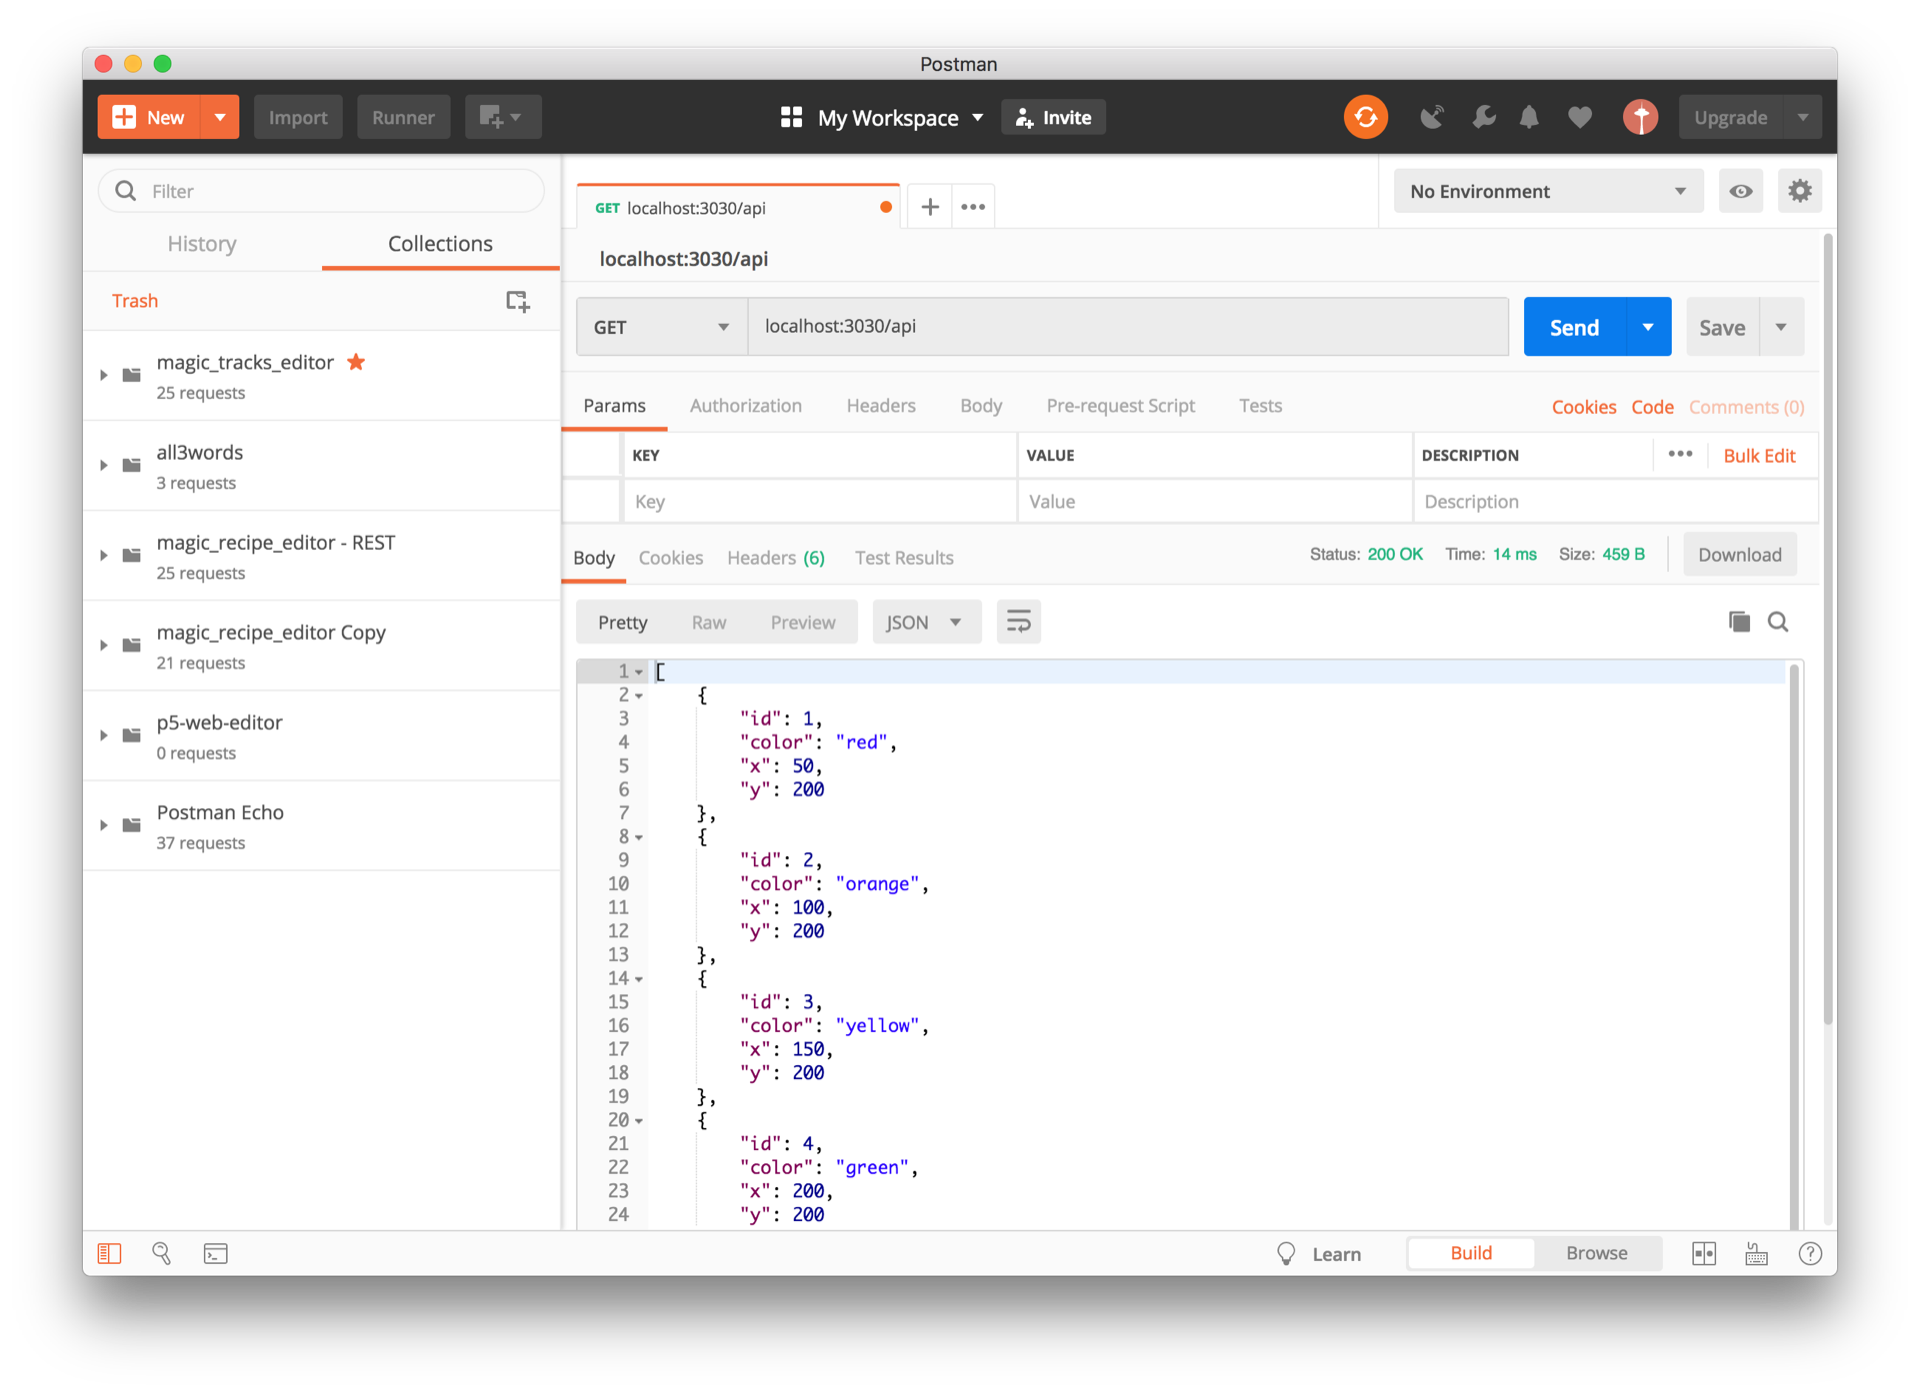
if you set the methods tab to GET and the url to : localhost:3030/api and press send you'll get the following:
Hooray! Postman is sending a GET request to our API and it is behaving as expected. Now we can go carry on an build in the API route to handle a POST request. We can test our if it works using postman in a bit.
Let's add in the ability to handle POST requests. In this case, what we're going to do when we POST to our database is push in a JSON object to the myData array. Let's see how that looks in context.
VERY IMPORTANT. Express handles how data comes in an out of your server. This means that when requests come in or when responses go out, express needs to have an idea of how to handle these incoming and outgoing data.
Note how we've added 2 lines of code after our app instantiation. These are "middleware" functions that tell Express - "whenever a post request comes in whether from a form or via API call, handle it as json and make it easy to grab from the request".
app.use(express.json());       // to support JSON-encoded bodies
app.use(express.urlencoded({extended:true})); // to support URL-encoded bodies
After adding these middleware, we can add our POST request handler. When a POST request is made, the data sent by that POST will be living in the request.body thanks to our 2 lines of code above. We can therefore work with that incoming data as it comes in by targeting that property of our request.
You'll notice that we generate a randomId to add to our data just so that we can reference our data later on for when we want to update or delete data.
After the data has been pushed to our array, we send back our updated dataset.
const express = require('express');

const app = express();

// Handling JSON data
app.use(express.json());       // to support JSON-encoded bodies
app.use(express.urlencoded({extended:true})); // to support URL-encoded bodies

let myData = [
    {id:1, color:"red", x:50, y: 200},
    {id:2, color:"orange", x:100, y: 200},
    {id:3, color:"yellow", x:150, y: 200},
    {id:4, color:"green", x:200, y: 200},
    {id:5, color:"blue", x:250, y: 200},
    {id:6, color:"purple", x:300, y: 200}
];

app.get("/", (request, response) => {
    response.send("hello lovely person");
});

// our API
// GET - /api
app.get("/api", (request, response) => {
    response.json(myData);
});

// POST - /api
app.post("/api", (request, response) => {
    // create a random ID to reference your data later on
    let randomId = Math.floor(Math.random()*1000);
    // Take our data from request.body and add the randomId to it as an id property
    const newData = Object.assign({id: randomId}, request.body);
    // push this newData object into myData
    myData.push(newData);
    // return the updated data - here we can do a number of things, redirect to a new page, etc. For now, let's send the updated data.
    response.json(myData)
});

app.listen(3030, () => {
    console.log("check out the magic at: http://localhost:3030")
})
NOTE: it's a good idea to do error handling with post requests. You dont want any nefarious things coming into your server and you also want to control the properties and form of your data.
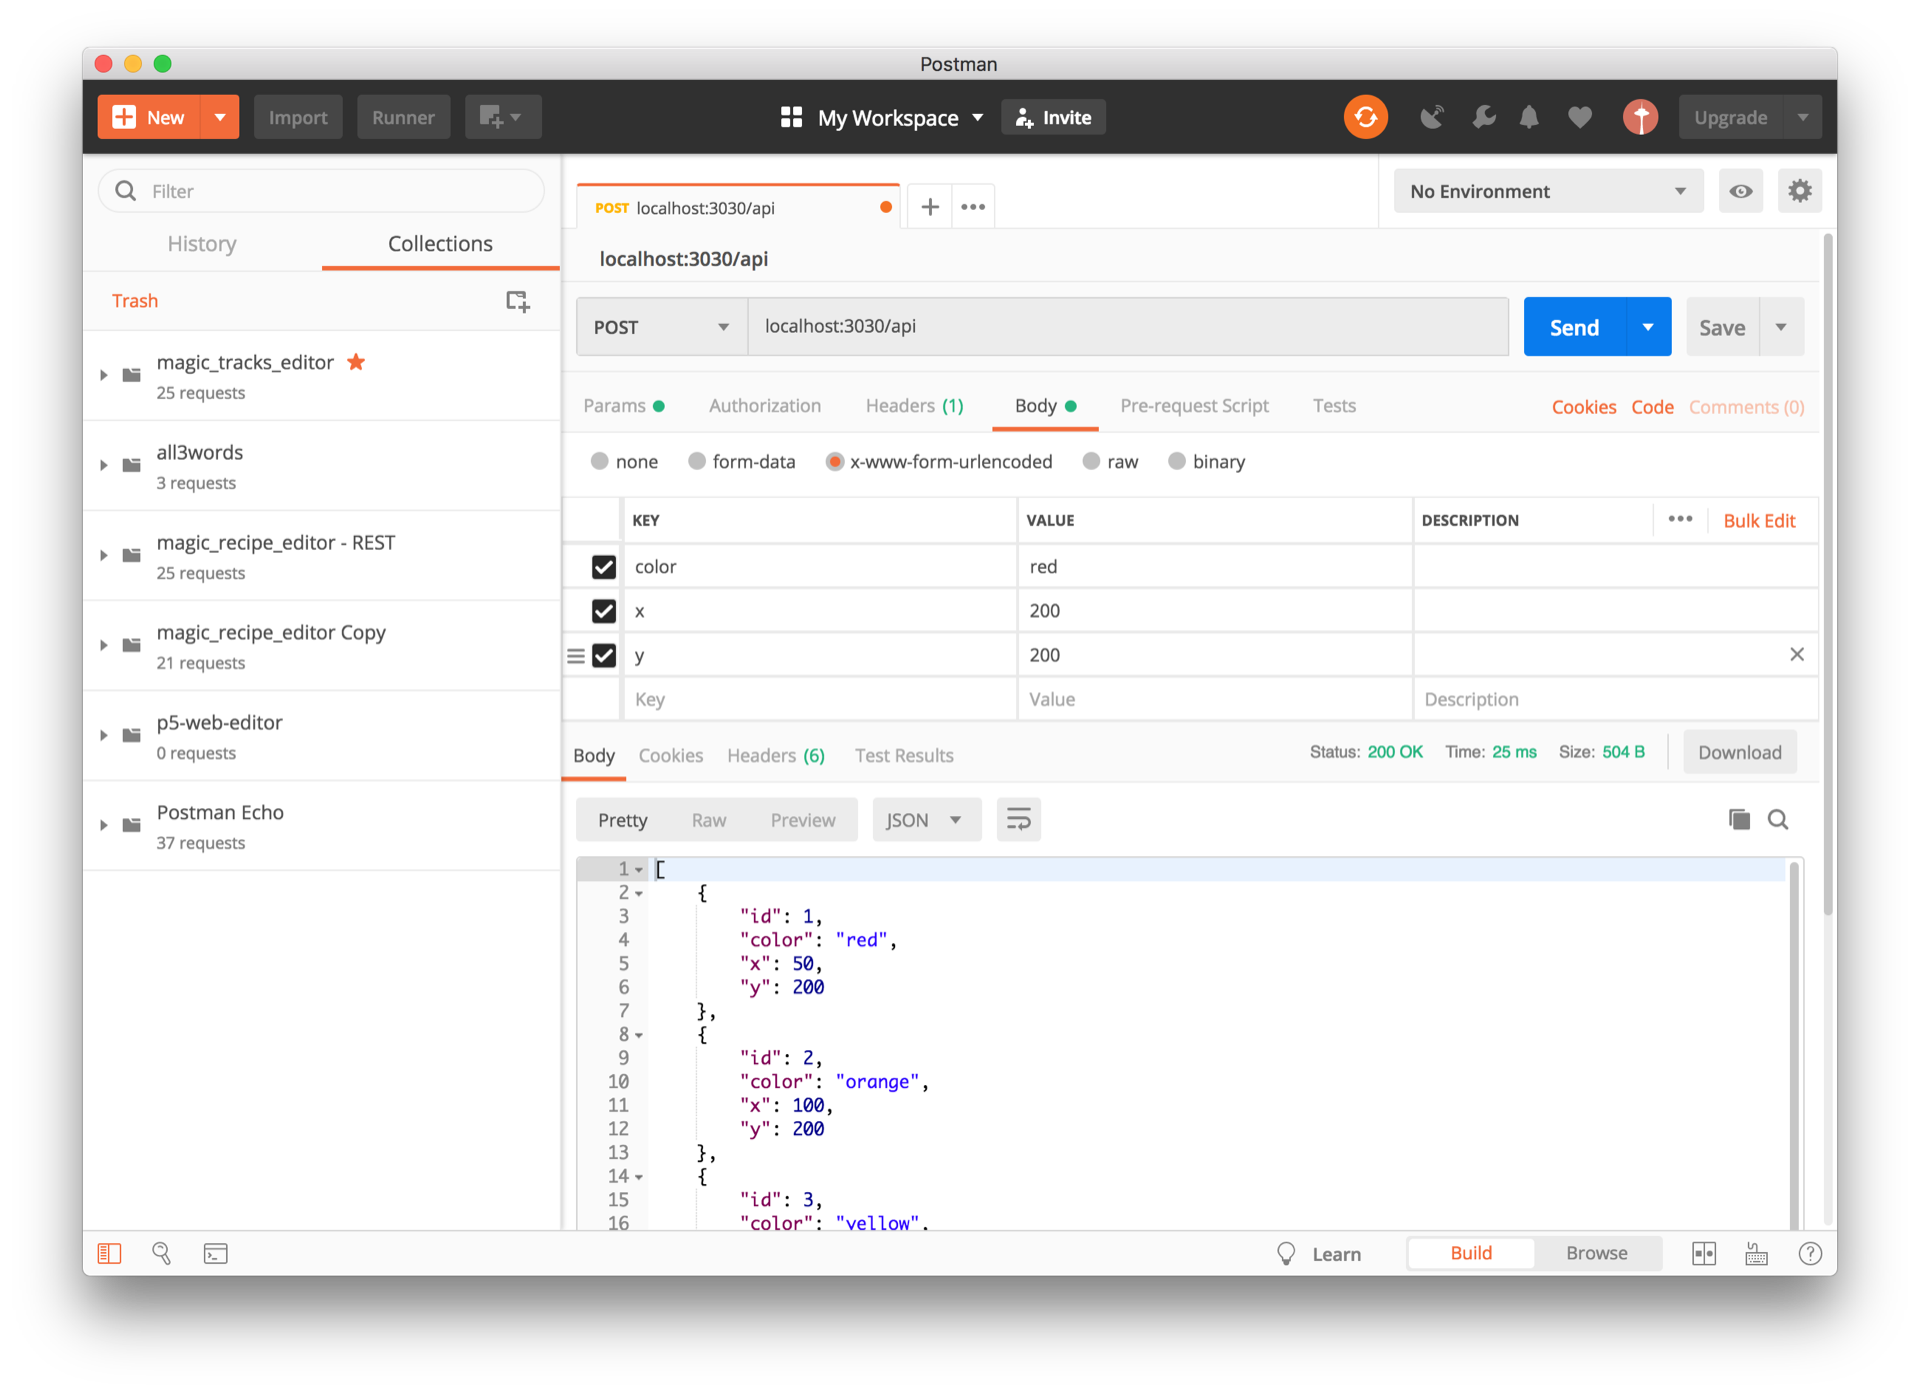
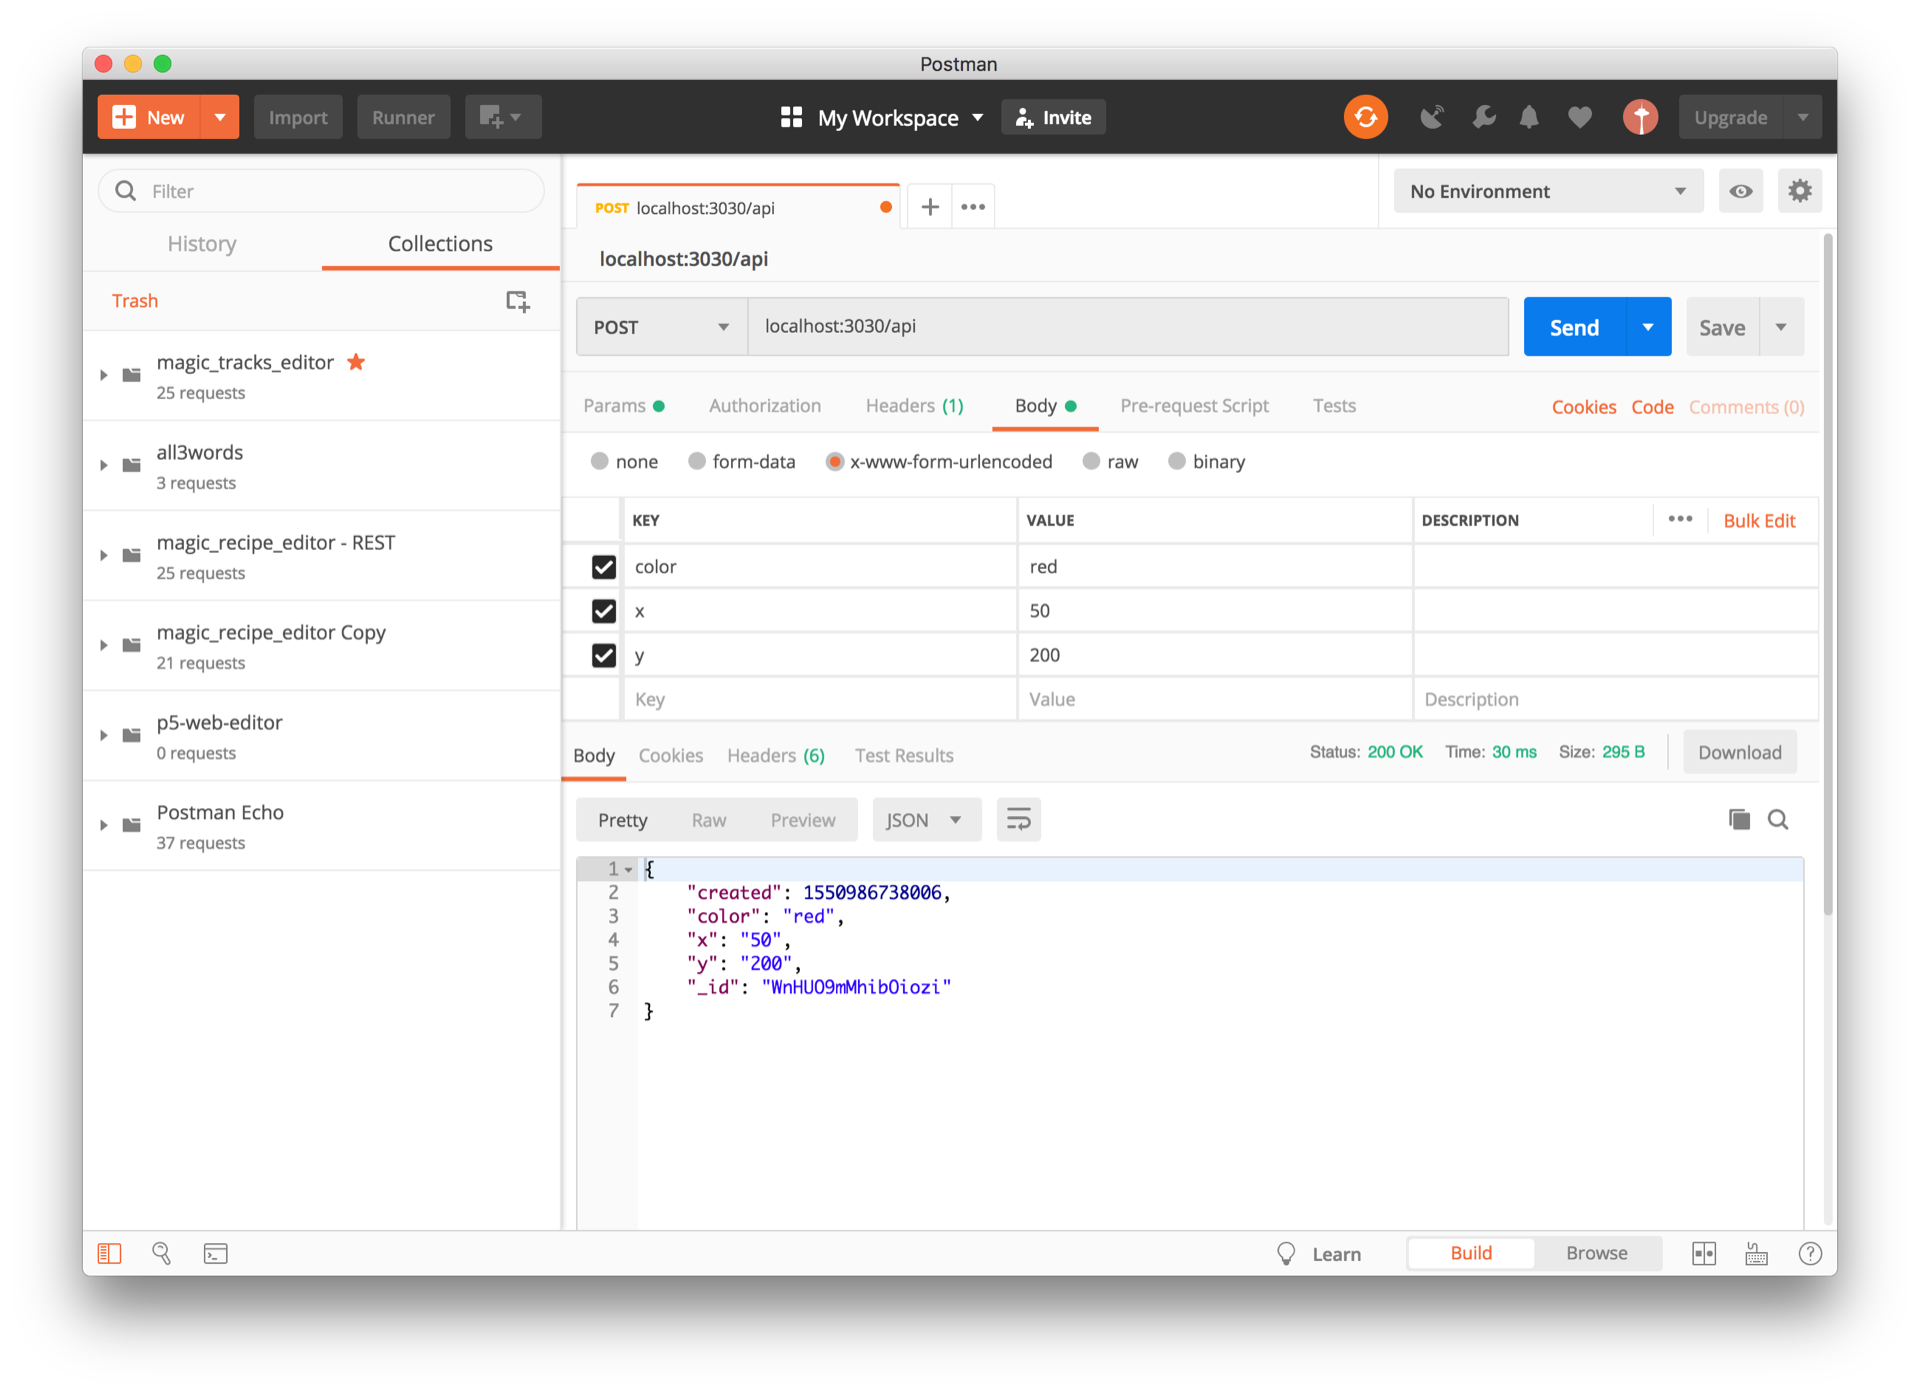
Now you can make a POST request using Postman. Here I'm sending the JSON as x-www-form-urlencoded -- https://developer.mozilla.org/en-US/docs/Web/HTTP/Methods/POST:
{color:"red", x:200, y: 200}
You should get a nice response with your updated data!
[
    ...
    {
        "id": 20,
        "color": "red",
        "x": "200",
        "y": "200"
    }
]
Let's say that we want to update some data in our myData array. How might we handle this? Well, we can use a PUT request to handle an update of existing data on our server.
In order to do this, we need some information from our incoming request:
- the ID of the item we want to update (or at least a position or something to target the values)
- and the data we want to change.
Since we're not using a fancy database to handle this logic for us, we'll have to write our own logic, but this is good practice for understanding what is happening under the hood of databases. So let's get to it. Our PUT endpoint will look something like the following:
- Step 1: We get the ID of the object we want to update from the URL. URLs have this thing called url parameters. In this case, we let our server know that if a request comes in at the endpoint /api/:id where
:idis a value that matches an id in our data, then we can find it! - Step 2: We get the updated data we want to send: e.g
{color:"turqoise"} - Step 3: we use the
.find()array function to find the data in our myData array with the corresponding ID - Step 4: if our data does not exist, return a 404 error and send a message
- Step 5: check all the properties of the incoming update request and update our data
- Step 6: Return myData with the newly update data
- Step 7: send the myData array to the client
// PUT - /api
app.put("/api/:id", (request, response)=> {
    // we get the id of the item we want from request.params.id ==> this matches the :id of the URL parameter
    // Step 1.
    const selectedItemId = request.params.id;
    // Step 2.
    const updatedDataProperties = request.body

    // Step 3: now find the item in our myData
    let selectedItem = myData.find(item => {
        return item.id === Number(selectedItemId)
    });

    // Step 4: if our data is undefined then send a 404 error and send this message
    if(selectedItem == undefined){
        response.status(404).send("oops! we couldn't find that data!");
    }

    // Step 5: for the properties in the incoming json, update our selected object
    for(p in updatedDataProperties){
        selectedItem[p] = updatedDataProperties[p]
    }

    // Step 6: update myData with the updated data
    myData = myData.map(item => {
        if(item.id == Number(selectedItemId) ){
            return selectedItem
        } else {
            return item
        }
    });

    // Step 7: send back our new myData
    response.json(myData)
});
Now we should have this entire code:
const express = require('express');

const app = express();

// Handling JSON data
app.use(express.json());       // to support JSON-encoded bodies
app.use(express.urlencoded({extended:true})); // to support URL-encoded bodies

let myData = [
    {id:1, color:"red", x:50, y: 200},
    {id:2, color:"orange", x:100, y: 200},
    {id:3, color:"yellow", x:150, y: 200},
    {id:4, color:"green", x:200, y: 200},
    {id:5, color:"blue", x:250, y: 200},
    {id:6, color:"purple", x:300, y: 200}
];

app.get("/", (request, response) => {
    response.send("hello lovely person");
});

// our API
// GET - /api
app.get("/api", (request, response) => {
    response.json(myData);
});

// POST - /api
app.post("/api", (request, response) => {
    // create a random ID to reference your data later on
    let randomId = Math.floor(Math.random()*1000);
    // Take our data from request.body and add the randomId to it as an id property
    const newData = Object.assign({id: randomId}, request.body);
    // push this newData object into myData
    myData.push(newData);
    // return the updated data - here we can do a number of things, redirect to a new page, etc. For now, let's send the updated data.
    response.json(myData)
});


// PUT - /api
app.put("/api/:id", (request, response)=> {
    // we get the id of the item we want from request.params.id ==> this matches the :id of the URL parameter
    const selectedItemId = request.params.id;
    const updatedDataProperties = request.body

    // now find the item in our myData
    let selectedItem = myData.find(item => {
        return item.id == Number(selectedItemId)
    });

    // if our data is undefined then send a 404 error and send this message
    if(selectedItem == undefined){
        response.status(404).send("oops! we couldn't find that data!");
    }

    // for the properties in the incoming json, update our selected object
    for(p in updatedDataProperties){
        selectedItem[p] = updatedDataProperties[p]
    }

    // update myData with the updated data
    myData.map(item => {
        if(item.id === Number(selectedItemId)){
            return selectedItem
        } else {
            return item
        }
    });

    response.json(myData)
});


app.listen(3030, () => {
    console.log("check out the magic at: http://localhost:3030")
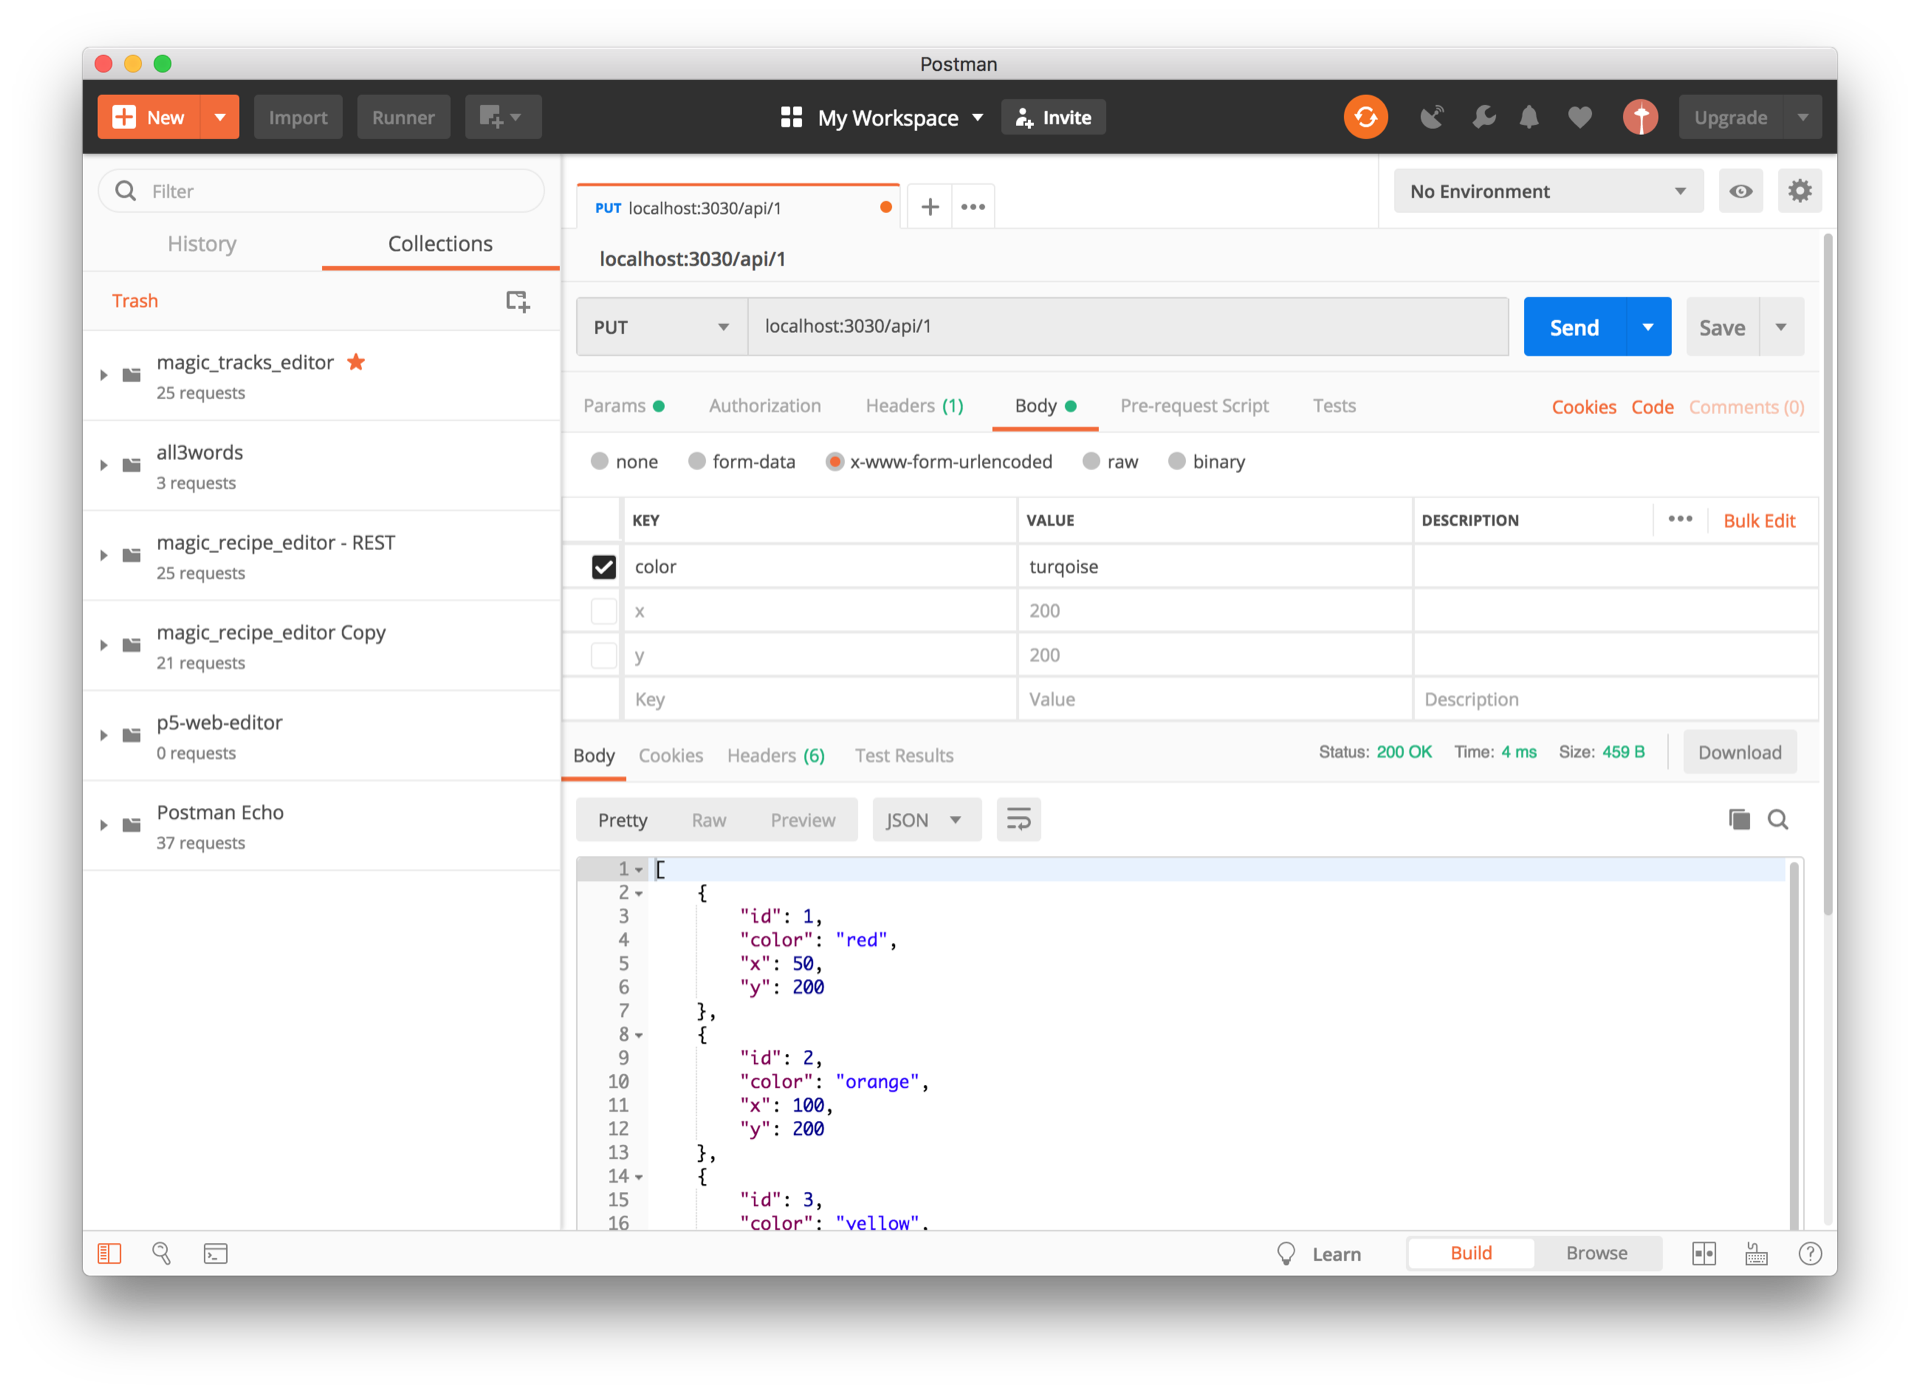
})Now make a PUT request to postman. Let's change the first instance of our data from color:"red" to color: "turqoise"
Last but not least, let's make a delete endpoint to our application. Here we do the same as in the PUT request by getting the id from the url parameters, but instead use a simple array filter to filter out the data that matches.
app.delete('/api/:id', (request, response) => {
    // we get the id of the item we want from request.params.id ==> this matches the :id of the URL parameter
    const selectedItemId = request.params.id;

    // use the .filter() function to return all values not matching that id and overwrite myData
    myData = myData.filter(item => {
        return item.id !== Number(selectedItemId)
    })

    response.json(myData);
})
Now our complete CRUD express app looks like this:
const express = require('express');

const app = express();

// Handling JSON data
app.use(express.json());       // to support JSON-encoded bodies
app.use(express.urlencoded({extended:true})); // to support URL-encoded bodies

let myData = [
    {id:1, color:"red", x:50, y: 200},
    {id:2, color:"orange", x:100, y: 200},
    {id:3, color:"yellow", x:150, y: 200},
    {id:4, color:"green", x:200, y: 200},
    {id:5, color:"blue", x:250, y: 200},
    {id:6, color:"purple", x:300, y: 200}
];

app.get("/", (request, response) => {
    response.send("hello lovely person");
});

// our API
// GET - /api
app.get("/api", (request, response) => {
    response.json(myData);
});

// POST - /api
app.post("/api", (request, response) => {
    // create a random ID to reference your data later on
    let randomId = Math.floor(Math.random()*1000);
    // Take our data from request.body and add the randomId to it as an id property
    const newData = Object.assign({id: randomId}, request.body);
    // push this newData object into myData
    myData.push(newData);
    // return the updated data - here we can do a number of things, redirect to a new page, etc. For now, let's send the updated data.
    response.json(myData)
});


// PUT - /api
app.put("/api/:id", (request, response)=> {
    // we get the id of the item we want from request.params.id ==> this matches the :id of the URL parameter
    const selectedItemId = request.params.id;
    const updatedDataProperties = request.body

    // now find the item in our myData
    let selectedItem = myData.find(item => {
        return item.id === Number(selectedItemId)
    });

    // if our data is undefined then send a 404 error and send this message
    if(selectedItem == undefined){
        response.status(404).send("oops! we couldn't find that data!");
    }

    // for the properties in the incoming json, update our selected object
    for(p in updatedDataProperties){
        selectedItem[p] = updatedDataProperties[p]
    }

    // update myData with the updated data
    myData.map(item => {
        if(item.id === Number(selectedItemId)){
            return selectedItem
        } else {
            return item
        }
    });

    response.json(myData)
});


app.delete('/api/:id', (request, response) => {
    // we get the id of the item we want from request.params.id ==> this matches the :id of the URL parameter
    const selectedItemId = request.params.id;

    // use the .filter() function to return all values not matching that id and overwrite myData
    const newData = myData.filter(item => {
        return item.id !== Number(selectedItemId)
    })

    // console.log(myData.length)
    myData = newData;

    response.json(myData);
})


app.listen(3030, () => {
    console.log("check out the magic at: http://localhost:3030")
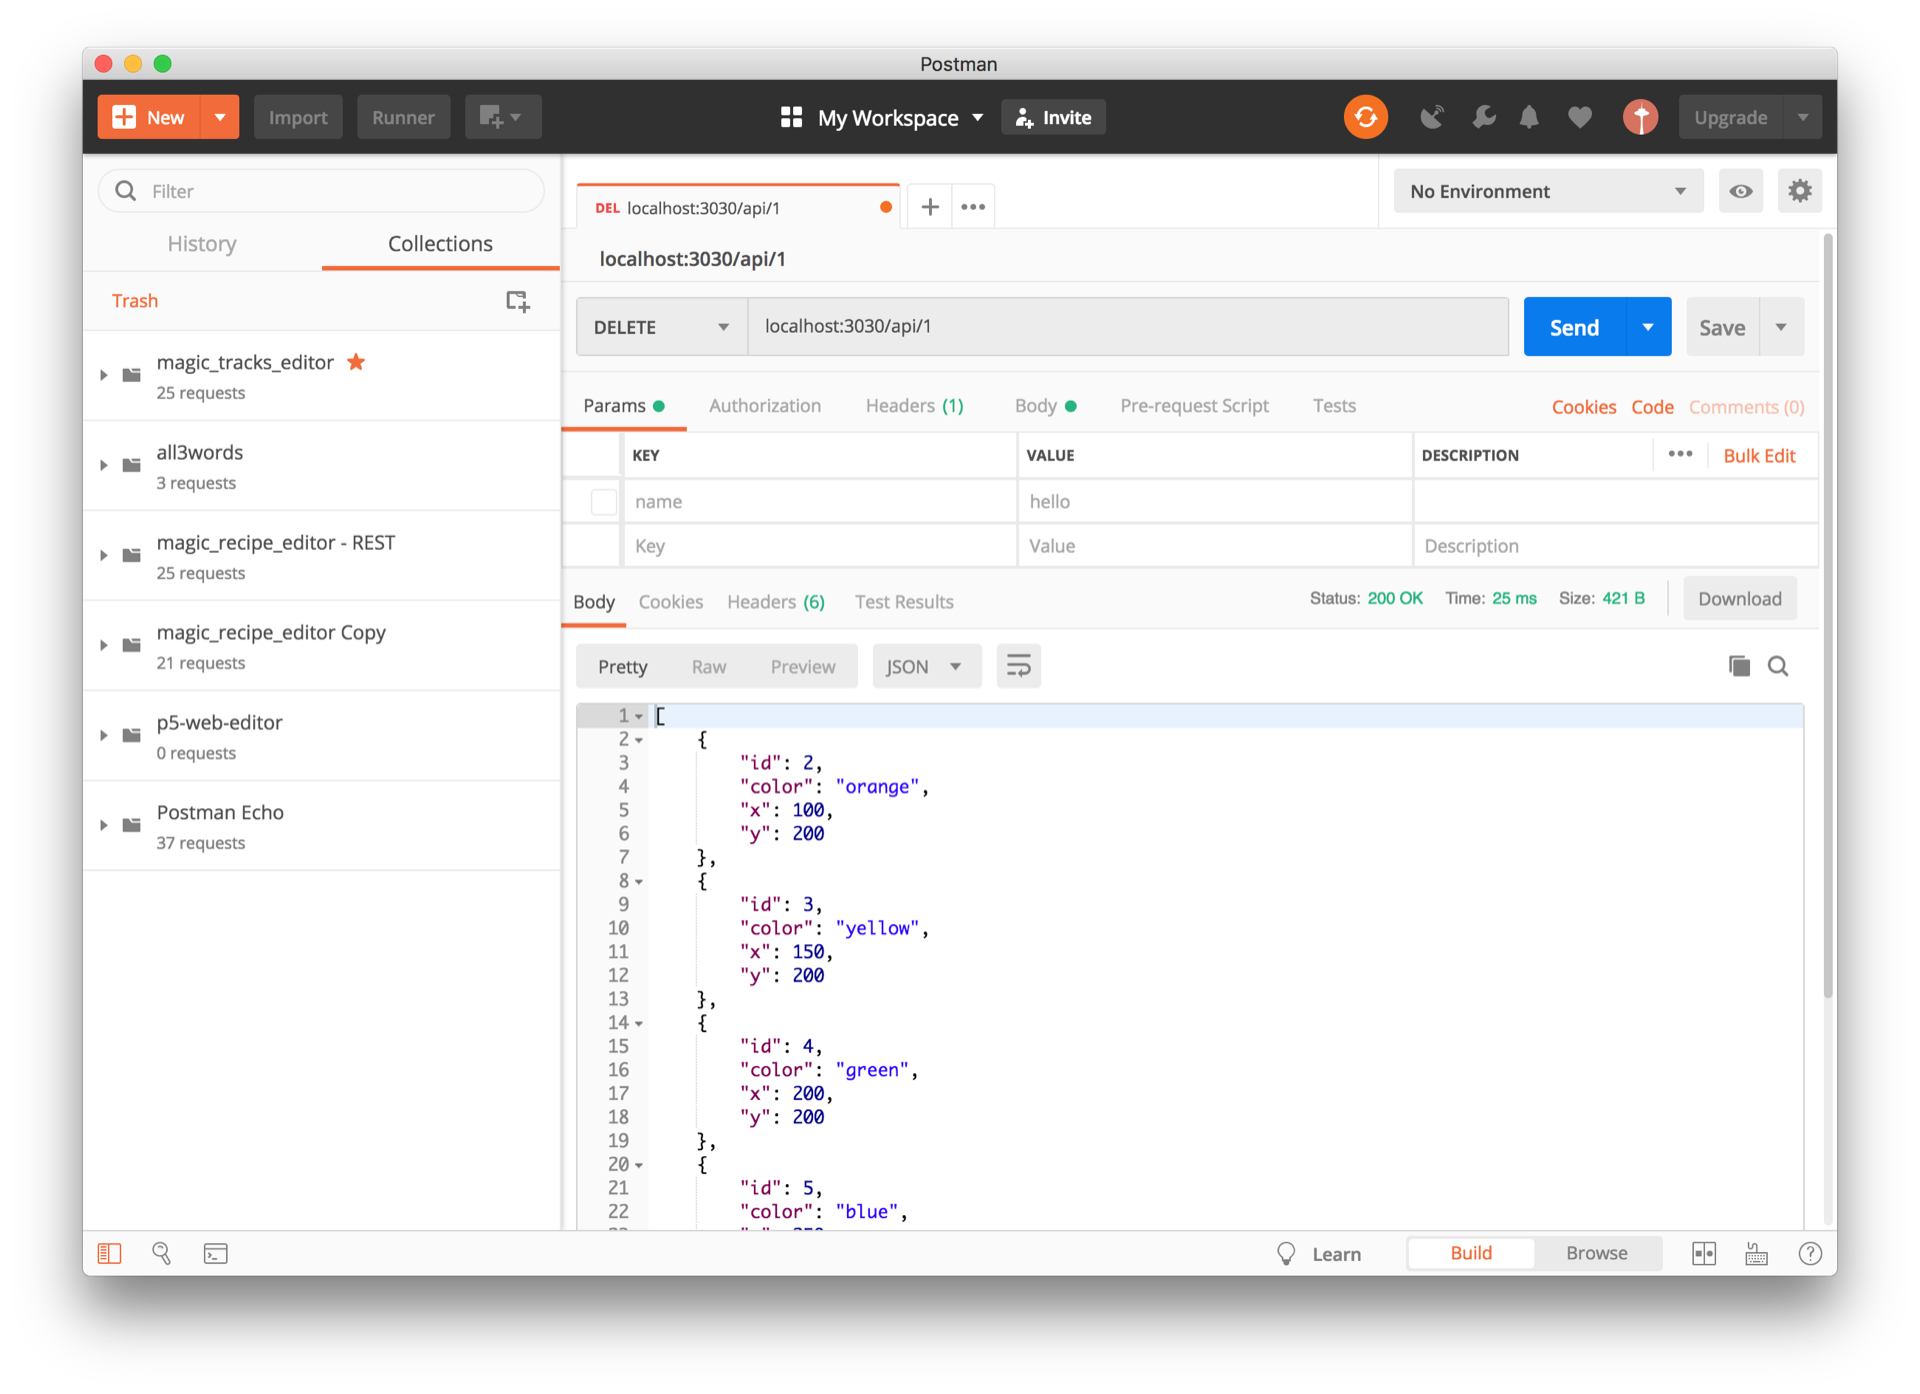
})Now you can delete some data from myData. Use postman to delete a value.
🌈Hooray!! Now we've got a fully functioning CRUD API in express 🌈 - take a break, go for a walk, jump up and down and sing a song. This is excellent!!
In the example we saw above we can write to our data - myData - as long as our server is running, but if anything happens and we need to restart our server our data goes POOF! and disappears. Data persistence is therefore a key feature of web applications. We have SO many options for databases that we can use. Some of you might have heard of mongodb others might be familiar with mySQL. These are fully fledged databases that each have their advantages and considerations.
For prototyping, sometimes it is nice to setup a lightweight method of creating data persistence without all of the overhead of setting up server with a database with database connections - even though doing so is beneficial in the long run and the more practice you have the easier it gets. For our purposes we can use something more lightweight. Popular lightweight databases like SQlite and NedB are good for this kind of usecase.
Since nedb is basically mongodb, it is great because should you decide to switch it out for mongodb later, you can do so with little changes to your application. Let's get started.
install nedb by:
npm install nedbTo setup nedb, we have to follow a few steps. It goes something like this:
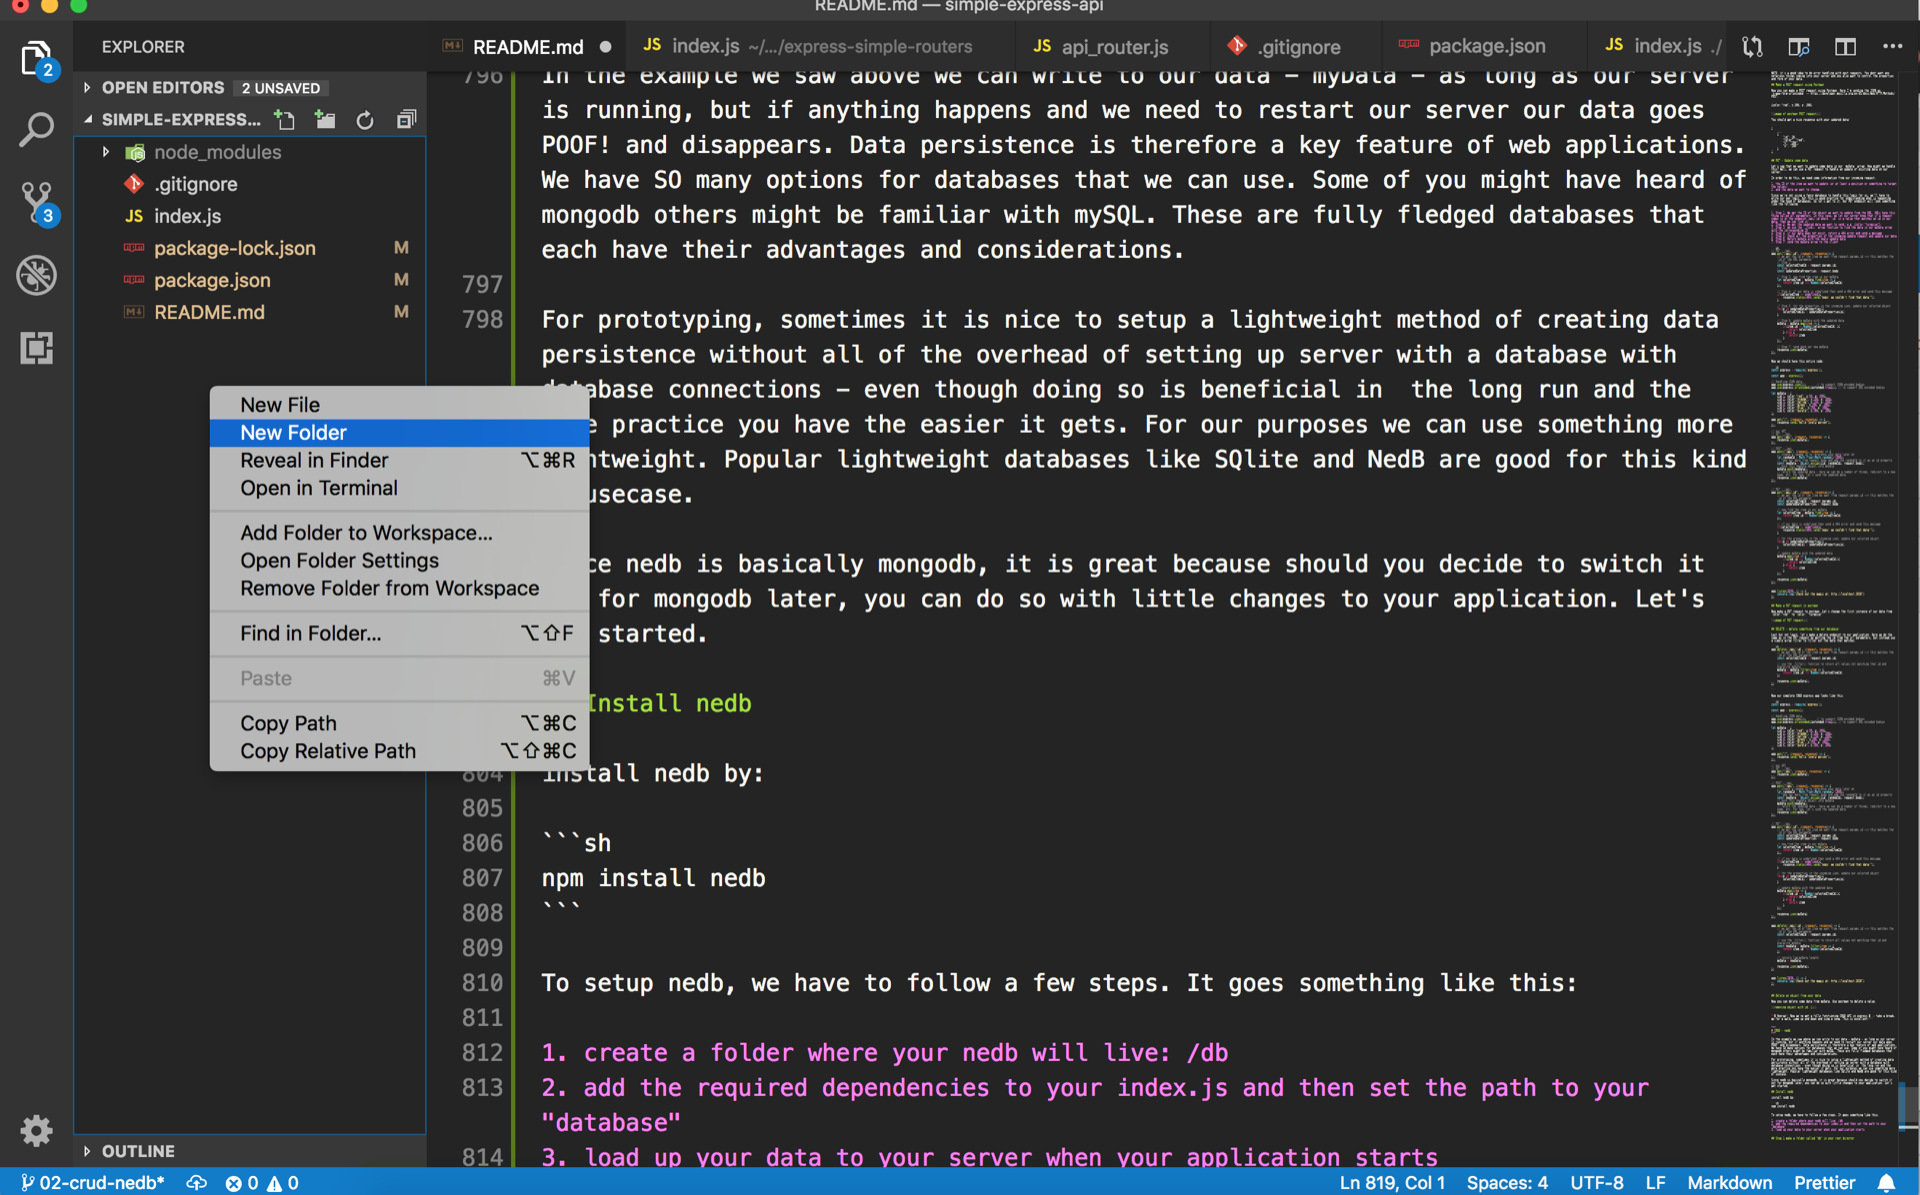
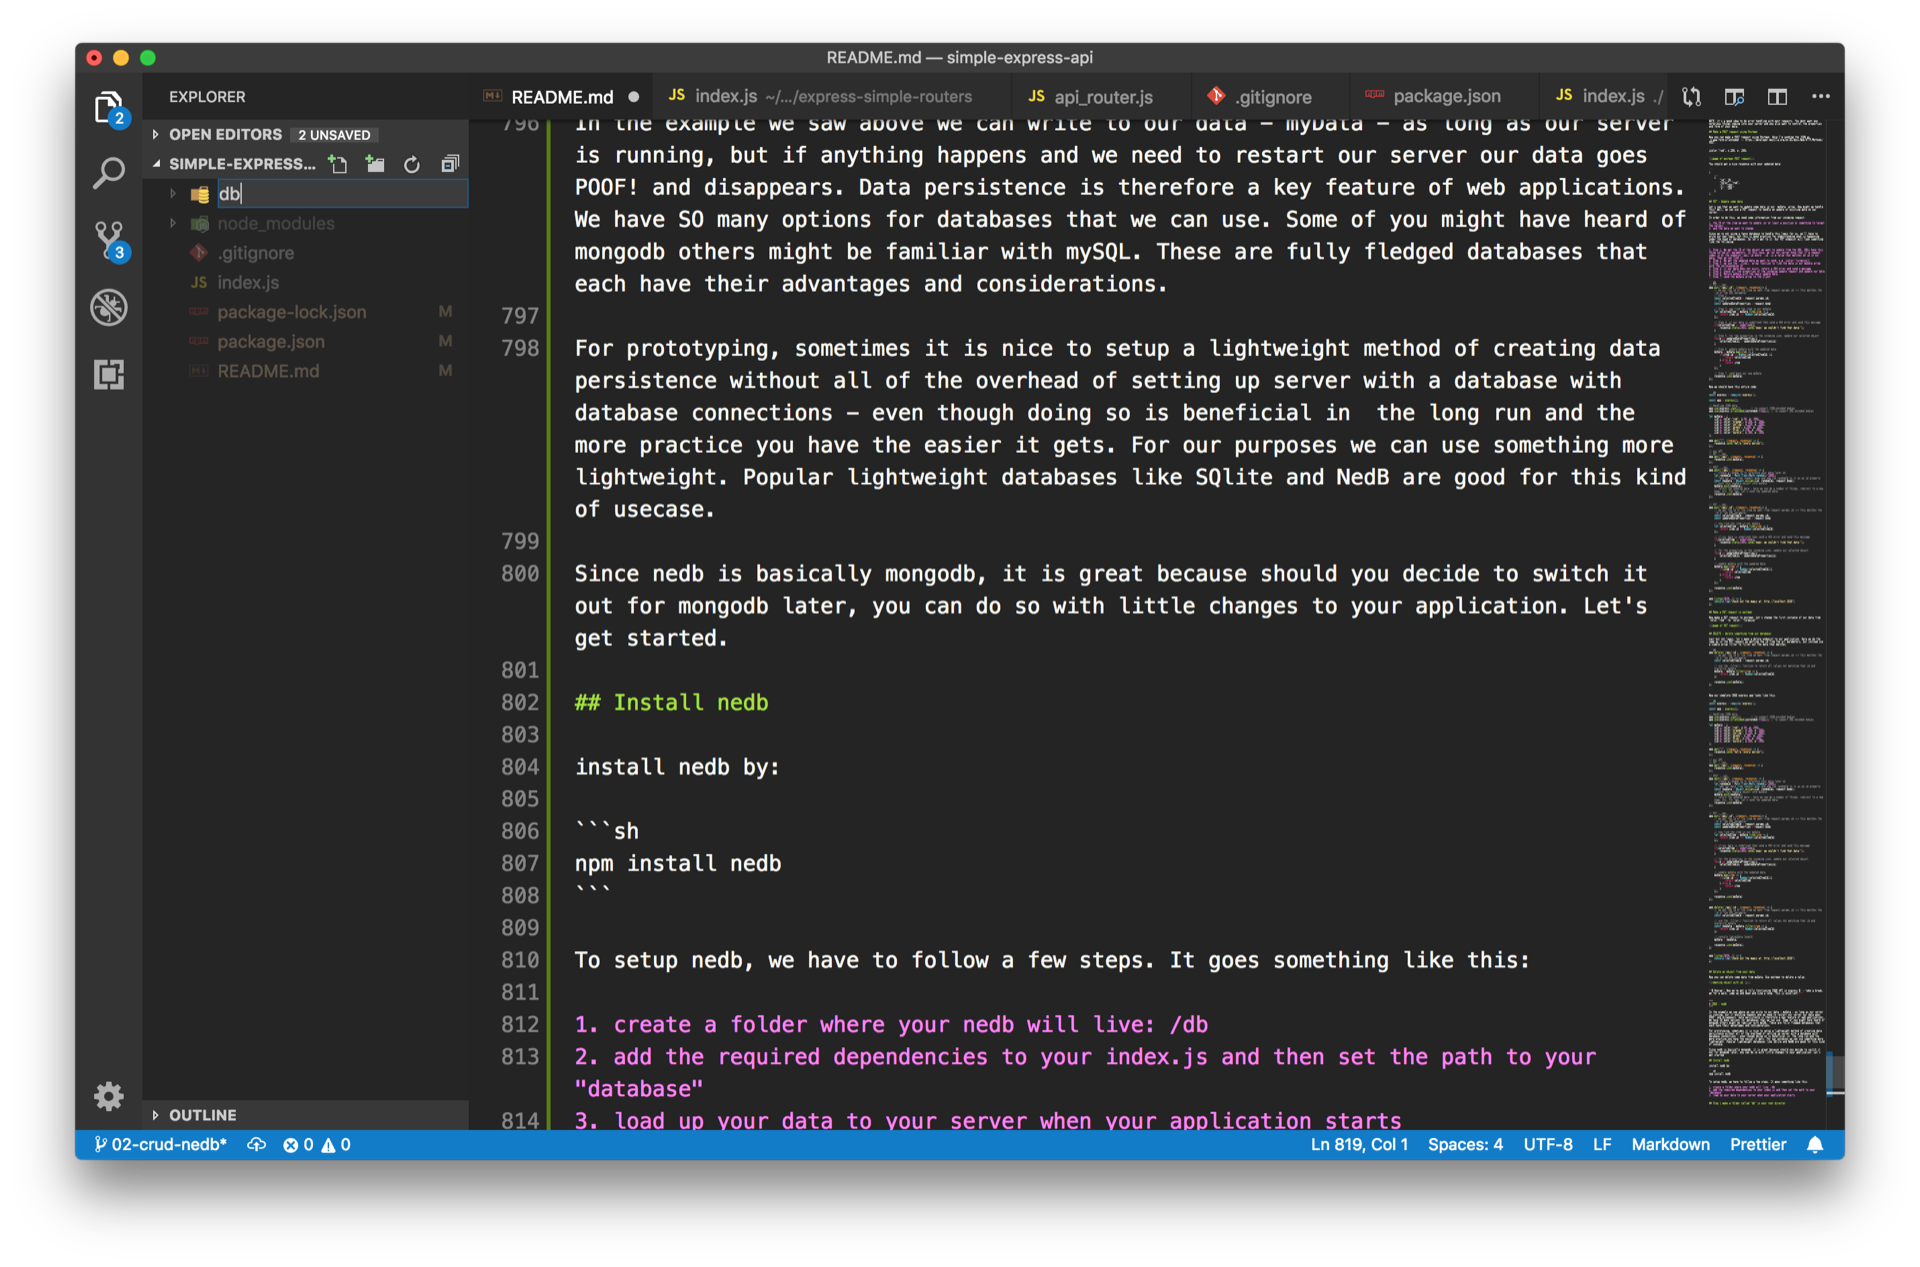
- create a folder where your nedb will live: /db
- add the required dependencies to your index.js and then set the path to your "database"
- load up your data to your server when your application starts
After express is required, bring in the following:
- path - helps us handle path variables
- require nedb
- get the path to our nedb instance
- define db by creating a new Datastore and setting the path to our "pathToData"
- Load up our database
const express = require('express');

// step 1
const path = require('path');
// step 2
// Type 3: Persistent datastore with automatic loading
const Datastore = require('nedb');
// step 3
const pathToData = path.resolve(__dirname, "db/db")
// step 4
const db = new Datastore({ filename: pathToData});
// step 5
db.loadDatabase();

const app = express();

// Handling JSON data
app.use(express.json());       // to support JSON-encoded bodies
app.use(express.urlencoded({extended:true})); // to support URL-encoded bodies
Our application will now look like this:
const express = require('express');

const path = require('path');
// Type 3: Persistent datastore with automatic loading
const Datastore = require('nedb');
const pathToData = path.resolve(__dirname, "db/db")
const db = new Datastore({ filename: pathToData});
db.loadDatabase();

const app = express();

// Handling JSON data
app.use(express.json());       // to support JSON-encoded bodies
app.use(express.urlencoded({extended:true})); // to support URL-encoded bodies

let myData = [
    {id:1, color:"red", x:50, y: 200},
    {id:2, color:"orange", x:100, y: 200},
    {id:3, color:"yellow", x:150, y: 200},
    {id:4, color:"green", x:200, y: 200},
    {id:5, color:"blue", x:250, y: 200},
    {id:6, color:"purple", x:300, y: 200}
];

app.get("/", (request, response) => {
    response.send("hello lovely person");
});

// our API
// GET - /api
app.get("/api", (request, response) => {
    response.json(myData);
});

// POST - /api
app.post("/api", (request, response) => {
    // create a random ID to reference your data later on
    let randomId = Math.floor(Math.random()*1000);
    // Take our data from request.body and add the randomId to it as an id property
    const newData = Object.assign({id: randomId}, request.body);
    // push this newData object into myData
    myData.push(newData);
    // return the updated data - here we can do a number of things, redirect to a new page, etc. For now, let's send the updated data.
    response.json(myData)
});


// PUT - /api
app.put("/api/:id", (request, response)=> {
    // we get the id of the item we want from request.params.id ==> this matches the :id of the URL parameter
    const selectedItemId = request.params.id;
    const updatedDataProperties = request.body

    // now find the item in our myData
    let selectedItem = myData.find(item => {
        return item.id === Number(selectedItemId)
    });

    // if our data is undefined then send a 404 error and send this message
    if(selectedItem == undefined){
        response.status(404).send("oops! we couldn't find that data!");
    }

    // for the properties in the incoming json, update our selected object
    for(p in updatedDataProperties){
        selectedItem[p] = updatedDataProperties[p]
    }

    // update myData with the updated data
    myData.map(item => {
        if(item.id === Number(selectedItemId)){
            return selectedItem
        } else {
            return item
        }
    });

    response.json(myData)
});


app.delete('/api/:id', (request, response) => {
    // we get the id of the item we want from request.params.id ==> this matches the :id of the URL parameter
    const selectedItemId = request.params.id;

    // use the .filter() function to return all values not matching that id and overwrite myData
    const newData = myData.filter(item => {
        return item.id !== Number(selectedItemId)
    })

    // console.log(myData.length)
    myData = newData;

    response.json(myData);
})


app.listen(3030, () => {
    console.log("check out the magic at: http://localhost:3030")
})
Now it's time to refactor our code to use NEDB instead of using in-memory myData
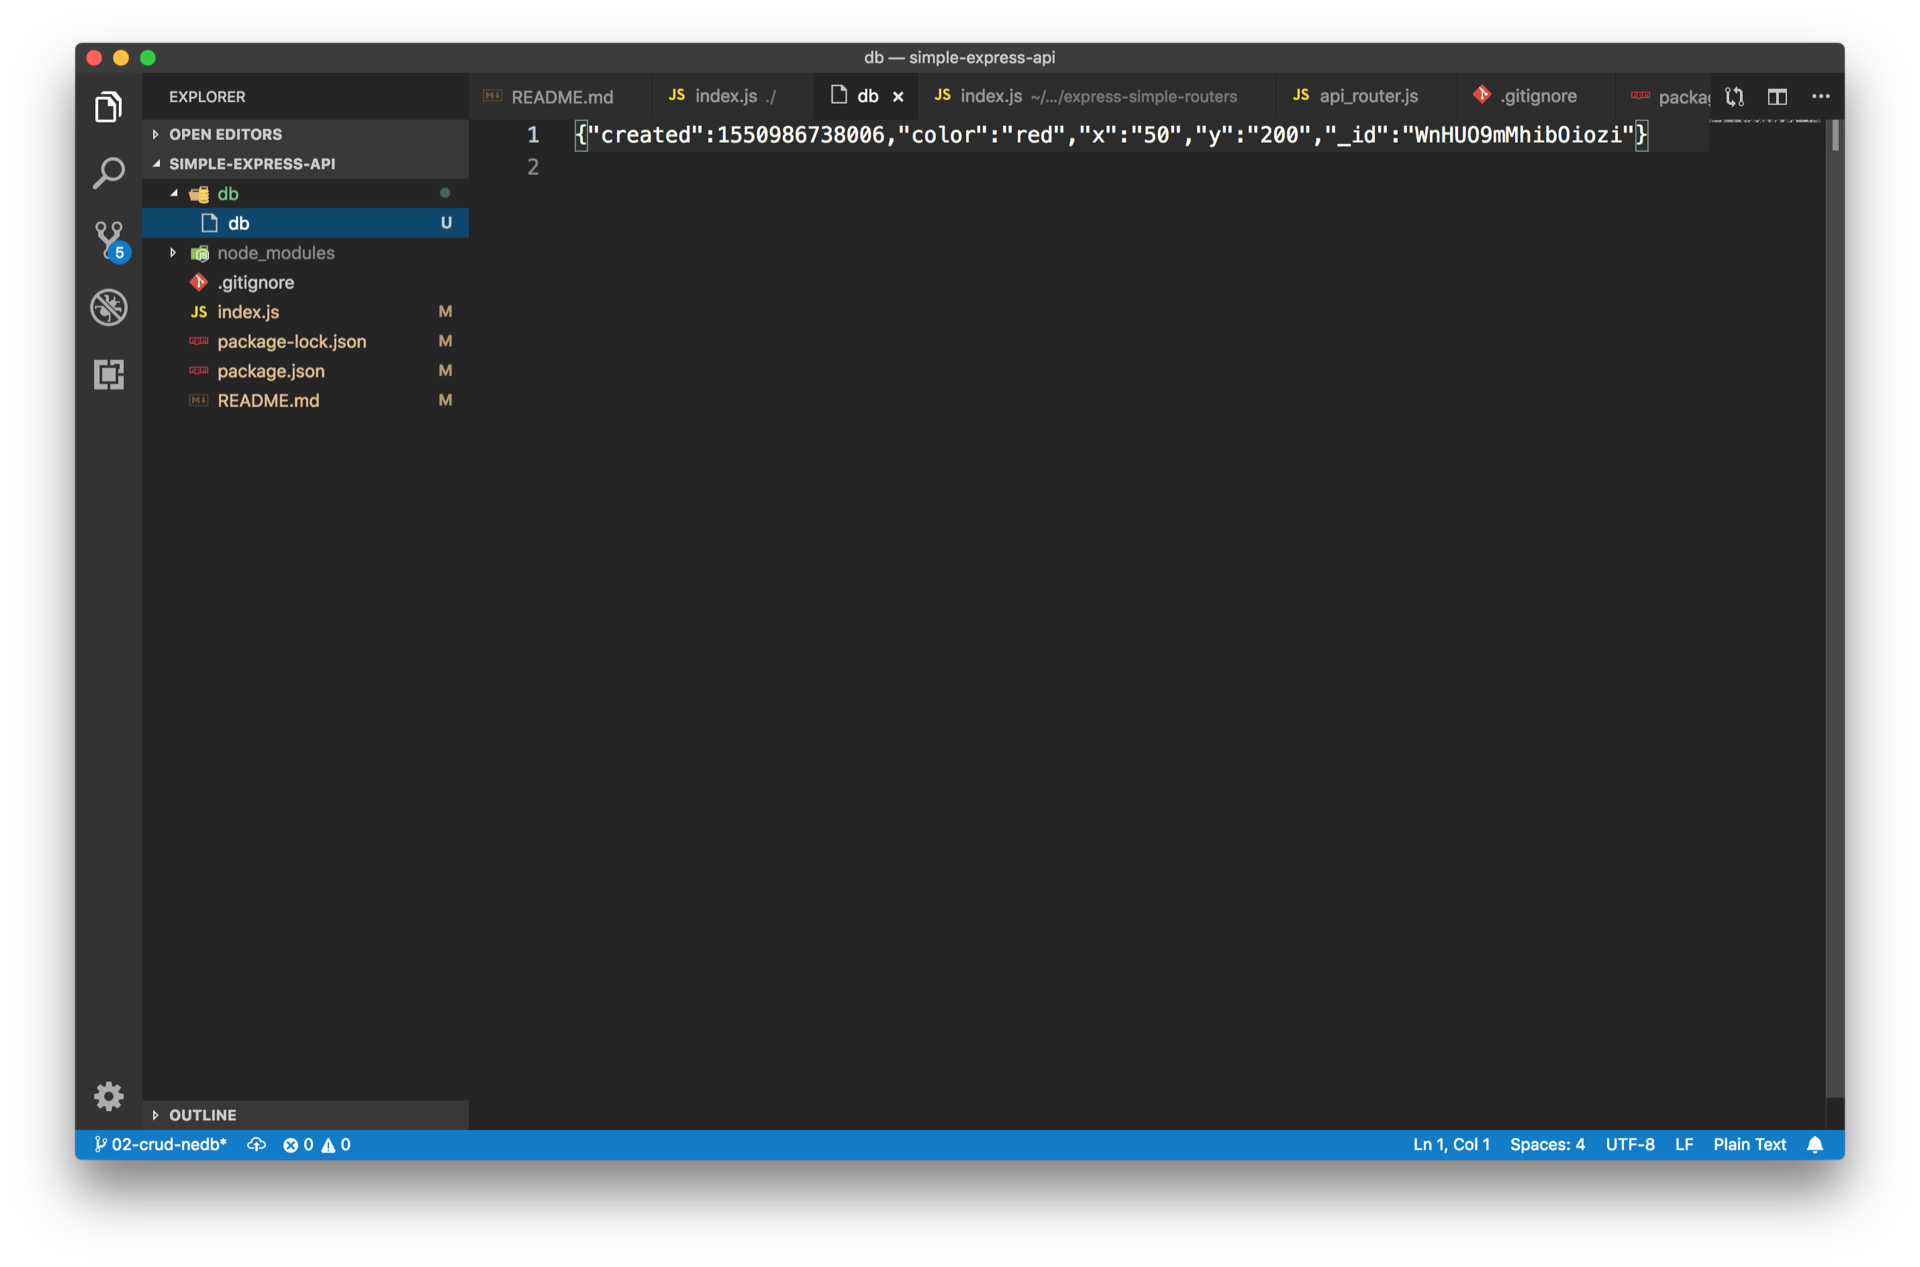
You'll notice that we reference const pathToData = path.resolve(__dirname, "db/db") as the path to our data. If you're server has been running in dev mode, you'll notice that a file called db has now been created. It has no file extension, but you can believe that it is the place where nedb will look into that file to retrieve, create, update, and delete JSON objects.
For now, let's remove the myData array. We can fill it with values with a POST request which we will refactor now.
we use the db.insert() command to insert new data into our database. The cool thing is that nedb will create a unique "_id" property to our incoming data. For good measure, let's just add in a date/time stamp so we know when our data was created.
app.post("/api", (request, response) => {
    // our unix timestamp
    const unixTimeCreated = new Date().getTime();
    // add our unix time as a "created" property and add it to our request.body
    const newData = Object.assign({"created": unixTimeCreated}, request.body)

    // add in our data object to our database using .insert()
    db.insert(newData, (err, docs) =>{
        if(err){
            return err;
        }
        response.json(docs);
    });
})
let's test this out!
Fire up postman and add in some data with the following properties:
{color:"red", x:50, y: 200}WOW! amazing now we've got our first data entry living in our db
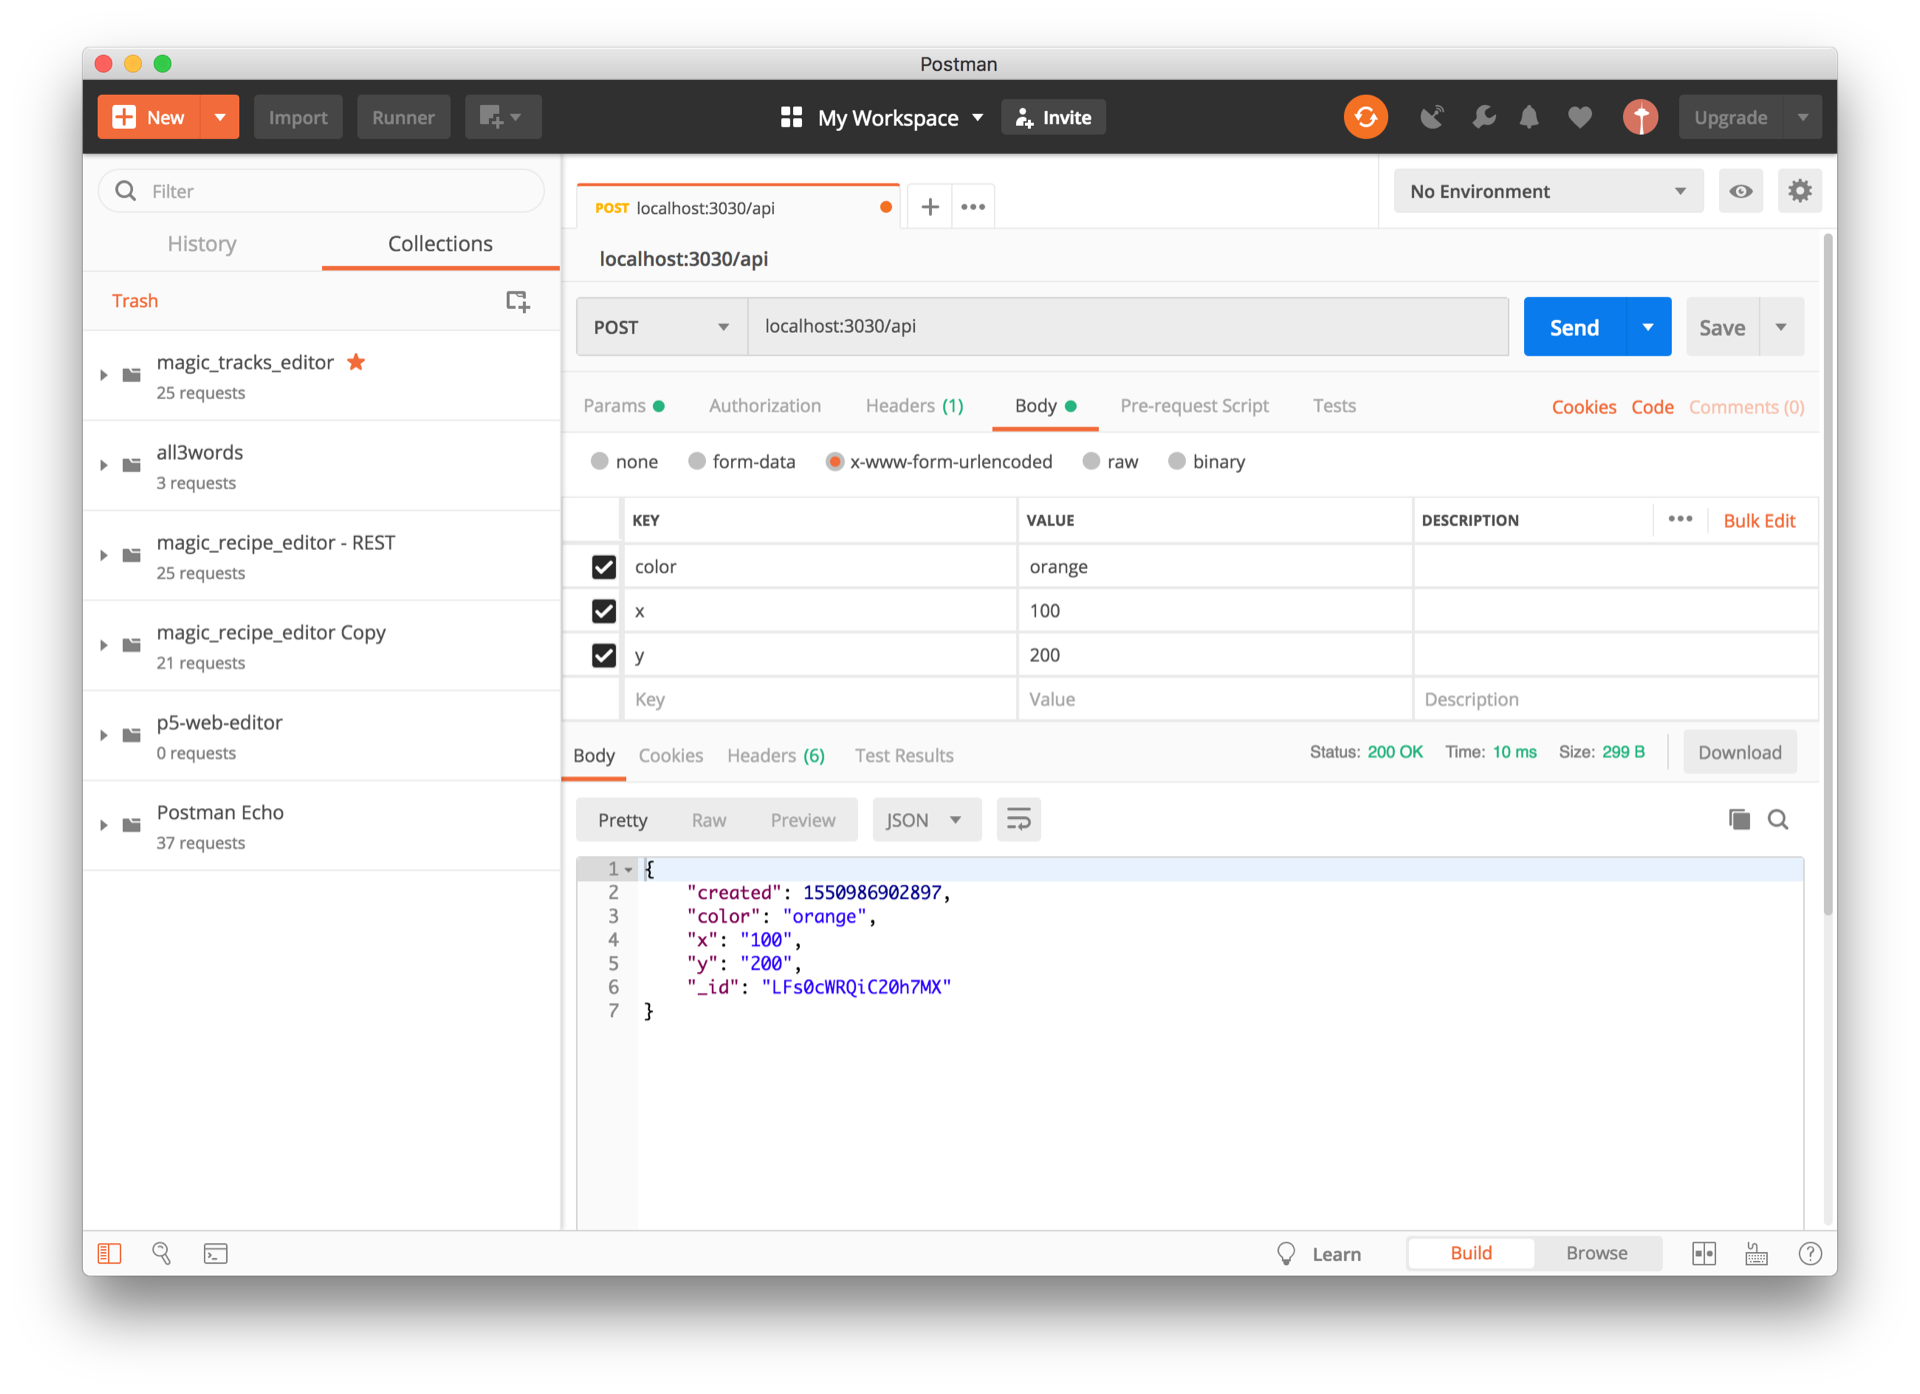
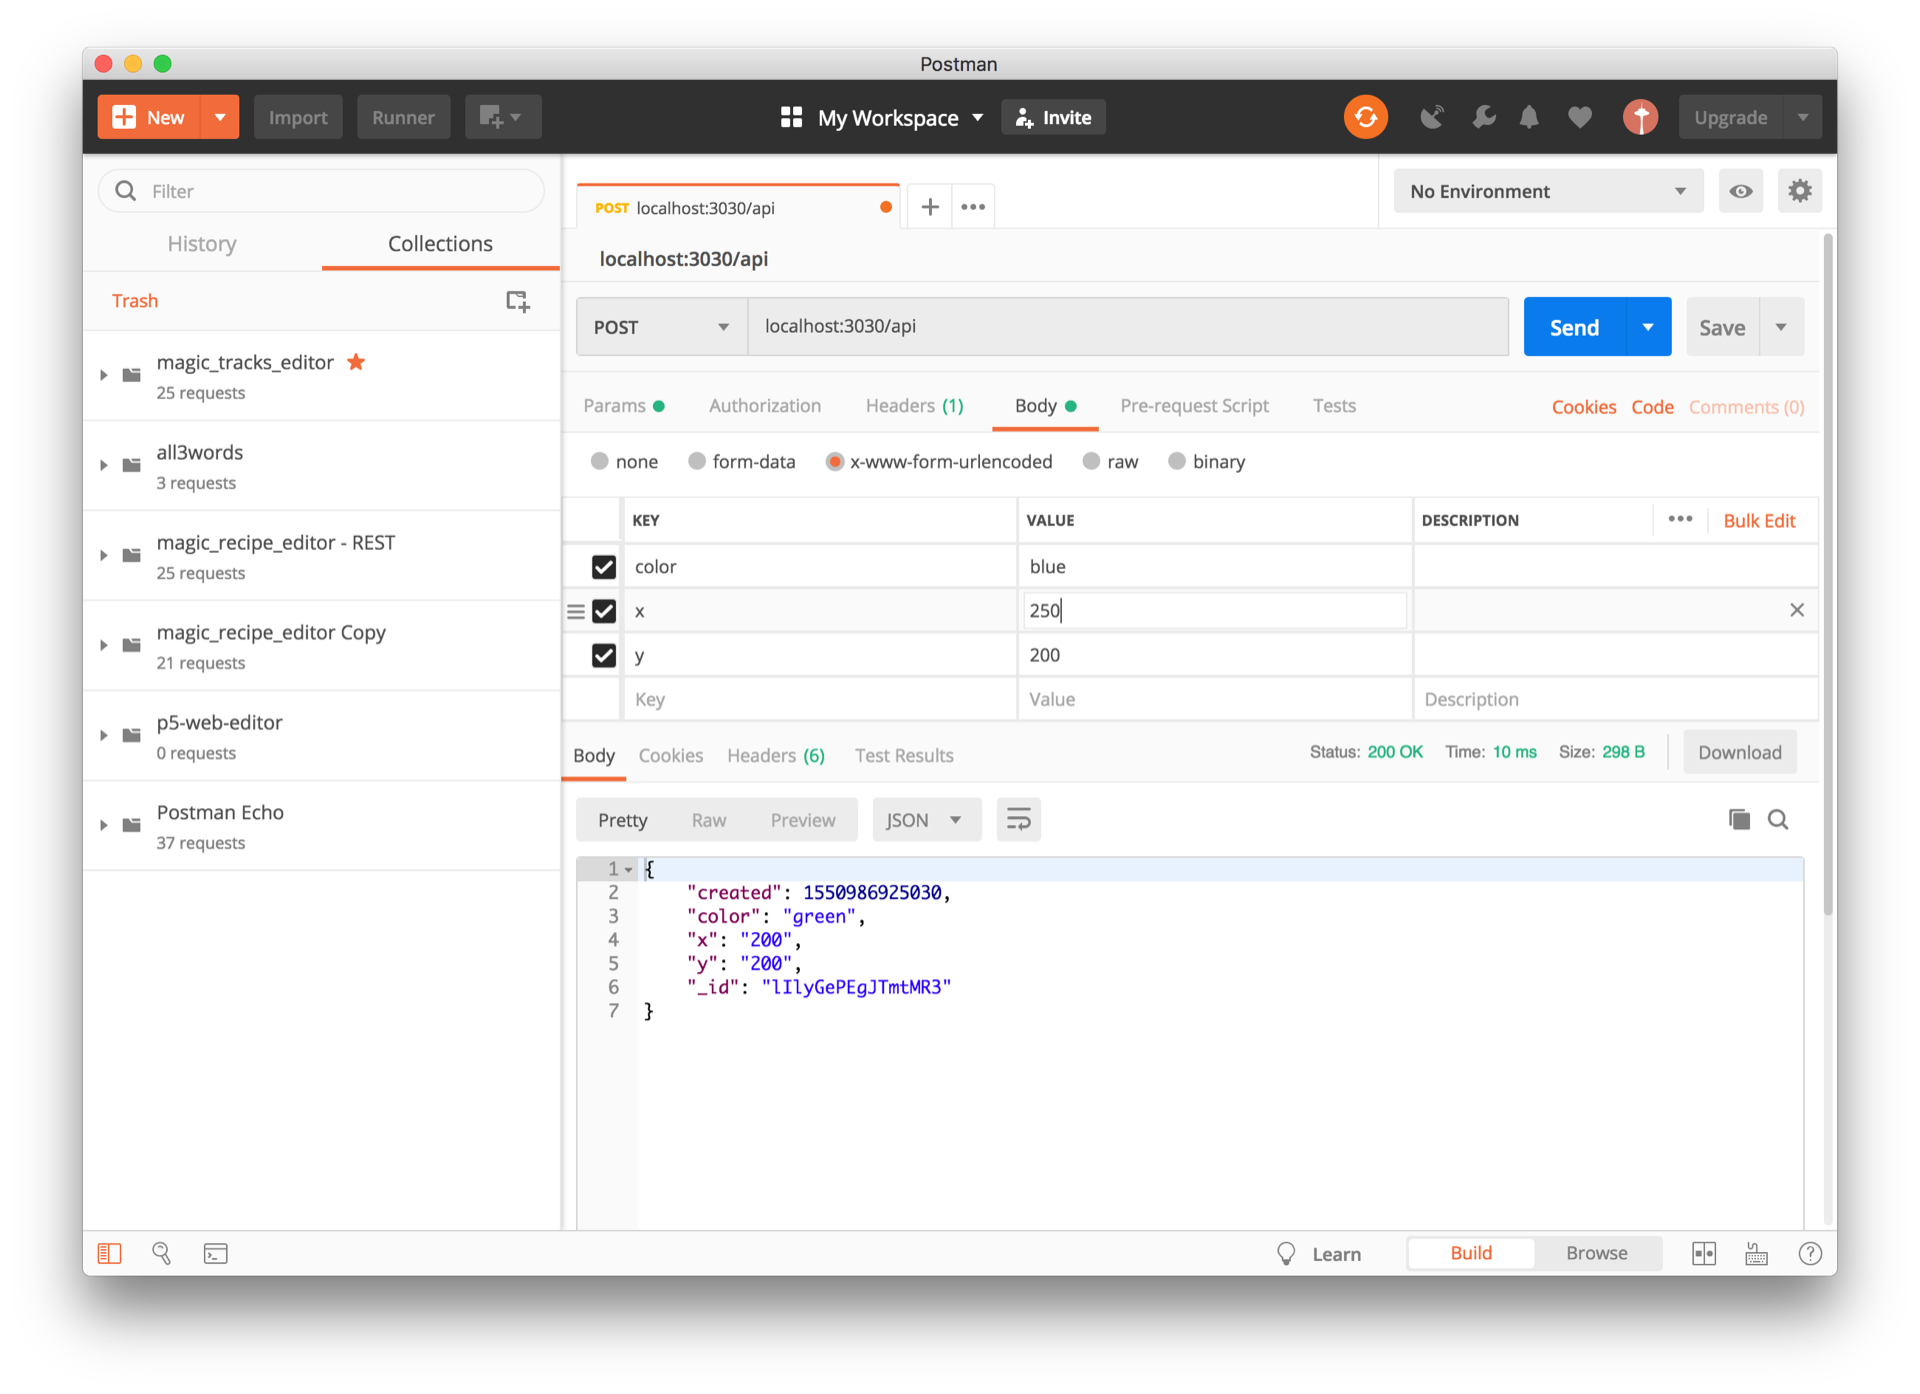
Now make post requests with the following data. NOTE: you'll have to do this individually for each POST:
{color:"orange", x:100, y: 200}
{color:"yellow", x:150, y: 200}
{color:"green", x:200, y: 200}
{color:"blue", x:250, y: 200}
{color:"purple", x:300, y: 200}
For examples:
In the next step we can rewrite our GET request to retrieve data from our database.
Let's write our first "database" query to retrieve data for a GET request. If you look at the reference of nedb, you'll see that actually it looks exactly like mongodb's structure.
// GET - /api
app.get("/api", (request, response) => {
    // db references our nedb instance
    // we use "find" and an empty search {} to give us back all the data in the db
    db.find({}, function (err, docs) {
        if(err){
            return err;
        }
        // like before we send the json response
        response.json(docs);
    });
});
Now in postman, give this a try. Make a GET request to localhost:3030/api
 )
)
Up to this point our full code should look like this:
const express = require('express');

const path = require('path');
// Type 3: Persistent datastore with automatic loading
const Datastore = require('nedb');
const pathToData = path.resolve(__dirname, "db/db")
const db = new Datastore({ filename: pathToData});
db.loadDatabase();

const app = express();

// Handling JSON data
app.use(express.json());       // to support JSON-encoded bodies
app.use(express.urlencoded({extended:true})); // to support URL-encoded bodies


app.get("/", (request, response) => {
    response.send("hello lovely person");
});

// our API
// GET - /api
app.get("/api", (request, response) => {
    db.find({}, function (err, docs) {
        if(err){
            return err;
        }
        response.json(docs);
    });
});

// POST - /api
app.post("/api", (request, response) => {
    // our unix timestamp
    const unixTimeCreated = new Date().getTime();
    // add our unix time as a "created" property and add it to our request.body
    const newData = Object.assign({"created": unixTimeCreated}, request.body)

    // add in our data object to our database using .insert()
    db.insert(newData, (err, docs) =>{
        if(err){
            return err;
        }
        response.json(docs);
    });
})


// PUT - /api
app.put("/api/:id", (request, response)=> {
    // we get the id of the item we want from request.params.id ==> this matches the :id of the URL parameter
    const selectedItemId = request.params.id;
    const updatedDataProperties = request.body

    // now find the item in our myData
    let selectedItem = myData.find(item => {
        return item.id === Number(selectedItemId)
    });

    // if our data is undefined then send a 404 error and send this message
    if(selectedItem == undefined){
        response.status(404).send("oops! we couldn't find that data!");
    }

    // for the properties in the incoming json, update our selected object
    for(p in updatedDataProperties){
        selectedItem[p] = updatedDataProperties[p]
    }

    // update myData with the updated data
    myData.map(item => {
        if(item.id === Number(selectedItemId)){
            return selectedItem
        } else {
            return item
        }
    });

    response.json(myData)
});


app.delete('/api/:id', (request, response) => {
    // we get the id of the item we want from request.params.id ==> this matches the :id of the URL parameter
    const selectedItemId = request.params.id;

    // use the .filter() function to return all values not matching that id and overwrite myData
    const newData = myData.filter(item => {
        return item.id !== Number(selectedItemId)
    })

    // console.log(myData.length)
    myData = newData;

    response.json(myData);
})


app.listen(3030, () => {
    console.log("check out the magic at: http://localhost:3030")
})
We now have to update our PUT and our DELETE endpoints.
See: https://github.com/louischatriot/nedb#updating-documents
As we saw earlier, the way updates work are to:
- get an id or some kind of selector property
- then send the data we want to update.
In our example we select a specific object in our database based on its _id -- remember, nedb is now generating unique ids for us -- and send in our data that we want updated.
In the noSQL database universe, there are a couple ways to do an update:
- you can replace the entire object with a new one or
- you can $set the properties you want updated.
The $set syntax is a convention in mongodb and nedb (and perhaps other noSQL databases) that says, "based on the selection, update the properties that I've specied based on this data".
Below you can see the snippet.
One other thing you'll notice here is that we use response.redirect('/api') after updating our data. We first check for errors, but if all is successful, return our entire updated data.
// PUT - /api
app.put("/api/:id", (request, response)=> {
    // we get the id of the item we want from request.params.id ==> this matches the :id of the URL parameter
    const selectedItemId = request.params.id;
    const updatedDataProperties = request.body


   // Set an existing field's value
   db.update({ _id: selectedItemId  }, { $set: updatedDataProperties }, (err, numReplaced) => {
       if(err){
           response.status(404).send("uh oh! something went wrong on update");
       }
        // redirect to "GET" all the latest data
        response.redirect("/api")
   });

}); )
)
Lastly we refactor our DELETE method with the following snippet. You'll notice a similar structure to the PUT request except that instead of sending data to update, we're just selecting the _id and removing it. Again we redirect to the "GET" endpoint which sends back all the data.
So far we're only deleting one feature at a time based on an _id but it is totally possible to delete many features based on a shared property, or just all the things in your database. You can check the nedb documentation on how to do this.
app.delete('/api/:id', (request, response) => {
    // we get the id of the item we want from request.params.id ==> this matches the :id of the URL parameter
    const selectedItemId = request.params.id;

    db.remove({ _id: selectedItemId }, {}, function (err, numRemoved) {
        if(err){
           response.status(404).send("uh oh! something went wrong on delete");
          }
         // numRemoved = 1
         response.redirect("/api")
      });

}) )
)
🌈 and there you have it! you've just built a full CRUD API with express.
const express = require('express');

const path = require('path');
// Type 3: Persistent datastore with automatic loading
const Datastore = require('nedb');
const pathToData = path.resolve(__dirname, "db/db")
const db = new Datastore({ filename: pathToData});
db.loadDatabase();

const app = express();

// Handling JSON data
app.use(express.json());       // to support JSON-encoded bodies
app.use(express.urlencoded({extended:true})); // to support URL-encoded bodies


app.get("/", (request, response) => {
    response.send("hello lovely person");
});

// our API
// GET - /api
app.get("/api", (request, response) => {
    db.find({}, function (err, docs) {
        if(err){
            return err;
        }
        response.json(docs);
    });
});

// POST - /api
app.post("/api", (request, response) => {
    // our unix timestamp
    const unixTimeCreated = new Date().getTime();
    // add our unix time as a "created" property and add it to our request.body
    const newData = Object.assign({"created": unixTimeCreated}, request.body)

    // add in our data object to our database using .insert()
    db.insert(newData, (err, docs) =>{
        if(err){
            return err;
        }
        response.json(docs);
    });
})


// PUT - /api
app.put("/api/:id", (request, response)=> {
    // we get the id of the item we want from request.params.id ==> this matches the :id of the URL parameter
    const selectedItemId = request.params.id;
    const updatedDataProperties = request.body


   // Set an existing field's value
   db.update({ _id: selectedItemId  }, { $set: updatedDataProperties }, (err, numReplaced) => {
       if(err){
           response.status(404).send("uh oh! something went wrong on update");
       }
        // redirect to "GET" all the latest data
        response.redirect("/api")
   });

});

// DELETE - /api
app.delete('/api/:id', (request, response) => {
    // we get the id of the item we want from request.params.id ==> this matches the :id of the URL parameter
    const selectedItemId = request.params.id;

    db.remove({ _id: selectedItemId }, {}, function (err, numRemoved) {
        if(err){
           response.status(404).send("uh oh! something went wrong on delete");
          }
         // numRemoved = 1
         response.redirect("/api")
      });

})


app.listen(3030, () => {
    console.log("check out the magic at: http://localhost:3030")
})Alighty, so last but not least, we want to build some kind of front end to our application. This will allow us and your users to interact with our API. Of course other developers could start using your API provided that you make some API documentation -- https://swagger.io/blog/api-documentation/what-is-api-documentation-and-why-it-matters/ -- but since we're creative people, let's make our own interface to this application.
There are many ways to build interfaces - we're going to keep it simple with HTML5, using p5.js of course since we <3 p5.
In order to serve static files from our current server, we need to be able to tell our express application to send static files such as an index.html, sketch.js, images, etc based on a directory on your server.
The common way to do this is to set a public directory where all your public assets will live. Public assets can be things like images, css style sheets, your index.html, your sketch.js files, etc.
Let's add this to our express code. Here's where this code snippet will live.
An important thing to note in Express is that the order you define "middleware" matters. Here we define early on in our express applicaton that Express should use the public folder to serve static assets. Therefore when you run the response.sendFile() the files sent to the client will be from the public folder.
/** a bunch of our code above */

const app = express();

// Send files from the public directory
app.use(express.static( path.resolve(__dirname, 'public') ));

// Handling JSON data
app.use(express.json());       // to support JSON-encoded bodies
app.use(express.urlencoded({extended:true})); // to support URL-encoded bodies

/** a bunch of our code below */
Now we can create a folder called public in our root directory:
 )
)
 )
)
And last create an index.html and sketch.js file with some boilerplate p5.js code to start.
In index.html
<!DOCTYPE html>
<html>

<head>
    <title>Simple Express API with P5.js</title>
    <style type="text/css">
    * {
        font-family: 'Monaco'
    }
    </style>
</head>
<body>
    <h1>Simple CRUD API with Express</h1>
    <!-- p5 libraries -->
    <script type="text/javascript" src="https://cdnjs.cloudflare.com/ajax/libs/p5.js/0.7.3/p5.min.js"></script>
    <script type="text/javascript" src="https://cdnjs.cloudflare.com/ajax/libs/p5.js/0.7.3/addons/p5.dom.min.js"></script>
    <script type="text/javascript" src="https://cdnjs.cloudflare.com/ajax/libs/p5.js/0.7.3/addons/p5.sound.min.js"></script>
    <!-- your p5 sketch -->
    <script type="text/javascript" src="sketch.js"></script>
</body>

</html>
and add a sketch.js file
function setup(){
    createCanvas(400, 400);

}

function draw(){
    background(200);

}
and last but not least, when a user goes to your root URL, they should recieve your index.html file from your server. To do this, let's tell express to .sendFile() when users navigate to the root URL at / :
app.get("/", (request, response) => {
    response.sendFile("index.html");
});
Your entire code will look like this now:
const express = require('express');

const path = require('path');
// Type 3: Persistent datastore with automatic loading
const Datastore = require('nedb');
const pathToData = path.resolve(__dirname, "db/db")
const db = new Datastore({ filename: pathToData});
db.loadDatabase();

const app = express();

// Send files from the public directory
app.use(express.static( path.resolve(__dirname, 'public') ));

// Handling JSON data
app.use(express.json());       // to support JSON-encoded bodies
app.use(express.urlencoded({extended:true})); // to support URL-encoded bodies


app.get("/", (request, response) => {
    response.sendFile("index.html");
});

// our API
// GET - /api
app.get("/api", (request, response) => {
    db.find({}, function (err, docs) {
        if(err){
            return err;
        }
        response.json(docs);
    });
});

// POST - /api
app.post("/api", (request, response) => {
    // our unix timestamp
    const unixTimeCreated = new Date().getTime();
    // add our unix time as a "created" property and add it to our request.body
    const newData = Object.assign({"created": unixTimeCreated}, request.body)

    // add in our data object to our database using .insert()
    db.insert(newData, (err, docs) =>{
        if(err){
            return err;
        }
        response.json(docs);
    });
})


// PUT - /api
app.put("/api/:id", (request, response)=> {
    // we get the id of the item we want from request.params.id ==> this matches the :id of the URL parameter
    const selectedItemId = request.params.id;
    const updatedDataProperties = request.body


   // Set an existing field's value
   db.update({ _id: selectedItemId  }, { $set: updatedDataProperties }, (err, numReplaced) => {
       if(err){
           response.status(404).send("uh oh! something went wrong on update");
       }
        // redirect to "GET" all the latest data
        response.redirect("/api")
   });

});

// DELETE - /api
app.delete('/api/:id', (request, response) => {
    // we get the id of the item we want from request.params.id ==> this matches the :id of the URL parameter
    const selectedItemId = request.params.id;

    db.remove({ _id: selectedItemId }, {}, function (err, numRemoved) {
        if(err){
           response.status(404).send("uh oh! something went wrong on delete");
          }
         // numRemoved = 1
         response.redirect("/api")
      });

})


app.listen(3030, () => {
    console.log("check out the magic at: http://localhost:3030")
})
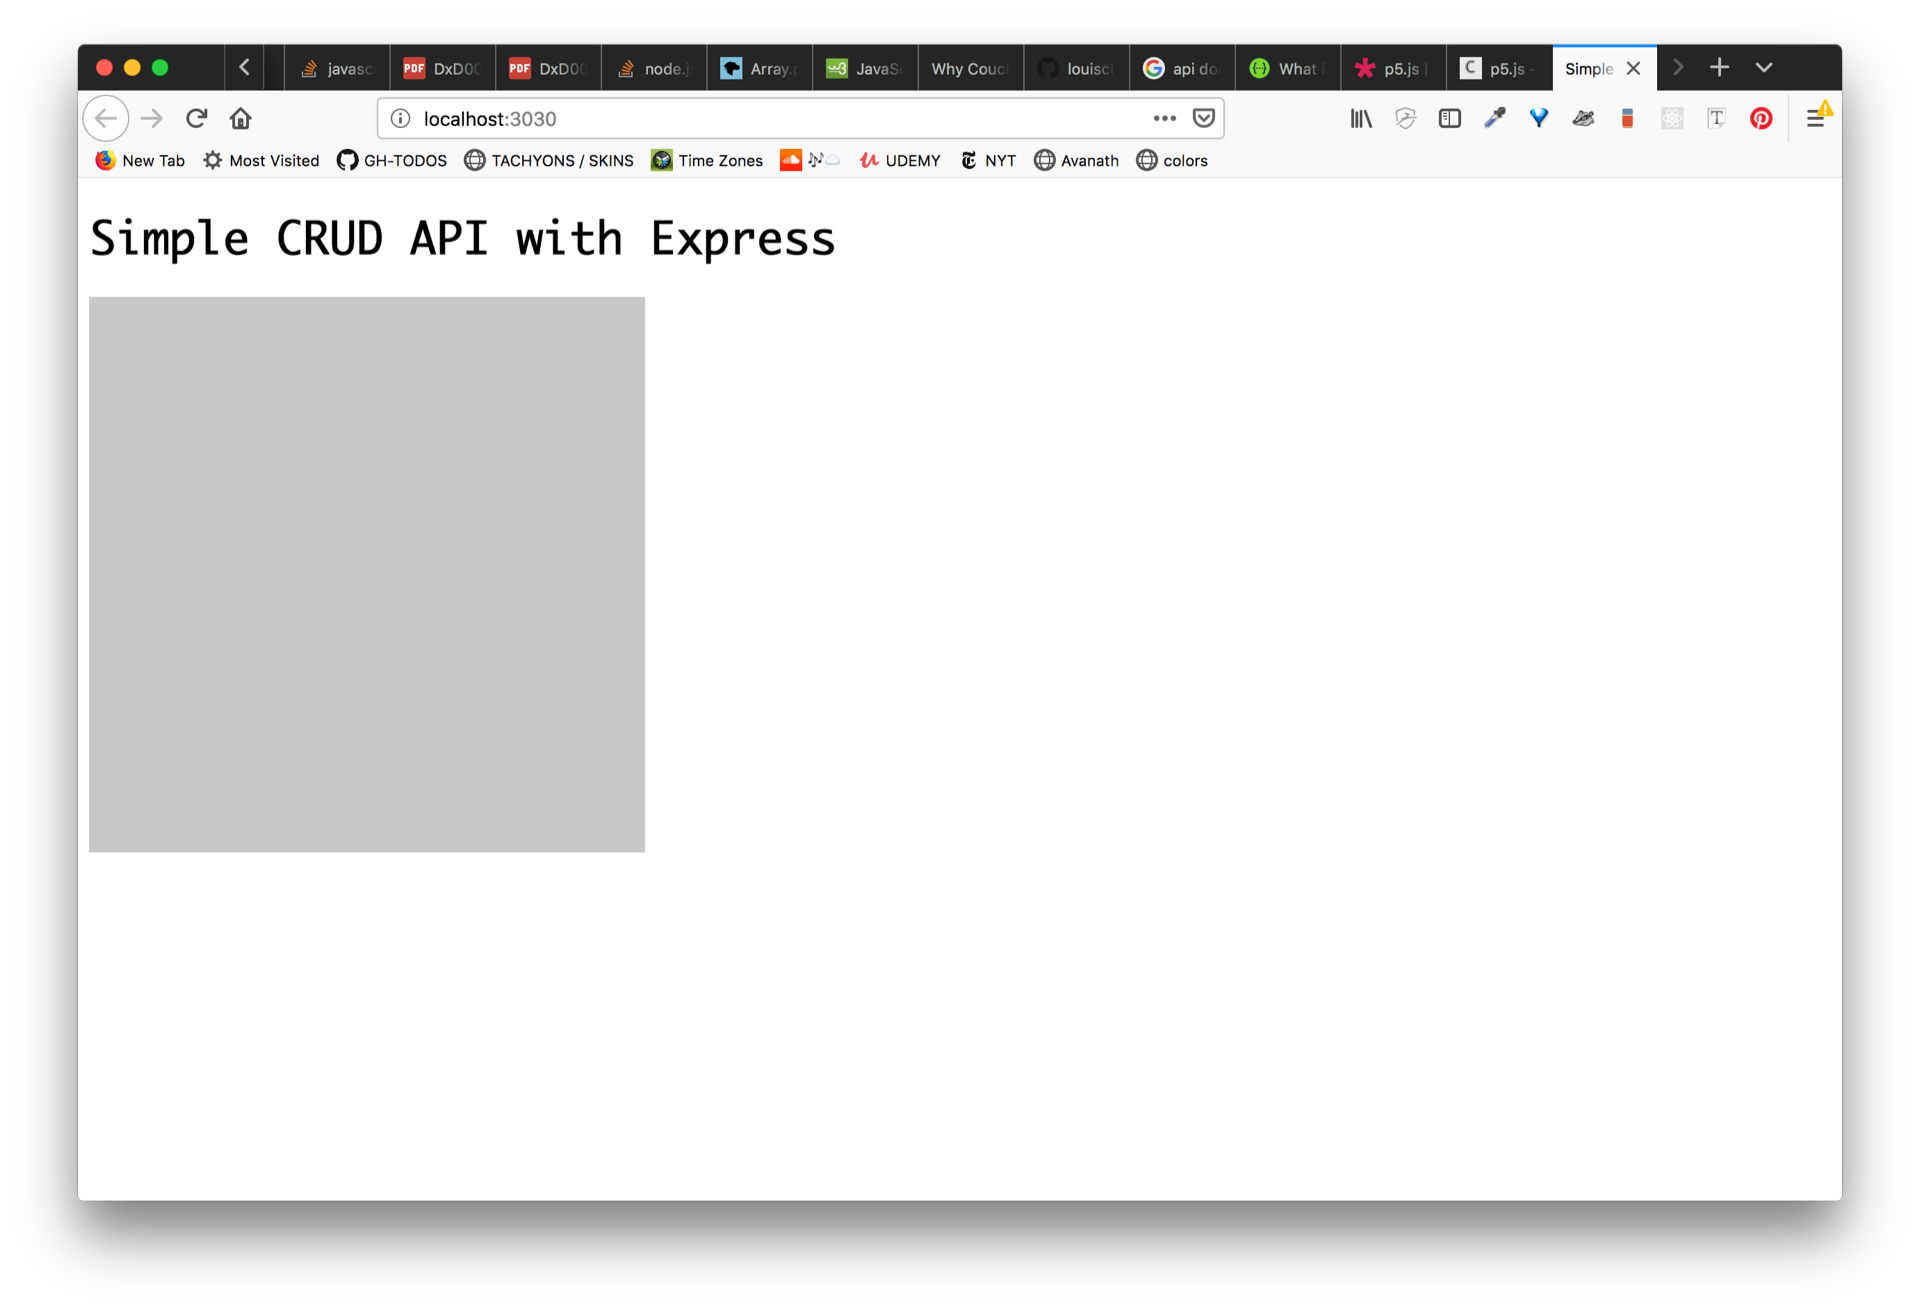
Now go to your web browser and check: localhost:3030/ and see that your sketch us being served at the root URL. This is just delightful.
Since we're using P5.js we've got a suite a tools at our disposal to making requests from the client. Let's explore some of those now.
We can use:
- loadJSON()
- httpGet()
we can use:
- httpPost(): https://p5js.org/reference/#/p5/httpPost
We can use:
- fetch()
Fetch() is a general purpose function for making API calls, but since p5 gives us some nice functions for GET and POST, we use those and then fetch() for the PUT and DELETE.
Remember we've so far been using Postman to do our API requests and shown that it works. Now we can start requesting data from our p5 sketch.
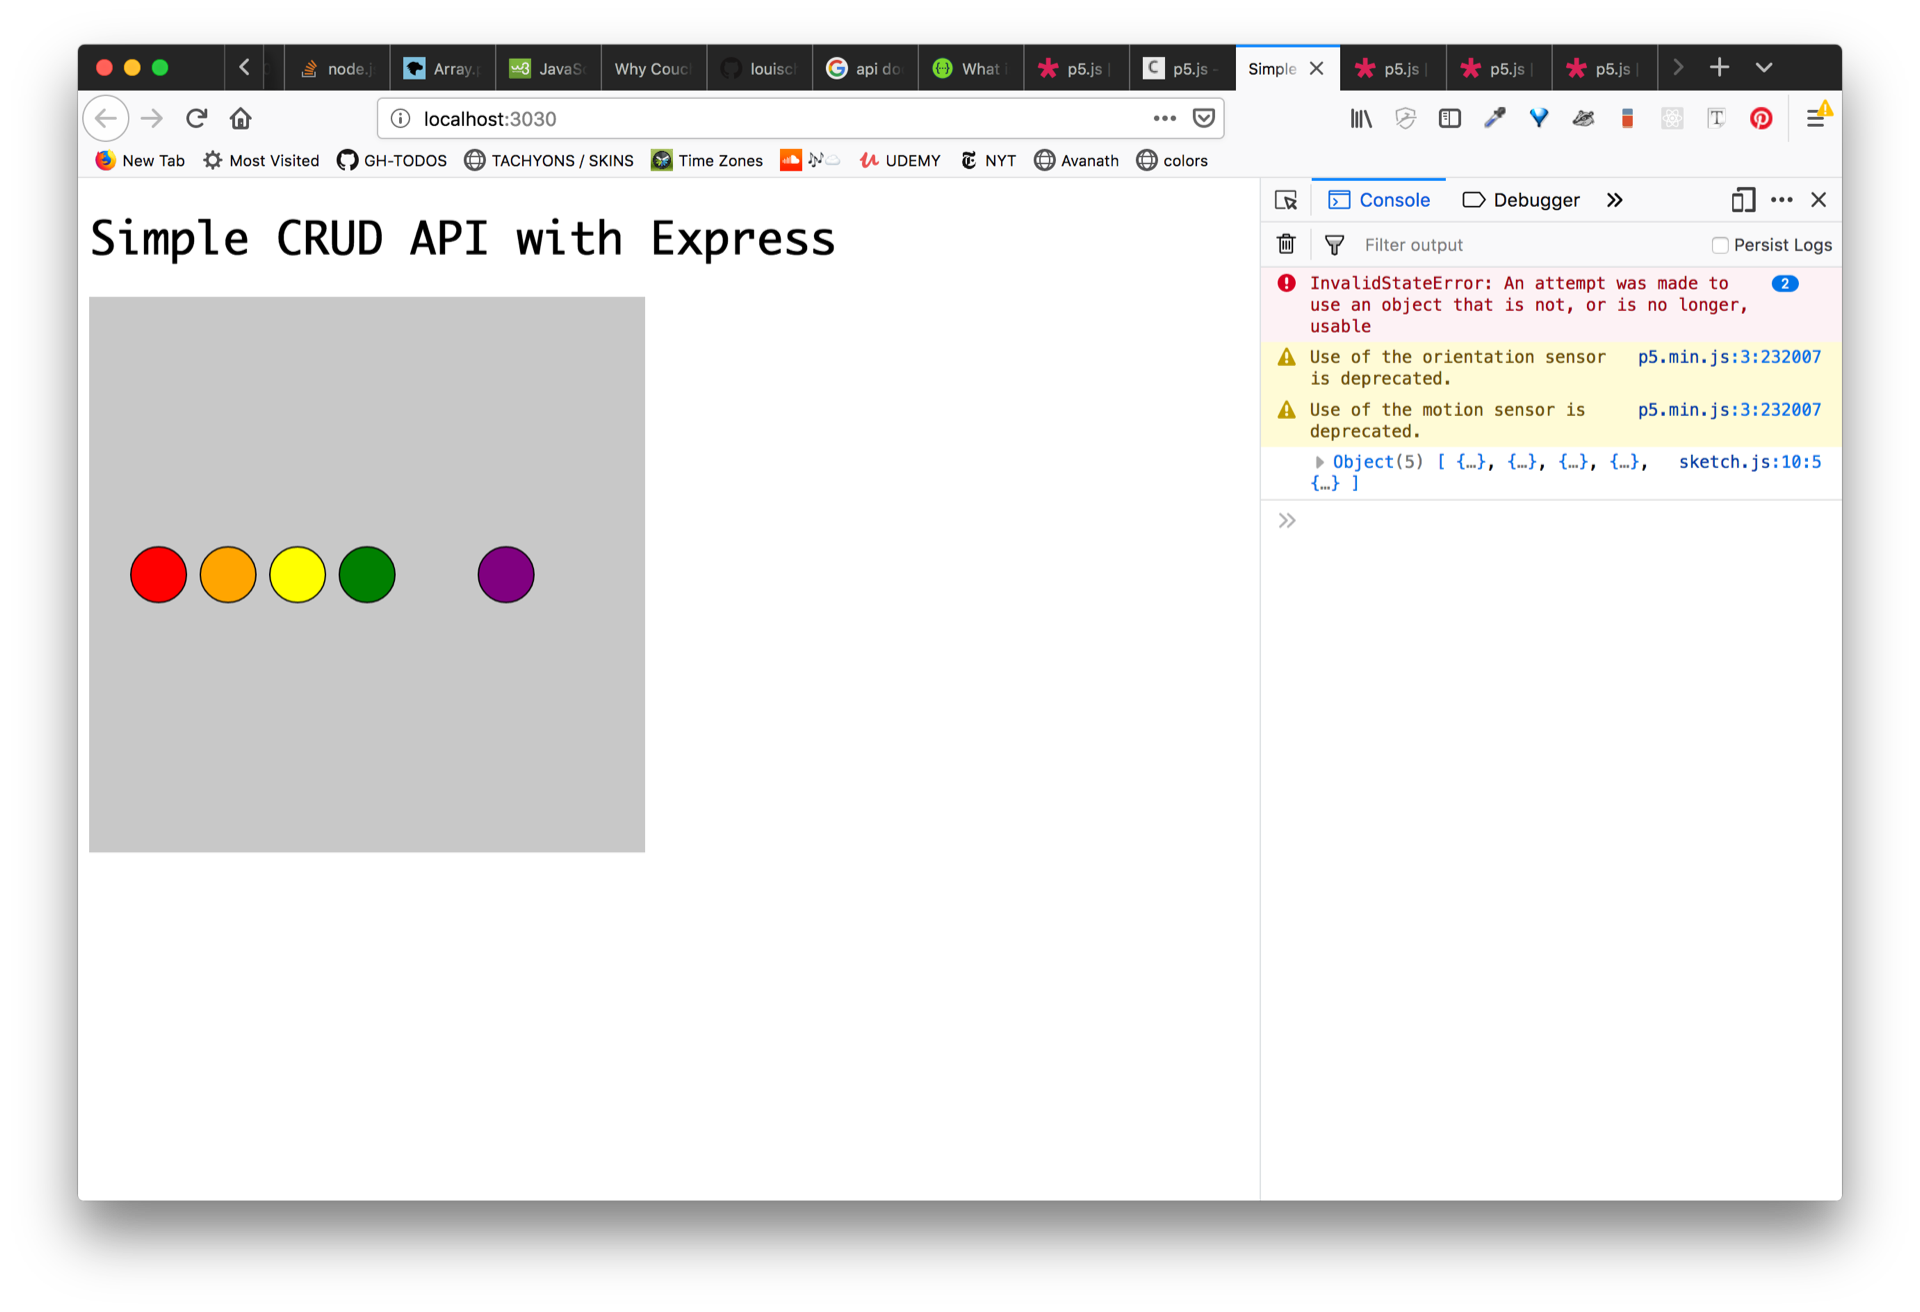
Let's request our data and render what is in our database in our canvas.
In sketch.js
let myData;

function preload(){
    // we request our data at the /api endpoint
    myData = loadJSON("/api");
}

function setup(){
    createCanvas(400, 400);
    // NOTICE: the x, y values are now strings rather than integers
    console.log(myData);
}


function draw(){
    background(200);

    // NOTE: we get back JSON not an array
    for(p in myData){
        const item = myData[p];
        const x = int(item.x)
        const y = int(item.y)
        fill(item.color);
        ellipse(x, y, 40, 40)
    }

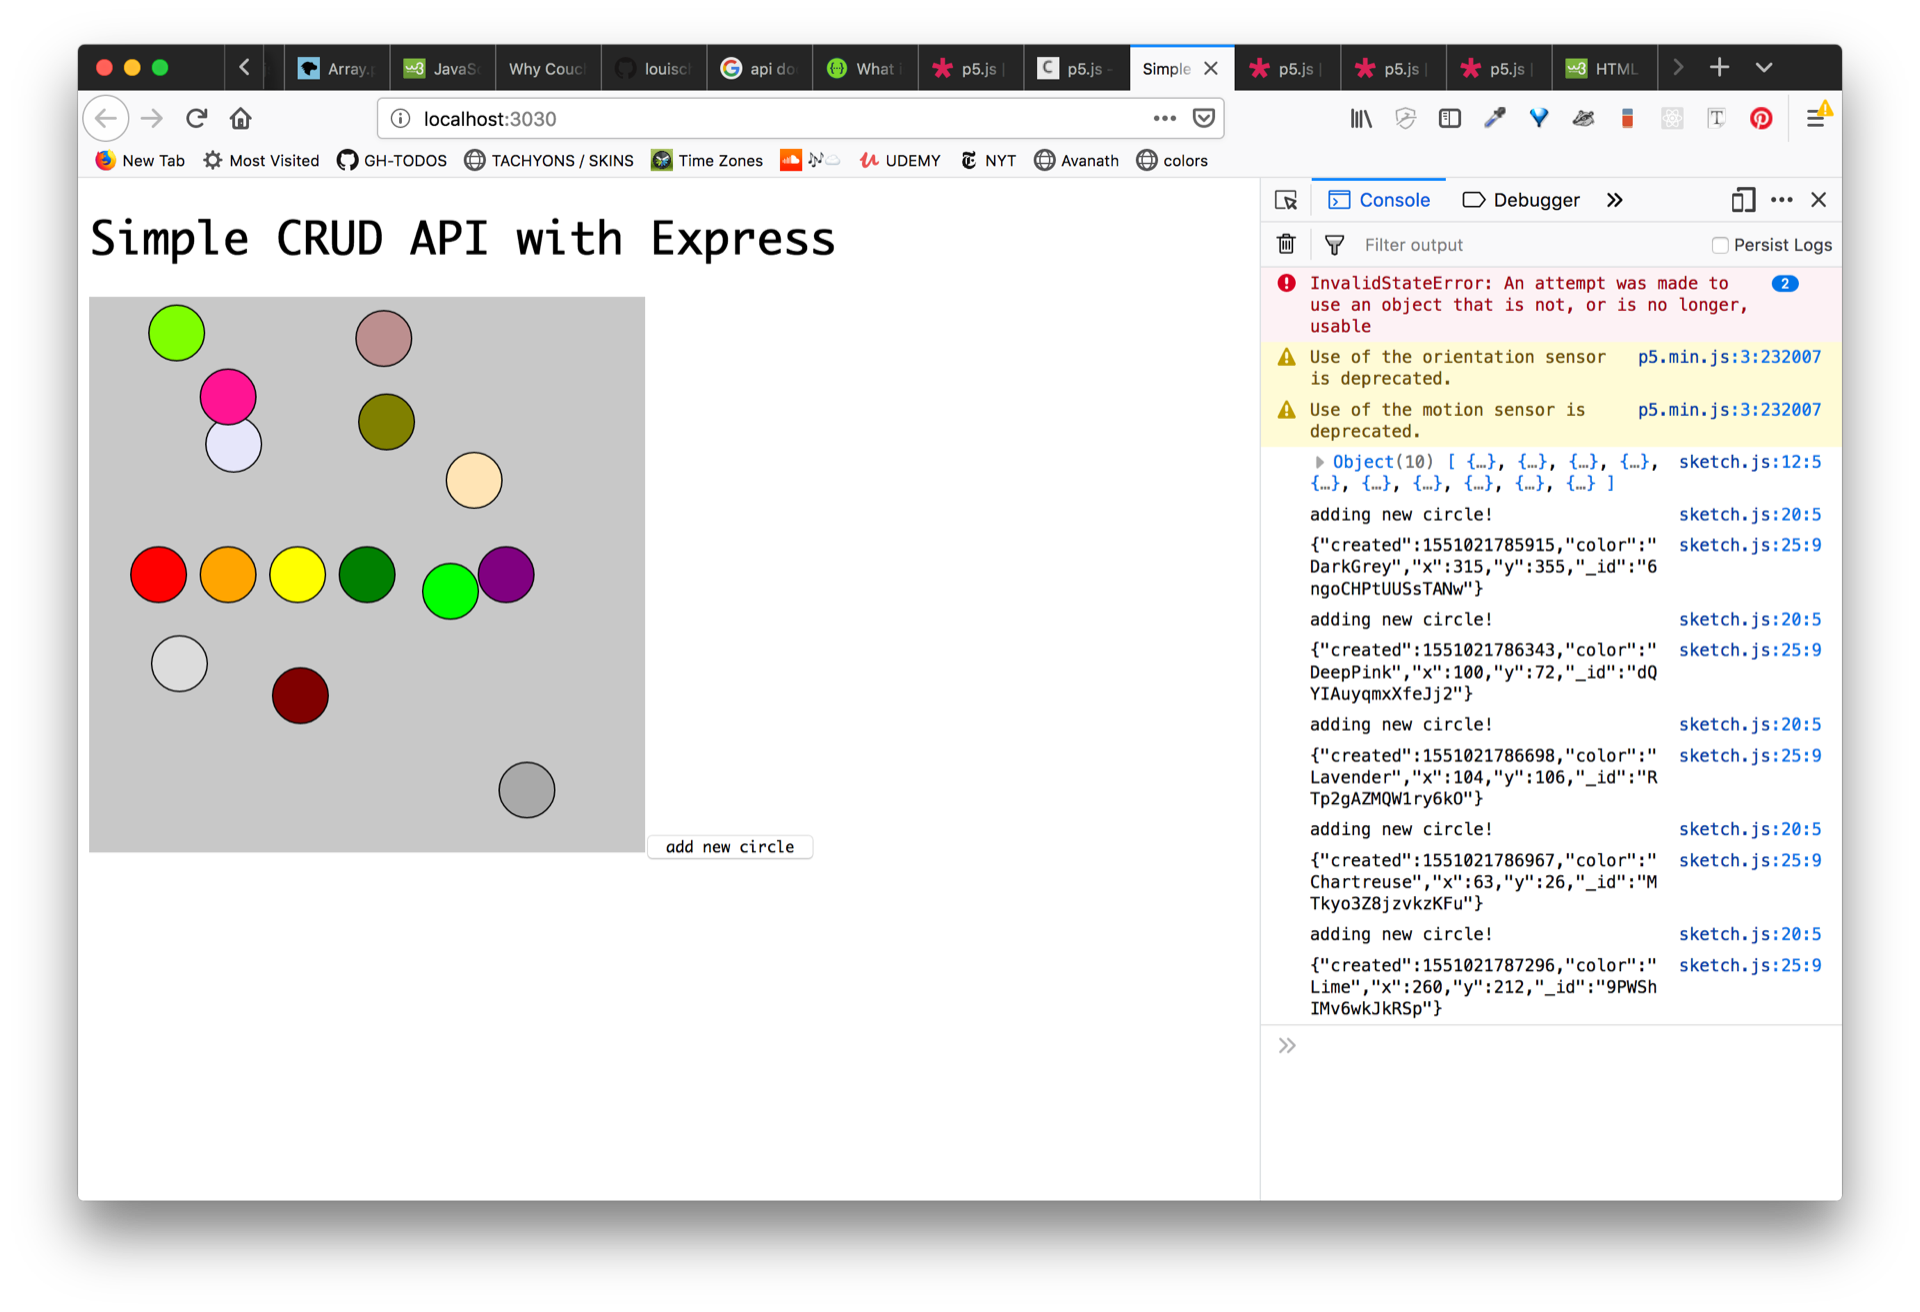
}Let's build a button that on click:
- sends a new object to our database specifying a color and x, y value
- updates the myData object in our sketch.
Here we attach a function to a mousePressed event that says "every time this button is pressed, send some data up to the server and then update the myData object we created for ourselves"
function handlePost(e){
    console.log('adding new circle!')
    let colorSelection = colors[floor(random(colors.length))]
    let newCircle = {"color":colorSelection, "x": floor(random(width)), "y": floor(random(height)) }
    httpPost("/api", newCircle, (result) => {
        // the result logs the object you submited
        console.log(result)
        // get the latest data and update myData
        myData = loadJSON("/api");
    })
}
In context all of our sketch.js will look like this. Notice that I've added a long array of colors to choose randomly from!
let myData;
const colors = ["AliceBlue", "AntiqueWhite", "Aqua", "Aquamarine", "Azure", "Beige", "Bisque", "Black", "BlanchedAlmond", "Blue", "BlueViolet", "Brown", "BurlyWood", "CadetBlue", "Chartreuse", "Chocolate", "Coral", "CornflowerBlue", "Cornsilk", "Crimson", "Cyan", "DarkBlue", "DarkCyan", "DarkGoldenRod", "DarkGray", "DarkGrey", "DarkGreen", "DarkKhaki", "DarkMagenta", "DarkOliveGreen", "DarkOrange", "DarkOrchid", "DarkRed", "DarkSalmon", "DarkSeaGreen", "DarkSlateBlue", "DarkSlateGray", "DarkSlateGrey", "DarkTurquoise", "DarkViolet", "DeepPink", "DeepSkyBlue", "DimGray", "DimGrey", "DodgerBlue", "FireBrick", "FloralWhite", "ForestGreen", "Fuchsia", "Gainsboro", "GhostWhite", "Gold", "GoldenRod", "Gray", "Grey", "Green", "GreenYellow", "HoneyDew", "HotPink", "IndianRed", "Indigo", "Ivory", "Khaki", "Lavender", "LavenderBlush", "LawnGreen", "LemonChiffon", "LightBlue", "LightCoral", "LightCyan", "LightGoldenRodYellow", "LightGray", "LightGrey", "LightGreen", "LightPink", "LightSalmon", "LightSeaGreen", "LightSkyBlue", "LightSlateGray", "LightSlateGrey", "LightSteelBlue", "LightYellow", "Lime", "LimeGreen", "Linen", "Magenta", "Maroon", "MediumAquaMarine", "MediumBlue", "MediumOrchid", "MediumPurple", "MediumSeaGreen", "MediumSlateBlue", "MediumSpringGreen", "MediumTurquoise", "MediumVioletRed", "MidnightBlue", "MintCream", "MistyRose", "Moccasin", "NavajoWhite", "Navy", "OldLace", "Olive", "OliveDrab", "Orange", "OrangeRed", "Orchid", "PaleGoldenRod", "PaleGreen", "PaleTurquoise", "PaleVioletRed", "PapayaWhip", "PeachPuff", "Peru", "Pink", "Plum", "PowderBlue", "Purple", "RebeccaPurple", "Red", "RosyBrown", "RoyalBlue", "SaddleBrown", "Salmon", "SandyBrown", "SeaGreen", "SeaShell", "Sienna", "Silver", "SkyBlue", "SlateBlue", "SlateGray", "SlateGrey", "Snow", "SpringGreen", "SteelBlue", "Tan", "Teal", "Thistle", "Tomato", "Turquoise", "Violet", "Wheat", "White", "WhiteSmoke", "Yellow", "YellowGreen"];

let postButton;

function preload() {
    myData = loadJSON("/api");
}

function setup() {
    createCanvas(400, 400);
    // NOTICE: the x, y values are now strings rather than integers
    console.log(myData);

    postButton = createButton("add new circle")
    postButton.mousePressed(handlePost);

}

function handlePost(e) {
    console.log('adding new circle!')
    let colorSelection = colors[floor(random(colors.length))]
    let newCircle = {
        "color": colorSelection,
        "x": floor(random(width)),
        "y": floor(random(height))
    }
    httpPost("/api", newCircle, (result) => {
        // the result logs the object you submited
        console.log(result)
        // get the latest data and update myData
        myData = loadJSON("/api");
    })
}

function draw() {
    background(200);

    // NOTE: we get back JSON not an array
    for (p in myData) {
        const item = myData[p];
        const x = int(item.x)
        const y = int(item.y)
        fill(item.color);
        ellipse(x, y, 40, 40)
    }

}
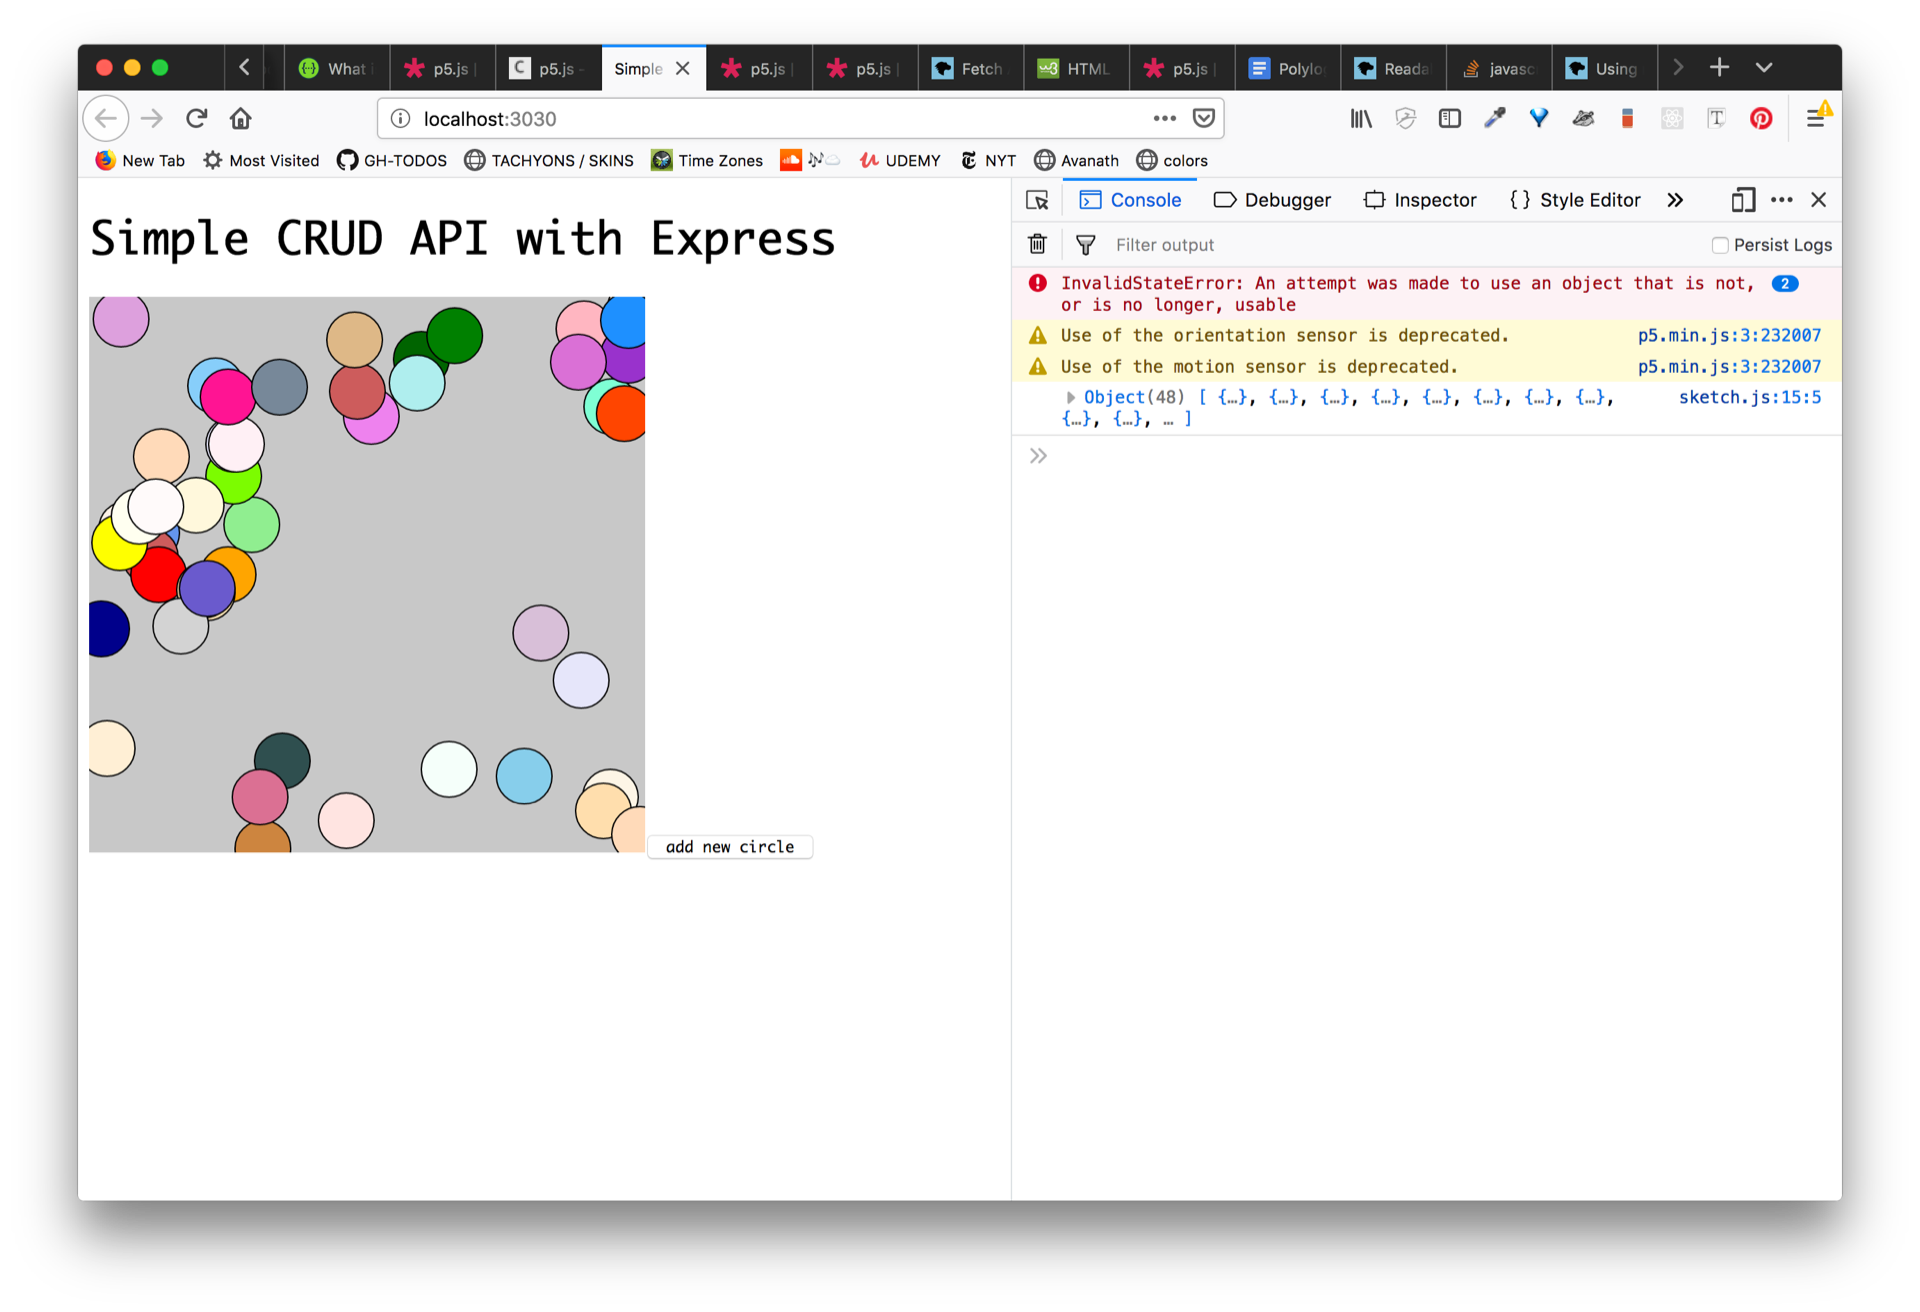
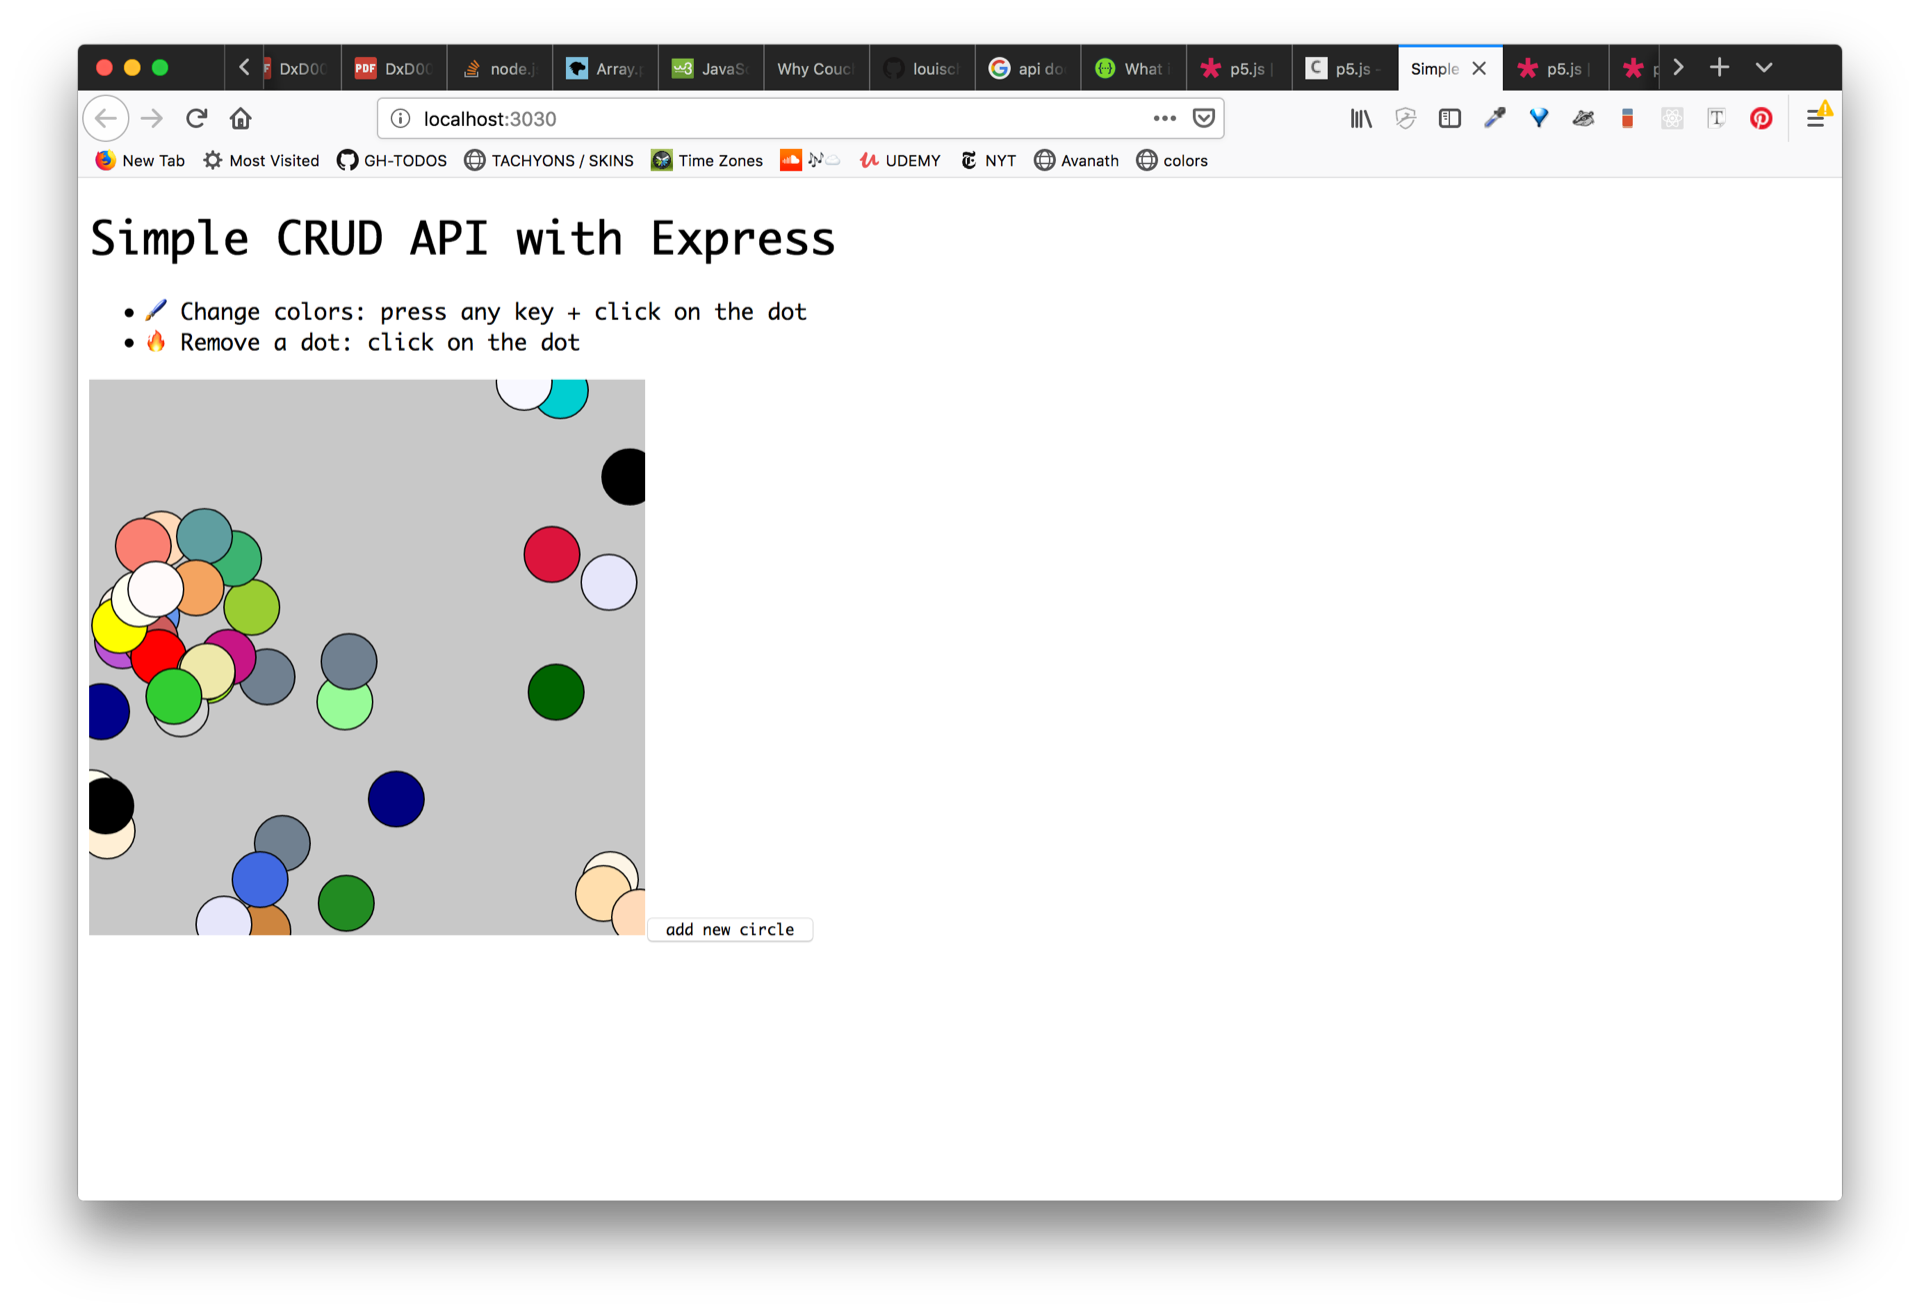
your view should now look something like this:
Now let's say we want to remove some data from our database. We need to make a way to remove a circle from our canvas.
We could do this in a bunch of ways, for example we could create circle objects that each contain the id, and when the circle is pressed, we can send a DELETE request to oru server. We could make a list of buttons with our data and remove each circle on click. Alternaitvely we could make a form input and send a delete based on a known ID. The world is our oyster.
For now probably the most exciting user experience would be to be able to click on a dot and remove it from the database.
let's make a new class and call it Dot. In Dot, we detect whether it intersects with the mouse and if so, then we remove it calling the updateMyDots() function defined up earlier in the code.
class Dot{
    constructor(_x, _y, _color, _id){
        this.x = _x;
        this.y = _y;
        this.id = _id;
        this.color = _color;
        this.remove = this.remove.bind(this);
    }

    intersects(){
        let d = dist(mouseX, mouseY, this.x, this.y);
        if (d < 20) {
            this.remove();
          }
    }

    remove(){
        // see issue with readable stream: https://stackoverflow.com/questions/40385133/retrieve-data-from-a-readablestream-object
        console.log('removing!', this.id)
        fetch(`/api/${this.id}`, {method:'DELETE'}).then( result => {
            updateMyDots()
        })
    }

    display(){
        fill(this.color);
        ellipse(this.x, this.y, 40, 40)
    }
}
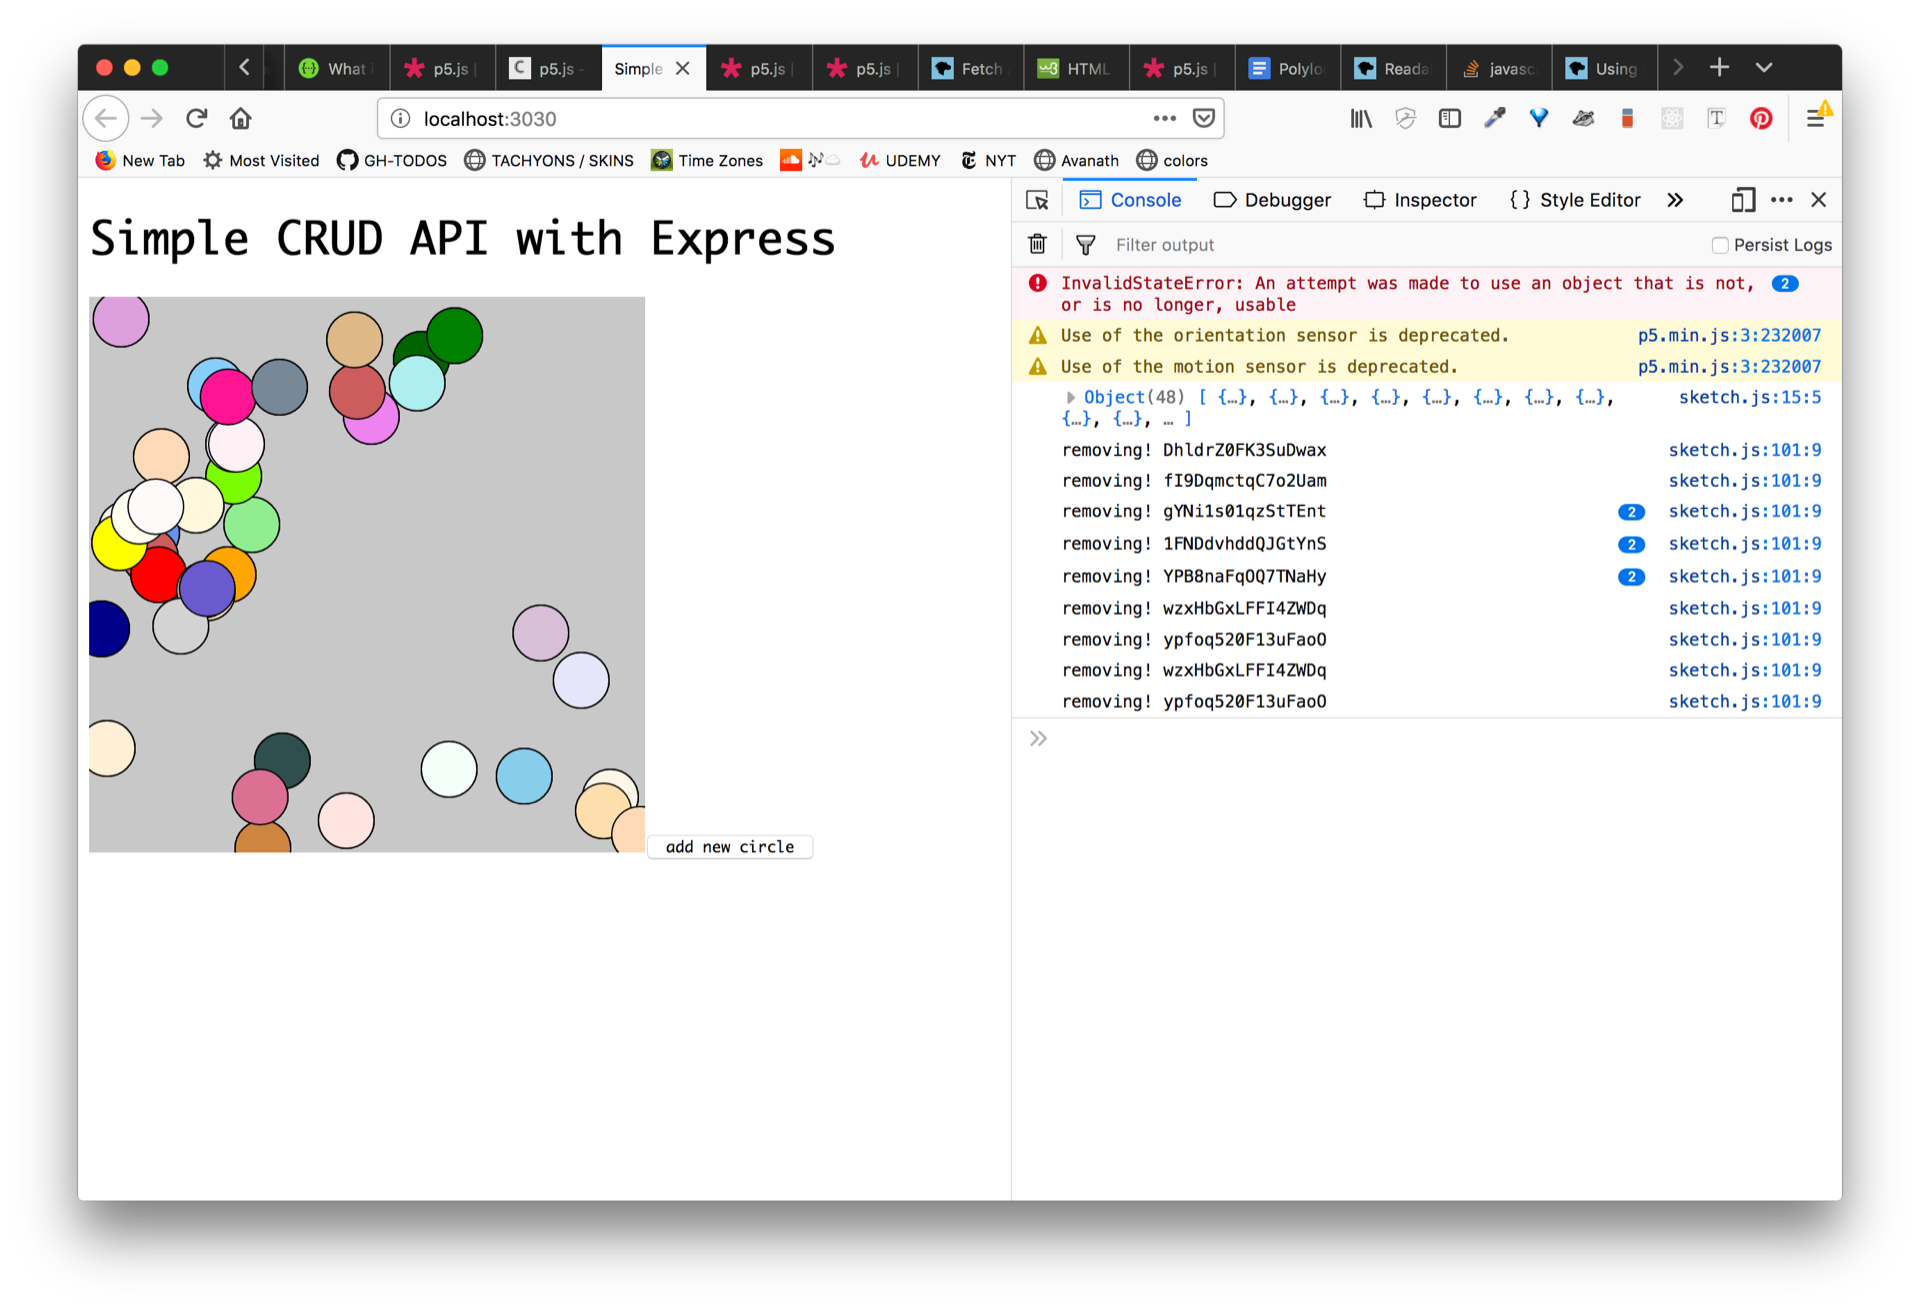
Up to this point our code now looks like this.
Notice:
- We run a loop to check to see when the mousePressed event is fired whether or not the dot lives within 40 px of the mouse. If so, then we remove it.
- We use "fetch" which is a native browser method for making web requests - it seems that the P5 httpDo() method does not support the DELETE method yet.
- that our rendering of our dots is using the Dot class "display()" function.
- We instantiate the Dots in the setup() and every time after we update our dots data
let myData;
let myDots = [];
const colors = ["AliceBlue", "AntiqueWhite", "Aqua", "Aquamarine", "Azure", "Beige", "Bisque", "Black", "BlanchedAlmond", "Blue", "BlueViolet", "Brown", "BurlyWood", "CadetBlue", "Chartreuse", "Chocolate", "Coral", "CornflowerBlue", "Cornsilk", "Crimson", "Cyan", "DarkBlue", "DarkCyan", "DarkGoldenRod", "DarkGray", "DarkGrey", "DarkGreen", "DarkKhaki", "DarkMagenta", "DarkOliveGreen", "DarkOrange", "DarkOrchid", "DarkRed", "DarkSalmon", "DarkSeaGreen", "DarkSlateBlue", "DarkSlateGray", "DarkSlateGrey", "DarkTurquoise", "DarkViolet", "DeepPink", "DeepSkyBlue", "DimGray", "DimGrey", "DodgerBlue", "FireBrick", "FloralWhite", "ForestGreen", "Fuchsia", "Gainsboro", "GhostWhite", "Gold", "GoldenRod", "Gray", "Grey", "Green", "GreenYellow", "HoneyDew", "HotPink", "IndianRed", "Indigo", "Ivory", "Khaki", "Lavender", "LavenderBlush", "LawnGreen", "LemonChiffon", "LightBlue", "LightCoral", "LightCyan", "LightGoldenRodYellow", "LightGray", "LightGrey", "LightGreen", "LightPink", "LightSalmon", "LightSeaGreen", "LightSkyBlue", "LightSlateGray", "LightSlateGrey", "LightSteelBlue", "LightYellow", "Lime", "LimeGreen", "Linen", "Magenta", "Maroon", "MediumAquaMarine", "MediumBlue", "MediumOrchid", "MediumPurple", "MediumSeaGreen", "MediumSlateBlue", "MediumSpringGreen", "MediumTurquoise", "MediumVioletRed", "MidnightBlue", "MintCream", "MistyRose", "Moccasin", "NavajoWhite", "Navy", "OldLace", "Olive", "OliveDrab", "Orange", "OrangeRed", "Orchid", "PaleGoldenRod", "PaleGreen", "PaleTurquoise", "PaleVioletRed", "PapayaWhip", "PeachPuff", "Peru", "Pink", "Plum", "PowderBlue", "Purple", "RebeccaPurple", "Red", "RosyBrown", "RoyalBlue", "SaddleBrown", "Salmon", "SandyBrown", "SeaGreen", "SeaShell", "Sienna", "Silver", "SkyBlue", "SlateBlue", "SlateGray", "SlateGrey", "Snow", "SpringGreen", "SteelBlue", "Tan", "Teal", "Thistle", "Tomato", "Turquoise", "Violet", "Wheat", "White", "WhiteSmoke", "Yellow", "YellowGreen"]
let postButton;

function preload() {
    myData = loadJSON("/api");
}

function setup() {
    createCanvas(400, 400);

    // Initialize the view with myDots
    // NOTICE: the x, y values are now strings rather than integers
    console.log(myData);
    for(p in myData){
        const item = myData[p];
        const x = int(item.x);
        const y = int(item.y);
        myDots.push( new Dot(item.x, item.y,item.color, item._id))
    }

    postButton = createButton("add new circle")
    postButton.mousePressed(handlePost);

}

function handlePost(e) {
    console.log('adding new circle!')
    let colorSelection = colors[floor(random(colors.length))]
    let newCircle = {
        "color": colorSelection,
        "x": floor(random(width)),
        "y": floor(random(height))
    }
    httpPost("/api", newCircle, (result) => {
        // the result logs the object you submited
        console.log(result)
        // get the latest data and update myData
        updateMyDots()
    })
}

function updateMyDots(){
    // clear myDots
    myDots = [];
    loadJSON("/api", (result) =>{
        myData = result;
        for(p in myData){
            const item = myData[p];
            const x = int(item.x);
            const y = int(item.y);
            myDots.push( new Dot(item.x, item.y,item.color, item._id))
        }
    });
}

function draw() {
    background(200);

    // NOTE: we get back JSON not an array
    // for (p in myData) {
    //     const item = myData[p];
    //     const x = int(item.x)
    //     const y = int(item.y)
    //     fill(item.color);
    //     ellipse(x, y, 40, 40)
    // }
        myDots.forEach(item => {
            item.display()
        })


}

function mousePressed(){
    myDots.forEach(item => {
        item.intersects()
    })
}


class Dot{
    constructor(_x, _y, _color, _id){
        this.x = _x;
        this.y = _y;
        this.id = _id;
        this.color = _color;
        this.remove = this.remove.bind(this);
    }

    intersects(){
        let d = dist(mouseX, mouseY, this.x, this.y);
        if (d < 20) {
            this.remove();
          }
    }

    remove(){
        // see issue with readable stream: https://stackoverflow.com/questions/40385133/retrieve-data-from-a-readablestream-object
        console.log('removing!', this.id)
        fetch(`/api/${this.id}`, {method:'DELETE'}).then( result => {
            updateMyDots()
        })
    }

    display(){
        fill(this.color);
        ellipse(this.x, this.y, 40, 40)
    }
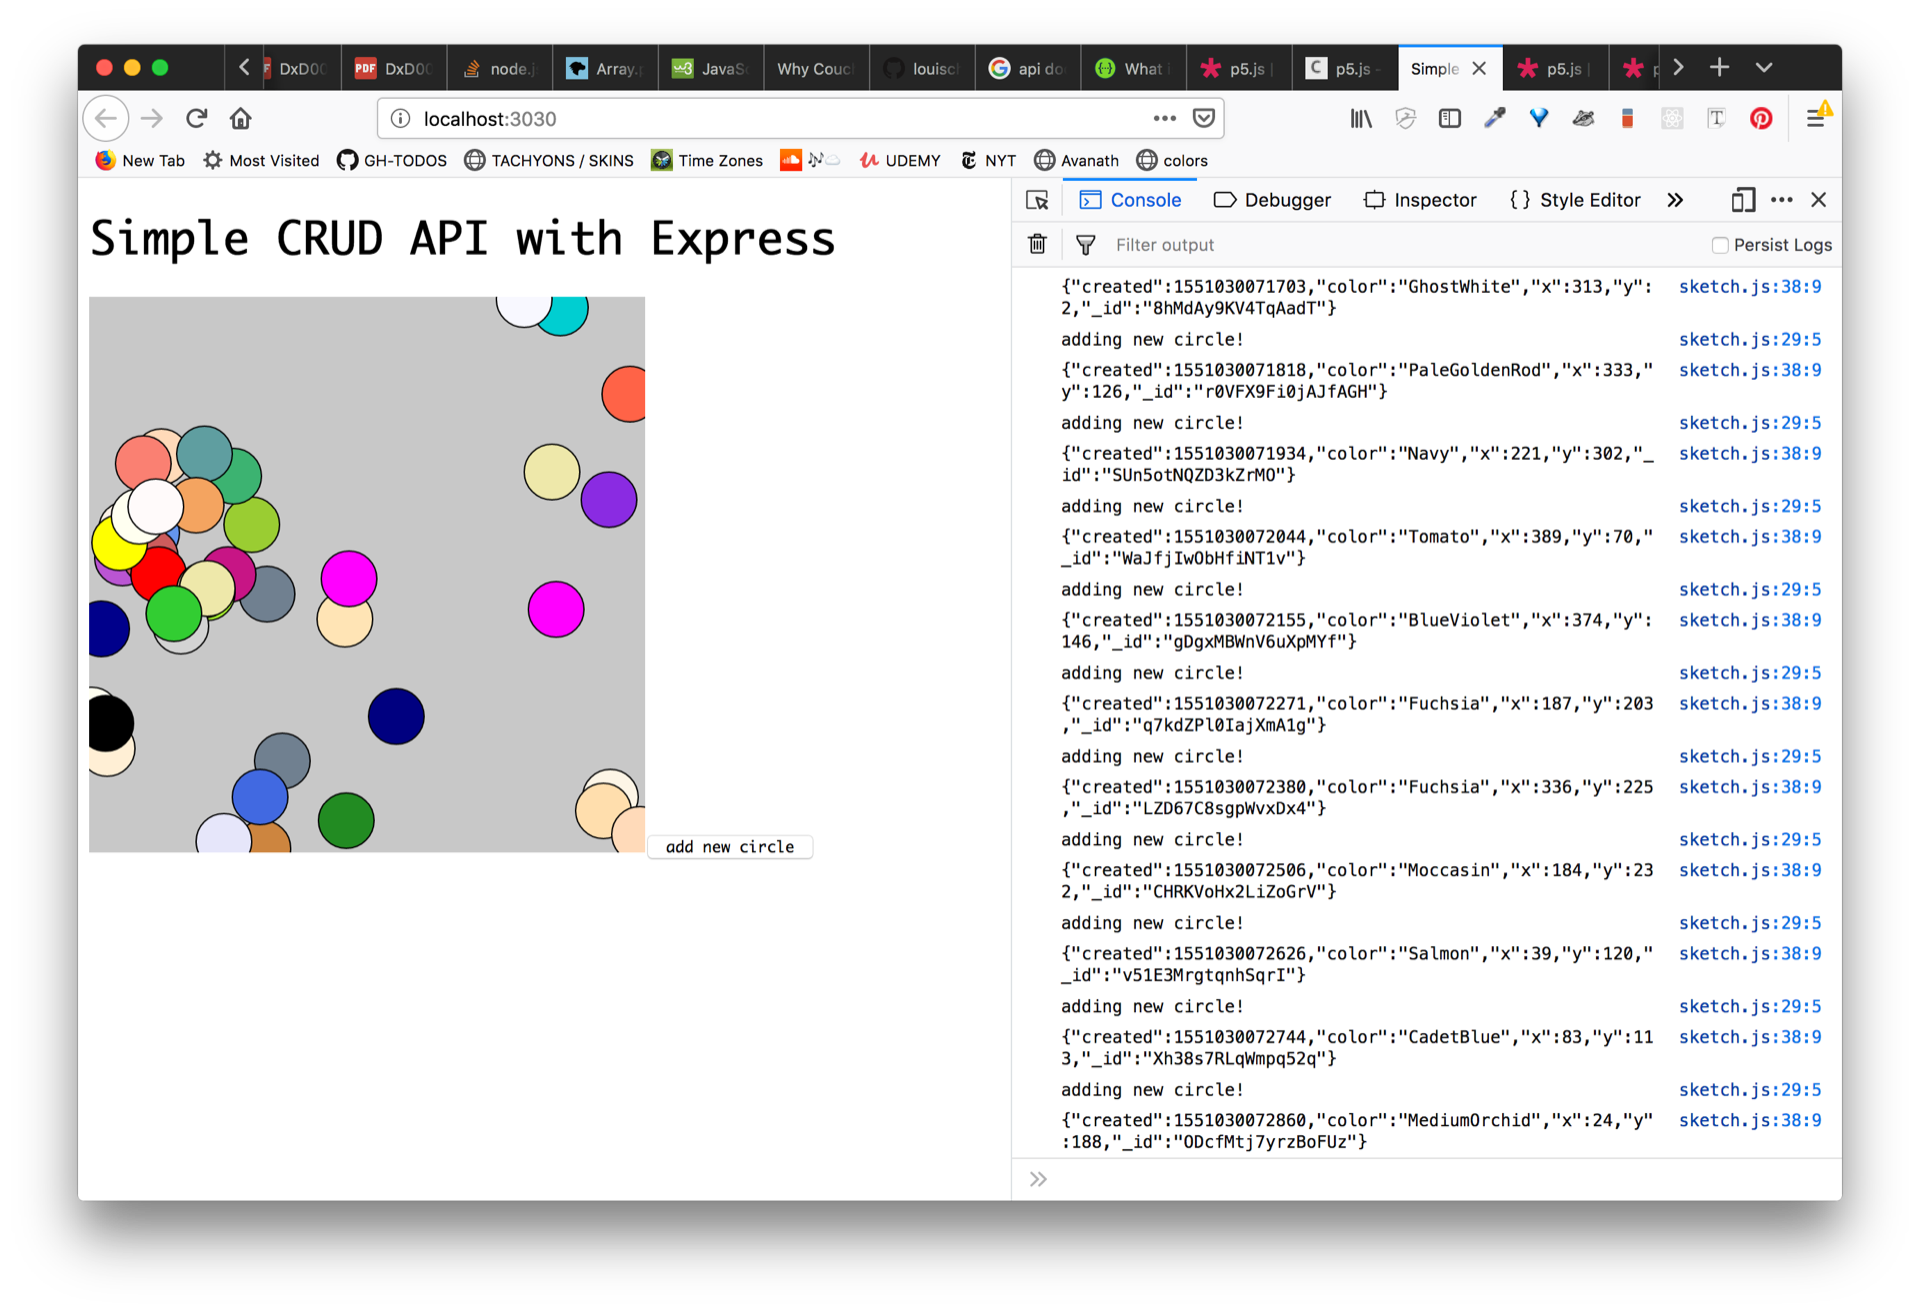
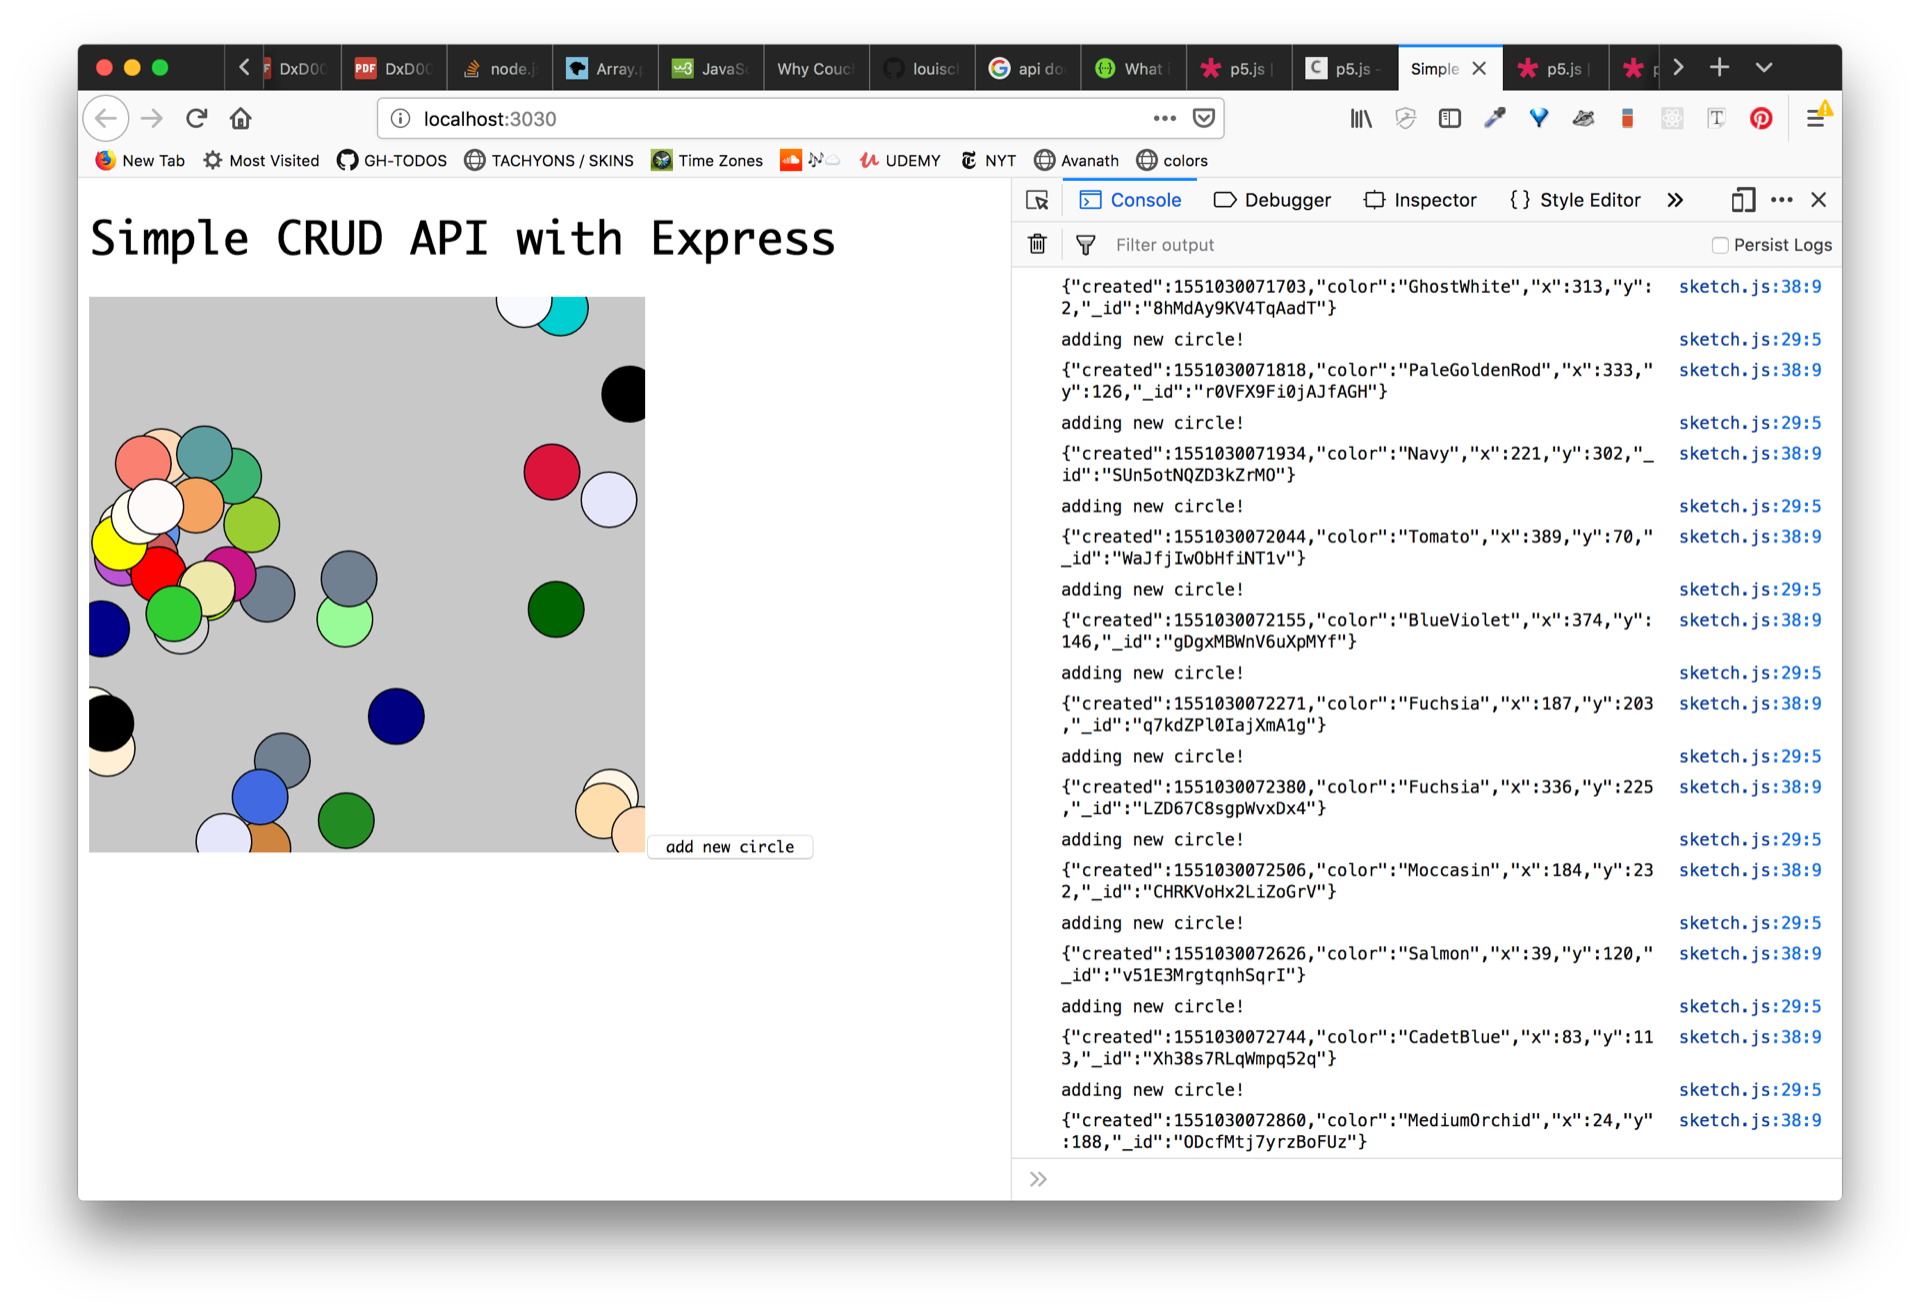
}Lastly, what we want to do is update a color of a circle. We have a number of options for achieving this, but for simplicity sake, lets update the color of a circle when a user is pressing the "a" key and clicking the mouse at the same time. I know, kind of a silly way to acheive this, but it introduces another kind of interaction without too much overhead to our existing code. Let's add an updateColor() function to our Dot class.
Notice:
- we update our
intersects()function by adding in "if keyIsPressed" to trigger a color update rather than a delete. - we send a fetch request using PUT as our method
class Dot{
    constructor(_x, _y, _color, _id){
        this.x = _x;
        this.y = _y;
        this.id = _id;
        this.color = _color;
        this.remove = this.remove.bind(this);
        this.updateColor = this.updateColor.bind(this);
    }

    intersects(){
        let d = dist(mouseX, mouseY, this.x, this.y);
        if (d < 20) {
            if(keyIsPressed){
                this.updateColor();
            } else{
                this.remove();
            }
          }
    }

    updateColor(){
        let colorSelection = colors[floor(random(colors.length))]
        const options = {
            method:'PUT',
            headers: {
                "Content-Type": "application/json",
                // "Content-Type": "application/x-www-form-urlencoded",
            },
            body:JSON.stringify({"color":colorSelection})
        }
        fetch(`/api/${this.id}`, options).then( result => {
            updateMyDots()
        })
    }

    remove(){
        // see issue with readable stream: https://stackoverflow.com/questions/40385133/retrieve-data-from-a-readablestream-object
        console.log('removing!', this.id)
        fetch(`/api/${this.id}`, {method:'DELETE'}).then( result => {
            updateMyDots()
        })
    }

    display(){
        fill(this.color);
        ellipse(this.x, this.y, 40, 40)
    }
}
Our full sketch.js code looks like this:
let myData;
let myDots = [];
const colors = ["AliceBlue", "AntiqueWhite", "Aqua", "Aquamarine", "Azure", "Beige", "Bisque", "Black", "BlanchedAlmond", "Blue", "BlueViolet", "Brown", "BurlyWood", "CadetBlue", "Chartreuse", "Chocolate", "Coral", "CornflowerBlue", "Cornsilk", "Crimson", "Cyan", "DarkBlue", "DarkCyan", "DarkGoldenRod", "DarkGray", "DarkGrey", "DarkGreen", "DarkKhaki", "DarkMagenta", "DarkOliveGreen", "DarkOrange", "DarkOrchid", "DarkRed", "DarkSalmon", "DarkSeaGreen", "DarkSlateBlue", "DarkSlateGray", "DarkSlateGrey", "DarkTurquoise", "DarkViolet", "DeepPink", "DeepSkyBlue", "DimGray", "DimGrey", "DodgerBlue", "FireBrick", "FloralWhite", "ForestGreen", "Fuchsia", "Gainsboro", "GhostWhite", "Gold", "GoldenRod", "Gray", "Grey", "Green", "GreenYellow", "HoneyDew", "HotPink", "IndianRed", "Indigo", "Ivory", "Khaki", "Lavender", "LavenderBlush", "LawnGreen", "LemonChiffon", "LightBlue", "LightCoral", "LightCyan", "LightGoldenRodYellow", "LightGray", "LightGrey", "LightGreen", "LightPink", "LightSalmon", "LightSeaGreen", "LightSkyBlue", "LightSlateGray", "LightSlateGrey", "LightSteelBlue", "LightYellow", "Lime", "LimeGreen", "Linen", "Magenta", "Maroon", "MediumAquaMarine", "MediumBlue", "MediumOrchid", "MediumPurple", "MediumSeaGreen", "MediumSlateBlue", "MediumSpringGreen", "MediumTurquoise", "MediumVioletRed", "MidnightBlue", "MintCream", "MistyRose", "Moccasin", "NavajoWhite", "Navy", "OldLace", "Olive", "OliveDrab", "Orange", "OrangeRed", "Orchid", "PaleGoldenRod", "PaleGreen", "PaleTurquoise", "PaleVioletRed", "PapayaWhip", "PeachPuff", "Peru", "Pink", "Plum", "PowderBlue", "Purple", "RebeccaPurple", "Red", "RosyBrown", "RoyalBlue", "SaddleBrown", "Salmon", "SandyBrown", "SeaGreen", "SeaShell", "Sienna", "Silver", "SkyBlue", "SlateBlue", "SlateGray", "SlateGrey", "Snow", "SpringGreen", "SteelBlue", "Tan", "Teal", "Thistle", "Tomato", "Turquoise", "Violet", "Wheat", "White", "WhiteSmoke", "Yellow", "YellowGreen"]
let postButton;

function preload() {
    myData = loadJSON("/api");
}

function setup() {
    createCanvas(400, 400);

    // Initialize the view with myDots
    // NOTICE: the x, y values are now strings rather than integers
    console.log(myData);
    for (p in myData) {
        const item = myData[p];
        const x = int(item.x);
        const y = int(item.y);
        myDots.push(new Dot(item.x, item.y, item.color, item._id))
    }

    postButton = createButton("add new circle")
    postButton.mousePressed(handlePost);

}

function handlePost(e) {
    console.log('adding new circle!')
    let colorSelection = colors[floor(random(colors.length))]
    let newCircle = {
        "color": colorSelection,
        "x": floor(random(width)),
        "y": floor(random(height))
    }
    httpPost("/api", newCircle, (result) => {
        // the result logs the object you submited
        console.log(result)
        // get the latest data and update myData
        updateMyDots()
    })
}

function updateMyDots() {
    // clear myDots
    myDots = [];
    loadJSON("/api", (result) => {
        myData = result;
        for (p in myData) {
            const item = myData[p];
            const x = int(item.x);
            const y = int(item.y);
            myDots.push(new Dot(item.x, item.y, item.color, item._id))
        }
    });
}

function draw() {
    background(200);

    myDots.forEach(item => {
        item.display()
    })
}

function mousePressed() {
    myDots.forEach(item => {
        item.intersects()
    })
}

class Dot {
    constructor(_x, _y, _color, _id) {
        this.x = _x;
        this.y = _y;
        this.id = _id;
        this.color = _color;
        this.remove = this.remove.bind(this);
        this.updateColor = this.updateColor.bind(this);
    }

    intersects() {
        let d = dist(mouseX, mouseY, this.x, this.y);
        if (d < 20) {
            if (keyIsPressed) {
                this.updateColor();
            } else {
                this.remove();
            }
        }
    }

    updateColor() {
        let colorSelection = colors[floor(random(colors.length))]
        const options = {
            method: 'PUT',
            headers: {
                "Content-Type": "application/json",
                // "Content-Type": "application/x-www-form-urlencoded",
            },
            body: JSON.stringify({
                "color": colorSelection
            })
        }
        fetch(`/api/${this.id}`, options).then(result => {
            updateMyDots()
        })
    }

    remove() {
        // see issue with readable stream: https://stackoverflow.com/questions/40385133/retrieve-data-from-a-readablestream-object
        console.log('removing!', this.id)
        fetch(`/api/${this.id}`, {
            method: 'DELETE'
        }).then(result => {
            updateMyDots()
        })
    }

    display() {
        fill(this.color);
        ellipse(this.x, this.y, 40, 40)
    }
}
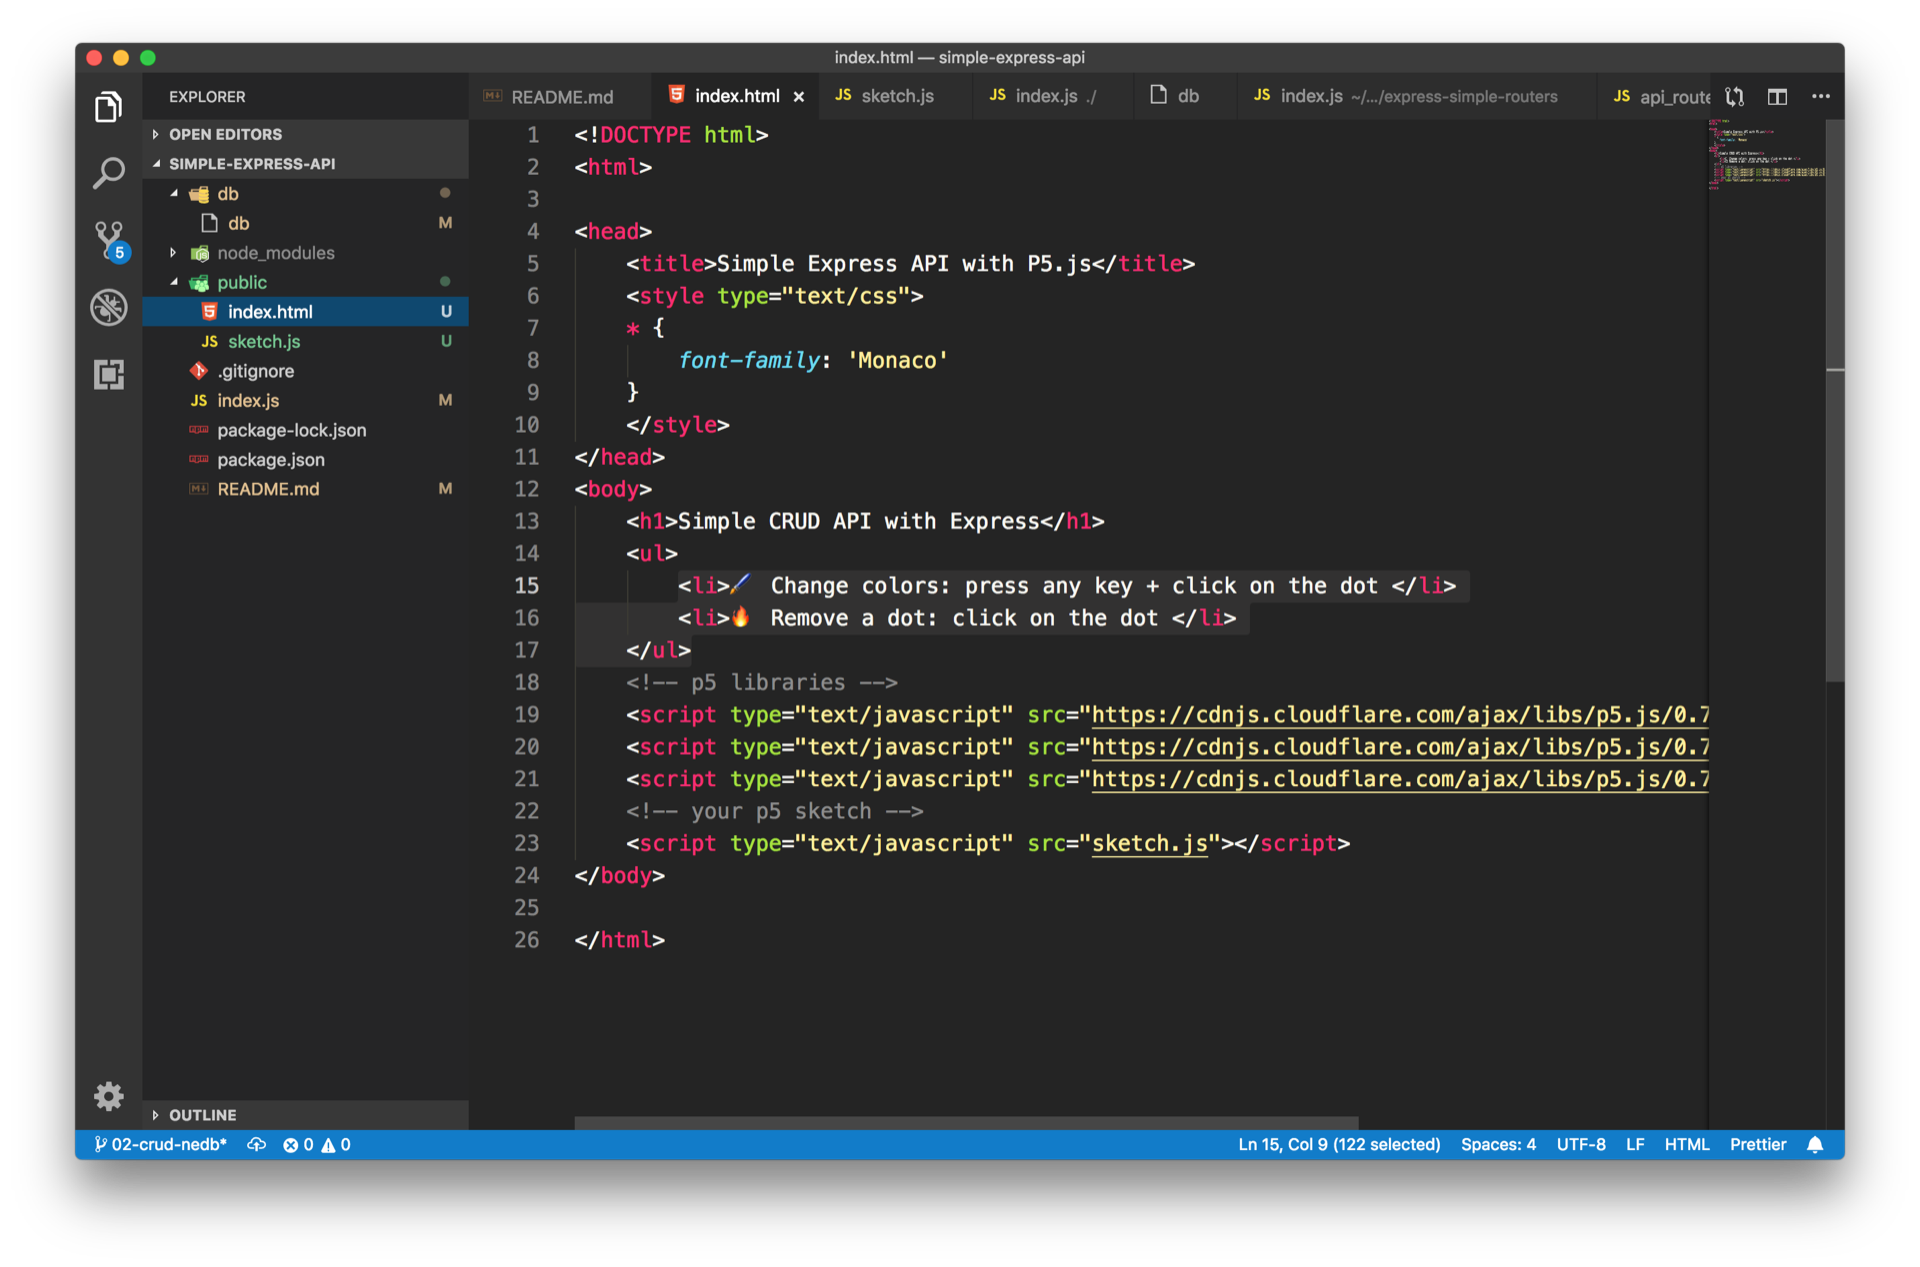
Lastly we can include some instructions on our index.html on how to interact with our application
In your index.html file. Add this to your markup.
<ul>
    <li>🖌 Change colors: press any key + click on the dot </li>
    <li>🔥 Remove a dot: click on the dot </li>
</ul>
Woohoo! You've now built a fullstack web application. You should be proud. The creative universe is now at your fingertips...sort of. With practice and diving in deeper, you can start to add more complexity to your application. For now, you have a basic framework for interacting with server side programs and persistent databases.
We didn't get into a bunch of things, but here's some things you can think about later on. A great book reference for all this is Express in Action: https://www.manning.com/books/express-in-action
- simple logging with the morgan library
- express view rendering
- http & https
- authentication 👻
- exploring the middleware universe
- see featherjs with p5.js example
