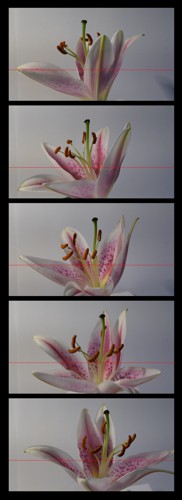
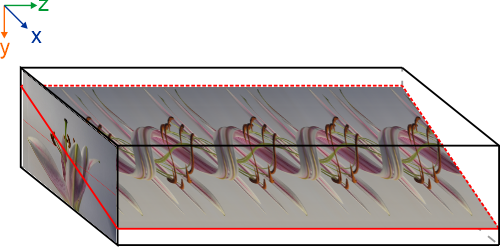
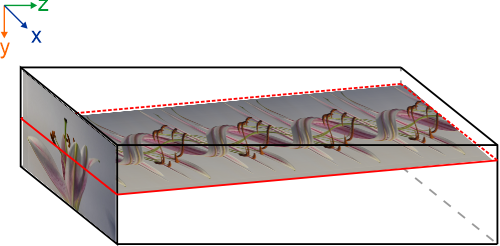
Program that generates slit scan photography images from videos. It generates a synthetic image by only taking one line of image pixels from each frame of a video. These lines are fused (and subsequently filtered) to generate images like these:
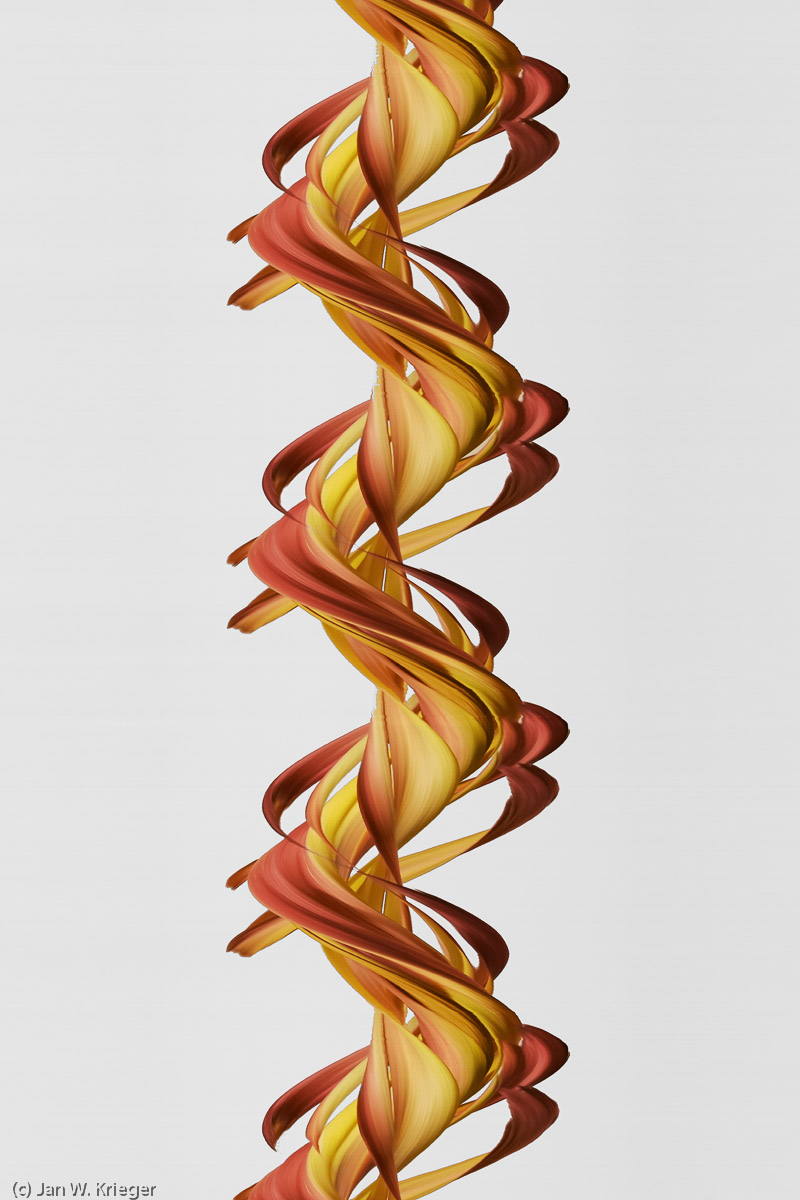
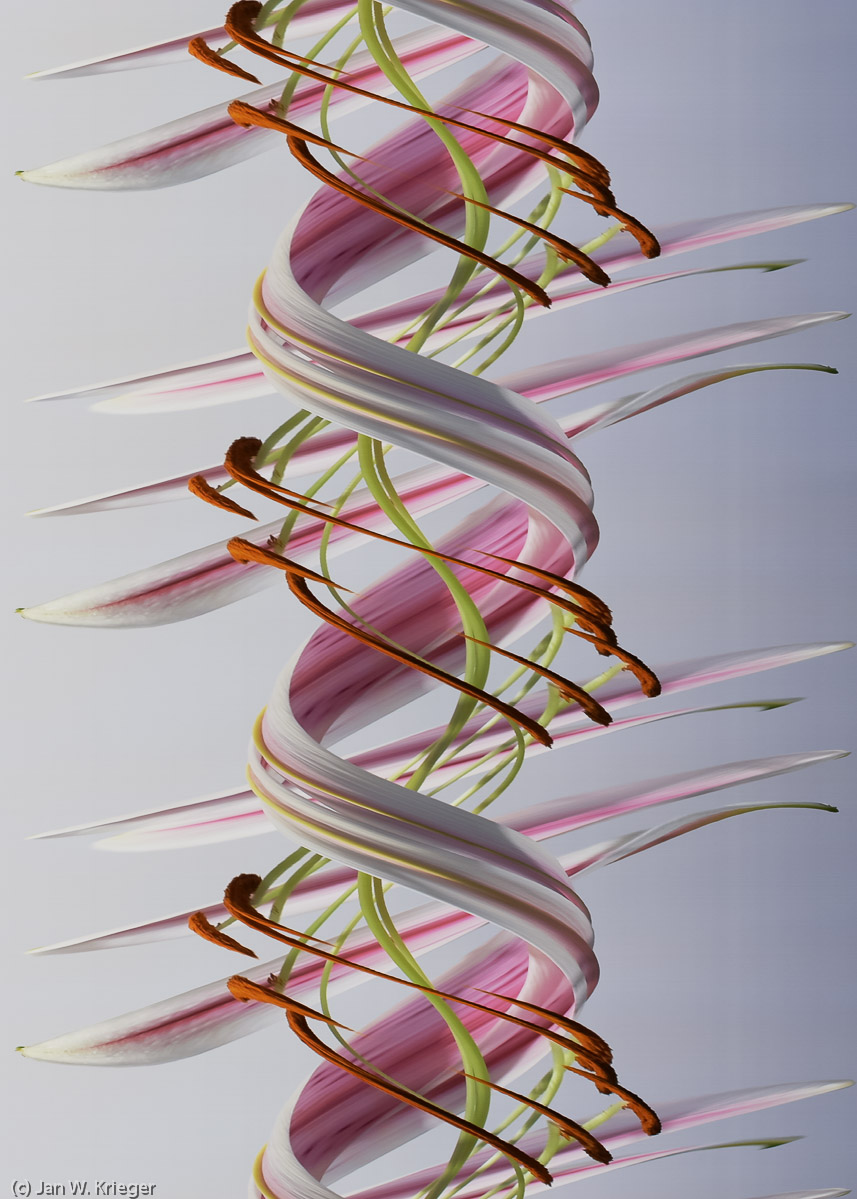
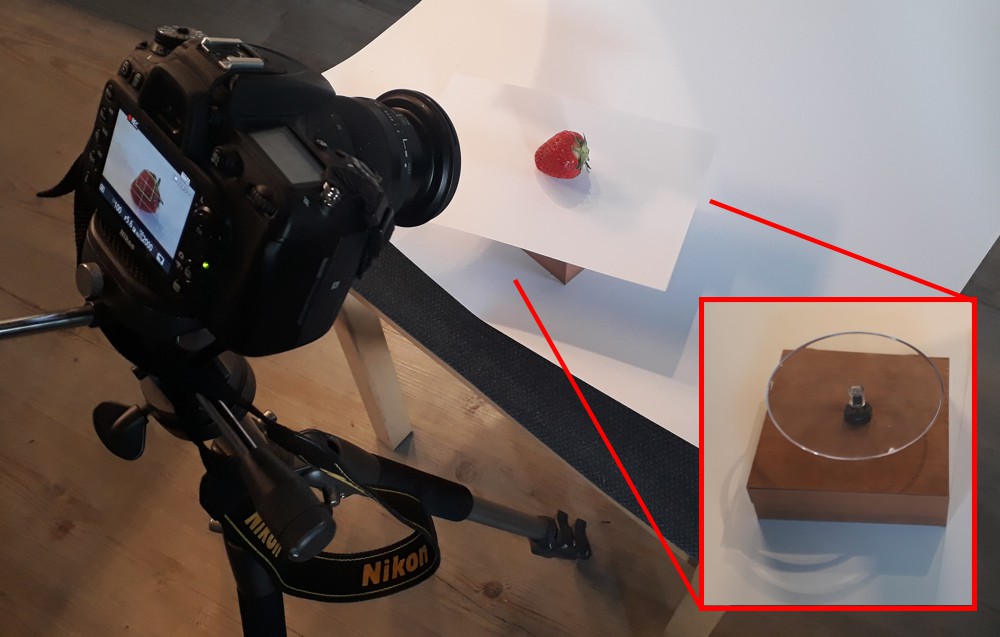
For the images above, flowers (roses on the left, a lily on the right) were put on a rotating plate and a video was recorded using a DSLR camera. Then the program SlitScanGenerator was used to create these images.
You can find more example image here: https://jkrieger.de/photography/slitscan/index.html
A detailed description of the different functions of this package can be found below:
Installers for Windows and Source-Code Archives can be found here:
https://github.com/jkriege2/SlitScanGenerator/releases/
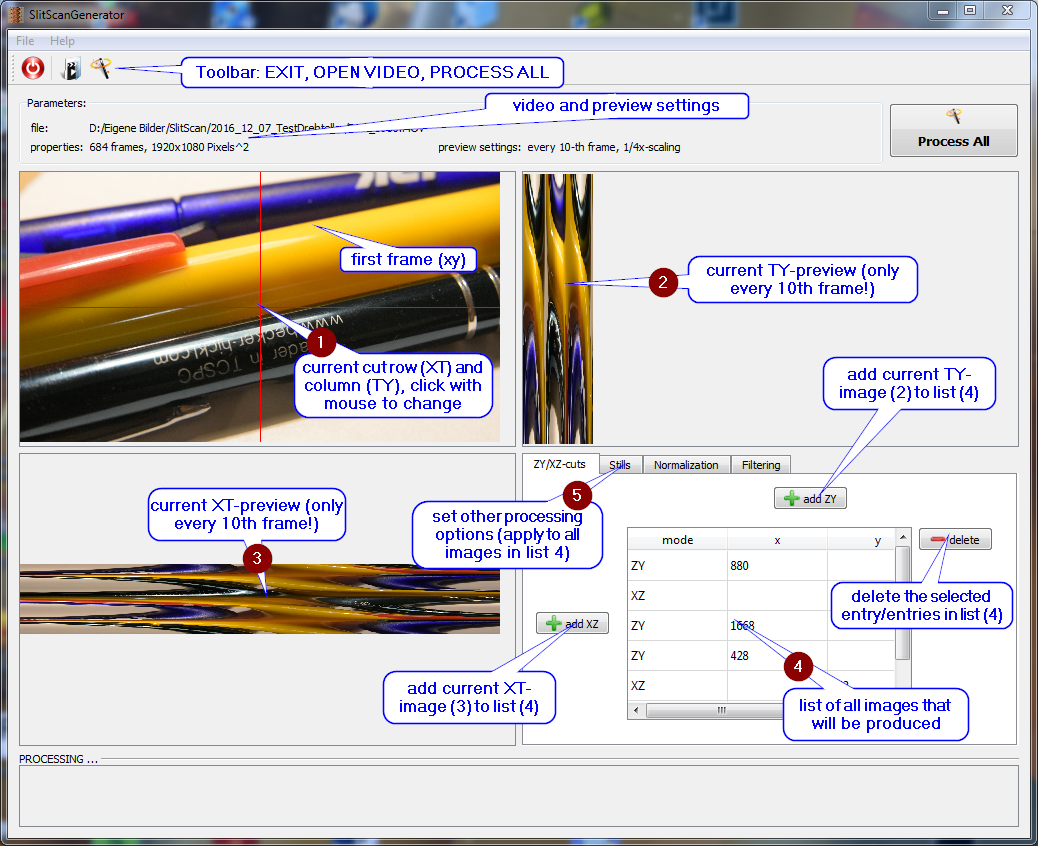
- Open Video file
 (It will be scaled down and only every N'th frame will be loaded to save memory during the initial stage)
 - Click on the top-left image (1) and select positions for cuts. The cuts generated from the current settings are shown at the top-right (2) and bottom-left (3).
- If you like a cut, add it with the
 "add ..." buttons. All selected cuts will be shown in the list (4) on the bottom right.
 - You can also set other filtering and processing options in the additional tabs at the bottom-right (5).
- Finally click on
 "Process All" to generate the output images (in the same folder as the video). Note that processing is done with the full resolution video, not the size-reduced video used for display. When the video is processed, all you settings are stored as an INI-file and you can reload (and alter) them by simply reloading the video or the INI-file with the "File" menu.
 - After clicking on "Process All", the processing is performed in the background (see list at the bottom) and you can load and edit the next video.
You can acquire videos for slit scan photography with any cell phone, DSLR with video function, or other video camera. The camera should be steady, e.g. mounted on a tripod. I usually use a Nikon D7200 DSLR with these settings:
- video mode 1080P60 (1920x1080 60p)
- film quality "high"
- sound switched off
- flicker reduction: 50Hz mode
- crop mode: 1.3x (18x12), which is necessary to enable the fast video modes
- acquisition mode "P"
- a good lens, e.g. a Sigma 17-70mm 1:2.8-4.0 DC, or the Nikon AF-S Micro Nikkor 40mm 1:2.8G DX
You can acquire any moving objects or scenes. For the spiraling structures, presented above, I use a slowly rotating table.
In order to ensure enough light, additional LED lamps can help improve your videos.
When filming:
- Ensure that the illumination stays constant (don't move around and cast changing shadows onto the scene).
- If you use a rotating table, ensure that it rotates slowly, so you get movies with enough temporal resolution.
- Acquire at least a few thousand frames (@60p you will acquire 3600 frames/minute, or 1000 frames every 16.7s!)
- Ensure that the camera does not shake or move during video acquisition.
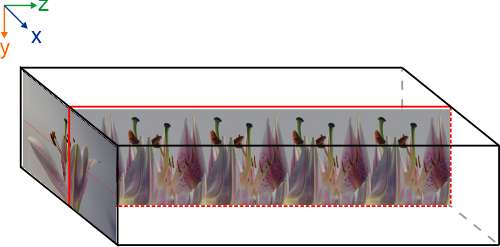
SlitScanGenerator processes videos (X-Y-T) in the following steps:
-
for each frame:
- OPTIONAL: normalize the colors in the frame at the specified position, i.e. scale all colors so the normalizing position has the same color in each frame of the whole video. This can be used to remove intensity variations during the video acquisition.
- calculate the line to copy, based on the chosen settings for the cut position, mode, angle (pitch/roll) etc.
- copy the line from the frame and put it into the output image
- OPTIONAL: If the current frame shall be used for a still(strip), store it for later
- load next frame
-
apply optional filters to the output image:
- a notch filter can be used to eliminate fast flickering of the images
- apply a white-point correction
-
save the output image:

-
generate the still image strip and save it:
SlitScanGenerator supports different cut modes. These are explained in the next sections.
You can configure the parameters and which cuts to generate in the main window in the tab "XZ/YZ-Cuts" (at the bottom-right). There you can set the angle for roll/pith and the roll/pitch-mode itself. Also the tab shows a table with all the tabs already created for the current video (as a table).
Whenever this tab is activated, you can click on different positions in the preview frame at the top-left. And a new center for the cut-cross is selected. The current position and cross is shown in red in the preview image. In the two preview images, you see currently configured cuts and can choose to add them to the processing list for the current video by clicking on "add XZ" or "add ZY".
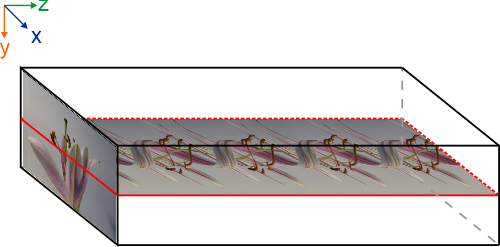
The output is a series of horizontal lines from the video frames.
The output is a series of vertical lines (columns) from the video frames.
The output is a series of rotated horizontal/vertical lines from the video frames. the rotation is given as an angle α from the horizontal.
The output is a series of horizontal or vertical lines from the video frames. Other than in the simple case (above), the line is moved through the frame along the time/z-axis of the video.
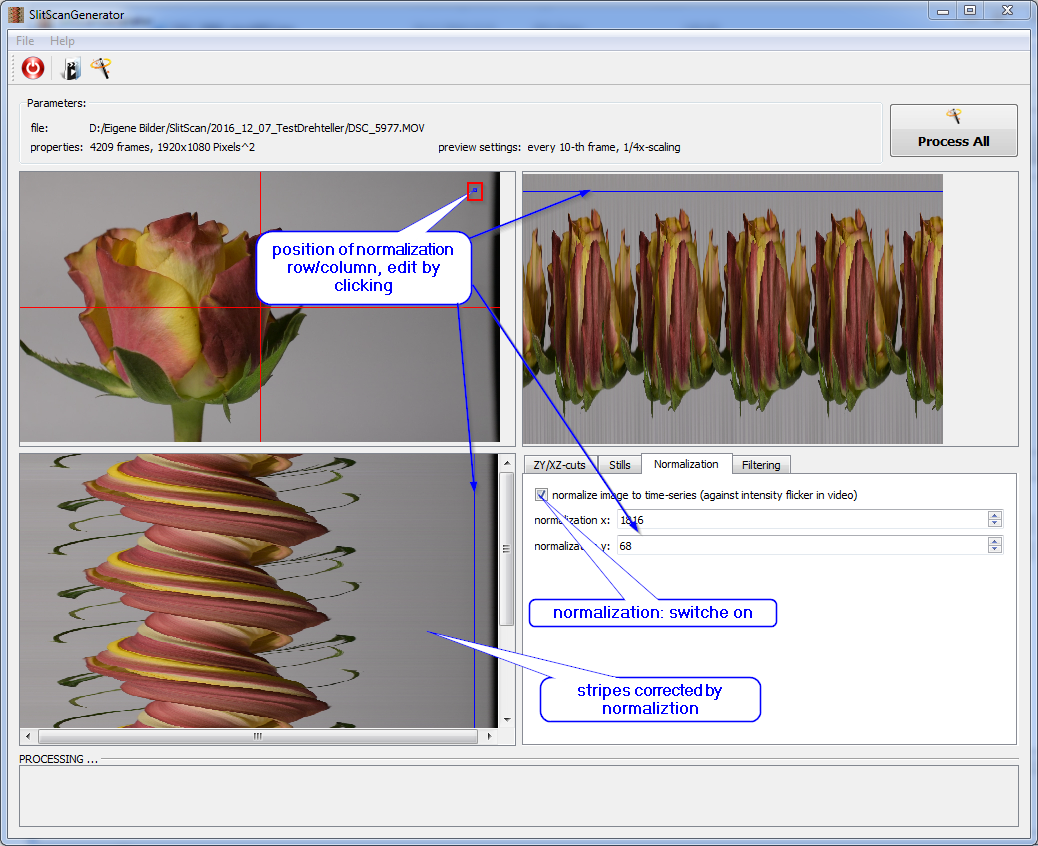
Sometimes the illumination varies during the video. You can accomodate for this, if you have a small patch that shows the same non-moving object in every frame. Then you can activate the "normalization" option in the tab "normalization" at the bottom-right. Then you can select a pixel to use for the normalization (click on any pixel in the preview image, top-left). the current pixel used for normalization is shown as a small blue square in the preview image.
Note that the wavelength filter is applied to EVERY cut in the list!
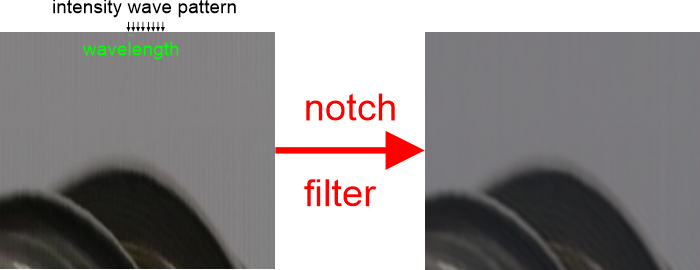
The Notch filter can be used, when fast intensity variations exist in the image. You simply give the wavelength of the pattern as a parameter plus a small allowed wavelength variation. The exactly waves of this wavelength are removed from the output image. The filter settings can be found in the tab "filter" at the bottom-right:
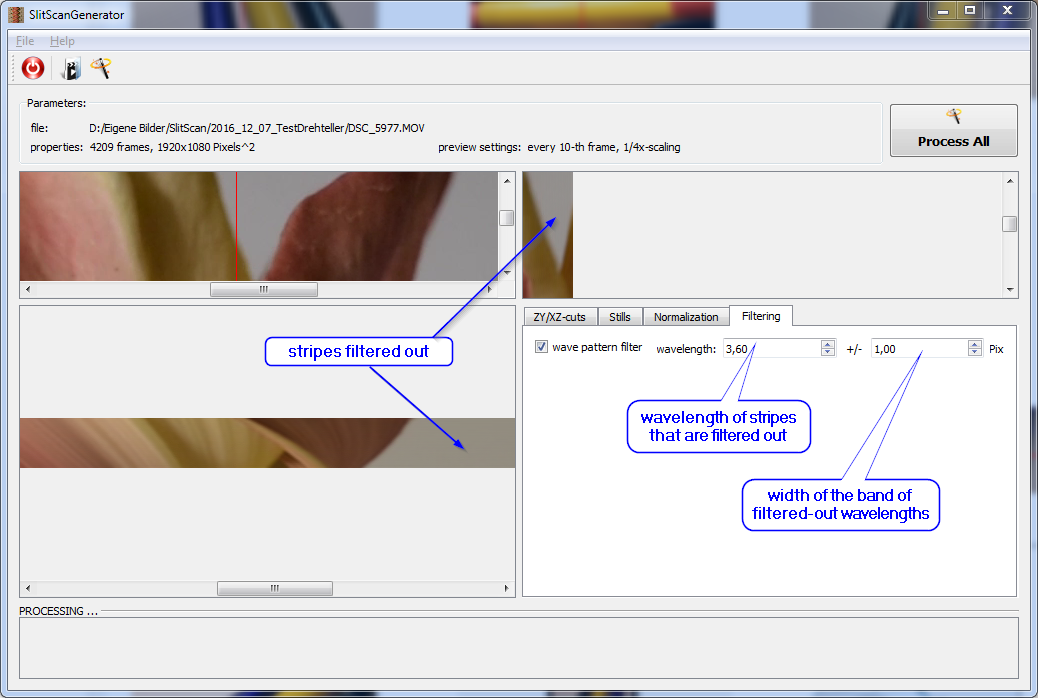
Note that the wavelength filter is applied to EVERY cut in the list!
SlitScanGenerator allows to perform a white-balancing (e.g. when the white balancing of the camera was off during the acquisition). This option is available from the tab "Filter" at the bottom-right:
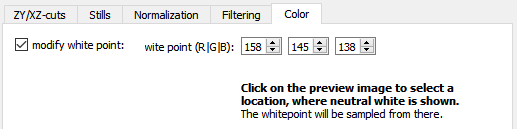
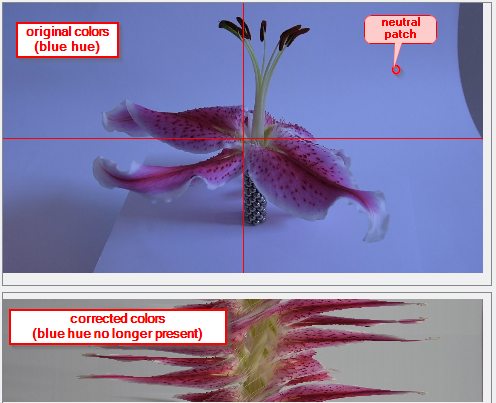
When this tab is active, you can click on any location in the image that should contain a neutral (white or gray, the brighter the better) color. The program then samples this color and tries to make it neutral while preserving its brightness. Here is an example (the white-balance was not properly set while recoding the video):
Note that the wavelength filter is applied to EVERY cut in the list!
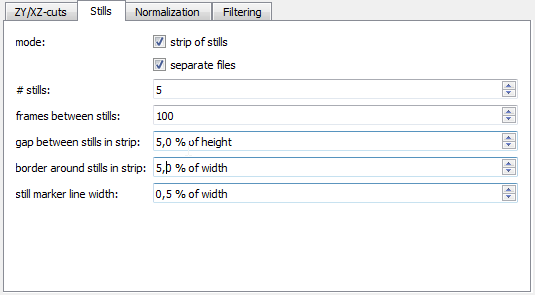
In addition to the actual output image, SlitScanGenerator also generates a strip with a few stills that demonstrates how the output image is generated.

You can set the options for this strip in the tab "Stills" at the bottom-right: