Note. this post is exported from my notion.
This project is about creating an simple app for the video game Diablo 3, using the official Blizzard API. The Blizzard API provides not only the Diablo 3 API, but also APIs for Starcraft 2, WoW, and the Overwatch League. It is possible that Blizzard may open up the Diablo 4 API after the game's release. As the Blizzard API already provides access to APIs for other popular games like Starcraft 2, WoW, and the Overwatch League, it would not be surprising if they added Diablo 4 to their list of available APIs. We will have to wait and see what Blizzard decides to do, but the potential for a new API is exciting for both players and developers alike.
In this project, I will create a Diablo 3 api app(act, artisan, and recipe info etc…), and also use SwiftUI and TCA. This app dose not cover the complete UI, but rather focuses solely on networking with the Blizzard API and parsing data received from it.
First, we need to login with our account on the Battlenet development portal. The link is down below:
If you do not currently have an account, you will need to create one and also register an authenticator.
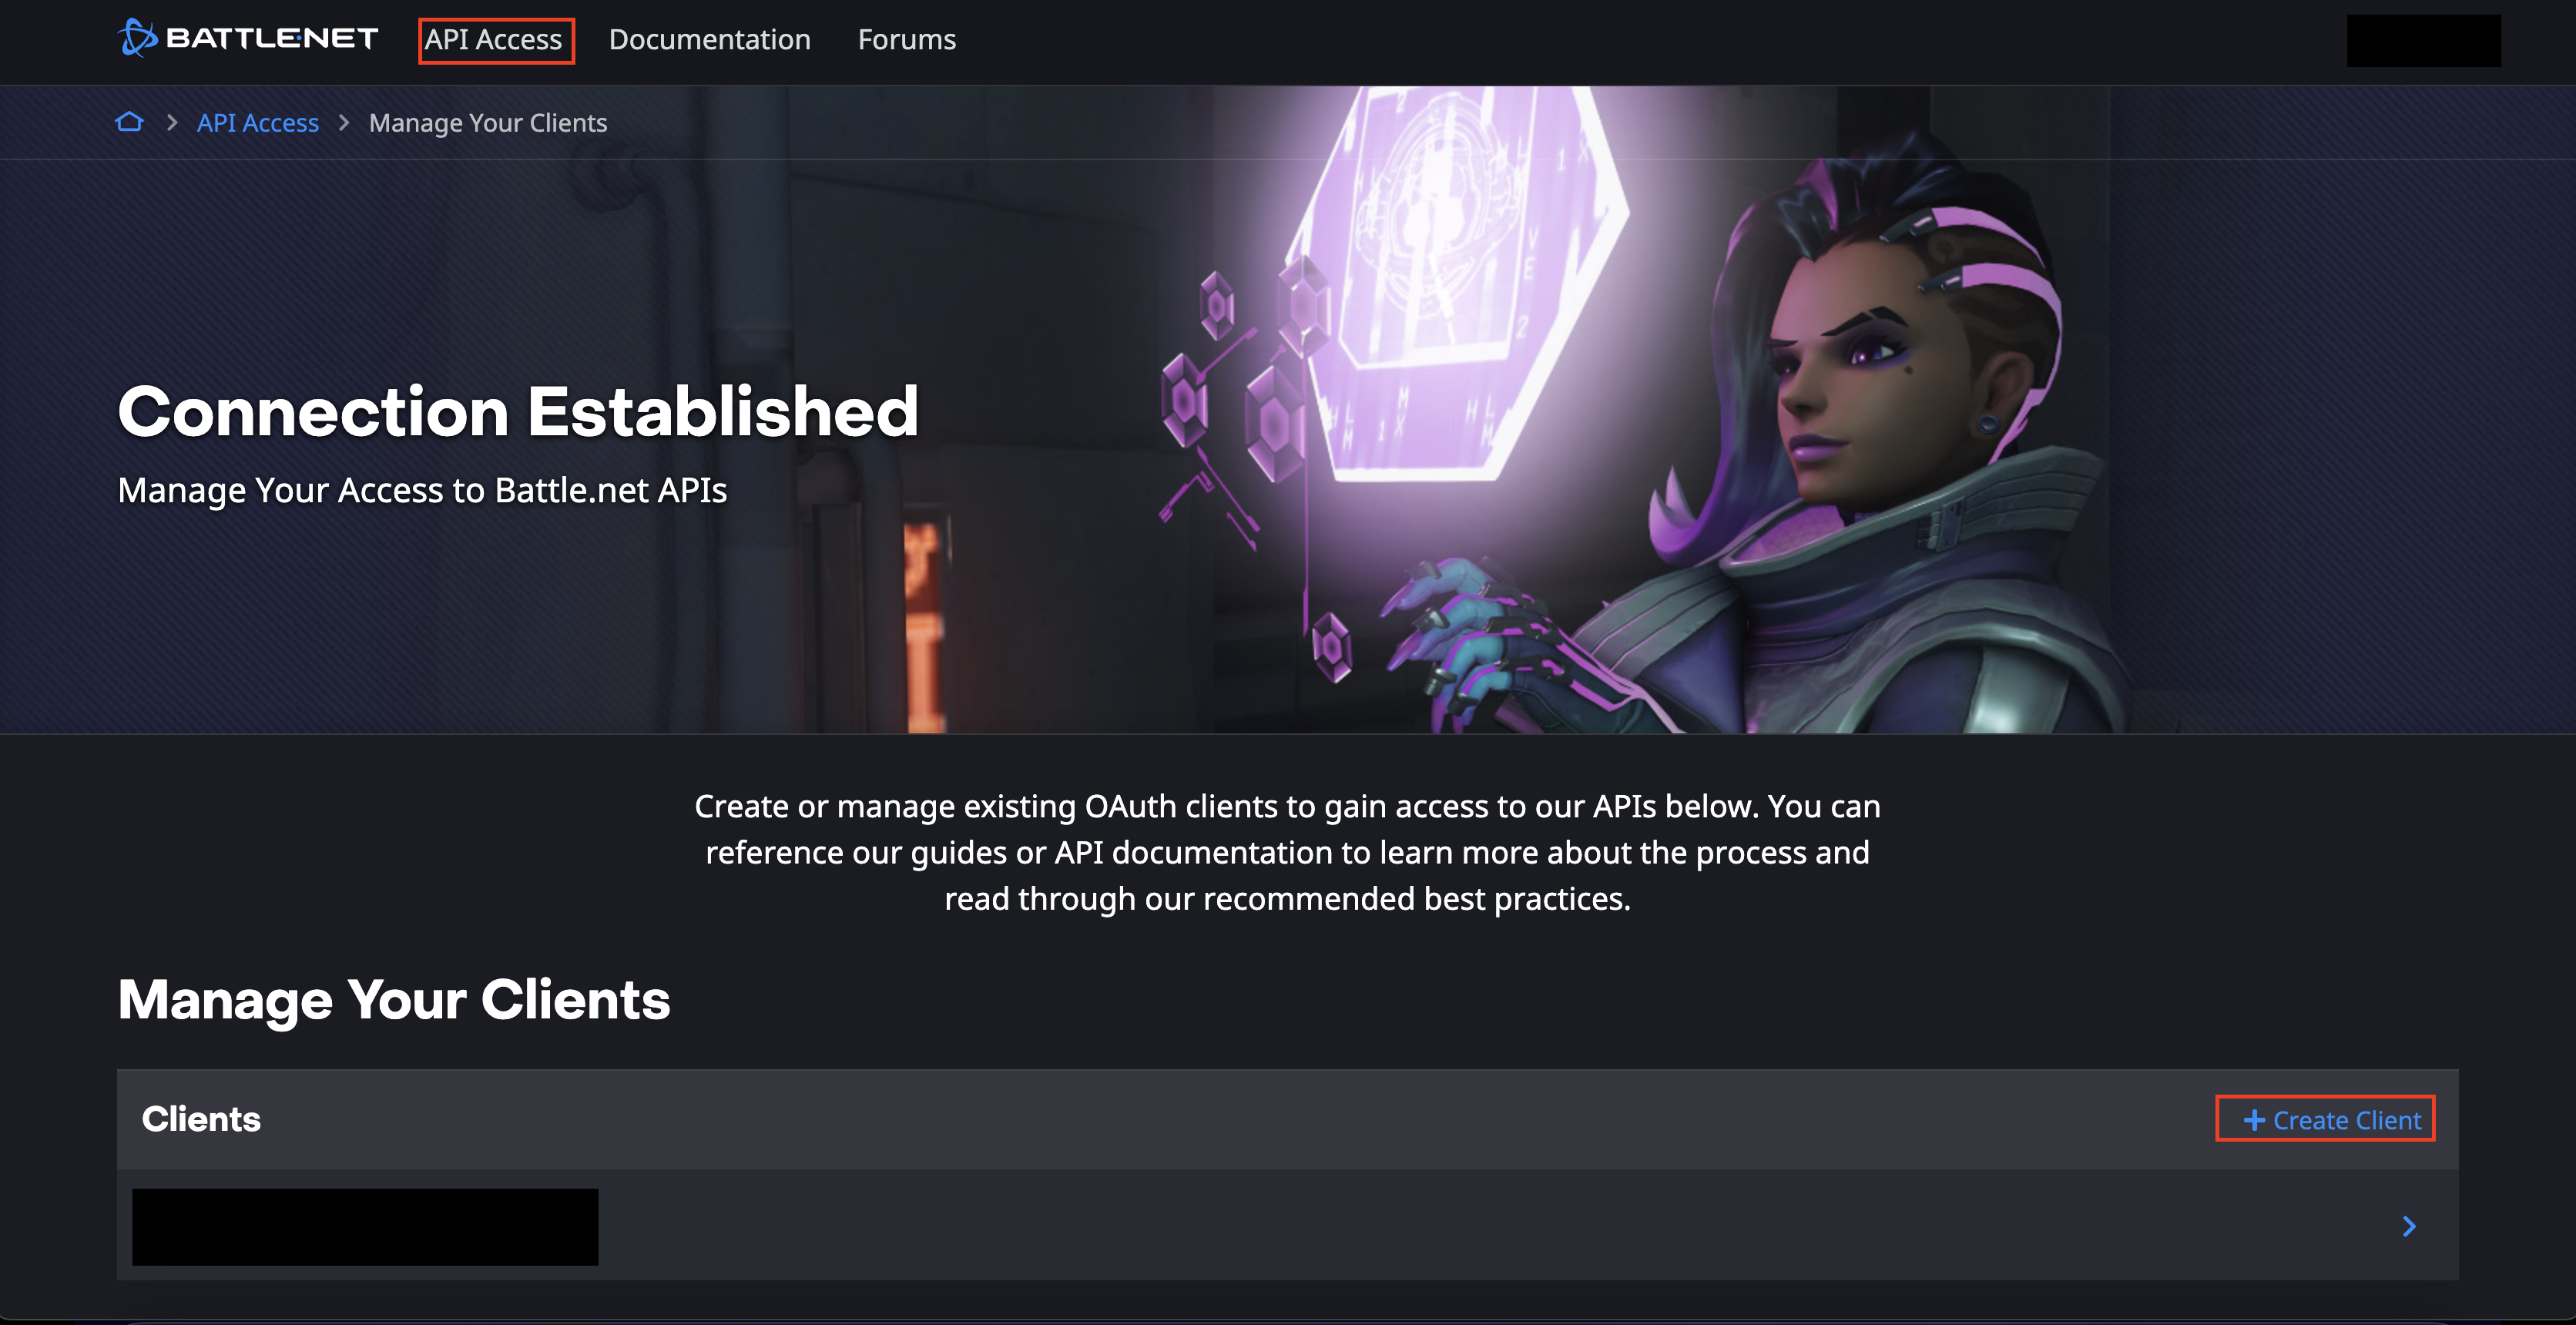
After completing the previous step, proceed to click on API Access and then Create Client. Note, you should not share the Client ID and Client Secret generated during this process with anyone. Additionally, please be aware that Blizzard only supports HTTP and HTTPS URIs. Therefore, if you wish to add login access to your application, you will need to set up your own server to achieve this.
Finally, it is recommended that you consult Blizzard’s documentation. For this project, the relevant documentations are provided below:
In order to use the Blizzard API, we require both the Client ID and Client Secret. Therefore, it is imperative that we securely store these credentials within the project. I will use the xconfig file.
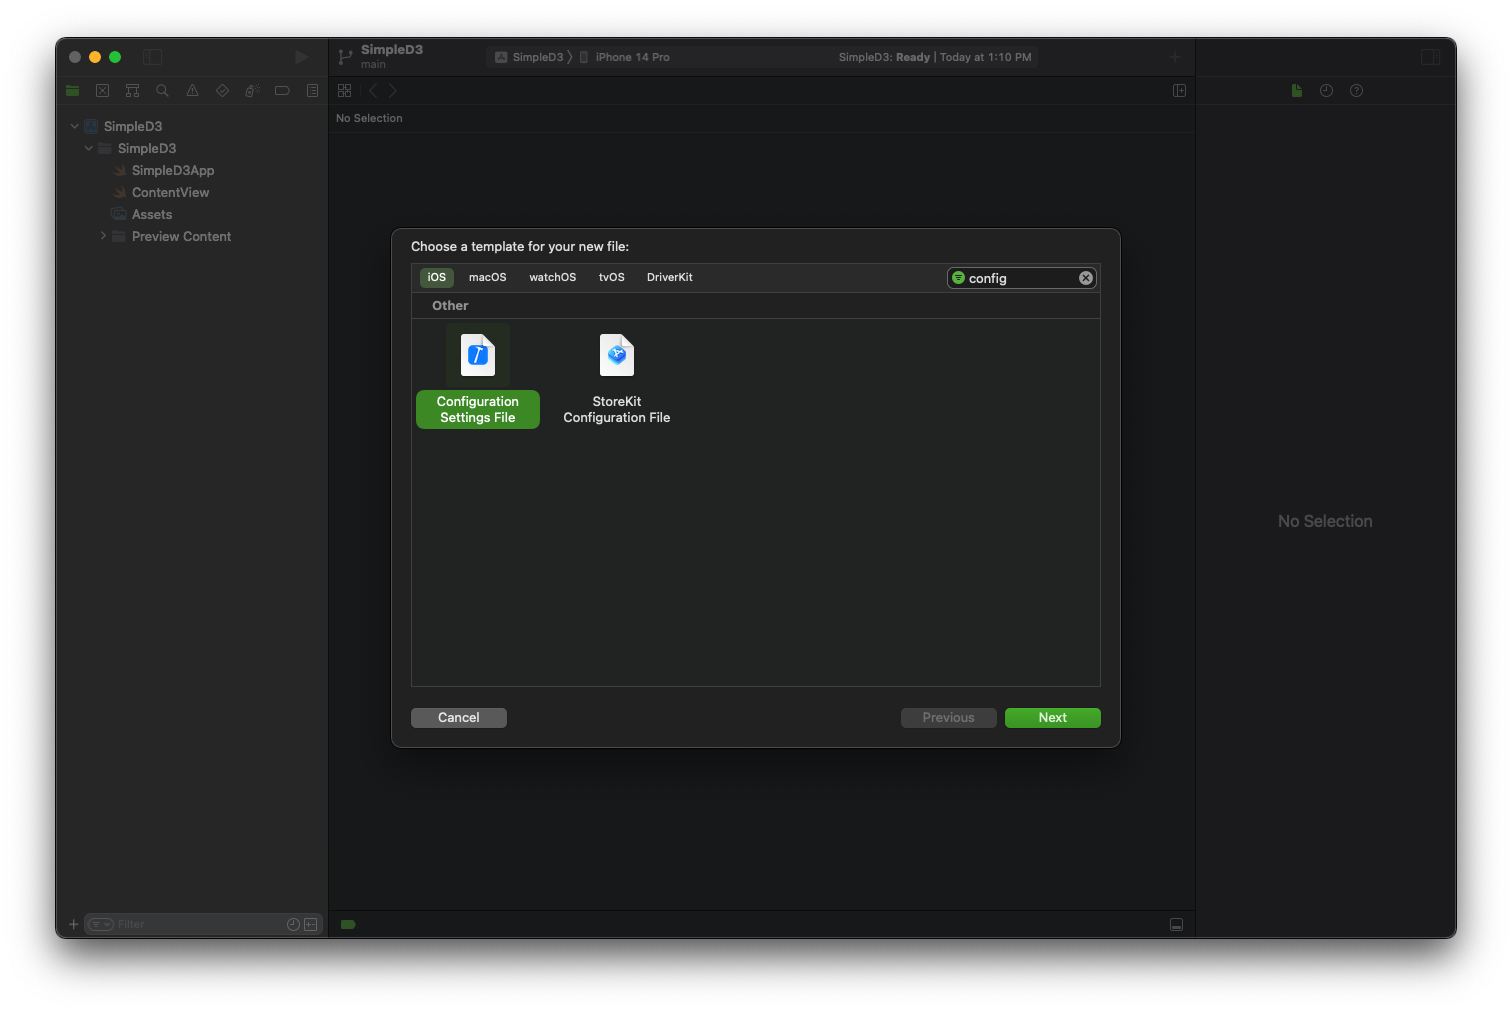
- create configuration file into the project.
Click File > New > File… and create a configuration file. I named Secrets.
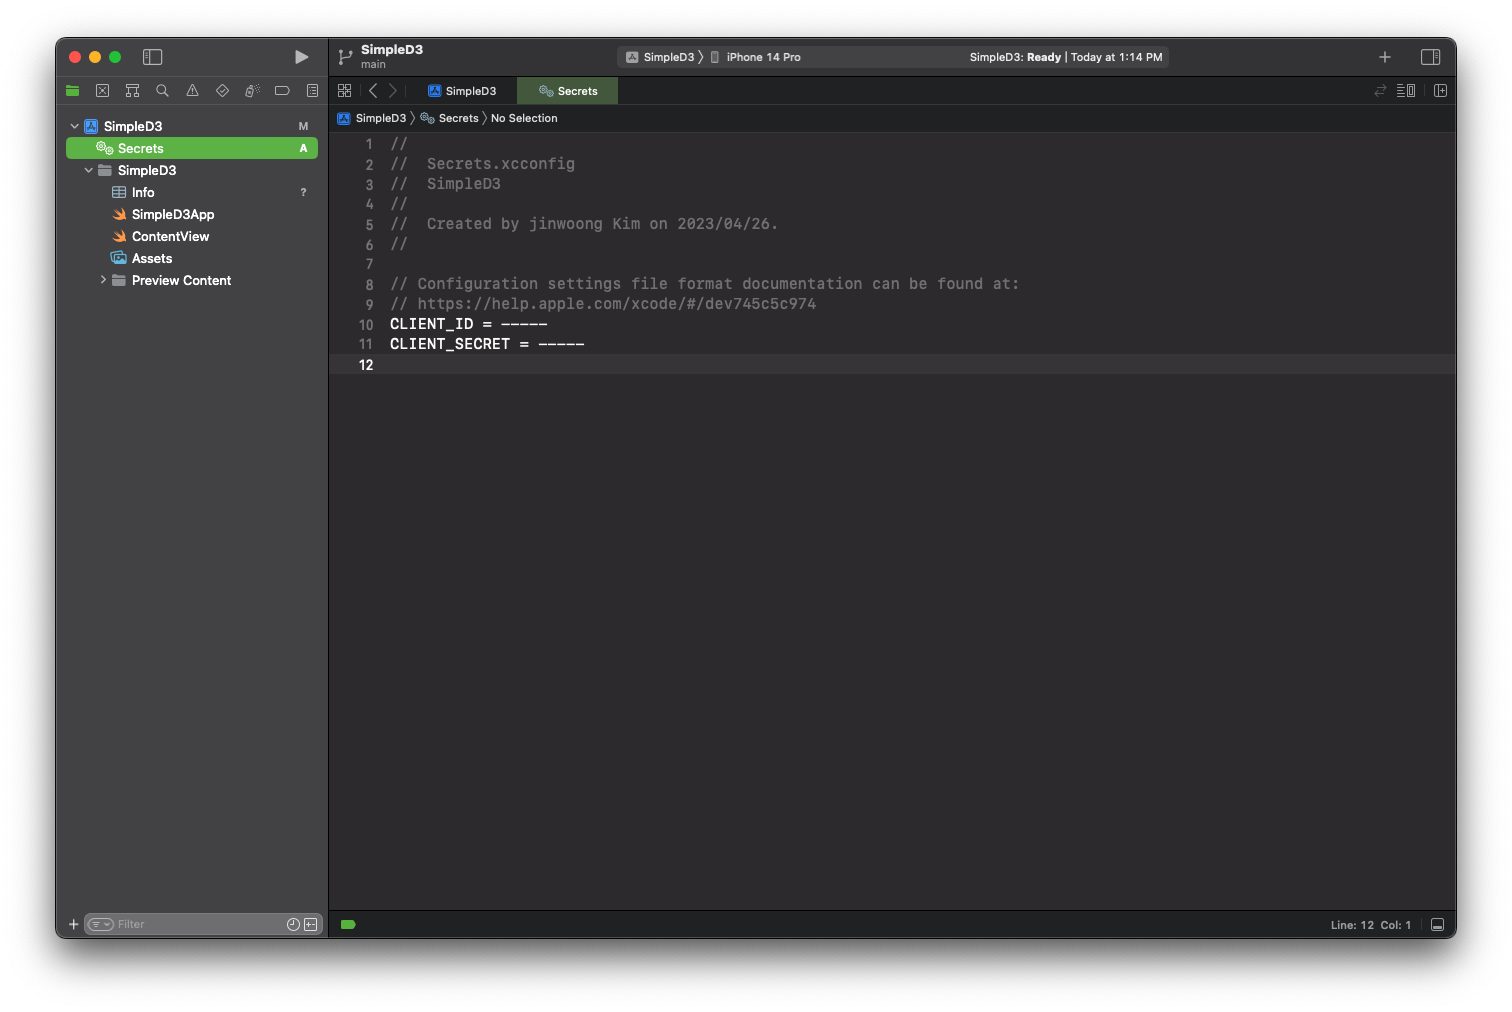
- enter your own id and secret.
You can check your id and secert on api access page. And note that if you plan to upload this project to github, you should add this file to the git ignore file.
3&4. project settings
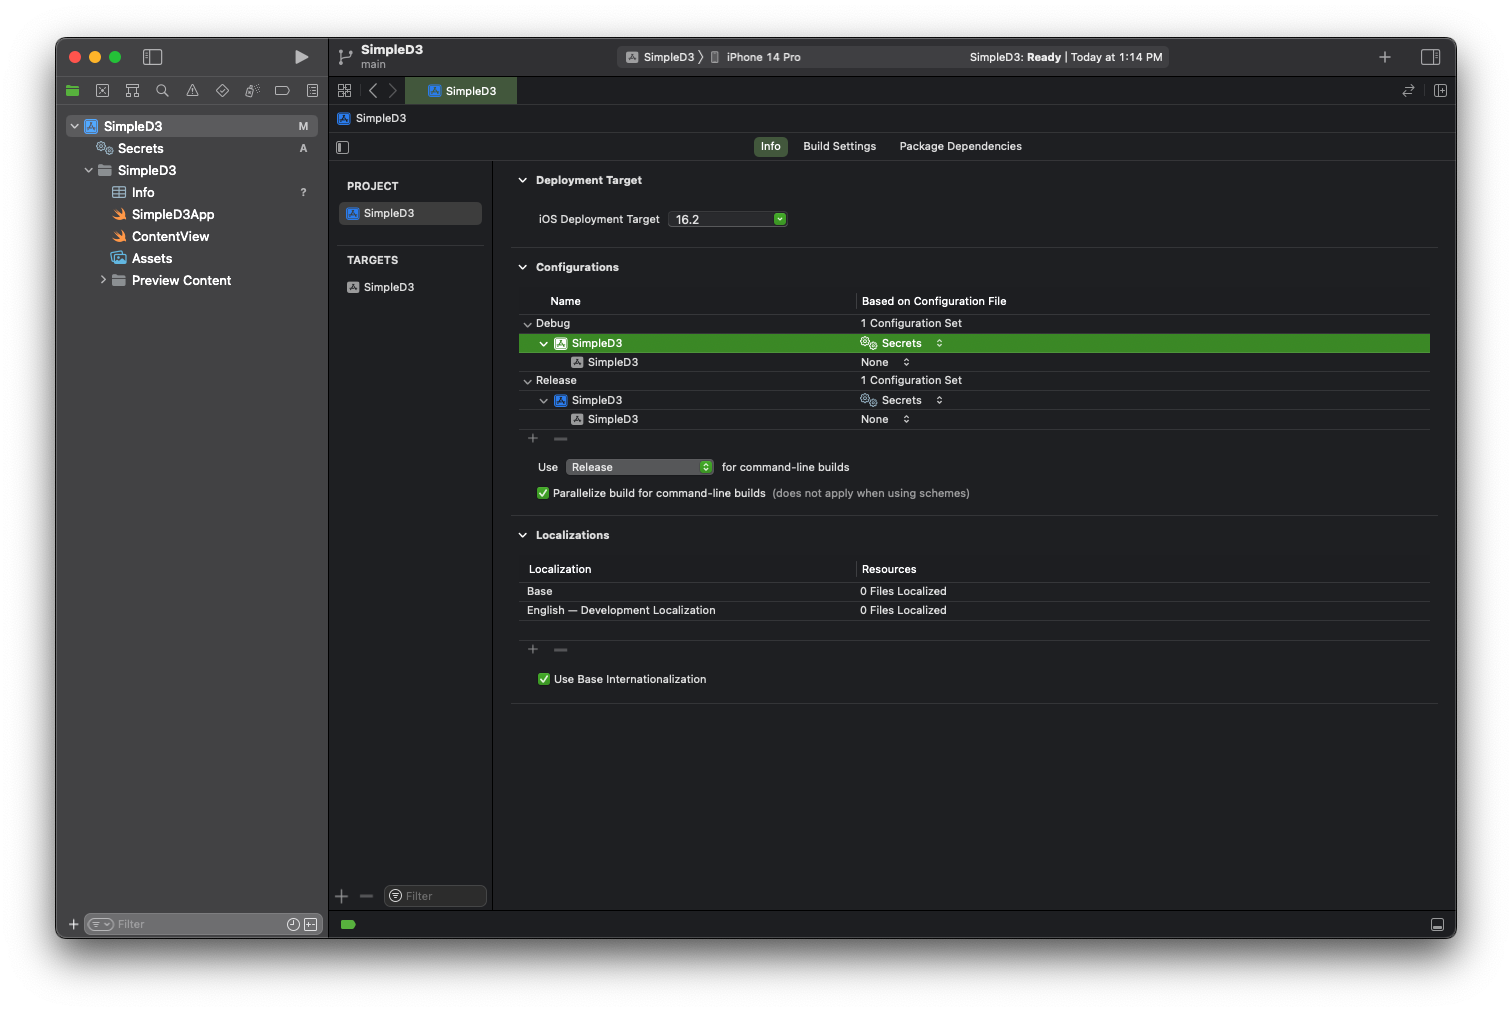
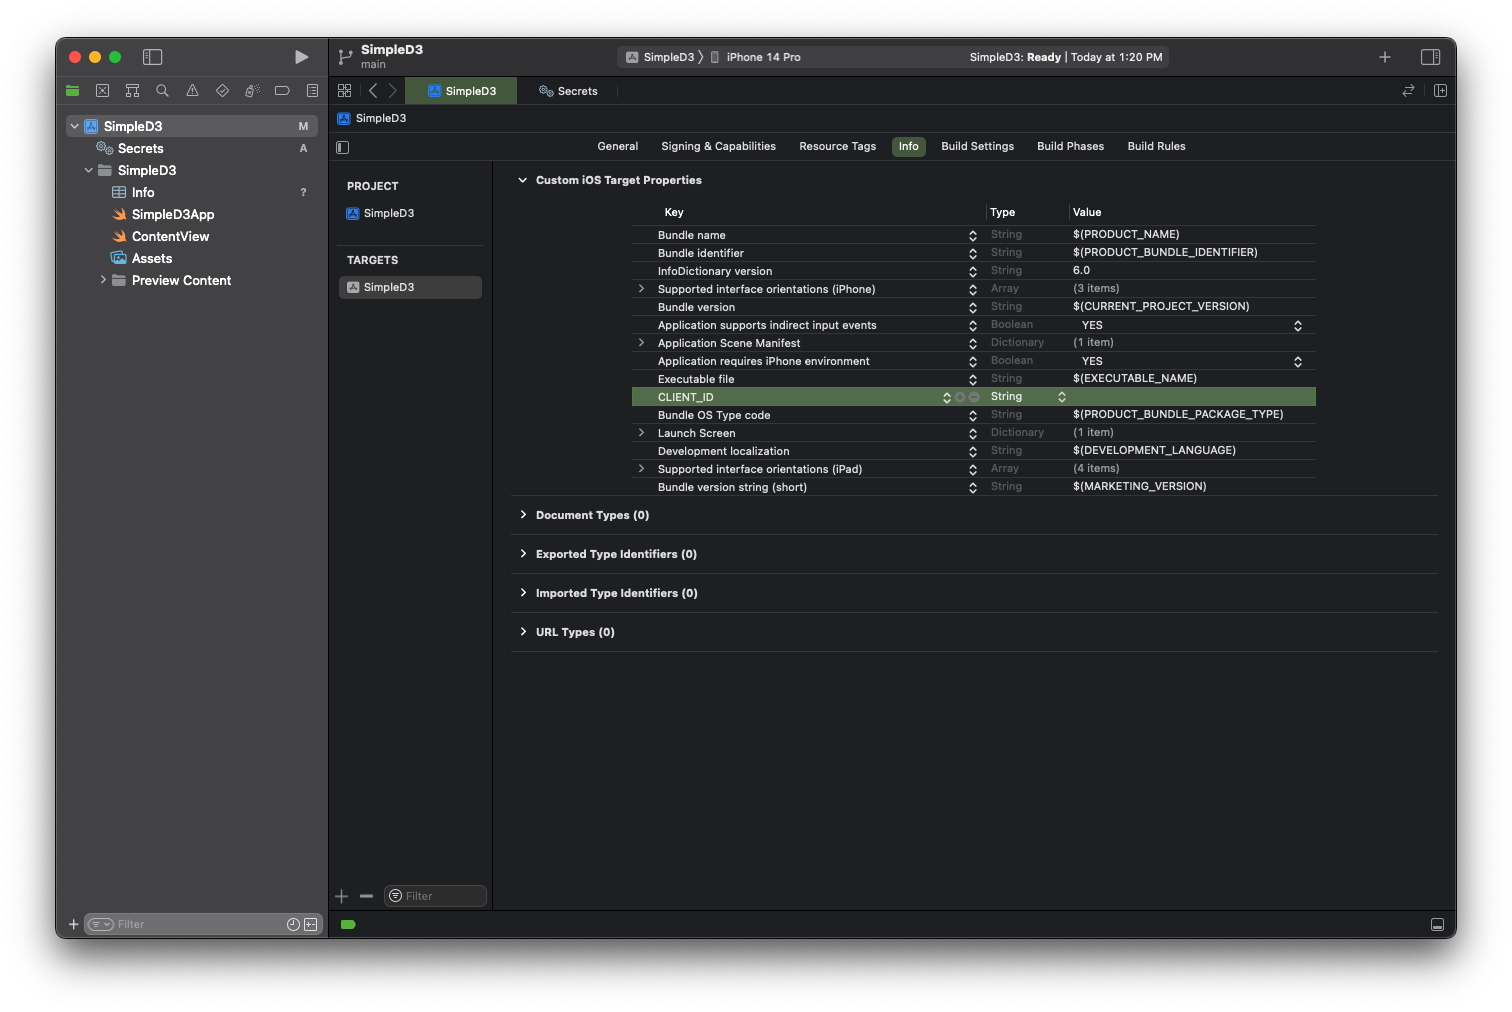
In project section, set up the configuration file in the Configurations section and create key-value paris in plist located in the Target section.
You can now use this key-value pairs with down below:
guard let id = Bundle.main.object(forInfoDictionaryKey: "CLIENT_ID") as? String else {
      fatalError("‼️ NO CLIENT ID was found.")
}
Create a type named 'BlizzardCredentials' that holds the client ID and secret using this:
struct BlizzardCredentials {
  var clientID: String {
    guard let id = Bundle.main.object(forInfoDictionaryKey: "CLIENT_ID") as? String else {
      fatalError("‼️ NO CLIENT ID was found.")
    }
    return id
  }

  var clientSecret: String {
    guard let secret = Bundle.main.object(forInfoDictionaryKey: "CLIENT_SECRET") as? String else {
      fatalError("‼️ NO CLIENT SECRET was found.")
    }
    return secret
  }

  var encrypted: String? {
    return String(
      format: "%@:%@",
      clientID,
      clientSecret
    )
    .data(using: .utf8)?
    .base64EncodedString()
  }
}
💡 What is the role of encrypted property?
Client Credential Flow must make a POST request with the
multipart-formdata to the token URI:grant-type=client_credentials, and must pass basic authorization using theclient_idas the user and theclient_secretas the user password. Basic authorization uses “id:password” form encrypted with base64.
💡 If you don’t familliar with oauth, read this article.
I have two parts of this section:
- Common part:
WebServiceprotocol - Authentication part.
- Diablo3 part
The AuthRepository will handle authentication using a token. It is responsible for obtaining, validating, and deleting the token. Speaking of which, the token will store in keychain.
The Diabloe3Repository is responsible for managing both the diablo 3 community api and the game data api using the token retrieved from the keychain.
Both of these repositories utilize the WebService object, which is contained within the BlizzardApi object.
The WebService protocol is the basic part of the other web service objects. All of the web service objects adopting this protocol have 4 properties:
- region
- locale
- session
- baseURL
The region’s type is the Region. I will use two regions: Korea(KR) and US(US). Since different regions have their own api endpoints, computed properties were created by the region. For instance, if we want to parse all the acts for Diablo 3, the complete API URL is provided below:
If we set the region to Korea(KR) and the locale to Korean, the corresponding values for the region and locale would be “kr” and “ko_kr”, respectively.
The Region type looks like this:
enum Region: String, CaseIterable, Codable {
  case kr
  case us

  var oauthURI: String {
    return "https://oauth.battle.net"
  }

  var tokenURI: String {
    return "https://oauth.battle.net/token"
  }

  var apiURI: String {
    return "https://\(self.rawValue).api.blizzard.com"
  }

  func checkTokenURI(token: String) -> String {
    "https://oauth.battle.net/oauth/check_token?token=\(token)"
  }
}
For more information about regionality, refer to the official documentation.
Additionally, the WebService protocol includes a single method named “call”, which is utilized by all web services for networking. This asynchronous method computes a complete URL with its parameters and returns HTTP response data or throws an error.
The complete protocol is here:
enum HttpMethod: String {
  case GET, POST
}

protocol WebService {
  var region: Region { get }
  var locale: Locale? { get }
  var session: URLSession { get }
  var baseURL: URL? { get }
}

extension WebService {
  func call(url: URL, method: HttpMethod = .GET, headers: [HttpHeader]? = nil, body: Data? = nil) async throws -> Data {
    var url = url

    if let locale = locale {
      url.append(
        queryItems: [
          URLQueryItem(name: "locale", value: locale.rawValue)
        ]
      )
    }

    var request = URLRequest(url: url)
    request.httpMethod = method.rawValue
    request.httpBody = body
    headers?.forEach { request.addValue($0.value, forHTTPHeaderField: $0.key) }

    let (data, response) = try await session.data(for: request)

    guard let httpResponse = response as? HTTPURLResponse,
          httpResponse.statusCode == 200 else {
      throw HttpError.invalidRequest
    }

    return data
  }
}This part will introduce two objects:
- Authentication Web Service
- Authentication Repository (and keychain helper too.)
The AuthenticationWebService protocol conforms to the basic WebService protocol, and DefaultAuthenticationWebservice is the implementation, which has a BlizzardCredentials property. AuthenticationWebService has two asynchronous methods for requesting a token and validating the token.
protocol AuthenticationWebService: WebService {
  var credentials: BlizzardCredentials { get set }

  func requestAccess() async throws -> Data
  func validate(token: Token) async -> Bool
}
final class DefaultAuthenticationWebService: AuthenticationWebService {
var credentials: BlizzardCredentials
var region: Region
var locale: Locale?
var session: URLSession
var baseURL: URL? { return nil }
init(credentials: BlizzardCredentials, region: Region, locale: Locale?, session: URLSession) {
self.credentials = credentials
self.region = region
self.locale = locale
self.session = session
}
func requestAccess() async throws -> Data {
guard let encrypted = credentials.encrypted,
let url = URL(string: region.tokenURI) else {
throw HttpError.invalidRequest
}
guard let body = "grant_type=client_credentials".data(using: .utf8) else {
throw HttpError.unexpectedBody
}
return try await call(
url: url,
method: .POST,
headers: [
.contentType(.form),
.authorization(.basic(encrypted))
],
body: body
)
}
func validate(token: Token) async -> Bool {
guard let url = URL(string: region.checkTokenURI(token: token.accessToken)),
let _ = try? await call(url: url)
else {
return false
}
return true
}
}Repository will be used in the TCA View Feature, and thus, it will be registered as a dependency.
import Foundation

import Dependencies

struct AuthRepository {
  var getAccessToken: @Sendable () async throws -> Token
  var validate: @Sendable (Token) async -> Bool

  /// Remove the token from keychain.
  var delete: () -> ()
}

extension AuthRepository: DependencyKey {
  static let liveValue: Self = .init(
    getAccessToken: {
      if let token = readToken(),
         await auth.validate(token: token) {
        return token
      } else {
        let data = try await auth.requestAccess()
        let decoder = JSONDecoder()
        let token = try decoder.decode(Token.self, from: data)
        save(token: token)

        return token
      }
    },
    validate: { token in
      return await auth.validate(token: token)
    },
    delete: {
      delete()
    }
  )

  private static var auth: AuthenticationWebService {
    @Dependency(\.blizzardAPI) var blizzardAPI
    return blizzardAPI.authentication
  }

  private static func save(token: Token) {
    KeychainHelper.standard.save(token, service: "blizzard-access-token", account: "blizzard")
  }

  private static func readToken() -> Token? {
    KeychainHelper.standard.read(service: "blizzard-access-token", account: "blizzard")
  }

  private static func delete() {
    KeychainHelper.standard.delete(service: "blizzard-access-token", account: "blizzard")
  }
}

extension DependencyValues {
  var authRepository: AuthRepository {
    get { self[AuthRepository.self] }
    set { self[AuthRepository.self] = newValue }
  }
}
Note, there are two parts to registering a dependency:
- conforms to
DependencyKeyprotocol: Implement theliveValue. - extends
DependencyValueswith the dependency.
If it is done, we can use like this:
@Dependency(\.authRepository) var authRepoBecause the token is a sensitive information, like a password, it needs to be saved in the keychain. Therefore, when the getAccessToken() method is called and the token is successfully obtained, it is stored in the keychain using KeychainHelper.
In this article, I provide a brief overview of using the API with Swift and handling an authentication. As I aim to learn how to use an API effectively and handle networking processes proficiently, I have meticulously read the documentation. Howeber, there are still points that can be improved and refactored. If you come across anything that needs modification, please let me know. I hope this article will be helpful. Thank you.

