Slide: https://speakerdeck.com/jinqian/bridge-the-physical-world-kotlin-native-on-raspberry-pi
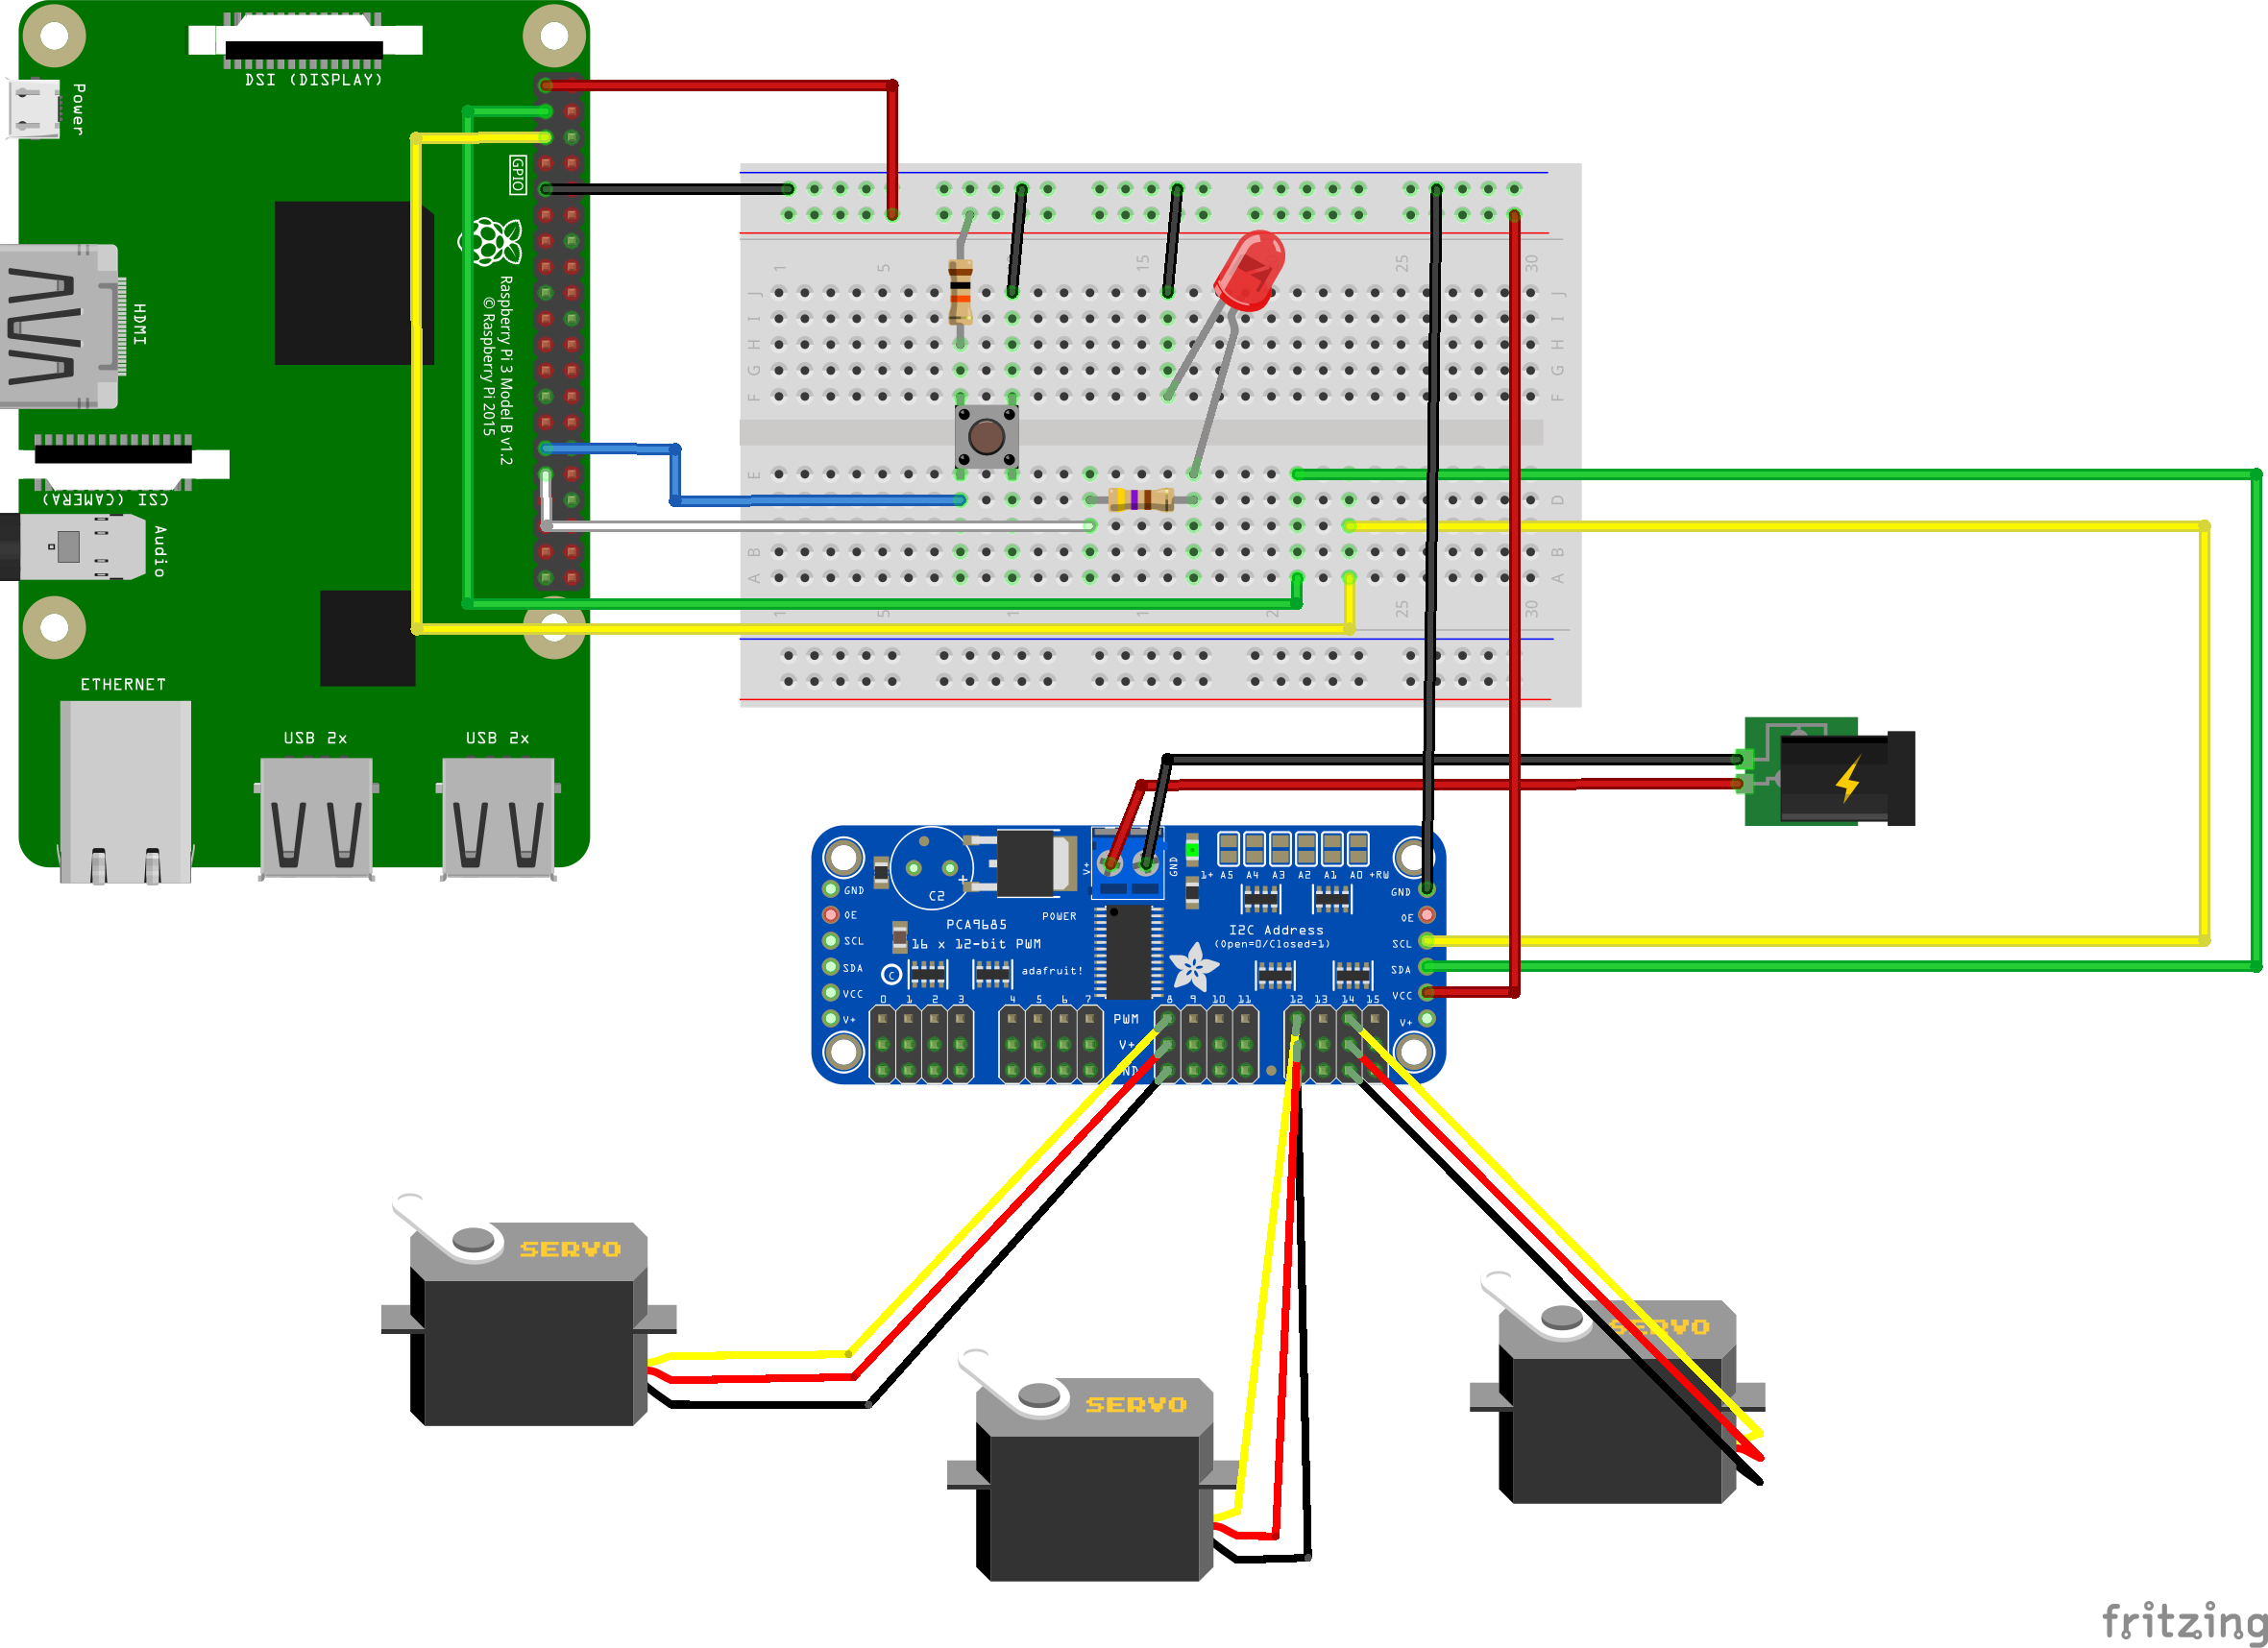
This circuit schema represents what I use in my project:
This part explains how to install different dependencies on your raspberry pi in order to test the project.
Since we are using the Tensorflow 2.0, we will need glibc-2.28 which is only available starting from Debian 10 (Buster). So make sure your rasbian is upgraded, otherwise the tensorflow part will not be able to work.
Then make sure you have cmake installed on your raspberry pi:
$ sudo apt-get install cmake
https://github.com/joan2937/pigpio
Connect to your pi with SSH:
$ git clone https://github.com/joan2937/pigpio
$ cd pigpio
$ make
$ sudo make install
https://github.com/edlins/libPCA9685
$ git clone https://github.com/edlins/libPCA9685
$ cd libPCA9685 && mkdir build && cd build
$ cmake ..
$ make
$ ctest
$ sudo make install
A japanese engineer has compiled the Tensorflow C libraries for raspberry pi and put it on github to share: https://github.com/PINTO0309/Tensorflow-bin
A huge arigato!!
$ git clone https://github.com/PINTO0309/Tensorflow-bin
$ cd Tensorflow-bin/C-library/2.0.0-armhf
$ ./install-buster.sh
Note: in order to use Tensorflow 2.0.0 you will need Raspbian/Debian Buster which is bundled with glibc 2.28.
/!\ For cross-compilation on a Linux machine or a MacOS, you have to download these libraries to your machine for linking during the compilation. In my code you can see they are gitignored because github does not allow file larger than 100MB. /!\
Compile the project:
$ ./gradlew build
After a successful build you should be able to see that the binaries are generated under the build/bin/chifoumi folder. In order to test the binary, deploy it on your Pi via SSH, make sure you update the SSH configuration, source folder and destination folder in build.gradle with your own configurations:
$ ./gradlew deployOnPi
Note: you have to configure the passwordless SSH access on your Pi to make the SSH plugin work.
If it's the first time you deploy on your Pi, you need to make sure your .kexe file is executable, then execute the binary with sudo to test with your circuit:
$ chmod 777 chifoumi-robot.kexe
$ sudo ./chifoumi-robot.kexe
- Support
linuxArm64? - Desktop or other remote control
https://github.com/PINTO0309/Tensorflow-bin
If you ran into this problem:
* What went wrong:
Execution failed for task ':deployOnPi'.
> com.jcraft.jsch.JSchException: invalid privatekey: [B@57eea633
That is caused by the private key headers generated by different versions of OpenSSH. You can refer to this Stackoverflow post to solve the problem.
- Building Multiplatform Projects with Gradle: https://kotlinlang.org/docs/reference/building-mpp-with-gradle.html
