This is Android Things hands-on workshop that showcases:
- how to control different GPIOs on Android Things
- how to build weather station which reads sensor data, display it and send it to cloud (a fork of the Android Things weather station codelab)
This is intially prepared for EPF IoT course 2018-2019.
- A PC or a Mac with latest Android Studio installed
- An Android Things starter kit with the latest image installed
- Basic knowledge of Linux/Unix system
- Basic knowledge of Android development
- Basic knowledge of Java or Kotlin
Let's get started! 💪🏻
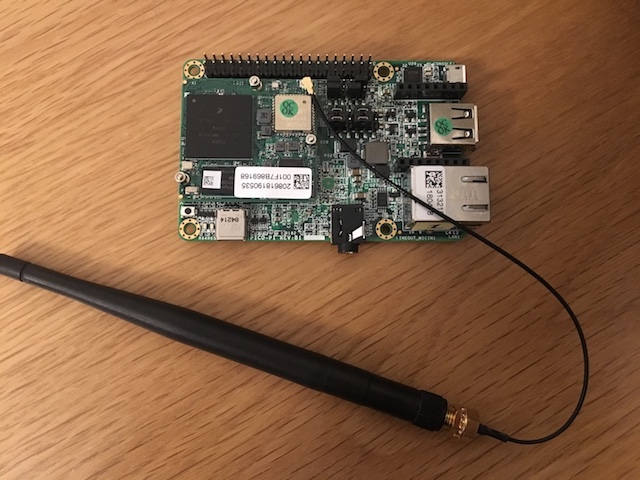
The board given to each of you is already flashed with the latest version of Android Things. The main board is a NXP Pico i.MX7 Dual development board.
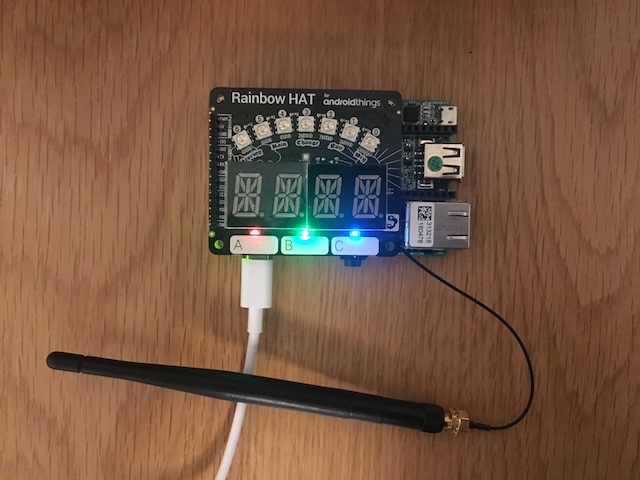
First plug the wifi antenna, then the Rainbow HAT onto your Pico board.
If you want to set up the multi-touch display, follow the instruction of Multi-touch display section here. Don't hesitate to ask for help.
Make sure you already installed the latest stable release of Android Studio. Go to menu -> Preferences -> Android SDK and find your Android SDK location (e.g. /Users/qian/Library/Android/sdk/)
- Add SDK's
platform-toolsto your path. An example for MAC user, add following line in your.bash_profileor.bashrc:
export PATH="/Users/qian/Library/Android/sdk/platform-tools:$PATH"
This will allow you to use ADB (Android Debug Bridge) easily from a terminal. Once you have adb ready, plug Android Things board and verify if it's properly connected:
$ adb devices
List of devices attached
xxxxxx  device
Make sure you can access adb shell:
$ adb shell
imx7d_pico:/ $
The board handed to you is already flashed with the latest version of Android Thing and pre-configured with the following wifi:
- SSID:
things - Password:
HelloAndroidThings
If you need do some further setups (flashing board, set up wifi...), download the Android Things Setup Utility from the Android Things Console. You will need to sign in to your Google account and accept the licensing agreement and terms of service.
In this hands-on, you're going to build a weather station that reads temperature and pressure data from a BMP280 sensor and displays the latest reading locally on the Rainbow HAT.
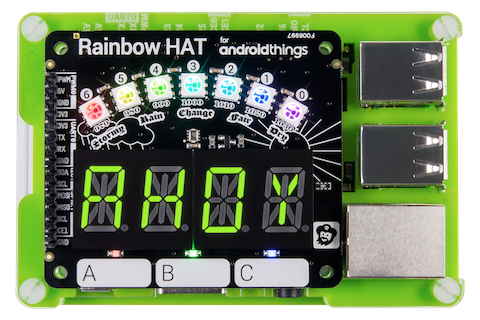
The expansion connector on the development board exposes Peripheral I/O signals for application use. The Rainbow HAT sits on top of the expansion connector, providing a variety of inputs and outputs for developers to interact with.
This hands-on makes use of the RainbowHat driver to provide access to the individual peripherals, so these signal names are for your information only. Your code will access these peripherals through the RainbowHat class.
Before start building the weather station, let's get familiar with the board by playing with some of the component on the Rainbow HAT. Open the playground project inside this repository with Android Studio and go to MainActivity.java.
In order to manipulate peripheral pins, you have to add this permission in AndroidManifest.xml:
<uses-permission android:name="com.google.android.things.permission.USE_PERIPHERAL_IO"/>The RainbowHat driver provides easy access to the peripherals available on the Rainbow Hat for Android Things, add the dependency in the build.gradle of your application (path: playground/app/build.gradle):
dependencies {
    ...
    implementation 'com.google.android.things.contrib:driver-rainbowhat:1.0'
}
LED is controlled by a digital GPIO pin, there are 3 LEDs on the rainbow HAT, their pin names mapping with Rainbow HAT on a Pico board are:
- Red LED:
GPIO2_IO02 - Green LED:
GPIO2_IO00 - Blue LED:
GPIO2_IO05
In order to manipulate them, you can use PeripheralManager, try to add this code inside onCreate() and launch it on your Android Things:
private Gpio redLed;

@Override
protected void onCreate(Bundle savedInstanceState) {
    super.onCreate(savedInstanceState);

	PeripheralManager service = PeripheralManager.getInstance();
	Gpio redLed = service.openGpio(GPIO_RED_LED);
	redLed.setDirection(Gpio.DIRECTION_OUT_INITIALLY_LOW);
	redLed.setValue(true);
}
The setDirection method sets the GPIO pin's initial value as low, which means the LED is not lit.
When you are done with the GPIO pin, dont forget to close it in onDestry() method to free the resource:
@Override
protected void onDestroy() {
    super.onDestroy();
    redLed.close();
}
You are probably noticing that IDE is underlining the openGpio method, telling you there is unhandled IOException, so don't forget to wrap your code inside a try catch.
With the Rainbow HAT driver, the same code can actually be much simpler:
redLed = RainbowHat.openLedRed();
redLed.setValue(true);
redLed.close();Light up the red and blue light while keeping the green off.
Raise hands when you are done 👋🏻
Now you know how output can be controlled from code, let's check out how to play with the input. One of the input on the rainbow HAT is the button. There are 3 buttons: Button A, B and C.
Following code shows how to detect when the button A is pressed:
// Detect when button 'A' is pressed.
Button button = RainbowHat.openButtonA();
button.setOnButtonEventListener(new Button.OnButtonEventListener() {
    @Override
    public void onButtonEvent(Button button, boolean pressed) {
        Log.d(TAG, "button A pressed:" + pressed);
    }
});

// Close the device when done.
button.close();
Every time the button is pressed, the OnButtonEventListener will received the event, thus you can carry out actions inside the callback. Read carefully with the log to understand the behavior of the button and how the boolean pressed changed.
Control the led with your button, for example, when press on the button A, the red LED is lit; when the button is pressed again, the red LED is turned off. Raise hands when you are done 👋🏻
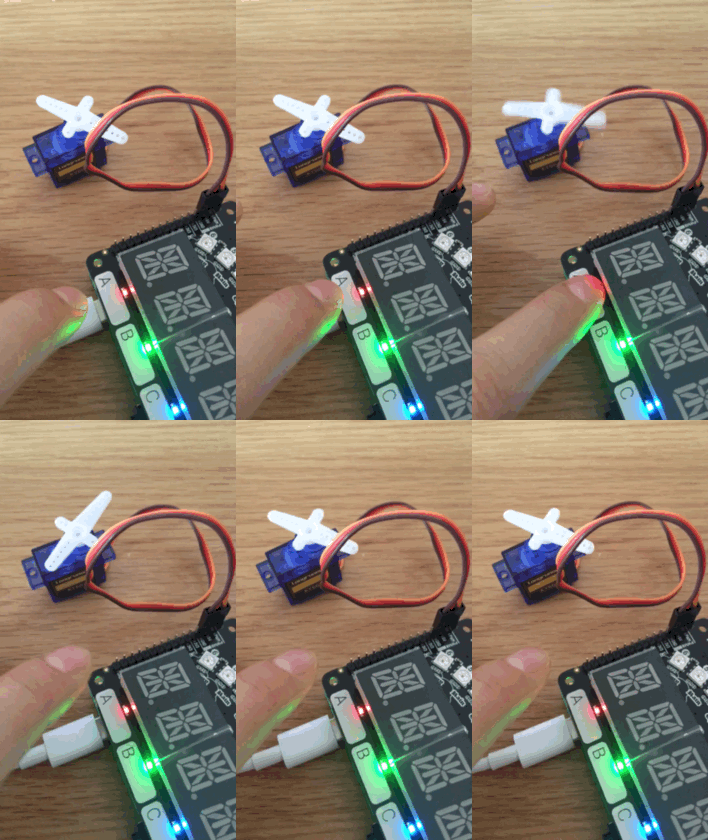
We have already seen during the presentation what a PWM (Pulse Width Modulation) is. Every one of you has a SG90 servo motor at disposal, now let's try to control the servo motor with code.
It is fairly easy to initialize the servo moter with Rainbo HAT driver:
Servo servo = RainbowHat.openServo();
servo.setPulseDurationRange(1, 2);
servo.setAngleRange(-90, 90);
servo.setEnabled(true);
In order to move the servo motor, you can call these method:
servo.setAngle(servo.getMinimumAngle());
// or
servo.setAngle(servo.getMaximumAngle());
Don't forget to close servo resource in onDestroy() when you are done with it.
Control the servo motor with one of the buttons! Raise hands when you are done 👋🏻
The peripherals on the Rainbow HAT used in this codelab are connected to the following signals. These are also listed on the back of the Rainbow HAT:
Now open the weatherstation-start project with Android Studio. The starter project contains the following source files:
RainbowUtil: Helper class to compute the Rainbow colors displayed on the Rainbow HAT RGB LED strip. Your code will reference this class to convert sensor readings into the proper display colors.WeatherStationActivity: Main activity of the application. The code you write in this codelab will be placed here. The app-level build.gradle file includes a dependency for Android Things support library to enable access to the Peripheral I/O API:
compileOnly 'com.google.android.things:androidthings:1.0'
The Rainbow HAT includes an HT16K33 segment display driver connected over the I2C serial bus and a strip of seven APA102 RGB LEDs connected over the SPI serial bus. You will be accessing these devices using drivers provided for the Rainbow HAT.
Add the rainbow HAT driver as you did for the playground, inside the app-level build.gradle file:
dependencies {
    ...
    implementation 'com.google.android.things.contrib:driver-rainbowhat:1.0'
}
Open the WeatherStationActivity class, and declare new fields for an AlphanumericDisplay and Apa102 LED strip:
import com.google.android.things.contrib.driver.apa102.Apa102;
import com.google.android.things.contrib.driver.ht16k33.AlphanumericDisplay;
import com.google.android.things.contrib.driver.rainbowhat.RainbowHat;

public class WeatherStationActivity extends Activity {

    //...

    private AlphanumericDisplay mDisplay;
    private Apa102 mLedstrip;

    @Override
    protected void onCreate(Bundle savedInstanceState) {
        super.onCreate(savedInstanceState);
        Log.d(TAG, "Weather Station Started");
    }
}
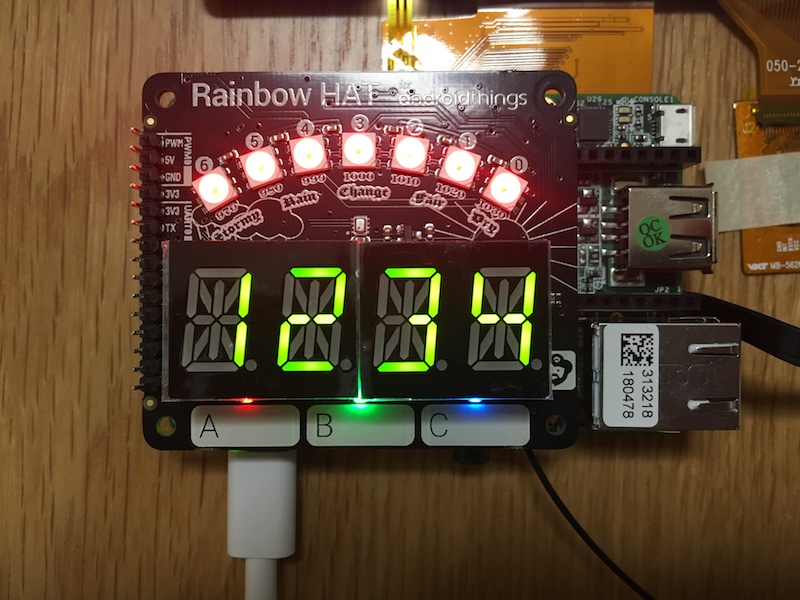
Open a connection to both peripherals in onCreate()using the RainbowHat driver. Set the AlphanumericDisplay to show the value 1234, and the Apa102 to display Color.RED across all the LEDs in the strip:
@Override
protected void onCreate(Bundle savedInstanceState) {
    super.onCreate(savedInstanceState);
    Log.d(TAG, "Weather Station Started");

    // Initialize 14-segment display
    try {
        mDisplay = RainbowHat.openDisplay();
        mDisplay.setEnabled(true);
        mDisplay.display("1234");
        Log.d(TAG, "Initialized I2C Display");
    } catch (IOException e) {
        throw new RuntimeException("Error initializing display", e);
    }

    // Initialize LED strip
    try {
        mLedstrip = RainbowHat.openLedStrip();
        mLedstrip.setBrightness(LEDSTRIP_BRIGHTNESS);
        int[] colors = new int[7];
        Arrays.fill(colors, Color.RED);
        mLedstrip.write(colors);
        // Because of a known APA102 issue, write the initial value twice.
        mLedstrip.write(colors);

        Log.d(TAG, "Initialized SPI LED strip");
    } catch (IOException e) {
        throw new RuntimeException("Error initializing LED strip", e);
    }
}Add the following code to onDestroy() to turn off both output devices and close the connections once they are no longer needed:
@Override
protected void onDestroy() {
    super.onDestroy();

    if (mDisplay != null) {
        try {
            mDisplay.clear();
            mDisplay.setEnabled(false);
            mDisplay.close();
        } catch (IOException e) {
            Log.e(TAG, "Error closing display", e);
        } finally {
            mDisplay = null;
        }
    }

    if (mLedstrip != null) {
        try {
            mLedstrip.setBrightness(0);
            mLedstrip.write(new int[7]);
            mLedstrip.close();
        } catch (IOException e) {
            Log.e(TAG, "Error closing LED strip", e);
        } finally {
            mLedstrip = null;
        }
    }
}Deploy the app to the device by selecting Run → Run 'app' from the menu, or click the Run icon in the toolbar. Verify that the display shows "1234" and all the LEDs on the Rainbow HAT are glowing red.
Raise hands when you are done 👋🏻
The Rainbow HAT includes a BMP280 temperature and pressure sensor that is connected over the I2C serial bus. This driver handles the low-level I2C communication and binds the new sensor to the Android framework as a user-space driver. Once the driver is registered, your code will retrieve the sensor data using the standard SensorManager system service.
Add the MANAGE_SENSOR_DRIVERS permission to your AndroidManifest.xml. This permission is required to register any new sensor as a user-space driver.
<uses-permission android:name="com.google.android.things.permission.MANAGE_SENSOR_DRIVERS" />Declare a new Bmx280SensorDriver and initialize it in onCreate(). Register the user-space drivers for each individual sensor on the BMP280 with the sensor framework:
import com.google.android.things.contrib.driver.bmx280.Bmx280SensorDriver;

public class WeatherStationActivity extends Activity {
    ...

    private Bmx280SensorDriver mEnvironmentalSensorDriver;

    @Override
    protected void onCreate(Bundle savedInstanceState) {
        super.onCreate(savedInstanceState);
        Log.d(TAG, "Weather Station Started");

        // Initialize temperature/pressure sensors
        try {
            mEnvironmentalSensorDriver = RainbowHat.createSensorDriver();
            // Register the drivers with the framework
            mEnvironmentalSensorDriver.registerTemperatureSensor();
            mEnvironmentalSensorDriver.registerPressureSensor();

            Log.d(TAG, "Initialized I2C BMP280");
        } catch (IOException e) {
            throw new RuntimeException("Error initializing BMP280", e);
        }

        //...
    }
}Obtain a reference to the SensorManager system service in onCreate():
private SensorManager mSensorManager;

@Override
protected void onCreate(Bundle savedInstanceState) {
    super.onCreate(savedInstanceState);
    Log.d(TAG, "Weather Station Started");

    mSensorManager = getSystemService(SensorManager.class);

    ...
}
Implement the updateTemperatureDisplay() method to write the temperature sensor value out to the segment display:
private void updateTemperatureDisplay(float temperature) {
    if (mDisplay != null) {
        try {
            mDisplay.display(temperature);
        } catch (IOException e) {
            Log.e(TAG, "Error updating display", e);
        }
    }
}
Implement the updateBarometerDisplay() method to update the RGB LED strip based on the pressure sensor value:
Use the
RainbowUtil.getWeatherStripColors()helper to convert the pressure value into a color array for the Apa102 driver.
private void updateBarometerDisplay(float pressure) {
    if (mLedstrip != null) {
        try {
            int[] colors = RainbowUtil.getWeatherStripColors(pressure);
            mLedstrip.write(colors);
        } catch (IOException e) {
            Log.e(TAG, "Error updating ledstrip", e);
        }
    }
}
Declare a new SensorEventListener to receive events generated for new temperature and pressure values and call the two update methods you just implemented:
// Callback when SensorManager delivers new data.
private SensorEventListener mSensorEventListener = new SensorEventListener() {
    @Override
    public void onSensorChanged(SensorEvent event) {
        final float value = event.values[0];

        if (event.sensor.getType() == Sensor.TYPE_AMBIENT_TEMPERATURE) {
            updateTemperatureDisplay(value);
        }
        if (event.sensor.getType() == Sensor.TYPE_PRESSURE) {
            updateBarometerDisplay(value);
        }
    }

    @Override
    public void onAccuracyChanged(Sensor sensor, int accuracy) {
        Log.d(TAG, "accuracy changed: " + accuracy);
    }
};
Register the listener for each sensor on the BMP280. User-space drivers register the sensors with the framework as dynamic sensors, so you can access them from the getDynamicSensorList() method:
@Override
protected void onStart() {
    super.onStart();

    // Register the BMP280 temperature sensor
    Sensor temperature = mSensorManager
            .getDynamicSensorList(Sensor.TYPE_AMBIENT_TEMPERATURE).get(0);
    mSensorManager.registerListener(mSensorEventListener, temperature,
            SensorManager.SENSOR_DELAY_NORMAL);
    // Register the BMP280 pressure sensor
    Sensor pressure = mSensorManager
            .getDynamicSensorList(Sensor.TYPE_PRESSURE).get(0);
    mSensorManager.registerListener(mSensorEventListener, pressure,
            SensorManager.SENSOR_DELAY_NORMAL);
}

@Override
protected void onStop() {
    super.onStop();

    mSensorManager.unregisterListener(mSensorEventListener);
}Add the following code to onDestroy() to close the driver connection:
@Override
protected void onDestroy() {
    super.onDestroy();

    if (mEnvironmentalSensorDriver != null) {
        try {
            mEnvironmentalSensorDriver.close();
        } catch (IOException e) {
            Log.e(TAG, "Error closing sensors", e);
        } finally {
            mEnvironmentalSensorDriver = null;
        }
    }

    // ...
}Deploy the app to the device by selecting Run → Run 'app' from the menu, or click the Run icon in the toolbar.
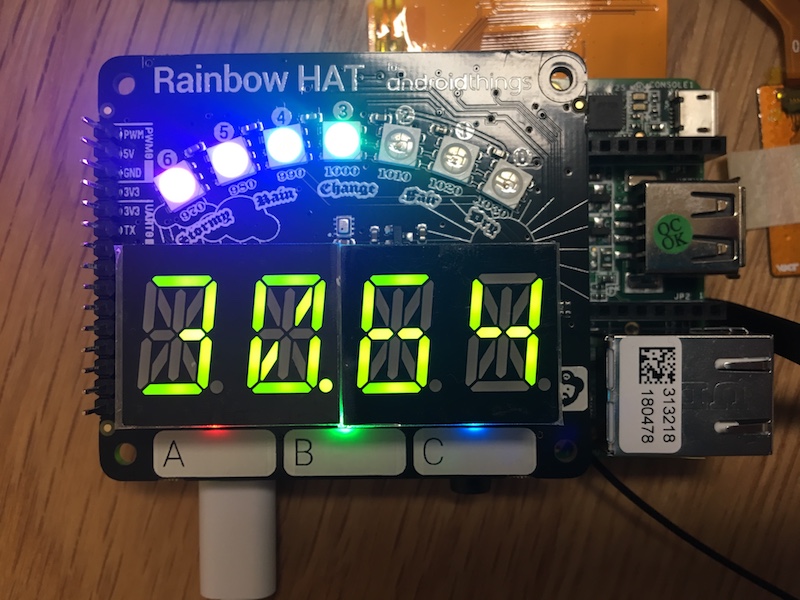
Verify that the Rainbow HAT display now shows the current temperature in ℃ and the LEDs show a rainbow gauge that corresponds to the pressure reading.
Raise hands when you are done 👋🏻
In this step, we are going to publish the sensor data to the Google Cloud Pub/Sub. Cloud Pub/Sub is a fully-managed real-time messaging service that allows you to send and receive messages between independent applications.
A publisher application creates and sends messages to a topic. Subscriber applications create a subscription to a topic to receive messages from it. Communication can be one-to-many (fan-out), many-to-one (fan-in), and many-to-many.
Make sure you have a valid Google Account before starting this step.
Until this point, your Android Things hasn't communicated with the internet yet. Now added the internet permission in your AndroidManifest.xml:
<uses-permission android:name="android.permission.INTERNET" />Since the Pub/Sub client will also need to know the network state, add this permission too:
<uses-permission android:name="android.permission.ACCESS_NETWORK_STATE" />- Create a project in the Google Cloud Platform console.
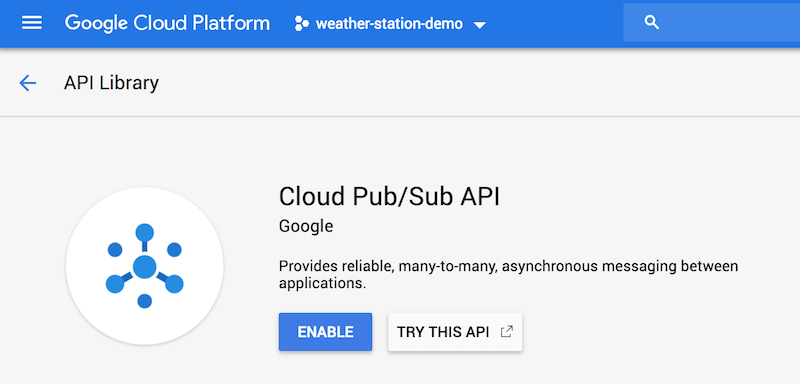
- Under API & Service dashboard, enable the following APIs: Cloud Pub/Sub.
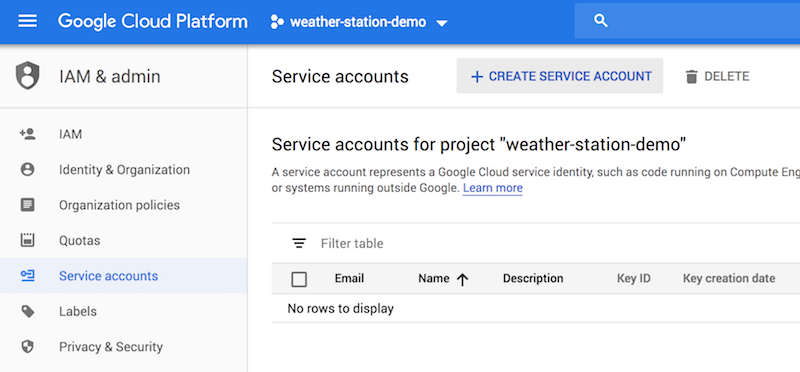
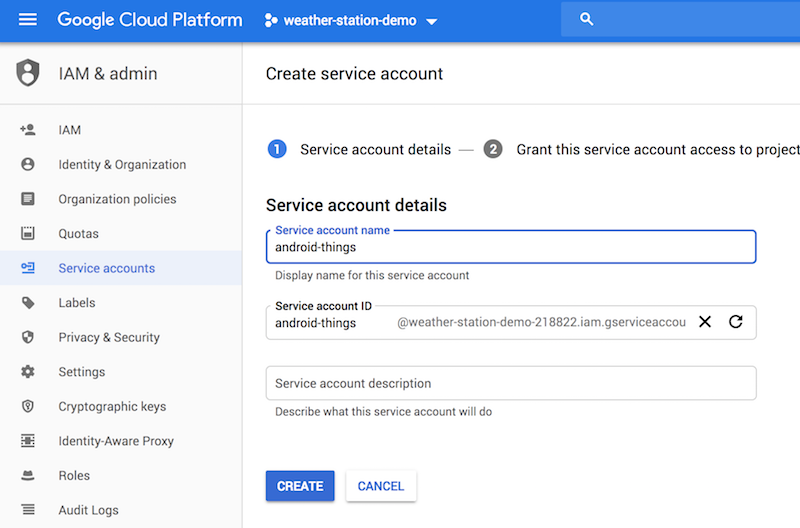
- Under IAM & Admin, create a new Service Account, provision a new private key with JSON format and save the generated credentials with the filename
credentials.json.
- Under Pub/Sub: create a new topic (e.g.
weather) and in the Permissions add the service account created in the previous step with the role Pub/Sub Publisher. - Under Pub/Sub: create a new Pull subscription on your new topic.
- Add the
credentials.jsonyou downloaded in the previous steps toapp/src/main/res/raw/folder. - In
app/build.gradle, replace thebuildConfigFieldvalues with values from your project setup.
buildConfigField "String", "PROJECT_ID", '"weather-station-demo-xxxx"'
buildConfigField "String", "PUBSUB_TOPIC", '"weather"'
private PubsubPublisher mPubsubPublisher;

@Override
protected void onCreate(Bundle savedInstanceState) {
    super.onCreate(savedInstanceState);
    Log.d(TAG, "Started Weather Station");

	...

	// start Cloud PubSub Publisher if cloud credentials are present.
    int credentialId = getResources().getIdentifier("credentials", "raw", getPackageName());
    if (credentialId != 0) {
        try {
            mPubsubPublisher = new PubsubPublisher(this, "weatherstation",
                BuildConfig.PROJECT_ID, BuildConfig.PUBSUB_TOPIC, credentialId);
            mPubsubPublisher.start();
        } catch (IOException e) {
            Log.e(TAG, "error creating pubsub publisher", e);
        }
    }
}@Override
protected void onStart() {
super.onStart();
// ...
mSensorManager.registerListener(mPubsubPublisher.getTemperatureListener(), temperature,
SensorManager.SENSOR_DELAY_NORMAL);
mSensorManager.registerListener(mPubsubPublisher.getPressureListener(), pressure,
SensorManager.SENSOR_DELAY_NORMAL);
}@Override
protected void onDestroy() {
super.onDestroy();
if (mPubsubPublisher != null) {
mSensorManager.unregisterListener(mPubsubPublisher.getTemperatureListener());
mSensorManager.unregisterListener(mPubsubPublisher.getPressureListener());
mPubsubPublisher.close();
mPubsubPublisher = null;
}
}The default publishing interval is 1 minutes, you can tweak it in class PubsubPublisher to accelerate the test:
private static final long PUBLISH_INTERVAL_MS = TimeUnit.MINUTES.toMillis(1);Now launch again your project, you should be able to see in your Logcat if the publish is success. Then you can check if your data is ingested in Google Cloud Pub/Sub by using gcloud client, running the following command:
gcloud --project <CLOUD_PROJECT_ID> beta pubsub subscriptions pull <PULL_SUBSCRIBTION_NAME>
TO install
glcoudclient: https://cloud.google.com/sdk/gcloud/
Raise hands when you are done 👋🏻
Please uninstall your application from the Android Things board you use by running this adb command:
$ adb uninstall com.example.androidthings.weatherstation
Hope you all enjoyed this hands-on and learned something about IoT & Android Things 🤓
