DSWaveformImage offers a native interfaces for drawing the envelope waveform of audio data in iOS, iPadOS, macOS or via Catalyst. To do so, you can use
WaveformImageView(UIKit) /WaveformView(SwiftUI) to render a static waveform from an audio file orWaveformLiveView(UIKit) /WaveformLiveCanvas(SwiftUI) to realtime render a waveform of live audio data (e.g. fromAVAudioRecorder)WaveformImageDrawerto generate a waveformUIImagefrom an audio file
Additionally, you can get a waveform's (normalized) [Float] samples directly as well by
creating an instance of WaveformAnalyzer.
For a practical real-world example usage of a SwiftUI live audio recording waveform rendering, see RecordingIndicatorView.
You may also find the following iOS controls written in Swift interesting:
- SwiftColorWheel - a delightful color picker
- QRCode - a customizable QR code generator
I'm doing all this for fun and joy and because I strongly believe in the power of open source. On the off-chance though, that using my library has brought joy to you and you just feel like saying "thank you", I would smile like a 4-year old getting a huge ice cream cone, if you'd support my via one of the sponsoring buttons
If you're feeling in the mood of sending someone else a lovely gesture of appreciation, maybe check out my iOS app 💌 SoundCard to send them a real postcard with a personal audio message.
- use SPM: add
https://github.com/dmrschmidt/DSWaveformImageand set "Up to Next Major" with "12.0.0"
import DSWaveformImage // for core classes to generate `UIImage` / `NSImage` directly
import DSWaveformImageViews // if you want to use the native UIKit / SwiftUI views
Deprecated or discouraged but still possible alternative ways for older apps:
- since it has no other dependencies you may simply copy the
Sourcesfolder directly into your project - use carthage:
github "dmrschmidt/DSWaveformImage" ~> 7.0(last supported version is 10) - or, sunset since 6.1.1:
use cocoapods:pod 'DSWaveformImage', '~> 6.1'
DSWaveformImage provides 3 kinds of tools to use
- native SwiftUI views - SwiftUI example usage code
- native UIKit views - UIKit example usage code
- access to the raw renderes and processors
The core renderes and processors as well as SwiftUI views natively support iOS & macOS, using UIImage & NSImage respectively.
@State var audioURL = Bundle.main.url(forResource: "example_sound", withExtension: "m4a")!
WaveformView(audioURL: audioURL)@StateObject private var audioRecorder: AudioRecorder = AudioRecorder() // just an example
WaveformLiveCanvas(samples: audioRecorder.samples)let audioURL = Bundle.main.url(forResource: "example_sound", withExtension: "m4a")!
waveformImageView = WaveformImageView(frame: CGRect(x: 0, y: 0, width: 500, height: 300)
waveformImageView.waveformAudioURL = audioURLFind a full example in the sample project's RecordingViewController.
let waveformView = WaveformLiveView()

// configure and start AVAudioRecorder
let recorder = AVAudioRecorder()
recorder.isMeteringEnabled = true // required to get current power levels

// after all the other recording (omitted for focus) setup, periodically (every 20ms or so):
recorder.updateMeters() // gets the current value
let currentAmplitude = 1 - pow(10, recorder.averagePower(forChannel: 0) / 20)
waveformView.add(sample: currentAmplitude)Note: Calculations are always performed and returned on a background thread, so make sure to return to the main thread before doing any UI work.
Check Waveform.Configuration in WaveformImageTypes for various configuration options.
let waveformImageDrawer = WaveformImageDrawer()
let audioURL = Bundle.main.url(forResource: "example_sound", withExtension: "m4a")!
waveformImageDrawer.waveformImage(fromAudioAt: audioURL, with: .init(
                                  size: topWaveformView.bounds.size,
                                  style: .filled(UIColor.black)),
                                  renderer: LinearWaveformRenderer()) { image in
    // need to jump back to main queue
    DispatchQueue.main.async {
        self.topWaveformView.image = image
    }
}let audioURL = Bundle.main.url(forResource: "example_sound", withExtension: "m4a")!
waveformAnalyzer = WaveformAnalyzer(audioAssetURL: audioURL)
waveformAnalyzer.samples(count: 200) { samples in
print("so many samples: \(samples)")
}The public API has been updated in 9.1 to support async / await. See the example app for an illustration.
public class WaveformAnalyzer {
    func samples(count: Int, qos: DispatchQoS.QoSClass = .userInitiated) async throws -> [Float]
}

public class WaveformImageDrawer {
    public func waveformImage(
        fromAudioAt audioAssetURL: URL,
        with configuration: Waveform.Configuration,
        qos: DispatchQoS.QoSClass = .userInitiated
    ) async throws -> UIImage
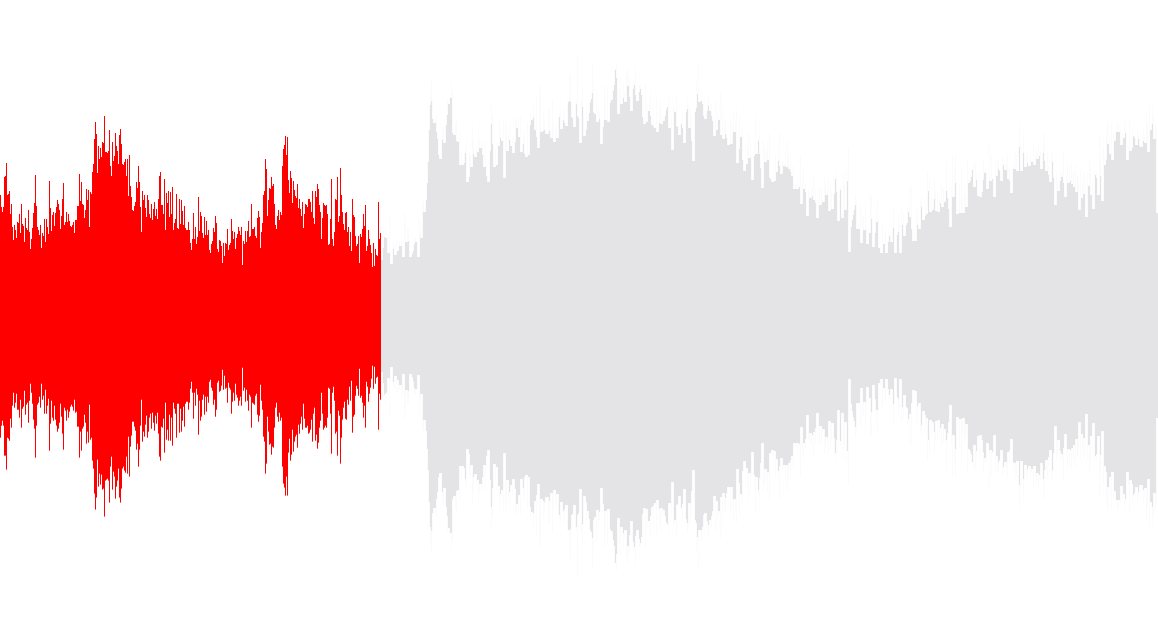
}If you're playing back audio files and would like to indicate the playback progress to your users, you can find inspiration in this ticket. There's various other ways of course, depending on your use case and design. One way to achieve this in SwiftUI could be
// @State var progress: CGFloat = 0 // must be between 0 and 1

ZStack(alignment: .leading) {
    WaveformView(audioURL: audioURL, configuration: configuration)
    WaveformView(audioURL: audioURL, configuration: configuration.with(style: .filled(.red)))
        .mask(alignment: .leading) {
            GeometryReader { geometry in
                Rectangle().frame(width: geometry.size.width * progress)
            }
        }
}
This will result in something like the image below.
Keep in mind though, that this approach will calculate and render the waveform twice initially. This will be more than fine for 95% of typical use cases. If you do have very strict performance requirements however, you may want to use WaveformImageDrawer directly instead of the build-in views. There is currently no plan to integrate this as a 1st class citizen as every app will have different requirements, and WaveformImageDrawer as well as WaveformAnalyzer are as simple to use as the views themselves.
For one example way to display waveforms for audio files on remote URLs see dmrschmidt#22.
Waveforms can be rendered in 2 different ways and 5 different styles each.
By default LinearWaveformRenderer is used, which draws a linear 2D amplitude envelope.
CircularWaveformRenderer is available as an alternative, which can be passed in to the WaveformView or WaveformLiveView respectively. It draws a circular
2D amplitude envelope.
You can implement your own renderer by implementing WaveformRenderer.
The following styles can be applied to either renderer:
- filled: Use solid color for the waveform.
- outlined: Draws the envelope as an outline with the provided thickness.
- gradient: Use gradient based on color for the waveform.
- gradientOutlined: Use gradient based on color for the waveform. Draws the envelope as an outline with the provided thickness.
- striped: Use striped filling based on color for the waveform.
live-recording.mov
In 12.0.0
- The rendering pipeline was split out from the analysis. You can now create your own renderes by subclassing
WaveformRenderer. - A new
CircularWaveformRendererhas been added. positionwas removed fromWaveform.Configuration, see 0447737.- new
Waveform.Styleoption have been added and need to be accounted for inswitchstatements etc.
In 11.0.0 the library was split into two: DSWaveformImage and DSWaveformImageViews. If you've used any of the native views bevore, just add the additional import DSWaveformImageViews.
The SwiftUI views have changed from taking a Binding to the respective plain values instead.
In 9.0.0 a few public API's have been slightly changed to be more concise. All types have also been grouped under the Waveform enum-namespace. Meaning WaveformConfiguration for instance has become Waveform.Configuration and so on.
In 7.0.0 colors have moved into associated values on the respective style enum.
Waveform and the UIImage category have been removed in 6.0.0 to simplify the API.
See Usage for current usage.
SoundCard - postcards with sound lets you send real, physical postcards with audio messages. Right from your iOS device.
DSWaveformImage is used to draw the waveforms of the audio messages that get printed on the postcards sent by SoundCard - postcards with audio.


