This plugin adds support for flake8 # noqa and # flake8: noqa.
With this plugin installed PyCharm will now show error markers any more as long as one of the two markers are defined.
Previously you had to do this to remove warnings from both flake8 and PyCharm:
# noinspection PyUnusedLocal
def foo():
    x = 1 # noqa
Now you can just use flake8's markers:
def foo():
    x = 1 # noqa
or
# flake8: noqa
def foo():
x = 1- I'm not planning to do much further work on this but I'm always glad to get pull requests
- This code and your contribution is licensed under the BSD-2-clause license.
For details about the webinar see the PyCharm blog. The repository used as base for the webinar is available at https://github.com/jansorg/pycharm-webinar-base.
The info below is still useful it you'd like to work on plugin.
I'm sorry that the initial setup is this complicated. You'll only need to this once, promise!
These steps won't be shown during the webinar. They're necessary only once to setup your environment to work on a Python plugin.
-
Clone this repository:
git clone https://github.com/jansorg/pycharm-webinar-base.git
-
Install IntelliJ 2018.3.3 (Community or Ultimate).
Download it from JetBrains. Feel free to use the Toolbox app, if you prefer that.
In the following steps we assume that you downloaded 2018.3.3. If you didn't, then make sure that you choose the right versions of the Python plugins.
-
Start the IntelliJ IDE. Make sure that the DevKit plugin is enabled, we'll need it!
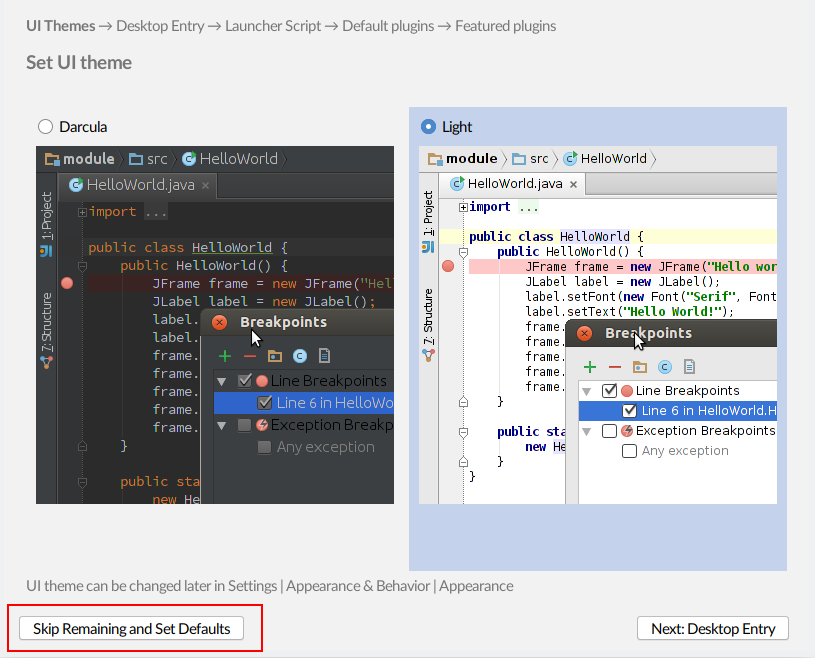
- If it's the first statup, then it'll look like this. Choosing 'Skip Remaining and Set Defaults' is fine.
- Choose 'Open' if it's the first startup or "File > Open" if you're already using IntelliJ.
-
Make sure to choose the repository directory
pycharm-webinar-basein the file selector. If you don't then the project won't work for plugin development.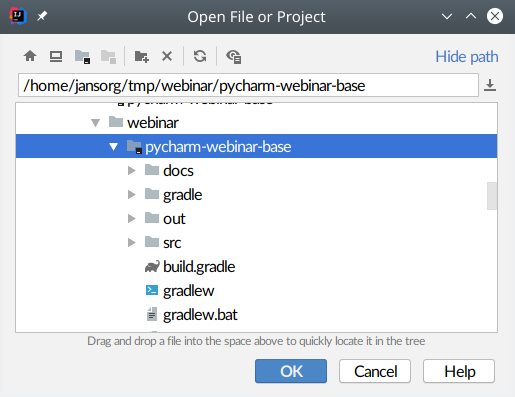
-
Setup your Java 8 SDK. IntelliJ still needs a Java 8 JDK.
Both OpenJDK or Oracle versions are compatible. Make sure to download a Java 8 SE JDK, not a JRE! Of course, if you already have Java 8 installed, then you dont't need to download it again.
Oracle's downloads are available at www.oracle.com/technetwork/java.
-
Choose
File > Project settings.... Click onNew..., then click onJDK.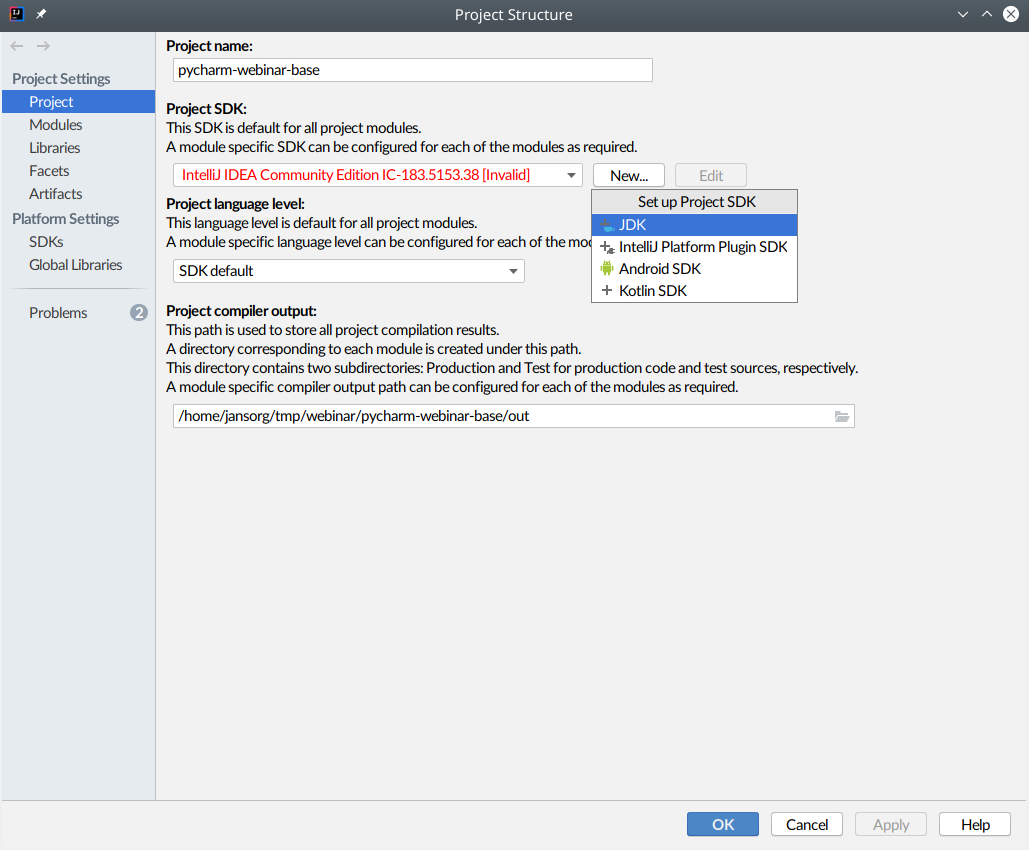
-
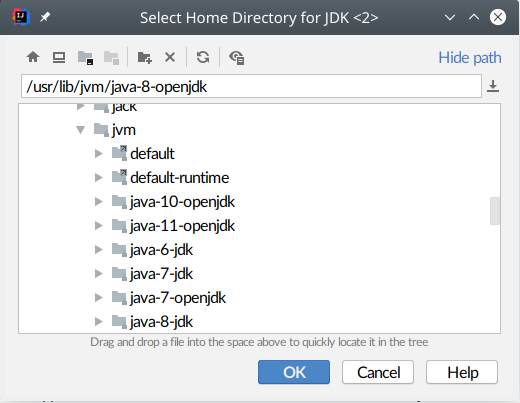
In the file selector choose the installation path of your Java 8 SDK:
-
Now setup your IntelliJ SDK. Click
New...on the project page and selectIntelliJ Platform Plugin SDK. The default location should be the installation path of your IntelliJ 2018.3.3. Use this path for your new SDK setting.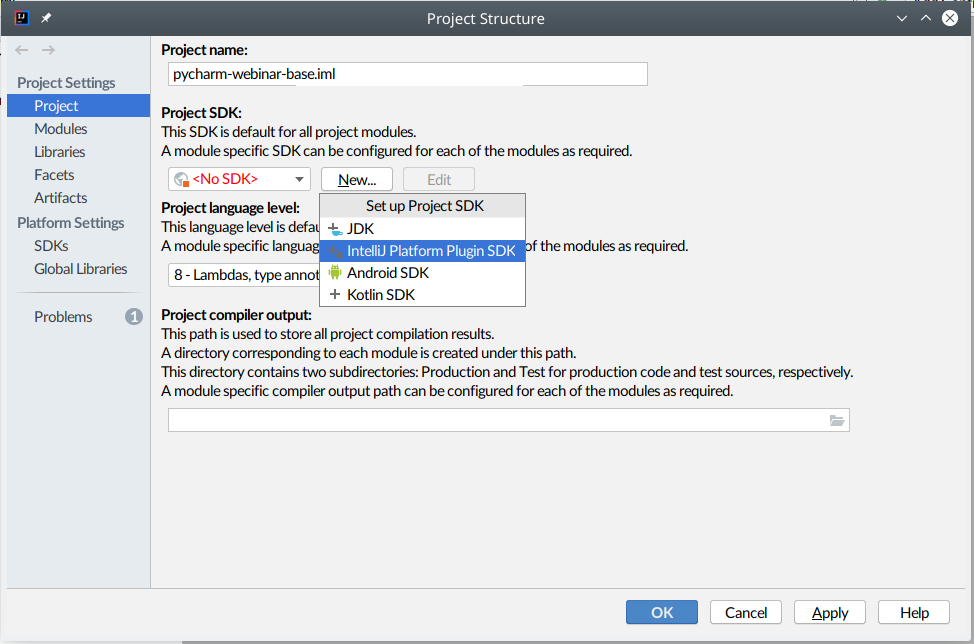
-
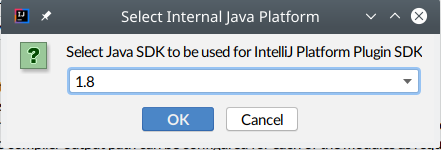
Make sure to select your Java 1.8 SDK in the next screen:
-
-
Configure your IntelliJ SDK
-
Choose
File > Project settings...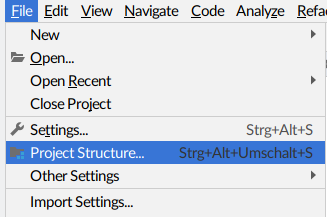
-
Now setup your IntelliJ SDK. Click
New...on the project page and selectIntelliJ Platform Plugin SDK. The default location should be the installation path of your IntelliJ 2018.3.3. Use this path for your new SDK setting. -
Make sure to choose your Java 1.8 SDK in the next screen:
-
-
Now download the Python plugin to finish the setup of your project's SDK.
Note: The PyCharm package can't be used as an SDK because it's not coming with the plugin development tooling we need.
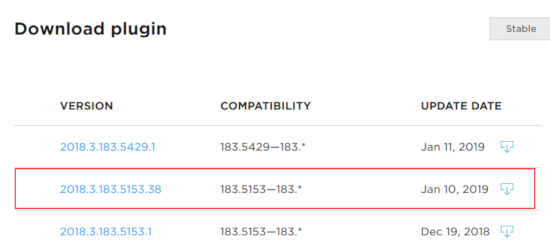
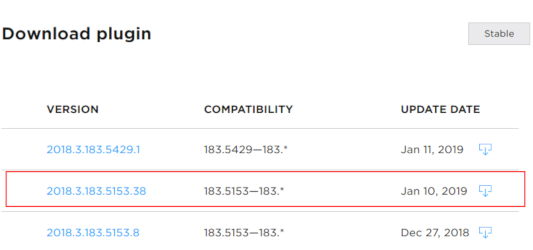
Download the PyCharm plugin which matches your edition of IntelliJ. Choose the download which is compatible with 2018.3.3. The red markers are highlighting the compatible versions.
-
Plugin for IntelliJ Community: https://plugins.jetbrains.com/plugin/7322-python-community-edition\
-
Plugin for IntelliJ Ultimate: https://plugins.jetbrains.com/plugin/631-python
-
-
The downloaded file is a ZIP file. Unzip it on disk. We'll need it in the next step.
-
Add the PyCharm plugin to the SDK to let IntelliJ know about the Python plugin:
-
Choose
File > Project Settings ...and select the pageSDK: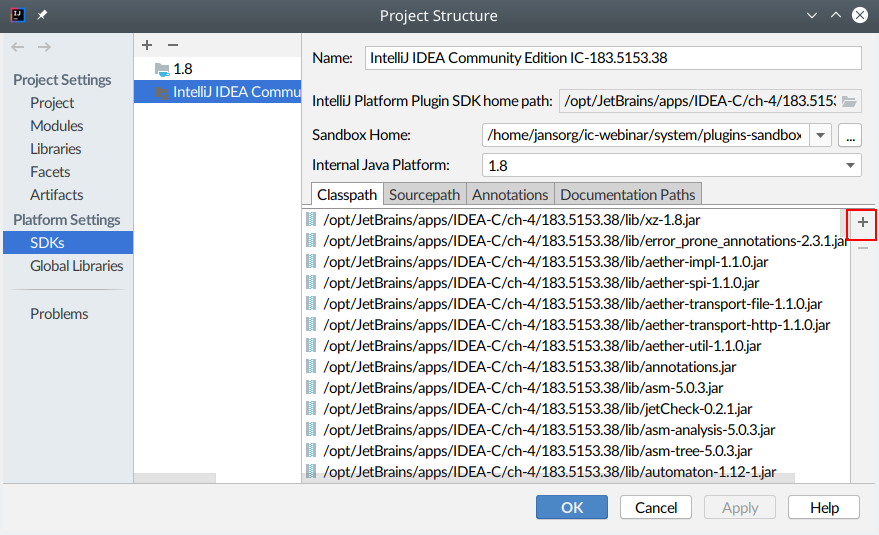
-
Navigate to the directory of the unzipped Python plugin. Select everything belwo
python-ce/libs/and clickOk: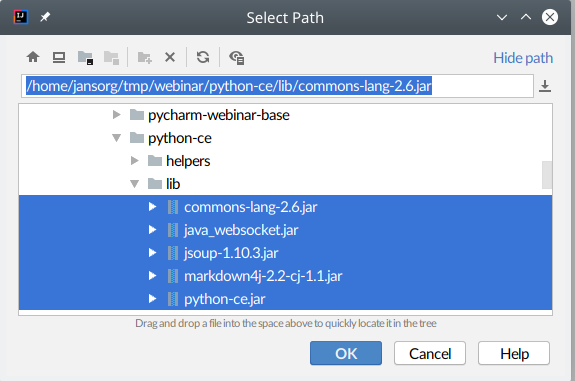
-
Close the dialog with
Ok.
-
-
Almost ready!
-
Run the plugin to test your environment: Click on the little arrow next to the run configuration
Webinar Plugin: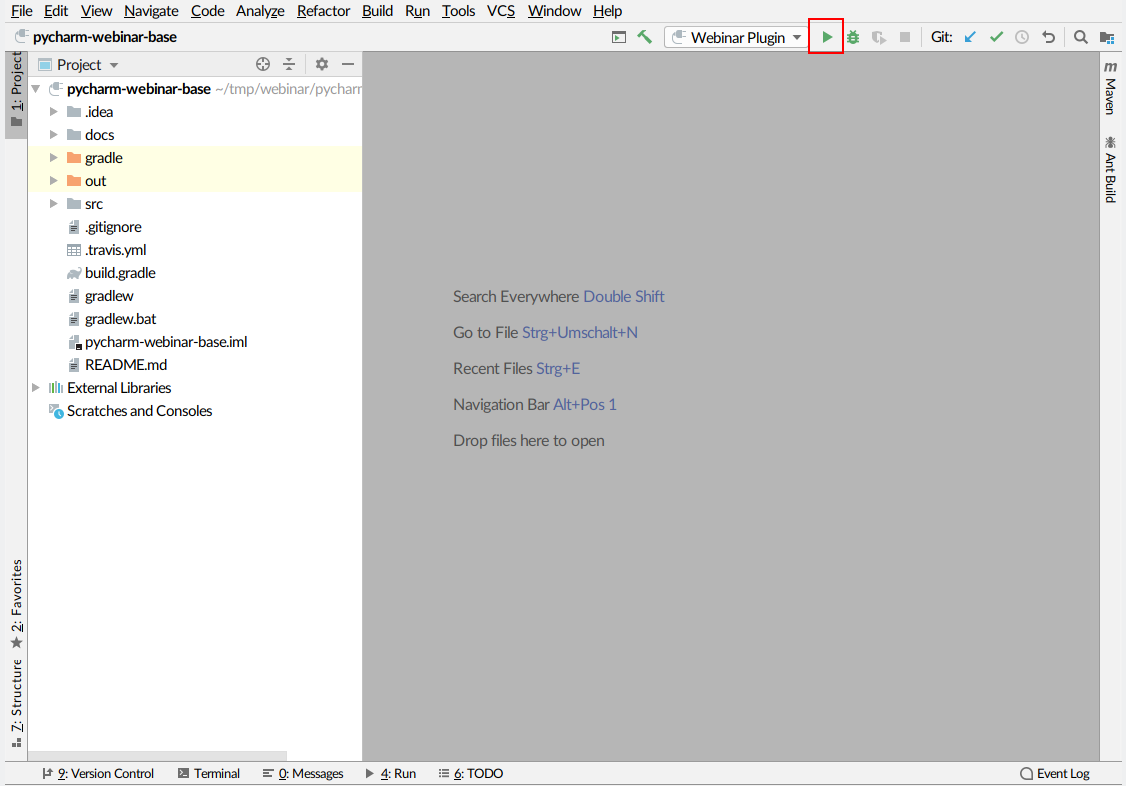
-
Now the plugin will be compiled, packaged and started within a new instance of IntelliJ. If you see error messages, the there's something wrong with your setup.


If you just want to execute your plugin in a IntelliJ test environment then execute this command:
gradle runIDEOf course, you'll need to install Gradle if you've not yet done that.
src/main/java: Java sourcessrc/main/resources: Java resource filessrc/test/java: Java test case sourcessrc/test/resources: Java test case resource files
.travis.yml configures a travis-ci.com build.
- Introduction to plugin development: https://www.plugin-dev.com/intellij/introduction/
- IntelliJ DevGuide: http://www.jetbrains.org/intellij/sdk/docs/welcome.html
- Gradle build plugin: http://www.jetbrains.org/intellij/sdk/docs/tutorials/build_system.html