Repository for iSamples Ansible scripts. As of this writing, there are two main Ansible playbooks, one for deploying iSamples to existing servers and one for configuring the iSamples software stack on a new server.
Ansible is based on python, and python is best managed by using virtual environments. iSamples manages its python dependencies using poetry, so it's assumed you have that installed and know how to use python virtual environments. Step by step:
- Create a virtualenv:
mkvirtualenv isamples-ansible - Or if the virtualenv already exists:
workon isamples-ansible - Install dependencies using poetry
poetry install - Open a poetry shell
poetry shell - Make sure it works:
ansible all -m ping --ask-pass
The first ansible playbook is used to push iSamples releases to one or more existing servers. The list of server groups to deploy to is contained in the hosts inventory file.
Before you run the Ansible playbook, you'll want to make a new tag, as we only deploy iSamples tags to dev off the develop branch using a custom tagger script.
- Have your iSamples Docker git repo checked out with all the submodules somewhere, then use that directory as the path argument to the python tagger script:
python create_release_tag.py <PATH>
When you run this, it will update the ansible group_vars/dev file with the latest tag. Ansible reads this to know which tag to check on the dev server.
After you've deployed the new tag to dev and you're happy that it works, you'll want to promote the dev tag to an official release. Similar to the tagging process for dev,
you'll want to run a different script on the same local checkout:
- Make sure you've activated the virtual environment running and run
python publish_main_tag.py <PATH>. By default, it will promote the last release tag, but you can also specify a specific one using the--source_tagargument.
IMPORTANT: Make sure you have already set up ssh passwordless access before you try running the playbook. The -K option is only for authenticating user once already on the machine.
After you've made a new tag, you can push it to one of the host groups by running the site.yml Ansible playbook.
- The host groups are defined in the
hostsfile, and you can specify the group under the limit parameter e.g.:ansible-playbook site.yml -i hosts -u <ssh_user> -K --limit 'isc'In that example, we chose theiscgroup, which will push to the iSamples Central host group. The options are as follows:- -i specifies the inventory file to use
- -u specifies the ssh user for the remote host (Ansible runs all communication over ssh)
- -K specifies to prompt for the credentials on the command-line. The deploy script runs many tasks as root via
sudo, so the ssh user will need sudo privileges. - --limit 'isc' specifies to limit the host inventory to the
ischost group
- References:
If you want to use a key file instead of prompting for a password, the command looks like this:
ansible-playbook site.yml -i hosts -u ubuntu --limit 'aws'
And you'll need to use an ssh agent before doing that, something like so:
ssh-agent bash
ssh-add ~/Downloads/isamples\ key\ pair.pem
You could test that part by manually issuing an ssh command and checking that it succeeds before running the ansible script.
- The directory where we check out the project may need to have been manually initialized with git lfs (mars needed manual intervention, hyde did not)
sudo apt install acl/focal-- the acl package is required for ansible to function properly on the remote host
- Create EC2 instance
- Create elastic IP, and assign it to the ec2 instance you just created. Those are two distinct steps!
- Create security group to allow http and https traffic (https://aws.amazon.com/premiumsupport/knowledge-center/connect-http-https-ec2/)
- Run all commands as ubuntu user you get out of the box with ec2. ssh by using the
.pemfile per the instructions in the ec2 console. - Checkout the isamples-ansible repo:
git clone https://github.com/isamplesorg/isamples-ansible.git - Install poetry:
curl -sSL https://install.python-poetry.org | python3 - poetry shellthenpoetry installto get the python environment with all the poetry dependencies available- Set up the URLs to work properly on the new instance:
- Register DNS to point at elastic IP (https://dns.he.net)
- Make sure the ansible group_vars/all hostname points to the hostname you configured in DNS
- Make local changes for various bits of config for the ansible settings
- In the ansible repo, you need to change the hostname variable in group_vars/all, e.g.
hostname: iscaws.isample.xyz- In the ansible repo, the built-in
systemdservice name isisamples_inabox, e.g.:services: [isamples_inabox] - In the ansible repo, you need to add your email for certbot registration in group_vars/all, e.g.
certbot_email: danny.mandel@gmail.com - In the ansible repo, you may need to change the redirect URL in
isamples-ina-box-nginx.j2. By default, it redirects allnginxrequests to<hostname>/isamples_inabox. Note that when you get to the Docker config there is a separate bit of config for this and the Docker config will need to match what you choose in this step. The lines in the nginx config look like this:location /isamples_inabox/ { rewrite /isamples_inabox/(.*) /$1 break;Make sure this matches up with whatever URL pattern you want to use for your instance.
- In the ansible repo, the built-in
- In the ansible repo, you need to change the hostname variable in group_vars/all, e.g.
ansible-playbook configure_isamples_server.yml -i hosts --limit 'localhost'-- this will fail the first time because the secrets don't exist and various bits of Docker config need to be edited.- Manually copy the model files into place (they aren't checked into git) at
/var/local/data/models- You can rsync them from mars.cyverse.org:
rsync -avz -e 'ssh -p 1657' dannymandel@mars.cyverse.org:/var/local/data/models/ /var/local/data/models/- Manually create a docker volume for the models
docker volume create metadata_models - Copy all the models into the docker volume after the instance is brought up for the first time:
sudo docker cp /var/local/data/models/OPENCONTEXT_material_config.json isamples_inabox-isamples_inabox-1:/app/metadata_models
- Manually create a docker volume for the models
- You can rsync them from mars.cyverse.org:
ansible-playbook configure_isamples_server.yml -i hosts --limit 'localhost'-- should work this time because you manually created the secrets- Manually edit the Docker config in the Docker checkout in the iSamples user directory. Note that by default the
systemdservice will use the.env.isamples_inaboxfile. Some variables you may want to change:UVICORN_ROOT_PATH=isamples_central-- This is the URL fragment after the hostname. MAKE SURE it matches te value you used in the nginx config up above.ISB_HOST=iscaws.isample.xyz-- This is the hostname you'll use when the Docker container starts up. MAKE SURE it matches the value you used in the Ansible group_vars up above.- For analytics integration, edit the following two variables:
ANALYTICS_URL = "https://metrics.isample.xyz/api/event"ANALYTICS_DOMAIN = "isamplescentral.isamples.org"
- If you need to debug why docker isn't starting: `sudo su - isamples; cd /home/isamples/isamples_inabox; docker compose --env-file .env.isamples_central up -d --build
- Note that the nginx config needs to match the paths specified in the isamples environment file you specify in the docker command. This is an easy way to get things out of whack.
- Manually dump the database on a known good instance:
pg_dump --data-only --dbname="isb_1" --host="localhost" --port=5432 --username=isb_writer > ./isamples.SQL - Load that database back up on the new instance:
psql -U isb_writer -d isb_1 -f isamples.SQL - Run the solr indexer in the iSB container:
docker exec -it isamples_inabox-isamples_inabox-1 bash- export PYTHONPATH=/app
python scripts/smithsonian_things.py --config ./isb.cfg populate_isb_core_solr
- Ping the URL to be able to see data: http://hostname/fragment/thing/select (e.g. https://iscaws.isample.xyz/isamples_central/thing/select)
- In source solr container:
mkdir /var/solr/data/backup - In source host:
curl "http://localhost:8984/solr/admin/collections?action=BACKUP&name=isb_core_records_backup&collection=isb_core_records&location=file:///var/solr/data/backup" - In source solr container:
tar czvf isb_core_records_backup.tgz isb_core_records_backup - In source host:
docker cp isamples_inabox-solr-1:/var/solr/data/backup/isb_core_records_backup.tgz . - In target host:
scp ubuntu@iscaws.isample.xyz:~/isb_core_records_backup.tgz . - In target solr container:
mkdir /var/solr/data/backup - In target host:
docker cp ./isb_core_records_backup.tgz isamples_inabox-solr-1:/var/solr/data/backup - In target solr container:
curl "http://localhost:8983/solr/admin/collections?action=RESTORE&name=isb_core_records_backup&collection=isb_core_records&location=file:///var/solr/data/backup"
- Create EC2 instance
- Create elastic IP, and assign it to the ec2 instance you just created. Those are two distinct steps!
- Create security group to allow http and https traffic (https://aws.amazon.com/premiumsupport/knowledge-center/connect-http-https-ec2/)
- Run all commands as ubuntu user you get out of the box with ec2. ssh by using the
.pemfile per the instructions in the ec2 console. - Checkout the isamples-ansible repo:
git clone https://github.com/isamplesorg/isamples-ansible.git - Install poetry:
curl -sSL https://install.python-poetry.org | python3 - poetry shellthenpoetry installto get the python environment with all the poetry dependencies available- Set up DNS for the plausible instance on (https://dns.he.net)
- In the ansible repo, you need to change the hostname variable in group_vars/all, e.g.
hostname: iscaws.isample.xyz - In the ansible repo, you need to add your email for certbot registration in group_vars/all, e.g.
certbot_email: danny.mandel@gmail.com - Edit the
plausible-conf.envfile in a shell using a text editor, and make sure to provide values for the the following variables:ADMIN_USER_EMAIL,ADMIN_USER_NAME,ADMIN_USER_PWD,BASE_URL - Set up plausible by running the ansible setup script:
ansible-playbook configure_plausible.yml -i hosts --limit 'localhost' - Note that for data to flow into the system, you'll need to create a new domain in plausible that matches up with the
ANALYTICS_DOMAINyou have configured in iSamples in a Box. You'll also need to make sure that theANALYTICS_URLin iSamples in a box properly points to the plausible hostname you just configured in this step.
The other ansible playbook is used to configure a new iSamples host with all the host dependencies. These instructions assume a virtual machine created and running on a local Mac, but there's no reason this ansible playbook couldn't be run against a remote linux server anywhere.
There are files checked into the repository with the .template extension. These files must be copied to another file in the same location on the filesystem with the .template extension omitted, e.g.
cp cloud-init.yaml.template cloud-init.yaml
After you copy the file, open it with your favorite text editor and customize before running the playbook. There are three such files in this repository:
cloud-init.yaml.template-- specifies details for virtual machine creation, mainly account credentials on the virtual machinegroup_vars/virtual_machines.template-- specifies details for the https setup with certbot. You'll need to have configured DNS beforehand, and ensure that port 80 of the IP that resolves the DNS is open for traffic and responding before running certbot.multipass-hosts.yml.template-- specifies details about where the virtual machine is located and which ssh account should be used to hit the VM
Multipass is a very handy program for installing and configuring a Linux VM on a Mac host. You can read about multipass here: https://multipass.run
- Install multipass:
brew install --cask multipass - Copy the
cloud-init.yaml.templatefile tocloud-init.yaml, then insert your user account name, public key, and plaintext password contents into the file. - Create a test VM:
multipass launch --name isamples-test --cloud-init cloud-init.yaml --disk 20G --mem 8G. Tweak parameters accordingly, but those settings do allow the iSamples software stack to come up as of 3/16/22. - To verify the VM is working as expected, ssh to the VM by using the IP address -- you can obtain it by running
multipass info isamples-test(or by looking at localhost if you're running with VirtualBox)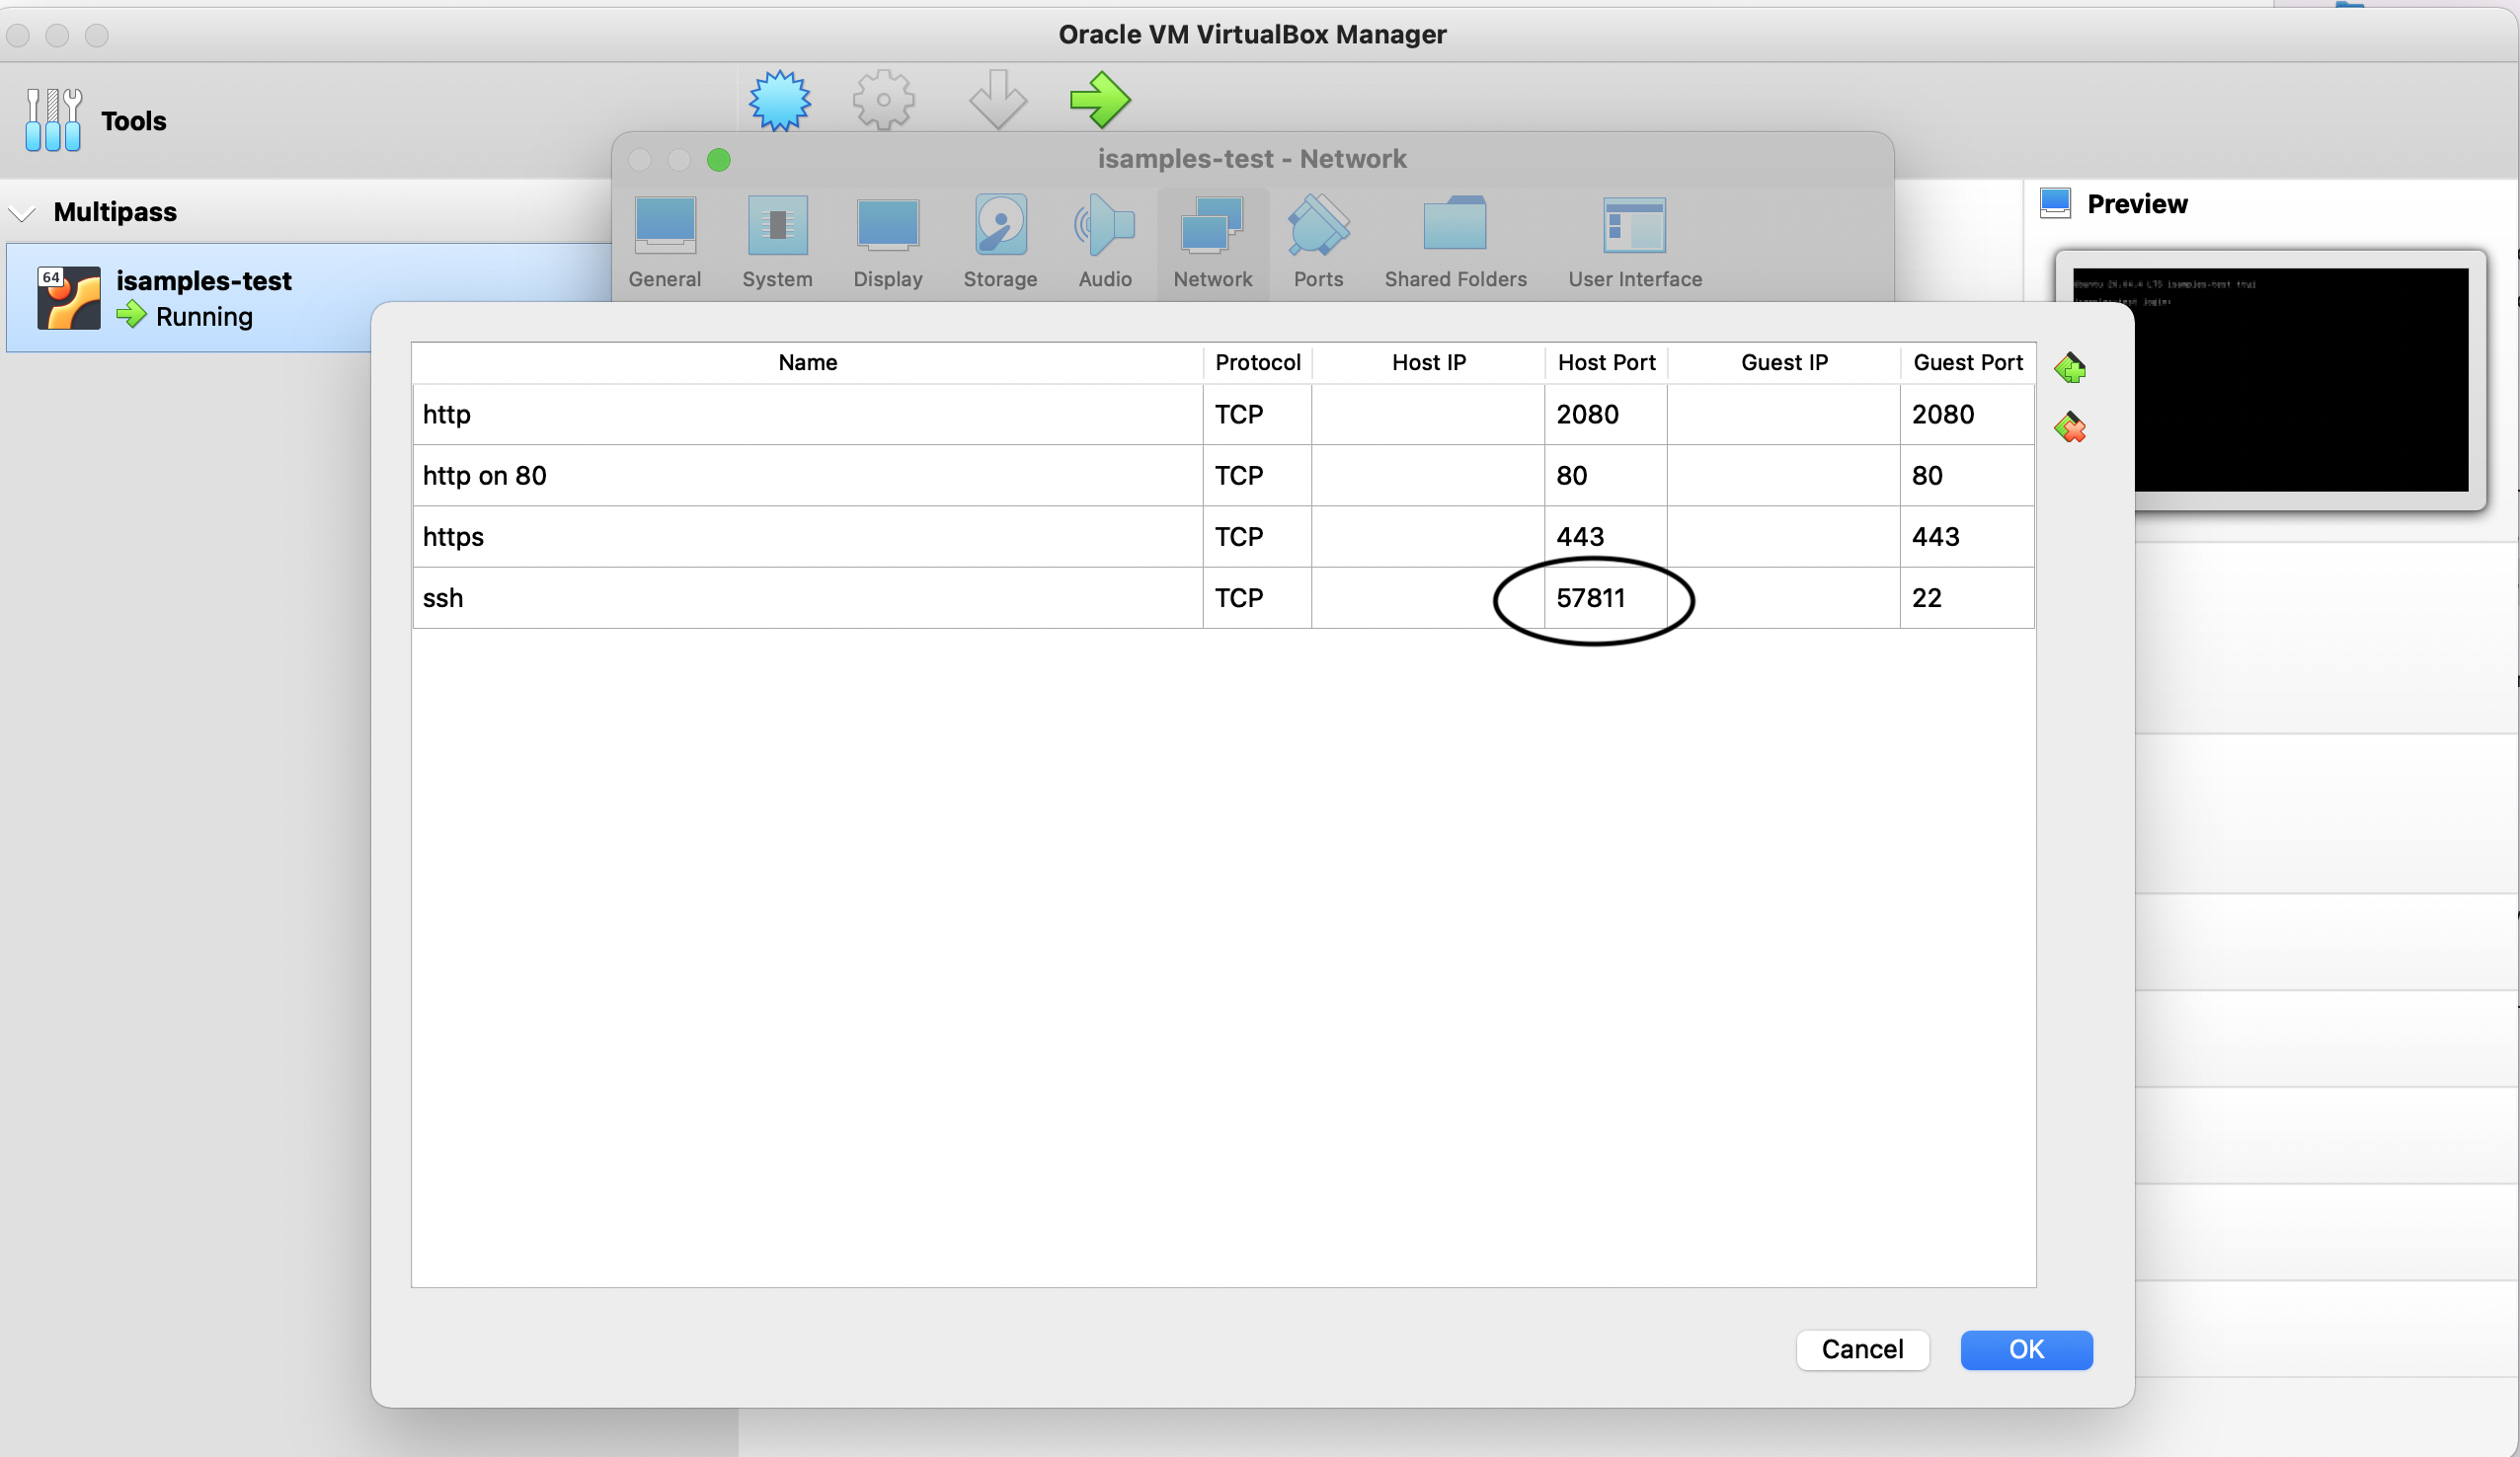
- Copy
multipass-hosts.yml.templatetomultipass-hosts.ymland insert the relevant values. - Verify you can ping the host with ansible:
ansible -i ./multipass-hosts.yml isamplesvm -m ping - Run the host configuration playbook:
ansible-playbook configure_isamples_server.yml -i ./multipass-hosts.yml -K

In order to get port forwarding to work on the Mac, you need to install virtualbox and tell multipass to use it for networking.
sudo multipass set local.driver=virtualbox- You can then configure port forwarding as described on this page: https://multipass.run/docs/using-virtualbox-in-multipass-macos
- Note that you won't get a standard IP address the way you do with hyperkit -- you'll need to launch VirtualBox, see which port is forwarded, and include that port in
multipass-hosts.yml. Since the port is forwarded, you can just set the host to localhost.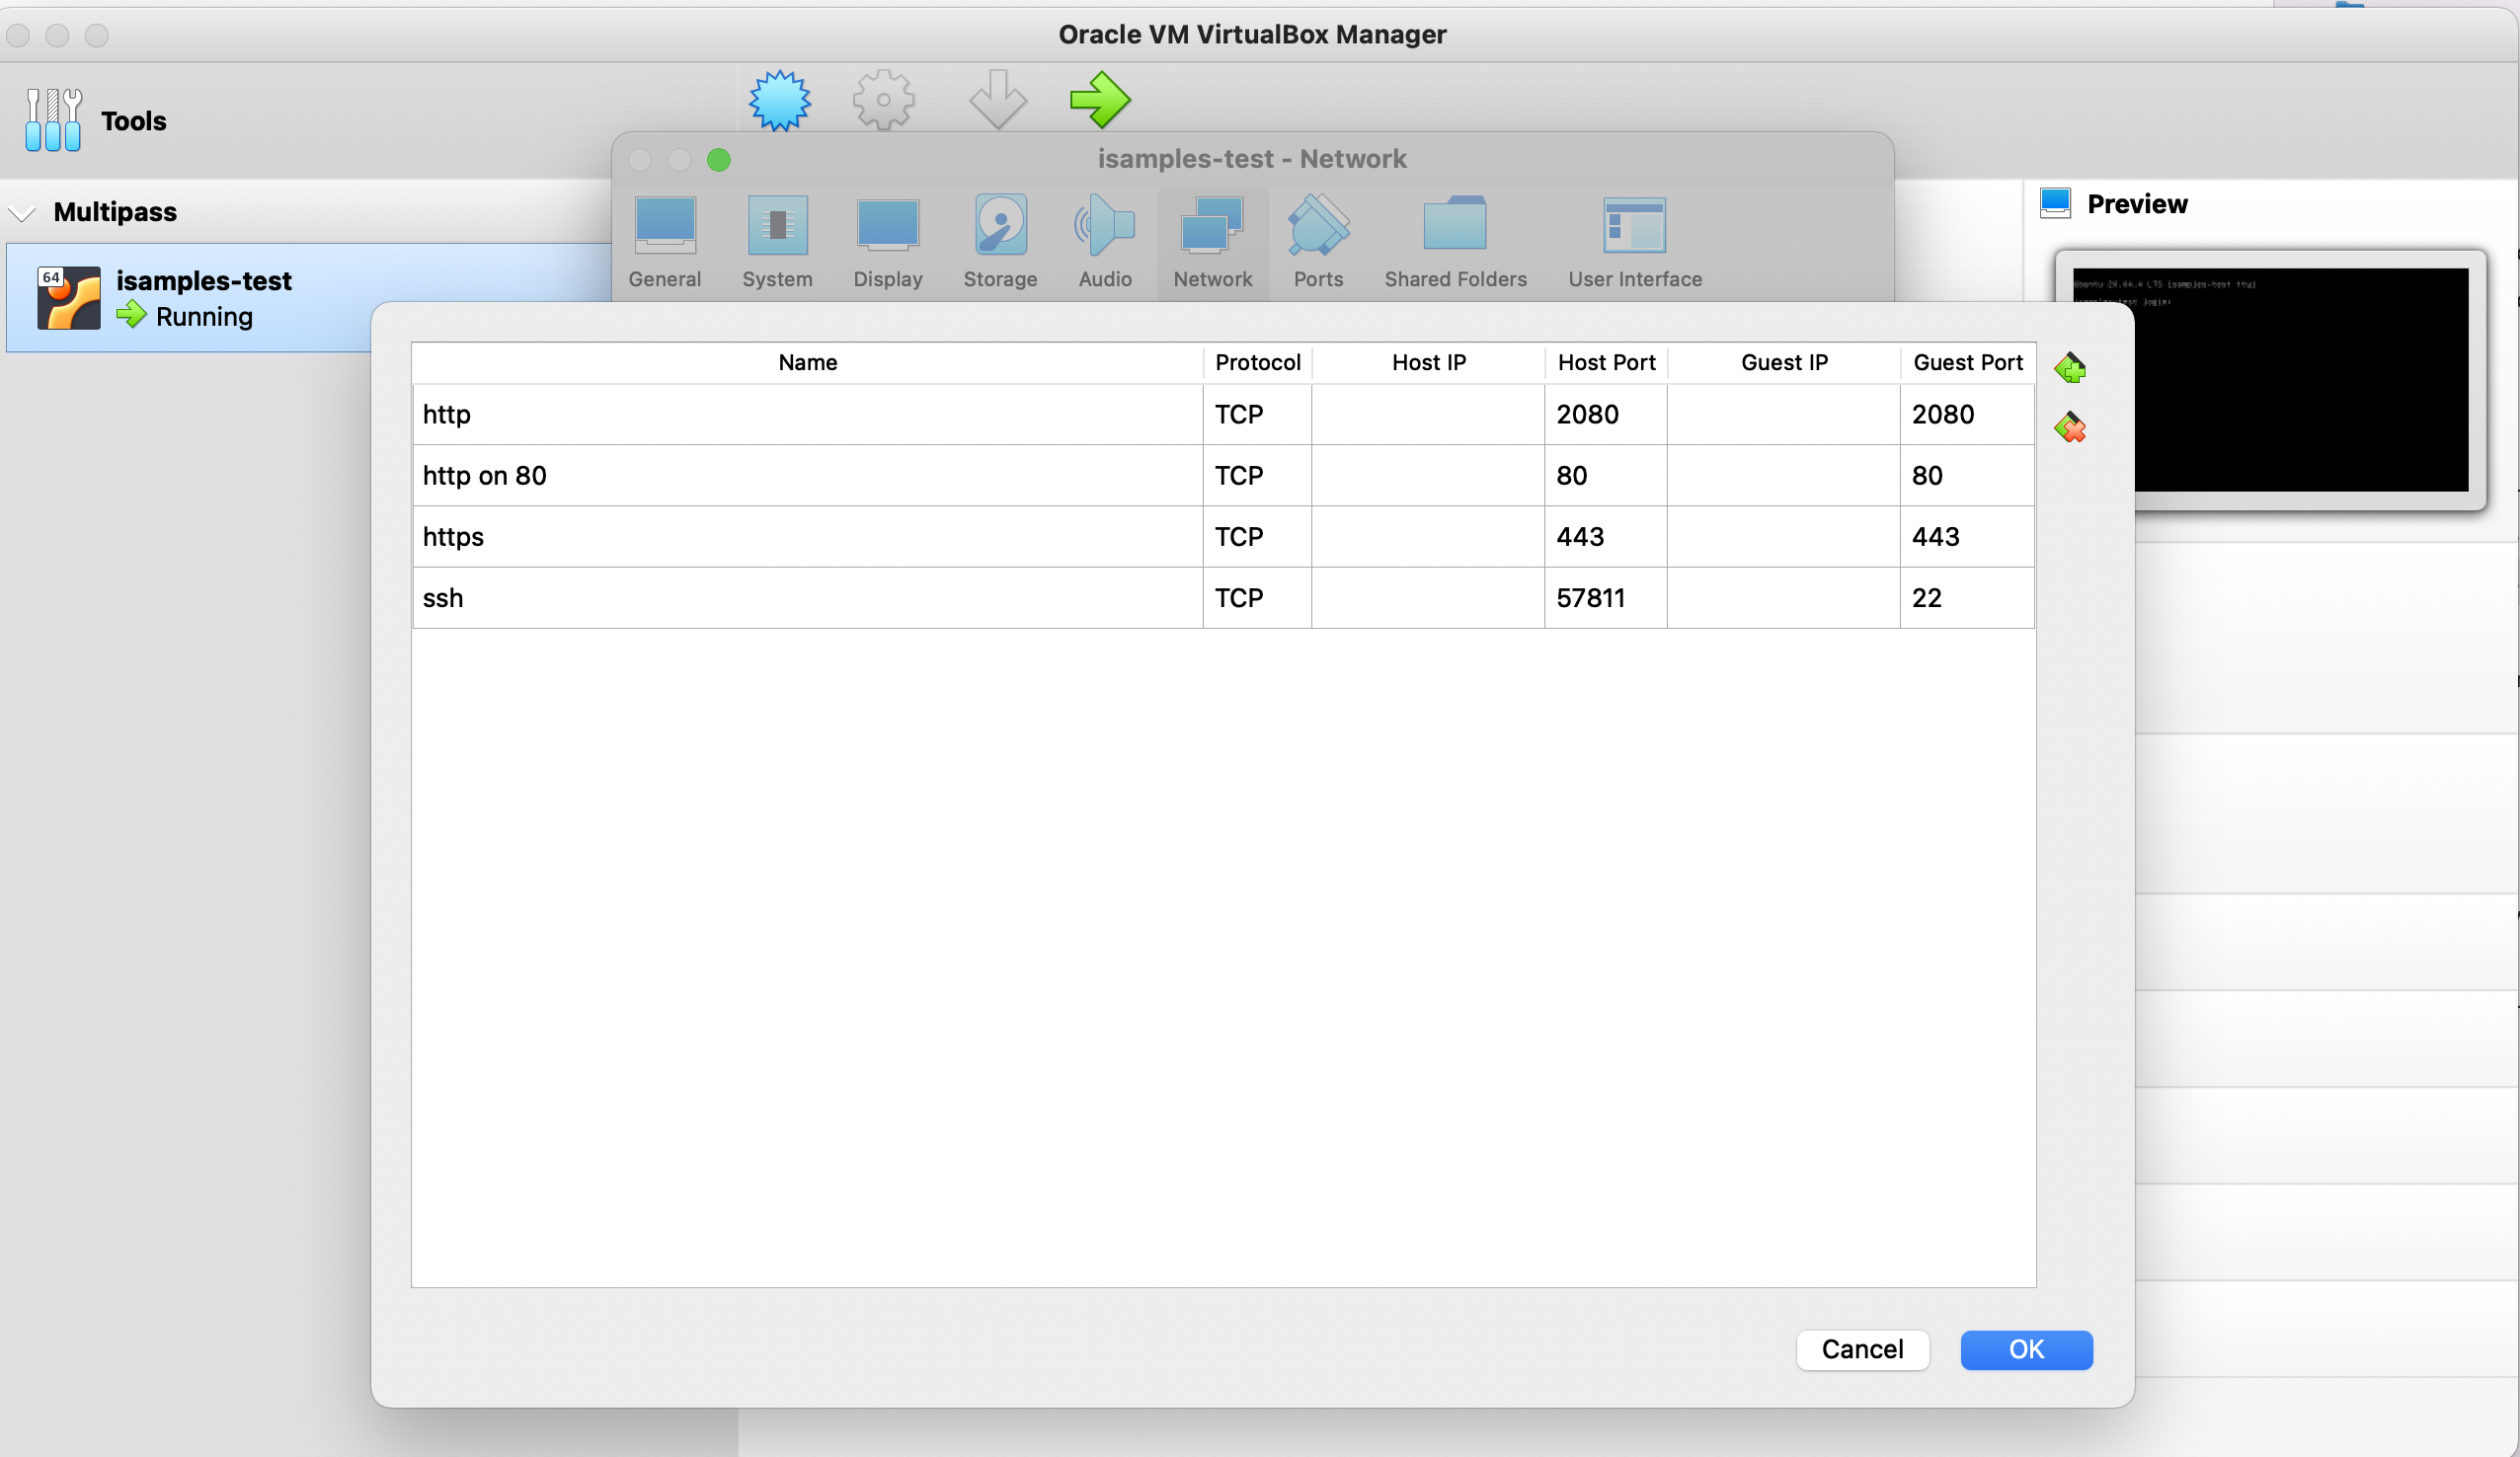

Due to the large size, the metadata models(that are finetuned BERT models) are not possible to be uploaded in the isamples_inabox repository. In order to solve this problem, we need to have the ansible playbook to manually copy the metadata models inside the target server. We have our roles/common/tasks/main.yml doing this for us.
- Download and unzip the metadata model folder into
/data/isamples/metadata_modelsof the machine that you will run the ansible playbook (or, you can change thesrcvalue of theansible.builtin.copycommand). - Run the ansible playbook, which will allow the
/data/isamples/metadata_modelscopied into the/home/isamples/isamples_inabox/isb/metadata_modelsof the target server.