Spring TLS Example
This is an example of using TLS (Transport Layer Security) with Spring Boot. In this example, TLS is enabled in both server and client. Basic Access Authorization is also enabled on the server side.
Introduction to TLS
Transport Layer Security (TLS) is a protocol that provides privacy and data integrity between two communicating applications, e.g., server and client. It's replacement for Secure Sockets Layer (SSL).
TLS provides a secured communication by encrypting the data transmitted using symmetric cryptography.
Key and Certificate Creation
Java keytool is a key and certificate management utility. It allows users to do the following:
-
Create and manage their own public/private key pairs and certificates. A certificate contains the public key (and some other information) used for authentication.
-
Allows to cache private keys and certificates in a file called keystore. A keystore may contain any certificate required to complete a chain of trust. Each certificate is associated with a unique alias. The private keys are protected with a password.
A keytool is part of the standard java distribution. For example in In MAC OS, it is located under:
/Library/Java/JavaVirtualMachines/jdk1.8.0_162.jdk/Contents/Home/bin
The generate-key.ssh shell script under script folder can be executed to
create keys and certificates. It does the following:
-
Generate a RSA 2048 public/private key pairs for the server and store in the the server keystore of type
PKCS12. The server keystore,server-keystore.p12, is created in theserver/main/resources/configfolder. -
Generate a RSA 2048 public/private key pairs for the client and store in the client keystore of type
PKCS12. The client keystore,client-keystore.p12is created in theclient/main/resources/configfolder. -
Export the server's certificate. A file named
server-public.ceris created in thescriptfolder. -
Export the client's certificate, A file named
client-public.ceris created in thescriptfolder. -
Import the server certificate,
server-public.cerin the client's keystore,client-keystore.p12. -
Import the client certificate,
server-public.cerin the client's keystore,server-keystore.p12(optional for TLS).
Configure TLS (SSL) in Spring Boot Server
TLS is configured in the Spring Boot server by the server.ssl.* properties
in the application.yml. Here is how the example server is configured in the server
application.yml file:
server:
  port: 8443
  ssl:
    key-store-type: PKCS12
    key-store: classpath:config/server-keystore.p12
    key-store-password: server
key-alias: server-
server.portspecifies the SSL port of the server. Spring Boot does not support the configuration of both an HTTP connector and an HTTPS connector via theapplication.yml. -
server.ssl.key-store-typespecifies the type of Java keystore. In this example, the keystore is ofPKCS12type. The other option isJKS, a proprietary Java specific format. Oracle recommendsPKCS12format. -
server.ssl.key-storespecifies the location of the keystore. In this example, the fileserver-keystore.p12(server keystore) in located in theresourcesfolder. -
server.ssl.key-store-passwordis the password used during the creation of the keystore to protect the private key by using the keytool. -
server.ssl.key-aliasis the alias used during the creation of the keystore using the keytool utility.
Enable TLS in Spring Boot Client
Configure a SSL Context with Trusted Store
Here is an example of creating a secured SSLContext which is used
to validate the identity of the HTTPS server against a list of trusted
certificates stored in the trust-store.
private HttpClient httpClient() throws IOException, GeneralSecurityException {
    SSLContext sslcontext =
        SSLContexts.custom()
            .loadTrustMaterial(
                creatKeyStore(sslProperties.getTrustStore(),
                    sslProperties.getTrustStoreType(),
                    sslProperties.getTrustStorePassword()),
                null)
            .build();
    ...
}
The client rejects any connection during the TLS handshake if the HTTPS server tries to authenticate with a certificate not present in the trusted store.
Configuring keystore in SSL context is optional.
private HttpClient httpClient() throws IOException, GeneralSecurityException {
    SSLContext sslcontext =
        SSLContexts.custom()
            ...
            .loadKeyMaterial(
                creatKeyStore(sslProperties.getKeyStore(),
                    sslProperties.getKeyStoreType(),
                    sslProperties.getKeyStorePassword()),
                sslProperties.getKeyPassword().toCharArray())
            .build();
    ...
}
Here is the code for method creatKeyStore:
   private KeyStore creatKeyStore(Resource resource, String storeType,
           String password) throws IOException, GeneralSecurityException {
       KeyStore ks = KeyStore.getInstance(storeType);
       ks.load(resource.getInputStream(), password.toCharArray());

       return ks;
   }
Create HttpClient
Once the SSL context is created, create the connection factory with the
newly created SSL context and the NoopHostnameVerifier.
private HttpClient httpClient() throws IOException, GeneralSecurityException {
    ...
    SSLConnectionSocketFactory socketFactory =
        new SSLConnectionSocketFactory(sslcontext, new NoopHostnameVerifier());

    HttpClientBuilder builder = HttpClients.custom();
    builder.setSSLSocketFactory(socketFactory);

    return builder.build();
}
The SSLConnectionSocketFactory.getDefaultHostnameVerifier() is not used
since it tries to match the server host name with the CN (common name) RDN
in the DN (distinguished name) provided in the server certificate. It's not used
as it's very restrictive. Where as NoopHostnameVerifier() doesn't verify host
name at all.
Create RestTemplate
Here is the code snippet for creating the RestTemplate:
@Bean
public RestTemplate restTemplate() throws IOException, URISyntaxException,
    GeneralSecurityException {
    RestTemplateBuilder builder = new RestTemplateBuilder();

    return builder.basicAuthorization(properties.getUsername(),
                       properties.getPassword())
                  .rootUri(clientURI())
                  .messageConverters(
                       new MappingJackson2HttpMessageConverter(objectMapper),
                       new StringHttpMessageConverter())
                  .requestFactory(requestFactory())
                  .errorHandler(new CustomErrorHandler(objectMapper))
                  .build();
}

private Supplier<ClientHttpRequestFactory> requestFactory() throws
            IOException, GeneralSecurityException {
    HttpComponentsClientHttpRequestFactory requestFactory
        = new HttpComponentsClientHttpRequestFactory();

    requestFactory.setHttpClient(httpClient());
    requestFactory.setConnectTimeout(properties.getConnectionTimeout());
    requestFactory.setReadTimeout(properties.getReadTimeout());

    return () -> requestFactory;
}
You can find the complete client code in ClientConfiguration.java.
Configure TLS (SSL) in Spring Boot Client
It's similar to the server SSL properties. If you don't want HTTPS turned-on in
client, you should specify the trust-store properties under a different
prefix other than server.ssl.*. The properties are in client application.yml.
server:
  ssl:
    trust-store-type: PKCS12
    trust-store: classpath:config/client-keystore.p12
    trust-store-password: client
    key-store-type: PKCS12
    key-store: classpath:config/client-keystore.p12
    key-password: client
    key-store-password: client
    key-alias: client
Build
To build the JAR, execute the following command from the parent directory:
mvn clean install
This should build the following Spring Boot jars:
-
The server jar,
spring-tls-server-1.1.0.jar, located inserver/targetfolder. -
The client jar,
spring-tls-client-1.1.0.jar, located inclient/targetfolder.
Run Server
To start the server, run the executable jar from the command:
java -jar server/target/spring-tls-server-1.1.0.jar

...
018-04-07 20:28:06.534  INFO 3379 --- [           main] d.s.w.p.DocumentationPluginsBootstrapper : Context refreshed
2018-04-07 20:28:06.568  INFO 3379 --- [           main] d.s.w.p.DocumentationPluginsBootstrapper : Found 1 custom documentation plugin(s)
2018-04-07 20:28:06.592  INFO 3379 --- [           main] s.d.s.w.s.ApiListingReferenceScanner     : Scanning for api listing references
2018-04-07 20:28:07.426  INFO 3379 --- [           main] o.s.b.w.embedded.tomcat.TomcatWebServer  : Tomcat started on port(s): 8443 (https) with context path ''
2018-04-07 20:28:07.430  INFO 3379 --- [           main] com.basaki.server.ServerApplication      : Started ServerApplication in 9.285 seconds (JVM running for 9.84)
This should start the server at port 8443. From the browser, you can access
the server swagger UI page at https://localhost:8443/swagger-ui.html.
Run Client
Similarly, run the executable jar from the command to start the client:
java -jar client/target/spring-tls-client-1.1.0.jar

...
und 1 custom documentation plugin(s)
2018-04-07 21:31:22.142  INFO 4633 --- [           main] s.d.s.w.s.ApiListingReferenceScanner     : Scanning for api listing references
2018-04-07 21:31:22.461  INFO 4633 --- [           main] o.s.b.w.embedded.tomcat.TomcatWebServer  : Tomcat started on port(s): 7081 (https) with context path ''
2018-04-07 21:31:22.465  INFO 4633 --- [           main] com.basaki.client.ClientApplication      : Started ClientApplication in 4.169 seconds (JVM running for 4.71)
This should start the client at port 7081. From the browser, you can access
the client swagger UI page at https://localhost:7081/swagger-ui.html.
Usage
-
Access the client Swagger UI at
https://localhost:7081/swagger-ui.html. -
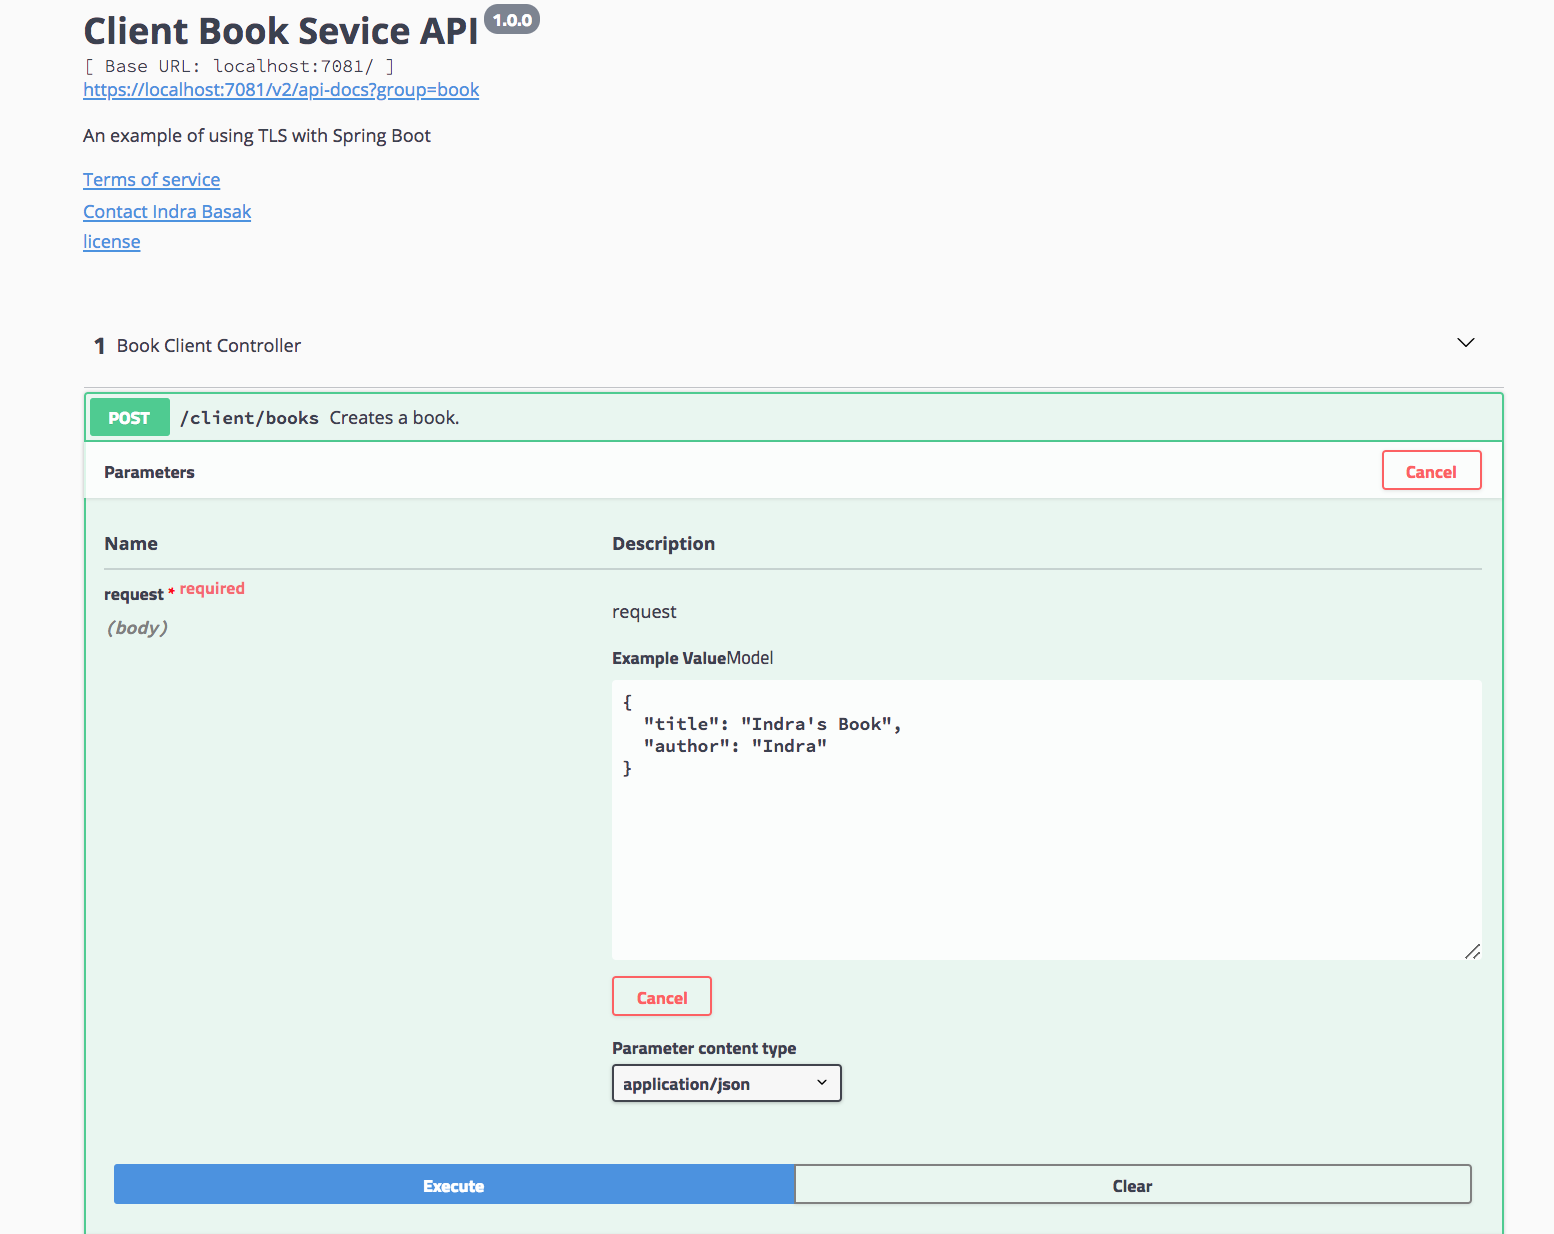
Make a POST request to create a book. The client in turn makes a request to the server to create a book.
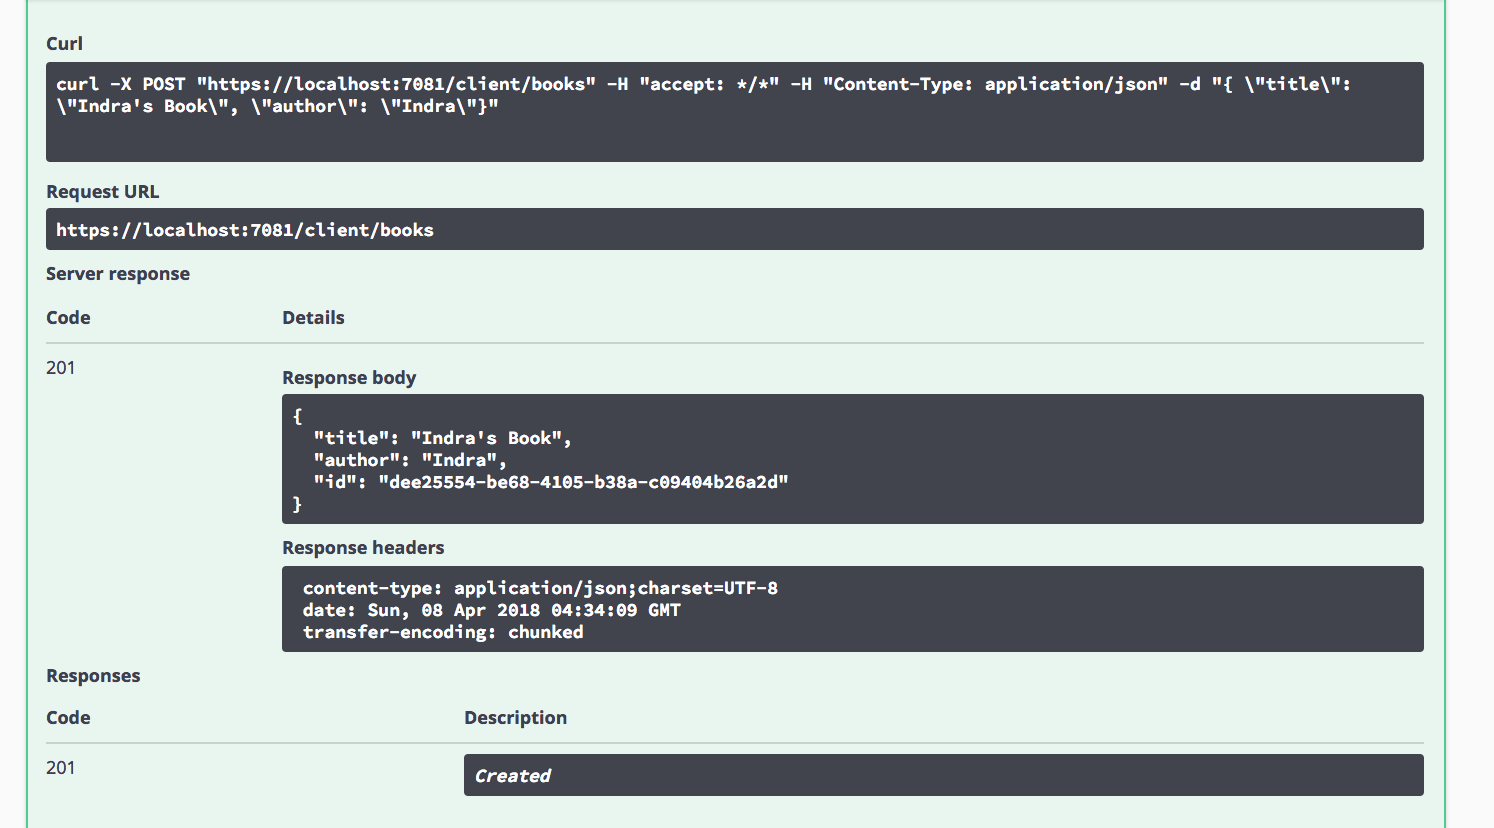
- If the request is successful, you should get a similar response as shown below:
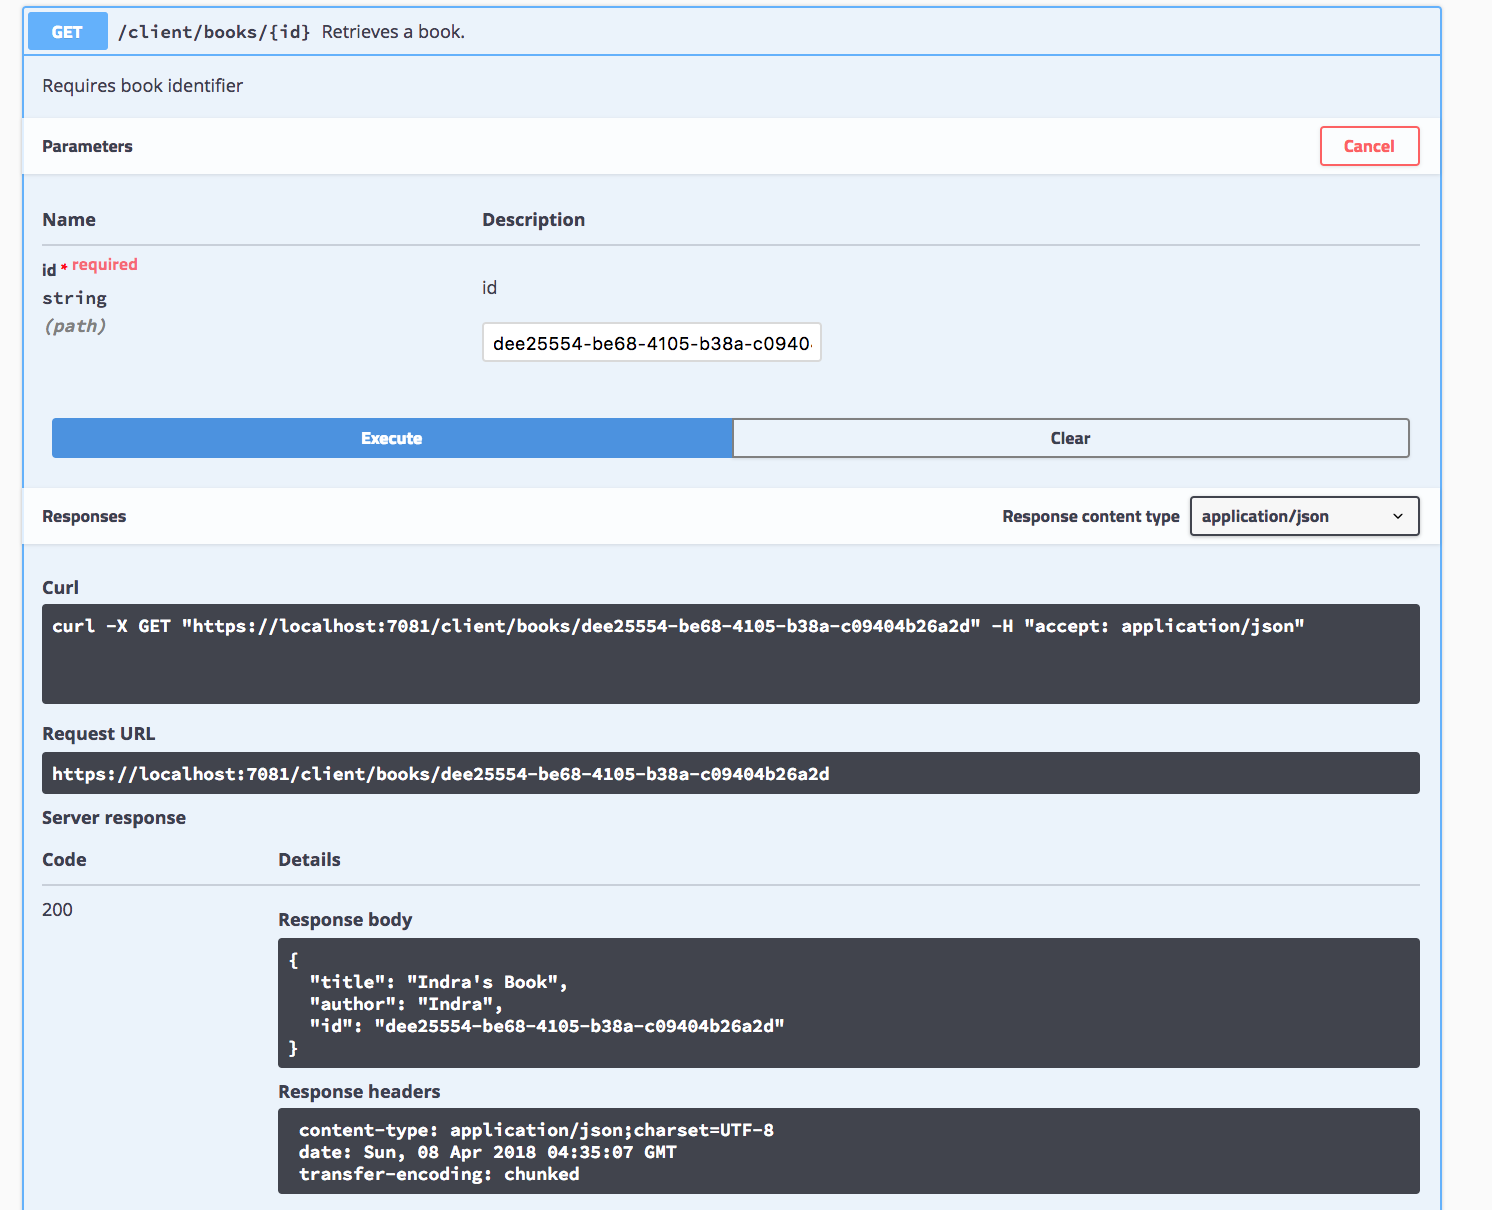
- Make a GET request to retrieve the newly created book. The client in turn makes a request to the server to retrieve the book. An example response is shown below:


