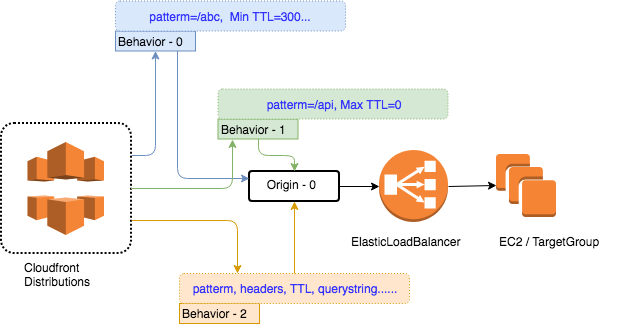
Today we are going to several configuration detail in Amazon CloudFront, which can support us to setup the distribution in front of our web services and application servers. From our last workshop, we already discussed about how to separate the static assets from dynamic content, if you want to review more detail, please check Here
For this workshop, we support following regions:
- N. Viginia(us-east-1)
- N. California(us-west-1)
- Tokyo(ap-northeast-1)
- Sydney(ap-southeast-2)
- Frankfurt(eu-central-1)
- London(eu-west-2)
Switch Region on the AWS console, a drag down menu near right-up corner.
- N. Viginia(us-east-1)
- N. California(us-west-1)
- Tokyo(ap-northeast-1)
- Sydney(ap-southeast-2)
- Frankfurt(eu-central-1)
- London(eu-west-2)
- Check if you already have a EC2 Key pair in your selected region.
- If not, create one through AWS Console > EC2 > Key Pairs > Create Key Pair.
- Remember to download the private key(.pem) and well saved.
- In usual, we will move it into ~/.ssh/ sub-folder in your home directory.
- To make it secure, remeber to change the privilege with command
chmod 0400 XXXXX.pem - If you are windows user, and you should download putty.exe and puttygen.exe from Here. And also check the document Here if you don't know how to convert .pem to .ppk
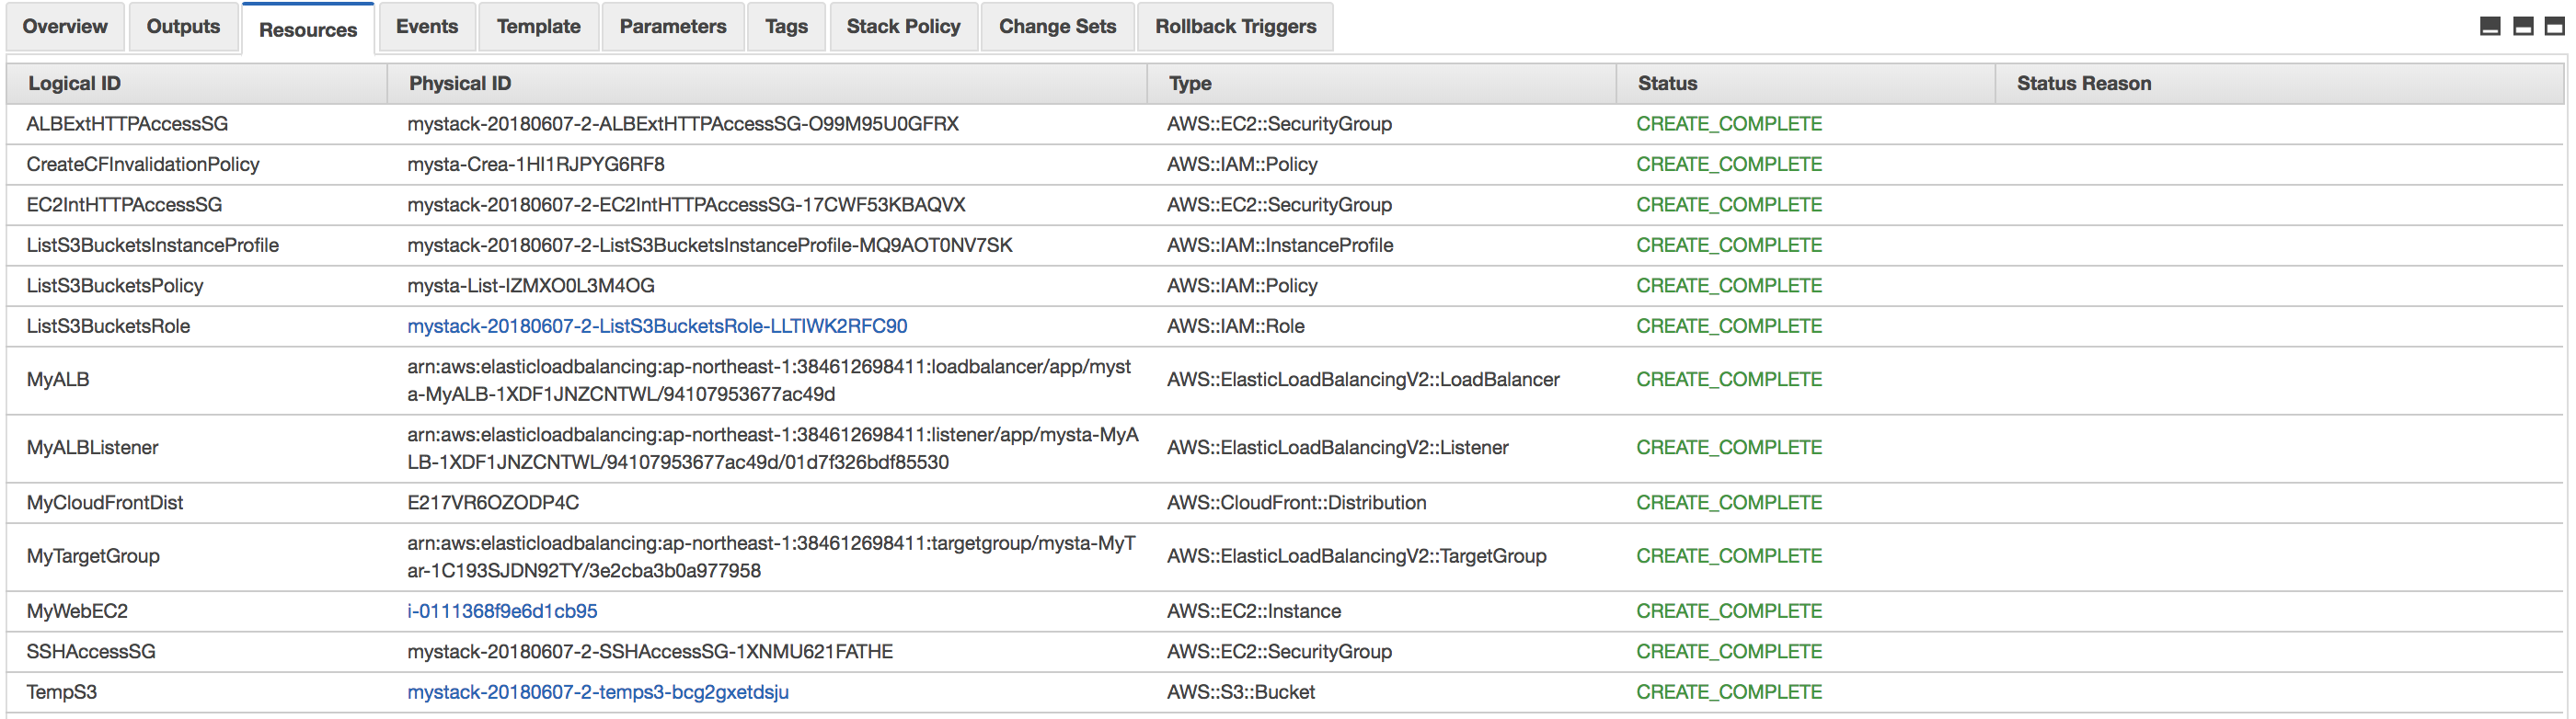
- Create your CoudFormation stack for this workshop: AWS Console > Cloudformation > Create Stack > from S3 template > https://s3-ap-northeast-1.amazonaws.com/workshop-data-public/cloudformation-workshop-20180620-ec2-alb-s3-cf.json
- Wait till the stack creation ready, the status will change to
CREATE_COMPLETE(20-25 minutes) - you can see the several information in "Resources" and "Output" sheet:

- Check the Web Service output from ALB- Open the Output Sheet, and check the ALBDNSName, you will find a link like 'http://xxxxxxx.region.amazonaws.com' Click the link you will see a response page like this:
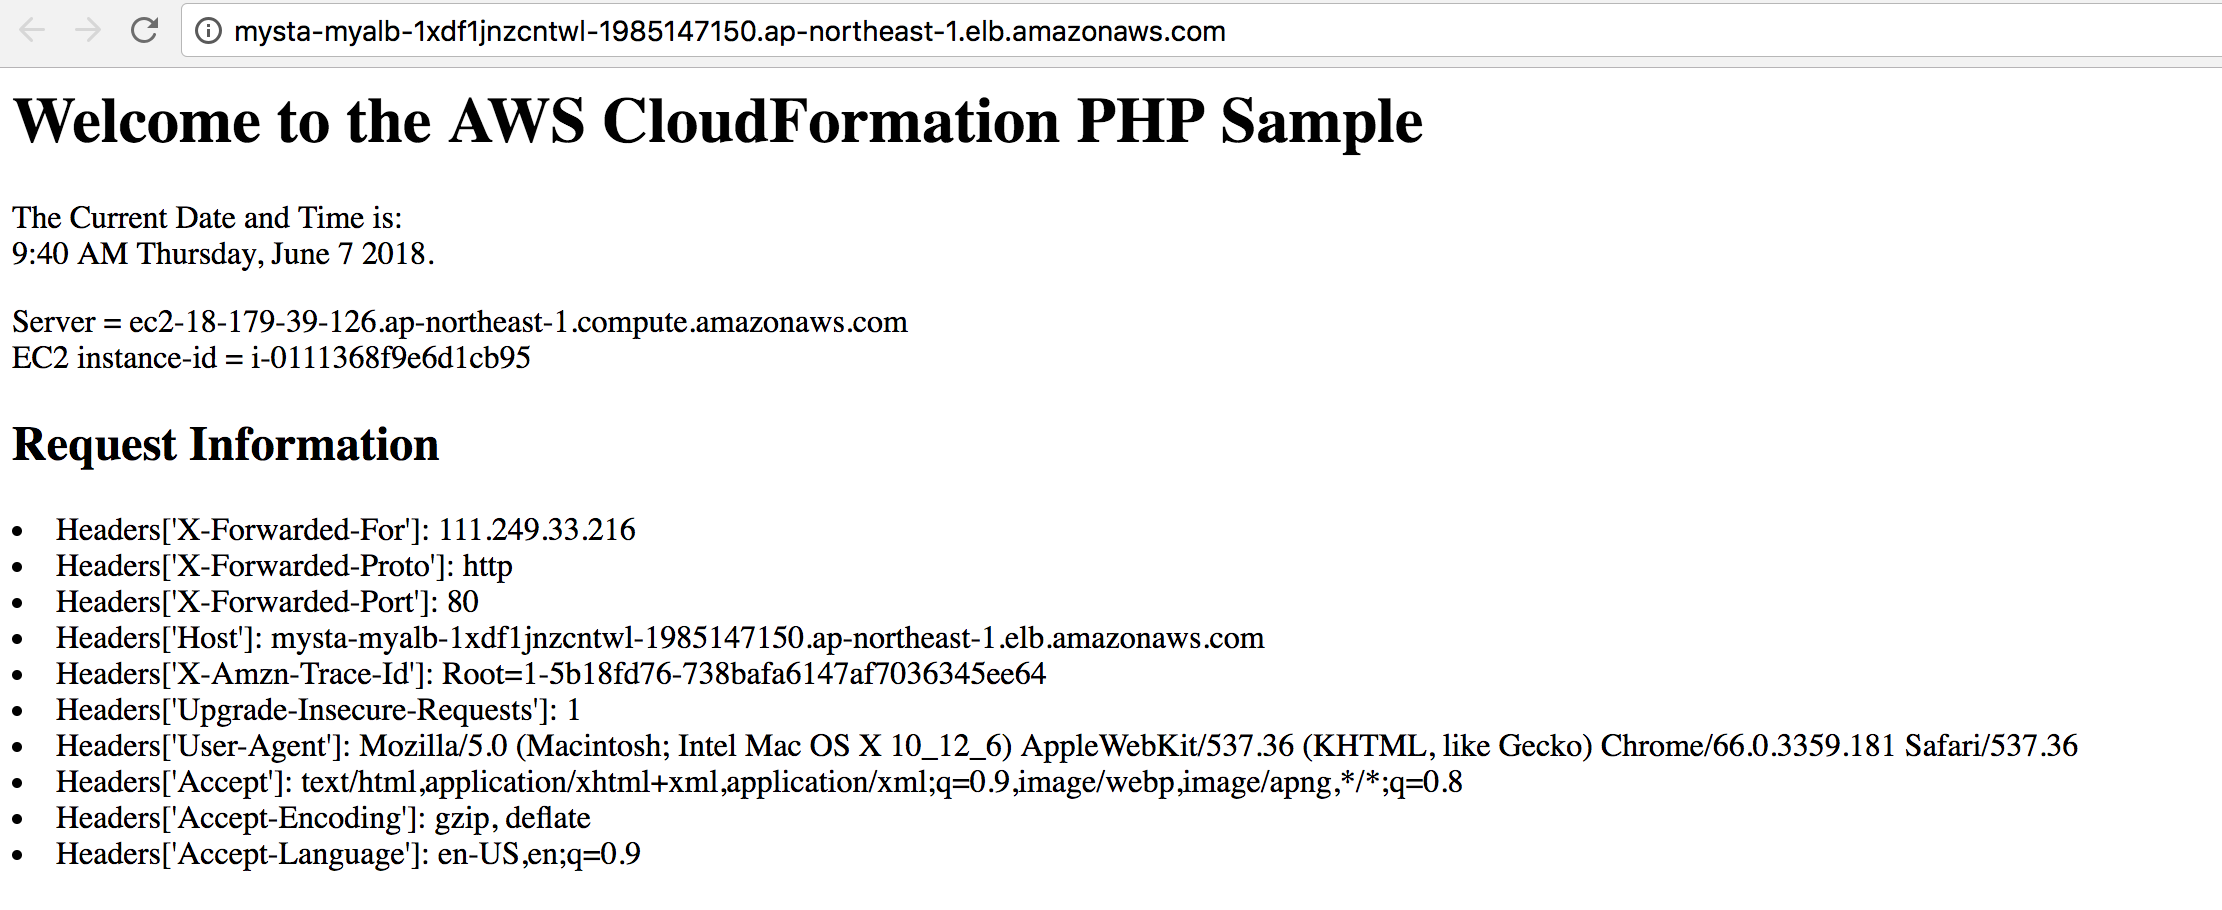 Which is the output from you ALB.
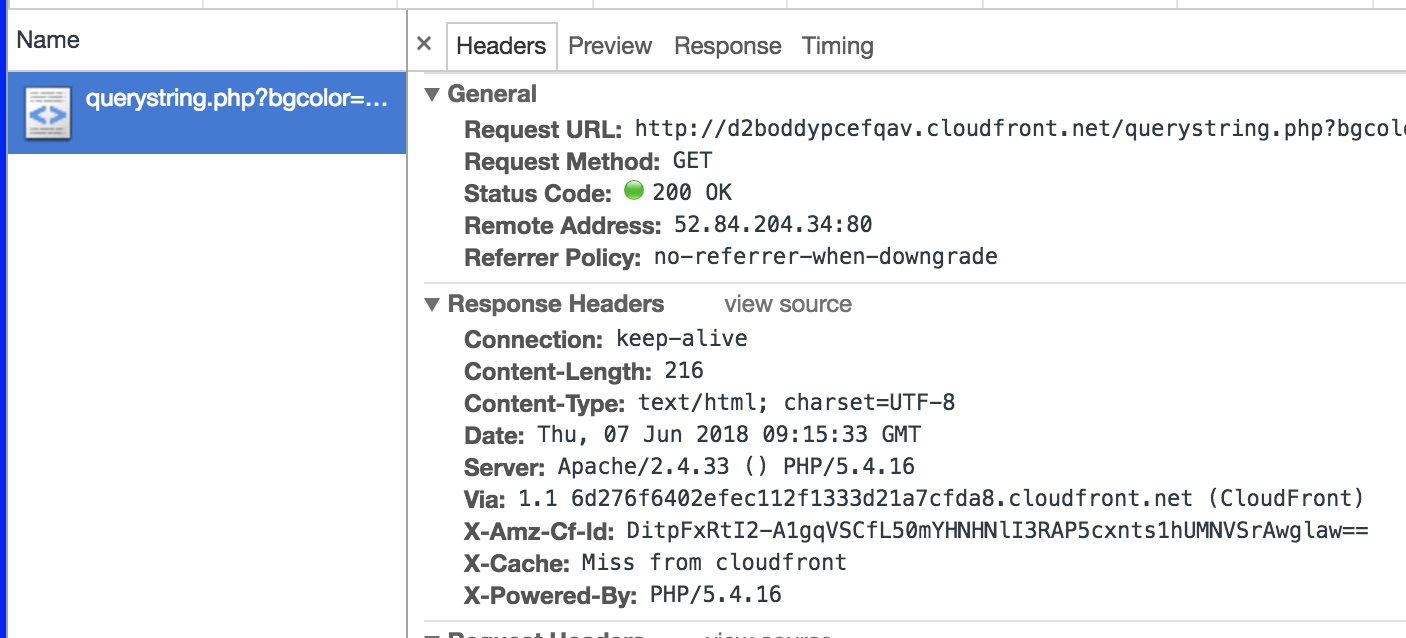
- Check the Web Service output from CloudFront- Open the Output Sheet, and check the CloudFront, you will find a link like 'http://http://YOUR_CF_DISTRIBUTION.cloudfront.net' Click the link you will see a response page like this:
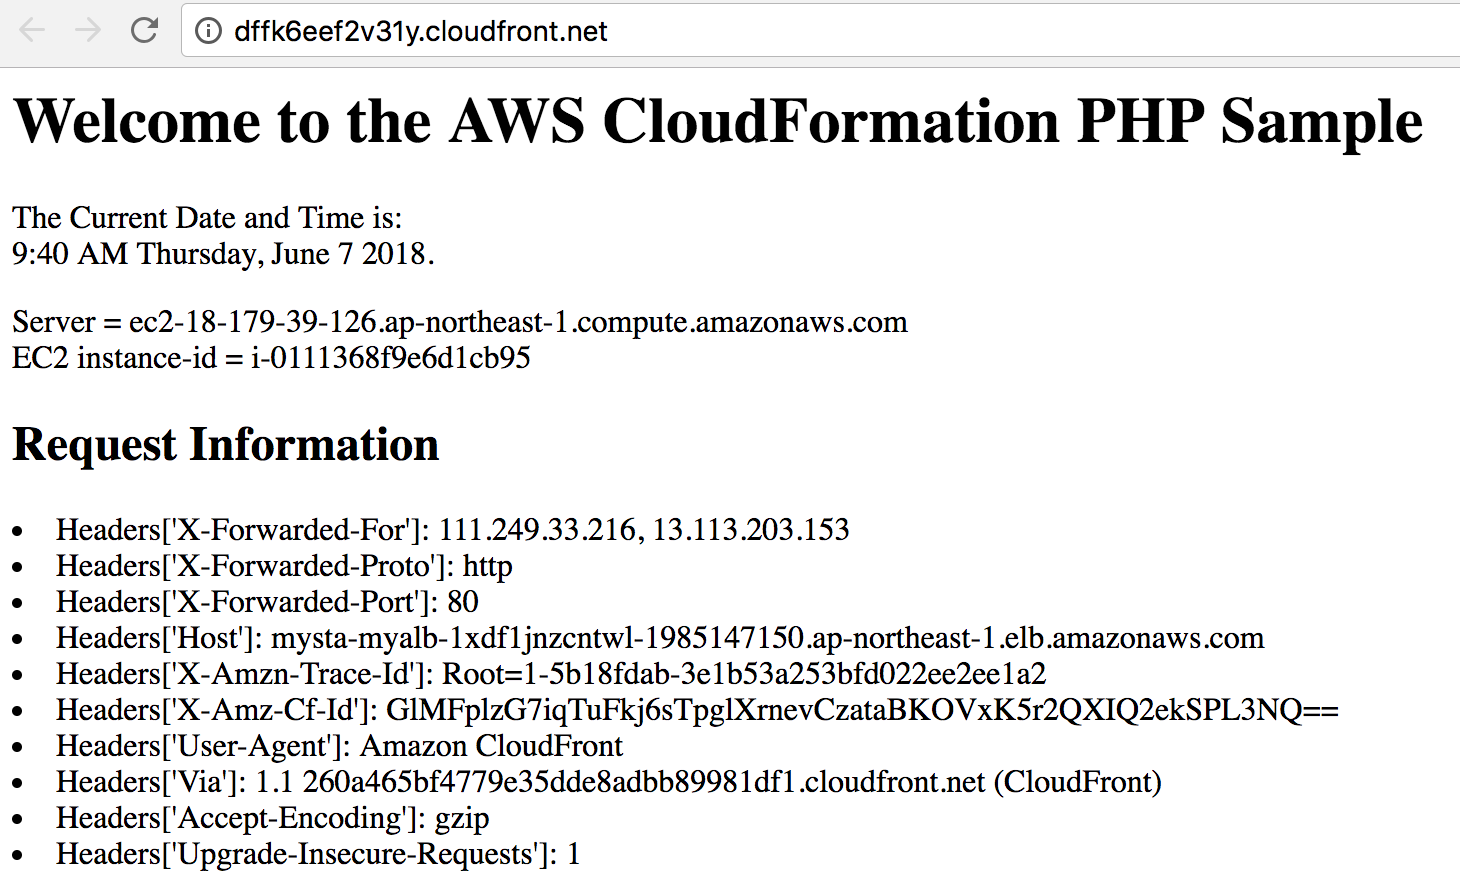 Which is the output from you ALB goes through your CloudFront distribution.
- But wait, where was those missing headers? Where was those real-users' request information and headers?
- What you see on the page, is the request sent from CloudFront to your Origin
- What you sent to CloudFront can be logged if you turned on the access log in your distribution.
-
Change the MinTTL/DefaultTTL/MaxTTL with different value, and flush the page on your browser, you can see the different behaviors.
-
AWS Console > CloudFront > Your Distribution > Behavior > Default > Edit*
-
Change the MinTTL=60, DefaultTTL=300, MaxTTL=900, and then refresh the browser, and check the timestemp on the web page.
-
In this chapter, we will give you a clear idea about how it work with following cache-control header and cloudfront configurations.
    Cache-Control: max-age=<seconds>
    Cache-Control: max-stale=<seconds>
    Cache-Control: min-fresh=<seconds>

    Cache-Control: no-cache
    Cache-Control: no-store
    Cache-Control: no-transform
    Cache-Control: only-if-cached
    Cache-Control: public
    Cache-Control: private

    Cache-Control: proxy-revalidate
    Cache-Control: must-revalidate
- Connect to your EC2 instance through SSH
- Now we need to create a ttl.php under
/var/www/html/with following content:
<?php

      header('Cache-Control: max-age=60');

      // Print out the current data and time

      print "The Current Date and Time is: <br/>";
      print date("g:i:s A l, F j Y.");
?>
And please through your browser [http://YOUR_CF_DISTRIBUTION.cloudfront.net/ttl.php] for the observation. Modify the max-age setting in your source code, and see the behavior change on your browser.
- Change the code
header('Cache-Control: max-age=10'); - Change the code
header('Cache-Control: max-age=600'); - Combind with the browser developer tool with 'no-cache' box check.
- change the Minial-TTL in your origin behavior to 300, and test the page response behavior on your browser.
- Now we create another page nocache.php under
/var/www/html/:
<?php

      header('Cache-Control: public, no-cache, no-store, must-revalidate, proxy-revalidate');

      // Print out the current data and time

      print "The Current Date and Time is: <br/>";
      print date("g:i:s A l, F j Y.");
?>
- And create another behavior set path as "/nocache.php"

with all the TTL setting to 300, and check with the behavior [http://YOUR_CF_DISTRIBUTION.cloudfront.net/nocache.php], and check with the different with previous pattern.
For more detail and description, please refer to [https://docs.aws.amazon.com/AmazonCloudFront/latest/DeveloperGuide/Expiration.html]
[https://docs.aws.amazon.com/AmazonCloudFront/latest/DeveloperGuide/Expiration.html#ExpirationDownloadDist] And also the TTL section in our official document: [https://docs.aws.amazon.com/AmazonCloudFront/latest/DeveloperGuide/distribution-web-values-specify.html#DownloadDistValuesMinTTL]
Now we have basic idea about server response through control header and distribution settings.
- What do I do if I want to shorten the TTL setting in my pattern configuration? I just set the MinTTL=300, and the page has already been cached!
- Check with the document: Invalidating Objects
- You updated the content in your static content page
- You overwrited some static assets, like image or logo
- You set the page refresh/cache TTL as 24 hours, but you found a typo need to fix it now......
aws cloudfront create-invalidation --distribution-id "XXXXXXXXXXXX" --paths "/nocache.php"
{
    "Invalidation": {
        "Status": "InProgress",
        "InvalidationBatch": {
            "Paths": {
                "Items": [
                    "/nocache.php"
                ],
                "Quantity": 1
            },
            "CallerReference": "cli-1234567890-12345678"
        },
        "Id": "ICV0AYDA406NC",
        "CreateTime": "2018-06-07T04:28:01.364Z"
    },
    "Location": "https://cloudfront.amazonaws.com/2017-03-25/distribution/XXXXXXXXXXX/invalidation/XXXXXXXXXXXX"
}
- Sometimes, the version update was too much complicated if I need to invalidate the page every time. Maybe I can create the page working with database or dynamic query? with parameters input?
- /dailynewspage?
Y=Year&m=Month&d=Date - /packagerelease?
version=latest
- This time, we need to create a new page querystring.php under
/var/www/html/
<?php

      $bgcolor="#FFFFFF";

      print "<html><body bgcolor='".$_GET['bgcolor']."'>";

      // Print out the current data and time

      $dt = date("g:i:s A l, F j Y.");
      print "<font color='".$_GET['fgcolor']."' size='".$_GET['size']."'>";
      print "The Current Date and Time is: $dt<br/>";

      print "<li> Server received QueryString:   ".$_SERVER['QUERY_STRING'];
      print "</font></body></html>";
?>
- And create another behavior to handle this new pattern:

-
Set the "bgcolor" into the queyrString configuration column:
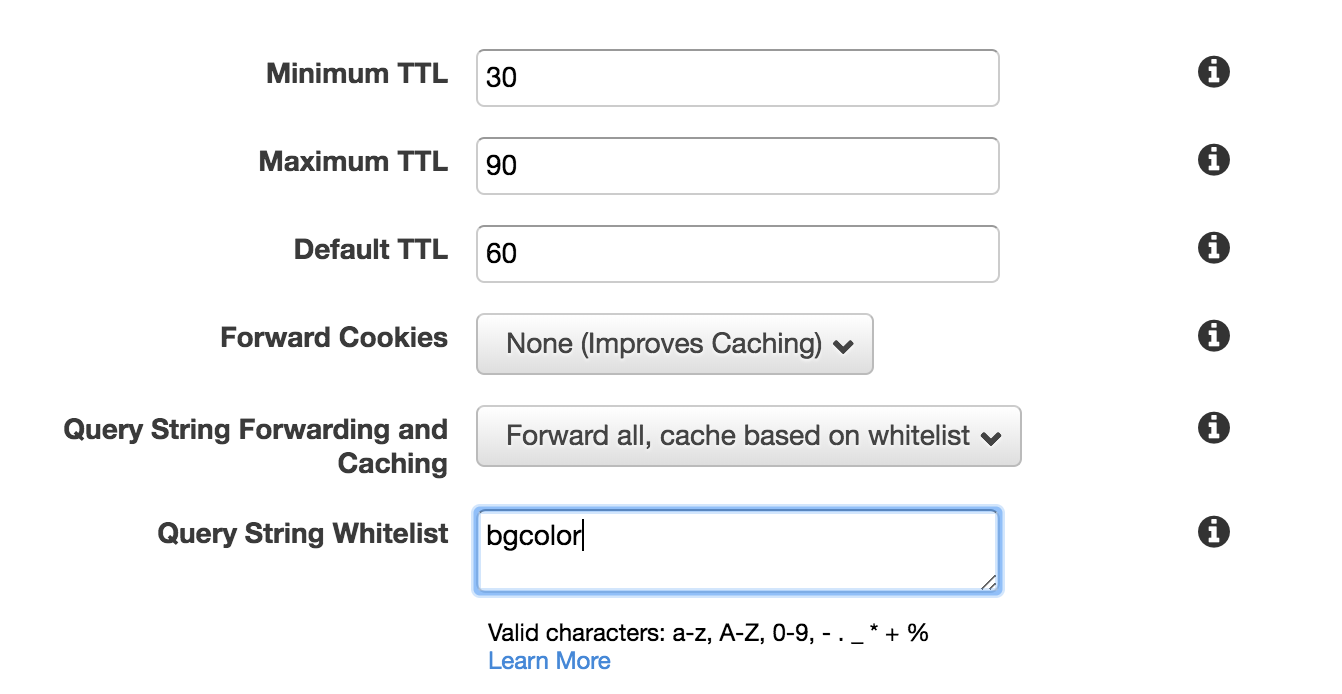
And try with following link [http://YOUR_CF_DISTRIBUTION.cloudfront.net/index.php?bgcolor=red] And also with following link [http://YOUR_CF_DISTRIBUTION.cloudfront.net/index.php?bgcolor=red&fgcolor=white]
-
Now update both querystring into the behavior:
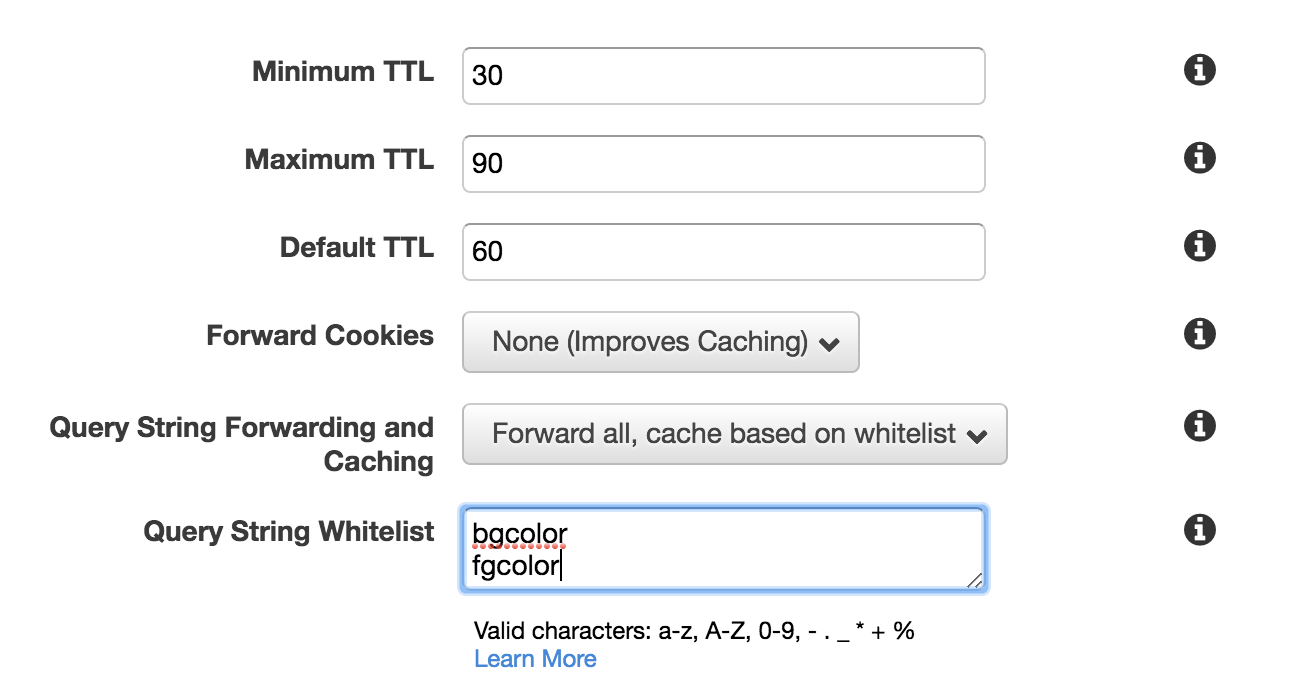 In this case you can see how we can control the valid query string filter for your CloudFront distribution.
From our official document Here, you can find that, with different querystring "sequence" it will be treat as different requests. Which means if you had a request
?bgcolor=white&fgcolor=blackcached(hit from cloudfront), but?fgcolor=black&bgcolor=whitewill still goes back to your origin server(miss from cloudfront).
Till here, you already know several detail about setting a CloudFront distribution in front of your dynamic page and API server.
You might already awared about there is still a easy way to get into your server without HTTPS, right? The ALB Domain is there and the Security Group is still open to public. How should I fix it now? Please check the page [https://aws.amazon.com/blogs/security/how-to-automatically-update-your-security-groups-for-amazon-cloudfront-and-aws-waf-by-using-aws-lambda/], which teach you to build up an automation flow to secure your ALB.
- Go to Cloudformation and delete stack.