Linux Server Configuration
This is the final project for Udacity's Full Stack Web Developer Nanodegree.
This page explains how to secure and set up a Linux distribution on a virtual machine, install and configure a web and database server to host a web application.
- The Linux distribution is Ubuntu 16.04 LTS.
- The virtual private server is Amazon Lighsail.
- The web application is my Item Catalog project created earlier in this Nanodegree program.
- The database server is PostgreSQL.
- My local machine is a MacBook Pro (Mac OS X 10_12_6).
You can visit http://13.59.39.163/ or http://ec2-13-59-39-163.us-east-2.compute.amazonaws.com for the website deployed.
Updates
Get a server
Step 1: Start a new Ubuntu Linux server instance on Amazon Lightsail
- Login into Amazon Lightsail using an Amazon Web Services account.
- Once you are login into the site, click
Create instance. - Choose
Linux/Unixplatform,OS OnlyandUbuntu 16.04 LTS. - Choose a instance plan (I took the cheapest, $5/month).
- Keep the default name provided by AWS or rename your instance.
- Click the
Createbutton to create the instance. - Wait for the instance to start up.
Reference
- ServerPilot, How to Create a Server on Amazon Lightsail.
Step 2: SSH into the server
- From the
Accountmenu on Amazon Lightsail, click onSSH keystab and download the Default Private Key. - Move this private key file named
LightsailDefaultPrivateKey-*.peminto the local folder~/.sshand rename itlightsail_key.rsa. - In your terminal, type:
chmod 600 ~/.ssh/lightsail_key.rsa. - To connect to the instance via the terminal:
ssh -i ~/.ssh/lightsail_key.rsa ubuntu@13.59.39.163, where13.59.39.163is the public IP address of the instance.
Secure the server
Step 3: Update and upgrade installed packages
sudo apt-get update
sudo apt-get upgrade
Step 4: Change the SSH port from 22 to 2200
- Edit the
/etc/ssh/sshd_configfile:sudo nano /etc/ssh/sshd_config. - Change the port number on line 5 from
22to2200. - Save and exit using CTRL+X and confirm with Y.
- Restart SSH:
sudo service ssh restart.
Step 5: Configure the Uncomplicated Firewall (UFW)
-
Configure the default firewall for Ubuntu to only allow incoming connections for SSH (port 2200), HTTP (port 80), and NTP (port 123).
sudo ufw status # The UFW should be inactive. sudo ufw default deny incoming # Deny any incoming traffic. sudo ufw default allow outgoing # Enable outgoing traffic. sudo ufw allow 2200/tcp # Allow incoming tcp packets on port 2200. sudo ufw allow www # Allow HTTP traffic in. sudo ufw allow 123/udp # Allow incoming udp packets on port 123. sudo ufw deny 22 # Deny tcp and udp packets on port 53. -
Turn UFW on:
sudo ufw enable. The output should be like this:Command may disrupt existing ssh connections. Proceed with operation (y|n)? y Firewall is active and enabled on system startup -
Check the status of UFW to list current roles:
sudo ufw status. The output should be like this:Status: active To Action From -- ------ ---- 2200/tcp ALLOW Anywhere 80/tcp ALLOW Anywhere 123/udp ALLOW Anywhere 22 DENY Anywhere 2200/tcp (v6) ALLOW Anywhere (v6) 80/tcp (v6) ALLOW Anywhere (v6) 123/udp (v6) ALLOW Anywhere (v6) 22 (v6) DENY Anywhere (v6) -
Exit the SSH connection:
exit. -
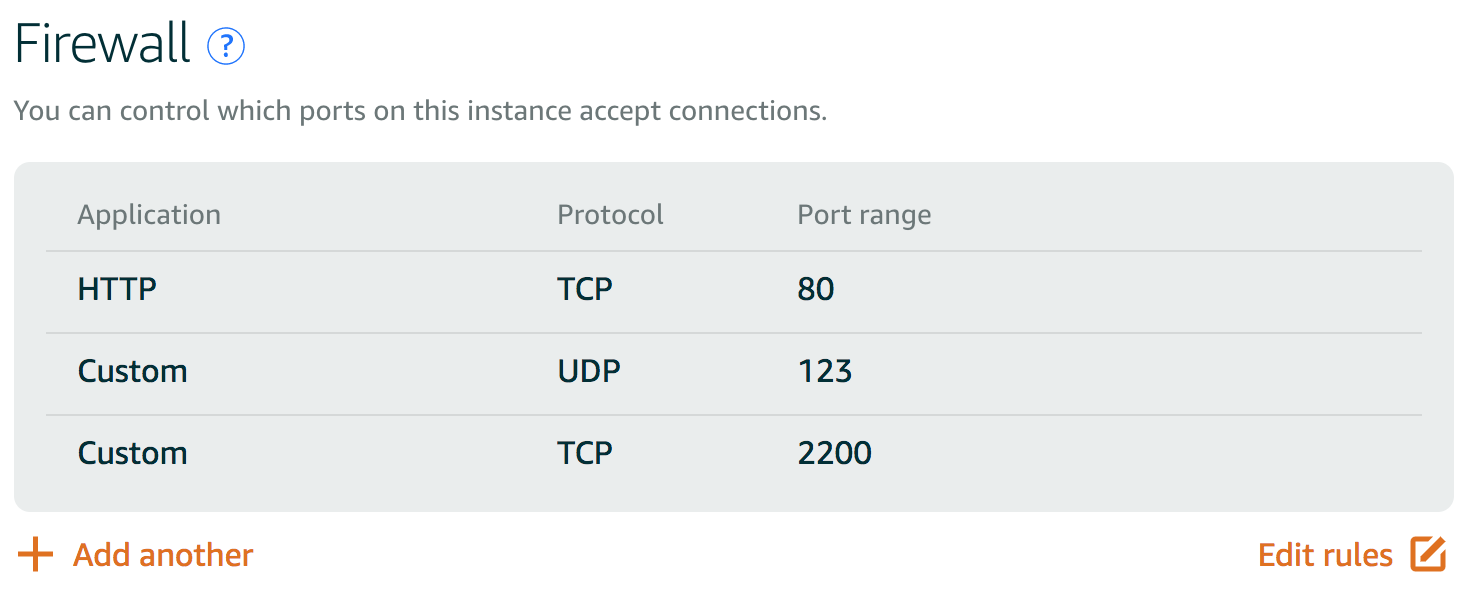
Click on the
Manageoption of the Amazon Lightsail Instance, then theNetworkingtab, and then change the firewall configuration to match the internal firewall settings above.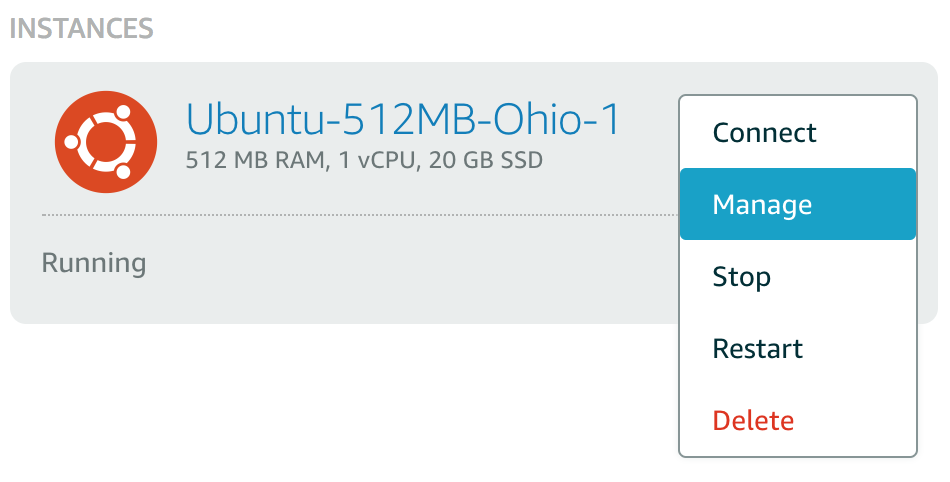
-
Allow ports 80(TCP), 123(UDP), and 2200(TCP), and deny the default port 22.
-
From your local terminal, run:
ssh -i ~/.ssh/lightsail_key.rsa -p 2200 ubuntu@13.59.39.163, where13.59.39.163is the public IP address of the instance.


References
- Official Ubuntu Documentation, UFW - Uncomplicated Firewall.
- TechRepublic, How to install and use Uncomplicated Firewall in Ubuntu.
Step 5.1: Use Fail2Ban to ban attackers
Fail2Ban is an intrusion prevention software framework that protects computer servers from brute-force attacks.
- Install Fail2Ban:
sudo apt-get install fail2ban. - Install sendmail for email notice:
sudo apt-get install sendmail iptables-persistent. - Create a copy of a file:
sudo cp /etc/fail2ban/jail.conf /etc/fail2ban/jail.local. - Change the settings in
/etc/fail2ban/jail.localfile:set bantime = 600 destemail = useremail@domain action = %(action_mwl)s - Under
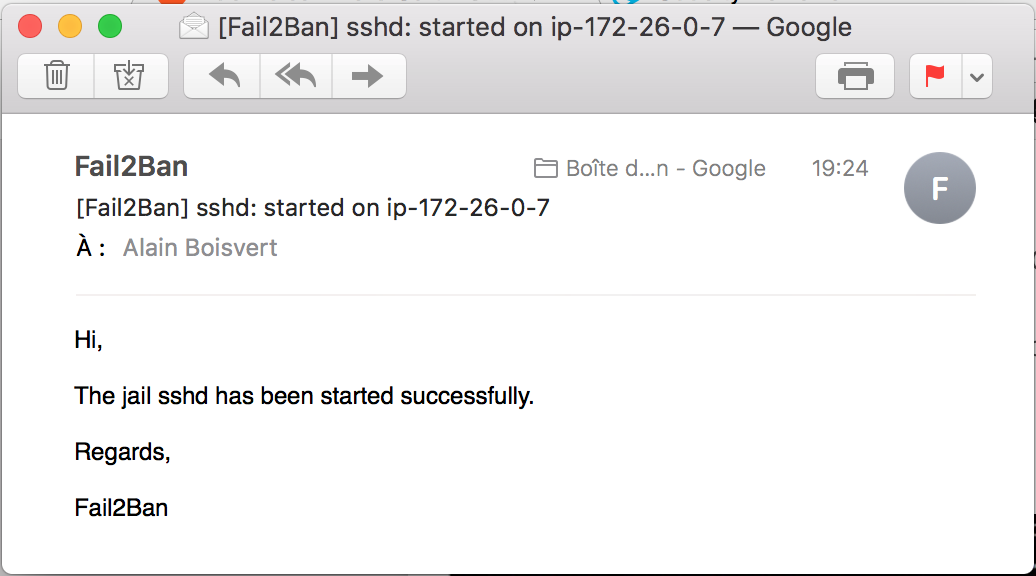
[sshd]changeport = sshbyport = 2200. - Restart the service:
sudo service fail2ban restart. - You should receive an email like this:

References
Step 5.2: Automatically install updates
The unattended-upgrades package can be used to automatically install important system updates.
- Enable automatic (security) updates:
sudo apt-get install unattended-upgrades. - Edit
/etc/apt/apt.conf.d/50unattended-upgrades, uncomment the line${distro_id}:${distro_codename}-updatesand save it. - Modify
/etc/apt/apt.conf.d/20auto-upgradesfile so that the upgrades are downloaded and installed every day:APT::Periodic::Update-Package-Lists "1"; APT::Periodic::Download-Upgradeable-Packages "1"; APT::Periodic::AutocleanInterval "7"; APT::Periodic::Unattended-Upgrade "1"; - Enable it:
sudo dpkg-reconfigure --priority=low unattended-upgrades. - Restart Apache:
sudo service apache2 restart.
References
- Official Ubuntu Documentation, Automatic Updates.
- Ubuntu Wiki, AutomaticSecurityUpdates.
Step 5.3: Updated packages to most recent versions
Some packages have not been updated because the server need to be rebooted. I found the solution here.
-
I did these commands:
sudo apt-get update sudo apt-get dist-upgrade sudo shutdown -r now -
Logged back in, and I now see this message:
Alains-MBP:udacity-linux-server-configuration boisalai$ ssh -i ~/.ssh/lightsail_key.rsa -p 2200 ubuntu@13.59.39.163
Welcome to Ubuntu 16.04.3 LTS (GNU/Linux 4.4.0-1039-aws x86_64)

 * Documentation:  https://help.ubuntu.com
 * Management:     https://landscape.canonical.com
 * Support:        https://ubuntu.com/advantage

  Get cloud support with Ubuntu Advantage Cloud Guest:
    http://www.ubuntu.com/business/services/cloud

0 packages can be updated.
0 updates are security updates.

Last login: Tue Oct 31 06:35:28 2017 from 24.201.154.77
ubuntu@ip-172-26-0-7:~$
Reference
- DigitalOcean, Updating Ubuntu 14.04 -- Security Updates.
Give grader access
Step 6: Create a new user account named grader
- While logged in as
ubuntu, add user:sudo adduser grader. - Enter a password (twice) and fill out information for this new user.
Step 7: Give grader the permission to sudo
-
Edits the sudoers file:
sudo visudo. -
Search for the line that looks like this:
root ALL=(ALL:ALL) ALL -
Below this line, add a new line to give sudo privileges to
graderuser.root ALL=(ALL:ALL) ALL grader ALL=(ALL:ALL) ALL -
Save and exit using CTRL+X and confirm with Y.
-
Verify that
graderhas sudo permissions. Runsu - grader, enter the password, runsudo -land enter the password again. The output should be like this:Matching Defaults entries for grader on ip-172-26-13-170.us-east-2.compute.internal: env_reset, mail_badpass, secure_path=/usr/local/sbin\:/usr/local/bin\:/usr/sbin\:/usr/bin\:/sbin\:/bin\:/snap/bin User grader may run the following commands on ip-172-26-13-170.us-east-2.compute.internal: (ALL : ALL) ALL
Resources
- DigitalOcean, How To Add and Delete Users on an Ubuntu 14.04 VPS
Step 8: Create an SSH key pair for grader using the ssh-keygen tool
- On the local machine:
- Run
ssh-keygen - Enter file in which to save the key (I gave the name
grader_key) in the local directory~/.ssh - Enter in a passphrase twice. Two files will be generated (
~/.ssh/grader_keyand~/.ssh/grader_key.pub) - Run
cat ~/.ssh/grader_key.puband copy the contents of the file - Log in to the grader's virtual machine
- Run
- On the grader's virtual machine:
- Create a new directory called
~/.ssh(mkdir .ssh) - Run
sudo nano ~/.ssh/authorized_keysand paste the content into this file, save and exit - Give the permissions:
chmod 700 .sshandchmod 644 .ssh/authorized_keys - Check in
/etc/ssh/sshd_configfile ifPasswordAuthenticationis set tono - Restart SSH:
sudo service ssh restart
- Create a new directory called
- On the local machine, run:
ssh -i ~/.ssh/grader_key -p 2200 grader@13.59.39.163.
References
- DigitalOcean, How To Set Up SSH Keys.
- Ubuntu Wiki, SSH/OpenSSH/Keys.
Prepare to deploy the project
Step 9: Configure the local timezone to UTC
-
While logged in as
grader, configure the time zone:sudo dpkg-reconfigure tzdata. You should see something like that:Current default time zone: 'America/Montreal' Local time is now: Thu Oct 19 21:55:16 EDT 2017. Universal Time is now: Fri Oct 20 01:55:16 UTC 2017.
References
- Ubuntu Wiki, UbuntuTime
- Ask Ubuntu, How do I change my timezone to UTC/GMT?
Step 10: Install and configure Apache to serve a Python mod_wsgi application
-
While logged in as
grader, install Apache:sudo apt-get install apache2. -
Enter public IP of the Amazon Lightsail instance into browser. If Apache is working, you should see:

-
My project is built with Python 3. So, I need to install the Python 3 mod_wsgi package:
sudo apt-get install libapache2-mod-wsgi-py3. -
Enable
mod_wsgiusing:sudo a2enmod wsgi.

Step 11: Install and configure PostgreSQL
-
While logged in as
grader, install PostgreSQL:sudo apt-get install postgresql. -
PostgreSQL should not allow remote connections. In the
/etc/postgresql/9.5/main/pg_hba.conffile, you should see:local all postgres peer local all all peer host all all 127.0.0.1/32 md5 host all all ::1/128 md5 -
Switch to the
postgresuser:sudo su - postgres. -
Open PostgreSQL interactive terminal with
psql. -
Create the
cataloguser with a password and give them the ability to create databases:postgres=# CREATE ROLE catalog WITH LOGIN PASSWORD 'catalog'; postgres=# ALTER ROLE catalog CREATEDB; -
List the existing roles:
\du. The output should be like this:List of roles Role name | Attributes | Member of -----------+------------------------------------------------------------+----------- catalog | Create DB | {} postgres | Superuser, Create role, Create DB, Replication, Bypass RLS | {} -
Exit psql:
\q. -
Switch back to the
graderuser:exit. -
Create a new Linux user called
catalog:sudo adduser catalog. Enter password and fill out information. -
Give to
cataloguser the permission to sudo. Run:sudo visudo. -
Search for the lines that looks like this:
root ALL=(ALL:ALL) ALL grader ALL=(ALL:ALL) ALL -
Below this line, add a new line to give sudo privileges to
cataloguser.root ALL=(ALL:ALL) ALL grader ALL=(ALL:ALL) ALL catalog ALL=(ALL:ALL) ALL -
Save and exit using CTRL+X and confirm with Y.
-
Verify that
cataloghas sudo permissions. Runsu - catalog, enter the password, runsudo -land enter the password again. The output should be like this:Matching Defaults entries for catalog on ip-172-26-13-170.us-east-2.compute.internal: env_reset, mail_badpass, secure_path=/usr/local/sbin\:/usr/local/bin\:/usr/sbin\:/usr/bin\:/sbin\:/bin\:/snap/bin User catalog may run the following commands on ip-172-26-13-170.us-east-2.compute.internal: (ALL : ALL) ALL -
While logged in as
catalog, create a database:createdb catalog. -
Run
psqland then run\lto see that the new database has been created. The output should be like this:List of databases Name | Owner | Encoding | Collate | Ctype | Access privileges -----------+----------+----------+-------------+-------------+----------------------- catalog | catalog | UTF8 | en_US.UTF-8 | en_US.UTF-8 | postgres | postgres | UTF8 | en_US.UTF-8 | en_US.UTF-8 | template0 | postgres | UTF8 | en_US.UTF-8 | en_US.UTF-8 | =c/postgres + | | | | | postgres=CTc/postgres template1 | postgres | UTF8 | en_US.UTF-8 | en_US.UTF-8 | =c/postgres + | | | | | postgres=CTc/postgres (4 rows) -
Exit psql:
\q. -
Switch back to the
graderuser:exit.
Reference
- DigitalOcean, How To Secure PostgreSQL on an Ubuntu VPS.
Step 12: Install git
- While logged in as
grader, installgit:sudo apt-get install git.
Deploy the Item Catalog project
Step 13.1: Clone and setup the Item Catalog project from the GitHub repository
-
While logged in as
grader, create/var/www/catalog/directory. -
Change to that directory and clone the catalog project:
sudo git clone https://github.com/boisalai/udacity-catalog-app.git catalog. -
From the
/var/wwwdirectory, change the ownership of thecatalogdirectory tograderusing:sudo chown -R grader:grader catalog/. -
Change to the
/var/www/catalog/catalogdirectory. -
Rename the
application.pyfile to__init__.pyusing:mv application.py __init__.py. -
In
__init__.py, replace line 27:# app.run(host="0.0.0.0", port=8000, debug=True) app.run() -
In
database.py, replace line 9:# engine = create_engine("sqlite:///catalog.db") engine = create_engine('postgresql://catalog:PASSWORD@localhost/catalog')
Step 13.2: Authenticate login through Google
- Go to Google Cloud Plateform.
- Click
APIs & serviceson left menu. - Click
Credentials. - Create an OAuth Client ID (under the Credentials tab), and add http://13.59.39.163 and http://ec2-13-59-39-163.us-east-2.compute.amazonaws.com as authorized JavaScript origins.
- Add http://ec2-13-59-39-163.us-east-2.compute.amazonaws.com/oauth2callback as authorized redirect URI.
- Download the corresponding JSON file, open it et copy the contents.
- Open
/var/www/catalog/catalog/client_secret.jsonand paste the previous contents into the this file. - Replace the client ID to line 25 of the
templates/login.htmlfile in the project directory.
Step 14.1: Install the virtual environment and dependencies
-
While logged in as
grader, install pip:sudo apt-get install python3-pip. -
Install the virtual environment:
sudo apt-get install python-virtualenv -
Change to the
/var/www/catalog/catalog/directory. -
Create the virtual environment:
sudo virtualenv -p python3 venv3. -
Change the ownership to
graderwith:sudo chown -R grader:grader venv3/. -
Activate the new environment:
. venv3/bin/activate. -
Install the following dependencies:
pip install httplib2 pip install requests pip install --upgrade oauth2client pip install sqlalchemy pip install flask sudo apt-get install libpq-dev pip install psycopg2 -
Run
python3 __init__.pyand you should see:* Running on http://127.0.0.1:5000/ (Press CTRL+C to quit) -
Deactivate the virtual environment:
deactivate.
References
- Flask documentation, virtualenv.
- Create a Python 3 virtual environment.
Step 14.2: Set up and enable a virtual host
-
Add the following line in
/etc/apache2/mods-enabled/wsgi.conffile to use Python 3.#WSGIPythonPath directory|directory-1:directory-2:... WSGIPythonPath /var/www/catalog/catalog/venv3/lib/python3.5/site-packages -
Create
/etc/apache2/sites-available/catalog.confand add the following lines to configure the virtual host:<VirtualHost *:80> ServerName 13.59.39.163 ServerAlias ec2-13-59-39-163.us-west-2.compute.amazonaws.com WSGIScriptAlias / /var/www/catalog/catalog.wsgi <Directory /var/www/catalog/catalog/> Order allow,deny Allow from all </Directory> Alias /static /var/www/catalog/catalog/static <Directory /var/www/catalog/catalog/static/> Order allow,deny Allow from all </Directory> ErrorLog ${APACHE_LOG_DIR}/error.log LogLevel warn CustomLog ${APACHE_LOG_DIR}/access.log combined </VirtualHost> -
Enable virtual host:
sudo a2ensite catalog. The following prompt will be returned:Enabling site catalog. To activate the new configuration, you need to run: service apache2 reload -
Reload Apache:
sudo service apache2 reload.
Resources
- Getting Flask to use Python3 (Apache/mod_wsgi)
- Run mod_wsgi with virtualenv or Python with version different that system default
Step 14.3: Set up the Flask application
-
Create
/var/www/catalog/catalog.wsgifile add the following lines:activate_this = '/var/www/catalog/catalog/venv3/bin/activate_this.py' with open(activate_this) as file_: exec(file_.read(), dict(__file__=activate_this)) #!/usr/bin/python import sys import logging logging.basicConfig(stream=sys.stderr) sys.path.insert(0, "/var/www/catalog/catalog/") sys.path.insert(1, "/var/www/catalog/") from catalog import app as application application.secret_key = "..." -
Restart Apache:
sudo service apache2 restart.
Resource
- Flask documentation, Working with Virtual Environments
Step 14.4: Set up the database schema and populate the database
-
Edit
/var/www/catalog/catalog/data.py. -
Replace
lig.random_para(250)bylig.random_para(240)on lines 86, 143, 191, 234 and 280. -
Add the these two lines at the beginning of the file.
import sys sys.path.insert(0, "/var/www/catalog/catalog/venv3/lib/python3.5/site-packages") -
Add the following lines under
create_db().# Create database. create_db() # Delete all rows. session.query(Item).delete() session.query(Category).delete() session.query(User).delete() -
From the
/var/www/catalog/catalog/directory, activate the virtual environment:. venv3/bin/activate. -
Run:
python data.py. -
Deactivate the virtual environment:
deactivate.
Step 14.5: Disable the default Apache site
-
Disable the default Apache site:
sudo a2dissite 000-default.conf. The following prompt will be returned:Site 000-default disabled. To activate the new configuration, you need to run: service apache2 reload -
Reload Apache:
sudo service apache2 reload.
Step 14.6: Launch the Web Application
- Change the ownership of the project directories:
sudo chown -R www-data:www-data catalog/. - Restart Apache again:
sudo service apache2 restart. - Open your browser to http://13.59.39.163 or http://ec2-13-59-39-163.us-east-2.compute.amazonaws.com.
Fix some issues
Step 15.1: Log in with Google OAuth
- When I try to log in with Google OAuth 2.0, I get the following error:
TypeError: the JSON object must be str, not 'bytes' - To correct that problem, edit
views/auth.pyusing:sudo nano -c auth.py. - Near line 60, add
.decode("utf-8")to therequest(url, "GET")instruction like that:h = httplib2.Http() # result = json.loads(h.request(url, "GET")[1] result = json.loads(h.request(url, "GET")[1].decode("utf-8")) - Save and exit using CTRL+X and confirm with Y.
- Reload Apache:
sudo service apache2 reload.
Useful commands
- To get log messages from Apache server:
sudo tail /var/log/apache2/error.log. - To restart Apache:
sudo service apache2 restart.
Folder structure
After these operations, the folder structure should look like:
/var/www/catalog
    |-- catalog.wsgi
    |__ /catalog             # Our Application Module
         |-- __init__.py
         |-- data.py
         |-- database.py
         |-- /models
              |-- __init__.py
              |-- category.py
              |-- item.py
              |__ user.py
         |-- /static
              |__ styles.css
         |-- /templates
              |-- about.html
              |-- base.html
              |-- categories.html
              |-- delete_item.html
              |-- edit_item.html
              |-- login.html
              |-- new_item.html
              |__ show_item.html
         |-- /utils
              |__ lorem_ipsum_generator.py
         |-- /venv3          # Virtual Environment
         |__ /views
              |-- __init__.py
              |-- about.py
              |-- api.py
              |-- auth.py
              |-- category_view.py
              |-- item_view.py
              |__ user_view.py