This guide shows how to configure a controller to do kerning & spacing with it. It is inspired by Hugo Jourdan's Kerning Controller Tutorial.
I use this method in Mac OS and Glyphs 3 but I believe this can be implemented in Windows and other font editors as well.
- You need a controller. It can be anything compatible with your OS. I'm using this.
- If you don't have Steam installed on your computer you need to download & install.
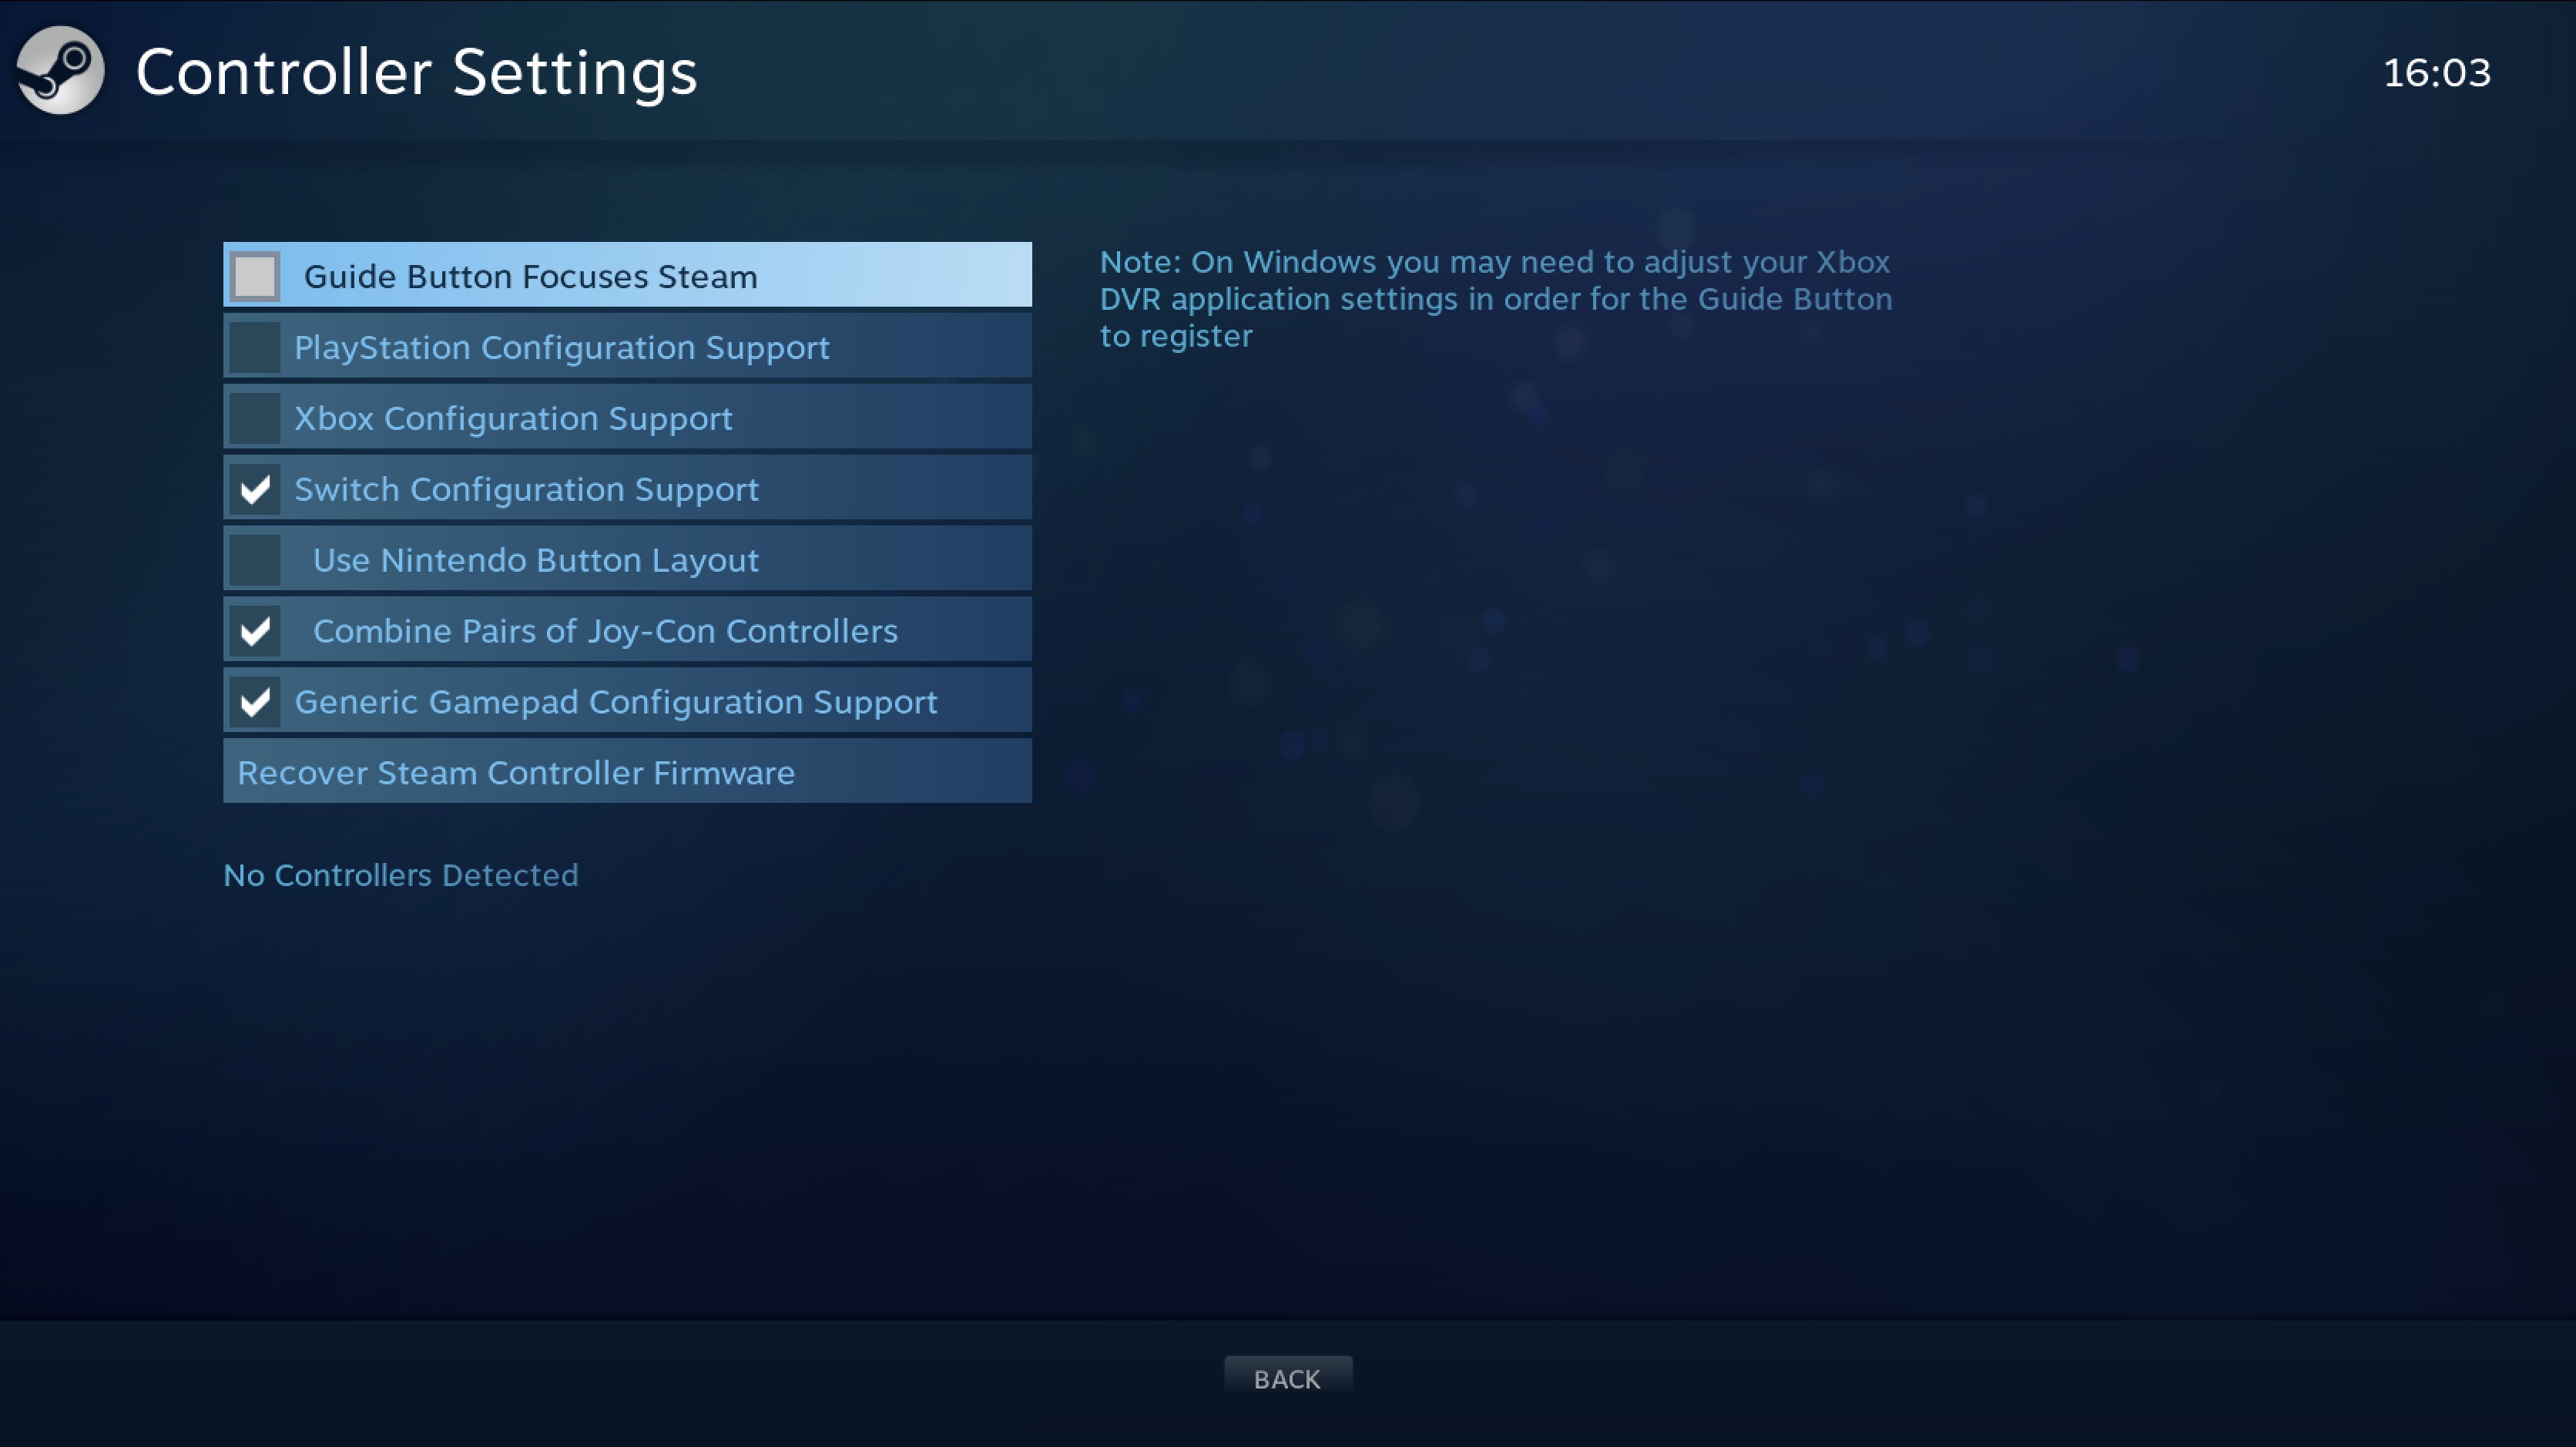
- Sign-in Steam, plug in your controller and go to Steam > Preferences > General Controller Settings
- Select the best pre-set option for your controller. Go back
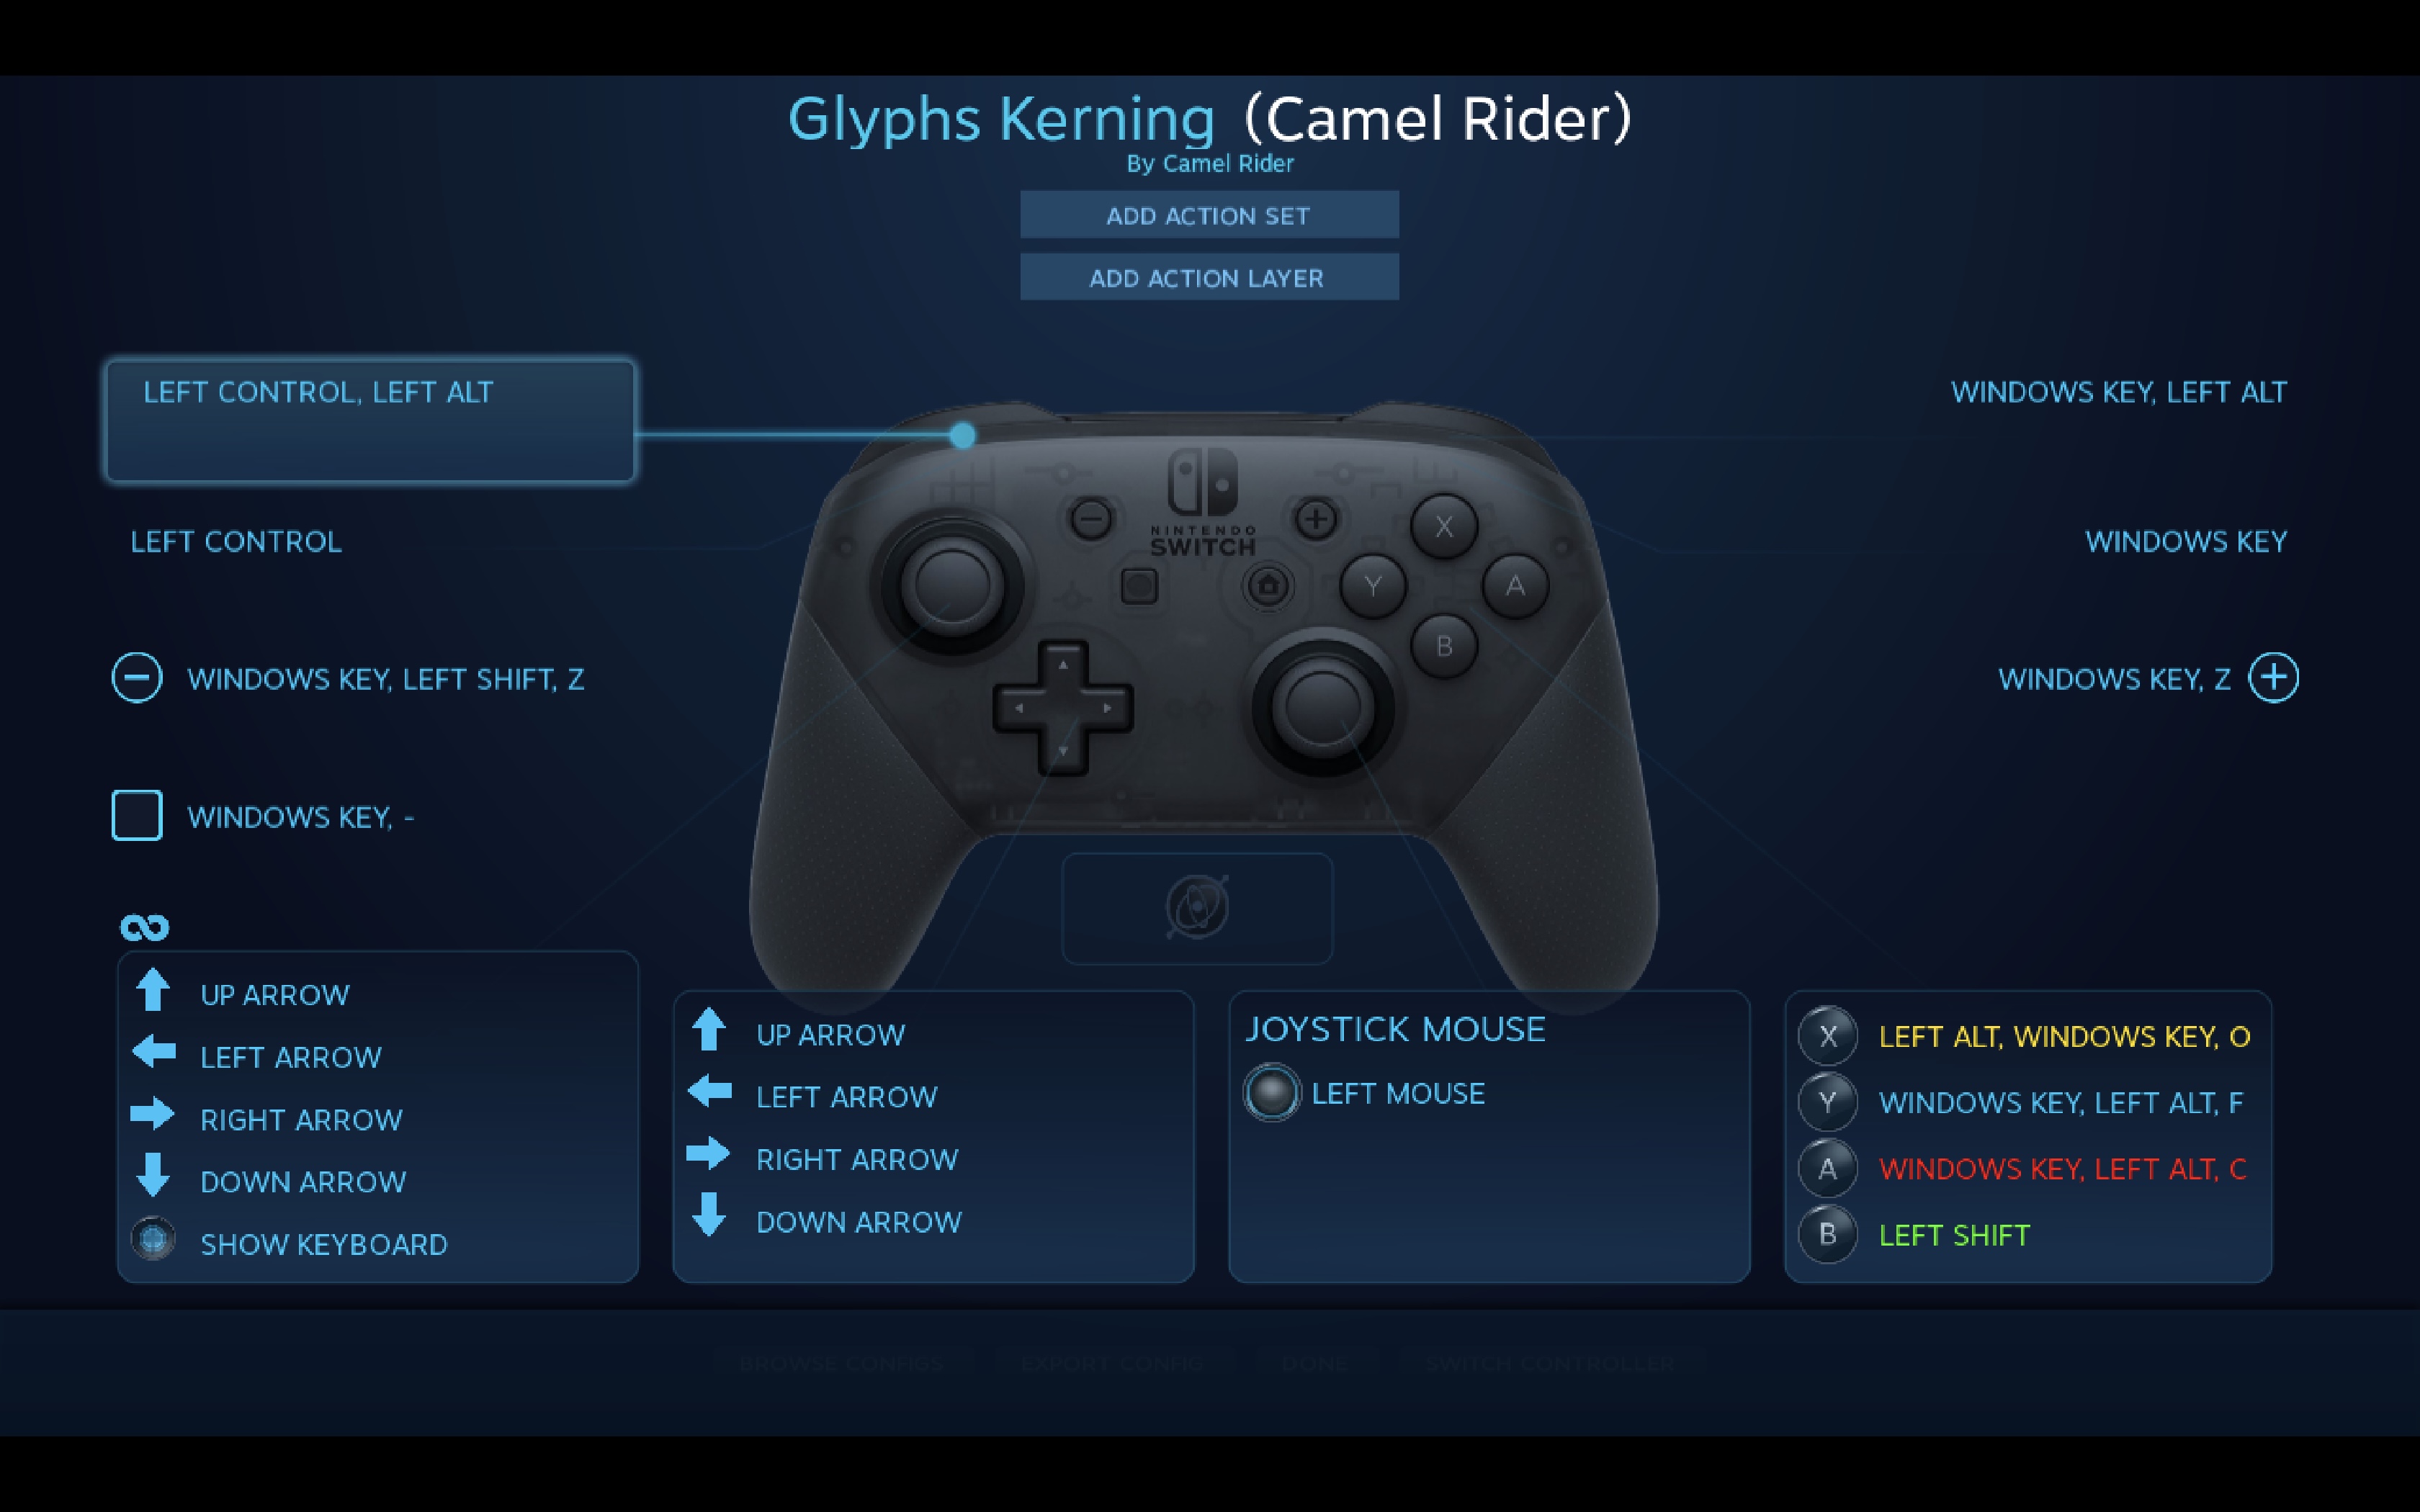
- Back to Preferences window > Desktop Configuration. You will see the interface showing your controller's assigned buttons.
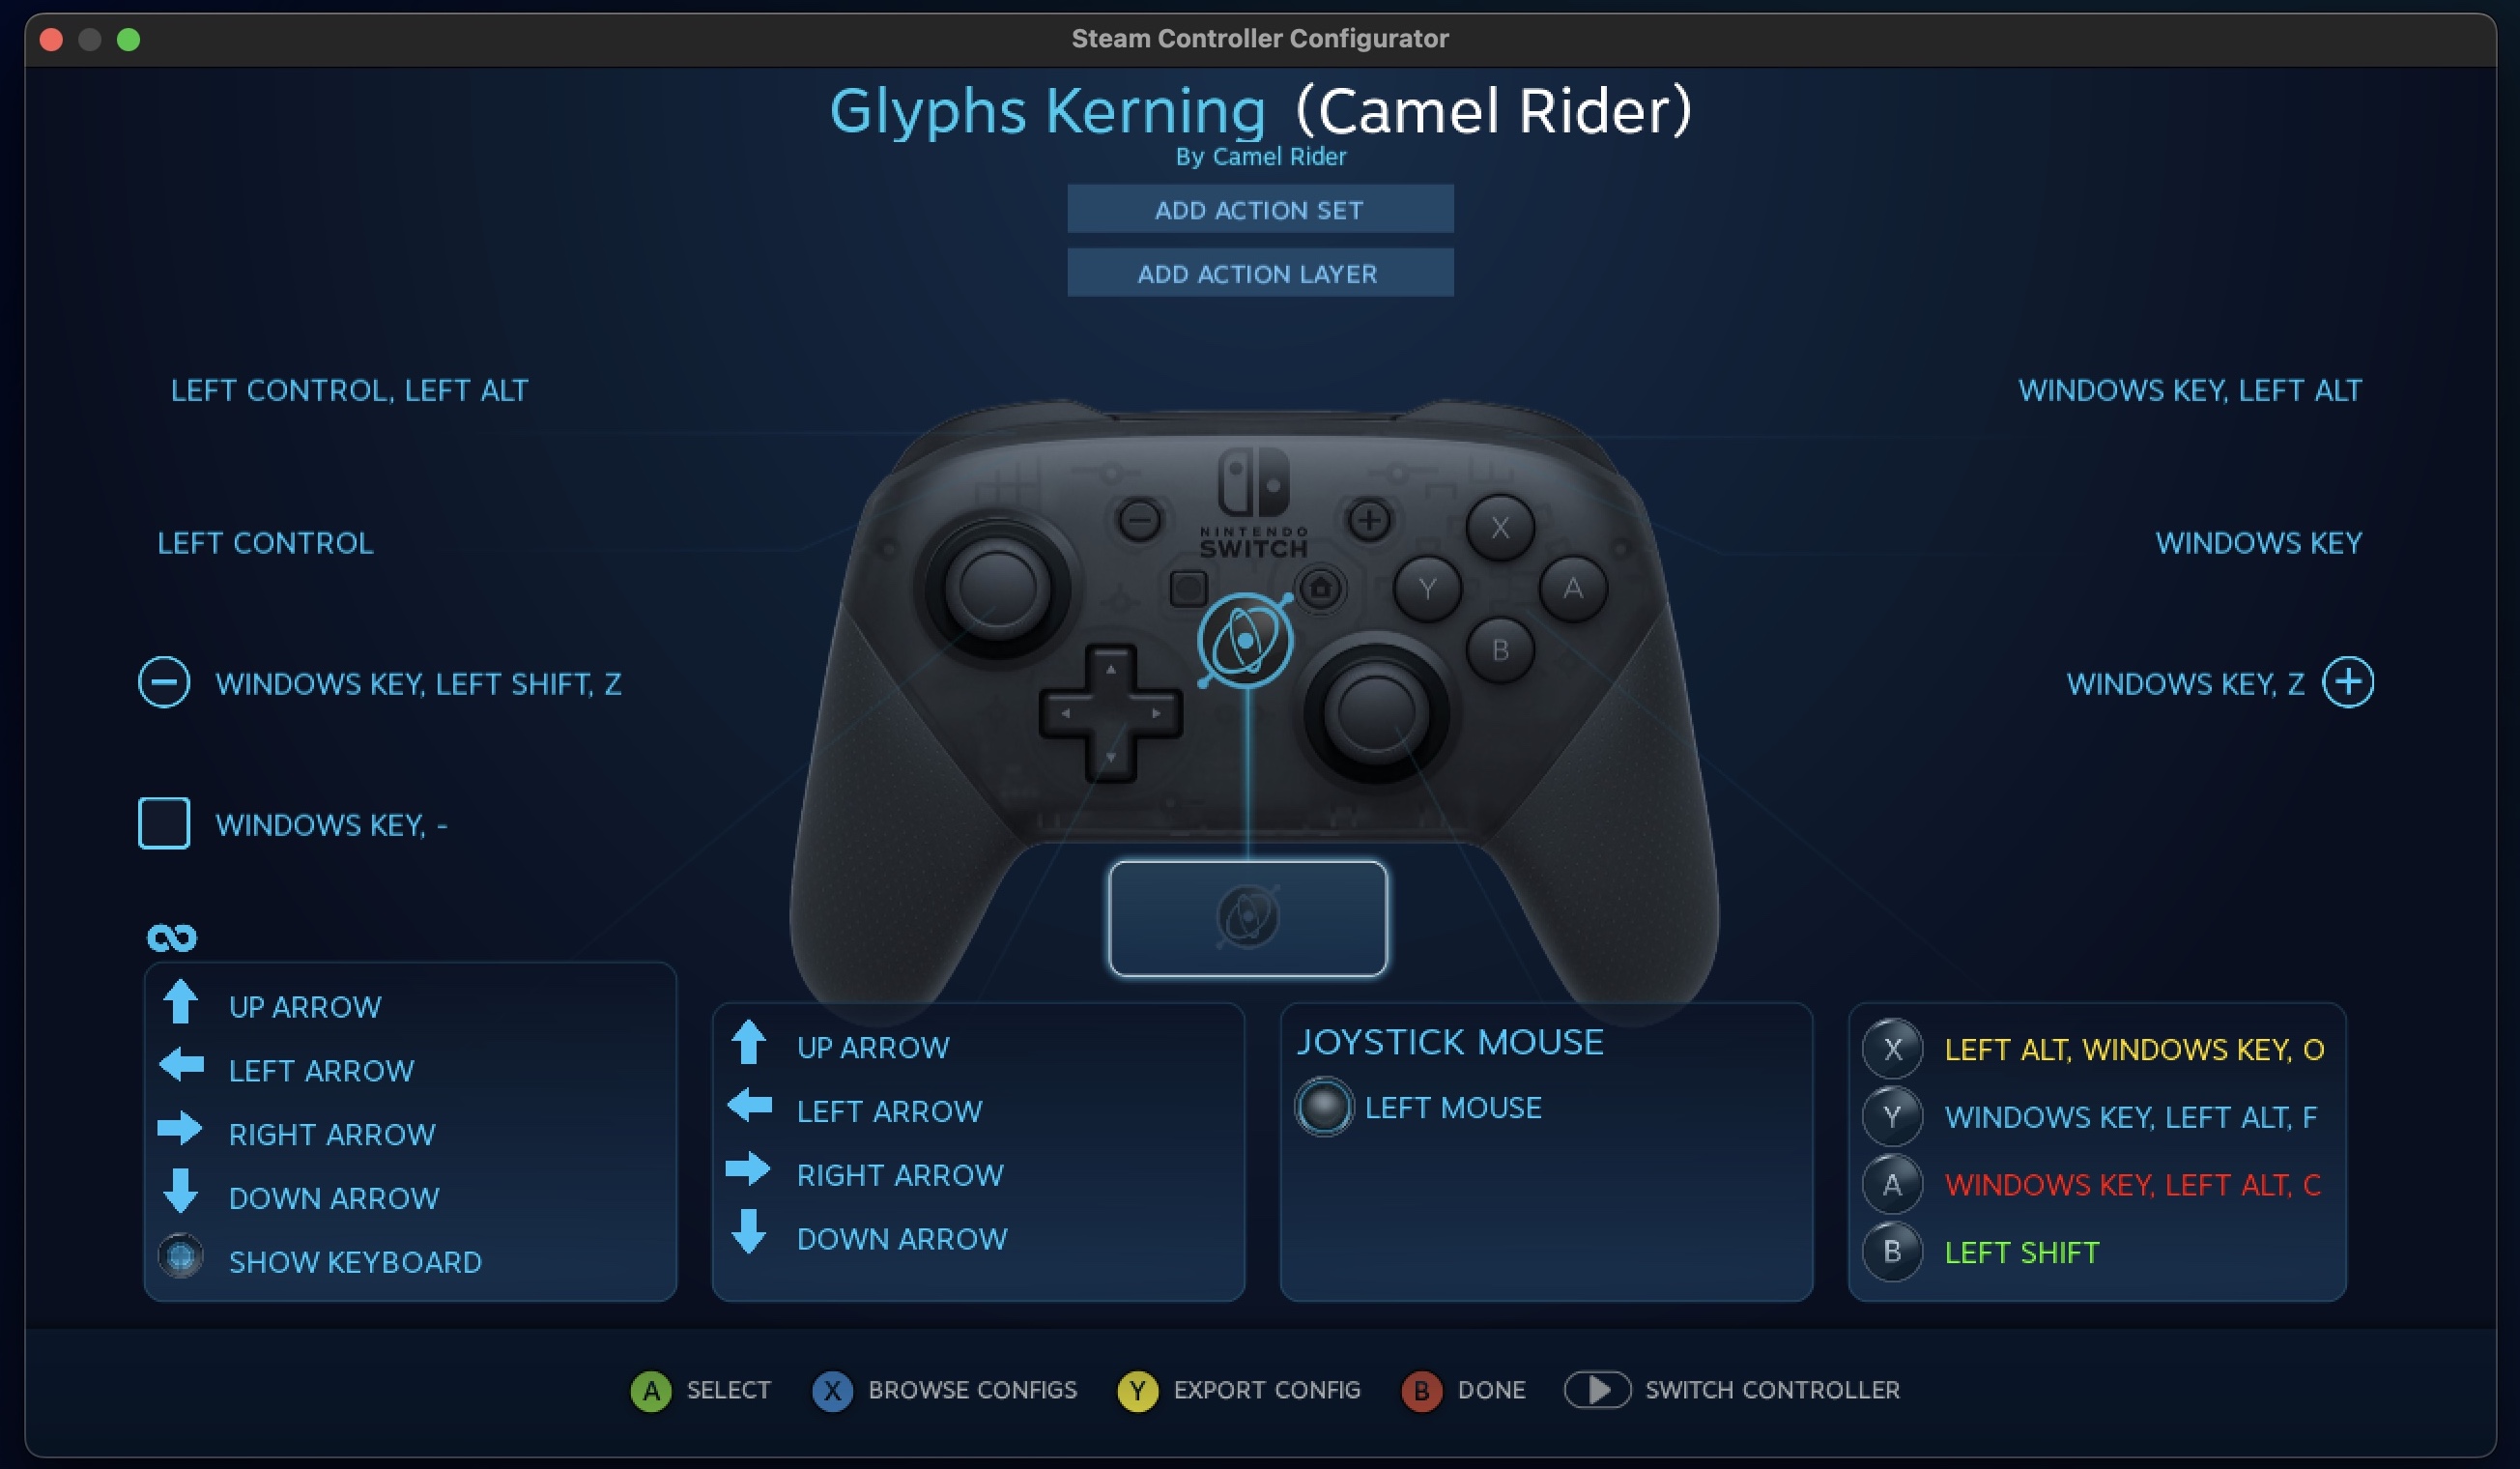
- To change the default button assignments, click on one of the command names lined around the controller. Here I selected the button on the bottom left (L2 for PS, LT for Xbox, ZL for Nintendo)
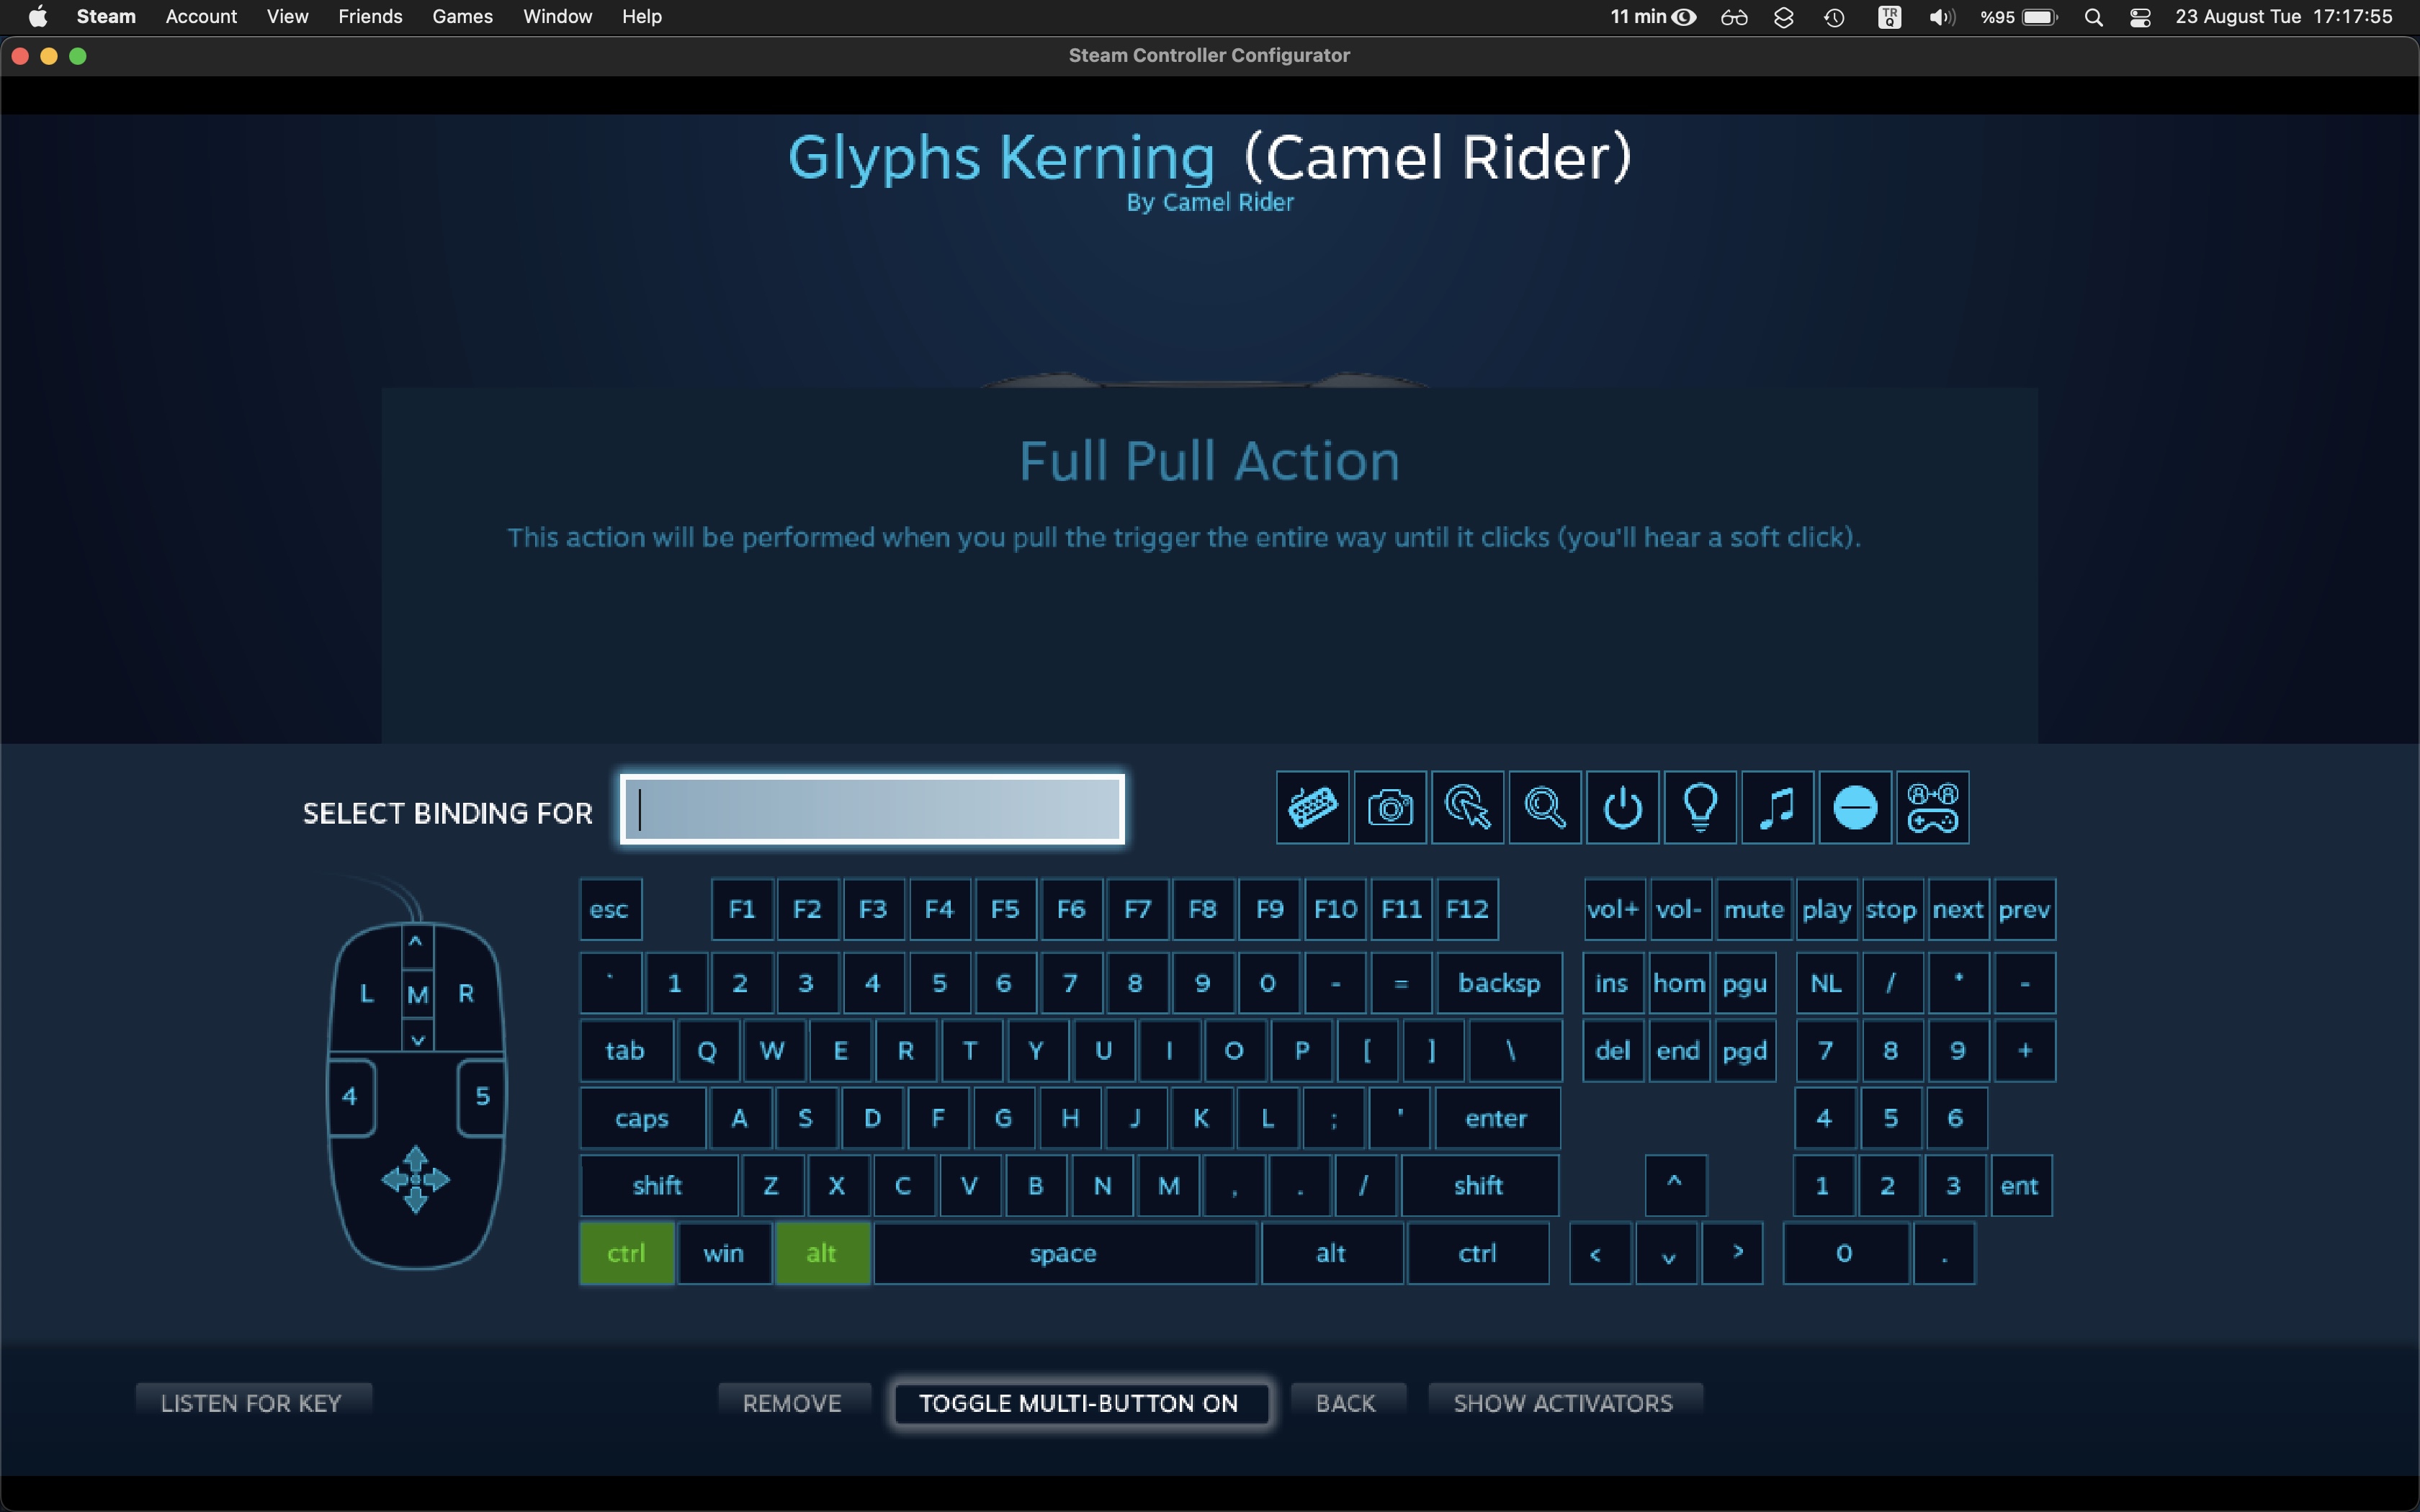
- Click on Full Pull Action
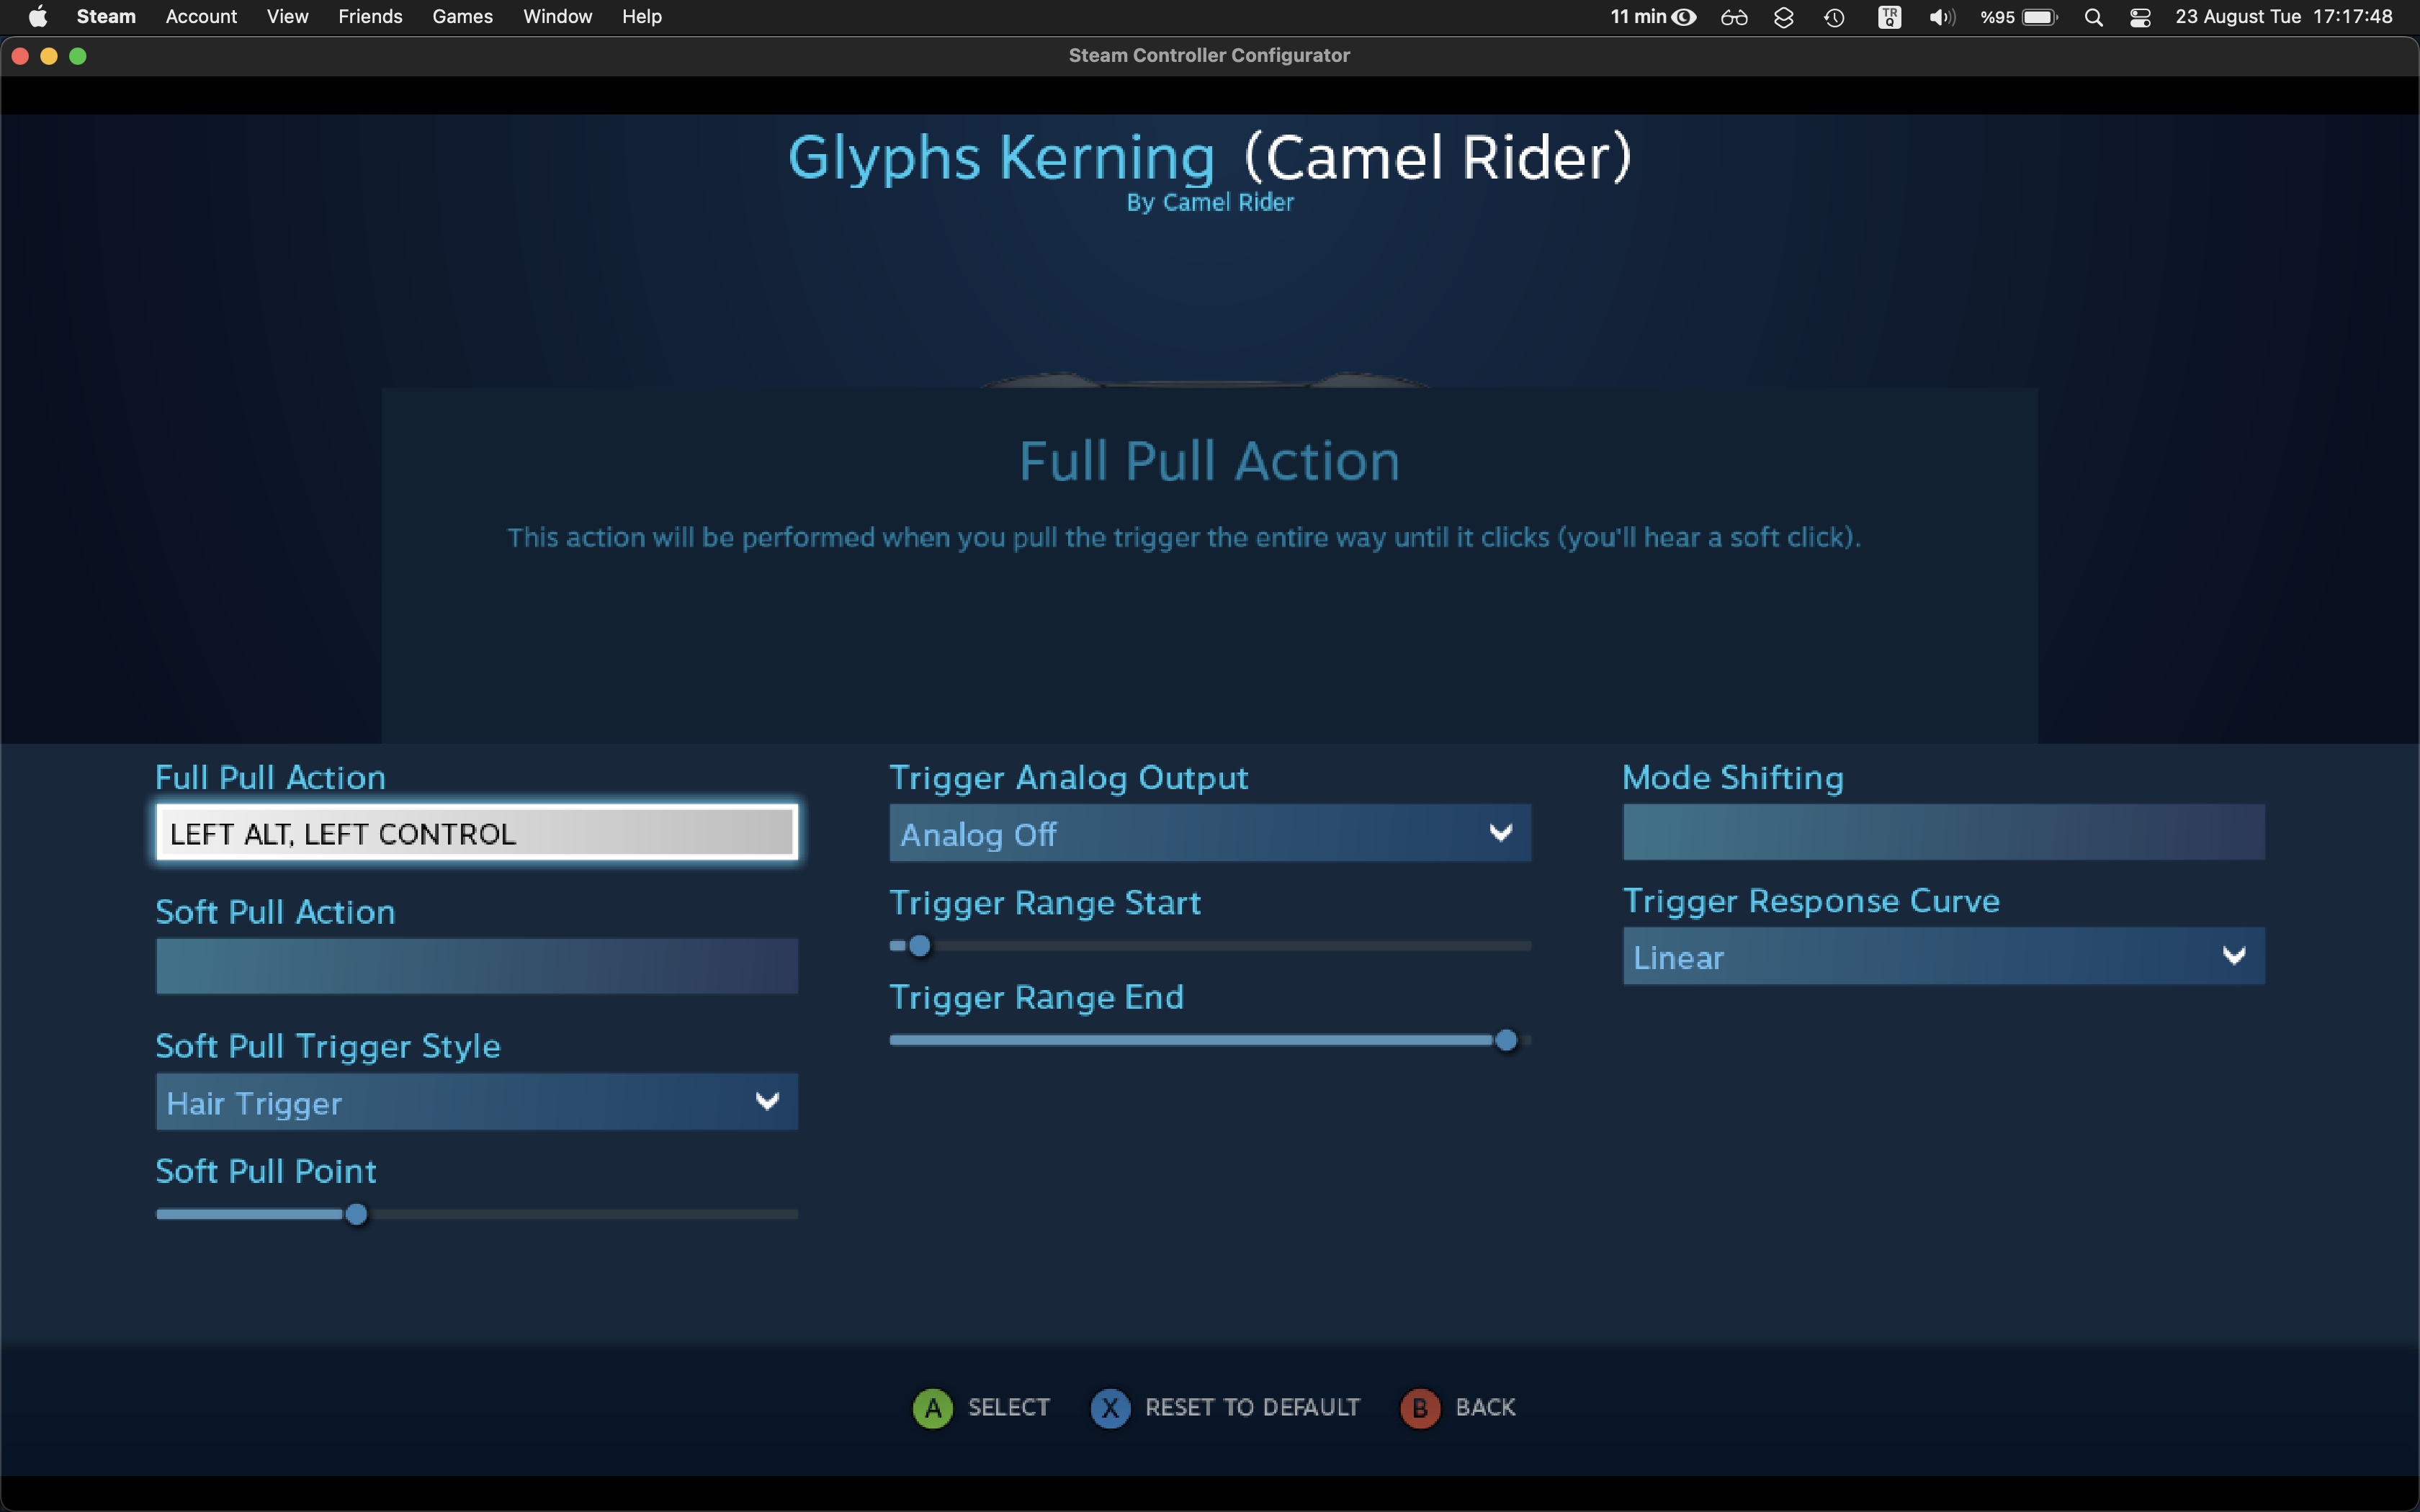
- First Remove the assignment, (If that button will include multiple keys) Toggle Multi-Button On, and then assign the desired keys either by using a keyboard or mouse or controller. Go back
-
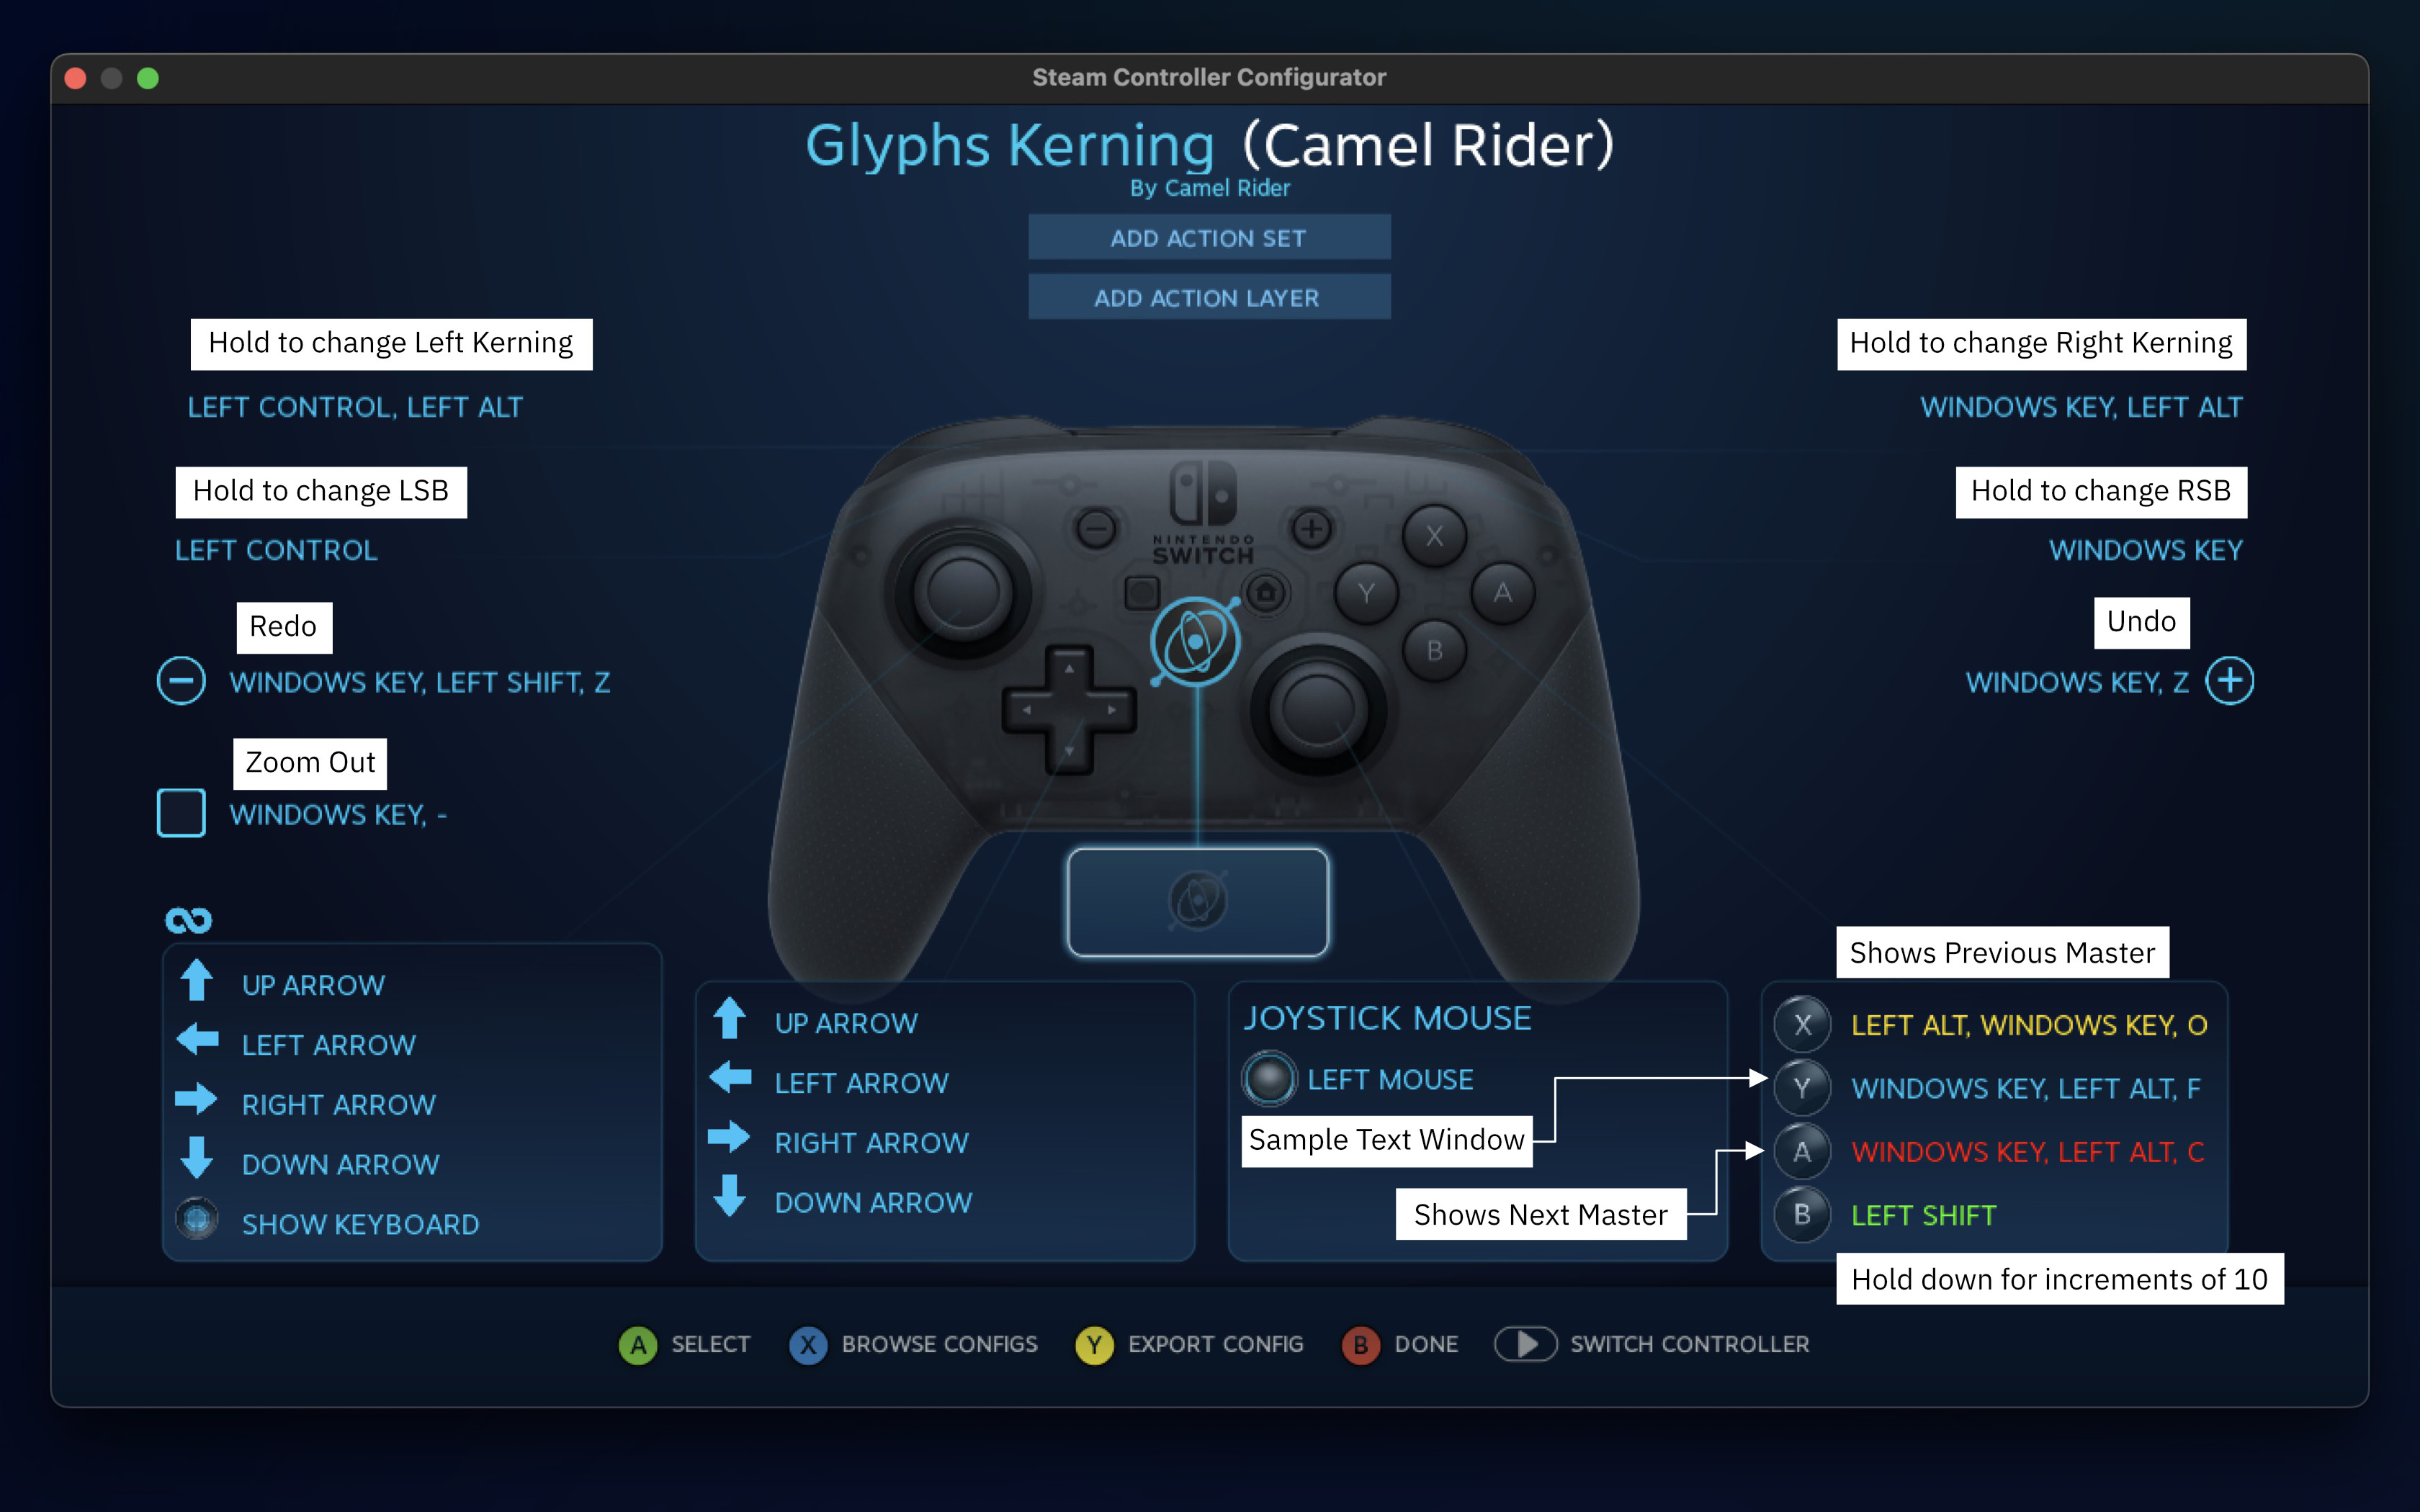
Change all the buttons according to your needs
-
When you are done with configuration > Export Config > Save to Local or Cloud storage You can save as many configurations as you want and apply them whenever you need them.
My button setup is still under development. I like the experience of spacing & kerning by using the left stick more than just pressing the buttons.
Plugin
Scripts