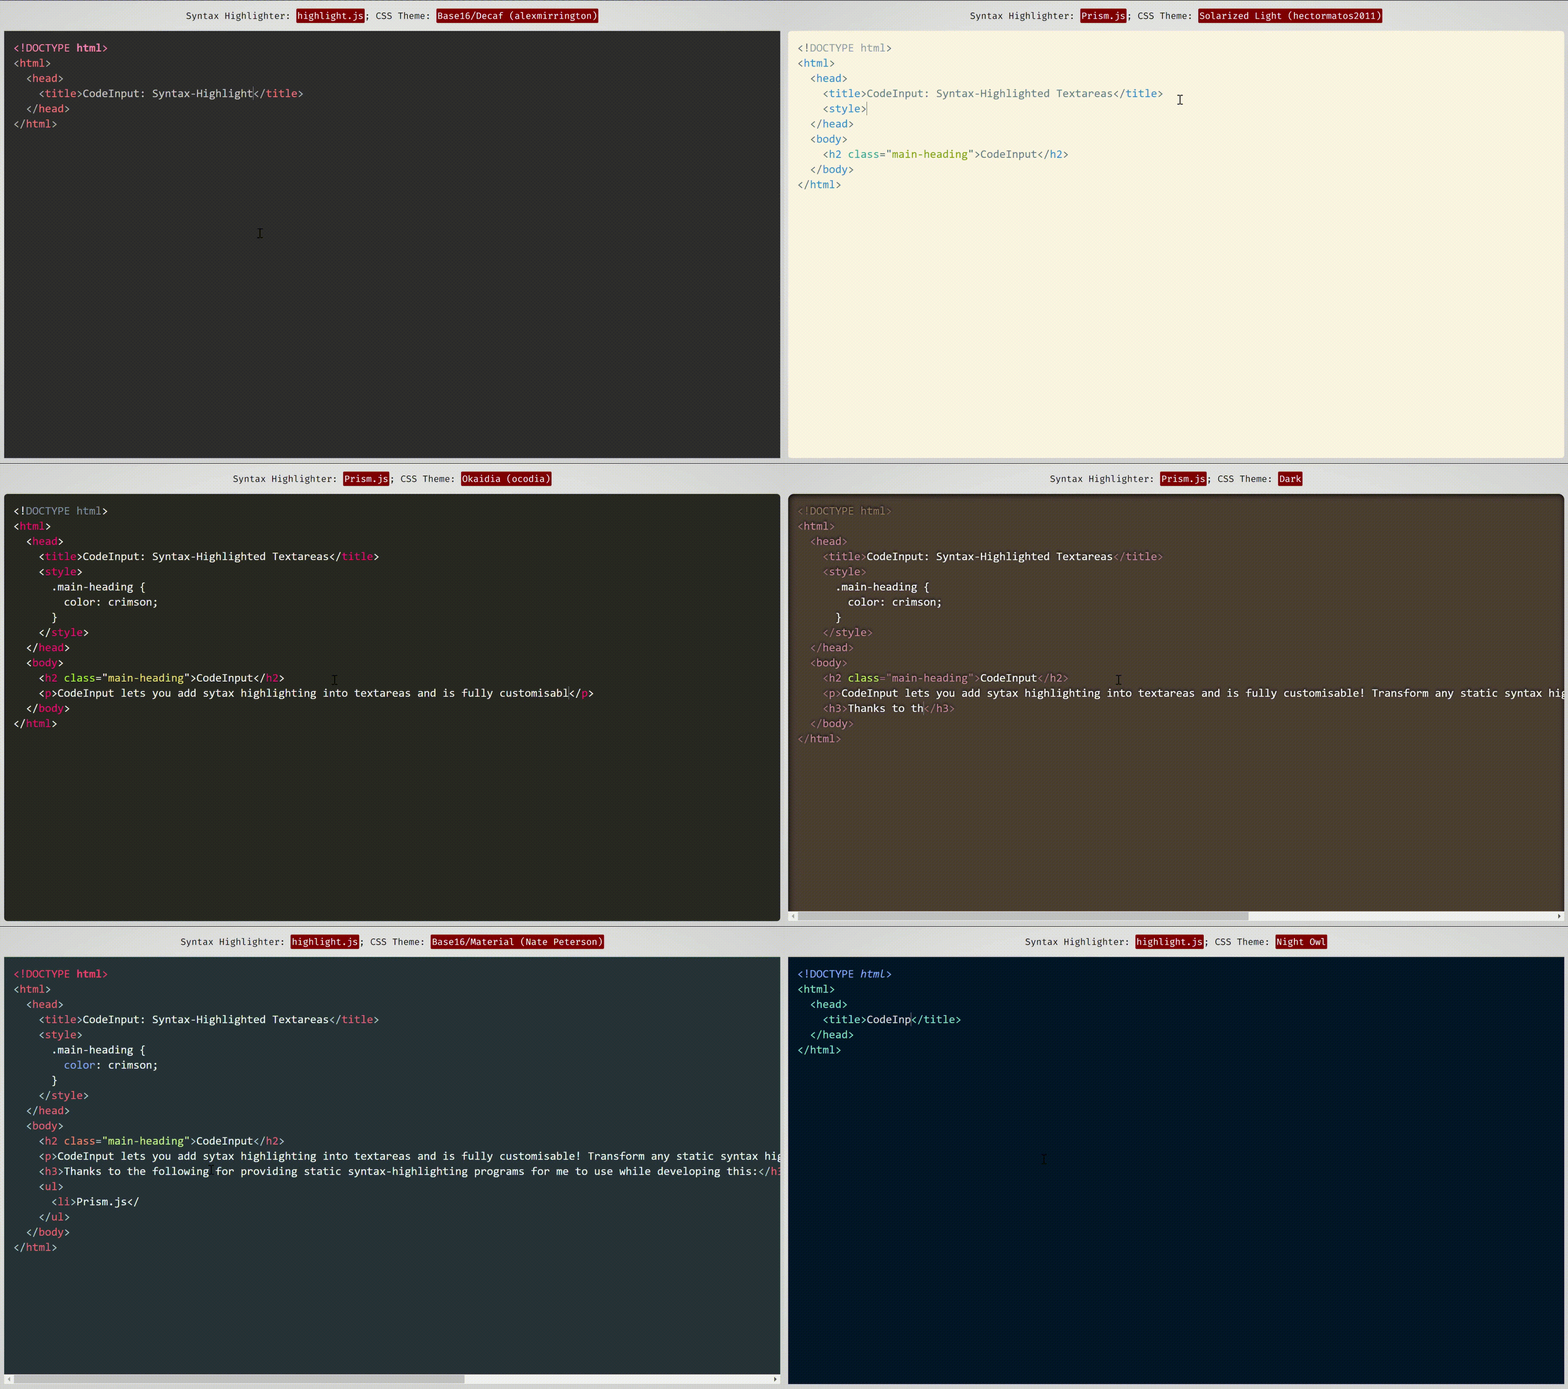
Fully customisable syntax-highlighted textareas. [🚀 View the Demo]
 This demonstration uses themes from Prism.js and highlight.js, two syntax-highlighting programs which work well and have compatibility built-in with code-input.
code-input lets you turn any ordinary JavaScript syntax-highlighting theme and program into customisable syntax-highlighted textareas using an HTML custom element. It uses vanilla CSS to superimpose a textarea on a pre code block, then handles indentations, scrolling and fixes any resulting bugs with JavaScript. To see how it works in more detail, please see this CSS-Tricks article I wrote.
Unlike other front-end code-editor projects, the simplicity of how code-input works means it is highly customisable. As it is not a full-featured editor, you can choose what features you want it to include, and use your favourite syntax-highlighting algorithms and themes.
The <code-input> element works like a <textarea> and therefore works in HTML5 forms and supports using the value and placeholder attributes, as well as the onchange event.
code-input is designed to be both easy to use and customisable. Here's how to use it to create syntax-highlighted textareas:
- First, import your favourite syntax-highlighter's JS and CSS theme files to turn editable.
- Then, import the CSS and JS files of
code-inputfrom a downloaded release or a CDN. The non-minified files are useful for using during development.
Locally downloaded
<!--In the <head>-->
<script src="path/to/code-input.min.js"></script>
<link rel="stylesheet" href="path/to/code-input.min.css">
From JSDelivr CDN
<!--In the <head>-->
<script src="https://cdn.jsdelivr.net/gh/WebCoder49/code-input@1.2/code-input.min.js"></script>
<link rel="stylesheet" href="https://cdn.jsdelivr.net/gh/WebCoder49/code-input@1.2/code-input.min.css">The next step is to set up a template to link code-input to your syntax-highlighter. If you're using Prism.js or highlight.js, you can use the built-in template, or you can create your own otherwise. In these examples, I am registering the template as "syntax-highlighted", but you can use any template name as long as you are consistent.
-
Highlight.js:
codeInput.registerTemplate("syntax-highlighted", codeInput.templates.hljs(hljs, [] /* Array of plugins (see below) */));
-
Prism.js:
codeInput.registerTemplate("syntax-highlighted", codeInput.templates.prism(Prism, [] /* Array of plugins (see below) */));
-
Custom:
codeInput.registerTemplate("syntax-highlighted", codeInput.templates.custom(
  function(result_element) { /* Highlight function - with `pre code` code element */
    /* Highlight code in result_element - code is already escaped so it doesn't become HTML */
  },
  true, /* Optional - Is the `pre` element styled as well as the `code` element? Changing this to false uses the code element as the scrollable one rather than the pre element */
  true, /* Optional - This is used for editing code - setting this to true overrides the Tab key and uses it for indentation */
  false /* Optional - Setting this to true passes the `<code-input>` element as a second argument to the highlight function to be used for getting data- attribute values and using the DOM for the code-input */,
  [] // Array of plugins (see below)
));
Plugins allow you to add extra features to a template, like automatic indentation or support for highlight.js's language autodetection. To use them, just:
- Import the plugins' JS files after you have imported
code-inputand before registering the template. - Place instances of the plugins in the array of plugins argument when registering, like this:
<script src="code-input.js"></script>
<!--...-->
<script src="plugins/autodetect.js"></script>
<script src="plugins/indent.js"></script>
<!--...-->
<script>
  codeInput.registerTemplate("syntax-highlighted",
    codeInput.templates.hljs(
      hljs,
      [
        new codeInput.plugins.Autodetect(),
        new codeInput.plugins.Indent()
      ]
    )
  );
</script>
To see a full list of plugins and their functions, please see plugins/README.md.
Now that you have registered a template, you can use the custom <code-input> element in HTML. If you have more than one template registered, you need to add the template name as the template attribute. With the element, using the lang attribute will add a language-{value} class to the pre code block. You can now use HTML attributes and events to make your element as simple or interactive as you like!
<code-input lang="HTML"></code-input>or
<code-input lang="HTML" placeholder="Type code here" value="<a href='https://github.com/WebCoder49/code-input'>code-input</a>" template="syntax-highlighted" onchange="console.log('Your code is', this.value)"></code-input>If you have any features you would like to add to code-input, or have found any bugs, please open an issue or fork and submit a pull request! All contributions to this open-source project would be greatly appreciated.


