cronologic_linux_kernel
Linux Kernel Module that allows to map large PCIe DMA ring buffers.
It has been developed by cronologic GmbH & Co. KG to support the drivers for its time measurement devices such as:
- xHPTDC8 8 channel 13ps streaming time-to-digital converter
- xTDC4 4 channel 13ps common-start time-to-digital converter
- Timetagger 500ps low cost TDCs
- Ndigo6G-12 6.4 Gsps 12 bit ADC digitizer board with pulse extraction and 13ps TDC.
- Ndigo5G-10 5 Gsps 10 bit ADC digitizer board with pulse extraction
However, the module could be useful to any PCIe developer who is using large buffers that are scattered in PCI space but shall look contiguous in user space.
The user mode part of the driver is available in a separate repository.
The initial code has been written by Bassem Ramzy with support from Richard Weinberger. It is licensed unter GPL3.
The Project
The project generates a Kernel Module that is installed on the system. This module creates a Miscellaneous Driver (miscdev) for every installed device, this miscdev driver is used to access its corresponding device.
Access is done by userspace and applications via the following ways:
sysfs. Accessing the driver from file system, e.g. accessing BAR0 or the Device Configuration.ioctlcalls for themiscdevfile.
The driver is designed to be used for all conologic devices that are installed on PCIe or Thunderbolt sockets.
Architecture

The driver module in this project represents the Crono Kernel Layer in the architecture.
OS Abstraction Layer introduced in the Userspace Repository interfaces with the driver module via ioctl, mainly to manage DMA buffers.
Directory Structure
.
├── include         # Header files to be included by userspace as well
├── src/            # Driver module source files
│   ├── debug_64    # Debug Build makefile and output files
│   └── release_64  # Release Build makefile and output files
├── Makefile        # Project general makefile
└── install.sh      # Installation script
Supported Kernel Versions
Driver is tested on Kernel Versions starting 5.0.
Supported Distributions
The driver is tested on the following 64-bit distributions:
- Ubuntu (ubuntu-20.04.1-desktop-amd64)
- 5.4.0-42-generic
- 5.10.0-051000-generic
- 5.11.0-37-generic
- CentOS (CentOS-Stream-8-x86_64-20210927)(**):
- 5.4.150-1.e18.elrepo.x86_64
- 5.14.9-1.el8.elrepo.x86_64
- Fedora (Fedora-Workstation-Live-x86_64-34-1.2)(**):
- 5.14.9-200.fc34.x86_64
- Debian (Debian GNU/Linux 11 (bullseye))(**)
- 5.10.0-8-amd64
- openSUSE Leap 15.3(**)
- 5.3.15-59.27-default
(**) Driver code is built successfully, however, the driver was not tested on the devices.
Build the Project
To build the project, run make command:
$ makeTarget Output
The build target output is:
| Output | Builds | Description |
|---|---|---|
crono_pci_drvmod.ko |
../../../build/linux/bin/release_64/and ./src/release_64/ |
The release version of the driver. |
crono_pci_drvmod.ko |
../../../build/linux/bin/debug_64/and ./src/debug_64/ |
The debug version of the driver. |
buildfolder is created on the same level of project foldercronologic_linux_kernel, to be shared with all other projects outputs in the same folder.
Makefiles and Build Versions
The following makefiles are used to build the project versions:
| Makefile | Builds | Description |
|---|---|---|
| ./Makefile | Debug Release |
Calls ALL makefiles in sub-directories. This will build both the debug and release versions of the project. |
| ./src/Makefile | Debug Release |
Calls ALL makefiles in sub-directories. This will build both the debug and release versions of the project. |
| ./src/debug_64/Makefile | Debug | Builds the debug version of the project. Output files will be generated on the same directory. Driver module file will be copied to ../../../build/linux/bin/debug_64/ directory. Additional debugging information will be printed to the kernel messages displayed using dmesg. |
| ./src/release_64/Makefile | Release | Builds the release version of the project. Output files will be generated on the same directory. Driver module file will be copied to ../../../build/linux/bin/release_64/ directory. |
Build Prerequisites
Ubuntu
- Make sure you have sudo access.
- Make sure that both
makeandgccpackages are installed, or install them using:
sudo apt-get install make gcc- Make sure
modulesandheadersof your current kernel version are installed, or install them using:
sudo apt-get install linux-headers-$(uname -r) linux-modules-$(uname -r)CentOS
- Make sure you have sudo access.
- Make sure that both
makeandgccpackages are installed, or install them using:
sudo yum install gcc make- If the kernel development is not installed on your system for the current kernel verision, you can install it using
elrepoas following
sudo rpm --import https://www.elrepo.org/RPM-GPG-KEY-elrepo.org
sudo yum install http://www.elrepo.org/elrepo-release-8.el8.elrepo.noarch.rpm- If you are using Long Term Support version, then, you need to run the following commands:
sudo dnf --enablerepo=elrepo-kernel install kernel-lt
sudo dnf --enablerepo=elrepo-kernel install kernel-lt-devel- If you are using Long Mainline Stable Version, then, you need to run the following commands:
sudo dnf --enablerepo=elrepo-kernel install kernel-ml
sudo dnf --enablerepo=elrepo-kernel install kernel-ml-devel
Fedora
- Make sure you have sudo access.
- Make sure that both
makeandgccpackages are installed, or install them using:
sudo yum install gcc make- If the kernel development is not installed on your system for the current kernel verision, you can install it as following
sudo yum install kernel-devel-$(uname -r)Debian
- Make sure you have sudo access.
- Make sure that both
makeandgccpackages are installed, or install them using:
sudo apt-get install make gcc- Make sure
modulesandheadersof your current kernel version are installed, or install them using:
sudo apt-get install linux-headers-$(uname -r) openSUSE
- Make sure you have sudo access.
- Make sure that both
makeandgccpackages are installed, or install them using:
sudo zypper install make gcc- Make sure
modulesandheadersof your current kernel version are installed, or install them using:
sudo zypper in kernel-devel kernel-default-devel
sudo zypper up
General Notes
- You can check if
makeandgccare installed by running the following commands:
make -vand
gcc -v- You can check if
kernel-develis installed on your system by running the following command:
ls /lib/modules/$(uname -r)/buildClean the Output Files
To clean the project all builds output:
make cleanOr, you can clean a specific build as following:
.../src/debug_64$ make clean
.../src/release_64$ make clean
More Details
Preprocessor Directives
| Identifier | Description |
|---|---|
OLD_KERNEL_FOR_PIN |
This identifier is defined when the current kernel version is < 5.6. Kernel Version 5.6 is the first version introduced pin_user_pages, which is used by the driver for DMA APIs. |
CRONO_KERNEL_MODE |
This identifier is used to differentiate between using the header files by the driver code and using them by userspace and applications code. Hance, it's defined only in the driver module makefiles. |
DEBUG |
Debug mode. |
Why There Is a Makefile Per Build
For creating a kernel module, it's much simpler (and feasibile) to have a Makefile per build, rather than having all builds in one Makefile.
Create Symbolic Links to Source Files
Makefile for kernel module is simpler when having all the source code files in the same directory of the Makefile.
That's why, the Makefiles create symbolic links to the source files before starting the build, then delete them after building the code.
Installation
Overview
This installation of the driver module is very simple, and is mainly done via insmod, however, an installation script is provided to support wider options, like debug, add to boot, uninstall, etc...
The installation firstly builds the driver module code, that's why the minimal build packages are needed as prerequisites (mentioned in the following sections).
User should run the installation script with every kernel version used on the machine, and after every upgrade to a new kernel version.
Prerequisites
Refer to: Build Prerequisites
Installation Steps
To install the driver:
- Clone this repository, either download it as .zip file and extract it, or use git.
git clone https://github.com/cronologic-de/cronologic_linux_kernel- From the
Terminal, navigate into the directorycronologic_linux_kernel, for instance:
cd cronologic_linux_kernel- Run the installation script:
sudo bash ./install.shor, simply, run insmod
sudo insmod ../../../build/linux/bin/release_64/crono_pci_drvmod.ko- And, voi la. The driver module name is
crono_pci_drvmod.
install.sh
Usage
    sudo bash ./install.sh [Options]

    [Options]
    -s  (S)top currently loaded driver (if exists). if '-s 0', currently loaded driver
        will not be stopped, otherwise, (by default) it's stopped if loaded.
        Ignored if -i is not '0', or if -u is used.
    -i  (I)nstall driver. if '-i 0', driver will not be installed, otherwise,
        (by default) driver is installed. Ignored if -u is used.
    -b  Add driver to (B)oot. If '-b 0', driver will not be added to boot, otherwise,
        (by default) driver is added. Ignored if -u is used.
    -u  Uninstall the driver and remove it from bood startup.
    -d  Display (D)ebug Messages.
    -h  Display (H)elp and usage and exit.
Hints
- The script installs the
releasebuild of the driver, however, you can install thedebugbuild of the driver, that is built automatically by the script, by replaceing the line:
DRVR_INST_SRC_PATH="../build/linux/bin/debug_64/$DRVR_FILE_NAME.ko"with
DRVR_INST_SRC_PATH="../build/linux/bin/release_64/$DRVR_FILE_NAME.ko"The debug build of the driver module prints more information to the kernel messages displayed using dmesg.
-
In case any error is encoutnered during installation, it should be either displayed explicitly on the terminal output or written in the error log file
errlogfound on the directory root. -
If the script encountered any error, it's highly recommended to rerun the script using
-d(debug) option, which should provide further information about the step and command caused that error, e.g.
sudo bash ./install.sh -dUninstall the Driver
Run the following command and it will uninstall the driver (if installed), and remove it from boot (if it's there):
sudo bash ./install.sh -uor, you can run rmmod, which will only removes the installed module but won't remove it from boot if it's there.
sudo rmmod crono_pci_drvmod.koWhat Happens After Installation
After installing the driver module successfully, the following takes place:
- The driver module is listed in the system. You should find the module listed using
lsmod, e.g.
$ lsmod | grep crono
crono_pci_drvmod 53248 0- The system
probesall installed cronologic devices, and sends them to the driver, which inturns creates aMisc Driverfor each device. You should find the misc drivers on the/devdirectory:
ls /dev/crono* -lah- All driver messages are directed to the kernel messages displayed using
dmesg
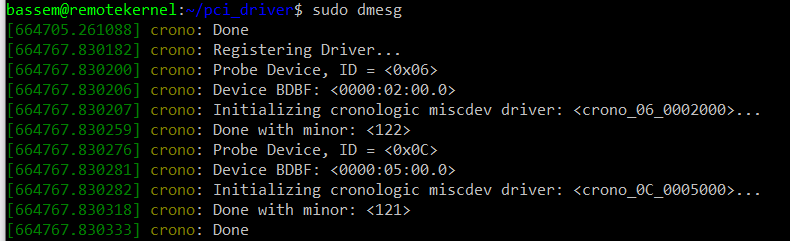
A typical debug successful output could be as following for two devices installed on the system (an xTDC4, and an xHPTDC8):
Accessing the Driver
Userspace and applications can access the device via the following ways:
- Using
sysfs. - Using
ioctl.
Full code is found in the userspace repository.
Using sysfs
Accessing the miscdev via sysfs is mainly done via accessing files under directory /sys/bus/pci/devices/DDDD:BB:DD:F/.
Sample code:
        char dev_slink_path[PATH_MAX];
        char BAR0_resource_path[PATH_MAX];
        char dev_slink_content_path[PATH_MAX];
        ssize_t dev_slink_content_len = 0;
        int fd = -1;

        // Get the /sys/devices/ symbolic link content
        dev_slink_content_len =
            readlink("/sys/bus/pci/devices/0000:02:00.0", dev_slink_content_path, PATH_MAX - 1);
        if (-1 == dev_slink_content_len) {
                return -1;
        }
        // e.g. ../../../devices/pci0000:00/0000:00:1c.7/0000:02:00.0
        dev_slink_content_path[dev_slink_content_len] = '\0';

        // Build pPath
        sprintf(BAR0_resource_path, "/sys/%s/resource0", &(dev_slink_content_path[9]));

        // Open the BAR resource file
        fd = open(BAR0_resource_path, O_RDWR | O_SYNC);

        // Do mmap
        .
        .

        // Close the file
        close(fd);

        .
        .
Using ioctl
Application should call ioctl using both the miscdev file name and the corresponding request value defined in ./include/crono_linux_kernel.h with prefix IOCTL_CRONO_.
Sample code to call ioctl:
#include "crono_linux_kernel.h"
{
        struct stat miscdev_stat;
        char miscdev_path[PATH_MAX];
        char miscdev_name[CRONO_DEV_NAME_MAX_SIZE];
        struct crono_dev_DBDF dbdf = {0, 0, 2, 0};
        CRONO_BUFFER_INFO buff_info;

        // Get the miscdev file path, e.g. `/dev/crono_06_0002000`
        CRONO_CONSTRUCT_MISCDEV_NAME(miscdev_name, 0x06, dbdf);
        sprintf(miscdev_path, "/dev/%s", pDevice->miscdev_name);
        if (stat(miscdev_path, &miscdev_stat) != 0) {
                printf("Error: miscdev `%s` is not found.\n", miscdev_path);
                return -1;
        }

        // Open the miscdev
        miscdev_fd = open(miscdev_path, O_RDWR);
        if (miscdev_fd < 0) {
                printf("Error %d: cannot open device file <%s>...\n", errno,
                       miscdev_path);
                return -1;
        }

        // Initialize buffer information
        buff_info.xyz = abc ;

        // Call ioctl
        if (CRONO_SUCCESS !=
                ioctl(miscdev_fd, IOCTL_CRONO_LOCK_BUFFER, &buff_info)) {
                close(miscdev_fd);
                return -1 ;
        }

        // Close device file
        close(miscdev_fd);

        .
        .

}
Miscellaneous Device Driver Naming Convension
The misc driver name is consutructed following the macro CRONO_CONSTRUCT_MISCDEV_NAME
crono_%02X_%02X%02X%02X%01X, device_id, domain, bus, dev, funcFor example: the misc driver name is crono_06_0002000 for xTDC4 (Id = 0x06), domain = 0x00, bus = 0x02, device = 0x00, and function = 0x0.
The Code
Design Approaches and Concepts
DMA APIs Handling
To satisfy DMA APIs "guards", the driver code takes the following into consideration:
- Calls
unpin_user_pagesto pin the user pages, and callsunpin_user_pageswhen done working with it. - Allocates Scatter/Gather table using
sg_alloc_table_from_pages, while its output is not really needed. - Uses
dma_map_sgto map the Scatter/Gather table.
pin_user_pages vs get_user_pages
pin_user_pages is introduced, starting Kenrel Version 5.6, to resolve problems caused by get_user_page as per this reference.
The driver uses pin_user_pages for kernel versions >= 5.6, and uses get_user_pages for kernel versions < 5.6.
Kernel version is determined in the Makefile, based on which, the identifier OLD_KERNEL_FOR_PIN is defined in case it's < 5.6.
Device vs Device Type
A PC might have two devices of different types (models): e.g. xHPTDC8 and xTDC4. Each type is called a device type.
This is generalizing the idea for a case that might be rare, where a PC can have two boards of xHPTDC8 installed, that’s why there is an array of devices in every type [crono_device_types_info]https://github.com/cronologic-de/cronologic_linux_kernel/blob/main/src/crono_kernel_module.c#L24.
Using sg_alloc_table_from_pages
The driver uses sg_alloc_table_from_pages as it optimizes memory (size of returned pages information) compared to __sg_alloc_table_from_pages, especially with huge memory sizes.
A macro is provided to toggle between the two functions, which is USE__sg_alloc_table_from_pages. By defining this macro, the code will use __sg_alloc_table_from_pages instead.
Use sg_alloc_table_from_pages to bind consecutive pages into one DMA descriptor to reduce size of S/G table sent to device.
Using __sg_alloc_table_from_pages instead of sg_alloc_table_from_pages will increase swiotlb buffer, when using dma_map_sg, it used 5868 (slots) to 32768 (slots), both ways, buffer is FULL:
crono_pci_driver 0000:05:00.0: swiotlb buffer is full (sz: 524288 bytes), total 32768 (slots), used 5868 (slots)
Using sg_dma_address To Get DMA Memory Physical Address
Using sg_dma_address is not applicable by “our driver” design when using sg_alloc_table_from_pages, while it is theoretically applicable when using __sg_alloc_table_from_pages and passing PAGE_SIZE.
When using sg_alloc_table_from_pages contiguous ranges of the pages are squashed into a single scatterlist entry up to the maximum size, hence, nents are not one-to-one mapped with the pages, so, we can’t really get use of sg_dma_address for page physical address.
As per Linux documentation, the number of pages returned by sg_alloc_table_from_pages is not necessarily equal to the number of input pages, actually in practice it’s much less, while the driver needs the physical address of every page of size 4096.
Since the driver uses sg_alloc_table_from_pages, accordingly, the driver uses PFN_PHYS(page_to_pfn()) to get the memory physical address.
BTW, I tried __sg_alloc_table_from_pages & sg_dma_address, but the addresses didn’t seem to be correct, but I didn’t use it again for the above mentioned reason.
Getting Kernel Version @ Compile Time
Kernel version is not prefferred to be got using include <linux/version.h> and LINUX_VERSION_CODE identifier to cover that case when there are more than a kernel version installed on the environment.
The unsigned memory address
For backward compability with kernel versions < 5.6, where pointers are not passed safely to ioctl, a new "integral unsigned" member variable (not a pointer, prefixed by u) is added to strcutures passed to ioctl for every pointer in the stucture, this unsigned variable is set to the value of the address of the relevant pointer (by ioctl caller) and is used (instead of the pointer member variable) in the copy_from_user and copy_to_user.
For instance, the variable ucmds in CRONO_KERNEL_CMDS_INFO:
typedef struct {
        .
        CRONO_KERNEL_CMD *cmds;
        uint64_t ucmds; // Is used exchangeably with `cmds`.
                        // It is mainly provided for backward compatibility
                        // with kernel versions earlier than 5.6
        .
} CRONO_KERNEL_CMDS_INFO;
While, in kernel versions >= 5.6, it's safe to use the pointer member variables of the structures directly.
Moreover, if the structure member variable is a strcuture that has a pointer member, this "sub-pointer" needs to have a relevant u integral variable as well. That's why, we target to simplify all the structures passed to ioctl minimizing pointers as much as we can.
struct file in Linux
The following chart illustrates the relation between the file struct* (filp) that's passed to ioctl
int ioctl(struct file *filp, ..);with:
- Its
inode. - The calling process
PID(userspace application). - The locked buffer.

Simple skeleton steps are like:
- Register (e.g. using
insmod) the kernel module, that registers a miscdev of the device, e.g./dev/crono_06_0003000, ofinodeA. - Run
xtdc4_ug_exampleof Process ID12345. - The process
12345opens/dev/crono_06_0003000by callingopen(), returning file descriptorfdB. - The process
12345callsioctl()usingfdBto lockBufferC(allocated previously in userspace12345). - In the kernel module,
ioctl()receives astruct file*of valuefilpD(in kernel space) that is related tofdB(in userspace). - The kernel module then locks the buffer
BufferCand assign it to process12345(CRONO_BUFFER_INFO_WRAPPER.app_pid).
Although a cronologic device can have one and only one ring buffer, but the chart was provided as a general example.
Code-style
The source code files are formatted using clang-format, with LLVM format and IndentWidth: 8.
A sample dmesg output
Release
Sample dmesg output when successfully installing the driver, running the xTDC4 user guide example, then remove the module:
[  845.504198] crono: Registering PCI Driver...
[  845.504213] crono: Probe Device, ID <0x06>
[  845.504236] crono: Probed device BDBF: <0000:03:00.0>
[  845.504237] crono: Initializing cronologic miscdev driver: <crono_06_0003000>...
[  845.504349] crono: Done probing with minor: <116>
[  845.504367] crono: Done registering cronologic PCI driver
[  851.814986] crono: Done locking buffer: wrapper id <0>
[  851.815269] crono: Done locking buffer: wrapper id <1>
[  851.948633] crono: Done releasing buffer: wrapper id <0>
[  851.948793] crono: Done releasing buffer: wrapper id <1>
[  851.955006] crono: Done cleanup process PID<7858> buffer wrappers
[  860.159463] crono: Unregistering <1> miscellaneous devices...
[  860.159464] crono: Exiting cronologic miscdev driver: <crono_06_0003000>, minor: <116>...
[  860.159570] crono: Done exiting miscdev driver: <crono_06_0003000>
[  860.159572] crono: Done unregistering miscellaneous devices
[  860.159572] crono: Cleanup wrappers list...
[  860.159572] crono: Done cleanup wrappers list
[  860.159573] crono: Removing Driver...