Spark AR Tutorial: Building an AR Game
Introduction
In this tutorial, you will build a Spark AR World Effect. You will learn how to use scripting to add logic and interactivity to your effects.
Key Concepts
This tutorial will cover the following key concepts:
-
Writing game logic with the scripting module
-
Working with reactive programming in Spark AR
-
Creating animations with the scripting module
Spark AR Features
We’ll implement the following Spark AR features in the project:
What We’ll Build
This tutorial will guide you in a step-by-step process to create an augmented reality puzzle game called Rabbit Coder. I created this game for the first Facebook AR hackathon and the project won first place. You can try out the game here. By the end of this tutorial, you should have learned how to build this game in Spark AR, you can then use this as a template to build other awesome games.
|
Note
|
To make this tutorial easier and shorter, we will not include all the features of Rabbit Coder. The following features will not be included: |
-
Obstacle and switch levels
-
Loop levels
Understanding the Game
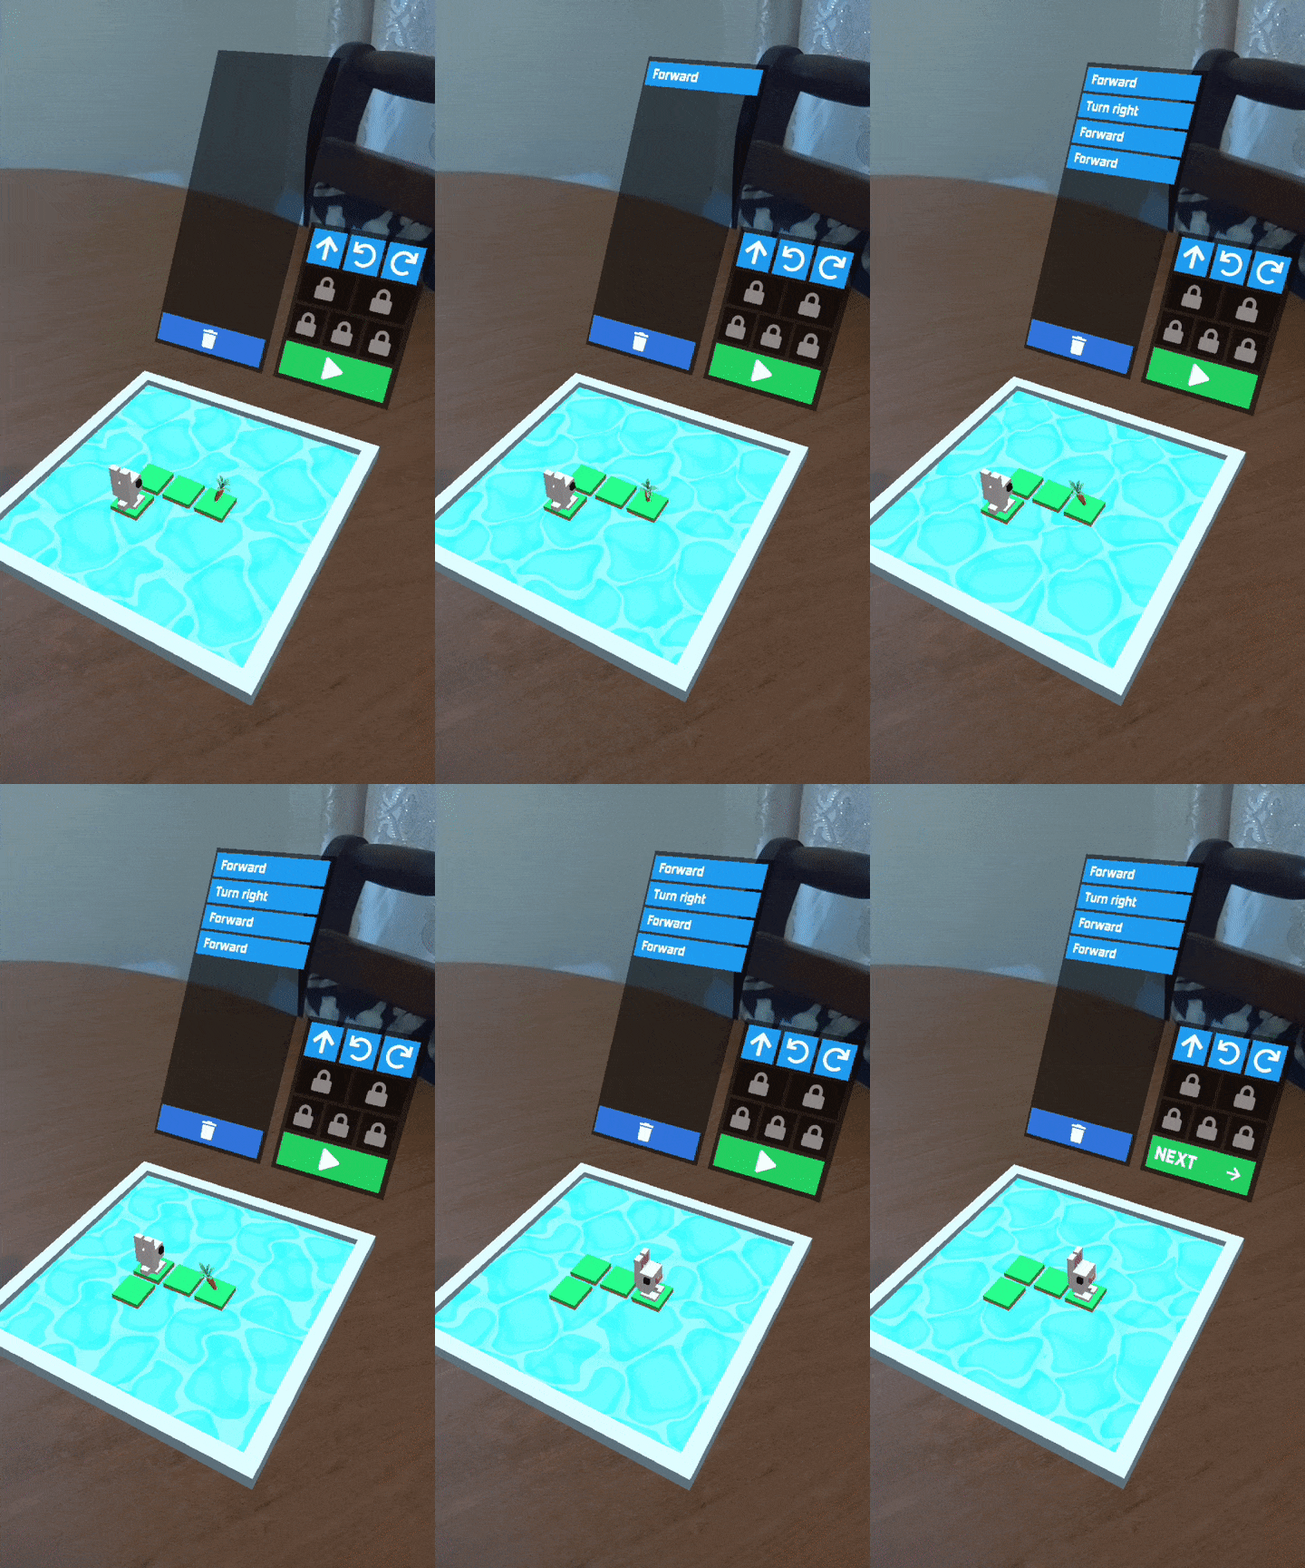
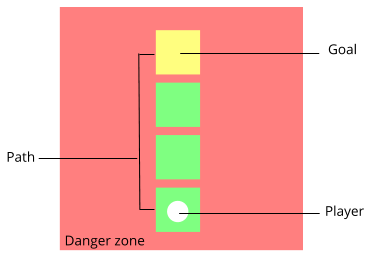
The objective of the game is to get the rabbit to the carrot using commands such as forward, left, and right, you need to insert these commands in the game and press the play button to execute them. The image below shows an example of one of the levels. The player must pass through the path to reach the goal without falling into the danger zone.
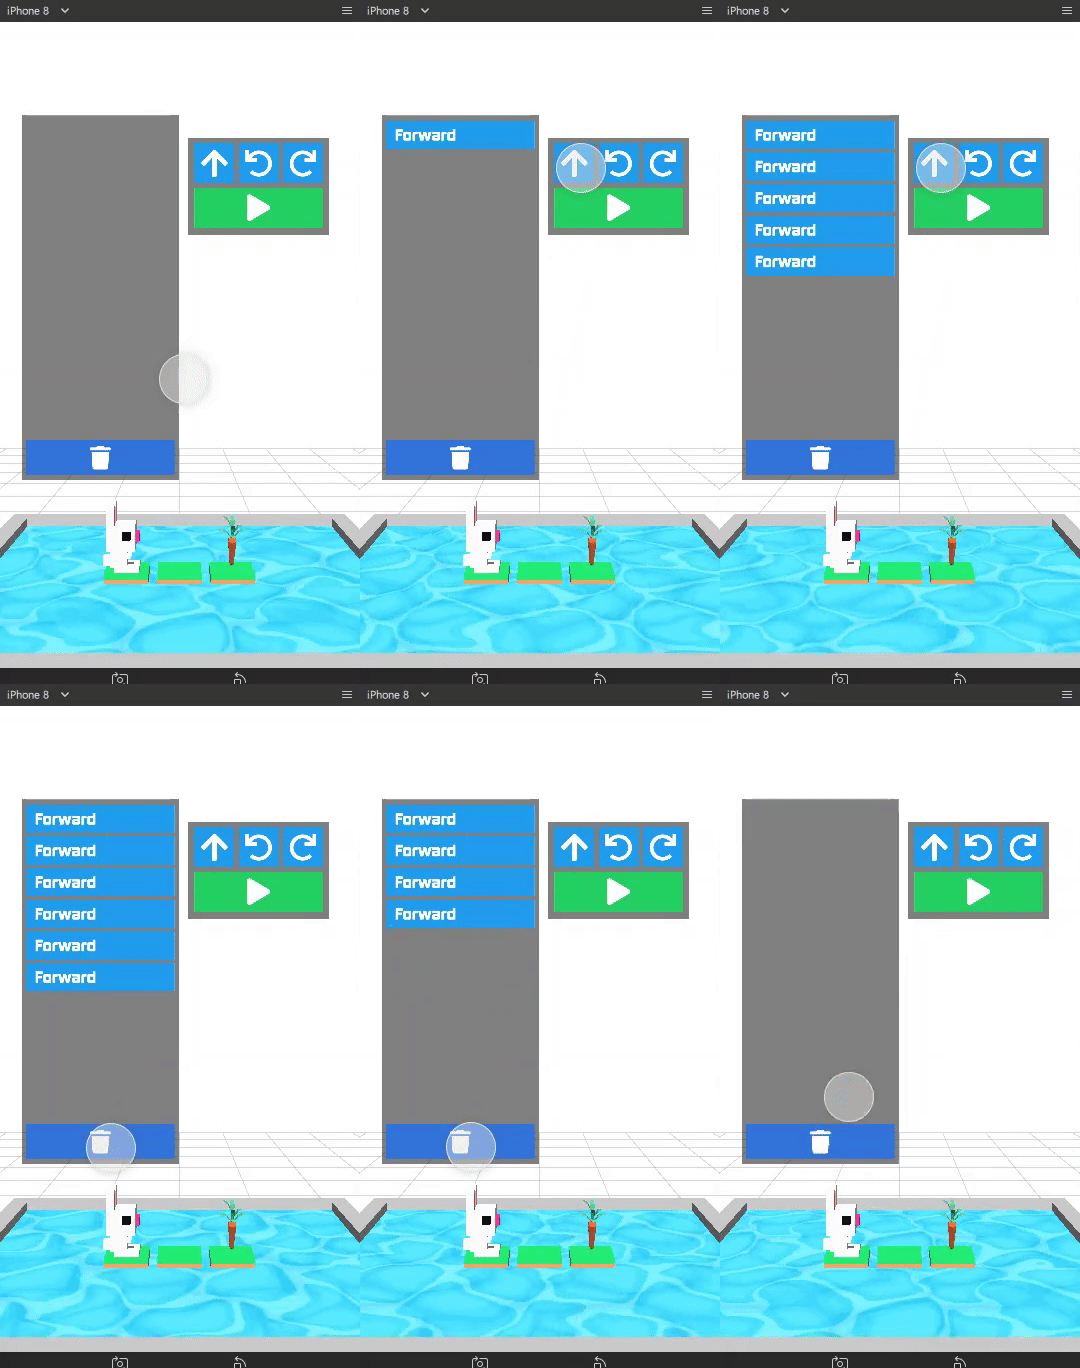
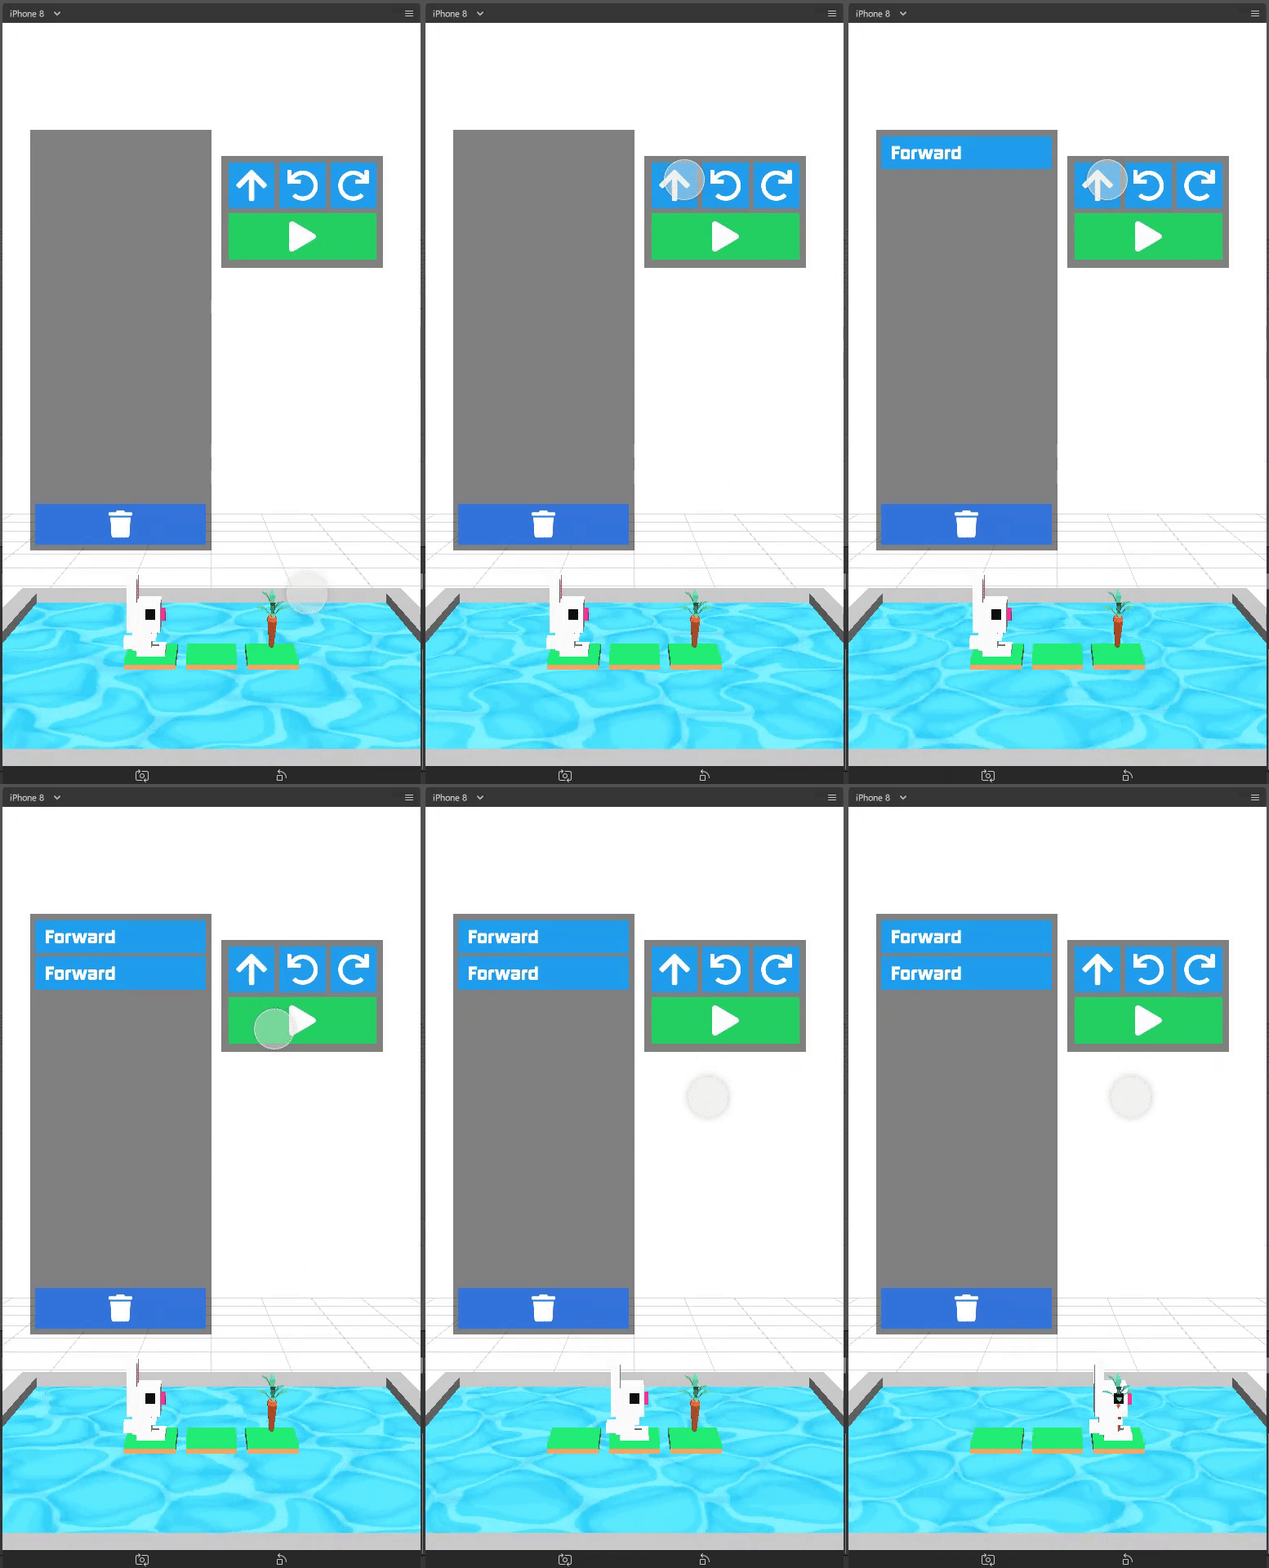
In the game, commands are represented by blocks, these commands are executed from top to bottom, the executor will iterate through each command, and if the command is equal to forward then the rabbit will move one step forward, if the command is equal to left or right the rabbit will turn 90 degrees in the respective direction. The image below shows a simplified example of the command blocks.
In the commands above the rabbit will move 2 steps forward turn left and move one step forward.
Knowledge Prerequisites
Make sure you meet the following knowledge prerequisites before starting the tutorial:
-
You must have basic knowledge of JavaScript
-
You must have a basic understanding of Spark AR studio
Getting Started
Downloading the Project
To follow this tutorial:
-
Open the sample project in Spark AR Studio.
I have already imported the required game assets you need to help you get started.
Setting Up the Scene
Before we start writing the game logic, we need to set up the scene. In Spark AR game objects cannot be created dynamically with a script so we need to add them to the scene before we can access them in the script.
Understanding the Assets
Within the Assets Panel you’ll find five folders and four 3D assets:
-
Bunny represents the main character in the game
-
Carrot is the objective that the rabbit needs to reach
-
tile is the platform the rabbit will hop on
-
Wall surrounds the water in the game
-
Textures contains the 2D images required by the game
-
Animation Sequences contains the water animation
-
Audio contains all the sound effects our game will need
Within the Scene panel of the starter project you’ll find a plane tracker with an empty null object inside it called container. In Spark AR Studio, a plane tracker is used to create world effects.
Adding Null Objects
Null objects act as empty groups and are a great way of grouping objects together, In this project, we’ll group our objects into two groups called level and UI.
To add a null object:
-
Right-click container
-
Select Add > Null Object
-
Rename the null object to level
-
Create another null object inside container and rename it to UI
The level null object will contain all our game objects and the UI null object will contain our 3D user interface elements as shown in the game. Next:
-
Create a null object called platforms in level.
-
Create a null object named buttons in UI
-
Create another null object named blocks in UI
The platforms null object will contain all the platforms that the rabbit will hop on. While buttons will contain 3D planes that will act as buttons in the game and blocks will contain 3D planes that will act as command blocks. In Spark AR, a Plane is a flat 3D object that can be positioned at any depth within the scene.
Your Scene Panel should look like this:
Adding Game Objects
Next, click and drag the bunny asset into level to add it as a child. Do the same for the carrot and the wall.
We’re also going to update the scale values of the 3D objects so that they fit the plane tracker.
-
Select the bunny object in the Scene Panel.
-
Change the x, y, and z-axis scale to 0.15 in the Inspector Panel.
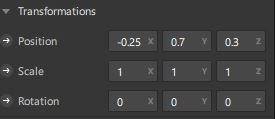
And for the carrot use the following values:
Adding Platforms
In this game, the rabbit needs to hop on platforms to reach the carrot. Usually, when creating games in any tool, we can dynamically create objects with a script, the Spark AR scripting module does not allow us to create objects dynamically so we are going to duplicate the platform object from the Scene Panel manually.
-
Select and drag the tile from the Assets Panel into the platforms null object.
-
Change the x, y, z scale to 0.1 in the Inspector Panel
-
Rename tile to platform0
-
Right-click on plaform0 and Click Duplicate this will create another platform object called plaform1.
-
Go to the next platform object and repeat the duplication process until you have plaform9
Your Scene Panel should look like this:
Adding Water
In the game when we enter a wrong command the rabbit will fall from a platform into the water, so the next thing we’ll add is a Plane with an animated texture to represent water.
-
Right-click level.
-
Select Add > Plane
-
Rename the plane to water
-
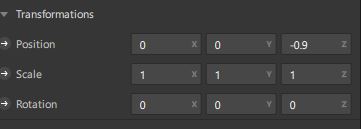
Change the scale and rotation of the water plane to look like this:
Your 3D scene should look like this:
Now to add the animated water texture:
-
Select the water plane
-
In the Inspector panel click the + button next to materials
-
Select the water material in the drop-down
In Spark AR Studio you can use 2D textures to create animations. You’ll add your own textures then turn them into an animation using an asset included in Spark AR Studio called an Animation Sequence.
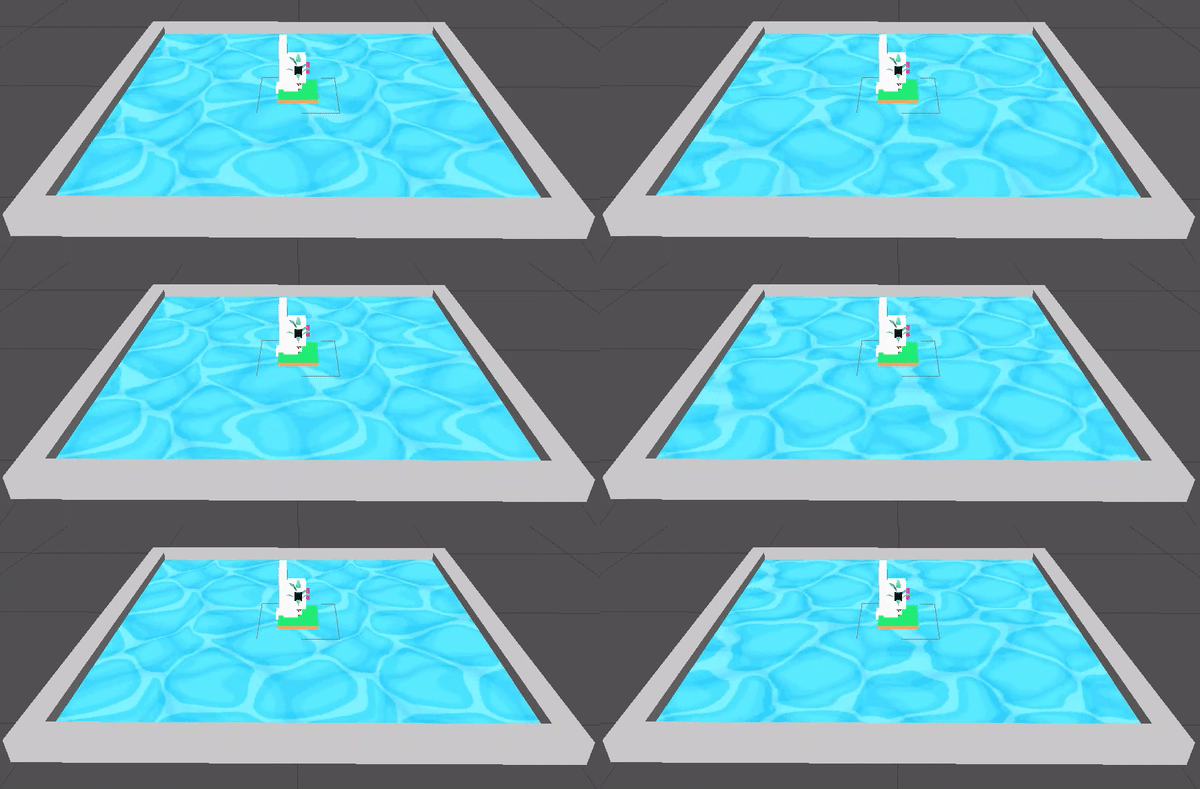
From the screenshot above we apply a looped animation sequence with 32 frames. I created this animation by attaching the texture named frame_[1-32] to the water_animation sequence and attaching that animation sequence to the water material. Originally the animation texture was a gif file, I had to convert it to frames before importing it to Spark AR Studio. You should have an animated pool of water that looks like this:
Adding a 3D User Interface
Next, we are going to add a 3D user interface, this user interface will allow us to insert commands into the game, first let’s add the buttons:
-
Right-click the buttons null object then Add > Plane to create a new plane
-
Name the plane btn0
-
Duplicate the button so that we have btn0 to btn3
Each button will have its own functionality, material, and transform values:
-
btn0 → this will add the command to move forward
-
btn1 → this will add the command to turn left
-
btn2 → this will add the command to turn right
-
btn3 → this is the play buttons that will execute the commands
Add one more plane in the UI null object and name it commands_ui this will act as the background of the user interface. Give it the following transform and material values:
You should see this in your scene:
Next, the UI needs to be properly arranged click the UI null object and add the following transform values:
Next, add the following transform values to the buttons null object:
Add this to the blocks null object:
Now we need to add the command blocks:
-
Right-click blocks then Add > Plane to create a new plane
-
Name the plane block0
-
Untick visible in the inspector panel
-
Give it the following transform values:
Command blocks represent our commands visually in the game, initially we hide the blocks so that the player only sees the blocks when they are added.
-
Next duplicate the blocks so that we have block0 to block9.
-
Create one more plane under the UI null object and name it program_ui this will be the background for the command blocks, give it the following transform and material:
We need to add one more button to the buttons null object:
-
Right-click buttons > Add > Plane
-
Name the plane btn4
-
Give the plane the following transform and material values.
This button will allow us to remove blocks from the command window.
Your final Scene Panel should look like this:
And your final scene should look like this:
Scripting Rabbit Coder
In this section, we are going to focus on writing game logic with the Spark AR Scripting API.
Spark AR Studio uses JavaScript for adding logic and interactivity to your effects. This part of the tutorial will show you how to use various Scripting modules from the Scripting API.
-
Click on Add Asset > Script to add a script.js file
-
Add another script file and name it levels.js
-
Open the script.js file and remove any code in there.
The levels.js file will contain all the values for each level and the script.js file will contain all of the game logic.
Importing Objects
Add this code to your script.js:
const Scene = require("Scene");In the code above the require() method tells the script we’re looking for a module, we pass in the name of the module as the argument to specify the one we want to load. The Scene variable now contains a reference to the Scene Module that can be used to access the module’s properties, methods, classes, and enums. Now we are going to add the code below:
(async function() {
  const [] = await Promise.all([]);
})();
In the code above we have added an async function. Async and Await make promises easier to write, async makes a function return a Promise and await makes a function wait for a Promise. The Promise.all takes an array of promises and returns a new promise. Next update your code to look like this:
(async function () {
  const [] = await Promise.all([
    // Game Objects
    Scene.root.findFirst("bunny"),
    Scene.root.findFirst("carrot"),
    Scene.root.findByPath("**/blocks/*"),
    Scene.root.findByPath("**/platforms/*"),
    Scene.root.findByPath("**/buttons/*"),
    Scene.root.findFirst("water_emitter"),
    Materials.findUsingPattern("btn*"),
    Materials.findUsingPattern("*block_mat"),
    Textures.findUsingPattern("btn*"),
  ]);

  })();
In the code above we are accessing objects from the Scene using promise.all. We have added two 3D objects bunny and carrot and three null objects blocks, platforms, and buttons. water_emitter will be used later in the tutorial, we have also added Materials and Textures from the scene. We use findByPath to access multiple objects at once. We then specify a pattern for findByPath to match, for example findByPath("*/blocks/") will return us any object which is a child of any object called "blocks". Next, we are going to import the audio files into the script:
First, add this line at the top of your script just before the async function:
const Audio = require("Audio");Next, update your promise.all code to look like this:
(async function () {
  const [
    // Game Objects
    bunny,
    carrot,
    blocks,
    platforms,
    buttons,
    waterEmitter,
    buttonMats,
    blockMats,
    buttonTextures,
    // Game Audio
    jumpSound,
    dropSound,
    failSound,
    completeSound,
    clickSound,
    removeSound,
  ] = await Promise.all([
    // Game Objects
    Scene.root.findFirst("bunny"),
    Scene.root.findFirst("carrot"),
    Scene.root.findByPath("**/blocks/*"),
    Scene.root.findByPath("**/platforms/*"),
    Scene.root.findByPath("**/buttons/*"),
    Scene.root.findFirst("water_emitter"),
    Materials.findUsingPattern("btn*"),
    Materials.findUsingPattern("*block_mat"),
    Textures.findUsingPattern("btn*"),
    // Game Audio
    Audio.getAudioPlaybackController("jump"),
    Audio.getAudioPlaybackController("drop"),
    Audio.getAudioPlaybackController("fail"),
    Audio.getAudioPlaybackController("complete"),
    Audio.getAudioPlaybackController("click"),
    Audio.getAudioPlaybackController("remove"),
  ]);

  })();
From the code, above we have imported the Audio module and added getAudioPlaybackController, the audio playback controller can be used to play sound continuously on a loop in your AR effect or add one-shot triggered audio in response to boolean signals. We have also added variables that correspond to the game and audio objects.
Generating Levels
In the game a level is represented by a 5 x 5 grid of coordinates, on this grid, we shall specify which coordinates are part of the path and which coordinates are part of the danger zones.
-
Path → these are the coordinates that the rabbit can hop on
-
Danger Zone → the coordinates that the rabbit cannot hop on.
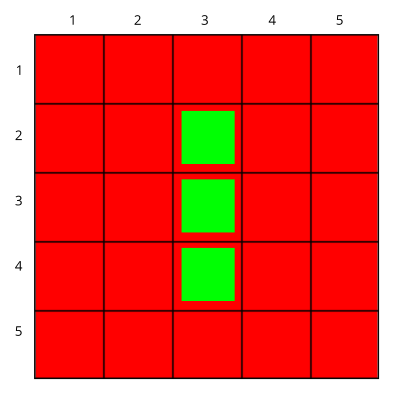
Each level has different path and danger zone coordinates the image below shows an example for a level, the green squares represent path coordinates while the red squares represent danger zone coordinates. In the image below the path coordinates are: [3,2] [3,3] [3,4].
Now that we have an idea of how that path is going to be generated we are going to define the path coordinates for each level in the levels.js file.
-
Open levels.js in your code editor and add the following code:
module.exports = [
  // level 1
  {
    path: [
      [2, 3],
      [3, 3],
      [4, 3],
    ],
    facing: "east",
  },
  // level 2
  {
    path: [
      [2, 4],
      [2, 3],
      [3, 3],
      [4, 3],
    ],
    facing: "north",
  },
  // level 3
  {
    path: [
      [4, 4],
      [3, 4],
      [3, 3],
      [3, 2],
      [2, 2],
    ],
    facing: "west",
  },
];
From the code above we are exporting an array of objects, each object in the array represents a level and each level has the following attributes:
-
Path → These are the coordinates of the path as explained above.
-
facing → This is the direction in which the rabbit will face when the level loads.
In script.js add this line of code to import the levels:
const levels = require("./levels");Next, create a function called initLevel and call in below
...

/*------------- Initialize level -------------*/

function initLevel() {

}

initLevel();
The initLevel function will run when the effect is launched.
Generating Grid Coordinates
Before we can generate the path and danger zone coordinates we need to define a grid of all the coordinates.
Add the following variables to your code:
  const gridSize = 0.36;
  const gridInc = 0.12;
  let allCoordinates = createAllCoordinates();
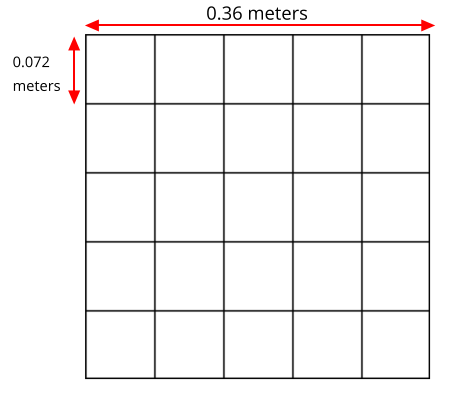
The default unit of measurement in Spark AR is Meters, so our values will be in meters. In the code above we use gridSize to represent the size of the grid in meters while gridInc is the increment value that is added to the position of each platform to form the grid. Each box in the grid has a size of 0.072 meters.
Next, create a function called createAllCoordinates and add the following code:
  function createAllCoordinates() {
    // Creates a grid of coordinates
    let coords = [];
    for (let i = -gridSize; i <= gridSize; i += gridInc) {
      for (let j = -gridSize; j <= gridSize; j += gridInc) {
        let x = Math.round(i * 1e4) / 1e4;
        let z = Math.round(j * 1e4) / 1e4;
        coords.push([x, z]);
      }
    }
    return coords;
  }
The createAllCoordinates function has a nested for loop that generates a 7 X 7 grid, the generated coordinate values are then stored in the allCoordinates variable. In the second for loop, we set the x and z values for each coordinate. The code Math.round(i * 1e4) rounds the value to the nearest integer.
Generating Path Coordinates
Add the following variables to your code:
let currentLevel = 0;
let pathCoordinates = createPathCoordinates();
From the code above, currentLevel will represent the current level as a number, since we only have 3 levels, currentLevel can be 0, 1, or 2. pathCoordinates will hold the path coordinates. Next, add the following function:
 function createPathCoordinates() {
    let path = levels[currentLevel].path;
    let coords = [];
    for (let i = 0; i < path.length; i++) {
      let x = allCoordinates[path[i][0]][1];
      let z = allCoordinates[path[i][1]][1];
      coords.push([x, z]);
    }
    return coords;
  }
The code above will generate path coordinates from the values defined in the currentLevel. From the code, we can also see a for loop this loop iterates through the path array, we use this to obtain the path x and z values from allCoordinates.
Generating Danger Zone Coordinates
Add the following variable to your code
let dangerCoordinates = createDangerCoordinates();The variable above will hold the danger zone coordinates. Next, add this code:
  function createDangerCoordinates() {
    let coords = allCoordinates;
    for (let i = 0; i < pathCoordinates.length; i++) {
      for (let j = 0; j < coords.length; j++) {
        let lvlCoordStr = JSON.stringify(pathCoordinates[i]);
        let genCoordStr = JSON.stringify(coords[j]);
        if (lvlCoordStr === genCoordStr) {
          coords.splice(j, 1);
        }
      }
    }
    return coords;
  }
Just like with the path coordinates the code above generates the danger zone coordinates from allCoordinates, we do that by subtracting the pathCoordinates from allCoordinates using the javaScript splice method, this leaves us with the danger coordinates, which the function returns.
Placing Level Objects
Next, we are going to focus on positioning the rabbit, carrot, and platforms using the coordinates we just generated. First, add the following variables to your code:
let playerDir = levels[currentLevel].facing;
let platformsUsed = 0;
const numOfPlatforms = 10;
const playerInitY = 0.02;-
playerDirgets the facing value from levels.js -
platformsUsedholds the number of platforms that have been added. -
playerInitYis the players initial position in the Y-axis
Next in the initLevel() function add the following code:
    playerDir = levels[currentLevel].facing;

    // Set the player's initial position
    bunny.transform.x = pathCoordinates[0][0];
    bunny.transform.z = pathCoordinates[0][1];
    bunny.transform.y = playerInitY;

    // set carrot position
    let goalX = pathCoordinates[pathCoordinates.length - 1][0];
    let goalZ = pathCoordinates[pathCoordinates.length - 1][1];
    carrot.transform.x = goalX;
    carrot.transform.z = goalZ;
    carrot.transform.y = 0.03;
    carrot.hidden = false;

    // Set the player's initial direction
    if (playerDir === "east") {
      bunny.transform.rotationY = 0;
    } else if (playerDir === "north") {
      bunny.transform.rotationY = degreesToRadians(90);
    } else if (playerDir === "west") {
      bunny.transform.rotationY = degreesToRadians(180);
    } else if (playerDir === "south") {
      bunny.transform.rotationY = degreesToRadians(270);
    }

    // Add the path platforms
    for (let i = 0; i < pathCoordinates.length; i++) {
      let path = pathCoordinates[i];
      let x = path[0];
      let z = path[1];
      let platform = platforms[i];
      platform.transform.x = x;
      platform.transform.z = z;
      platform.hidden = false;
    }
The code above will first set the direction that the rabbit should face, next we set the player’s initial position. From the pathCoordinates the first coordinate is always the rabbit’s start position and the last coordinate is always the position of the carrot. After that, we transform the rabbit’s rotation based on the direction defined in the level. Lastly, we draw the path by iterating through pathCoordinates, getting each path, and applying it to a platform in the Scene. Save the code and check your scene, you should see that we have a level generated with three platforms.
You can try changing the currentLevel value to 1 or 2 you should see that the level changes.
Adding Commands
Now that we can generate levels it’s time to make the rabbit move but before we do that let’s first set up the commands. In the game commands allow us to instruct the rabbit what to do, in this game we are going to have 3 commands, move forward, turn left and turn right. To add commands we need to tap the 3D planes that we added in the buttons null object, to do that add the following code at the top of your script
const TouchGestures = require("TouchGestures");
const Materials = require("Materials");
The TouchGestures module enables touch gesture detection, in our case we are going to use it to detect screen taps and the Materials module provides access to the materials in the effect.
Before we can add the commands we need to declare some variables that will be needed:
  const states = {
    start: 1,
    running: 2,
    complete: 3,
    failed: 4,
    uncomplete: 5,
  };
  let currentState = states.start;
  let commands = [];
  let blocksUsed = 0;
  const blockSlotInc = 0.1;
  const initBlockSlot = 0.6;
  const numOfBlocks = 10;
  const blockInitY = 0.9;
  let nextBlockSlot = initBlockSlot;
In the code above state represents the current state of the game, in this game we have 5 states:
-
start → this is the initial game state
-
running → this is when the game is running e.g the rabbit is moving
-
complete → this is when the when a level is successfully completed
-
failed → this is when the rabbit falls in the water
-
uncomplete this is when the rabbit does not reach the goal.
The commands array stores all the commands that the player inserts e.g forward, left, Right.
BlocksUsed stores the number of blocks that the player has added, we use this to keep track of the number of blocks so that we do not go over the maximum number.
blockSlotInc is the value that the added blocks are offset by, e.g. when a user adds a new command block it will be placed 0.1 meters lower.
InitBlockSlot is the initial block position.
numOfBlock is the maximum number of blocks that we have in the blocks null object.
nextBlockSlot represents the next slot that is available for a block to be inserted.
Now that we have the variables its time to add the logic:
  function addCommand(move) {
    if (currentState === states.start) {
      if (blocksUsed < numOfBlocks) {
        let block = blocks[blocksUsed];
        blocksUsed++;
        nextBlockSlot -= blockSlotInc;
        block.transform.y = nextBlockSlot;

        // Set the block material
        for (let i = 0; i < blockMats.length; i++) {
          if (blockMats[i].name === move + "_block_mat") {
            block.material = blockMats[i];
          }
        }

        block.hidden = false;
        commands.push({ command: move, block: block });
        clickSound.setPlaying(true);
        clickSound.reset();
      }
    }
  }
The addCommand function above takes in a string argument called move this value can either be "forward", "left" or "right". On the next line, we check if currentState is equal to the initial state, if that’s the case then we can insert new blocks. In the second If statement we check if the blocks that have been used are greater than the max number of blocks, we have in our scene. In this case, if we run out of command blocks we prevent the game from trying to access blocks that do not exist in the scene. We set the position of the next slot and insert the block on that slot. we then apply the correct material based on the name of the block and make it visible. In the last 3 lines, we add the blocks to the commands array and play a sound effect.
Next, add the following code anywhere inside the promise then function:
buttons.forEach((button, i) => {
    TouchGestures.onTap(button).subscribe(function () {
      switch (i) {
        case 0:
          addCommand("forward");
          break;
        case 1:
          addCommand("left");
          break;
        case 2:
          addCommand("right");
          break;
        case 3:
          break;
        case 4:
          break;
      }
    });
  });
The for loop above iterates through all the buttons in our null object and assigns an onTap listener to each button. We then add a switch statement to call the addCommand function and pass a command.
Now we should be able to click the buttons and add the command blocks.
Next, let’s add the code to remove added blocks in case 4 of the switch statment:
case 4:
  removeSound.setPlaying(true);
  removeSound.reset();
  if (blocksUsed !== 0 && currentState === states.start) {
    let popped = commands.pop();
    popped.block.transform.y = blockInitY;
    popped.block.hidden = true;
    nextBlockSlot += blockSlotInc;
    blocksUsed--;
  }
  break;
The code above allows us to remove the bottom block, we do this by using the JavaScript pop method to remove the last command in the commands array, when we remove a command we are hiding the block and moving it to its initial position. You can try to click the Remove button after adding some blocks you should see them getting removed.
Moving the Rabbit
Now that we have the commands logic all set up it’s time to make the rabbit move. In order to make the rabbit move, we need to execute the commands that we have entered, to do that we need to write an execution function that iterates through each command in the commands array. Create a function called executeCommands and add the following code inside the function:
function executeCommands() {
    currentState = states.running;
    let executionCommands = [];
    for (let i = 0; i < commands.length; i++) {
      executionCommands.push(commands[i].command);
    }
    setExecutionInterval(
      function (e) {
        animatePlayerMovement(executionCommands[e]);
      },
      1000,
      executionCommands.length
    );
  }
The function above iterates through each command, gets the command value e.g. forward, left or right, and sets an execution interval of 1 second. Next import the Time, Texture and Animation module then add a variable called exeIntervalID like this:.
const Time = require("Time");
const Textures = require("Textures");
const Animation = require("Animation");
...
let exeIntervalID;
The TimeModule class we added above enables time-based events.
Next create the setExecutionInterval function:
   function setExecutionInterval(callback, delay, repetitions) {
    let e = 0;
    callback(0);
    exeIntervalID = Time.setInterval(function () {
      callback(e + 1);
      if (++e === repetitions) {
        Time.clearInterval(exeIntervalID);
        if (currentState === states.running) currentState = states.uncomplete;
        setTexture("btn_retry");
        failSound.setPlaying(true);
        failSound.reset();
      }
    }, delay);
  }
The setExecutionInterval function takes in a callback, delay, and repetitions this will allow us to move the rabbit after 1 second. The callback function will contain the movement animation code. Next, add the setTexture function, we need this function to dynamically apply textures to objects:
  function setTexture(texture_name) {
    for (let i = 0; i < buttonTextures.length; i++) {
      if (buttonTextures[i].name === texture_name) {
        let signal = buttonTextures[i].signal;
        buttonMats[3].setTextureSlot("DIFFUSE", signal);
      }
    }
  }
Adding Animations
Now that our command execution code is all set up let us focus on Animations, to make the rabbit move forward and turn we are going to use Spark AR’s Animation Module. Add the following function:
  function animatePlayerMovement(command) {
    const timeDriverParameters = {
      durationMilliseconds: 400,
      loopCount: 1,
      mirror: false,
    };

    const timeDriver = Animation.timeDriver(timeDriverParameters);
    const translationNegX = Animation.animate(
      timeDriver,
      Animation.samplers.linear(
        bunny.transform.x.pinLastValue(),
        bunny.transform.x.pinLastValue() - gridInc
      )
    );

    const translationPosX = Animation.animate(
      timeDriver,
      Animation.samplers.linear(
        bunny.transform.x.pinLastValue(),
        bunny.transform.x.pinLastValue() + gridInc
      )
    );

    const translationNegZ = Animation.animate(
      timeDriver,
      Animation.samplers.linear(
        bunny.transform.z.pinLastValue(),
        bunny.transform.z.pinLastValue() - gridInc
      )
    );

    const translationPosZ = Animation.animate(
      timeDriver,
      Animation.samplers.linear(
        bunny.transform.z.pinLastValue(),
        bunny.transform.z.pinLastValue() + gridInc
      )
    );

    const rotationLeft = Animation.animate(
      timeDriver,
      Animation.samplers.linear(
        bunny.transform.rotationY.pinLastValue(),
        bunny.transform.rotationY.pinLastValue() + degreesToRadians(90)
      )
    );

    const rotationRight = Animation.animate(
      timeDriver,
      Animation.samplers.linear(
        bunny.transform.rotationY.pinLastValue(),
        bunny.transform.rotationY.pinLastValue() - degreesToRadians(90)
      )
    );

    const jump = Animation.animate(
      timeDriver,
      Animation.samplers.sequence({
        samplers: [
          Animation.samplers.easeInOutSine(playerInitY, 0.1),
          Animation.samplers.easeInOutSine(0.1, playerInitY),
        ],
        knots: [0, 1, 2],
      })
    );

    timeDriver.start();

    switch (command) {
      case "forward":
        bunny.transform.y = jump;
        jumpSound.setPlaying(true);
        jumpSound.reset();
        if (playerDir === "east") {
          bunny.transform.x = translationPosX;
        } else if (playerDir === "north") {
          bunny.transform.z = translationNegZ;
        } else if (playerDir === "west") {
          bunny.transform.x = translationNegX;
        } else if (playerDir === "south") {
          bunny.transform.z = translationPosZ;
        }
        break;
      case "left":
        if (playerDir === "east") {
          playerDir = "north";
        } else if (playerDir === "north") {
          playerDir = "west";
        } else if (playerDir === "west") {
          playerDir = "south";
        } else if (playerDir === "south") {
          playerDir = "east";
        }
        bunny.transform.rotationY = rotationLeft;
        break;
      case "right":
        if (playerDir === "east") {
          playerDir = "south";
        } else if (playerDir === "south") {
          playerDir = "west";
        } else if (playerDir === "west") {
          playerDir = "north";
        } else if (playerDir === "north") {
          playerDir = "east";
        }
        bunny.transform.rotationY = rotationRight;
        break;
    }
  }
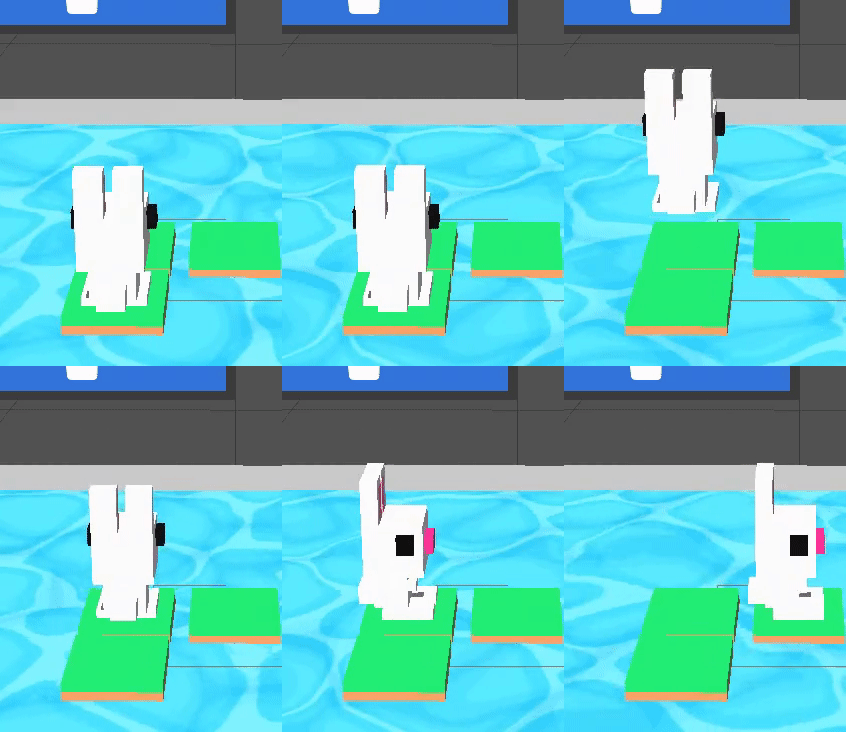
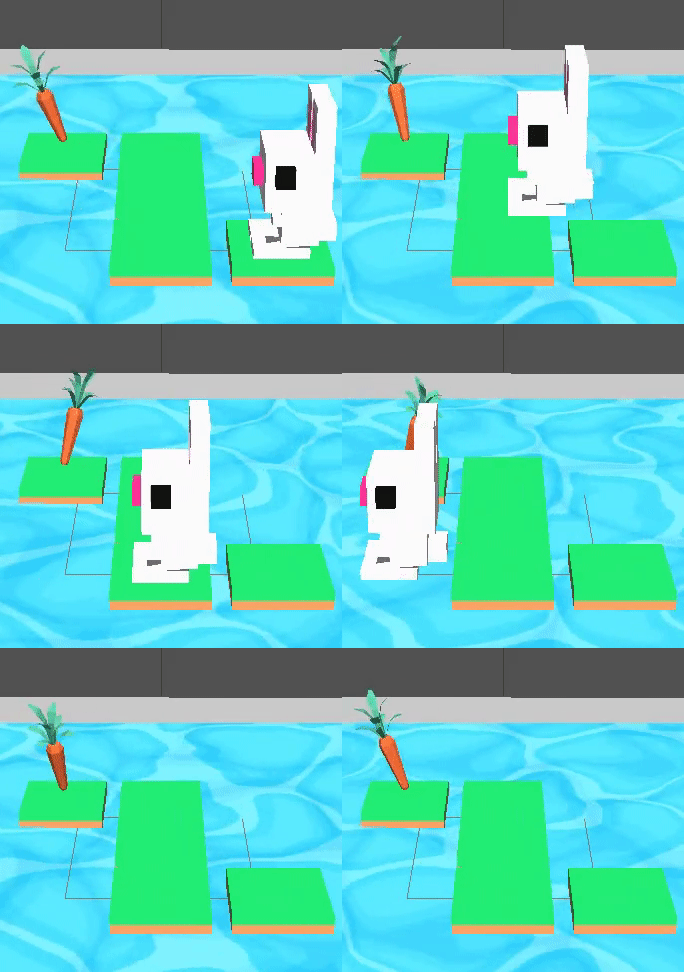
The code above will be responsible for the rabbit’s movement, first, we set timeDriverParameters and a timeDriver, this will allow us to animate the rabbit once for 400 milliseconds. The next lines of code simply transform the rabbits x, z, and y positions, next we have a Switch statement that executes the correct animation code based on the command, we also need to take note of the direction the rabbit is facing so that we move the rabbit in the direction it’s facing. The Time driver allows us to specify a duration in milliseconds for the animation along with optional parameters for looping and mirroring. The samplers property of the animation module gives us access to the SamplerFactory class, which we use to set the easing function. From the gif below you can see that the rabbit can hop forward, the rabbit will also be able to turn left or right.
Now that our animation code is all setup it’s time to run the commands, we need to do this on a button press, so lets update our commands switch statement we added earlier to look like this:
 buttons.forEach((button, i) => {
    TouchGestures.onTap(button).subscribe(function () {
      switch (i) {
        case 0:
          addCommand("forward");
          break;
        case 1:
          addCommand("left");
          break;
        case 2:
          addCommand("right");
          break;
        case 3:
          clickSound.setPlaying(true);
          clickSound.reset();
          switch (currentState) {
            case states.start:
              Time.setTimeout(function () {
                if (commands.length !== 0) executeCommands();
              }, 300);
              break;
            case states.failed:
              resetLevel();
              break;
            case states.uncomplete:
              resetLevel();
              break;
            case states.complete:
              nextLevel("next");
              break;
          }
          break;
        case 4:
          removeSound.setPlaying(true);
          removeSound.reset();
          if (blocksUsed !== 0 && currentState === states.start) {
            let popped = commands.pop();
            popped.block.transform.y = blockInitY;
            popped.block.hidden = true;
            nextBlockSlot += blockSlotInc;
            blocksUsed--;
          }
          break;
      }
    });
  });
In the switch statement above we have updated case 3, this case runs the executeCommands() function when the user presses the run button and we reset the level when the state is failed or incomplete. Let’s add the reset function:
/*------------- Reset current level -------------*/

function resetLevel() {
    currentState = states.start;
    playerDir = levels[currentLevel].facing;
    commands = [];
    blocksUsed = 0;
    nextBlockSlot = initBlockSlot;

    bunny.hidden = false;

    setTexture("btn_play");
    Time.clearInterval(exeIntervalID);

    for (let i = 0; i < numOfBlocks; i++) {
      let block = blocks[i];
      block.transform.y = blockInitY;
      block.hidden = true;
    }

    initLevel();
  }
This function sets all the game values back to their initial values. We also need a function to take users to the next level:
  function nextLevel(state) {
    if (state === "next" && currentLevel < levels.length - 1) {
      currentLevel++;
    } else {
      currentLevel = 0;
    }

    allCoordinates = createAllCoordinates();
    pathCoordinates = createPathCoordinates();
    dangerCoordinates = createDangerCoordinates();

    for (let i = 0; i < numOfPlatforms; i++) {
      let platform = platforms[i];
      platform.hidden = true;
    }

    resetLevel();
  }
The function above will increase the current level and regenerate the level coordinates for the new level. We can now test the game, you should be able to see the rabbit moves based on the commands added.
Monitoring the Player’s Position
Currently, the rabbit can move but we need a way to check if the rabbit has reached the goal or fallen off the path, to do that we are going to use the Spark AR Reactive Module.
Spark AR Studio’s implementation of reactive programming allows you to create relationships between objects, assets, and values. This means that the engine doesn’t have to execute JavaScript code every frame when performing common tasks such as animating content or looking for user input.
First lets import the reactive module like this:
const Reactive = require("Reactive");Next, add the following code:
 Reactive.monitorMany({
    x: bunny.transform.x,
    z: bunny.transform.z,
  }).subscribe(({ newValues }) => {
    let playerX = newValues.x;
    let playerZ = newValues.z;
    let goalX = pathCoordinates[pathCoordinates.length - 1][0];
    let goalZ = pathCoordinates[pathCoordinates.length - 1][1];
    let collisionArea = 0.005;

    // Check if player is on the goal
    if (
      isBetween(playerX, goalX + collisionArea, goalX - collisionArea) &&
      isBetween(playerZ, goalZ + collisionArea, goalZ - collisionArea)
    ) {
      bunny.transform.x = goalX;
      bunny.transform.z = goalZ;
      commands = [];
      Time.clearInterval(exeIntervalID);
      changeState(states.complete, "next");
      carrot.hidden = true;
      animateLevelComplete();
      completeSound.setPlaying(true);
      completeSound.reset();
    }

    // Check if player is on a danger zone
    for (let i = 0; i < dangerCoordinates.length; i++) {
      let dx = dangerCoordinates[i][0];
      let dz = dangerCoordinates[i][1];
      if (
        isBetween(playerX, dx + collisionArea, dx - collisionArea) &&
        isBetween(playerZ, dz + collisionArea, dz - collisionArea)
      ) {
        bunny.transform.x = dx;
        bunny.transform.z = dz;
        commands = [];
        Time.clearInterval(exeIntervalID);
        changeState(states.failed, "retry");
        animatePlayerFall();
        dropSound.setPlaying(true);
        dropSound.reset();
      }
    }
  });

  function isBetween(n, a, b) {
    return (n - a) * (n - b) <= 0;
  }

  function changeState(state, buttonText) {
    Time.setTimeout(function () {
      currentState = state;
      setTexture(buttonText);
    }, 500);
  }
In the code above we use monitorMany from the Reactive Module, it accepts the rabbit’s x and z transform values as arguments, we need to monitor these values in order to check if the player is on the goal coordinates or the dangerzone coordinates.
   if (
      isBetween(playerX, goalX + collisionArea, goalX - collisionArea) &&
      isBetween(playerZ, goalZ + collisionArea, goalZ - collisionArea)
    ) {
      bunny.transform.x = goalX;
      bunny.transform.z = goalZ;
      commands = [];
      Time.clearInterval(exeIntervalID);
      changeState(states.complete, "next");
      carrot.hidden = true;
      animateLevelComplete();
      completeSound.setPlaying(true);
      completeSound.reset();
    }
The code above checks if the player’s X and Z values are on the goal coordinates, if that happens change our game state to complete. This means the player has completed the level.
for (let i = 0; i < dangerCoordinates.length; i++) {
      let dx = dangerCoordinates[i][0];
      let dz = dangerCoordinates[i][1];
      if (
        isBetween(playerX, dx + collisionArea, dx - collisionArea) &&
        isBetween(playerZ, dz + collisionArea, dz - collisionArea)
      ) {
        bunny.transform.x = dx;
        bunny.transform.z = dz;
        commands = [];
        Time.clearInterval(exeIntervalID);
        changeState(states.failed, "retry");
        animatePlayerFall();
        dropSound.setPlaying(true);
        dropSound.reset();
      }
    }
  });
From the code above we iterate through all the danger coordinates and check if the player’s X and Z values match any of them, if that happens we set the game’s state to failed. This means the player has fallen off the path and failed to complete the level.
Adding More Animations
Player Idle animation
function animatePlayerIdle() {
    const timeDriverParameters = {
      durationMilliseconds: 400,
      loopCount: Infinity,
      mirror: true,
    };
    const timeDriver = Animation.timeDriver(timeDriverParameters);

    const scale = Animation.animate(
      timeDriver,
      Animation.samplers.linear(
        bunny.transform.scaleY.pinLastValue(),
        bunny.transform.scaleY.pinLastValue() + 0.02
      )
    );

    bunny.transform.scaleY = scale;

    timeDriver.start();
  }

  animatePlayerIdle();
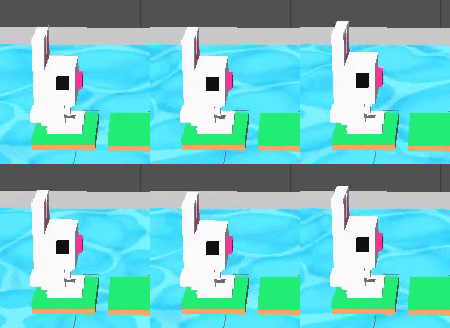
In game design, Idle animations refer to animations within video games that occur when the player character does not do any action (hence being idle). The code above makes the rabbit scale up and down when idle. As you can see in the gif below the rabbit has a slight movement in the Y-axis.
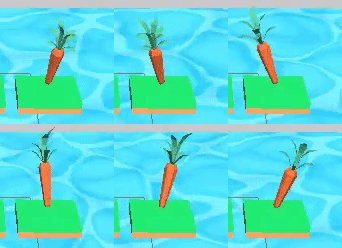
Carrot Animation
 function animateCarrot() {
    const timeDriverParameters = {
      durationMilliseconds: 2500,
      loopCount: Infinity,
      mirror: false,
    };

    const timeDriver = Animation.timeDriver(timeDriverParameters);

    const rotate = Animation.animate(
      timeDriver,
      Animation.samplers.linear(
        carrot.transform.rotationY.pinLastValue(),
        carrot.transform.rotationY.pinLastValue() - degreesToRadians(360)
      )
    );

    carrot.transform.rotationY = rotate;

    timeDriver.start();
  }

  animateCarrot();
The code above makes the carrot rotate in the Y-axis this is to make the game look more dynamic.
Level Complete Animation
  function animateLevelComplete() {
    const timeDriverParameters = {
      durationMilliseconds: 450,
      loopCount: 2,
      mirror: false,
    };

    const timeDriver = Animation.timeDriver(timeDriverParameters);

    const jump = Animation.animate(
      timeDriver,
      Animation.samplers.sequence({
        samplers: [
          Animation.samplers.easeInOutSine(playerInitY, 0.1),
          Animation.samplers.easeInOutSine(0.1, playerInitY),
        ],
        knots: [0, 1, 2],
      })
    );

    bunny.transform.y = jump;

    timeDriver.start();
  }
The animation above makes the rabbit jump up and down when it reaches the goal.
Level Failed Animation
  function animatePlayerFall() {
    emmitWaterParticles();
    const timeDriverParameters = {
      durationMilliseconds: 100,
      loopCount: 1,
      mirror: false,
    };

    const timeDriver = Animation.timeDriver(timeDriverParameters);

    const moveY = Animation.animate(
      timeDriver,
      Animation.samplers.easeInOutSine(playerInitY - 0.1, -0.17)
    );

    bunny.transform.y = moveY;

    timeDriver.start();

    Time.setTimeout(function () {
      bunny.hidden = true;
    }, 200);
  }
The animation code above makes the rabbit fall over a platform
Water Splash Animation
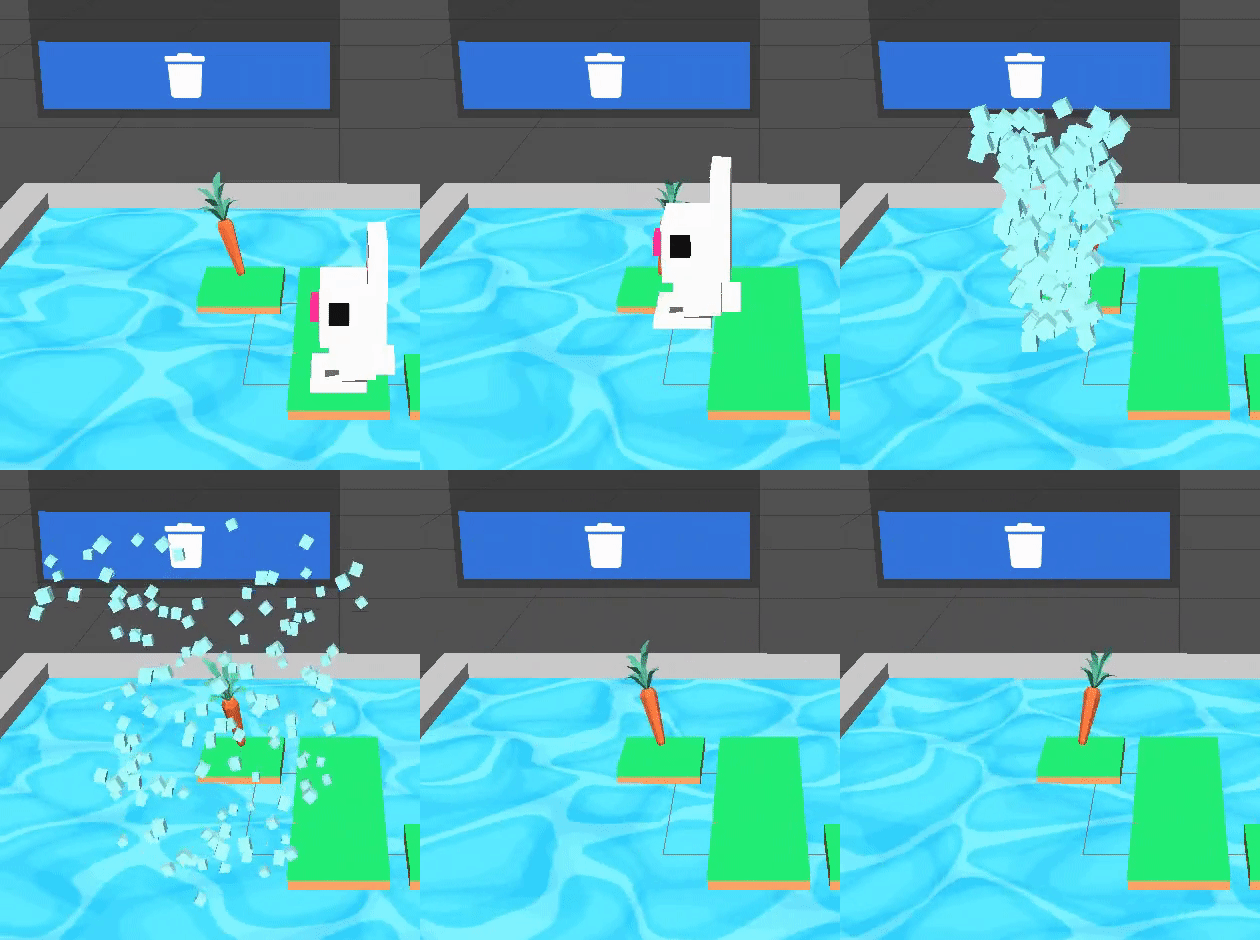
The last animation we are going to add is the splash animation when the rabbit falls in the water, unlike the other animations this one uses particles. We need to create the particle effect in Spark AR studio first add the following function.
  function emmitWaterParticles() {
    const sizeSampler = Animation.samplers.easeInQuad(0.015, 0.007);
    waterEmitter.transform.x = bunny.transform.x;
    waterEmitter.transform.z = bunny.transform.z;
    waterEmitter.birthrate = 500;
    waterEmitter.sizeModifier = sizeSampler;

    Time.setTimeout(function () {
      bunny.hidden = true;
      waterEmitter.birthrate = 0;
    }, 200);
  }
The code above will emit particles when the player falls into the water.
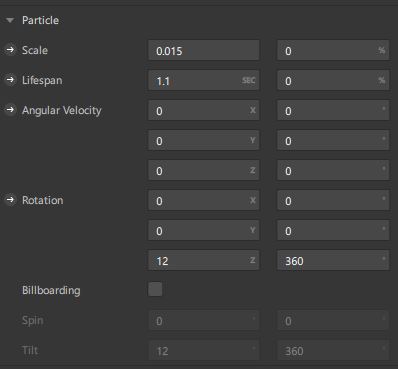
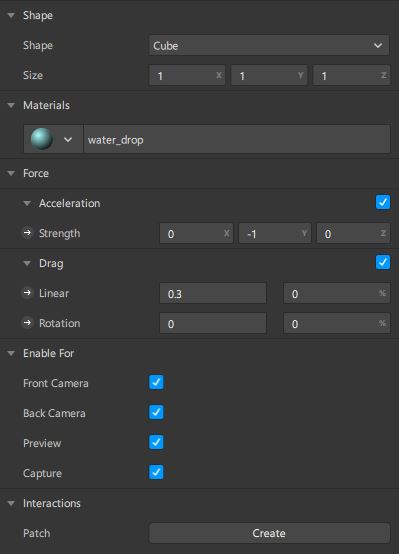
Adding a Particle System
Particle systems let you display and move large numbers of objects, called particles. You can apply force and drag to particles to mimic the effects of gravity.
To add a particle system to your scene:
-
Click Add Object.
-
Select Particle System from the menu.
-
Name it water_emitter
-
Move it to the level null object
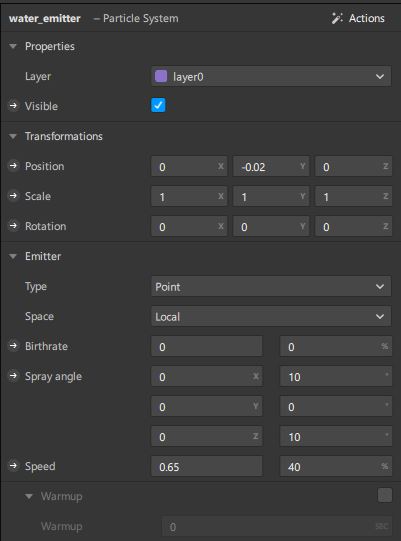
In the Inspector panel give your particle emitter the following values:
That’s it! If we run our effect we should see the game working as expected.
What’s Next?
The game that we created in the tutorial is a good template to create similar games with Spark AR, here are some game ideas:
-
Board games such as Chess or Checkers
-
Turn-based RPG games
If you’d like to continue building on Rabbit Coder, here are a few ideas:
-
Add more commands such as loops and conditionals.
-
Design more levels
-
Add more game modes
Learning Resources
Looking for more ways to develop your Spark AR skills Check out the official Spark AR Tutorials.
Some of the free assets used in this game can be found at the following links:
You can find the full code sample on GitHub.
Thanks for reading! Happy coding!
