Simple Bootable ISO Creator
This repo aims at producing a bootable .iso file according to the ISO9660 and EL TORITO standard.
It can be booted by VMware Workstation and VirtualBox. The UltraISO also considers it as "bootable".
Files Structure
Main codes
- The
main.pyis the code that generates2022_0821_A.iso. - The
utils.pyextracts some useful codes as a library.
Assistant codes
- The
read_iso.pycan parse and display some (but not all) information of an ISO file. - The
read_bin.pyaims at displaying the bytes of binary machine codes. - The
test.pytests some Python grammar and verifies my library.
How to Run
1 - Prepare ISO file
The 2022_0821_A.iso is already attached in the repo.
If you want to further explore, modify and run main.py to generate new ISO.
2 - Create a Virtual Machine (VM) and Load the ISO File
During the VM creating process, never select an existing OS (such as Windows, Linux, ...) but always choose "others".
In VMware Workstation:
- Select "Typical (典型)" option of the wizard.
- When selecting the source of the guest OS, choose "Use an ISO image (安装程序光盘映像文件(iso))" and load the ISO file.
- The wizard may give a warning that the OS in this image can not be detected. Just ignore it.
- When selecting guest OS and its version, choose "Others (其他)" OS and "Others (其他)" version.
- Input the name and location for the new VM.
- For the disk size, 0.01 GB is enough, because our system is too simple and never uses hard disk.
- Finish.
In VirtualBox:
- Input the name and location for the new VM, and choose "Other" type and "Other/Unknown" version. 4MB for memory is enough.
- For the disk size, 4MB is enough.
- Finish.
- Open the VM "Settings (设置)" window.
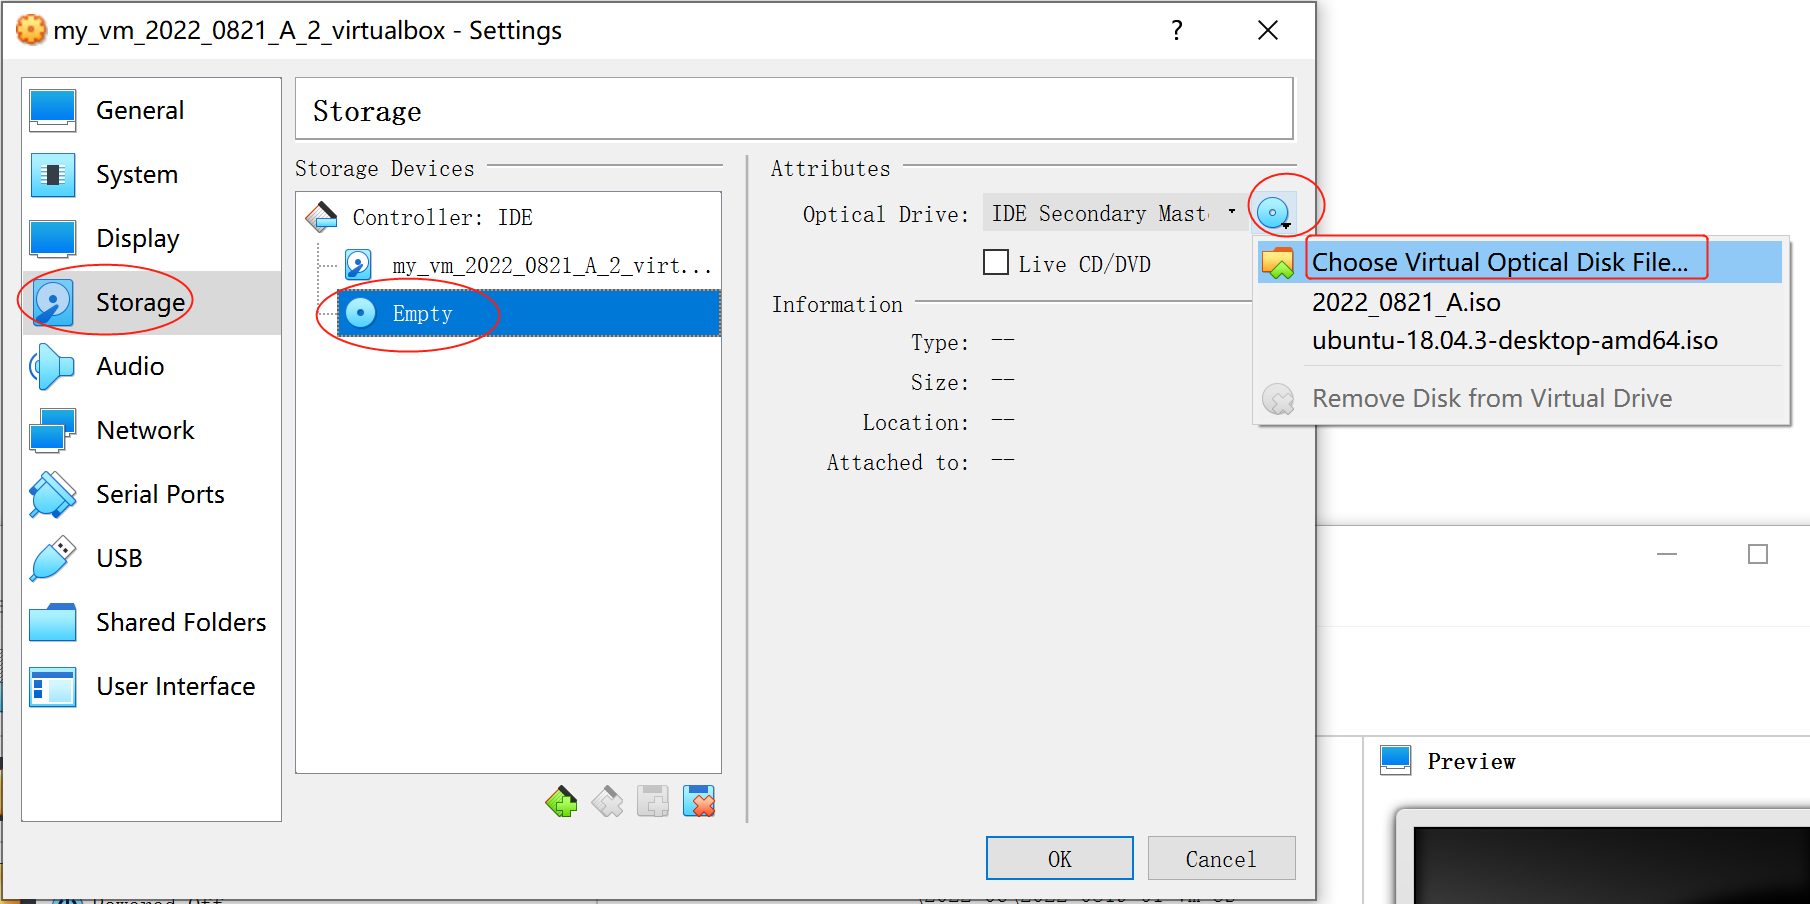
- Switch to the "Storage (存储)" tab on the left. Select the "Empty (没有盘片)" optical drive. In the "Attributes", click "Choose Virtual Optical Disk File... (选择一个虚拟光盘文件...)" and load the ISO file.
3 - Adjust the Boot Order and Start the VM
Usually, a machine can be booted from several ways, such as hard disk booting, CD booting and network booting. During booting, it tries the ways one by one in a specific order (called "boot order") until someone succeeds. So we need to adjust the boot order to let the VM to try the CD booting at first.
In VMware Workstation:
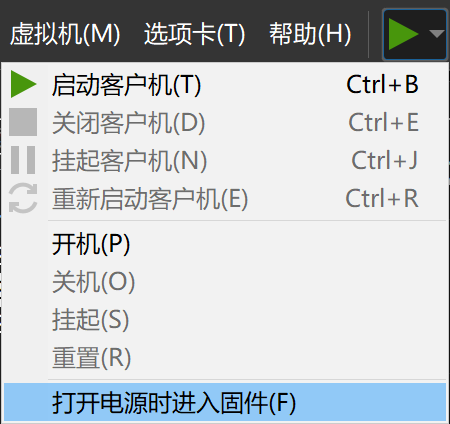
- Switch on the VM by "Start the Virtual Machine in BIOS Setup Mode (打开电源时进入固件)".
- Click into the VM screen, so your mouse and keyboard are focus on the guest system rather than the host.
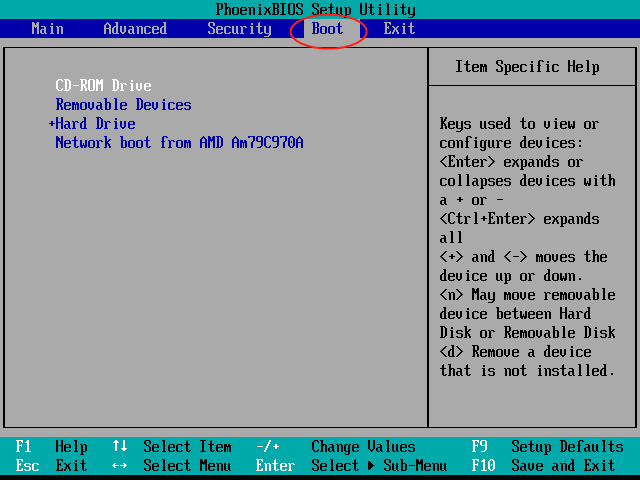
- Press "right-arrow" key to switch to the "Boot" tab. Press "down-arrow" key to select the "CD-ROM Drive". Press "+" key to push the "CD-ROM Drive" up, until it becomes the first entry.
- Press "F10" key to save the configuration. Now the system starts, and a letter "H" is printed.
In VirtualBox:
- Open the VM "Settings (设置)" window.
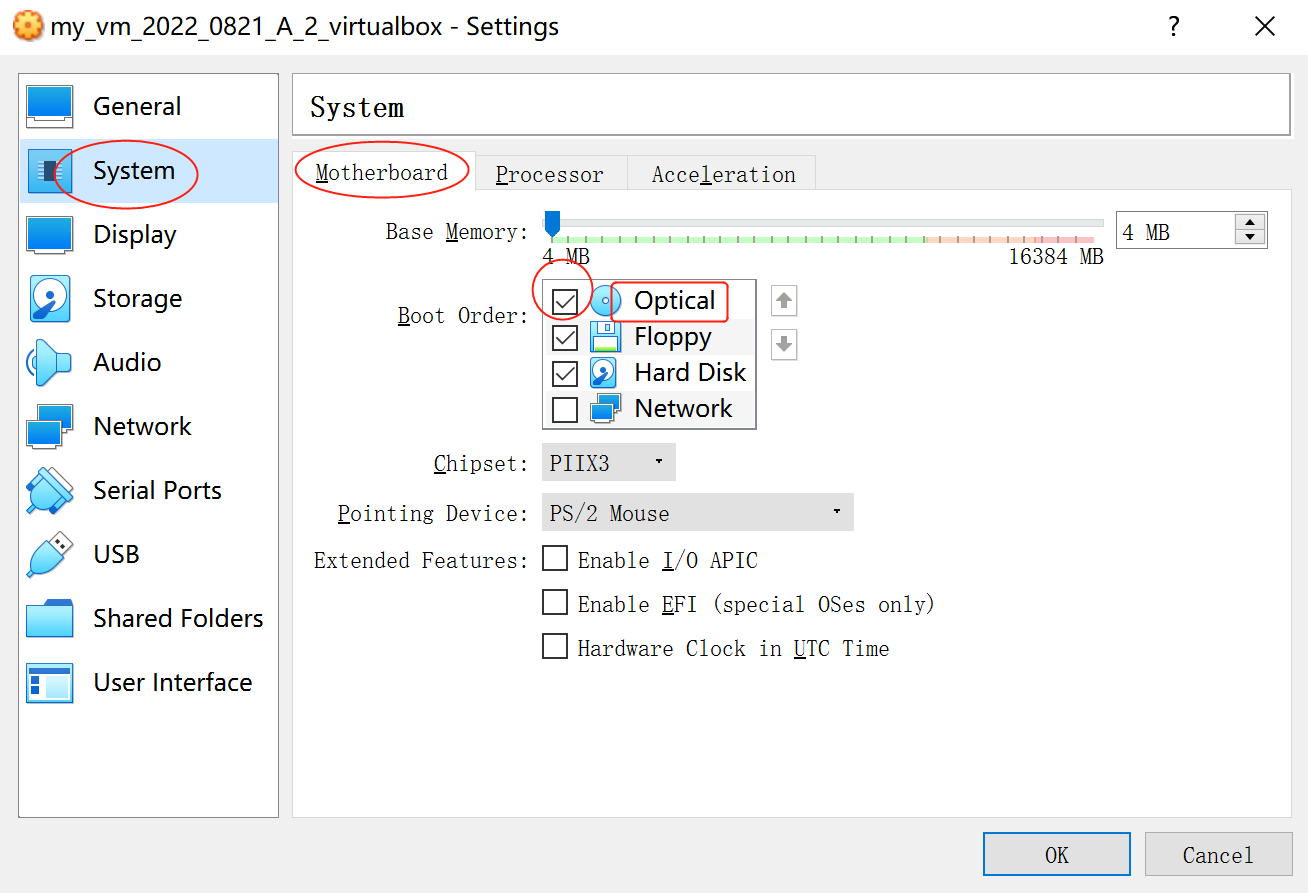
- Switch to the "System (系统)" tab on the left, and the "Motherboard (主板)" tab on the top. In the "Boot Order (启动顺序)" list, check the "Optical (光驱)" item and move it to the top.
- Start the VM. Now the system starts, and a letter "H" is printed.
- VirtualBox may give a warning that a critical error has occurred while running the virtual machine and the machine execution has been stopped. Just choose "Ignore (忽略)".


