The purpose of this project was to create a small and cheap device that helps market and promote SecKC at industry events. The original concept was a device running a form of Wifi Karma, that would respond to all wifi requests and then once connected would serve a "Guerrilla Marketing" page about SecKC. In its first iteration I used a RaspberryPi Zero, running a series of scripts. However the price of the components needed made this a difficult project to "give to the people". That is where the ESP8266 Came in. For about $5, anyone can make and deploy this device.

-
User connects to the device broadcasting an SSID of "Conference WiFi" (this is configurable of course)
-
The captive portal helper on their phone/table/computer kicks in and presents them with a page showing a fancy SecKC logo, and beeps the ESP8266 letting the owner know that someone connected.
-
There is a hidden hacking game embedded. If you view source of the http://1.3.3.7/index.htm page, it will give a few clues on how to begin.

- ESP8266 Module with 4MB of flash (I used the WeMos D1 Mini) $3 [Link]
- TP4056 USB Charger Module $0.25 [Link]
- 3.7V 500mAh 503035 Lithium Polymer LiPo Rechargeable Battery $2 [Link]
- Piezo buzzer $1 [Link] -- This is not needed, but makes the beeps fun.
Total Cost: About $5, because you don't need the speaker. But even if you do add one, it is STILL less than 0.6% of the cost of one iphone.
I will be updating this section soon. Basically the instructions are "build it".
- Connect Lipo Battery to Lipo Charger
- Connect Battery Out on LipoCharger to 3V3 (3.3v) and GND on D1 Mini
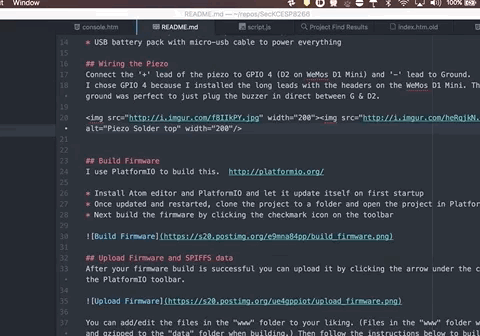
If you want sound: Connect the '+' lead of the piezo to GPIO 4 (D2 on WeMos D1 Mini) and '-' lead to Ground. I chose GPIO 4 because I installed the long leads with the headers on the WeMos D1 Mini. The spacing from ground was perfect to just plug the buzzer in direct between G & D2.


I use PlatformIO to build this. http://platformio.org/
- Install Atom editor and PlatformIO and let it update itself on first startup
- Once updated and restarted, clone the project to a folder and open the project in PlatformIO
- Next build the firmware by clicking the checkmark icon on the toolbar

After your firmware build is successful you can upload it by clicking the arrow under the checkmark in the PlatformIO toolbar.

Note: Anytime you make changes to the firmware you can rebuild and upload either without needing to upload the SPIFFS data again. They reside in different areas of the flash memory.
You can add/edit the files in the "www" folder to your liking. (Files in the "www" folder will be cloned and gzipped to the "data" folder when building.) Then follow the instructions below to build and upload the SPIFFS file system image to your ESP8266.


Note: Anytime you make changes to the to the www data you can upload without needing to reupload firmware. They reside in different areas of the flash memory.
This section is for the hackers. Yep, I fucked mine up a couple times too. Here is how you fix all the fuck ups. Change to the included ./esptool/ directory. Don't worry, you can use the esptool.py tool to completely erase the ESP8266 and start all over. The steps would be:
- Connect the D1 Mini to your computer via the Micro-USB port and discover the serial port that is used. Sparkfun has an excellent write-up on how to do this if you dont know already.
- Open your terminal and change to the included ./esptool/ directory and run:
$ ./esptool.py erase_flashNote 1: This assumes you are using OSX or *nix based operating system. If you are running Windows, esptool runs fine but you will need python installed. There are several windows tools available, and a lot of people reference this page as a good walk through, but I have not tested it.
Note 2: Depending on your setup, you may have to provide the serial port to esptool. That would look like: ./esptool.py --port /dev/tty.wchusbserial1420 erase_flash (Assuming that /dev/tty.wchusbserial1420 is your serial port. This will be dependant on your system)
- Re-Upload the Firmware and SPIFFS content
- High-five yourself for being super awesome
If you complete the game, you will get administrative access to the SecKC-ESP8266 Console. It is at least one step further than you think. If I was really good at making games, this would be more clear, but I am not, so there you go.
From here you can monitor all connections and see when someone connects to the device. The console also allows you to enter commands to get more info about the status of the device, and various other 'things'.
The "debug" setting is on by default and shows you all DNS and HTTP requests made to the device. It's kind of cool to see all the sites that the apps on your phone are trying to access. Check out the screenshots of the console for a glimpse of what it looks like. Some apps are very noisy. You can toggle the "debug" off to not see that stuff.
The SecKC-ESP8266 Project started from the RickRoll Project (https://github.com/idolpx/mobile-rr) and modified code to fit our needs. That project referenced the projects below:
- PlatformIO - http://platformio.org/
-
http://docs.platformio.org/en/latest/platforms/espressif.html#uploading-files-to-file-system-spiffs - ESP8266 Captive Portal - https://www.hackster.io/rayburne/esp8266-captive-portal-5798ff
- ESP-RADIO - https://github.com/Edzelf/Esp-radio
- ESPAsyncWebServer - https://github.com/me-no-dev/ESPAsyncWebServer
- SOFTAP - Get List of Connected Clients - http://www.esp8266.com/viewtopic.php?f=32&t=5669
- How to print free memory - http://forum.wemos.cc/topic/175/how-to-print-free-memory
- WebSocketToSerial - https://github.com/hallard/WebSocketToSerial.git
- JQueryTerminal - https://github.com/jcubic/jquery.terminal
- OTA Update - http://www.penninkhof.com/2015/12/1610-over-the-air-esp8266-programming-using-platformio/
- Piezo Beep - http://framistats.com/2015/06/07/esp8266-arduino-smtp-server-part-2/
- Simple Audio Board - http://bitcows.com/?p=19
- Tone Doesn't Work - https://www.reddit.com/r/esp8266/comments/46kw38/esp8266_calling_tone_function_does_not_work/
- ArduinoJson - https://github.com/bblanchon/ArduinoJson
- EEPROM - https://gist.github.com/dogrocker/f998dde4dbac923c47c1
- Exception Causes - https://github.com/esp8266/Arduino/blob/master/doc/exception_causes.md
- WiFi Scan- https://www.linuxpinguin.de/project/wifiscanner/
- SPIFFS - https://github.com/esp8266/Arduino/blob/master/doc/filesystem.md
-
http://blog.squix.org/2015/08/esp8266arduino-playing-around-with.html - WiFiManager - https://github.com/tzapu/WiFiManager
- ESP-GDBStub - https://github.com/esp8266/Arduino/tree/master/libraries/GDBStub