Git Tutorial for the Primers for Predocs course, January 2022
Prerequisites
Set-up
Create a Branch
Open a Pull Request
Additional Resources
- GitHub account which you can log in to (please send me a slack message with this account)
- Record of an email associated to your GitHub account settings. You should have access to the primary email on your account. Feel free to add your institutional (i.e. EBI or Sanger) email address.

Background: last summer, GitHub removed support for password authentication, requiring users to use a Personal Access Token (PAT) or to Authenticate with SSH. I prefer the SSH method, so that's what I'll be showing, though other options are possible. This method requires you to generate an SSH-key for every machine from which you'll push code to GitHub (i.e. the cluster, your laptop, any VM). It also requires that when you want to clone a repository, you'll need to copy a repository's URL (to clone it), you'll need to copy the SSH link rather than the HTTPS link (don't worry if none of this makes sense, we'll go over it).
-
Log into the VM (see course instructions for this)
-
Open the Terminal, and on the command-line run:
mkdir -p ~/.ssh && cd ~/.ssh
ssh-keygen -t ed25519 -f github_key -C "<your_github_email@example.com>" -N ''
cat ~/.ssh/github_key.pub
Copy the output of the last command.
-
In a browser, go to your GitHub SSH keys and click 'New SSH key'


- Return to the VM and create an
~/.ssh/configfile viatouch ~/.ssh/config. Open it with your favourite text editor (vim, nano, emacs) and paste in the following:Host github.com HostName github.com IdentityFile ~/.ssh/github_key - Set your local git user by running:
The email must be associated to your GitHub account
git config --global user.email "<your_github_email@example.com>"
git config --global user.name "<your-github-username>"
- Copy this repository's URL either from here ->
git@github.com:helrick/git-tutorial.gitor by clicking the Code button on the top right of the repository:

- Test cloning this repository on your VM:
This should create a folder,
cd ~/Documents
git clone git@github.com:helrick/git-tutorial.git
git-tutorialin yourDocumentsdirectory containing the code from this repo.
The main branch in GitHub is the default branch where commits are made. However, it is usful to create branches; to develop specific features, coordinate work, or to refactor code while knowing you can switch back to a "working code point" if needed.
I've made everyone in the course who sent me their username an "Issue". You should be able to find it by checking the Issues Page of the repository and looking for your username, or checking your Notifications. Make a note of the issue number (preceded by a hashtag)

-
In your
git-tutorialfolder, create a branch (named<your-username>-testor something similar) with thecheckoutcommand:git checkout -b <your-username>-test
To check which branch you're on, you can run
git status
-
Now, you should create a
.txtfile in theparticipantsfolder. Name it your username/name and put whatever you'd like in it. Once done, rungit statusand it should show that you have an untracked file:
-
Add your file via:
git add .
# OR
git add <your-file>.txt
You can run
git statusagain to see if it's been successfully added (it should appear in green). -
Make a commit with a descriptive message and include a hashtag and your issue number (e.g. #2)
git commit -m "your descriptive message #<issue-number>" -
Push your changes. The first time you push to a new branch, you must run:
git push --set-upstream origin <branch-name>
After this first push to a branch, you can simply run
git push -
You should now be able to see your branch on the dropdown at the top of the repo. If you go to your issue, you should see your commit linked (and vice versa)


This feature is only available on GitHub (to my knowledge anyways, it may be called something else on different platforms). It becomes useful during collaborative work as it allows you to notify others of your proposed changes and have others test your code before updating the main branch.
- When you navigate to this repository after pushing your branch, there should already be a banner at the top asking if you'd like to open a Pull Request (PR) for your branch:
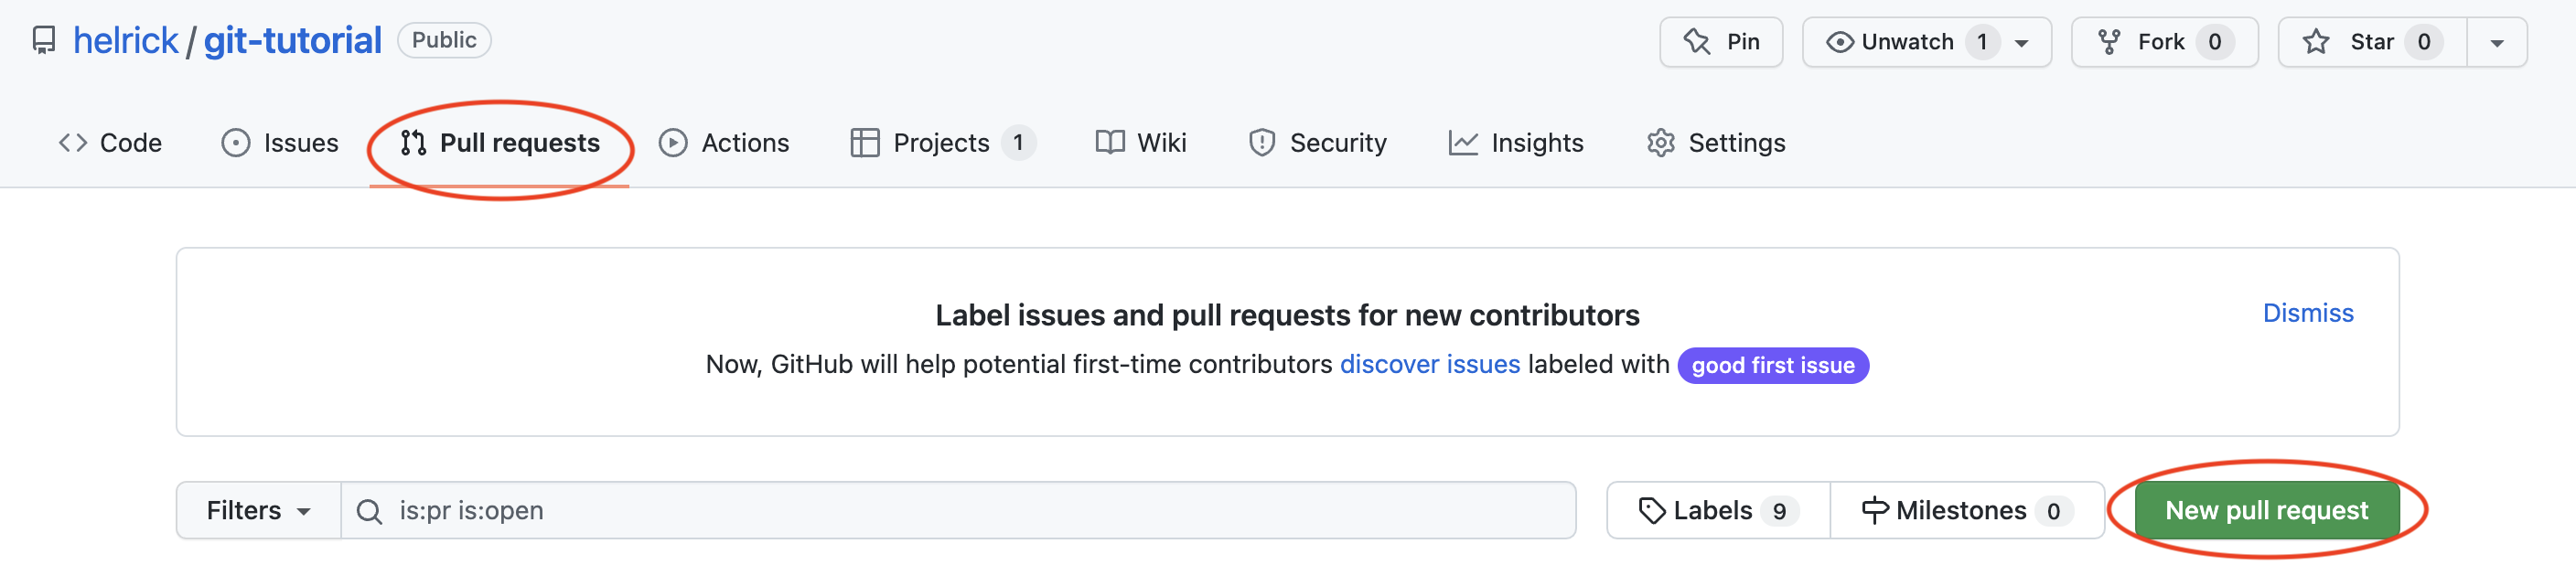
 Click it if so. If this banner doesn't appear, go to the Pull requests tab, and click "New pull request":
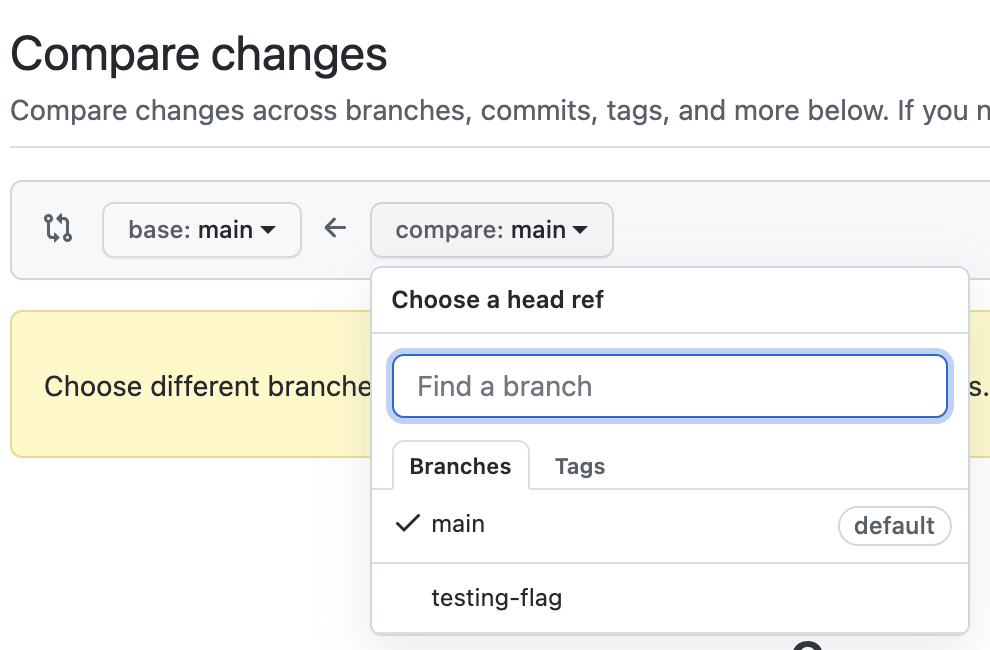
 Select your branch from the dropdown and click "Create pull request":


I will then merge your branch into the main branch which should put your .txt file into the participants directory. While you're waiting for me to merge it, you can check for your Issue on the Project Board for this repo. I've set it up in "Automated Kaban Board" mode so before you open a PR, your issue should be in the "To do" column. Once you've opened the PR, it should move to the "In progress" column, and finally, once I've merged your PR (writing "closes #issue" in the comment), your issue should be in the "Done" column.
- This guide by Seth Robertson for what to do when you've messed up
- VSCode is a code editor that comes built in with Git support. This is a quick guide on how to use git in VSCode
- GitHub Actions are a great feature which you can use, for example, to automatically run tests every time you open a Pull Request
- Related to this, git hooks are a feature built into git which can run a script every time you perform an action locally. For example, if you use Jupyter notebook, you could set up a Git Hook to convert .ipynb files to python and html every time you make a commit.
- Spice up your commit messages with gitmojis