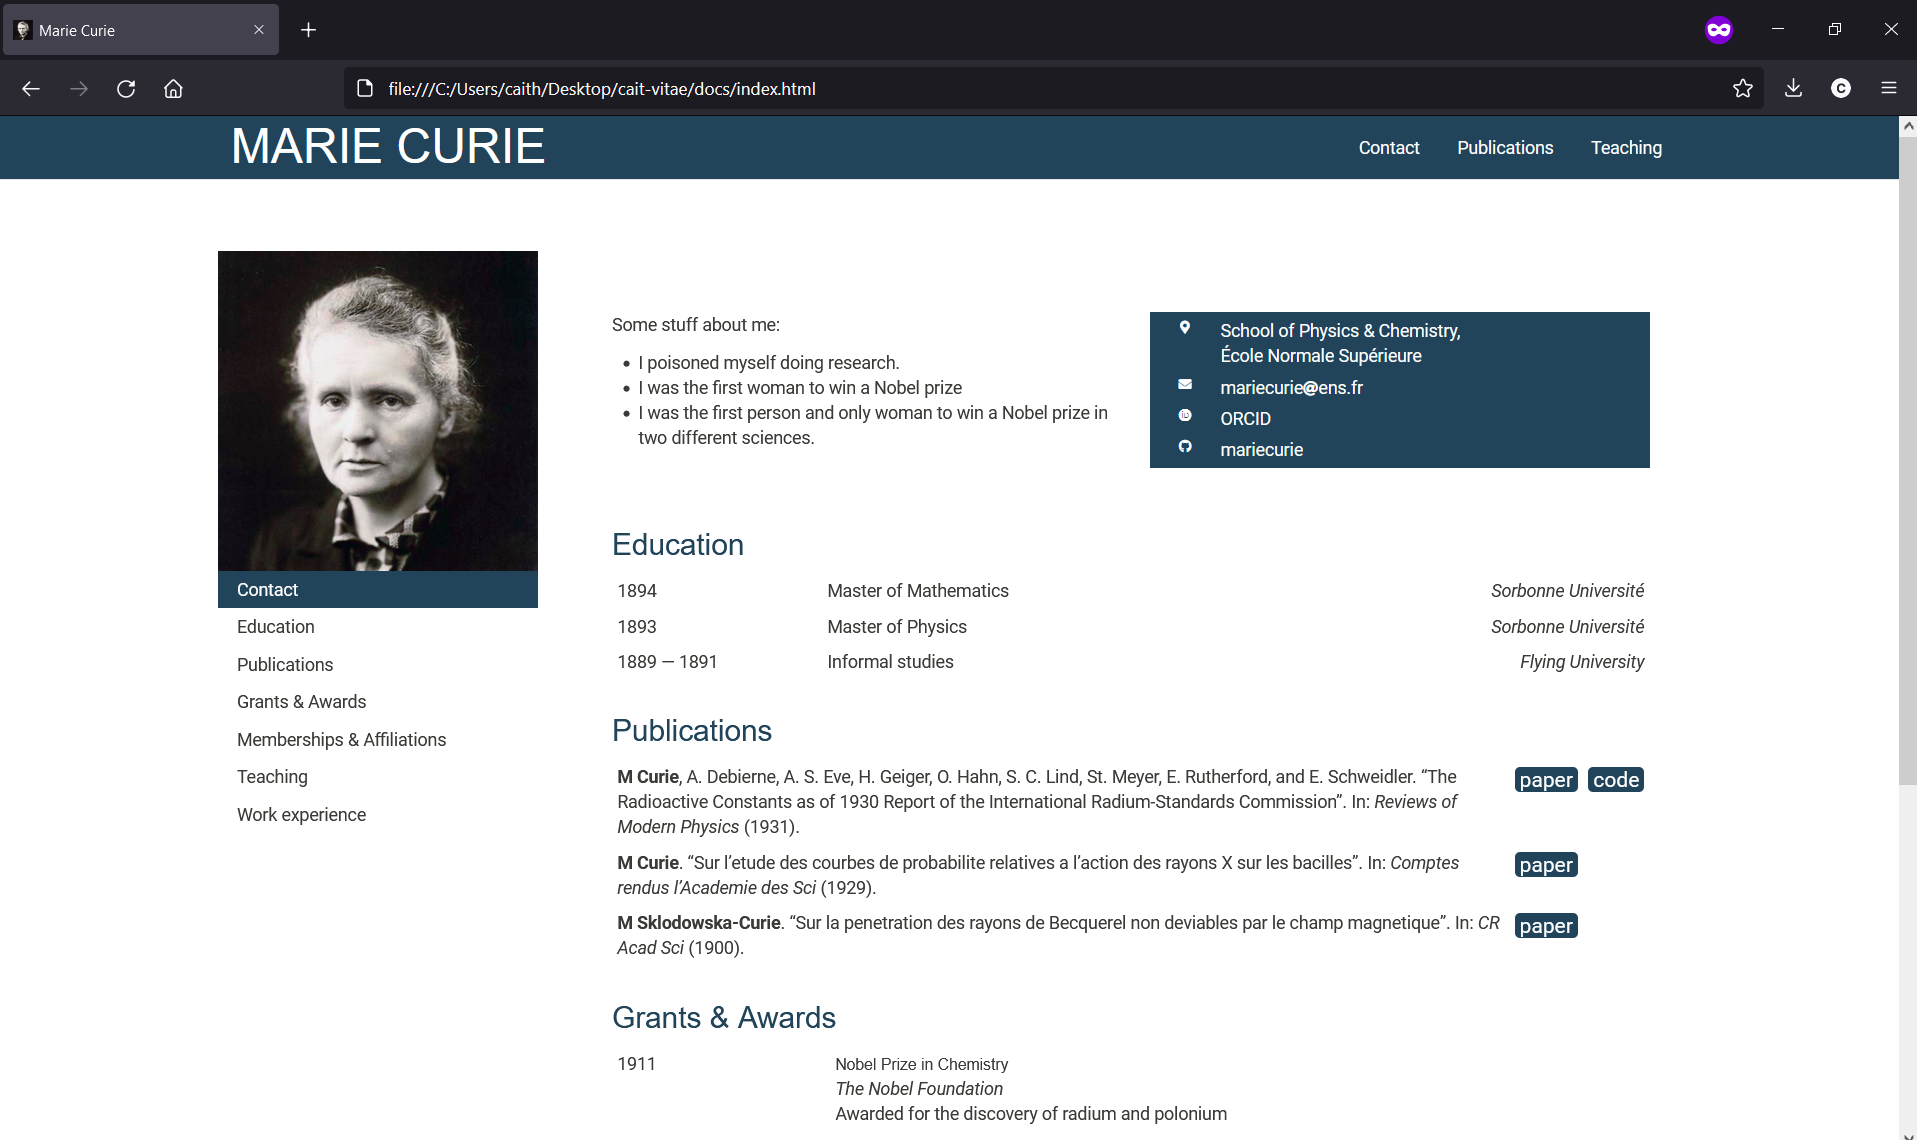
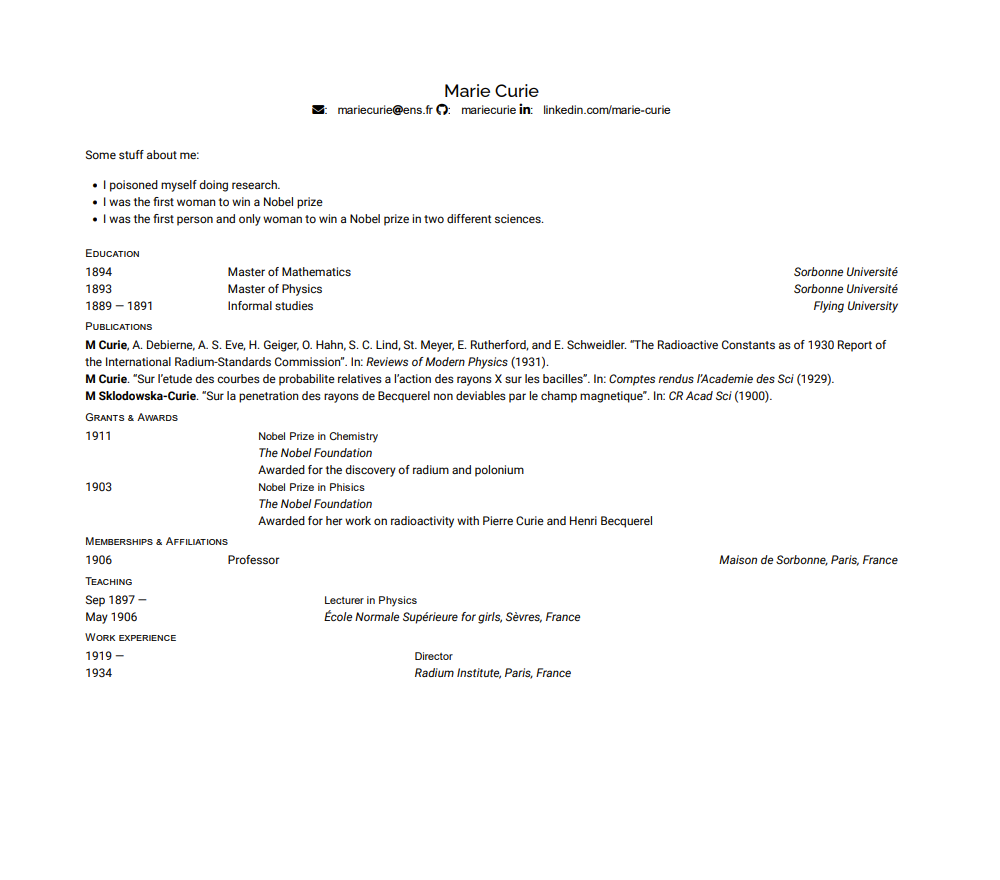
General template for creating a data-driven academic CV in Rmarkdown, autofilled from a google sheets.
While making my own CV, I found some awesome elements that I liked from Ulrik Lyngs. However, working out the intricacies of how he supports various formatting options took some time, so I pared the principles behind his design down to only what I need.
As of August 2021, use this format to render both my personal webpage, and my CV. To this end, I have designed this template such that it displays well as a simple static html webpage, and prints nicely to PDF.
- All CV content is managed in google sheets. This makes it fast to update, easy to maintain, and trivial to add and remove entries to customize & fine tune a CV for a particular application. 💃 💃 💃
- Reduce time spent trying to format an invisible table in Word by 400%
- Easy to keep my website up-to-date with my CV, and they are never inconsistent
- All publications managed through bibtex
- I'm not that experienced at CSS so there are some oddities I'm still working out
- PDF output is not directly created. You have to render html, then print to PDF
- It's not fully programmatic; you still have to put in headers by hand, and sometimes force a pagebreak, depending on your content
- Not robust against bad input in the google sheet
To personalize this template to your own CV content, you will need to maintain a spreadsheet of your CV data. I use google sheets for this purpose, but xlxs or csv will be equally appropriate.
The main idea is: all your CV data is in a spreadsheet (with possibly the exception of publication references), and you can select an appropriate subset of entries to show in each section by setting show = TRUE in the spreadsheet.
-
Make a copy of the example spreadsheet. For ease of use, I use
gs4_deauth(), so your sharing settings should be set such that anyone with the link can view your sheet (but it's possible to chang this to require a login). Replace the sheet ID inindex.Rmdwith your new sheet ID. Experimental: see branch magic-hide for some sneaky use of html comments to make sections automatically appear/disappear as entries are added/removed from the spreadsheet, so long as the section is already defined inindex.html. -
Edit
index.Rmdfor your sections and content! In principle, I filter the cv data by section, then usedplyrandkableto sort and arrange a table of entries. I have two formatting functions,shortEnrty()andlongEntry(). I've found that the short entries sometimes need a but of custom formatting (by changing the column widths to suit the content) as in general they are more heterogeneous in nature than the long entries. -
You may wish to bold a name in the publications section. Find this in the code chunk titled "publications" in
index.Rmd, and replace your name as appropriate. -
Find and replace
curie.jpgas appropriate to change your TOC background, favicon (seefiles/style.cssandfiles/header.htmlrespectively).
This template is purposely very bare-bones, intended for a quick start and minimal meddling. The easiest two elements to change are the main colours and fonts. I have placed all the css in files/style.css. There is a section that will change formatting such that it only applies to the printed PDF version of the CV. Google fonts has a nice interface to choose font pairings, and when you're happy with your selection, you can just link the style sheets in files/header.html.
The document can be rendered using knitr. This will output an html file. If you are creating a PDF CV, Set toc: false in the yaml header of index.html before knitting. Then, simply open the html file with your browser of choice, and print to PDF. This is an unusual instruction, because Rmarkdown is great at knitting straight to pdf. However, I've so far found that it's a lot easier to make small tweaks to CSS and html, than trying to get into the weeds of latex for this purpose. (I love latex for other things!). I have set some parameters that will make the html and pdf output look more similar together if you print to PDF after generatingt he html (see files/style.css). Additionally, I used some html directly within index.Rmd, meaning it may be challenging to move to a different type of output without significantly changing the structure of the template.
In my personal use, I use the toc: false to toggle whether I want to output everything (ie. my CV) or a restricted set of sections (for my public webpage), in addition to set a few other web-only things (the TOC for one, but also links to my papers and code).
The output looks nice as an html page, and once printed to PDF.
Once rendered, you can set docs/ folder as your publishing source for gh-pages.

