English | 简体中文
You only need to integrate Chat SDK to easily gain chat, conversation, group capabilities, and you can also communicate with other products such as whiteboards through signaling messages. Chat can cover various business scenarios, support the access and use of various platforms, and fully meet the communication needs.
| Android Experience App |
|---|
 |
TUIKit is a UI component library based on Chat SDK. It provides universal UI components to offer features such as conversation, chat, search, relationship chain, group, and audio/video call features.

Explore more docs about TUIKit Library Overview.
This document introduces how to quickly run through the Chat demo on the Android platform. For the other platforms, please refer to document:
In respect for the copyright of the emoji design, the Chat Demo/TUIKit project does not include the cutouts of large emoji elements. Please replace them with your own designed or copyrighted emoji packs before the official launch for commercial use. The default small yellow face emoji pack is copyrighted by Tencent Cloud and can be authorized for a fee. If you wish to obtain authorization, please Contact us.
- Log in to the Chat Console.
If you already have an app, record its SDKAppID and go to step 2.
- On the Application List page, click Create Application.
- In the Create Application dialog box, enter the app information and click Confirm. After the app is created, an app ID (SDKAppID) will be automatically generated, which should be noted down.
- Click Application Configuration in the row of the target app to enter the app details page.
- Click View Key and copy and save the key information.
Please store the key information properly to prevent leakage.
- Clone this Chat demo project.
- Open the project in the terminal directory and find the
GenerateTestUserSigfile in the following paths:
| Platform | Relative Path to File |
|---|---|
| Android | Android/Demo/app/src/main/java/com/tencent/qcloud/tim/demo/signature/GenerateTestUserSig.java |
| iOS | iOS/Demo/TUIKitDemo/Private/GenerateTestUserSig.h |
In this document, an Android project is opened by using Android Studio as an example.
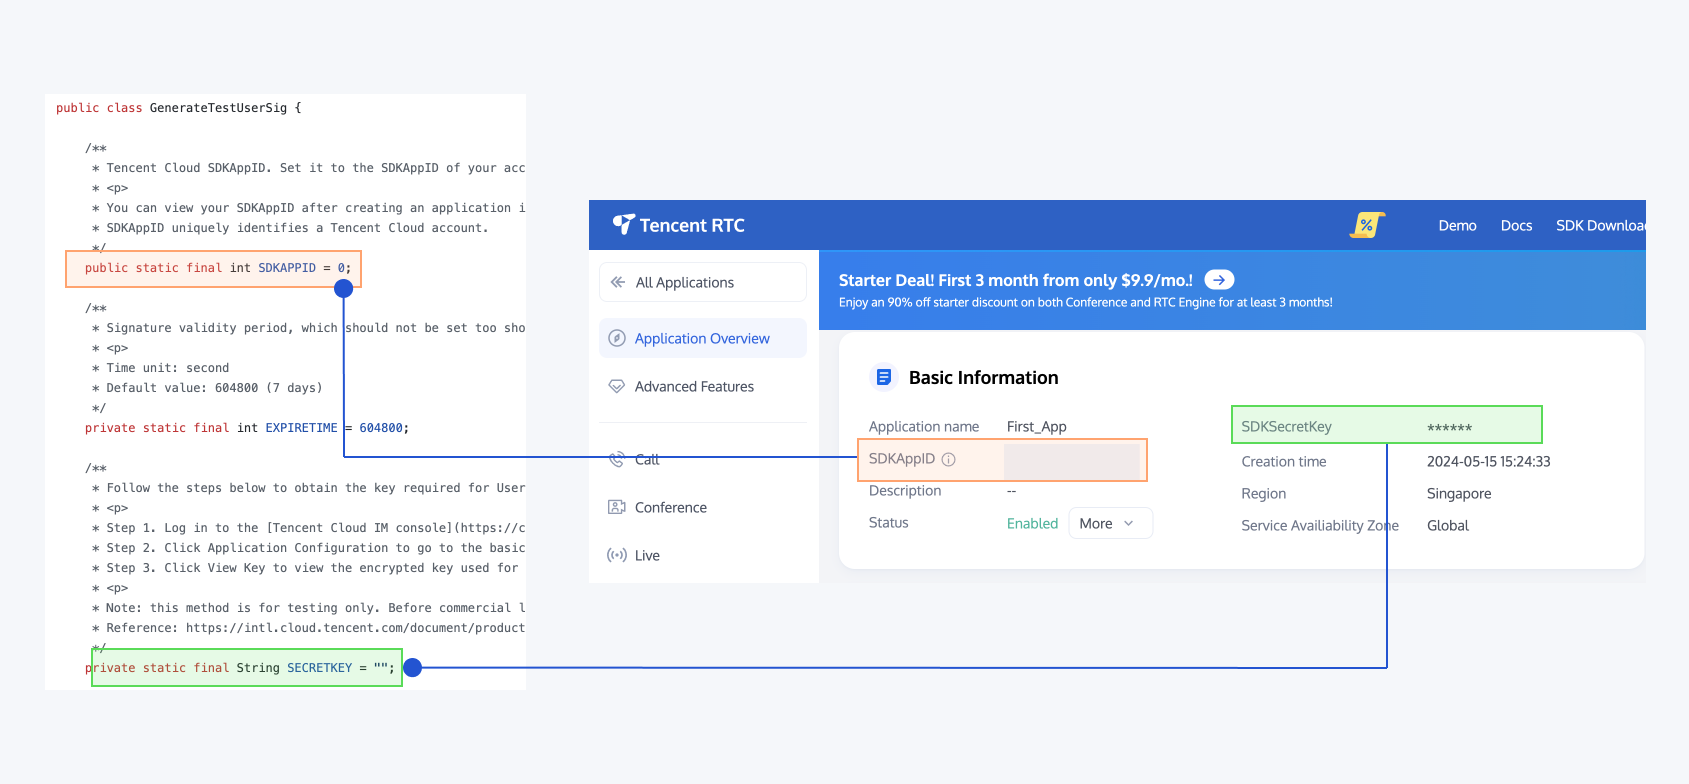
- Set relevant parameters in the
GenerateTestUserSigfile:
- SDKAPPID: set it to the SDKAppID obtained in step 1.
- SECRETKEY: enter the actual key information obtained in step 2.
In this document, the method to obtain UserSig is to configure a SECRETKEY in the client code. In this method, the SECRETKEY is vulnerable to decompilation and reverse engineering. Once your SECRETKEY is leaked, attackers can steal your Tencent Cloud traffic. Therefore, this method is only suitable for locally running a demo project and feature debugging. The correct
UserSigdistribution method is to integrate the calculation code ofUserSiginto your server and provide an application-oriented API. WhenUserSigis needed, your app can send a request to the business server for a dynamicUserSig. For more information, please see How do I calculate UserSig on the server?.
Import the demo project with Android Studio, and then compile and run it.
The demo integrates the audio and video call function by default. Since the audio and video SDK that this function depends on does not support the emulator, please use a real device to debug or run the demo.
If you do not need the audio/video call feature, you only delete the audio/video call integration code as shown in the figure below from the build.gradle file under the app module:
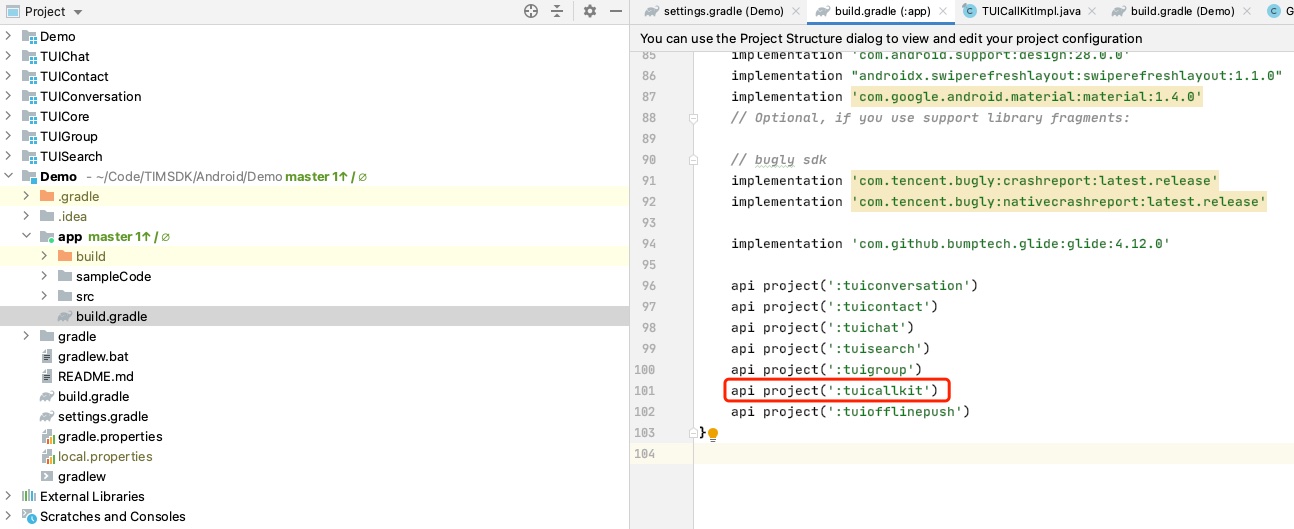
api project(':tuicallkit')After the preceding steps are completed, the audio and video call entries in the demo are hidden. The conversation UIs before and after TUICallKit masking are as follows:
| before | After |
|---|---|
 |
 |
The contact profile UIs before and after TUICallKit masking are as follows:
| before | After |
|---|---|
 |
 |
The above only shows how to remove the audio/video call feature from the demo. Developers can customize the demo according to their business requirements.
If you do not need the search feature, you only delete the line of code as shown in the figure below from the build.gradle file under the app module:
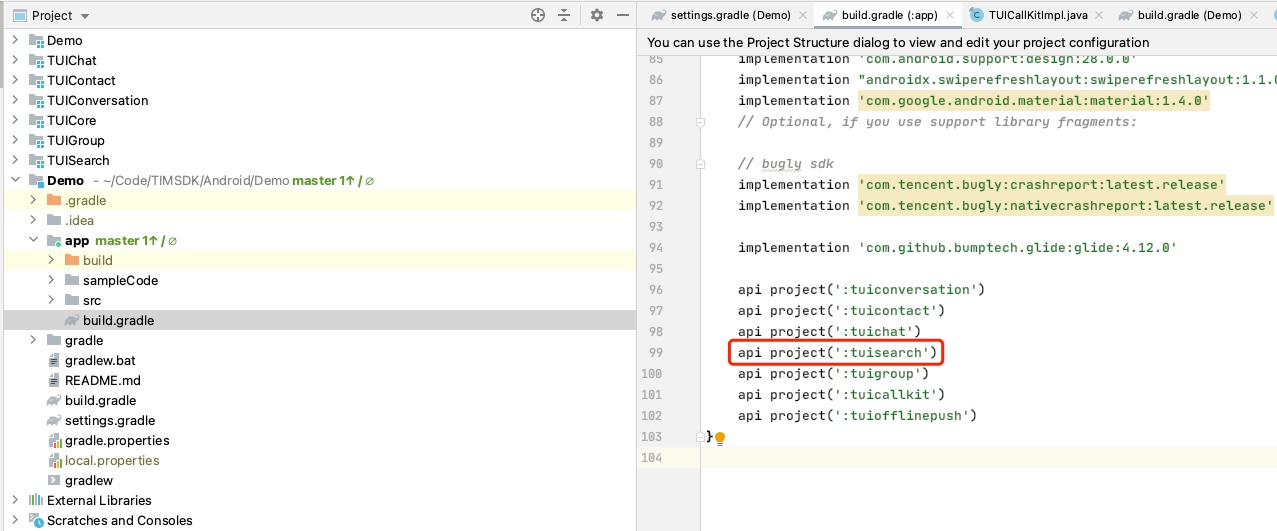
api project(':tuisearch')After the preceding steps are completed, the message search box in the demo is hidden.
The message UIs before and after TUISearch masking are as follows:
| before | After |
|---|---|
 |
 |
The above only shows how to remove the search feature from the demo. Developers can customize the demo according to their business requirements.